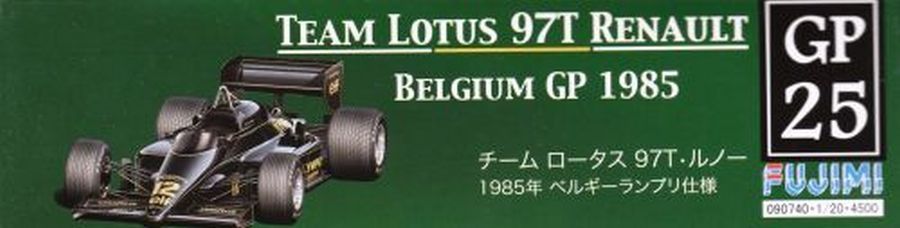
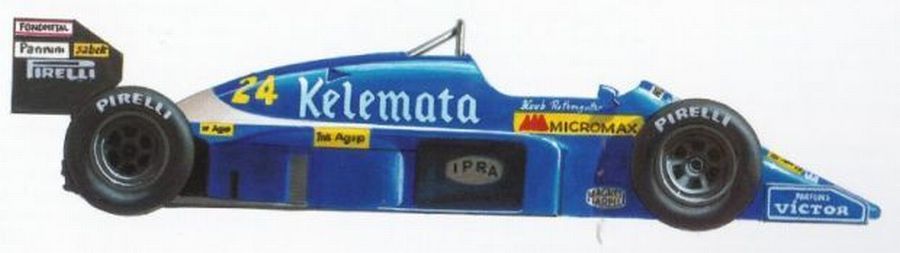
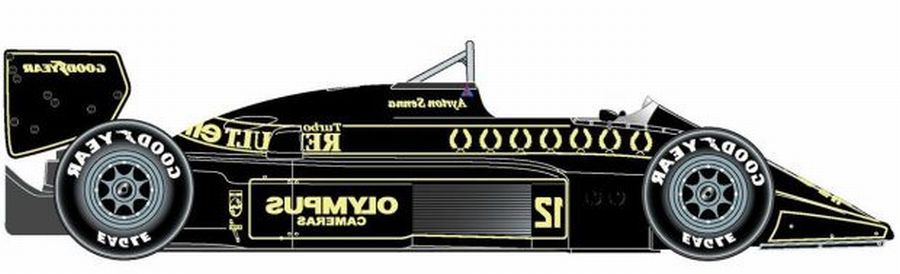
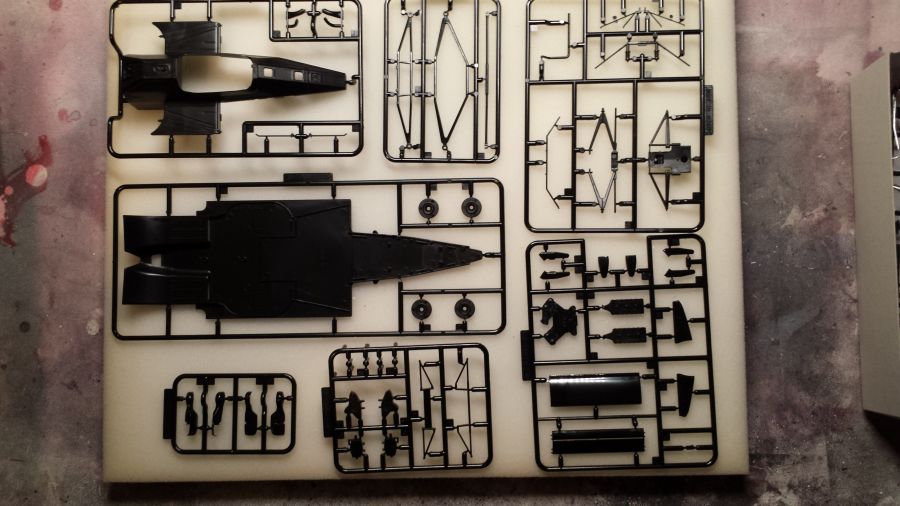
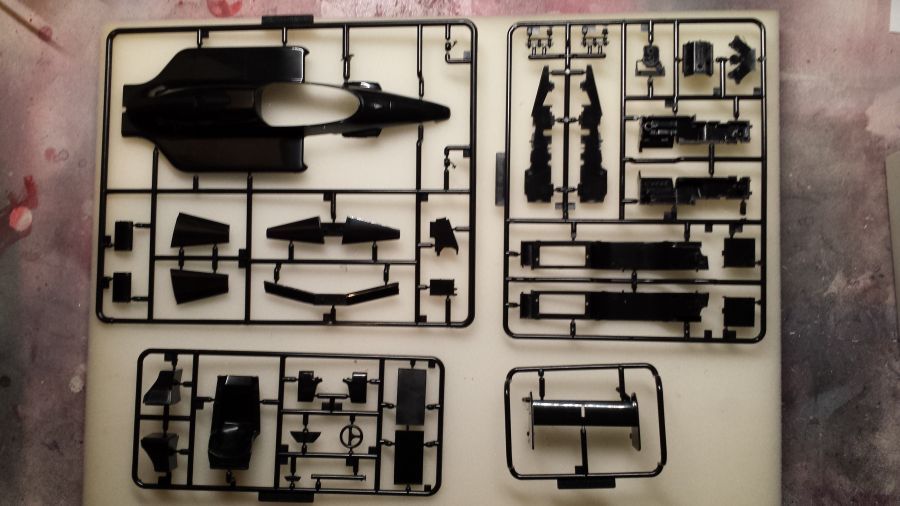
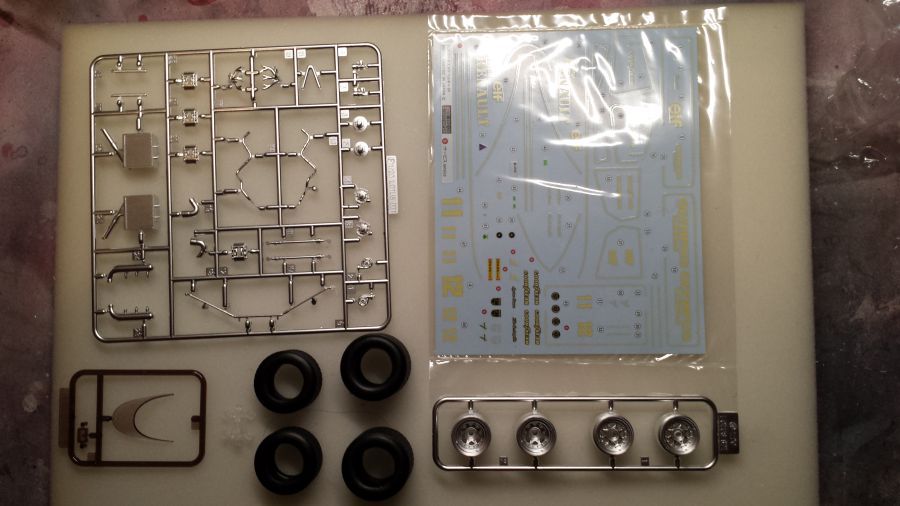
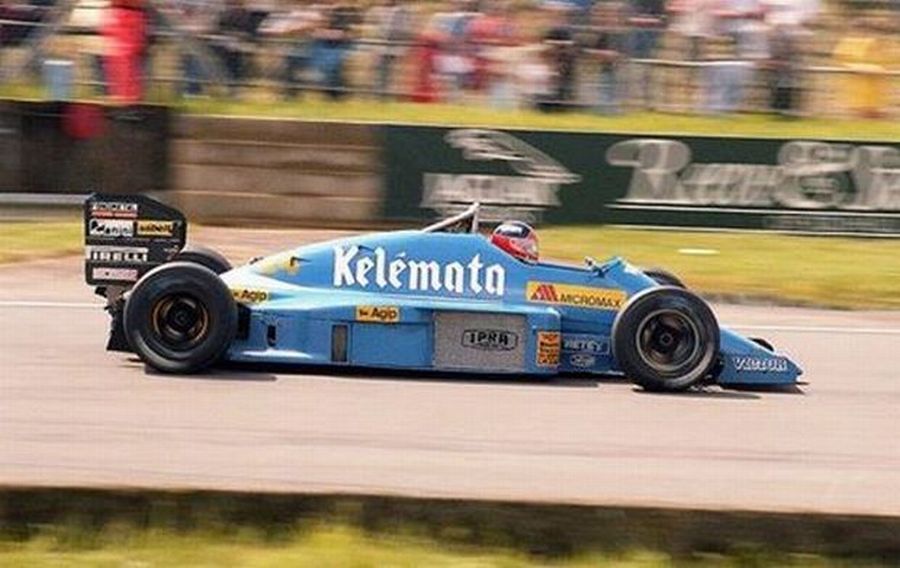
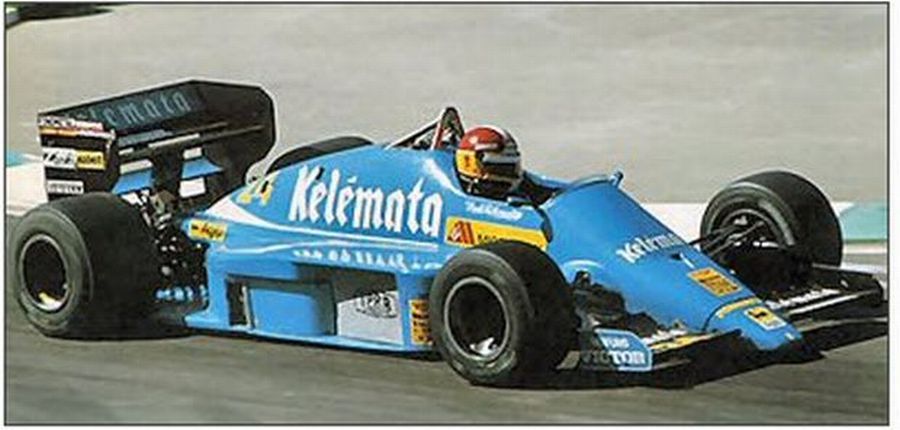
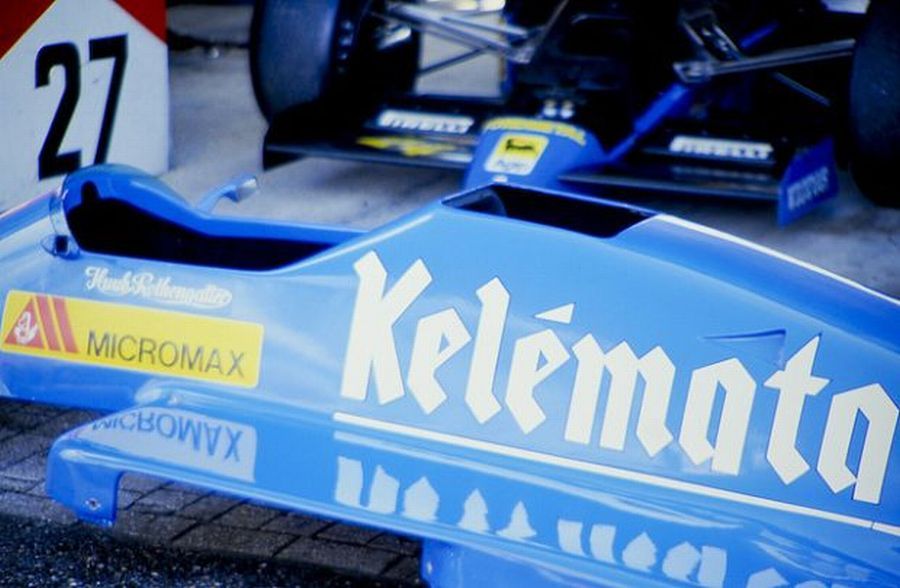
Graag wil ik een Osella FA1G zoals gereden in 1985 door Huub Rothengatter. Deze wagen werd alleen gebruikt tijdens de training. De race werd gereden met een FA1F. Helaas is er geen enkele fabrikant die dit model heeft gemaakt. Dus de enige manier is om er zelf een te bouwen. In mijn ogen komt een Lotus 97T heel dicht bij. Het mag duidelijk zijn dat ik nooit een 100% accuraat model kan bouwen. Daarbij zijn op het web nauwelijks goede foto's beschikbaar. Het zal dus een hele klus worden. Ik hoop dat ik dit kan afmaken. De Osella FA1G had een Alfa Romeo 1.5 V8 motor. Ik ga geen dingen doen om de motor aan te passen. Het gaat om een 'curbside' model. Als basis gebruik ik een Fujimi Lotus 97T Belgie versie (kit GP-25 / 090740). Hieronder eerst weer de foto's van de inhoud van de kit.
I would like to own an Osella FA1G as driven in 1985 by Huub Rothengatter. This car was only used during practice. The race was driven with a FA1F. Unfortunately there is no firm which produced this car. So the only way to get one is to build one myself. In my opinion the Lotus 97T comes very close. Of course i will never be able to build a 100% accurate model. Also there are almost no correct pictures available on the web. So it will be a tough job. I hope i will be able to finish this. The Osella FA1G had an Alfa Romeo 1.5 V8 engine. I will do nothing to create this engine. I will make a 'curbside' model. As a starter i will use a Fujimi Lotus 97T Belgium version (GP-25 / 090740). Below first of all the pictures of the content of the kit.
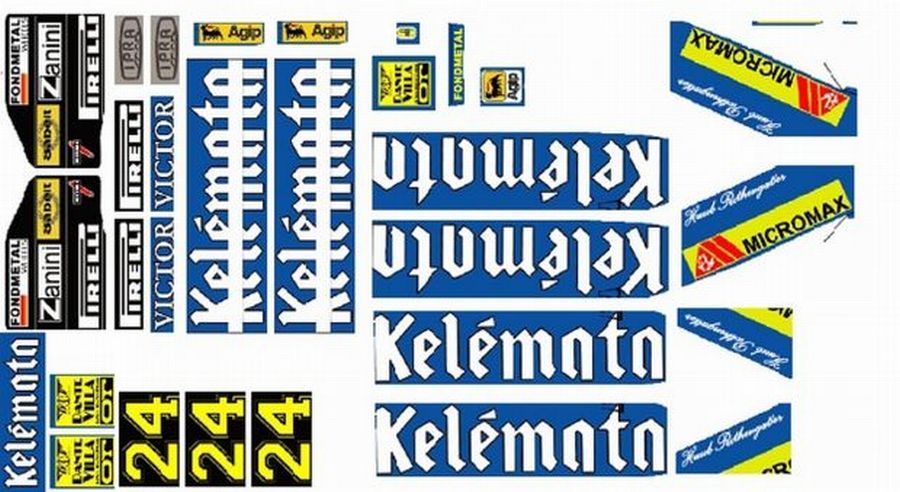
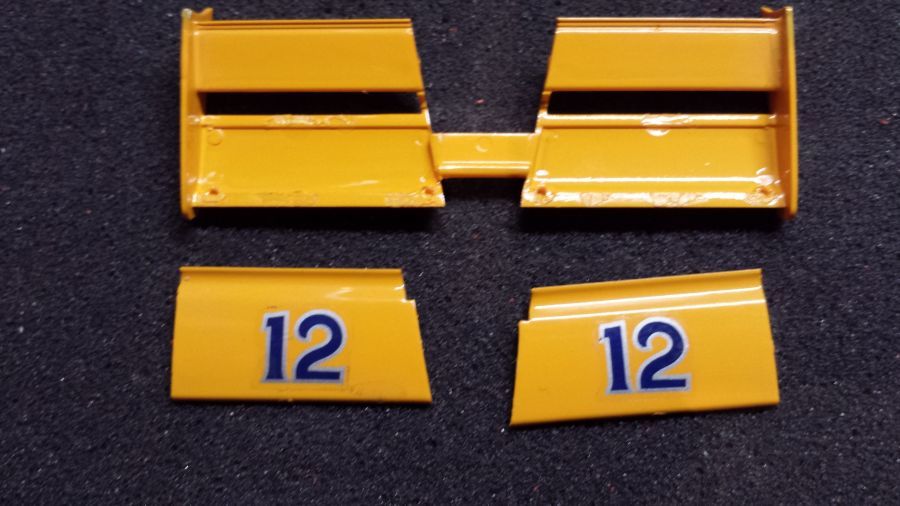
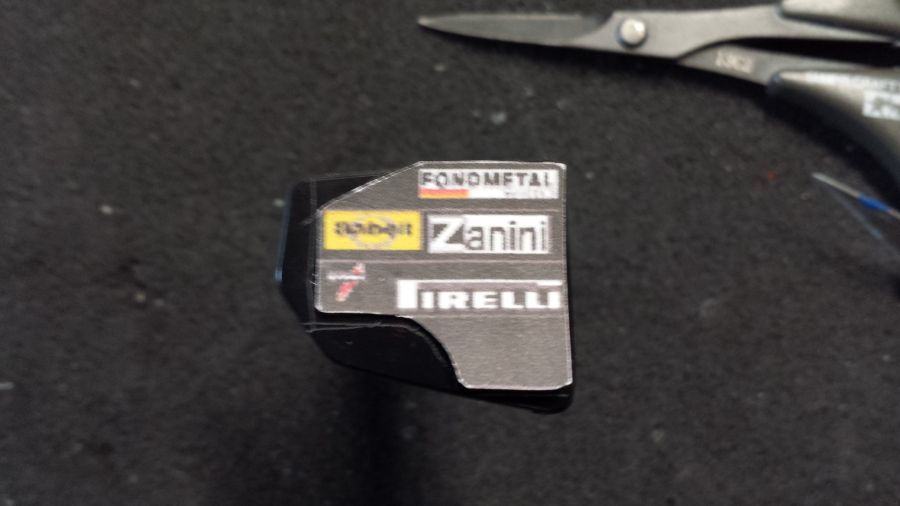
Hier de decals die ik ga gebruiken. Was veel werk. Niet perfect, maar ik doe het er mee.
Here the decals i will use. Tough job. Not perfect, but i guess they will do.
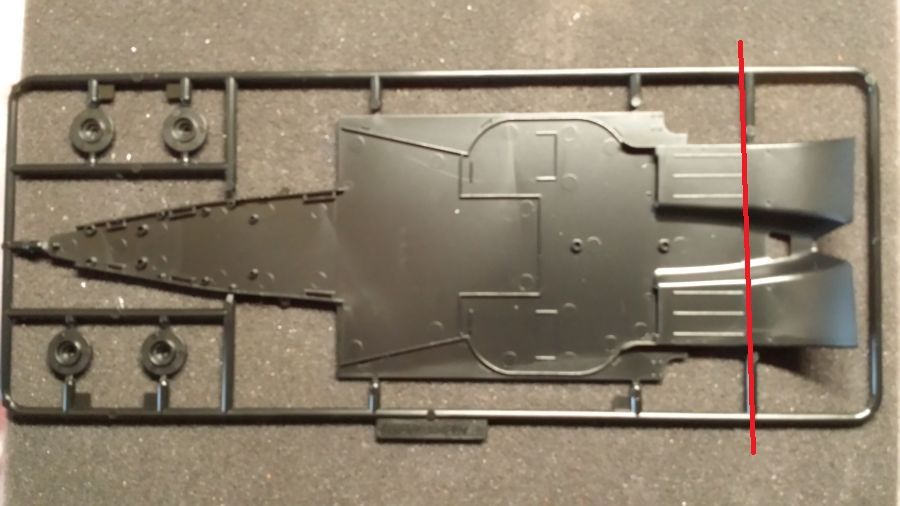
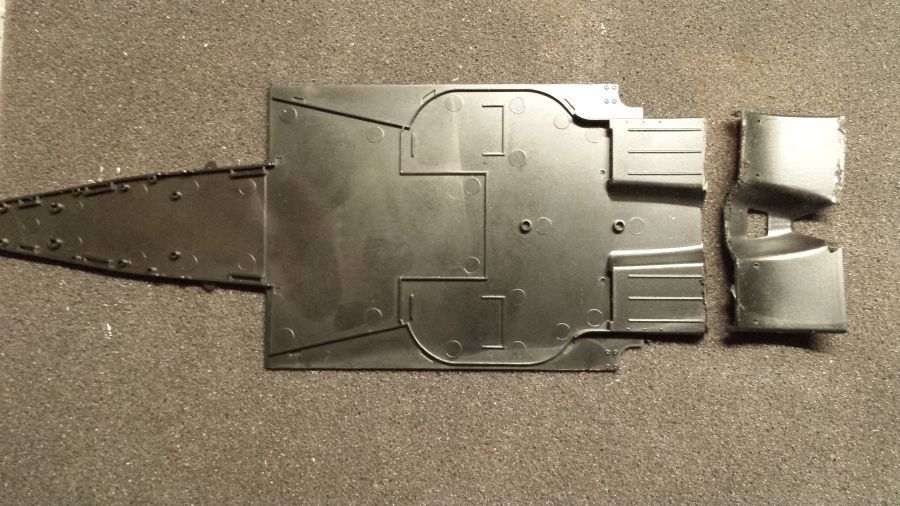
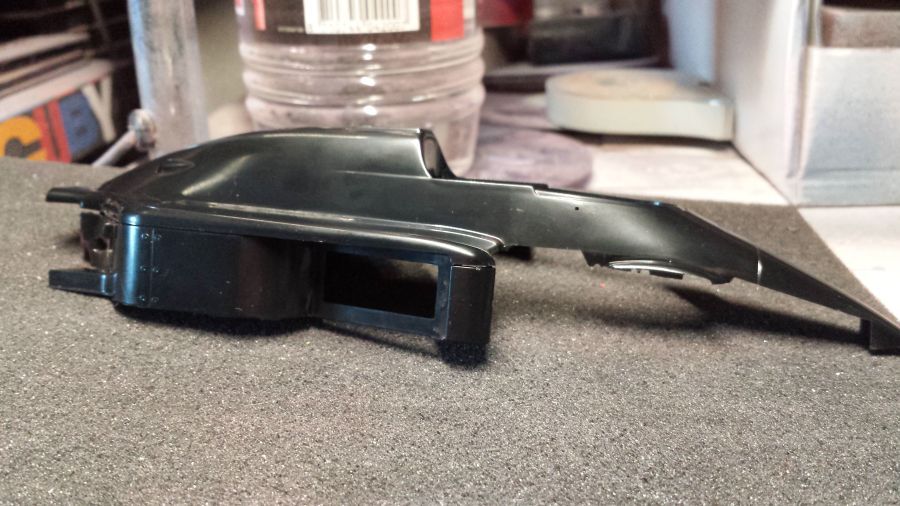
Ik zal zeker een hoop problemen tegen komen, maar het is voor mij onmogelijk om hier nu al volledig inzicht in te krijgen. Zoals ik al aangaf zijn er maar weinig bruikbare foto's op het web. In ieder geval zie ik op het eerste oog al zgn. pull rods aan de Lotus 97T terwijl de Osella FA1G push rods heeft. De voorvleugel is geheel anders. De vleugel achter moet aanpakt. De voorkant van de cockpit is hoger. De side pods moeten gewijzigd en de kit heeft regenbanden ipv slicks. Ik heb geen foto's van de achterkant, maar duidelijk is dat de vloer moet worden ingekort. Hierna de rand een beetje afvijlen en vervolgens spuiten met Tamiya TS-29 Semi Gloss Black.
I will get a lot of problems for sure, but to me it is impossible to tackle them all upfront. Like i said there are not much useful pictures on the web. At first glance i see pull rods on the Lotus 97T instead of push rods on the Osella FA1G. The front wing is very different. The rear wing needs a change. The front of the cockpit is much higher. The side pods need a change and the kit contains rain tires instead of slicks. I don't have pictures from the rear, but it is obvious the floor has to be shortened. After this file the edge and spray it with Tamiya TS-29 Semi Gloss Black.
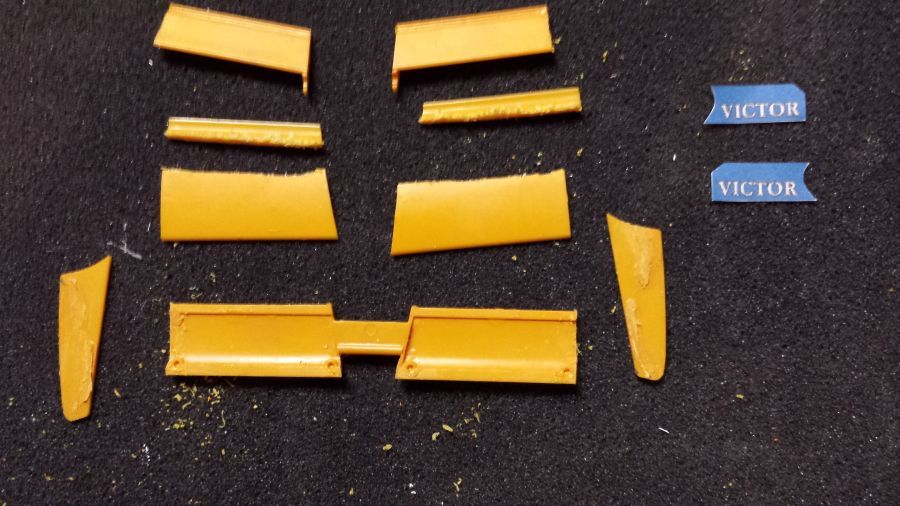
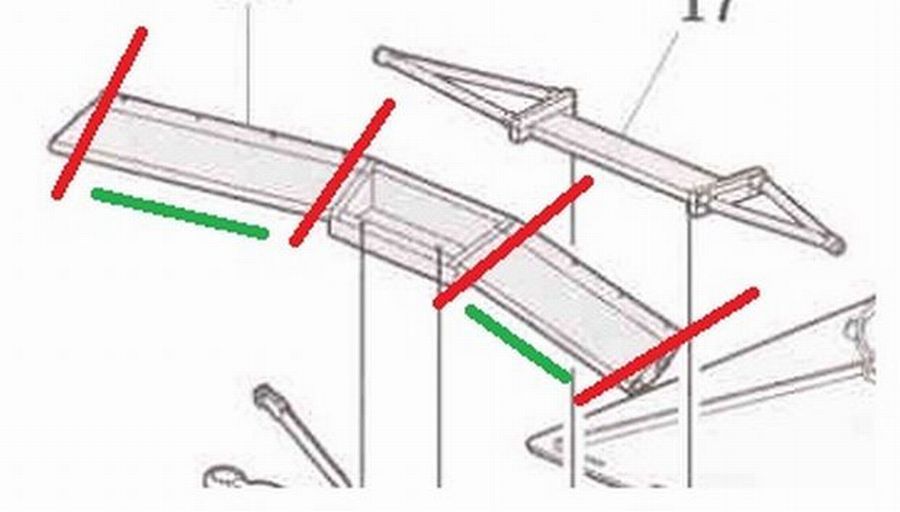
Ik ga een voorvleugel van een oude Lotus 99T gebruiken voor het maken van een nieuwe voorvleugel. Lastig want ik kan nergens een goede foto vinden. Ik ga eerst alles snijden volgens de rode lijnen en gebruik de templates (groen) voor het maken van nieuwe end plates.
I will use a front wing from an old Lotus 99T to create a new one. Tricky, because i am unable to find a picture. I will first make cuts according to the red lines and use the templates (green) to create new end plates.
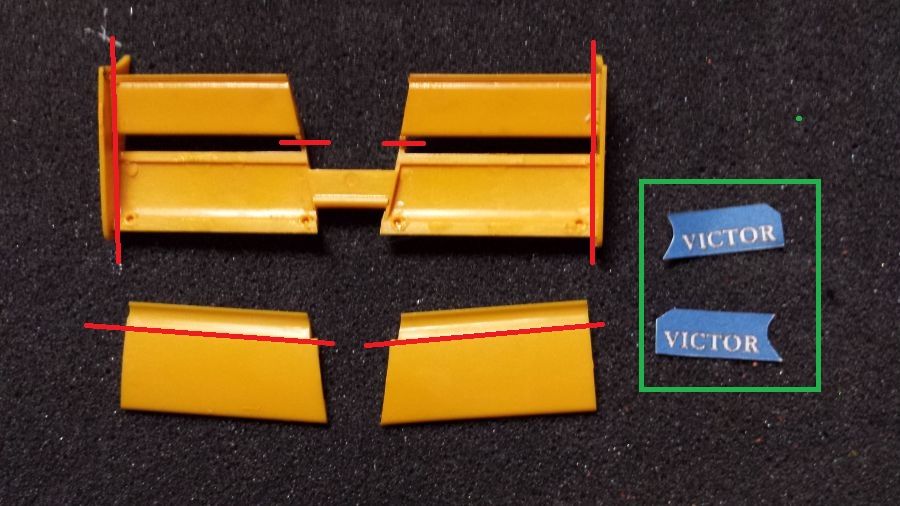
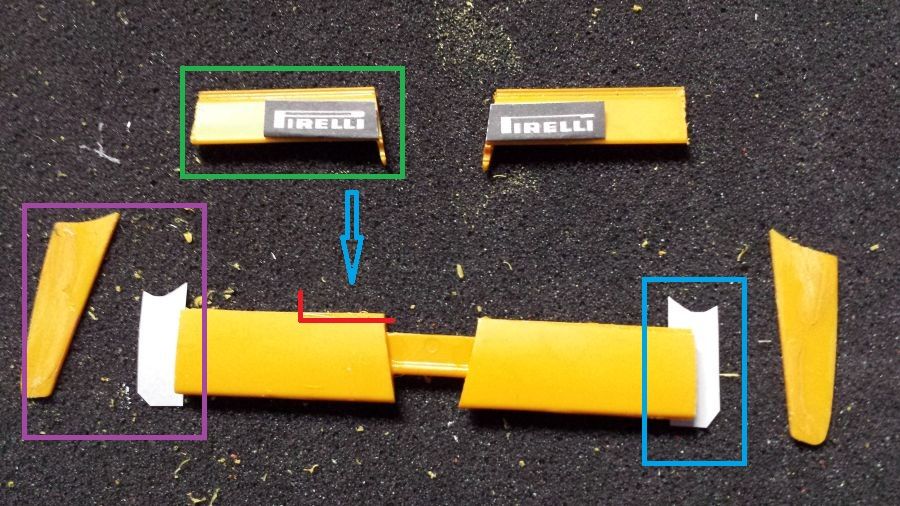
Ik heb de template voor de end plate naast de vleugel gelegd (blauw). De hoofdvleugel moet nog iets aangepast worden, dus ga ik nog wat afzagen (rood). Ik zaag allen wat van de bovenste helft. Het andere bovenste deel van de vleugel moet aangepast worden aan de template (groen). Deze wordt uiteindelijk weer met de hoofdvleugel verbonden. De end plate moet worden aangepast aan the template (paars).
I put the template for the end plate next to the wing (blue). The main wing needs to be adjusted, so i will cut it (red). I will only cut the upper part. The other upper part of the wing has to be cut to the size of the template (green). This one will be attached to the front wing again. The end plate will be adjusted to the template (purple).
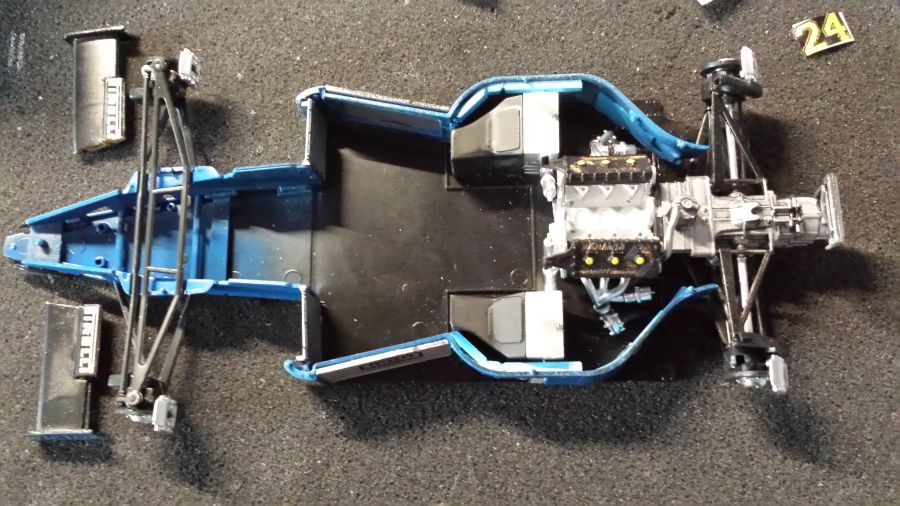
De eerste stappen aan de motor. Omdat het een curbside model wordt, maak ik me niet te druk om details.
The first steps on the engine. As it will be a curbside model, i don't mind about details.
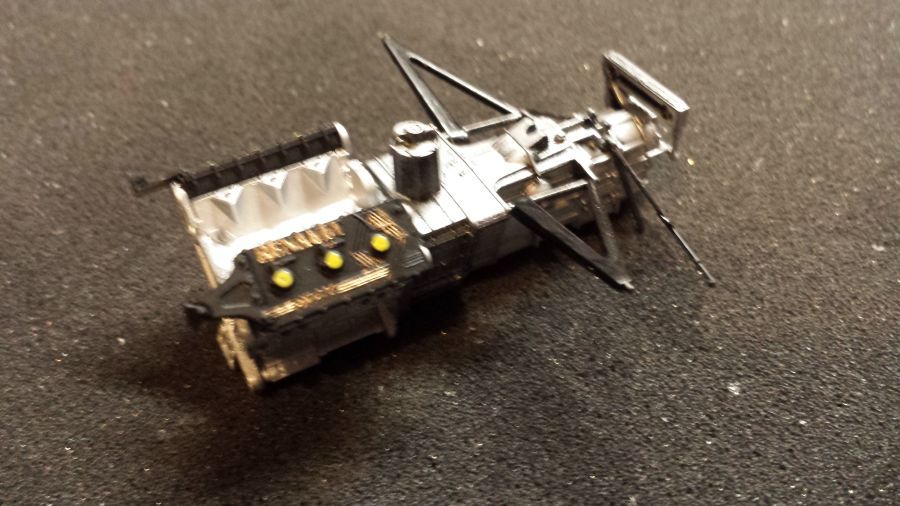
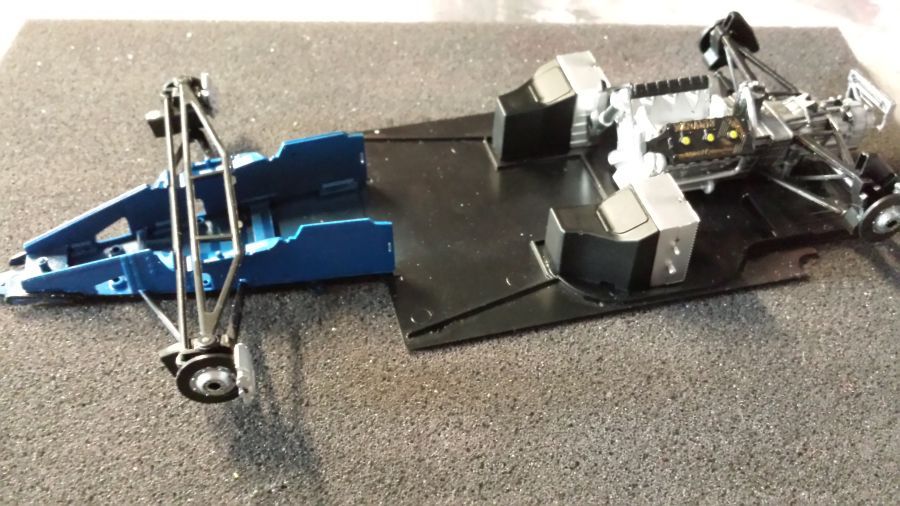
De motor wordt op de bodemplaat geplaatst.
The engine is mounted to the floor.
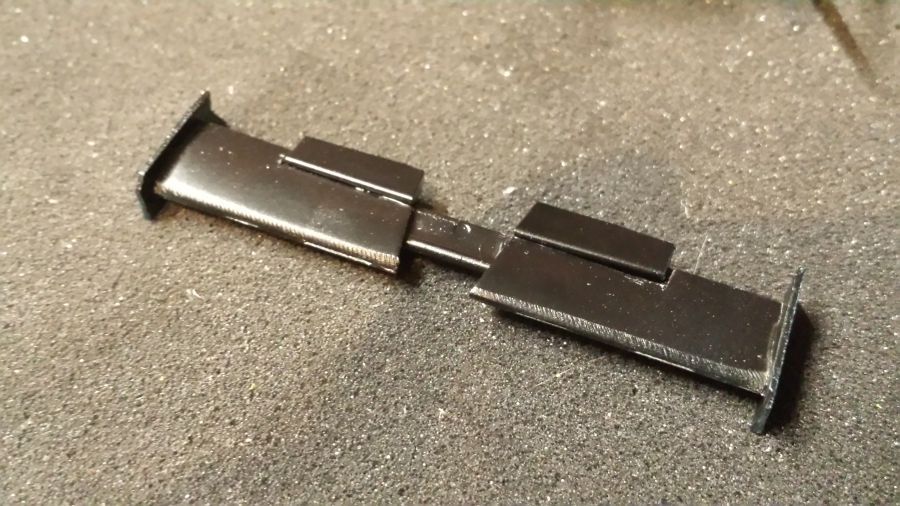
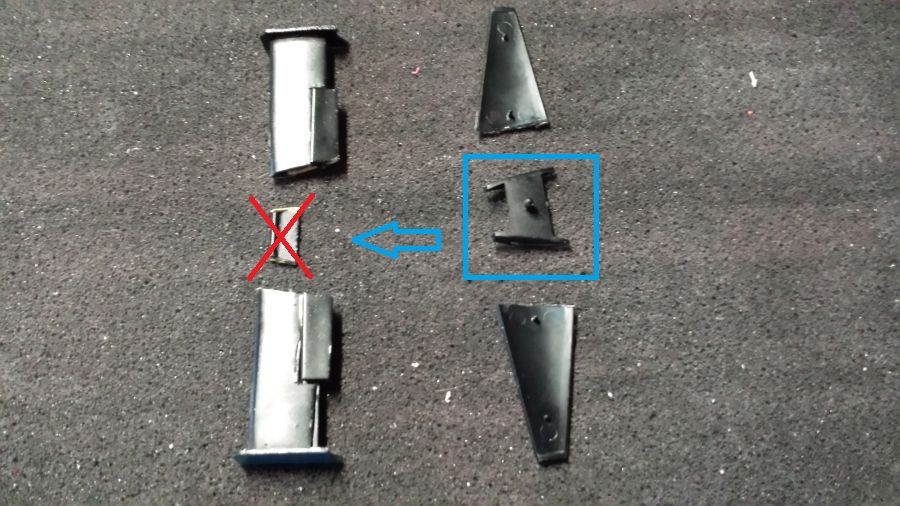
De nieuwe vleugel past niet op de bodemplaat. Daarom verwissel ik de montageplaat.
The new wing does not fit to the floor. Therefor i will change the mounting.
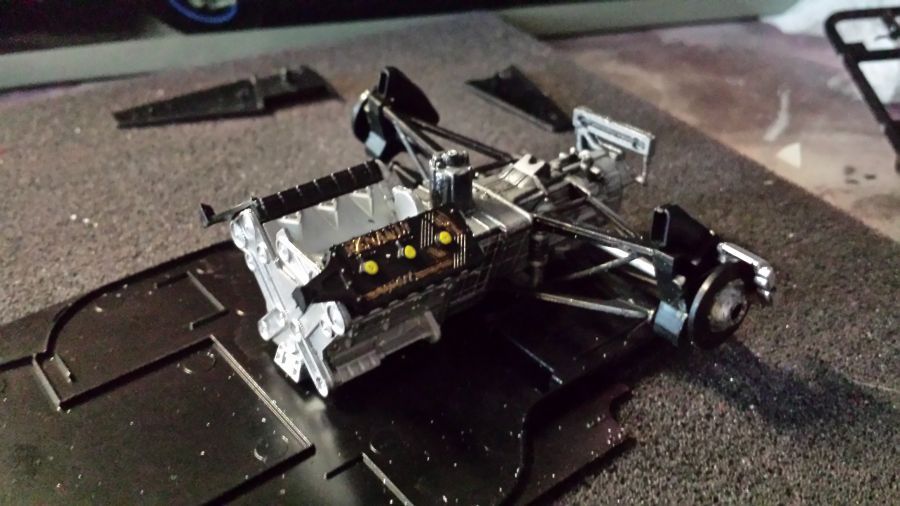
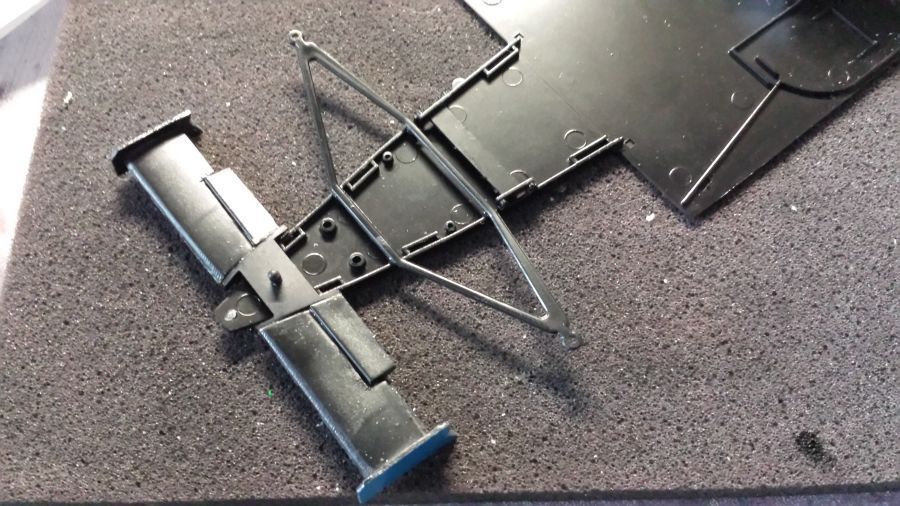
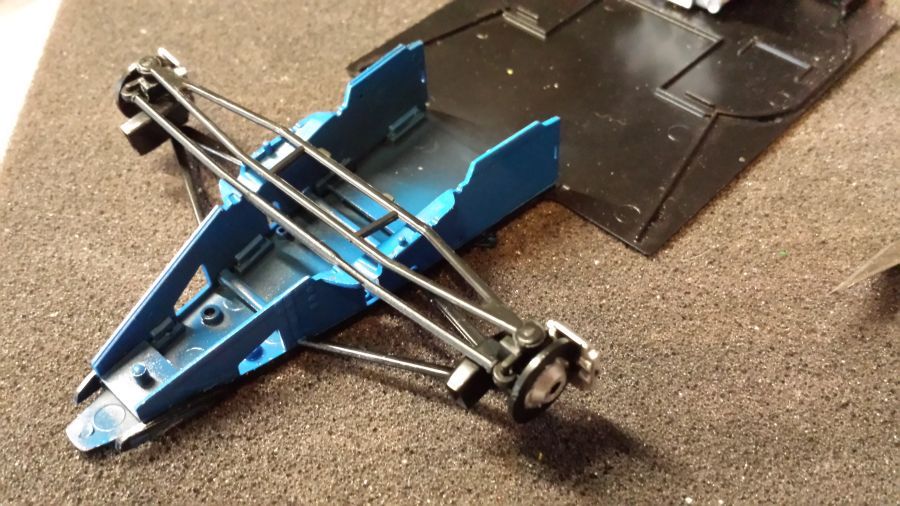
Een deel van de voorwielophanging is geplaatst. Niet de pull rods en geen steunen voor de uitbreiding van de voorvleugel (onderdeel I7 is voor een deel afgeknipt).
A part of the front wheel suspension has been mounted. Not the pull rods and not the supports for the extension of the front wing (part I7 has been cut).
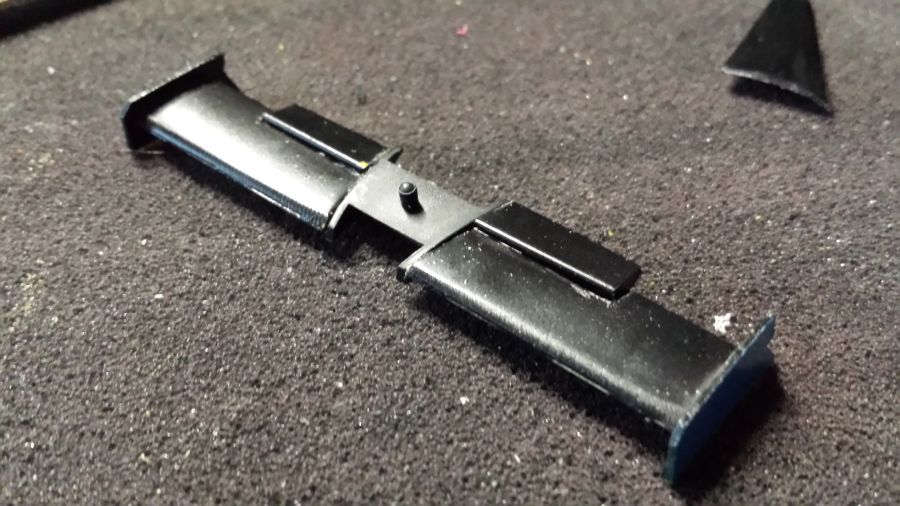
Achteraf lijkt de uitlijning van de voorvleugel niet helemaal goed te zijn (niet horizontaal). Ik maak daarom de vleugels weer los van de support en zal deze later weer vastzetten. De steun blijft wel zitten.
Looking back it seems the allignment of the front wing is not correct (not horizontal). I will cut the wings and attach them later again. The support will stay attached.
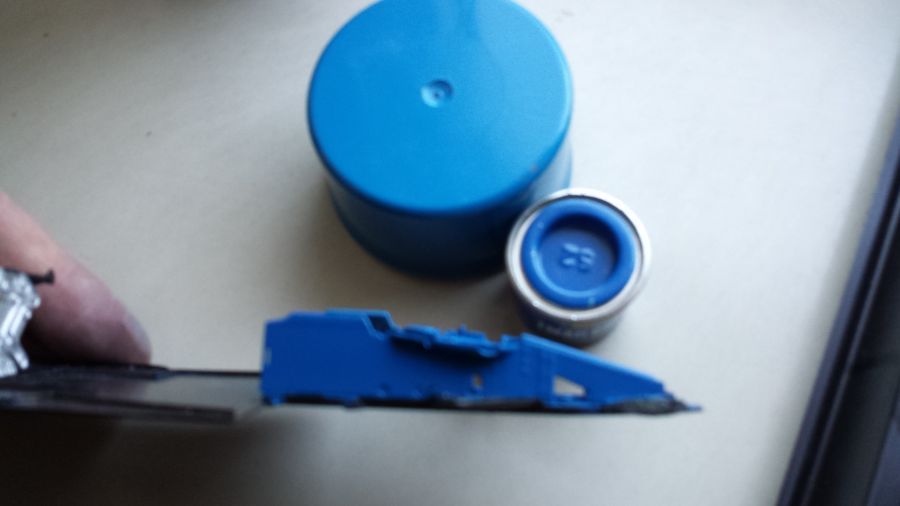
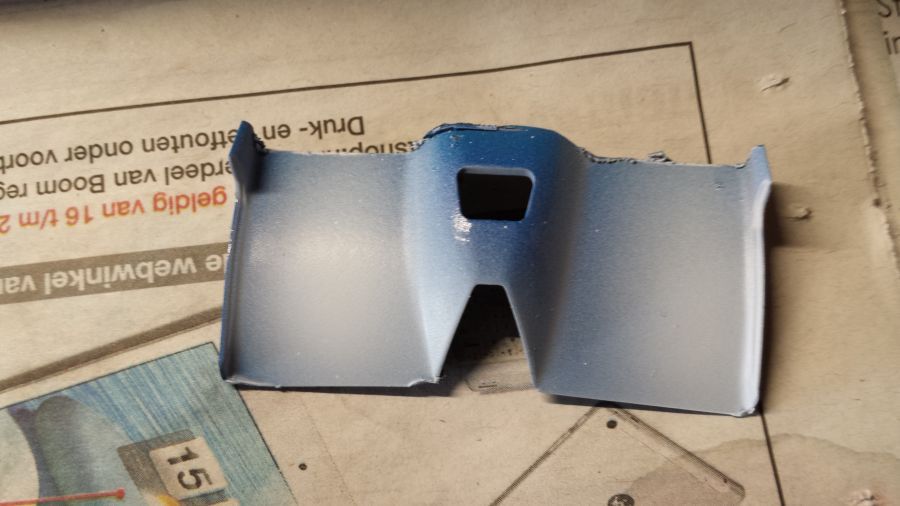
Ik ben niet helemaal tevreden met de kleur. Het is ook erg lastig. Ik heb wel 3 verschillende foto's van dezelfde auto waar op ieder de kleur er heel anders uit ziet. Ook kan het computerscherm enorm vertekenen. En dan nog de printer waarop ik de decals print. Ik heb met mijn vrouw gepraat en het is duidelijk dat de huidige kleur niet gaat werken. Daarom heb ik besloten over te stappen op Revell Blauw 52. Ik ga de tot nog toe gespoten delen overspuiten. Hieronder de nieuwe kleur onder daglicht. Misschien kan ik nu nog iets spelen met het printen van de decals m.b.t. saturation, gamma correctie en meer/minder blauw.
I am not happy with the color. It is very tricky. I have at least 3 pictures on which the car color looks different from each other. Also my computer screen can show incorrect colors. And then the printer i am using to print the decals might print incorrect colors. I had a chat with my wife and we agreed the current color might not be the best. That's why i decided to use Revell Blue 52. I will respray the current colored parts. Below a picture of the new color taken by daylight. Maybe i can play a bit when printing the decals with saturation, gamma correction and less/more blue.
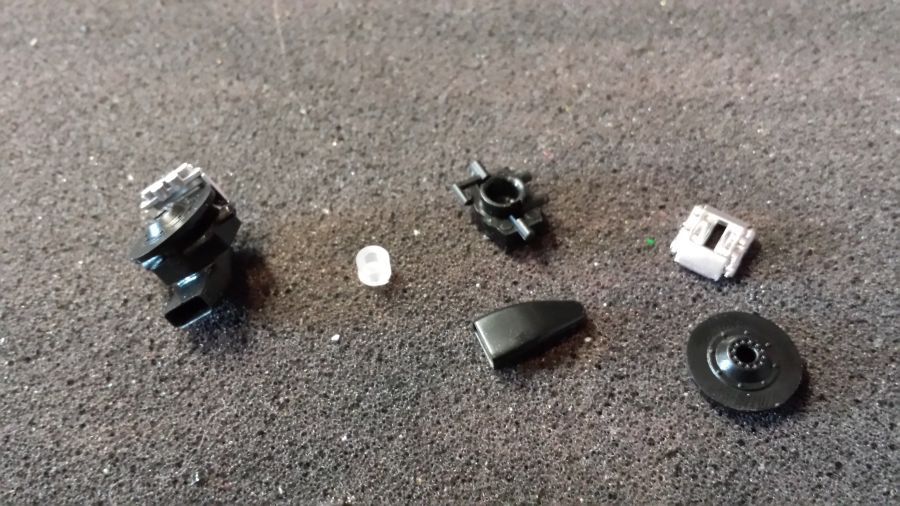
Het samenstellen van de remmen en het monteren van de voorwielophanging.
Combining the brakes and mounting them to the front wheel suspension.
Een paar onderdelen voor de koeling zijn geplaatst.
A few parts regarding the cooling are put in place.
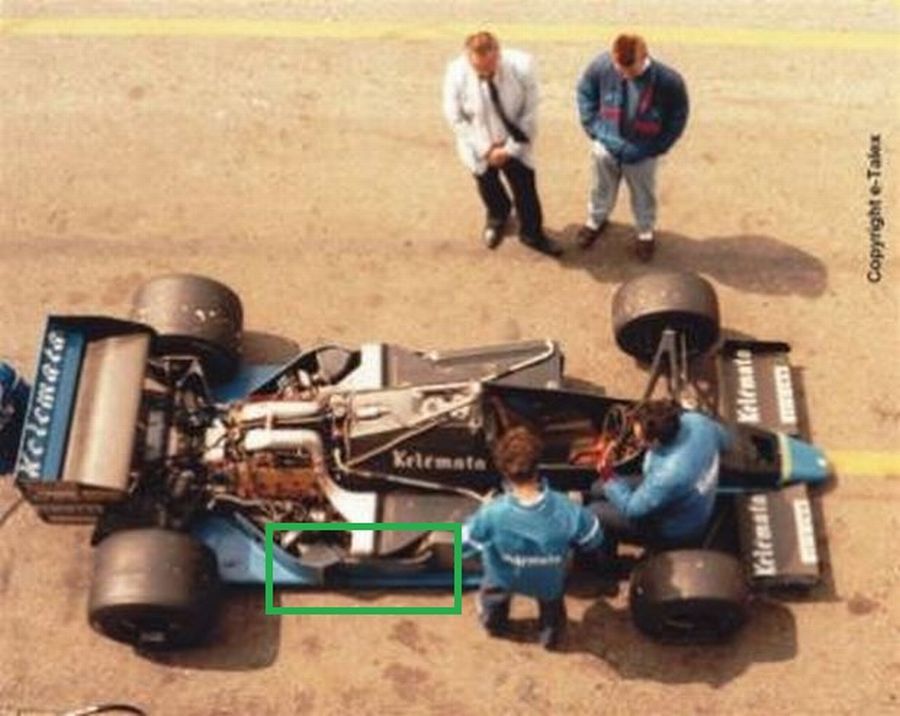
Het volgende is de plannen maken voor de wijzigingen aan de body. Op het eerste gezicht komen in ieder geval de volgende punten naar voren.
Next is making plans for changes to the body work. At first glance these points come to my mind.
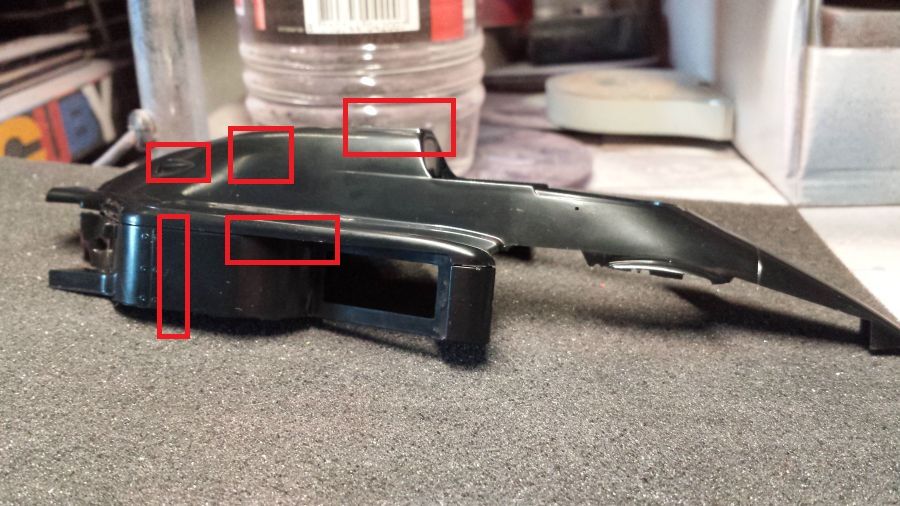
De genoemde punten zijn gecorrigeerd. De putty moet nog geschuurd worden wanneer deze droog is.
The points have been corrected. The putty needs sanding after it is dry.
Er zijn extra sleuven gemaakt in de zijwanden voor de koeling.
Some extra cuts have been made in the side pods for the cooling.
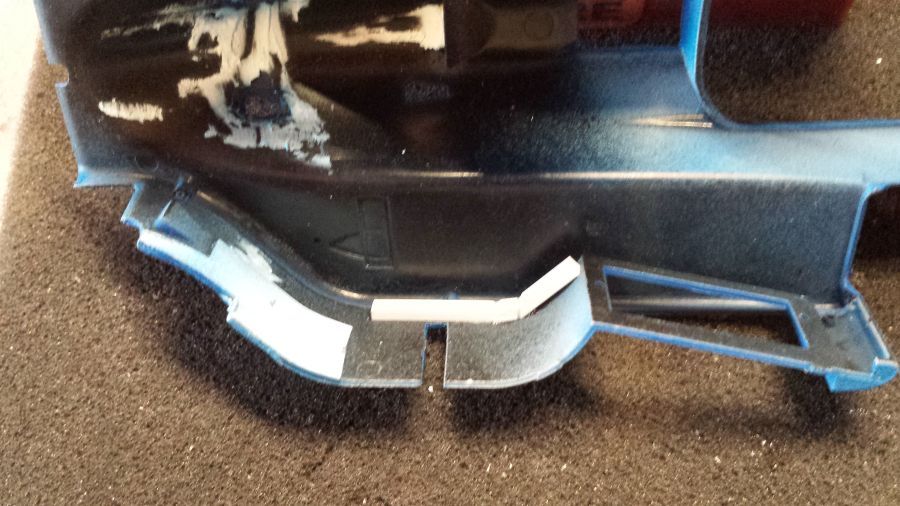
En een stukje van de onderkant gaat eraf.
And a part from the underside will be cut off.
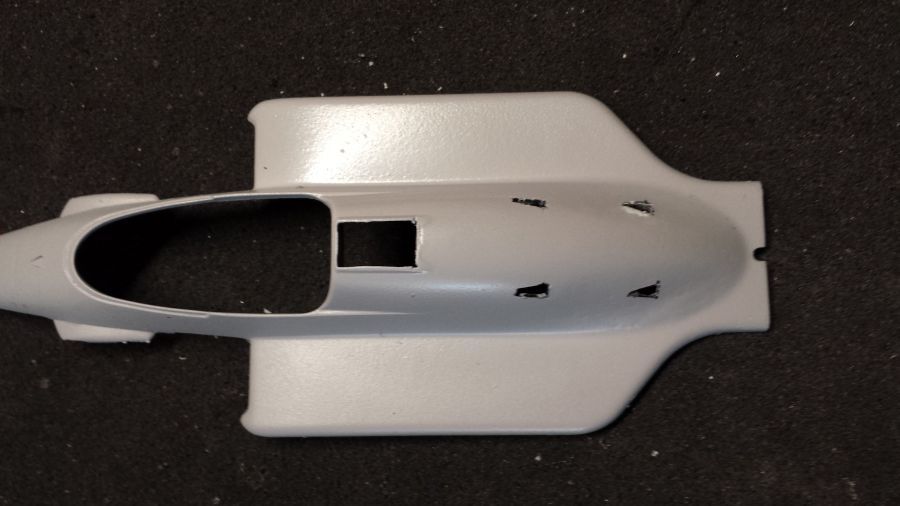
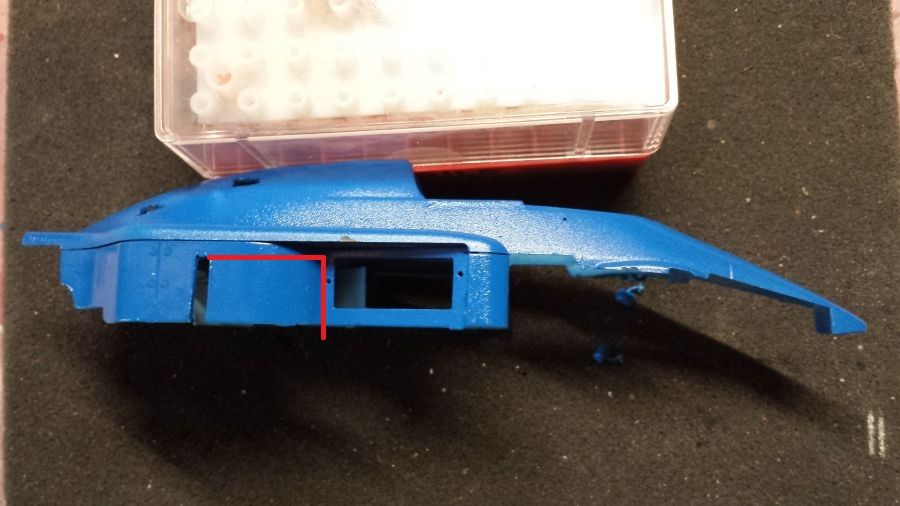
Aan de binnenkant heb ik een plaatje gelijmd. De rood gemarkeerde punten worden gevuld met putty.
I glued some plastic on the inside. The spots marked red will be filled with putty.

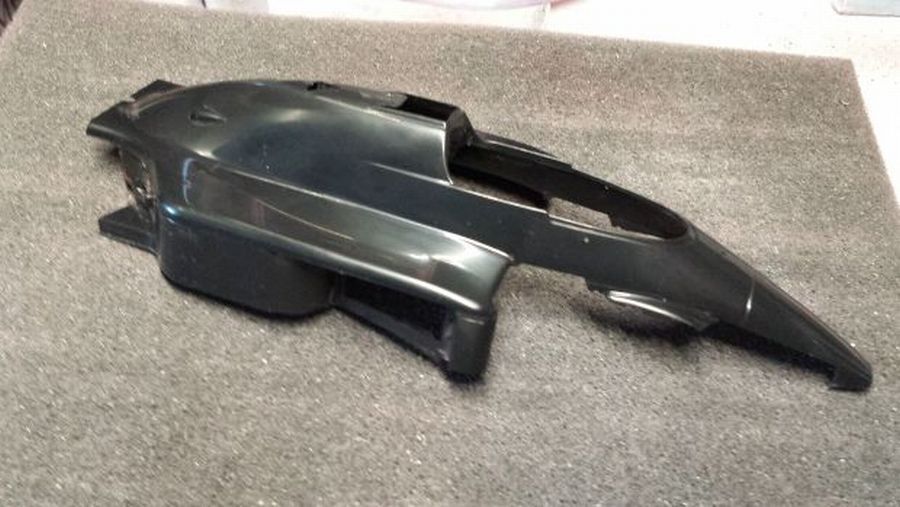
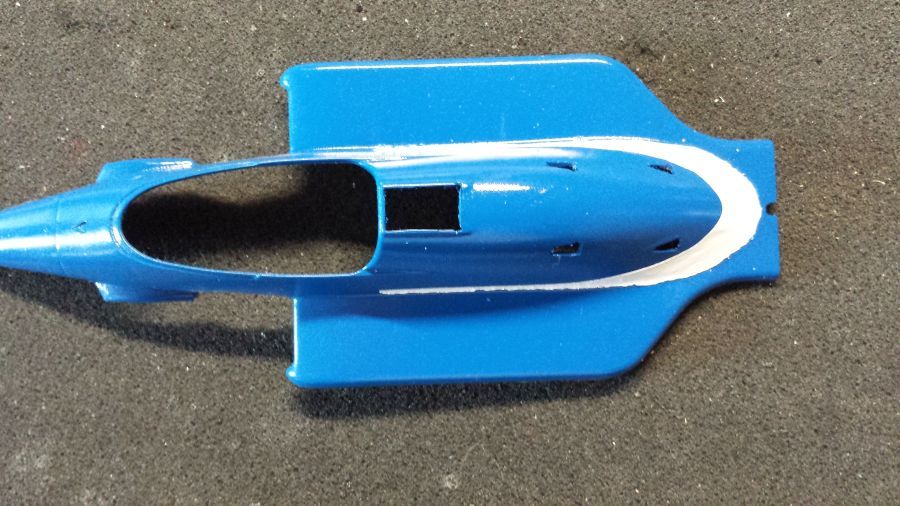
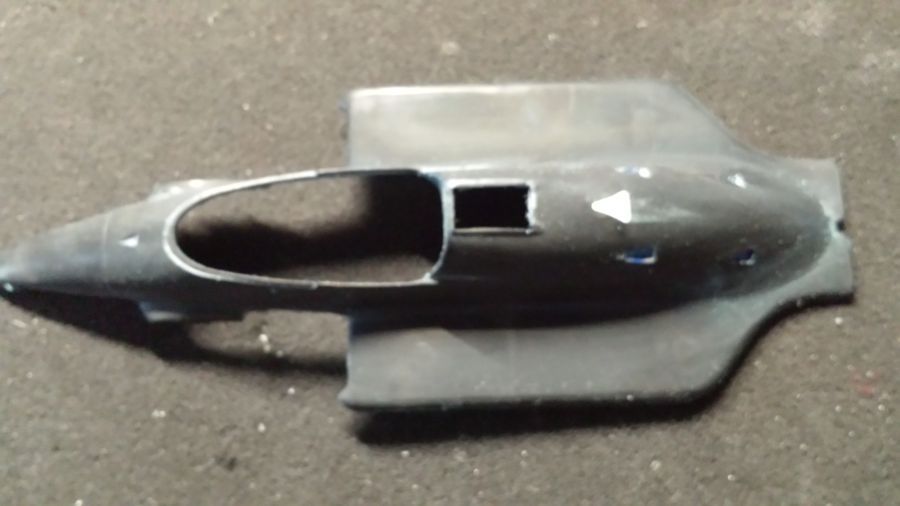
De klus is voorlopig geklaard. De grondverf zit erop. Nu goed schuren.
The job has been done for now. The primer is on. Now the sanding.

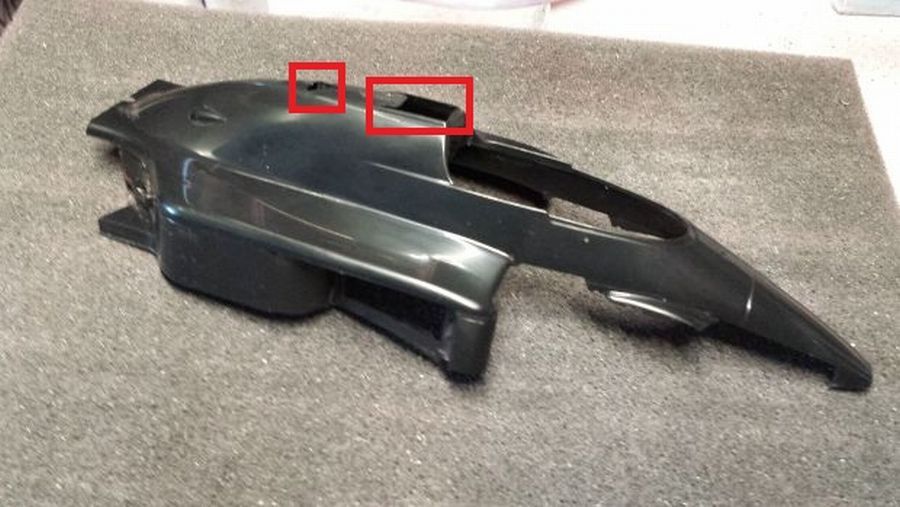
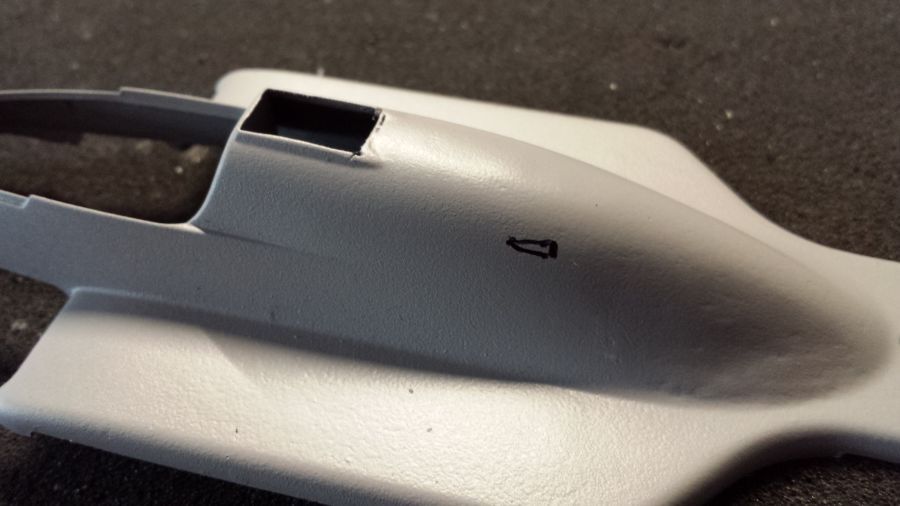
Er moeten een paar kleine 'gaten' in de body worden gemaakt.
There have to be made some small 'holes' in the body.
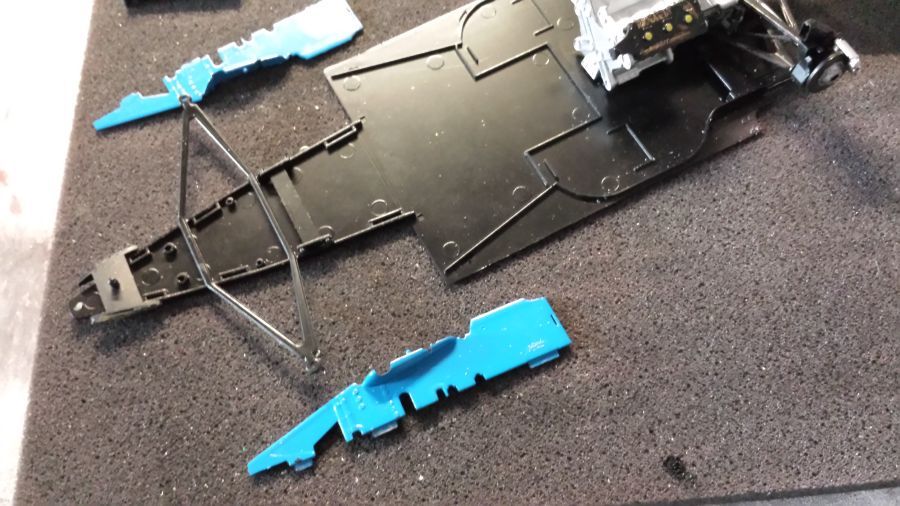
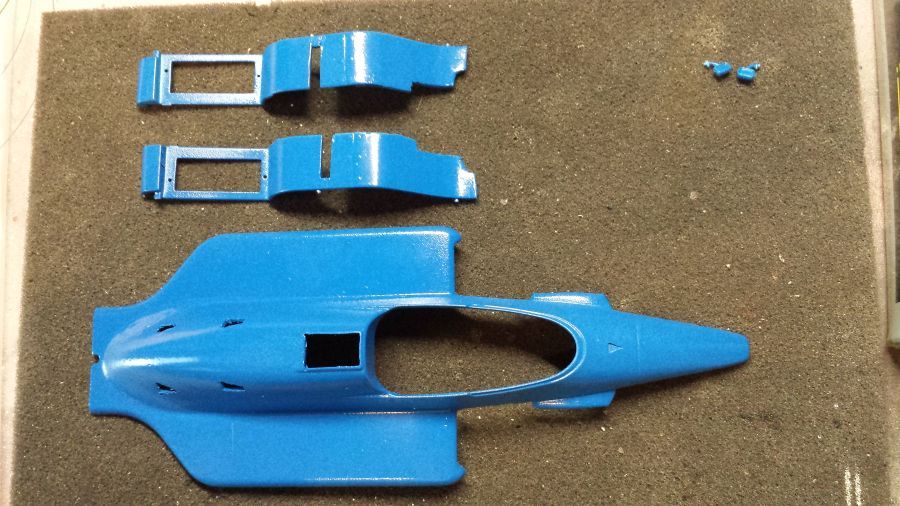
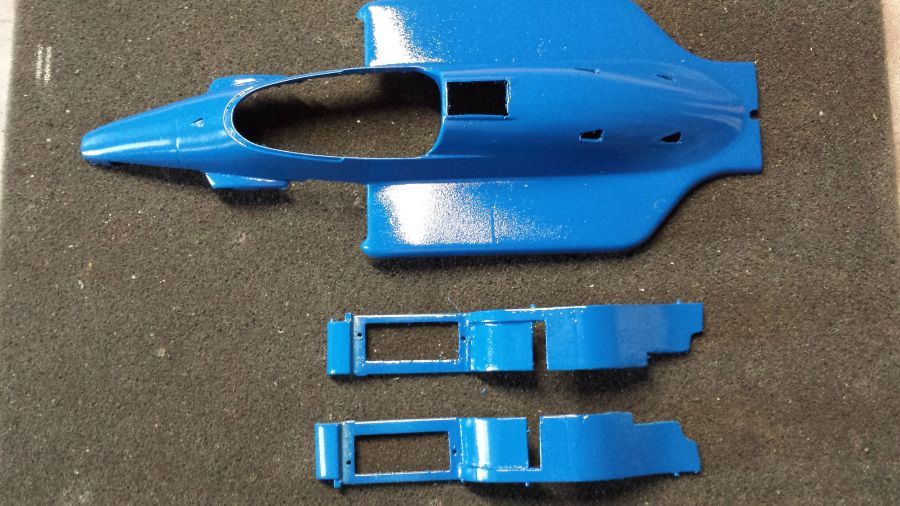
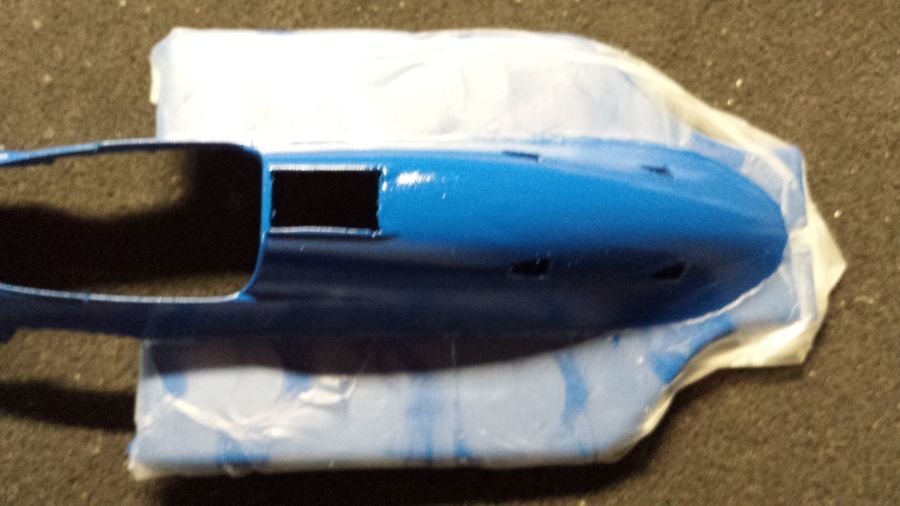
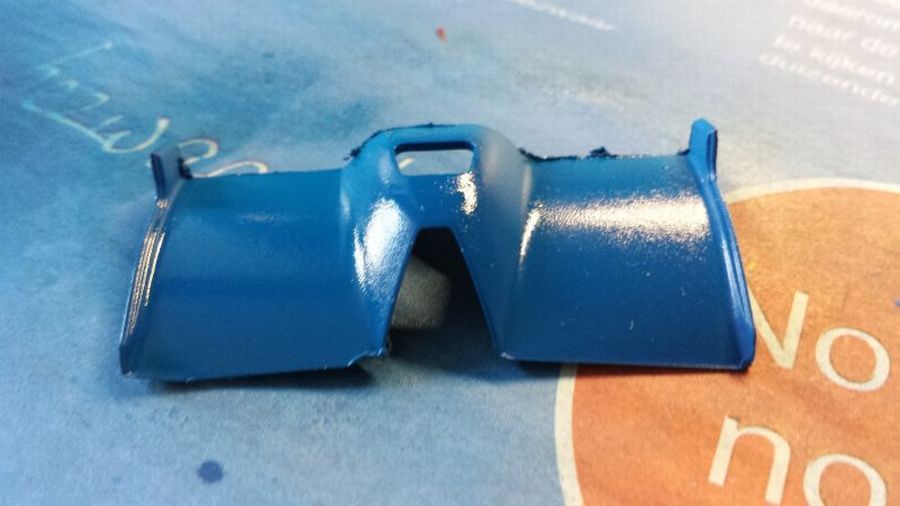
Een paar onderdelen zijn blauw gespoten om een paar beslissingen te nemen. Nog niet de definitieve verflaag.
A few parts have been painted blue to make some decisions. Not the final coat of paint.
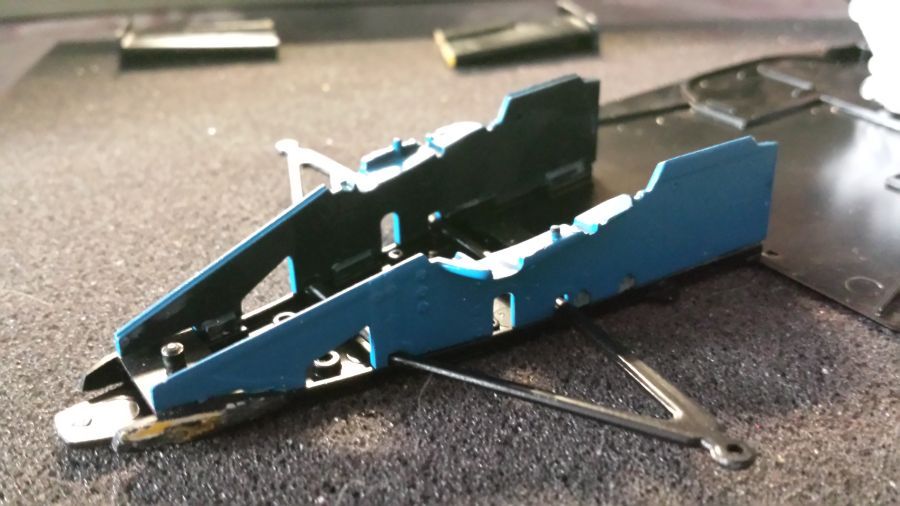
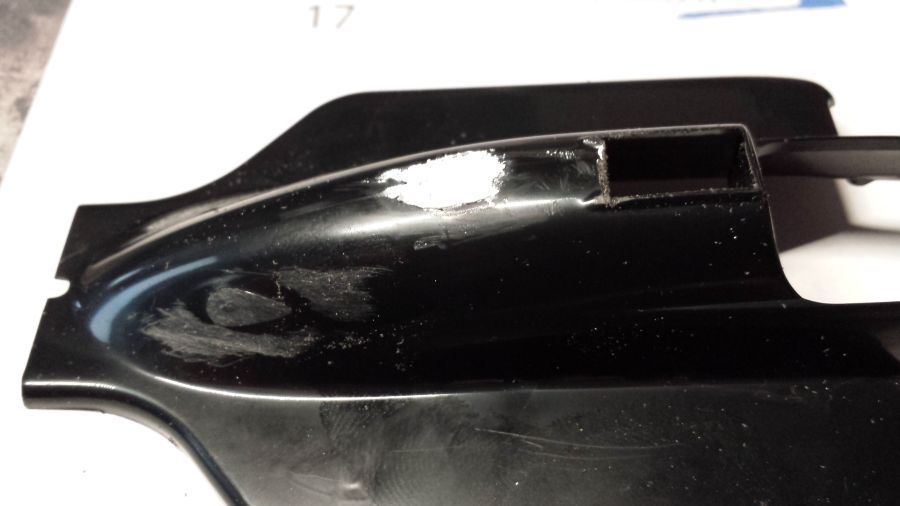
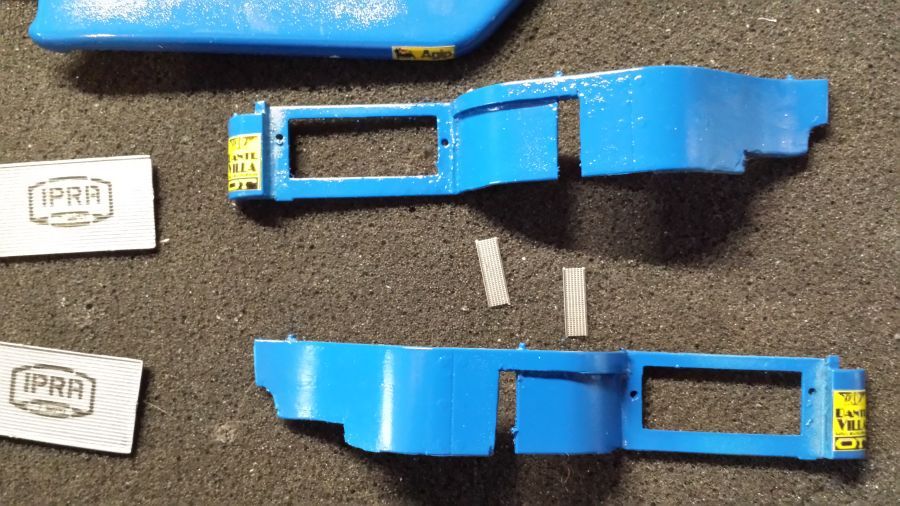
Er is nog wat werk aan de zijkanten nodig. Daarvoor wordt weer een en ander gezaagd. Op de foto is te zien dat
de wand van de side pod wat naar binnen staat.
Still some work on the side pods is necessary. Some cuts will be made. On the picture you can see
the wall of the side pod is placed a little bit inwards.
Eerst wat versteviging aan de binnenkant maken. Daar wordt later de gezaagde zijwand geplaatst.
First some reinforcements on the inside. The side wall that is cut will be attached here later.
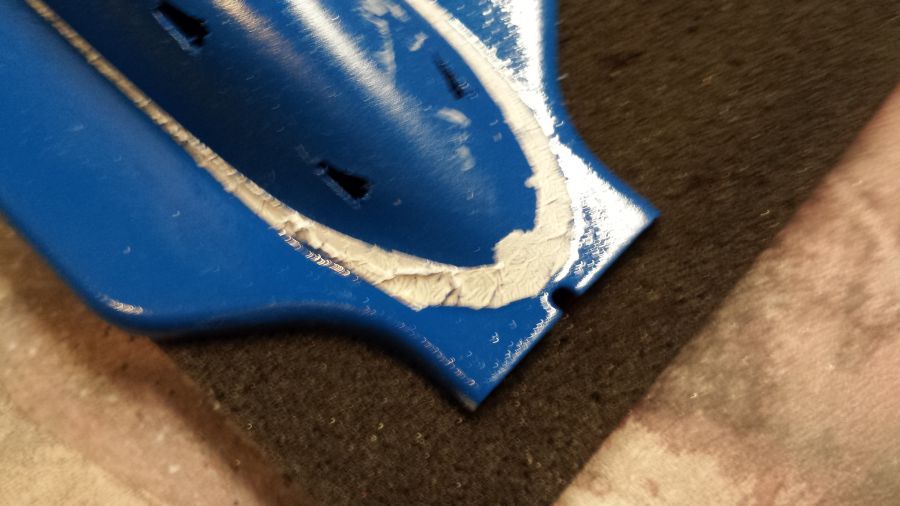
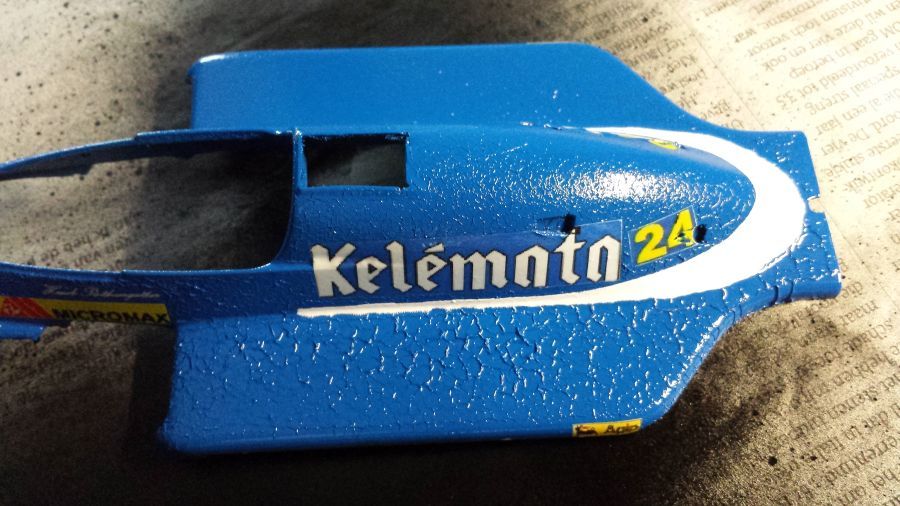
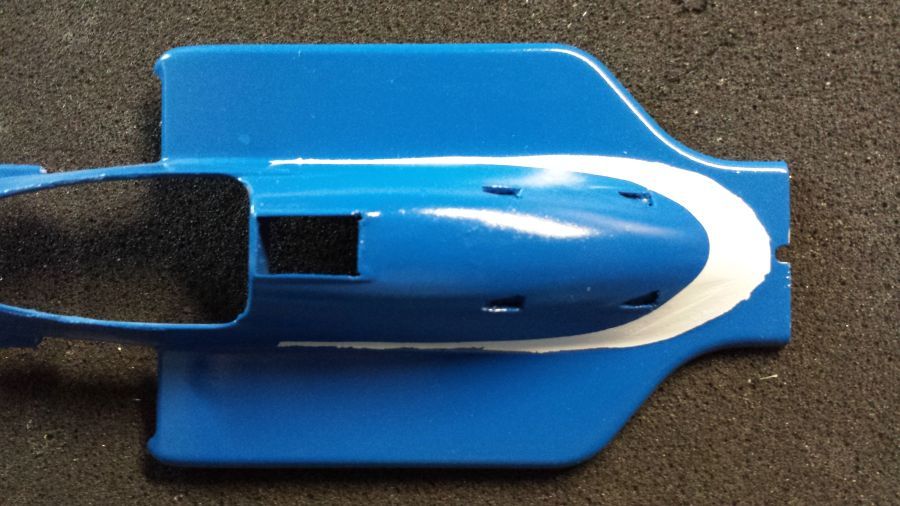
Ik heb de body afgeplakt en een deel wit gespoten (Tamiya TS-26 Pure White). Het lijkt erop dat de verf van Revell dat niet zo leuk vindt. Alles weer schoonmaken en opnieuw beginnen dus.
I taped the body and sprayed a part with white (Tamiya TS-26 Pure White). It looks like the paint from Revell does not like this. So i have to clean everything and start over again.
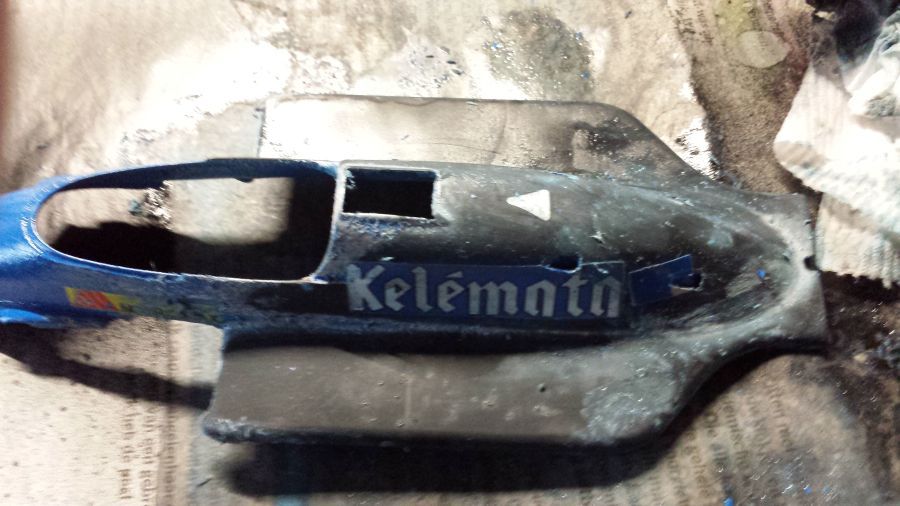
Alle verf is compleet gestript en alles opnieuw gespoten.
All the paint has been removed and everything has been sprayed again.
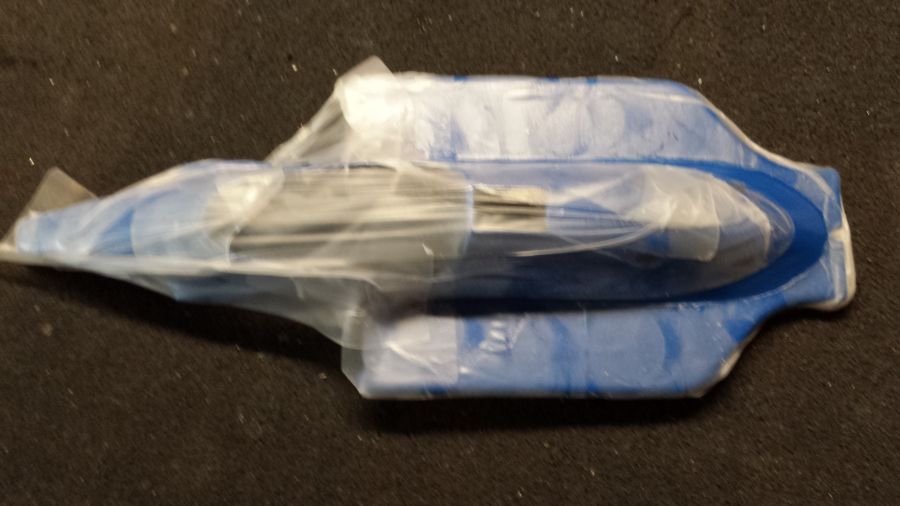
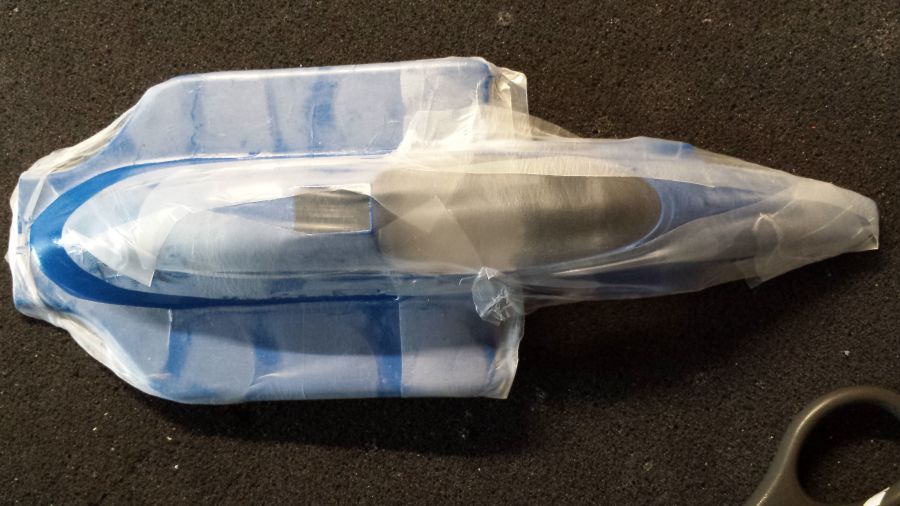
Daarna alles opnieuw maskeren. Dit keer gebruik ik Parafilm M. Dit is een compleet nieuw produkt voor mij.
Then masking everything. This time i am using Parafilm M. This is a completely new product to me.
Dan het wit erop. Dit keer spuit ik geen Tamiya Pure White, maar primer van Valejo. Ik zal daarna lak spuiten.
Next is the white. This time i will not use Tamiya Pure White, but Valejo primer. I will then use clear coat.
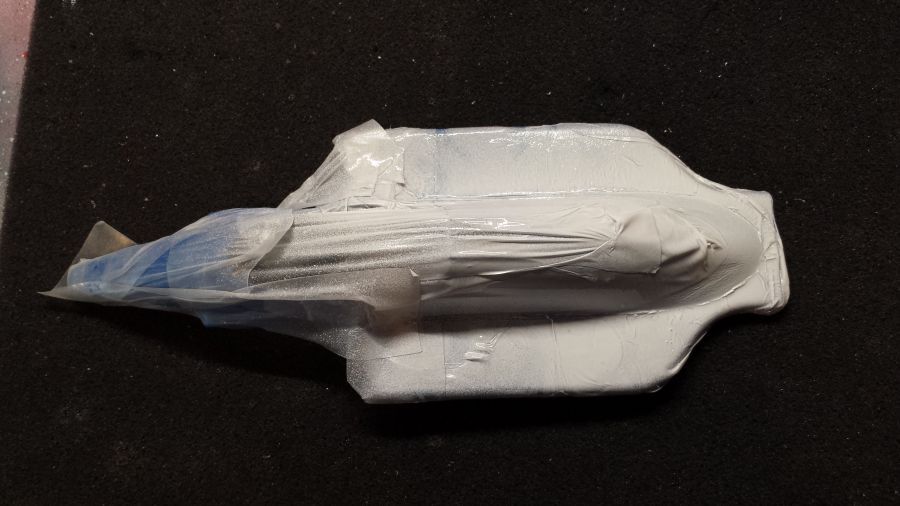
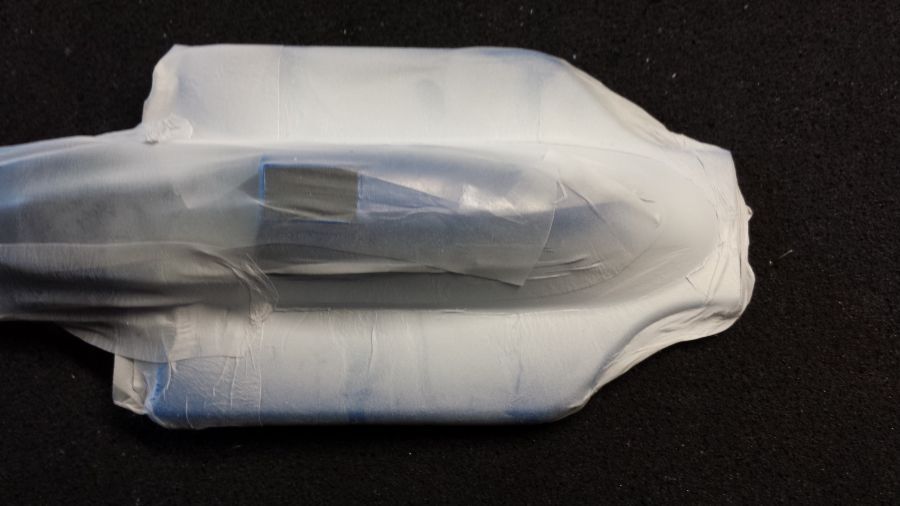
Het resultaat. Niet perfect. Ik zal zien of ik er nog iets aan kan doen. In ieder geval moet ik nog maar eens trainen in het werken met Parafilm M.
The result. Not Perfect. I will see what to do about it. I will need some training in working with Parafilm M though.
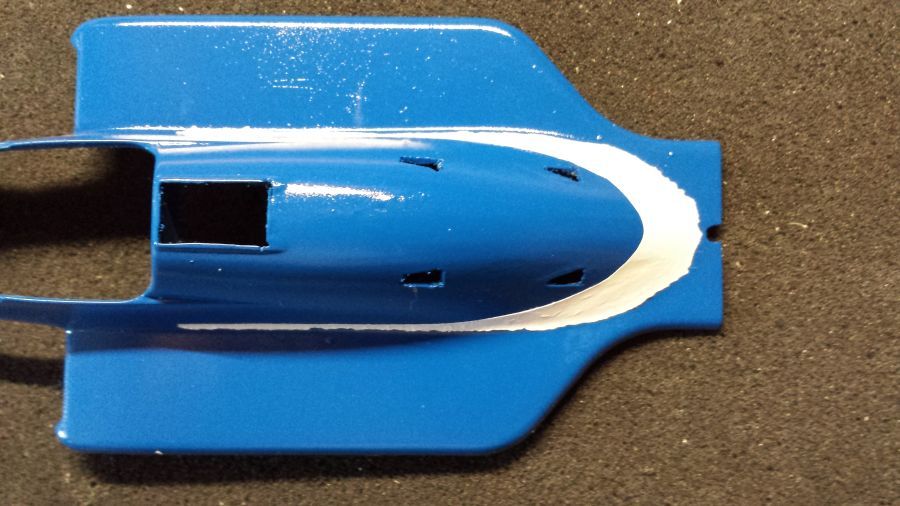
Na wat werken met wit en blauw.... Het moet maar. Het ziet er op de foto slechter uit dan in werkelijkheid.
After some touch up with white and blue.... I have to do with it. It looks more bad on the picture than in real life.
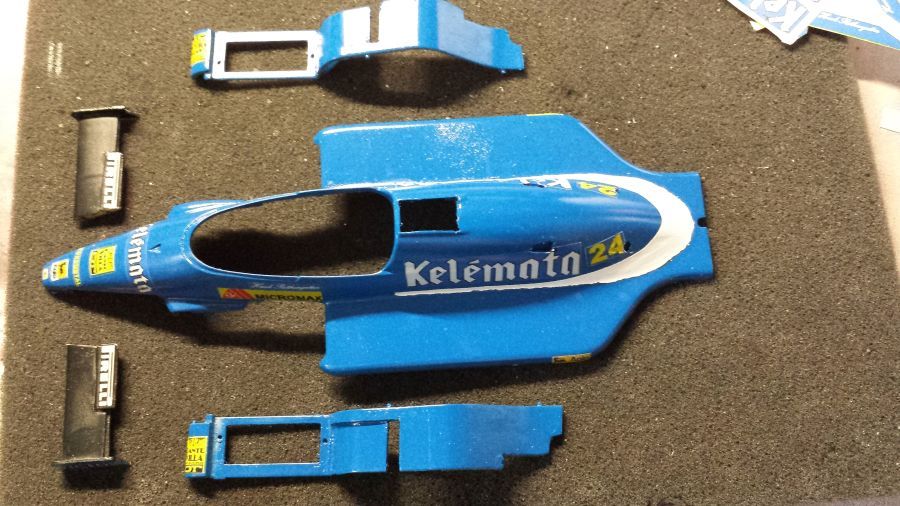
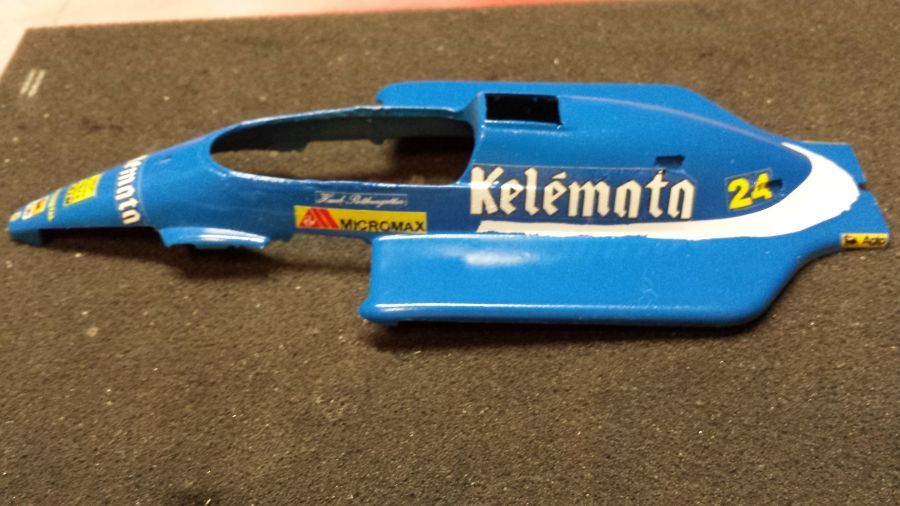
Een aantal decals zijn geplaatst.
Some decals are put into place.
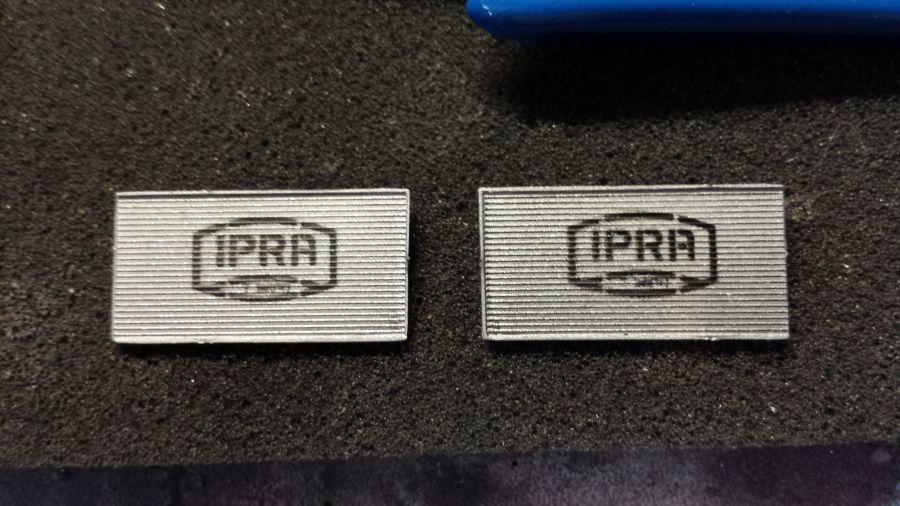
Het logo is op de koeling gespoten.
The logo has been painted on the coolers.
Voor de nieuw gemaakte koeling kijk ik even in mijn rommeldoos.
I will have a look in my scrap box to look for something to create the new coolers.
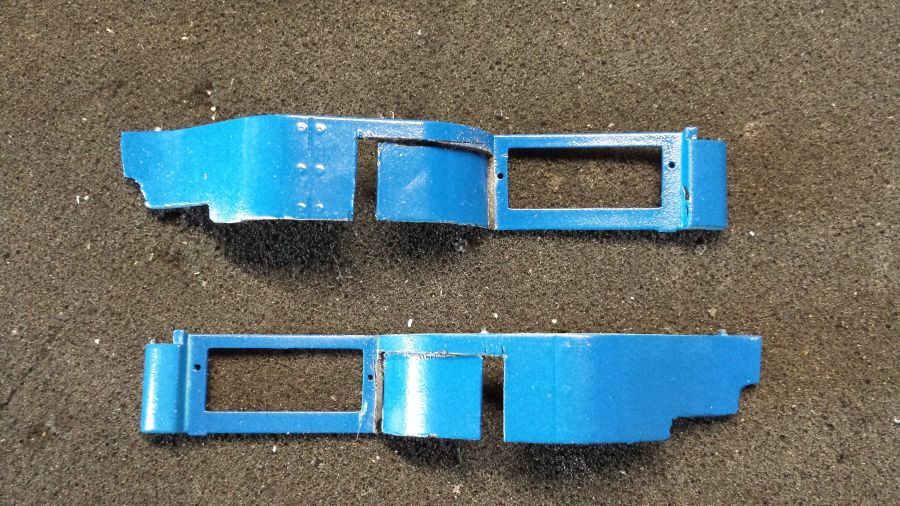
De zijwanden zijn aan de bodemplaat bevestigd.
The side walls have been mounted to the floor.
Even wat lak erover om de decals te sealen en..... Dit moet mijn geluksauto zijn. Tamiya TS-13 past niet op Revell enamels.
Applied some clear coat to seal the decals and..... This must be my lucky car. Tamiya TS-13 does not match Revell enamels.
Voor de 2e keer helemaal schoonmaken dus. De zelf geprinte decals zijn van goed kwaliteit. Ze zijn er bijna niet af te krijgen.
So cleaning everything for the 2nd time. The self printed decals are of good quality. They hardly come off.
Test: Zero Paints ZP-3002 Clearcoat Lacquer werkt over Revell Enamels.
Test: Zero Paints ZP-3002 Clearcoat Lacquer works over Revell Enamels.
Zero Paints white over Revell Enamel blauw (rechterkant van onderdeel) en Zero Paints Lacquer (linkerkant van onderdeel) is ook geen probleem.
Zero Paints white over Revell Enamel blue (right side of part) and Zero Paints Lacquer (left side of part) is not a problem.
De body is opnieuw gemaskeerd en daana is het wit gespoten.
The body has been masked again and then the white was airbrushed.
En weer terug op het punt vóór de ramp.
And back to the point before disaster stroke.
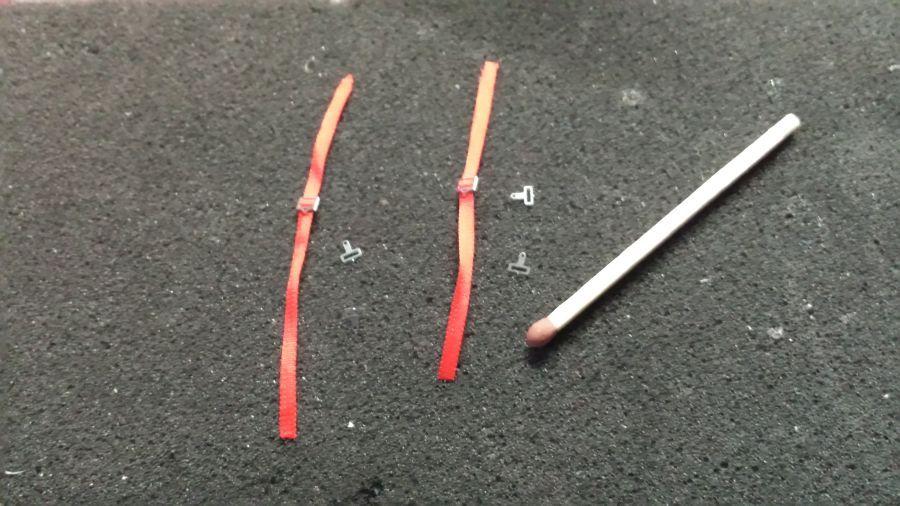
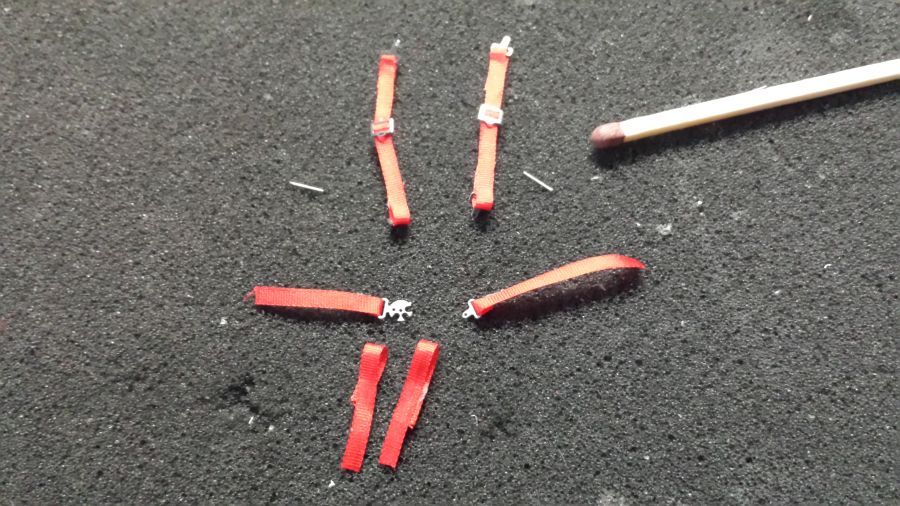
Daarna de gordels maken.
Next is creating the seat belts.
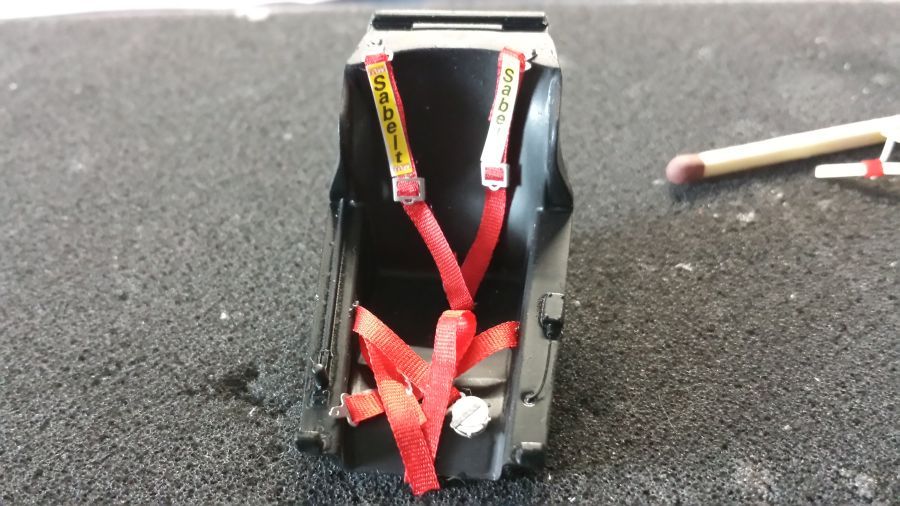
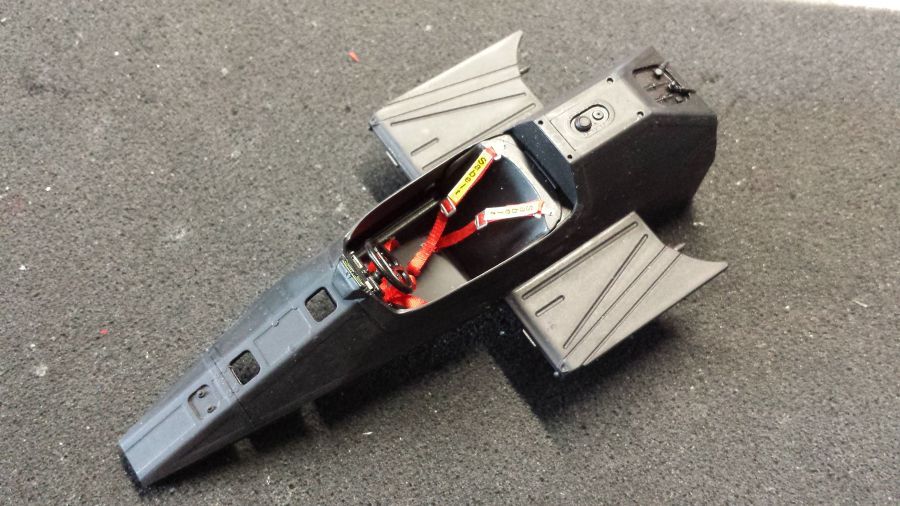
Daarna wordt de stoel op de bodemplaat bevestigd, samen met het dashboard.
Next is attaching the seat to the floor, together with the dash.
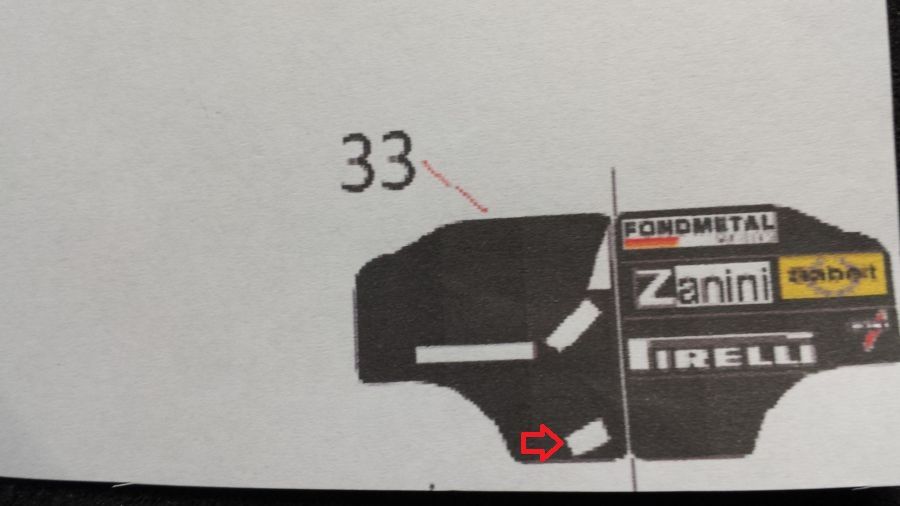
Vervolgens moet het model van de vleugel worden gewijzigd. Ik gebruik het papiermodel voor het bepalen van de vorm.
Then the shape of the wing needs to be changed. I will use the paper model to create the shape.
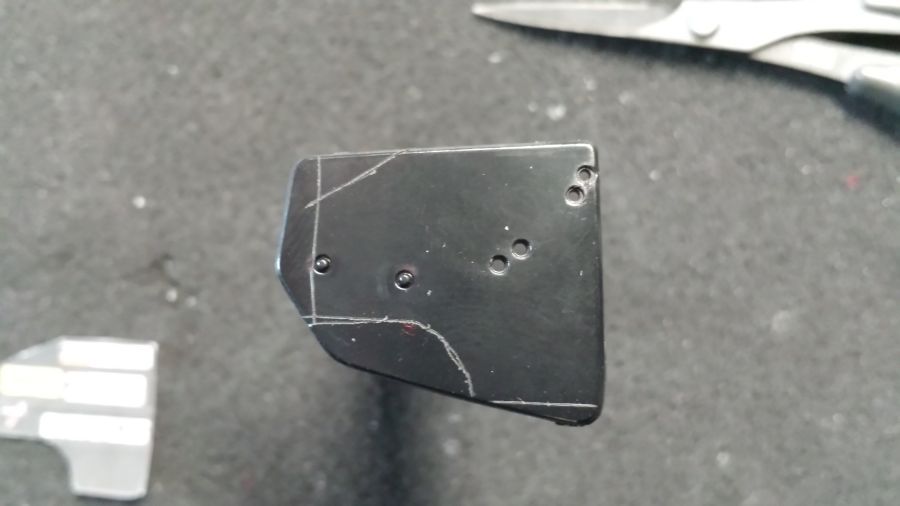
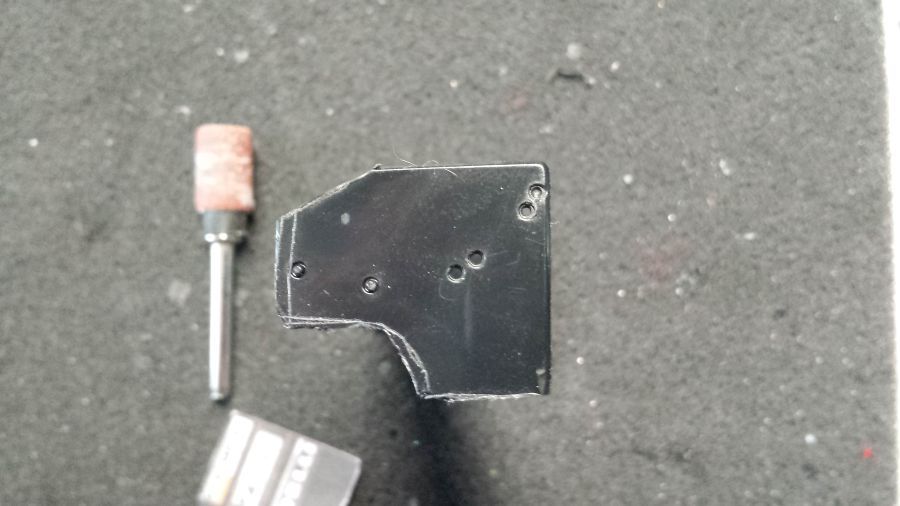
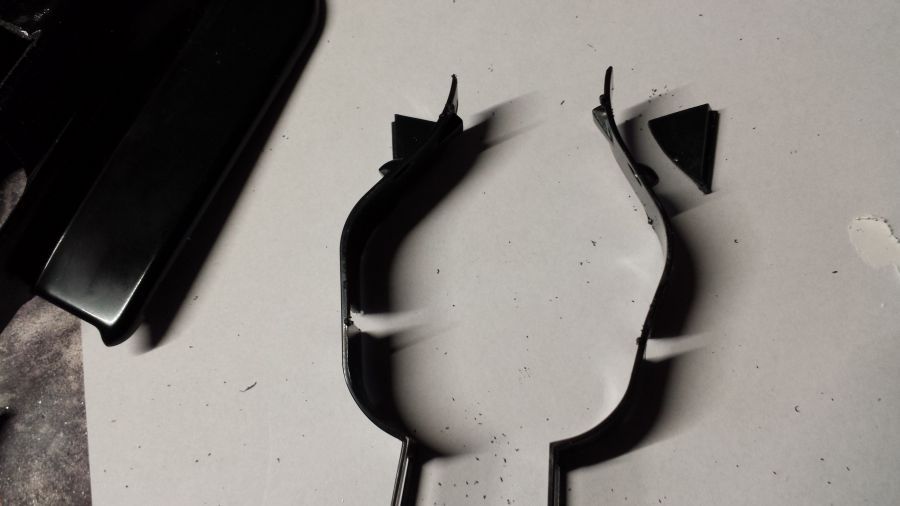
Uit de tekening blijkt dat de Osella een extra deel voor de vleugel nodig heeft. Deze maak ik van een onderdeel in de kit. Ik zaag het door bij de rode strepen en lijm de 2 groene delen tegen elkaar. Daarna maak ik dit deel passend.
On the drawing you can see the Osella needs another wing part. I will create this from a kit part. I will cut it at the red lines and glue the 2 green parts together. Then i will see to make it fit.
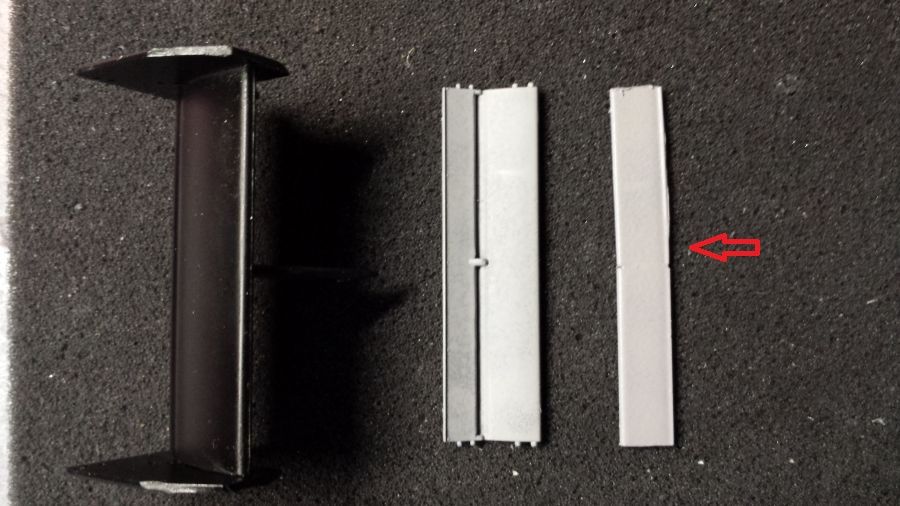
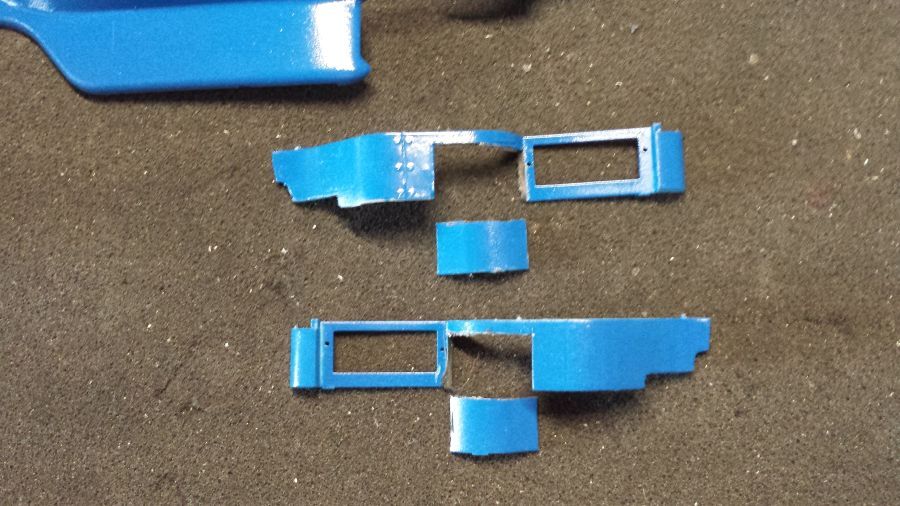
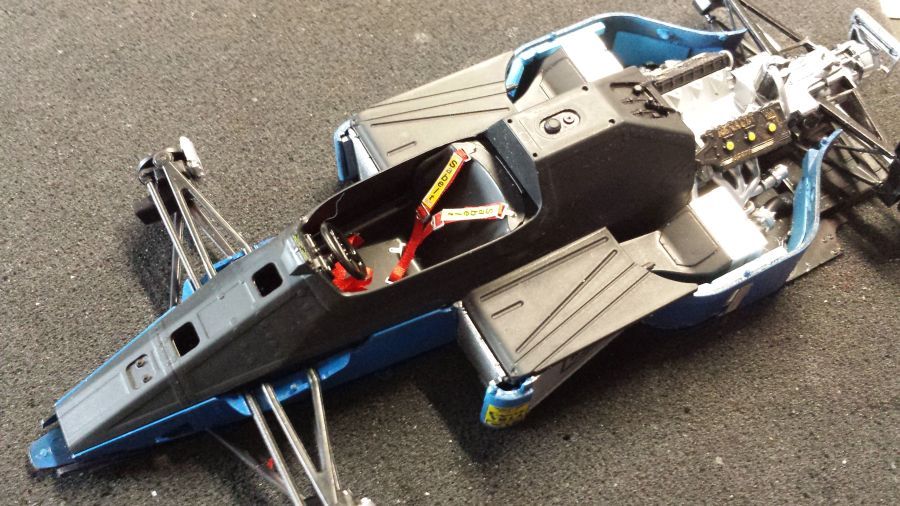
De twee grijze delen worden weer blauw gespoten.
The two grey parts are to be painted blue again.
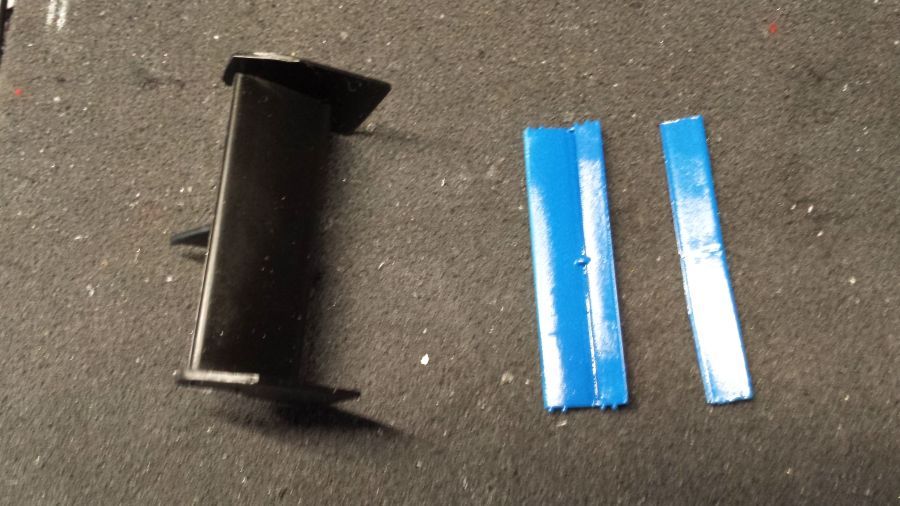
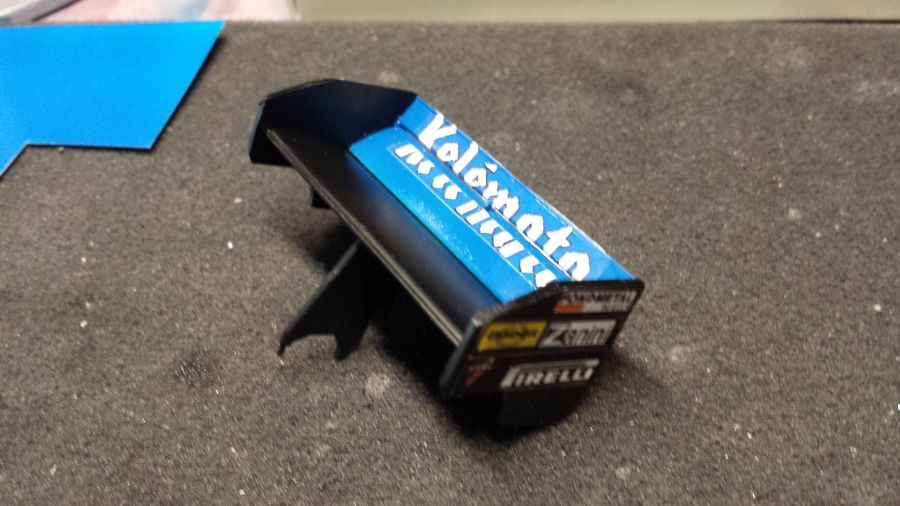
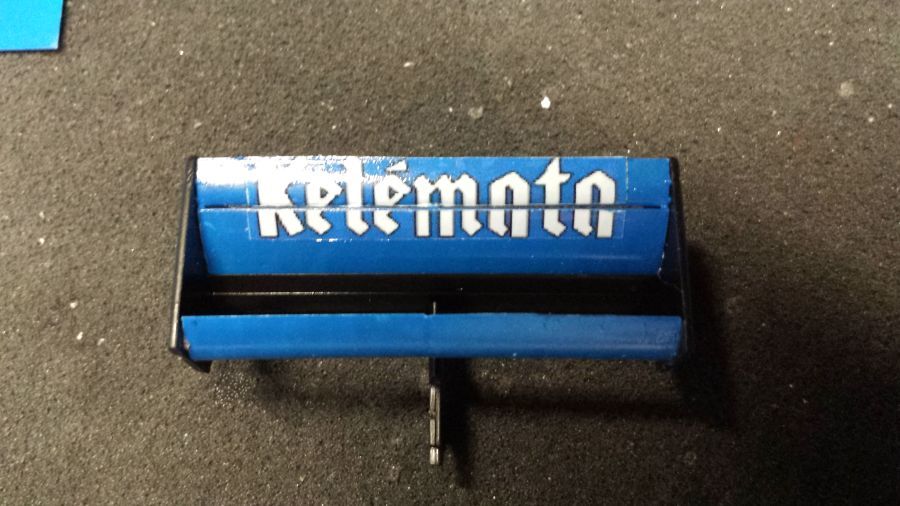
Daarna alles in elkaar zetten en de decals erop.
Then putting everything together and adding the decals.
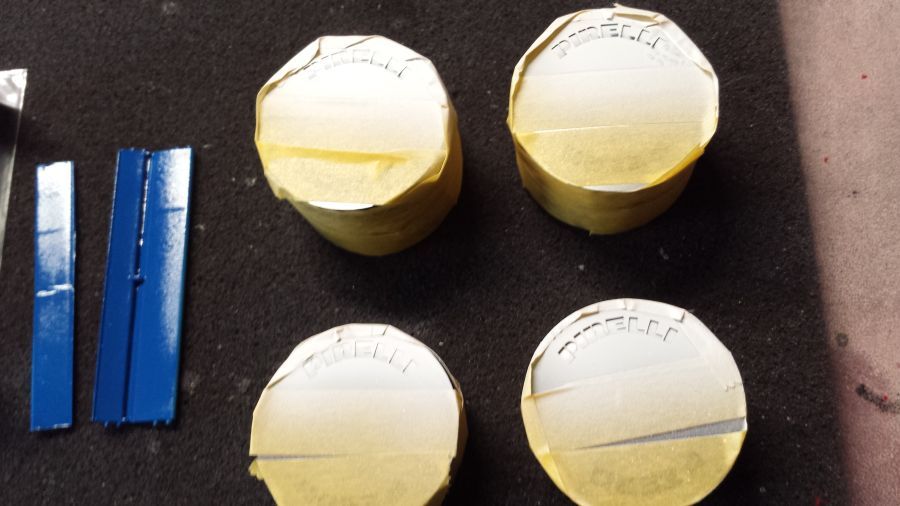
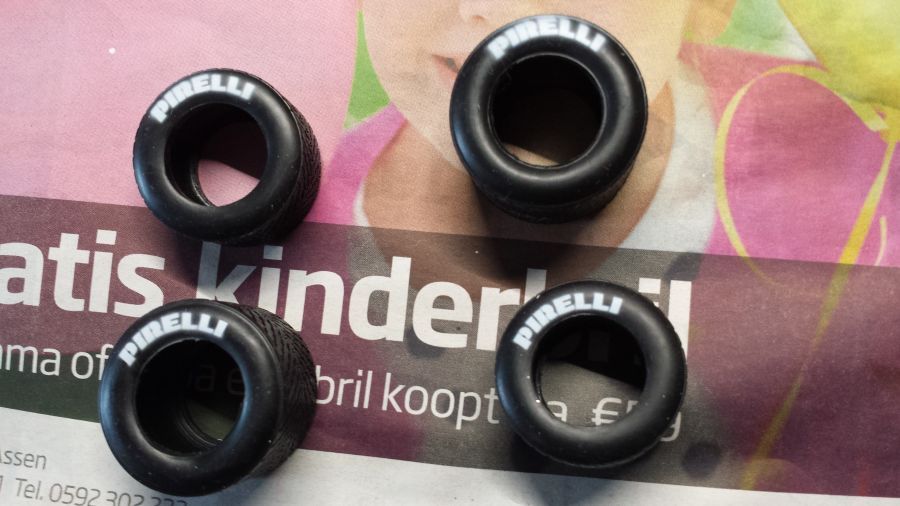
De banden krijgen een logo van Pirelli. Hiervoor gebruik ik een sjabloon.
The tires will get a Pirelli logo. I will use a template for this.
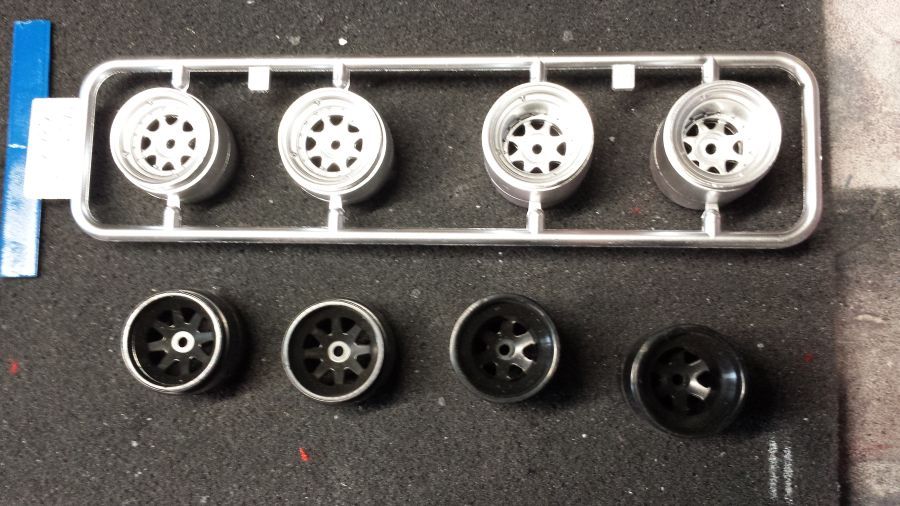
In de rommeldoos vond ik velgen met 6 spaken. De in de kit geleverde velgen gaan naar de rommeldoos.
In the scrap box i found 6 spoke rims. The rims included in the kit move to the scrap box.
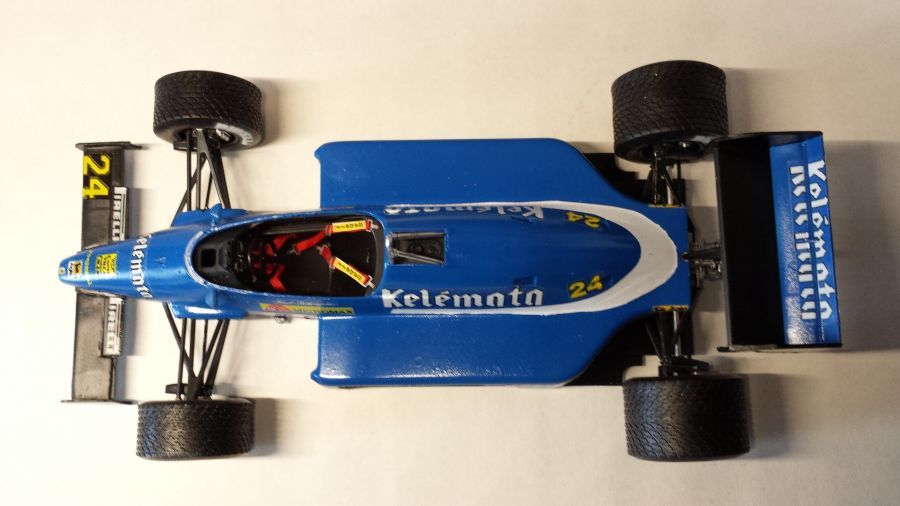
Het bodywerk zit er op.
The body work is in it's place.
De kit heeft standaard regenbanden in de doos. Volgens mijn encyclopedie regende het tijdens de training. Waarschijnlijk een onjuist profiel, maar ik doe het er mee.
The kit contains rain tires. According to my F1 encyclopedia is was raining during training. Probably an incorrect tire profile, but i have to do with it.
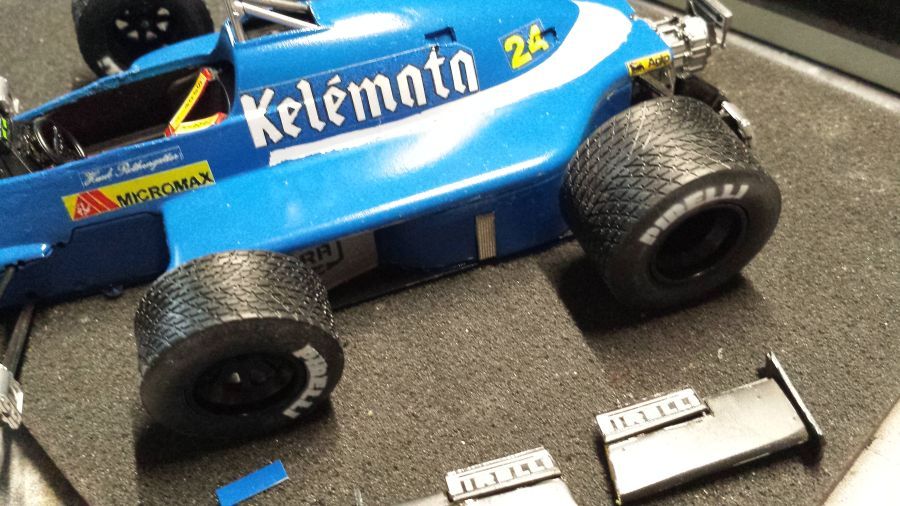
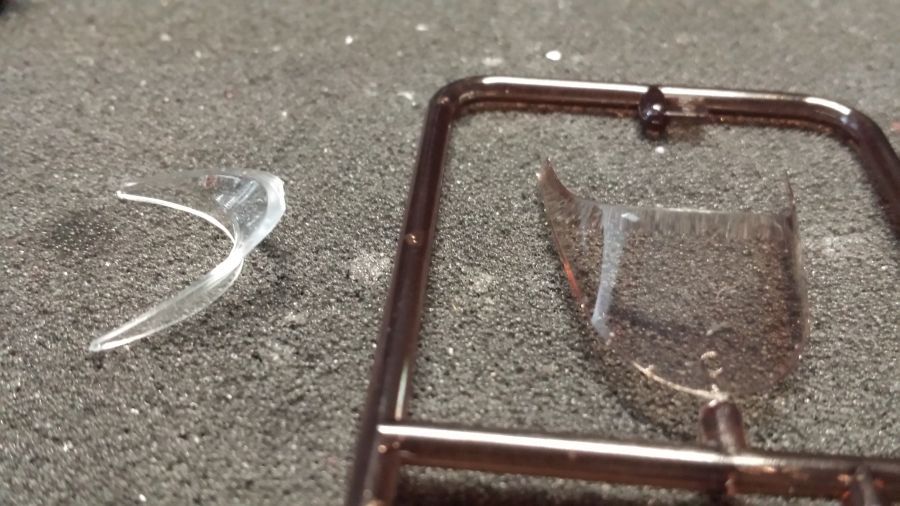
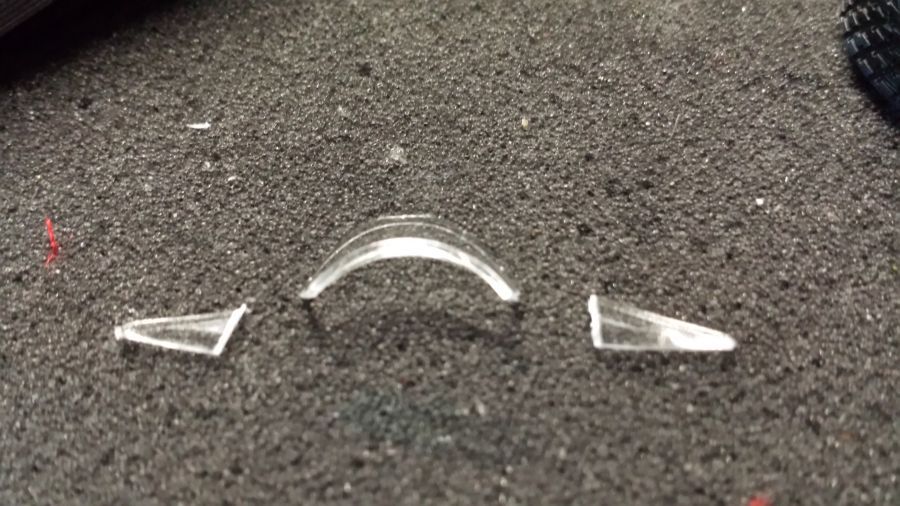
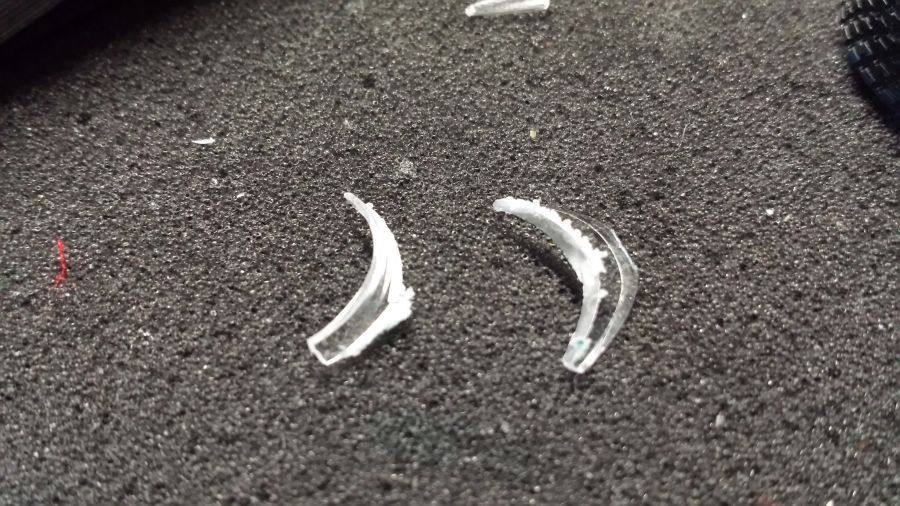
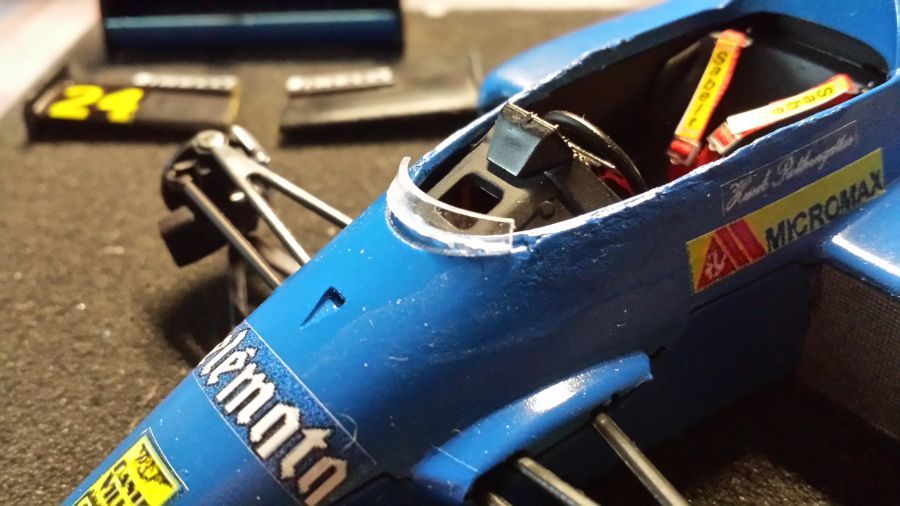
De kit bevat een donkere ruit. In de rommelkist vond ik een licht gekleurde. Deze ga ik bewerken zodat deze gaat passen. Deze wordt dan omgekeerd gemonteerd. Op de voorgaande foto zie je dat het lijkt alsof de ruit naar voren steekt.
The kit contains a dark wind shield. In the scrap box i found a light colored one. I will work on this until it fits. It will be mounted upwards. When you have a look at the previous photo you can see it looks like the wind shield points forward.
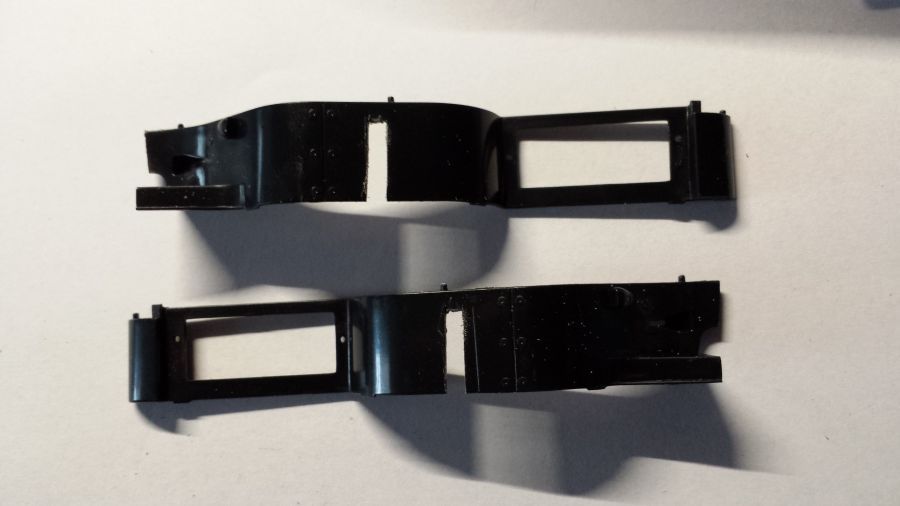
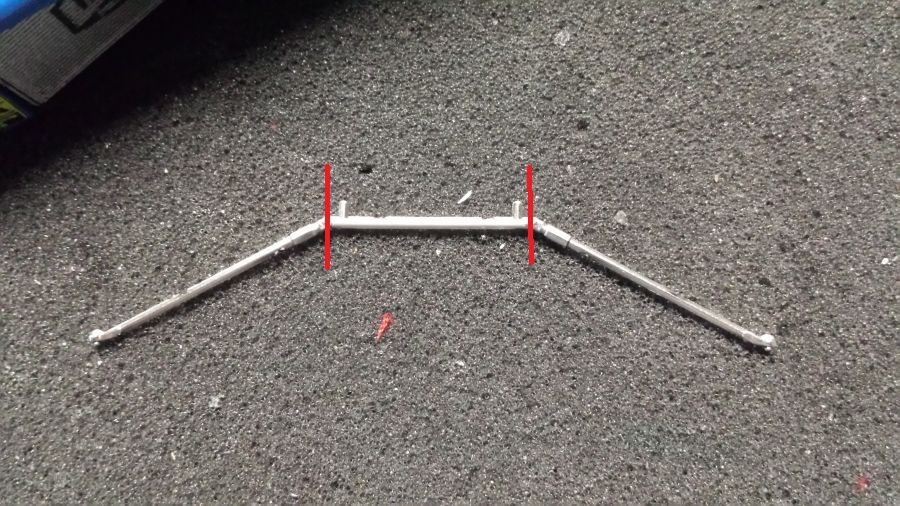
De pull rod moet veranderd worden in een push rod. Het onderdeel wordt zwart gespoten, doorgezaagd bij de met rood aangegeven punten en vervolgens gemonteerd.
The pull rod needs to be changed to a push rod. The part will be painted black, cut and the red marked points and mounted.
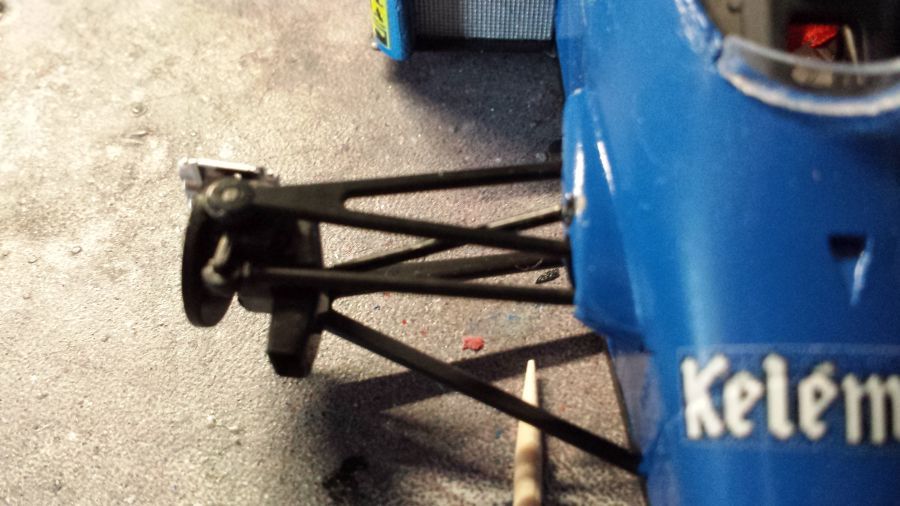
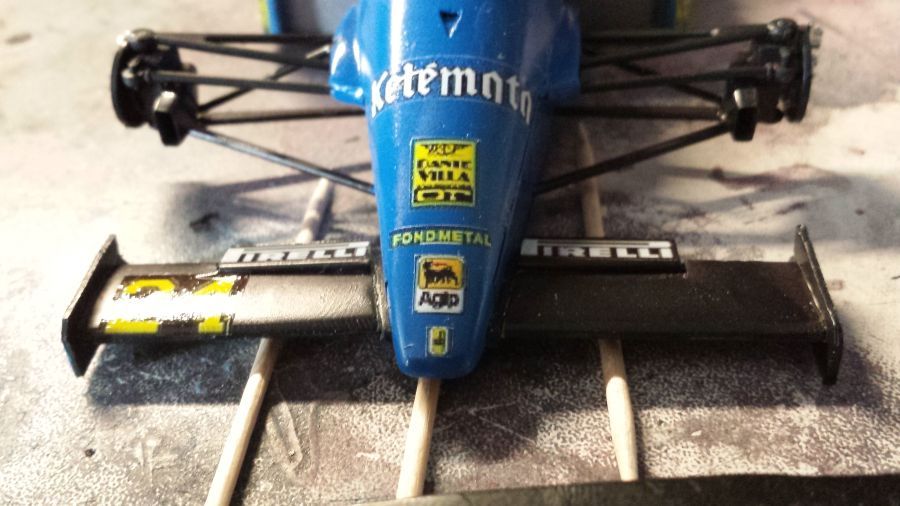
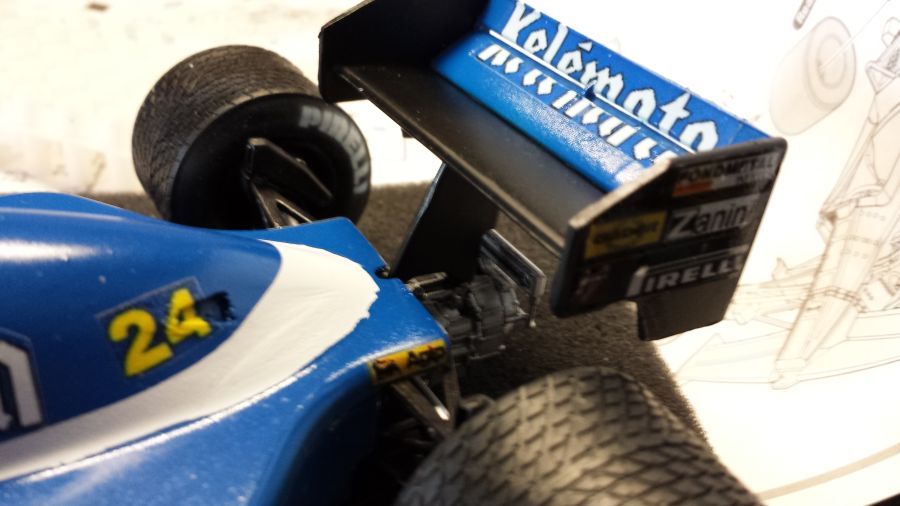
De voorvleugels worden aan de body gezet.
The front wings will be attached to the body.
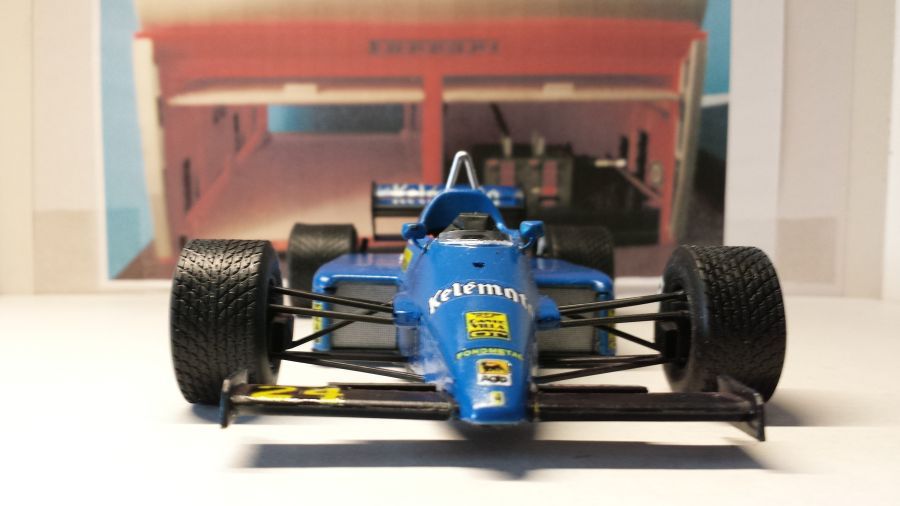
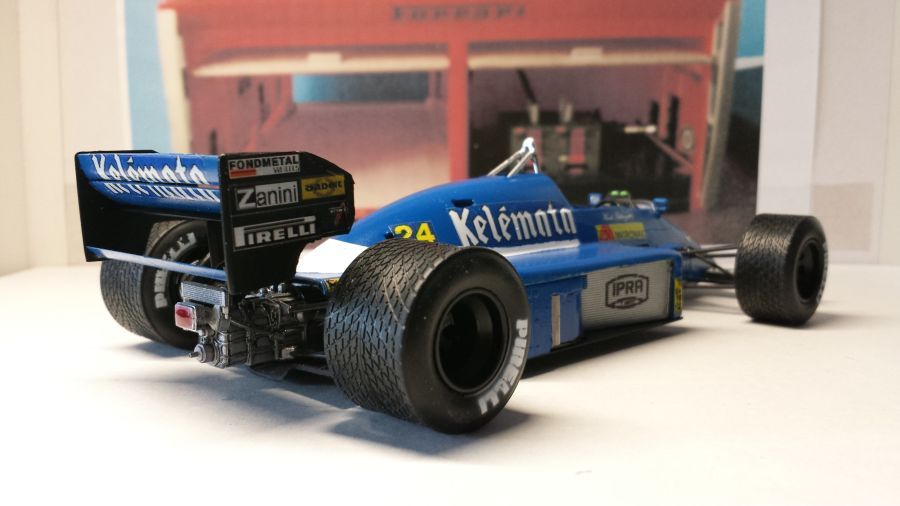
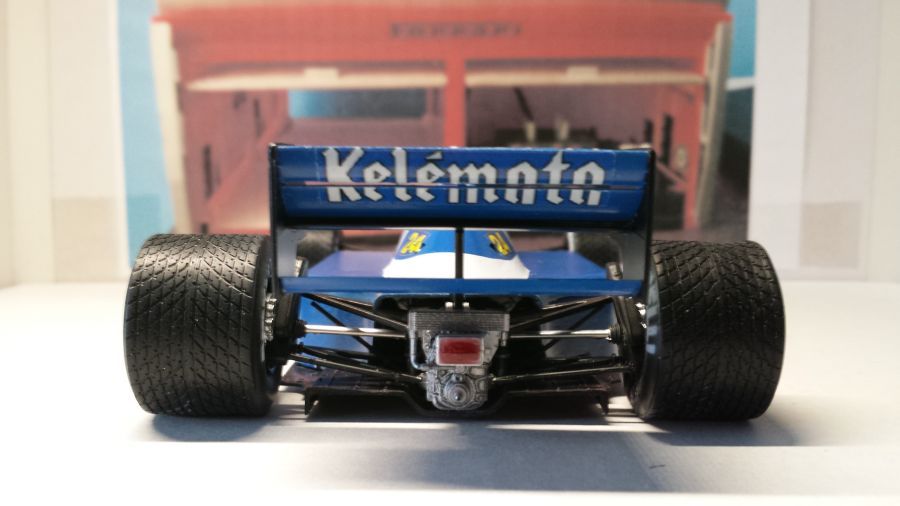
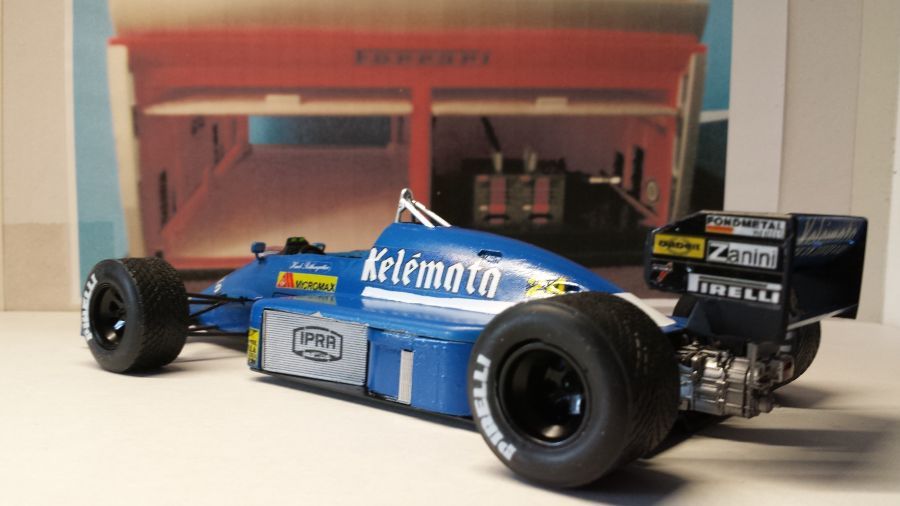
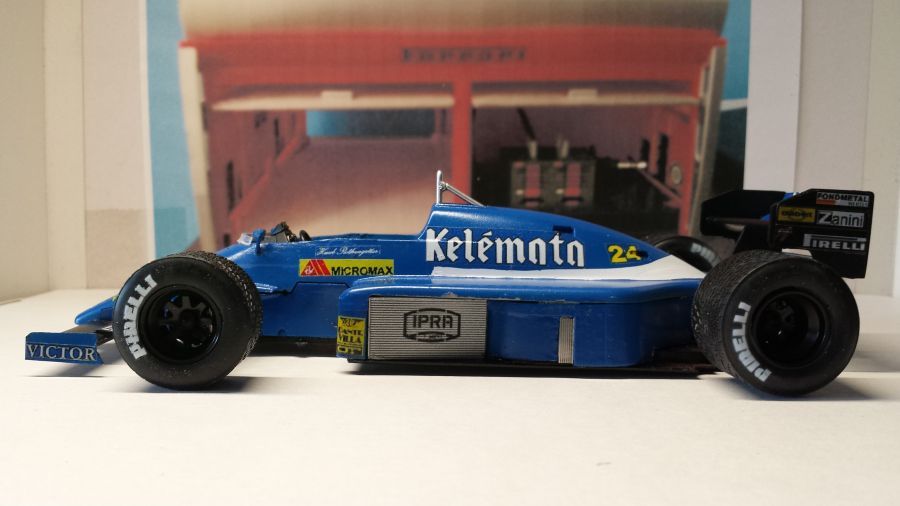
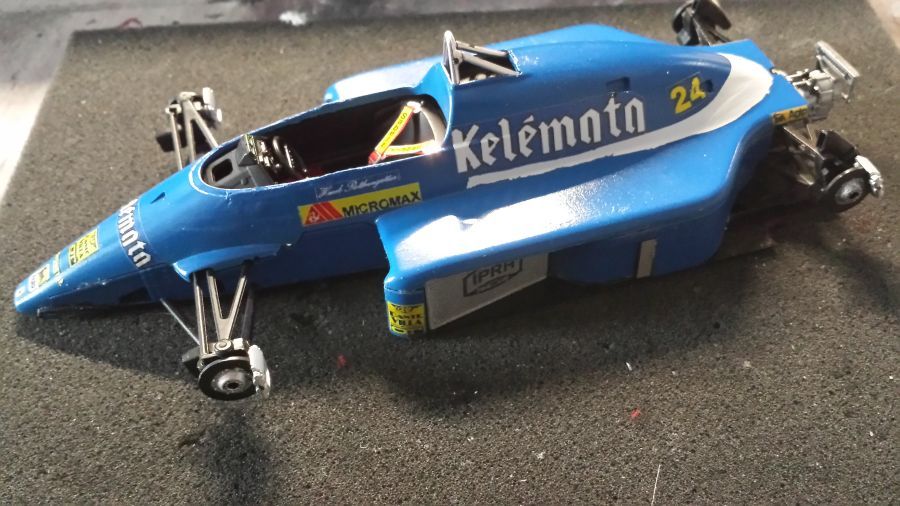
Dan de wielen, de achtervleugel en een paar kleine details aanbrengen en.....
Next is mounting the wheels, the rear wing and some small details and.....
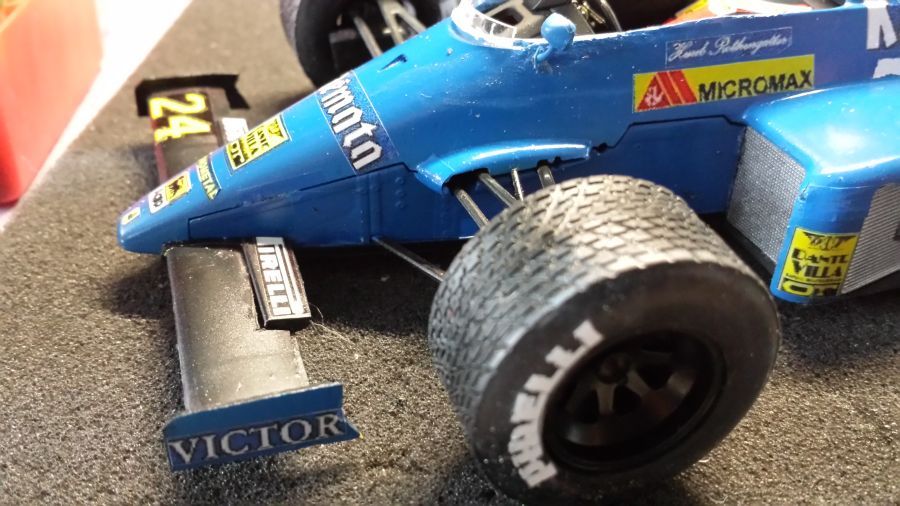
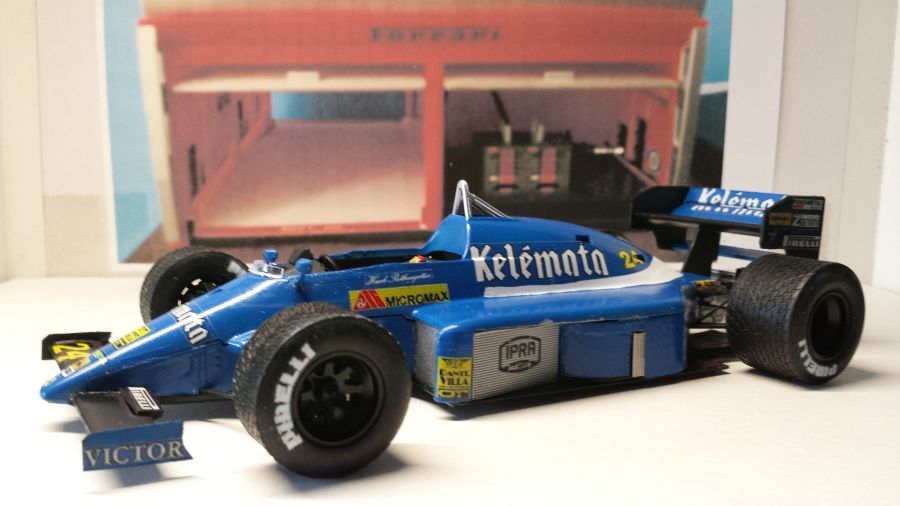
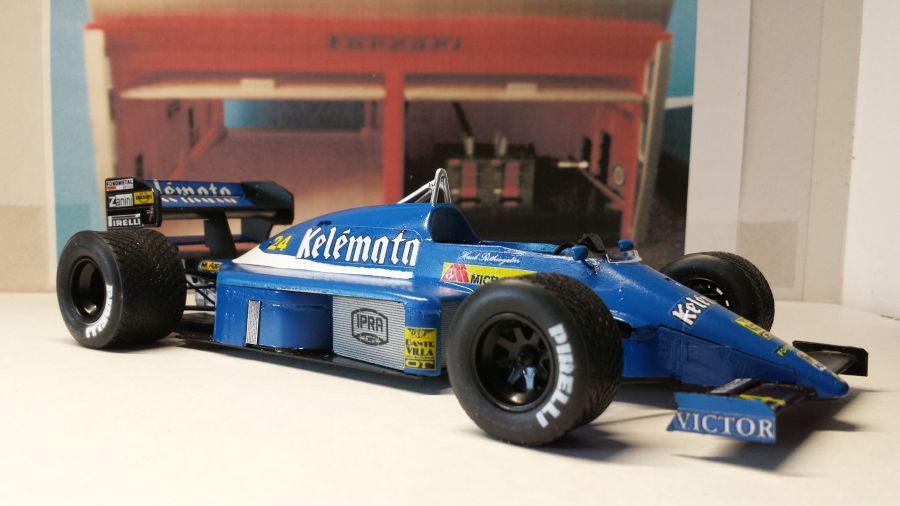
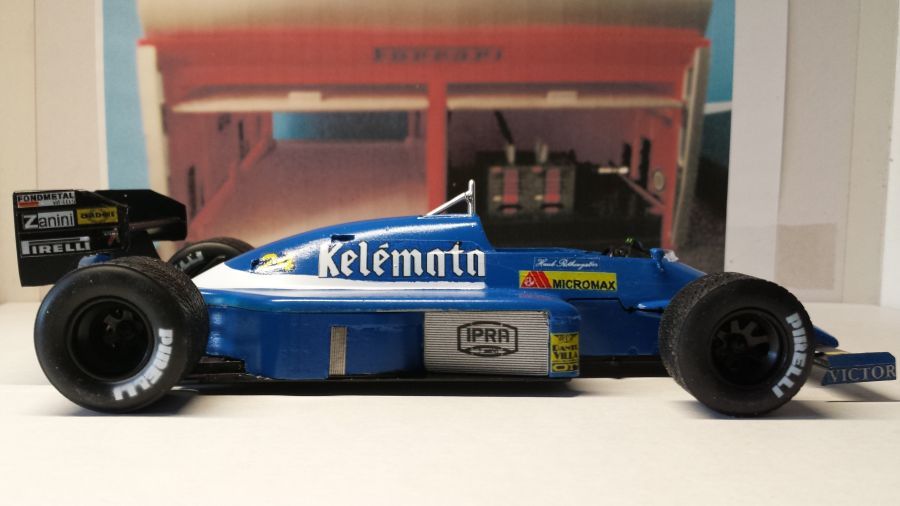
weer een voor de collectie.
another one for the collection.