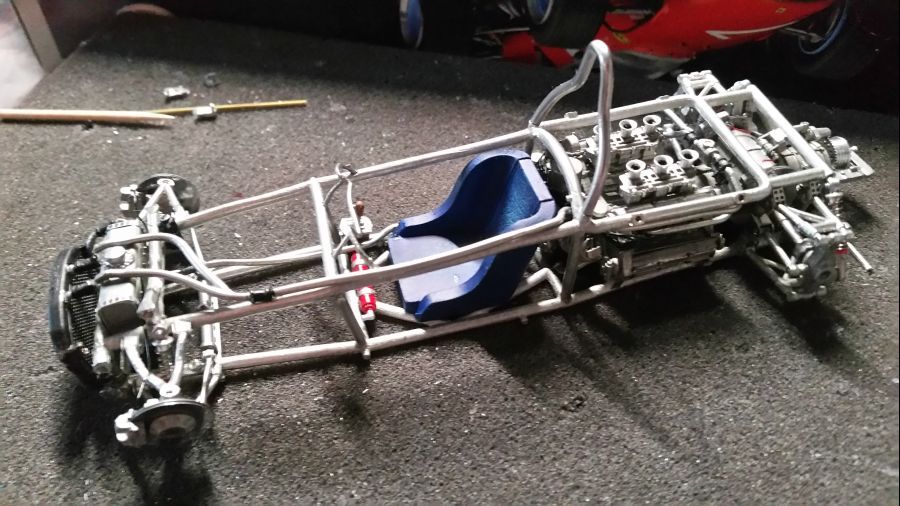
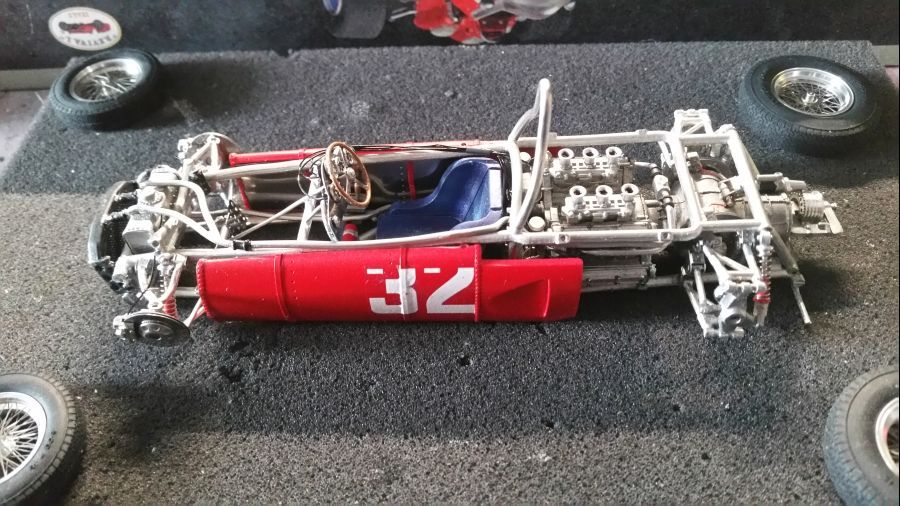
Ik heb 4 verschillende van deze 1961 Ferrari F-156 Sharknose te doen, dus het wordt maar eens tijd. Ik wil ze natuurlijk niet allemaal achter elkaar bouwen. Anders wordt het wel heel vervelend. Deze wagen die ik nu ga bouwen werd bestuurd door Giancarlo Baghetti tijdens de GP van Monza Italië. Het is een versie met de 120º motor. Later volgt nog de 65º versie. Eerst het schhonmaken van de metalen onderdelen met de magnetische polijstmachine en dan maar weer de foto's met de inhoud van de kit. Sommige delen zijn behoorlijk misvormd. Ik hoop dat ik dat weer goed krijg zonder schade/breken. Voor referentie heb ik in ieder geval een mooie serie foto's. Deze staan ook op deze website.
I have to do 4 different versions of the Ferrari F-156 Sharknose, so it's time. Of course i don't want to do these cars right after each other. It would be dull. This car wasa driven by Giancarlo Baghetti during the GP of Monza Italy. It's the version with the 120º engine. I will do a 65º later. First of all the cleaning of the metal parts with the magnetic polisher and then the pictures with the content of the kit. Some parts are heavily deformed. I hope i can get them right again without damage/breaking. Anyway, for reference i have a nice set of photos. These are on this website too.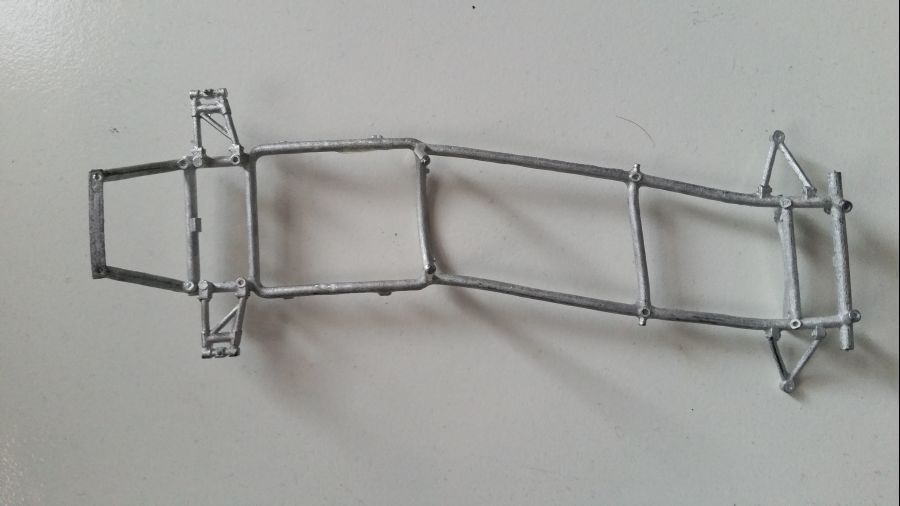
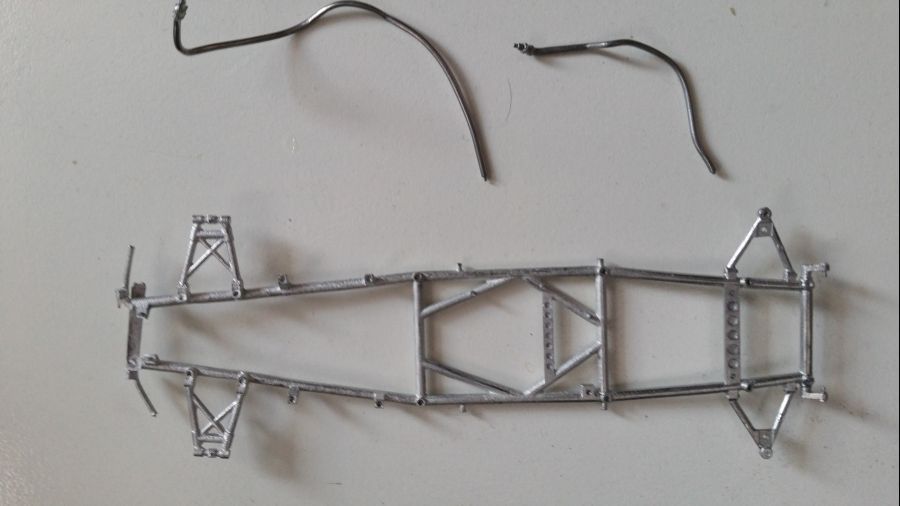
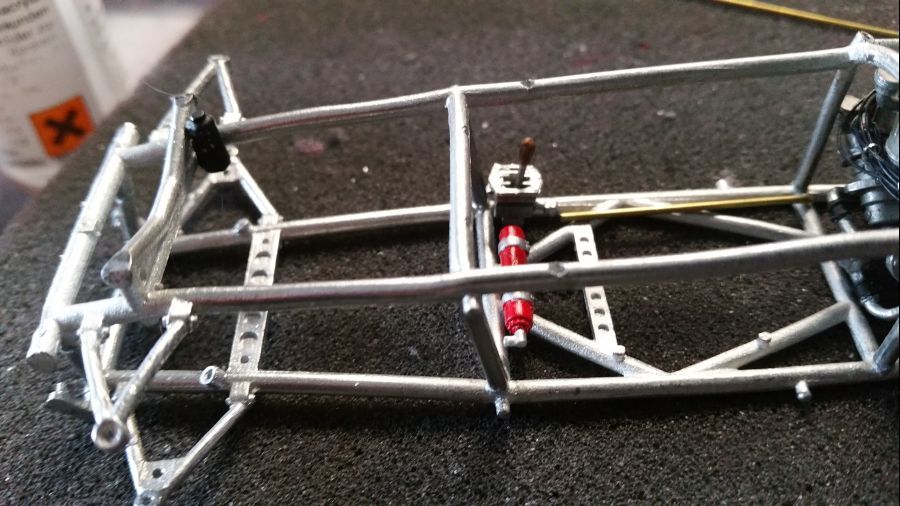
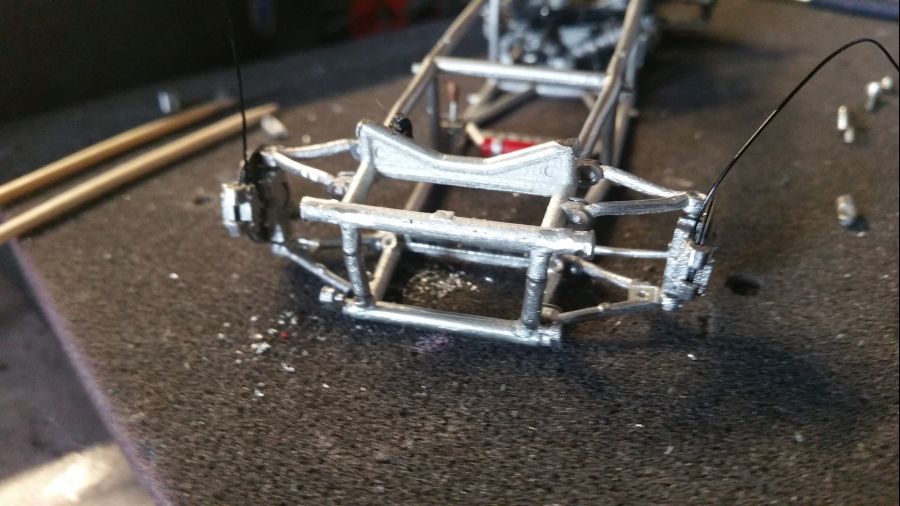
Een deel van het frame is gebroken. Dit moet ik zien op te lossen met een lage temperatuur soldeer.
A part of the frame is broken. I need to try to fix this with some low temperature soldering.
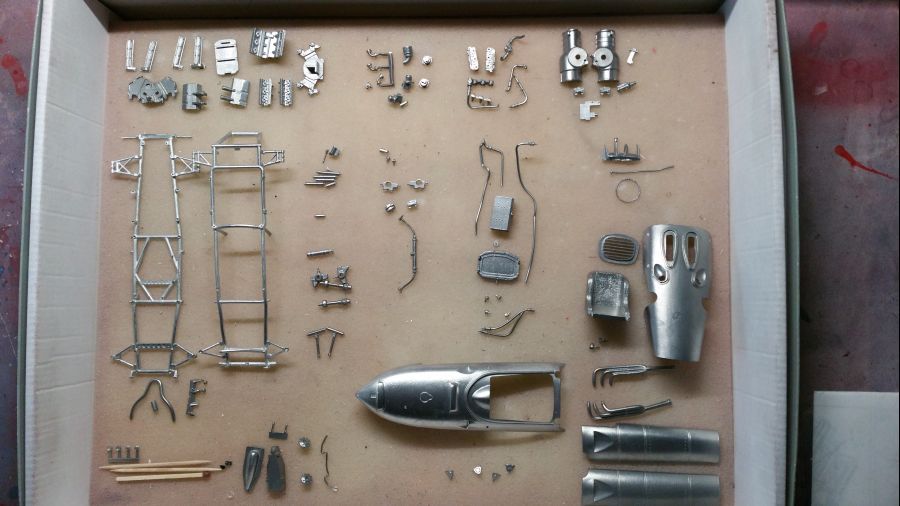
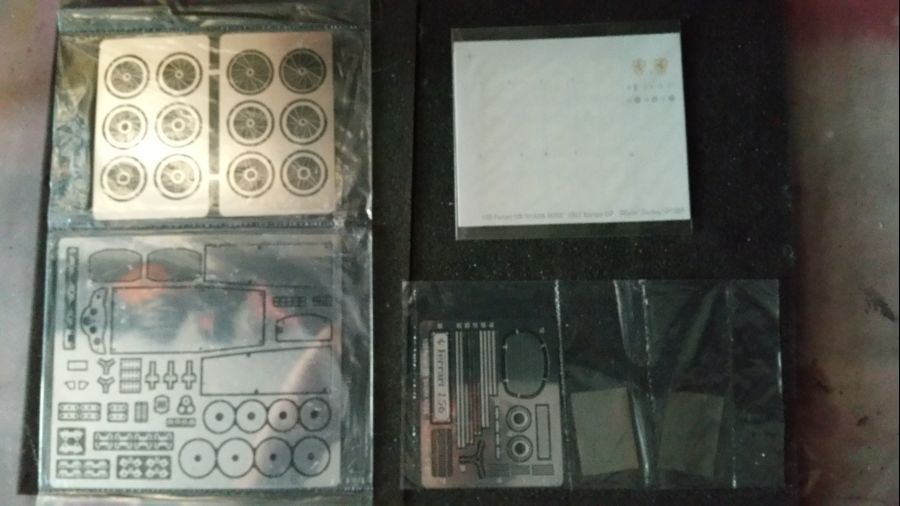
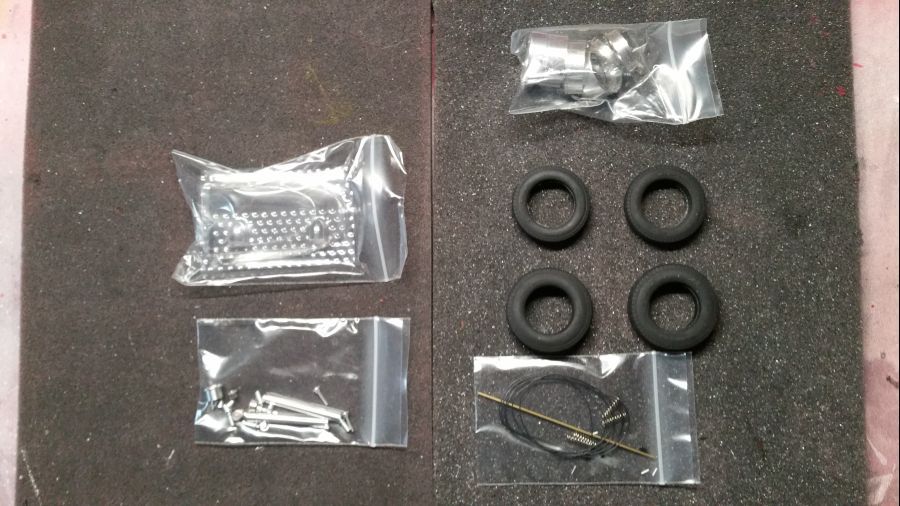
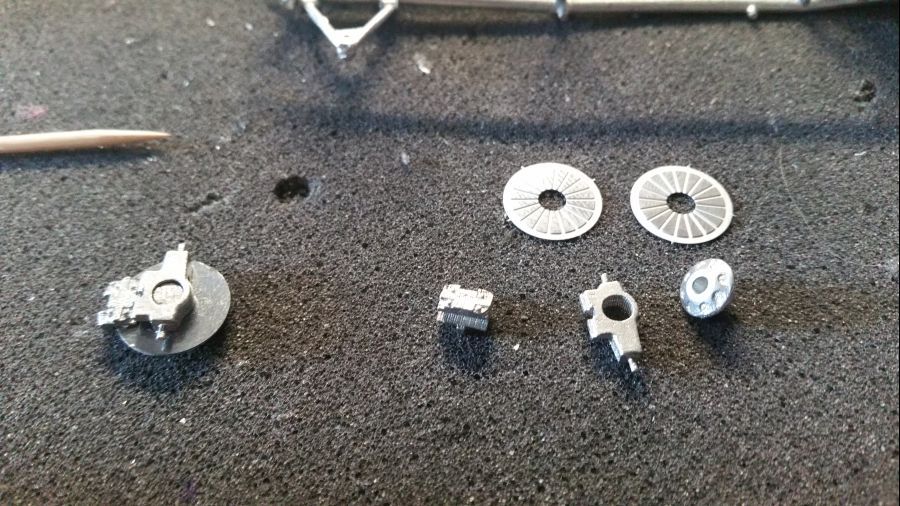
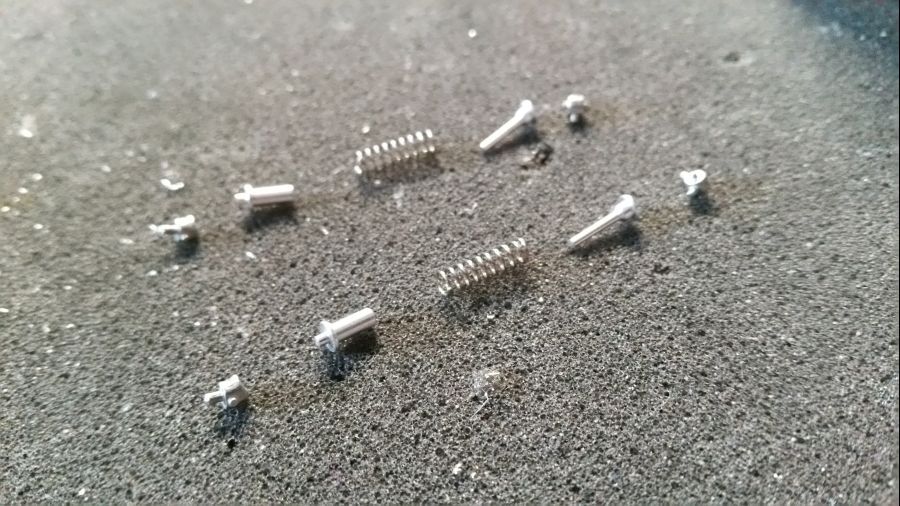
Hier alle onderdelen..
Below all parts..
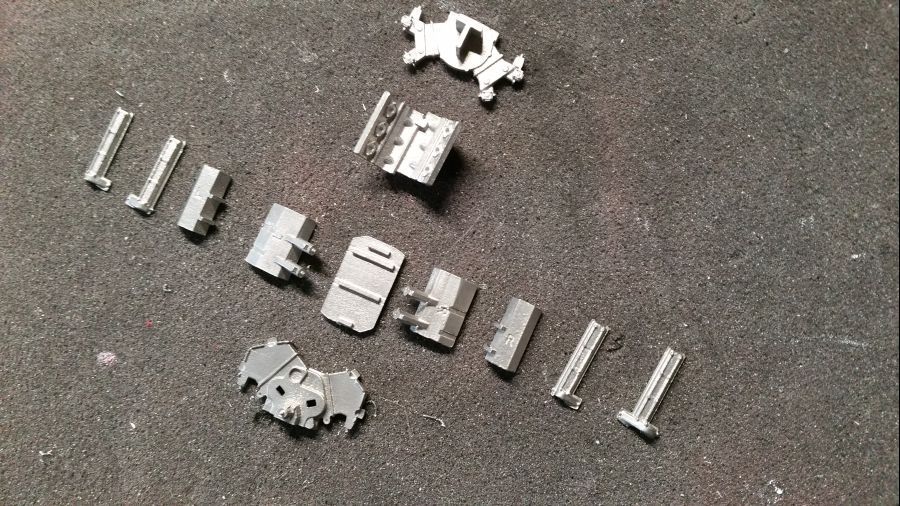
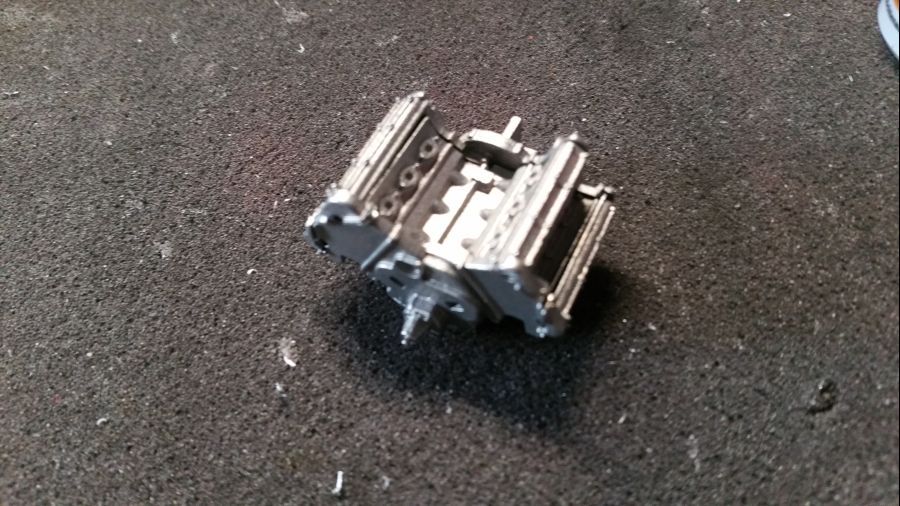
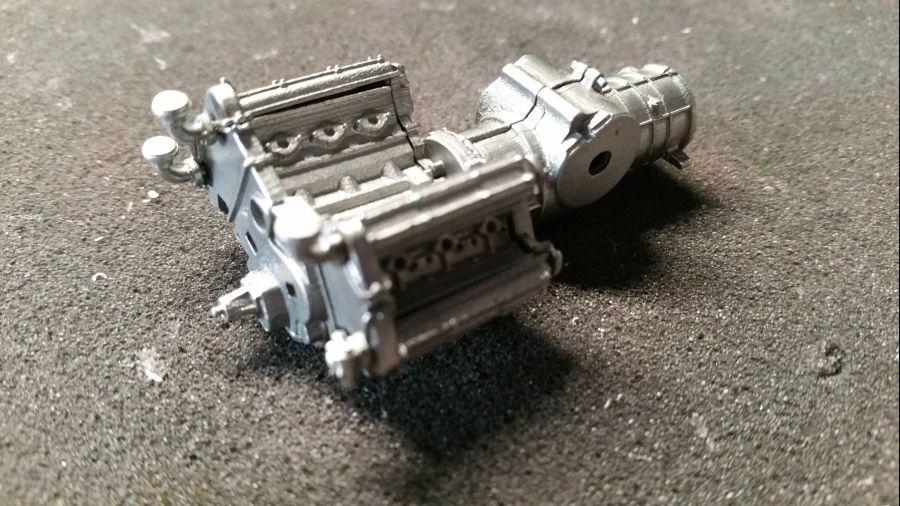
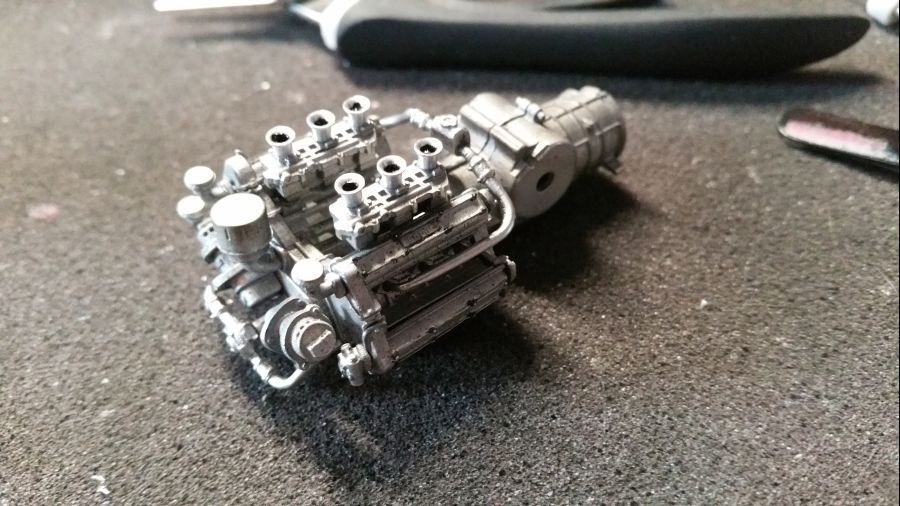
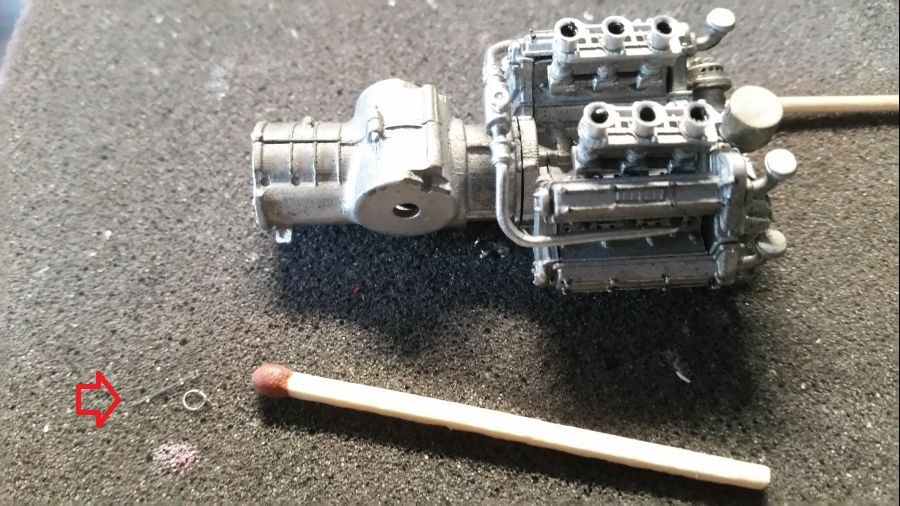
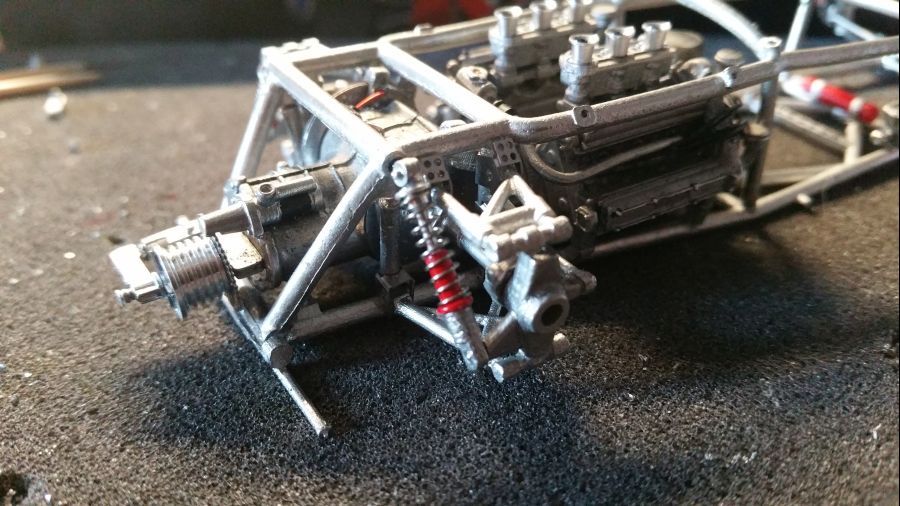
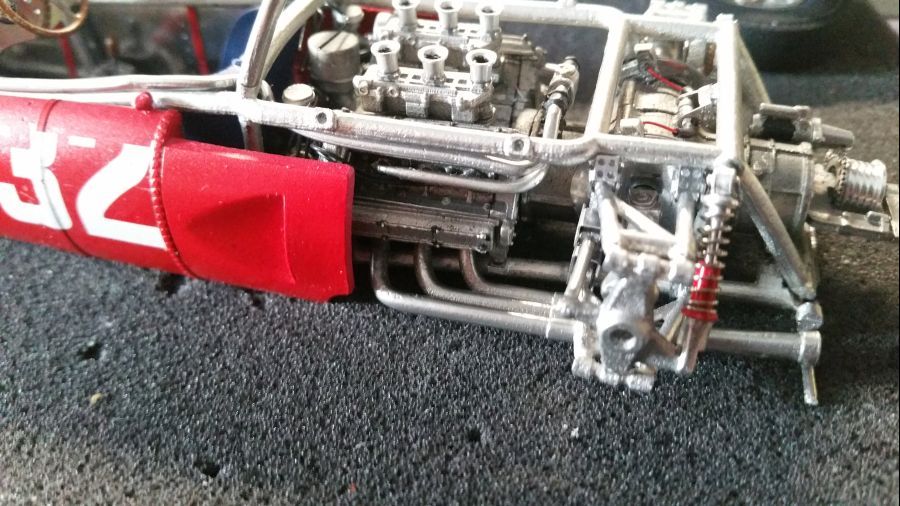
De eerste stappen aan de motor...
The first steps to the engine...
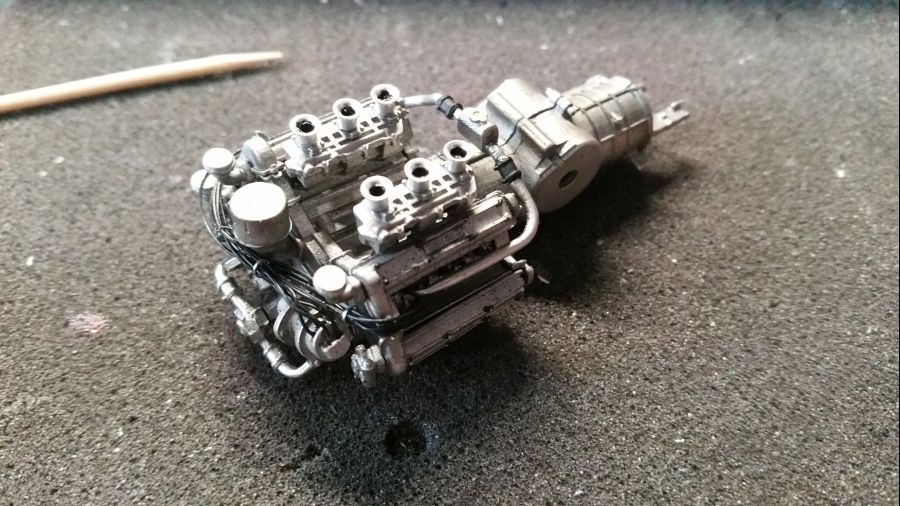
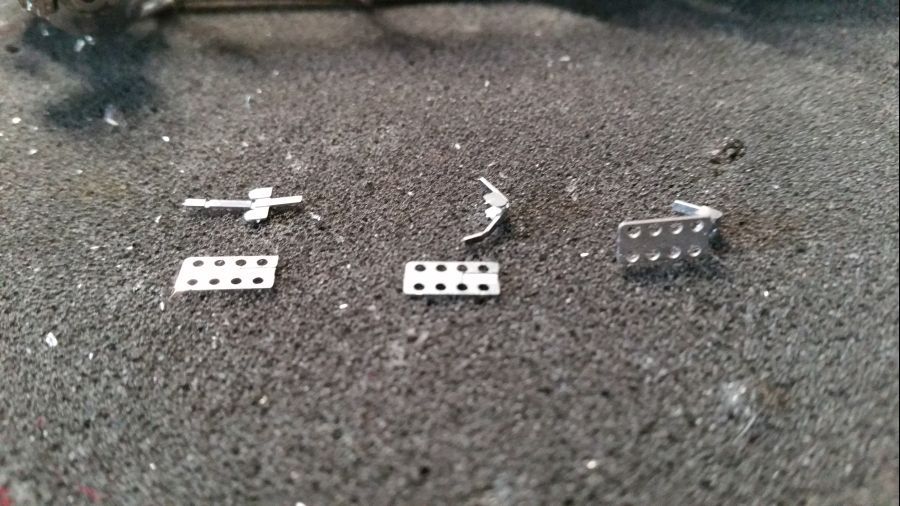
Nu de kabelbinders maken van etched metaal. Daarmee wordt de bedrading bij elkaar gehouden. Ik gebruik altijd een ronde houten cocktailprikker om dit te vormen.
Now creating the etched tie wraps. It is to keep the wired lines together. I always use a wooden cocktail pick to get the round shape.
Na dit volgen de remschijven...
After this it's time for the break discs...
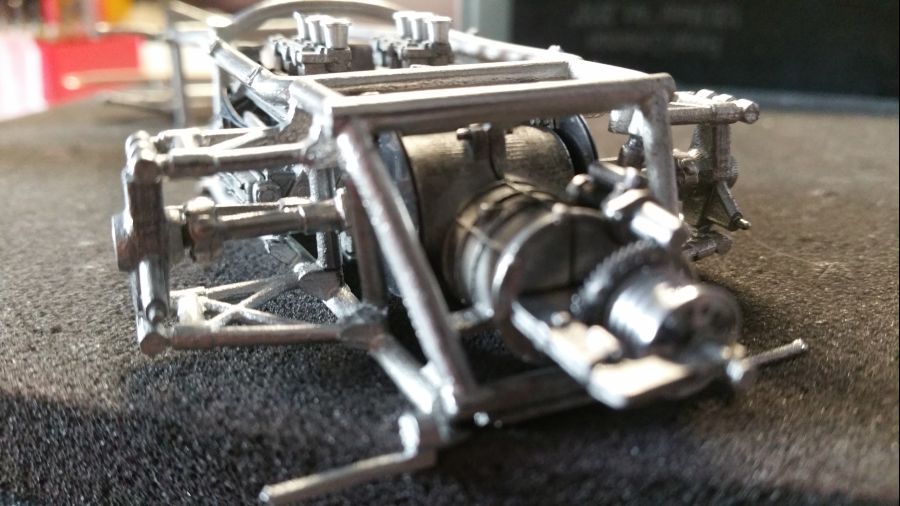
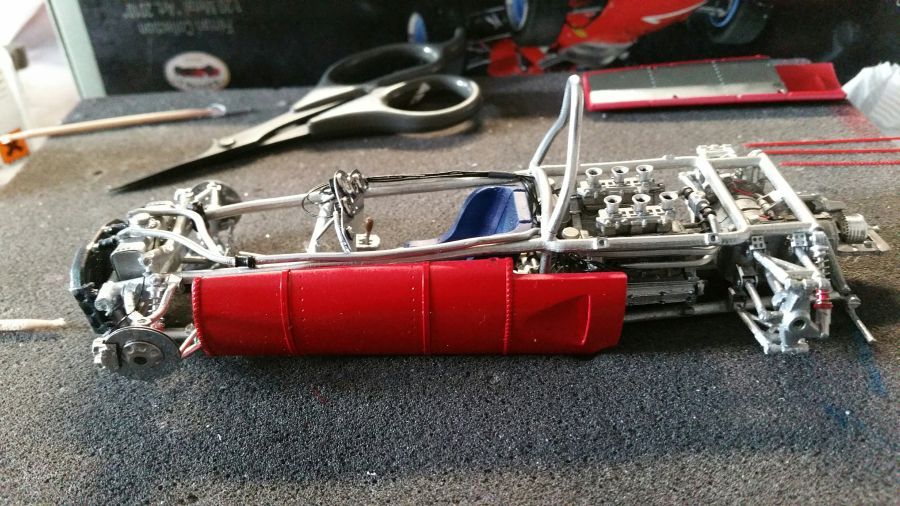
Deze worden gemonteerd en de motor wordt met het chassis verbonden... Daarna gaat het bovenste deel van het chassis erop...
These are mounted and the engine gets attached to the chassis... Then the top part of the chassis gets mounted...
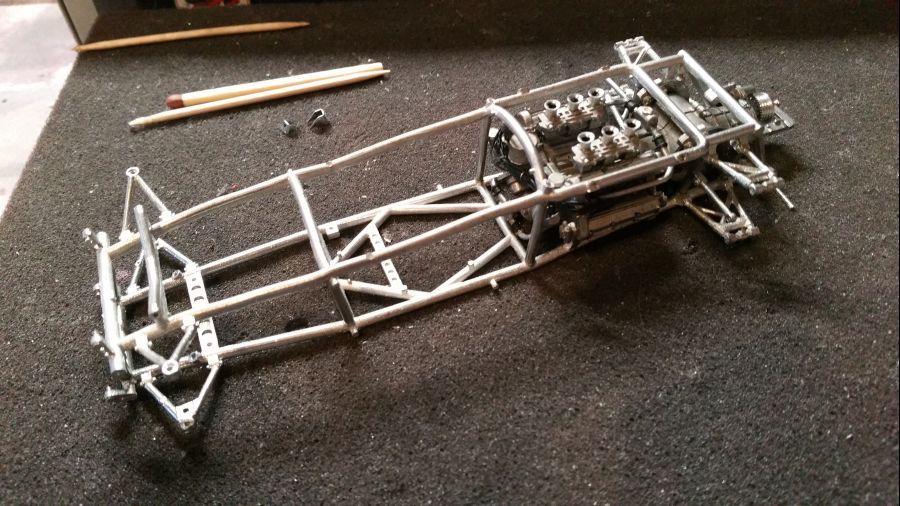
Nu moet eerst alle een beetje passen gemaakt worden. Een hele klus met dat verbogen chassis....
Now everything needs to be fitted. Quite a job with the deformed chassis....

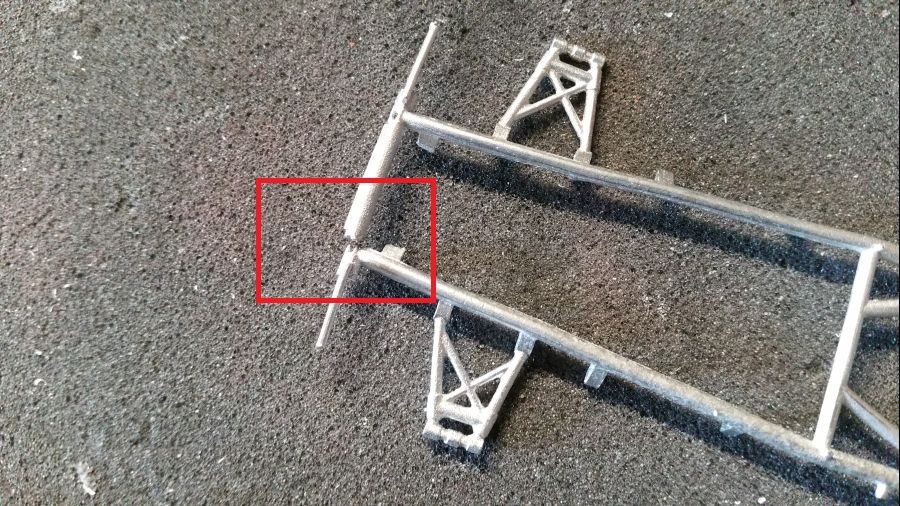
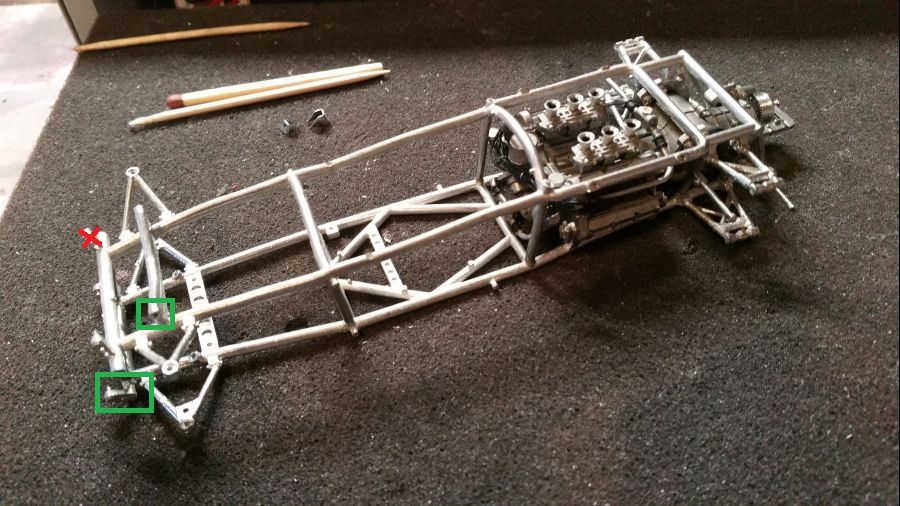
Ik heb wat zitten slijpen aan het chassis. De neus past er nu vrij aardig op. De bovenste steunen voor de radiateur heb ik verwijderd (rood kruis). Ik heb geen idee hoe MFH dacht die te gebruiken. Vervolgens op een paar plekken wat afgeslepen (groen).
I have done some grinding to the chassis. The nose fits much better. The upper supports for the cooler were cut off (red cross). I have no idea what MFH was thinking on how to use them. Then some grinding at some spots (green).
Het ziet er niet verkeerd uit....
Coming along nice...
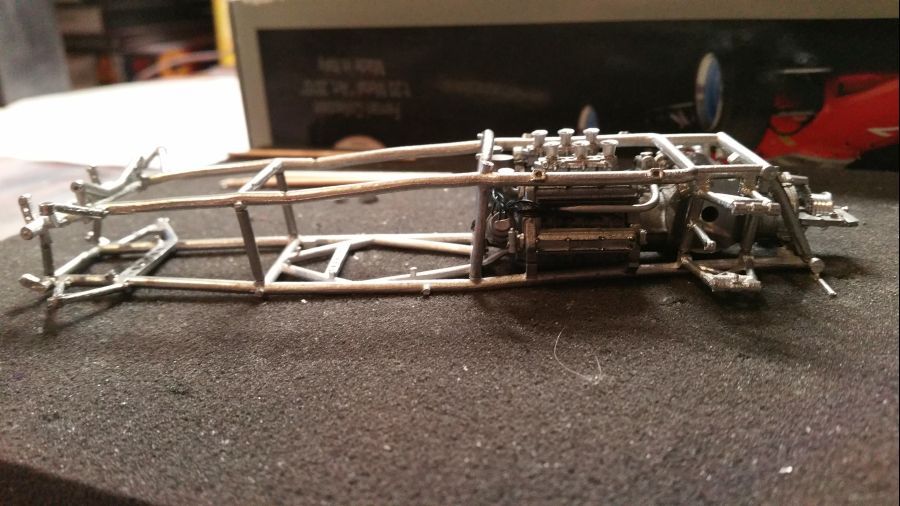
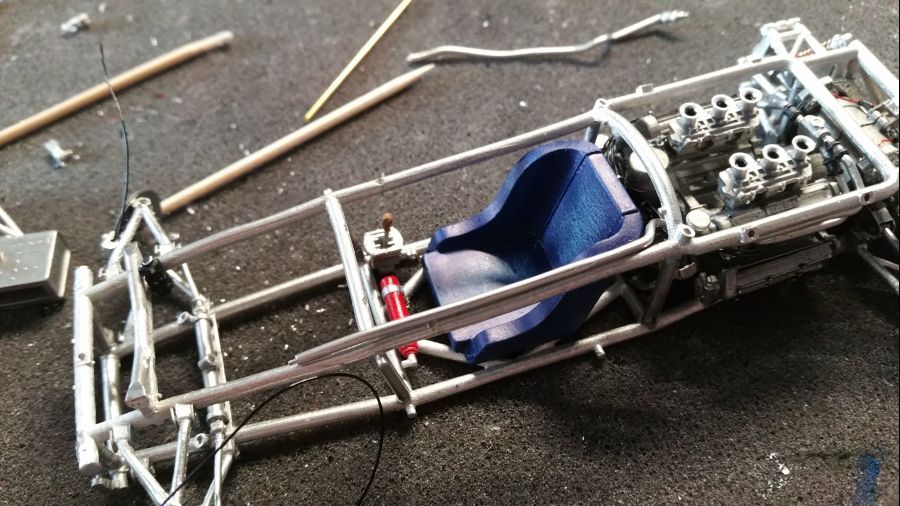
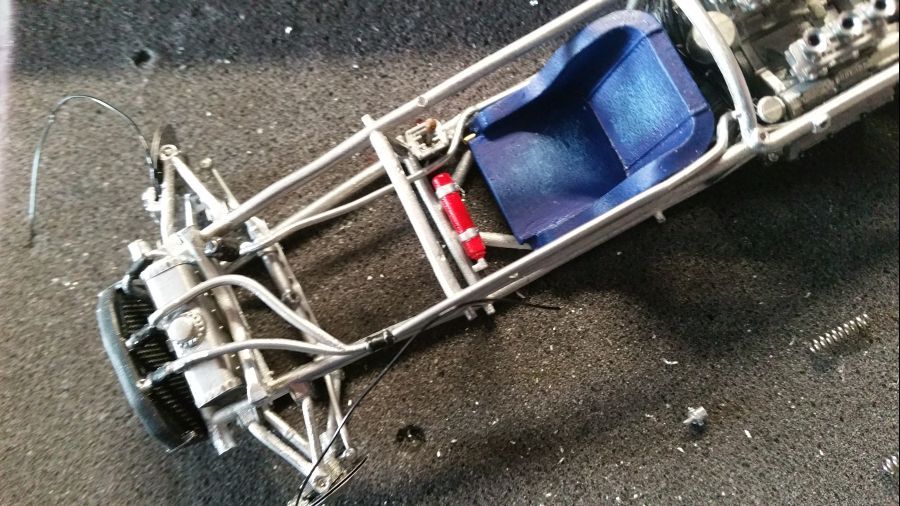
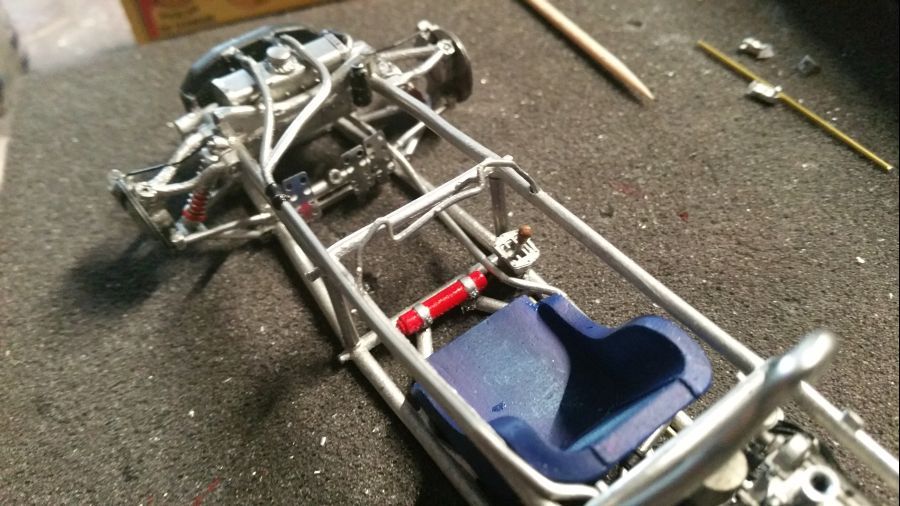
Versnellingspook en brandblusser zijn geplaatst...
The gear shifter and fire extinguisher are attached...
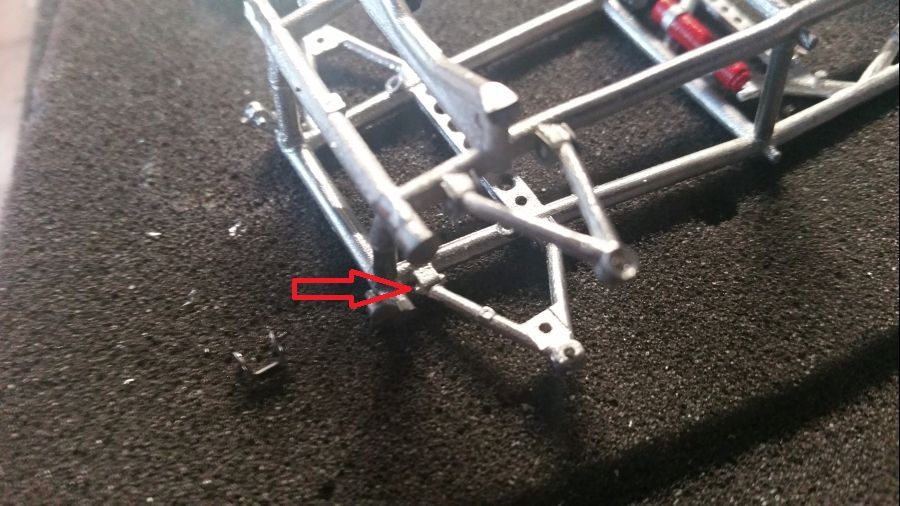
Dan verder met de achterwielophanging...
Next is the rear wheel suspension...
Dan eerst veel etched onderdelen aanbrengen op alle steunpunten van de wielophanging.
Then a lot of etched parts need to be attached to the wheel suspension.
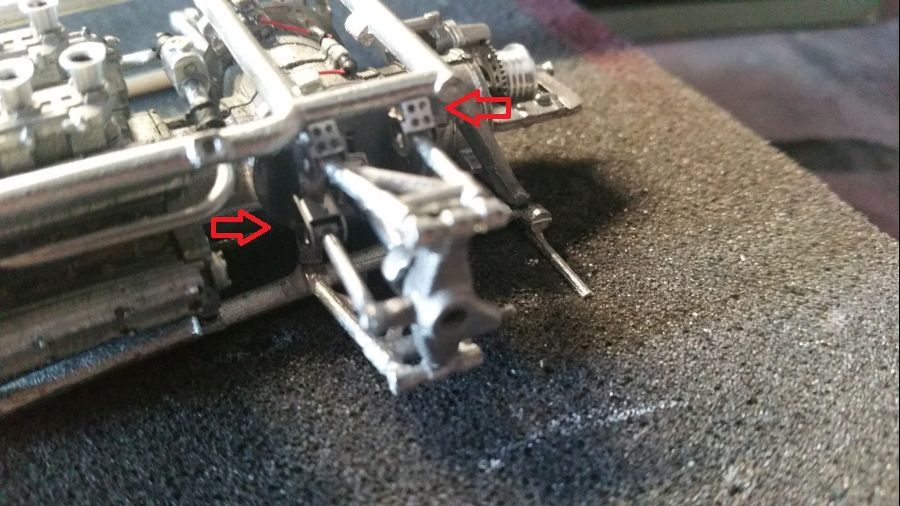
Verder met de voorremmen....vervolgens gemonteerd... Het lijkt erop dat veel dingen niet kloppen met deze kit.
Next are the front brakes....then mounted... It looks like there are many thing wrong with this kit.
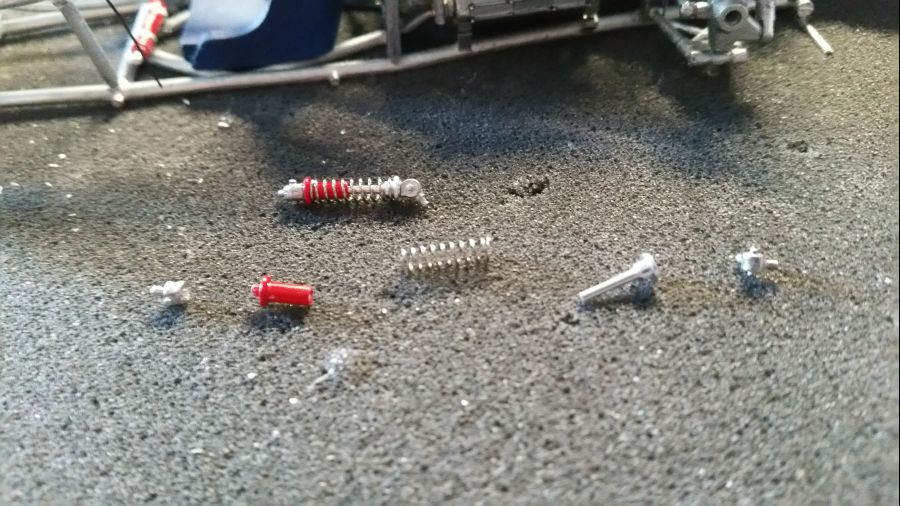
De schokbrekers worden in elkaar gezet en geplaatst aan de achterkant.
The shocks are put together and attached to the backside.

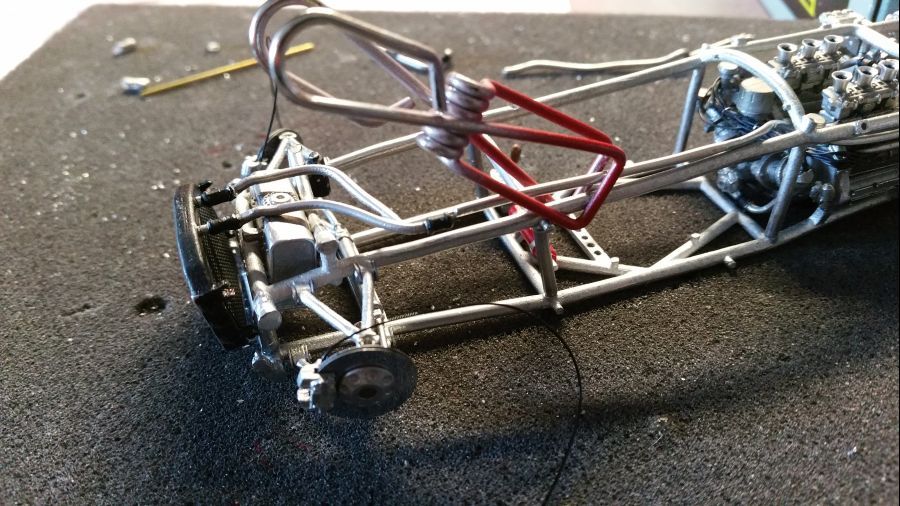
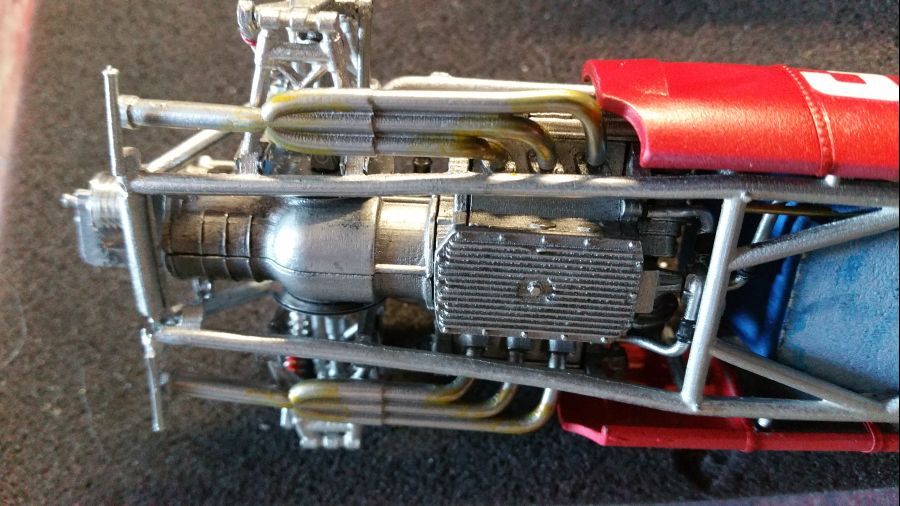
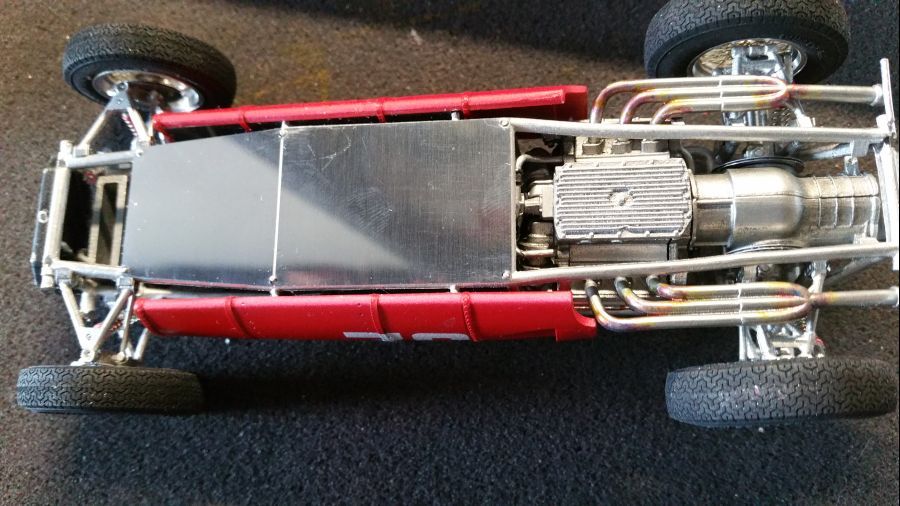
Tijd voor de koeling en het leidingwerk.
Time for the cooler and the plumbing.
Het vastmaken van de koeling is een ramp. Naar mijn mening zitten de steunen voor het bevestigen op een heel verkeerde plek. Ik heb de bovenste steunen verwijderd, ga de boel passend maken en nieuwe steunen plaatsen. Hiervoor kijk ik of ik etched spullen kan vinden in de rommelkist.
Attaching the cooler is a disaster. In my opinion the supports are placed totally wrong. I cut off the upper supports, try to fit everything and attach new supports. I will have a look in my scrap box to find some etched ones.
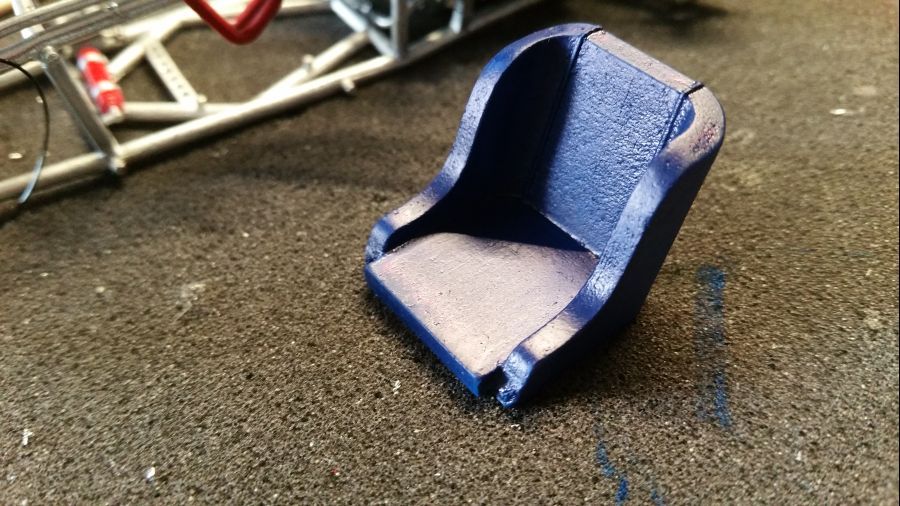
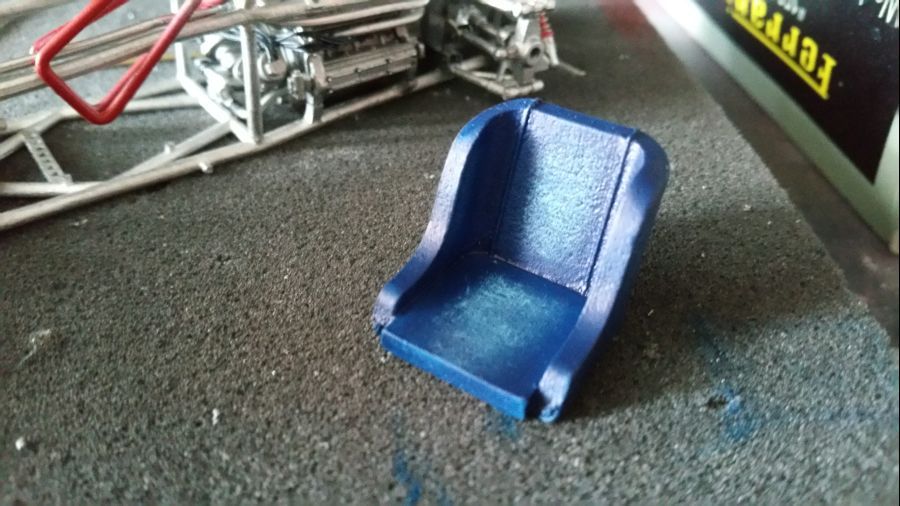
Voordat ik de koeling definitief plaats, ga ik eerst de stoel klaarmaken.
Before putting the cooler into position, i will first finish the seat.
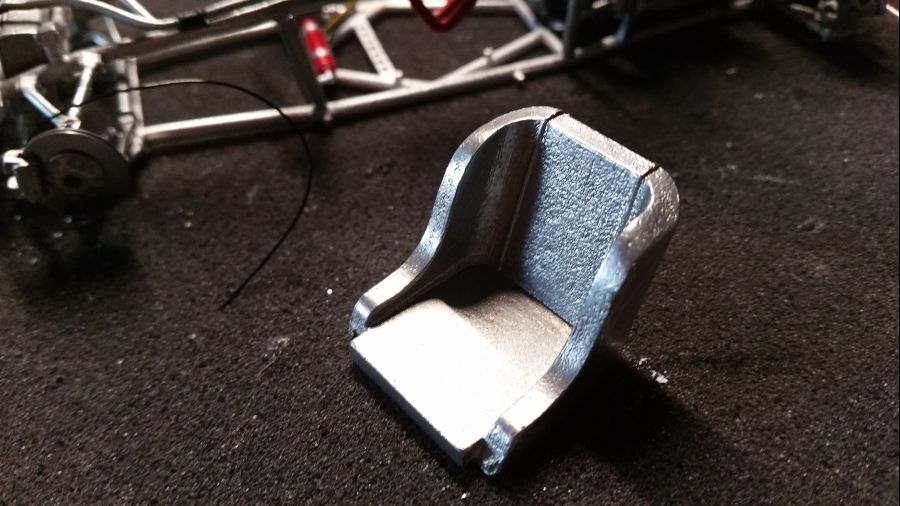
Eerst heb ik de stoel met olieverf geschilderd, met de kwast.. ik was niet tevreden Toen met Valejo acryl verf, met de kwast.. ik was niet tevreden. Nu heb ik de stoel gespoten met met water verdunde Valejo verf (899 Dark Prussian Blue)...dat ziet er beter uit. Daarna met een bijna droge kwast nr. 901 Azul Blue erop. Voor het spuiten heb ik mijn nieuwe airbrush gebruikt. Een Evolution Silverline van Harder & Steenbeck. Deze heeft een regelbare verftoevoer, dat heeft mijn Ultra van hetzelfde merk niet.
First i painted the seat with oil paints, with a brush.. did not look good. Then i painted it with Valejo acrylic paint, with a brush.. did not look good. Now i have airbrushed it with water thinned Valejo paint (Dark Prussian Blue).. much nicer. Then dry brushed it with no, 901 Azul Blue. As an airbrush i used my new Evolution Silverline from Harder & Steenbeck. This one has an adjustable paint flow. My old Ultra of the same brand doesn't.
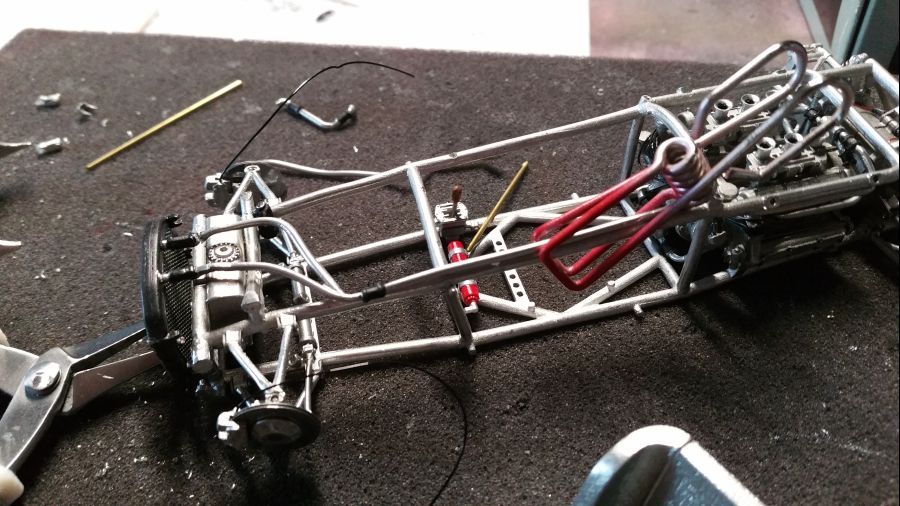
Het werk aan de koeling is een ramp. Ik heb het idee dat niets goed past, of ik doe iets grandioos verkeerd. De leidingen zijn zo verbogen, dat bij het terugbuigen het zachte wit metaal zo afknapt. Ik moet er maar het beste van zien te maken. Gelukkig zal dit niet zichtbaar zijn met de kap erop.
The work to the cooler is a disaster. I think nothing fits well, or i might be doing things very wrong. The pipes are that bent, when i bend them back all things break off of this soft white metal. I will try to make best of it. Luckily this will not be visible with the cover on.
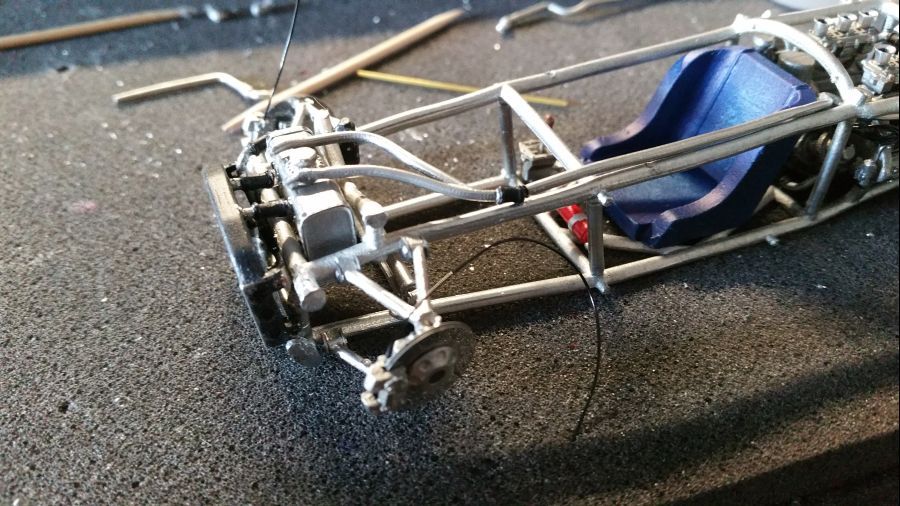
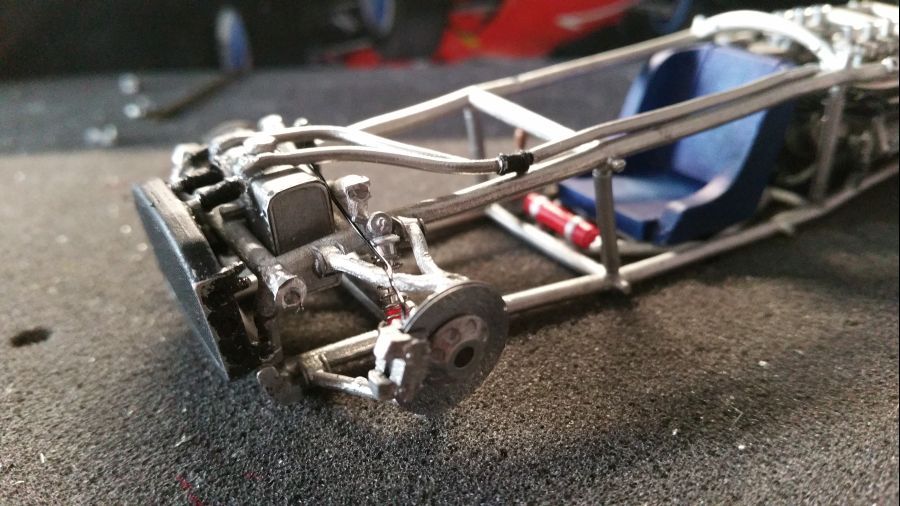
Dan zijn de voorste schokbrekers aan de beurt.
Then it's time for the front shocks.
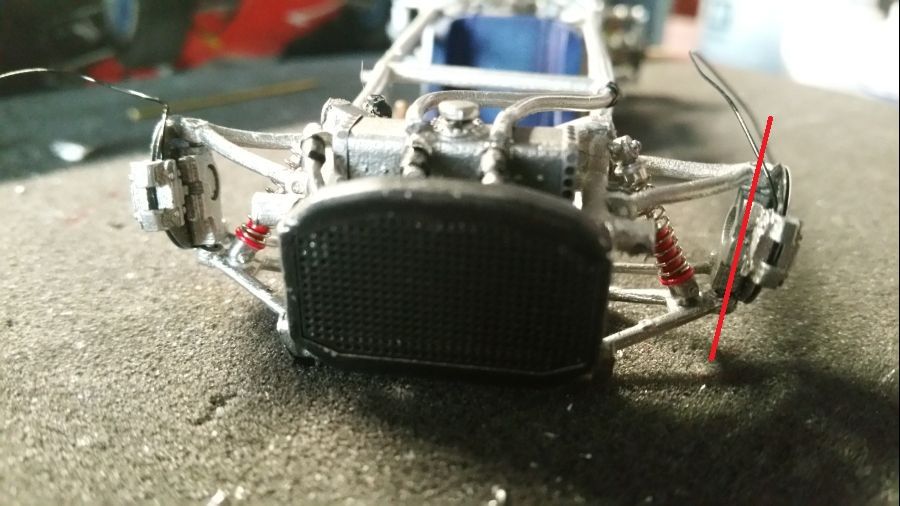
Ik heb steeds minder vertrouwen in een goede afloop. Of de schokbrekers zijn te kort, of er is iets serieus fout met deze kit. Ik vind de stand van de wielen maar raar.... Ik probeer het zo goed mogelijk te verhelpen door de bovenste draagarm wat te buigen...
I am not confident in a good result with this one. Either the shocks are too short, or there might be something seriously wrong with this kit. When i look at the alignment.... I will try to fix it by bending the upper arm a bit...
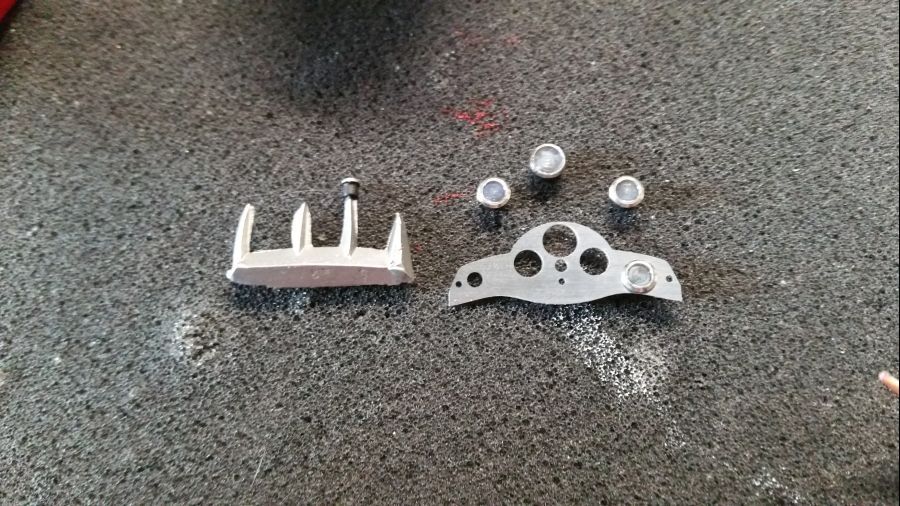
De rolbeugel en de steun voor het dashbord zijn geplaatst.
The roll bar and the support for the dash have been installed.
Tijd voor de pedalen...
Time for the pedals...
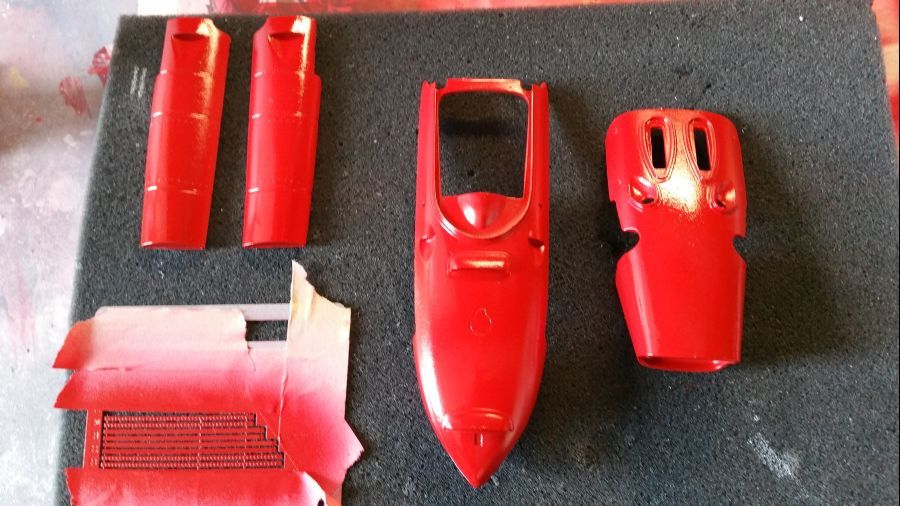
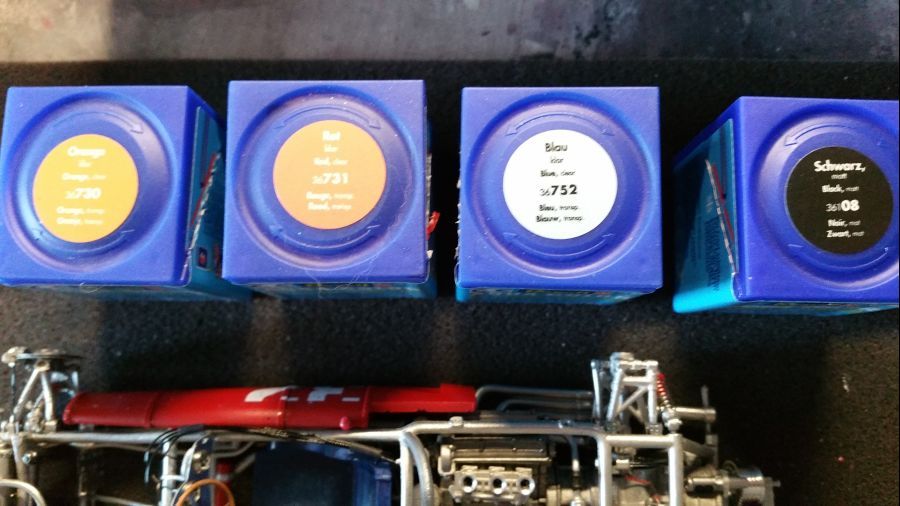
Voorbereidingen voor het rood...
Preparations for the red...
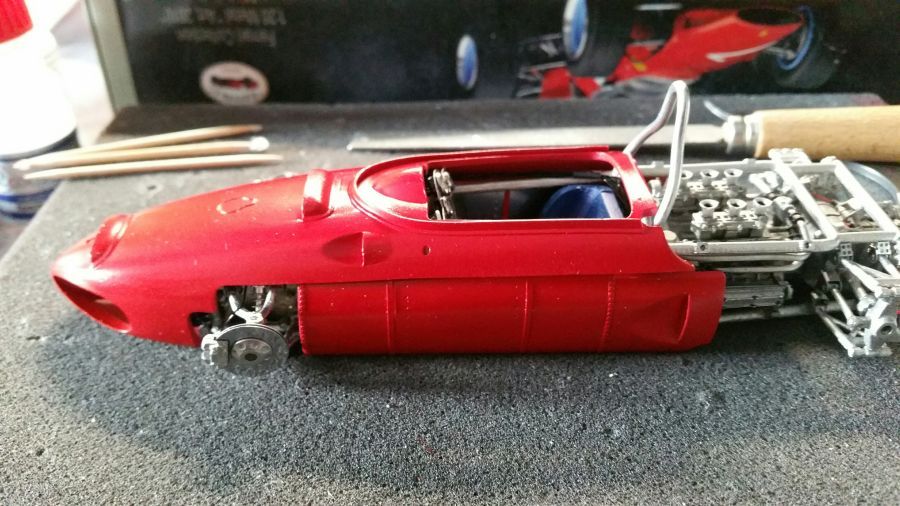
Het rood (Zero Paints ZP-1007 1960's Rosso Formula 1) en de glanslak zitten erop...
The red (Zero Pants ZP-1007 1960's Rosso Formula 1) and the gloss clear are on...
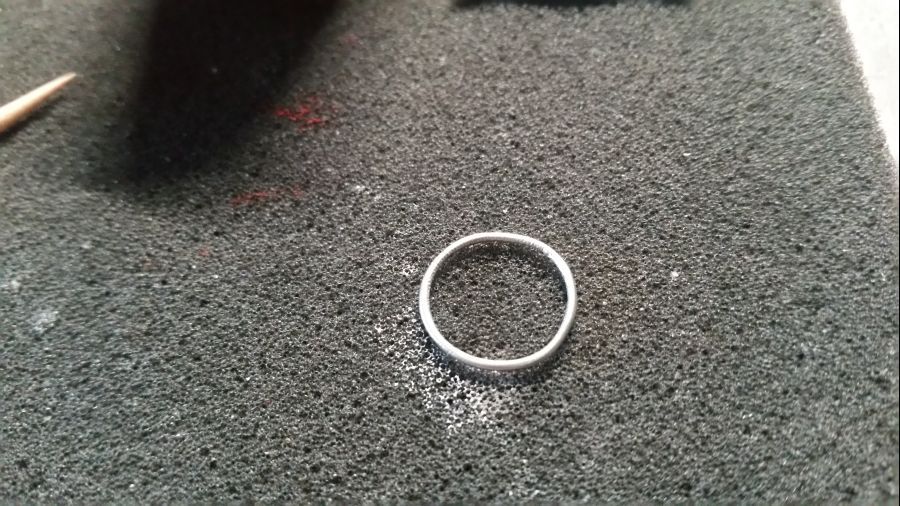
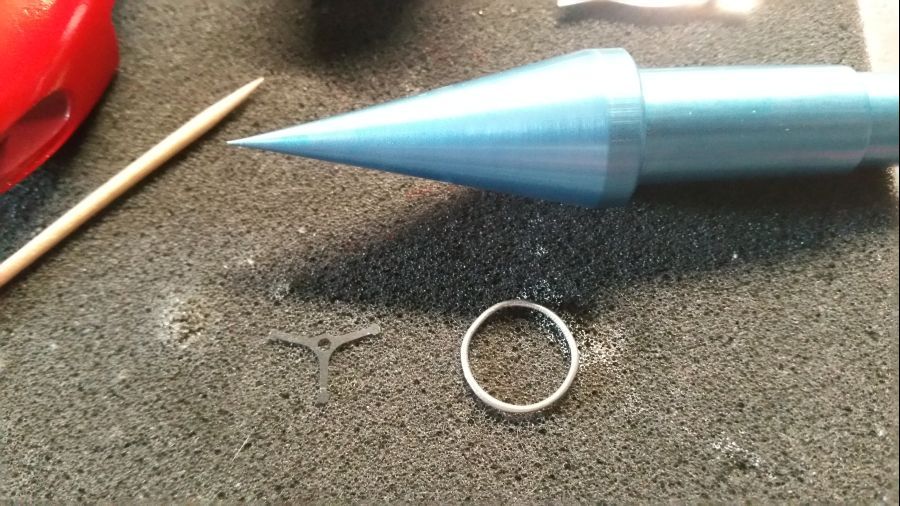
Daarna verder met het dashbord en het stuur. Het stuur maak ik weer perfect rond met behulp van de tool.
Next are the dashboard and the wheel. The wheel is made perfect round shaped again with help of the tool.
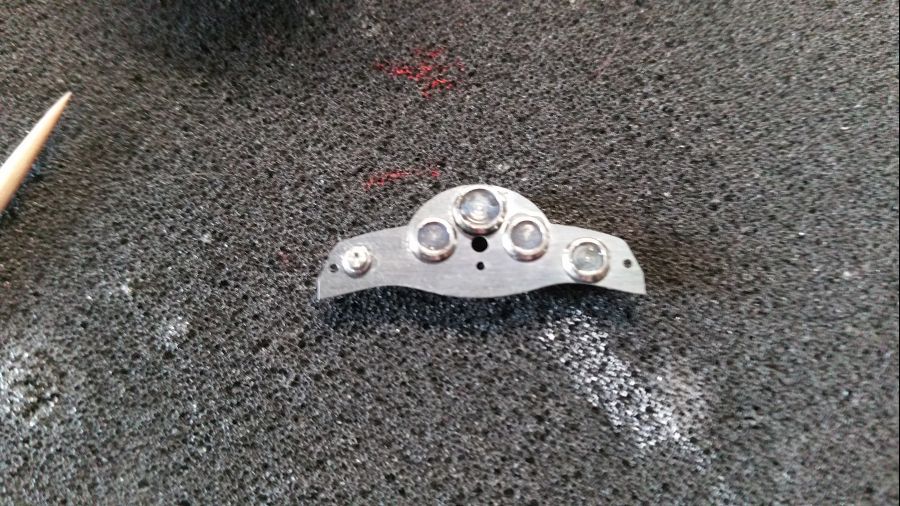
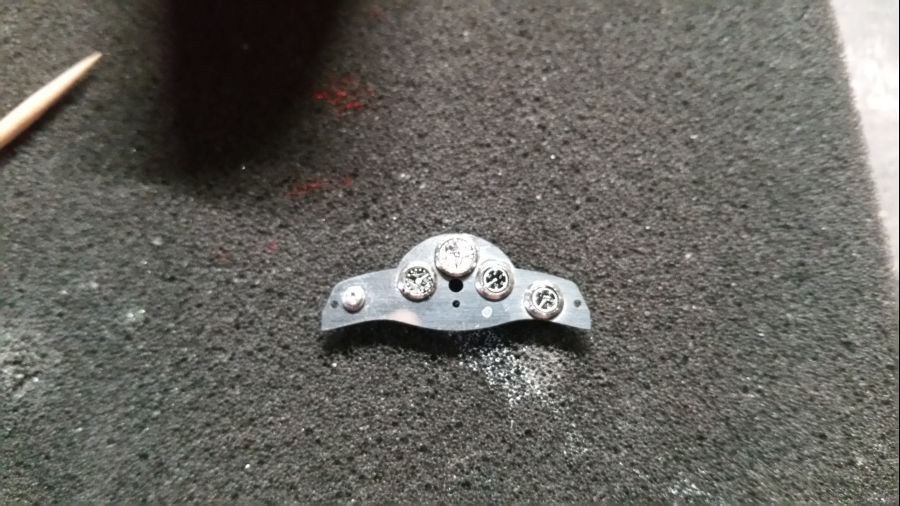
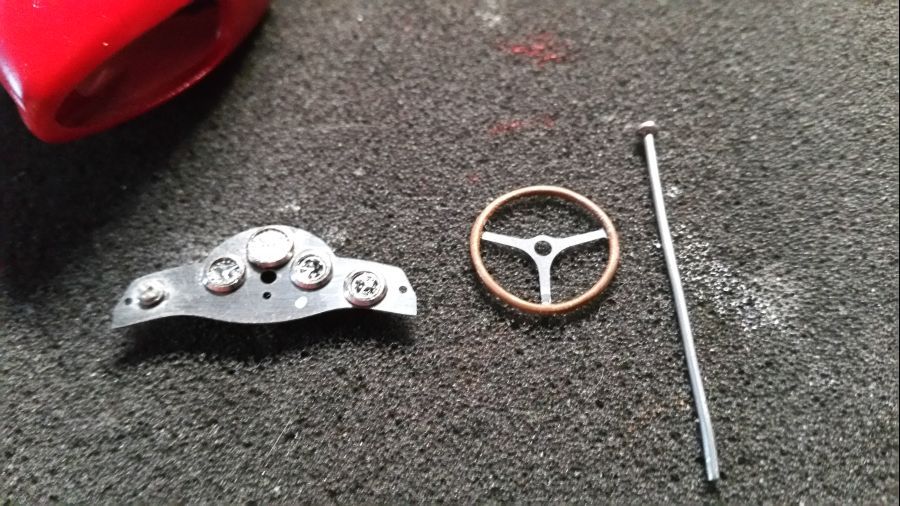
Er is wat bekabeling toegevoegd aan het dashbord.
Some wiring has been added to the dash.

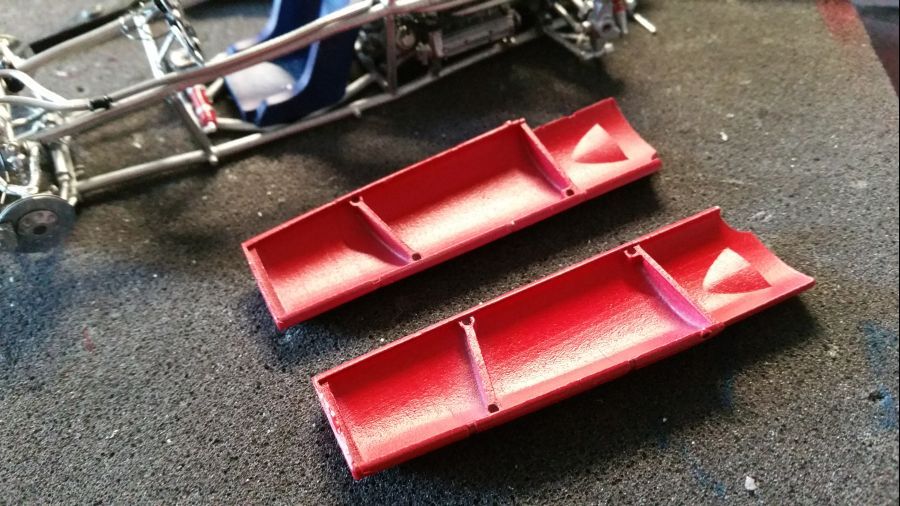
Nu ga ik verder met het voorbereiden van de zijkanten...
Now i will continue with the preparation of the sides...
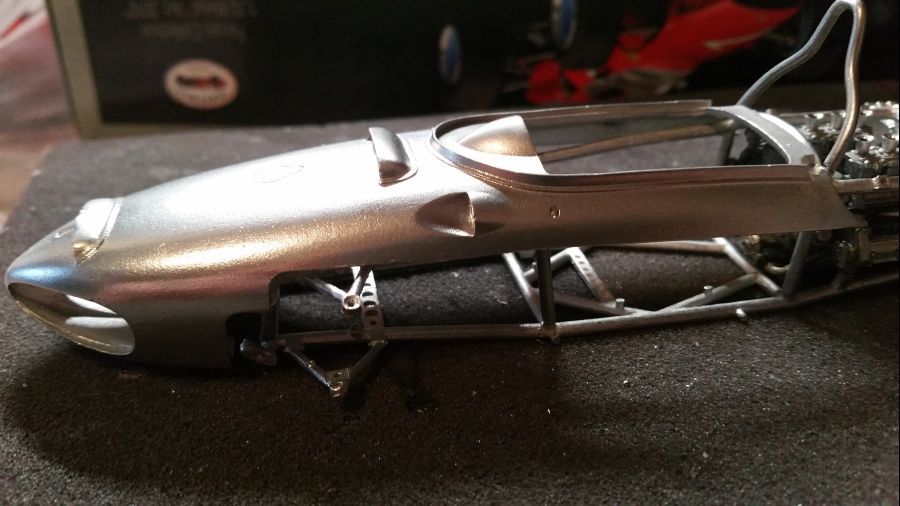
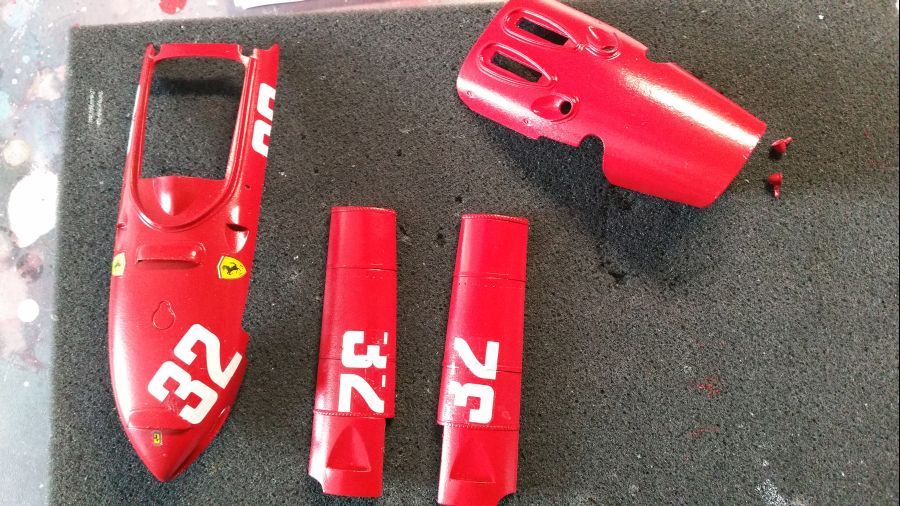
Daarna volgt de tijdelijke plaatsing. Op deze wijze wordt het gemakkelijker de decals goed aan te brengen. Wees voorzichtig met de decals, ze zijn erg dun en vallen gemakkelijk uit elkaar.
Then there is temporarily attaching. This way it will be more easy to apply the decals. Beware with the decals, they are very thin and can be destroyed easily.
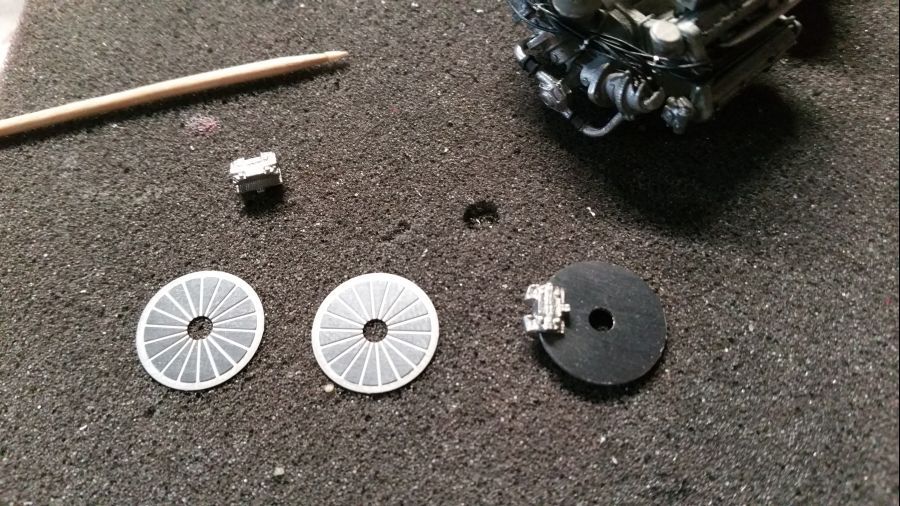
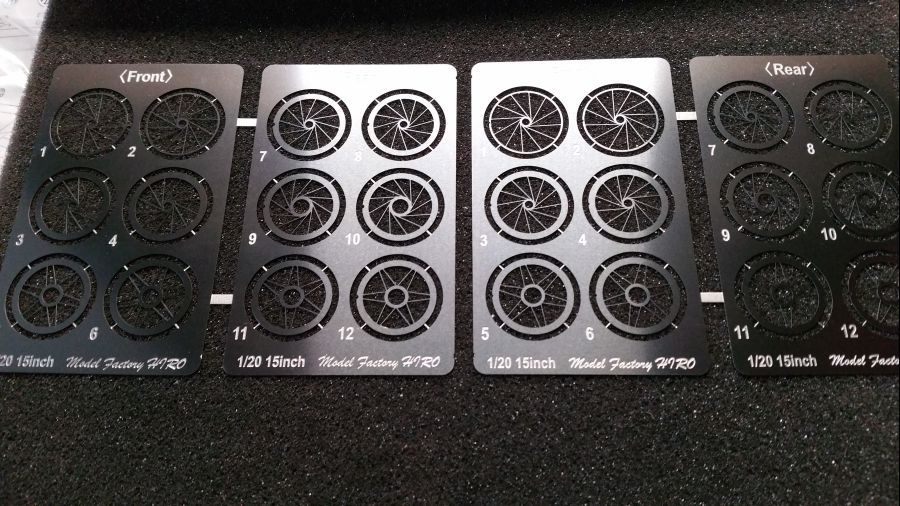
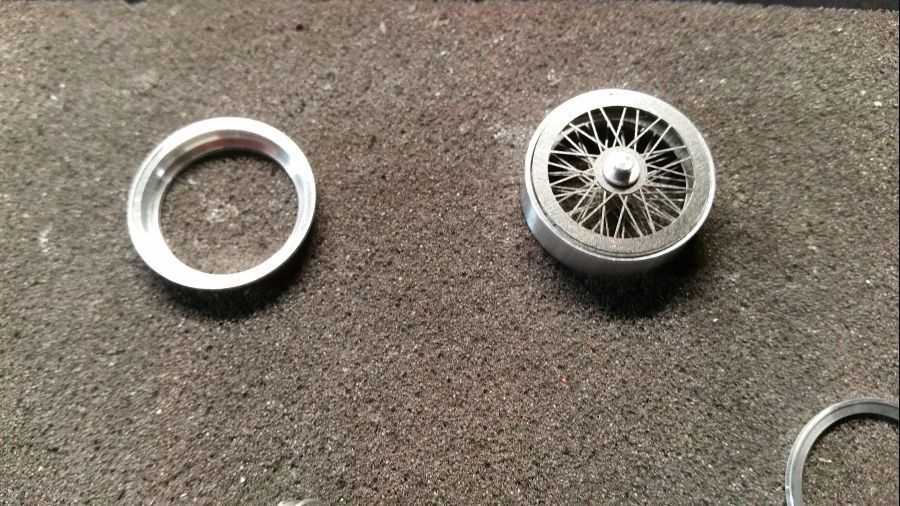
Voor het assembleren van de velgen leg ik eerst alle onderdelen op volgorde. Eerst de metalen delen en de etched delen.
Before assembling the rims i will first sort all parts. First the turned metal parts and the etched parts.
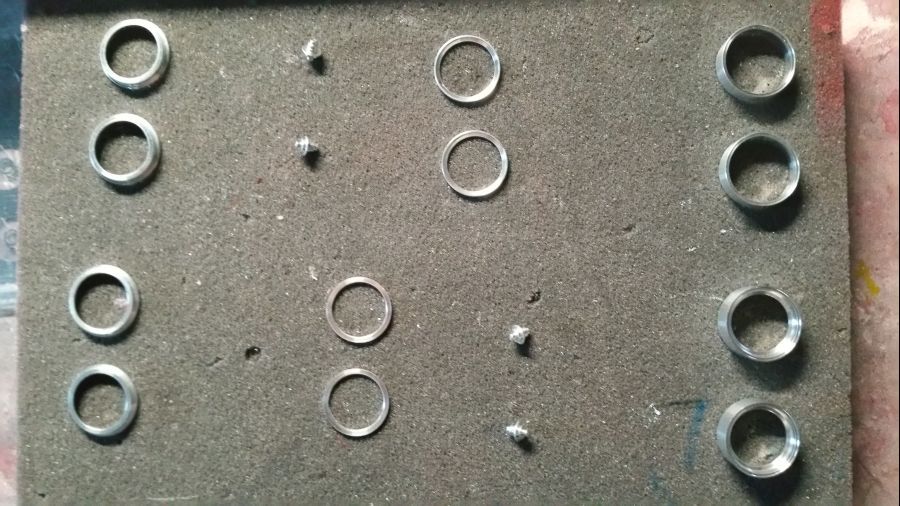
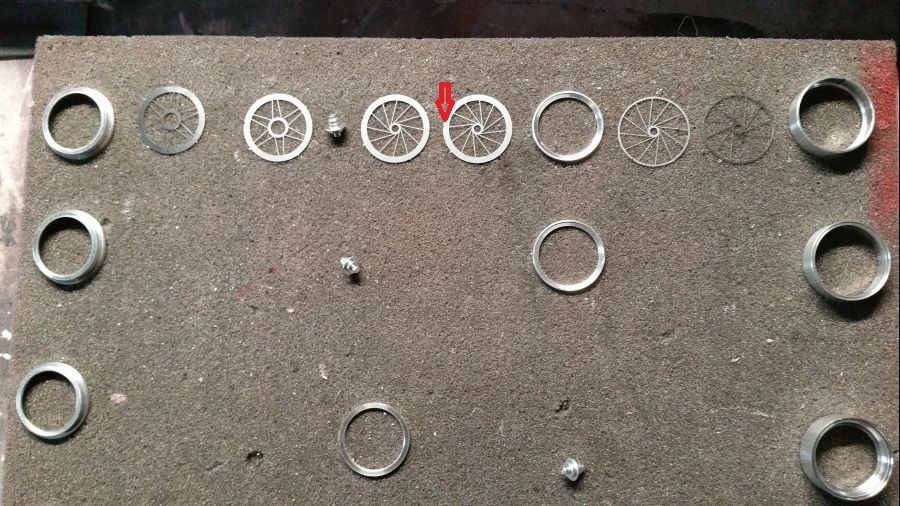
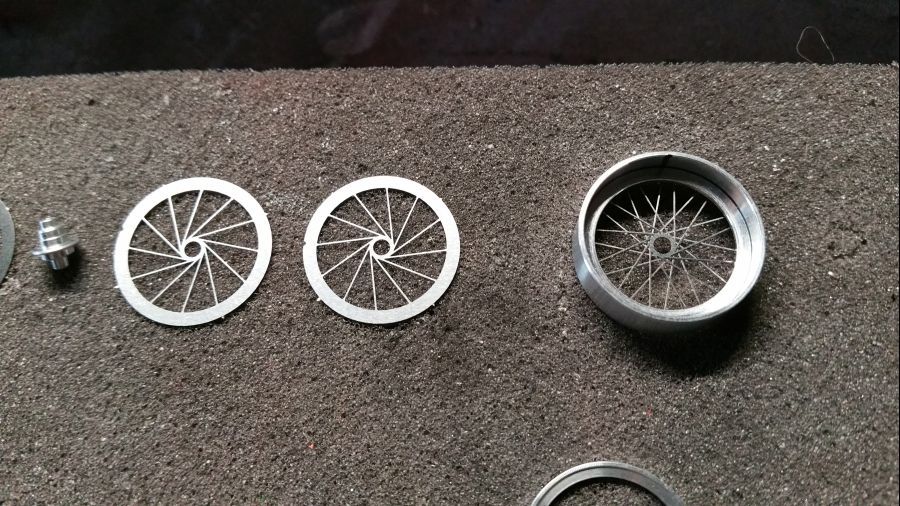
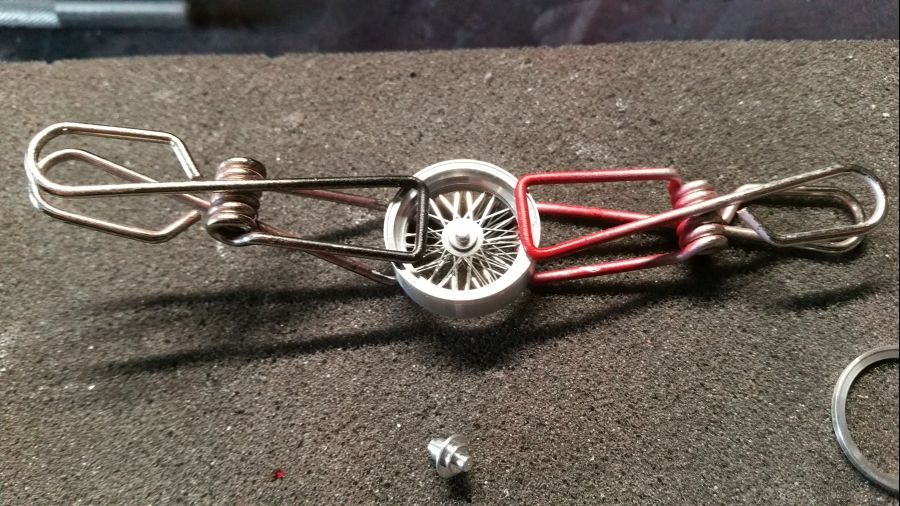
Daarna verwijder ik de eerste etched onderdelen van het raamwerk. Let op de draairichting van de velgen en de kleine inkeping op de etched onderdelen. Deze inkepingen moeten precies op elkaar vallen bij het monteren. Op de velg zet ik aan de binnenkant een streep om alle inkepingen goed uit te lijnen. Lijm deze etched delen niet. De verlijming vindt pas plaats bij het plaatsen van de laatste ring.
Then i cut the etched parts from the sprue. Mind the turning direction of the spokes and the small notch on the etched parts. These should be place exactly the same way when mounting. On the rims i write a stroke to easily line up the notches. Do not glue these etched parts. Only at the end when the last ring is attached some glue will be applied.
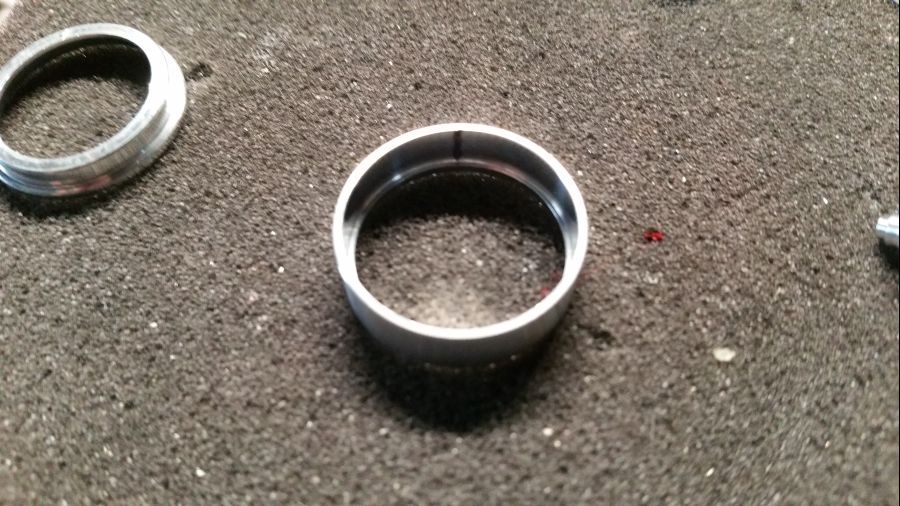
Daarna werk ik van rechts naar links.... Wees voorzichtig bij het plaatsen van de laatste ring. Druk alles voorzichtig samen en breng wat superlijm aan op de buitenkant van de velg om de boel te verlijmen.
Then i start from right to left.... Be careful when attaching the last ring. Press everything carefully together and apply some superglue on the outside of the rim to combine.

Nu wordt alles langzamerhand afgemonteerd.. Eerst de zijkanten..
Now everything gets mounted.. First the sides..
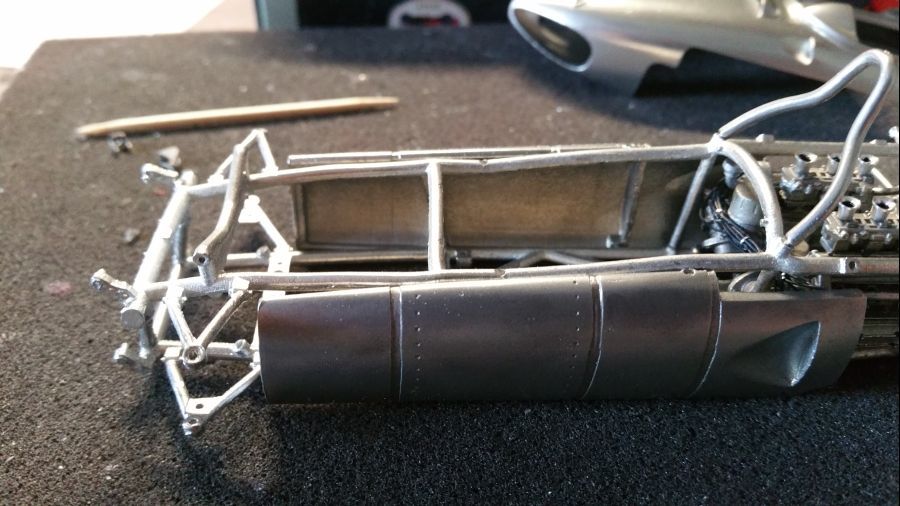
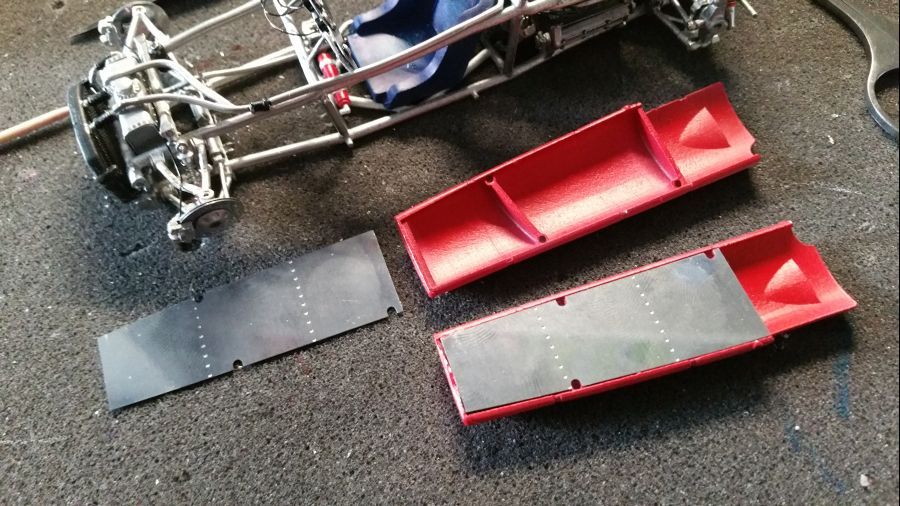
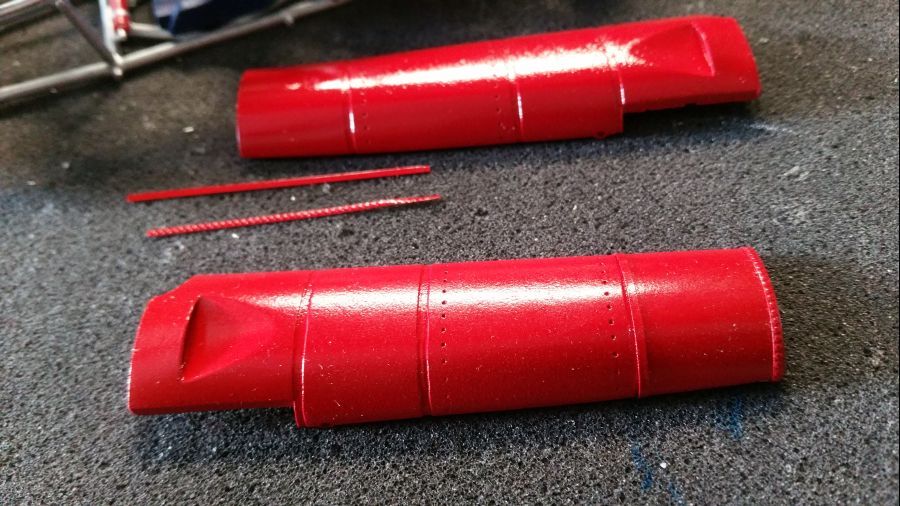
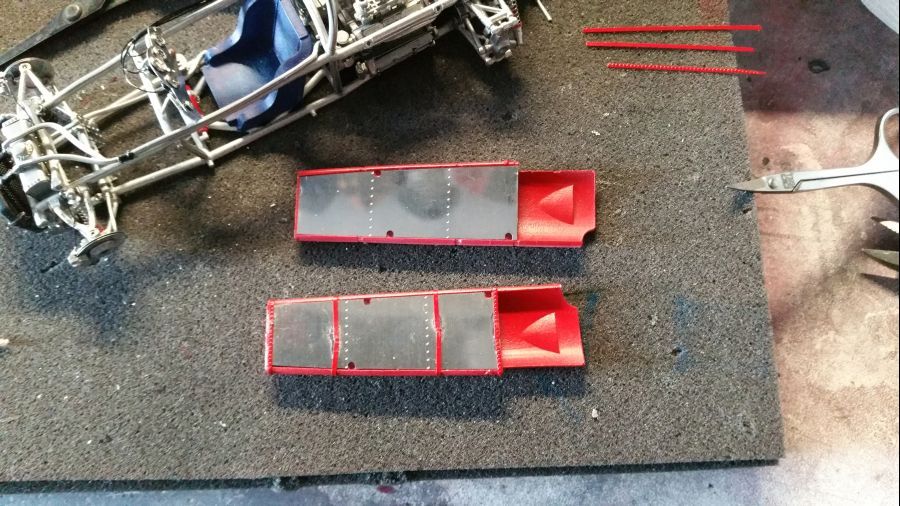
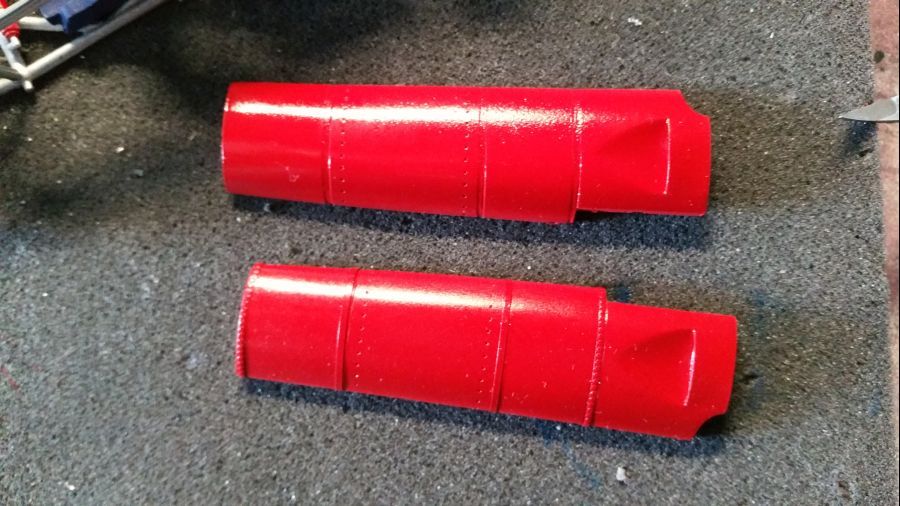
De uitlaten...
The exhausts...
Ik ga de uitlaatpijpen een beetje verouderen...
I am going to do some weathering to the exhaust pipes...
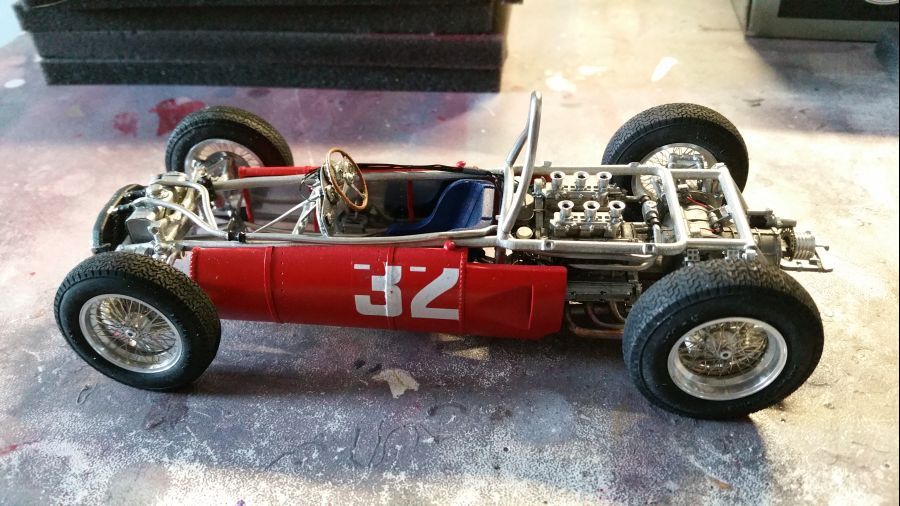
Het oranje, rood en blauw wordt op de juiste plekken aangebracht..
The orange, red and blue are applied to the correct spots..


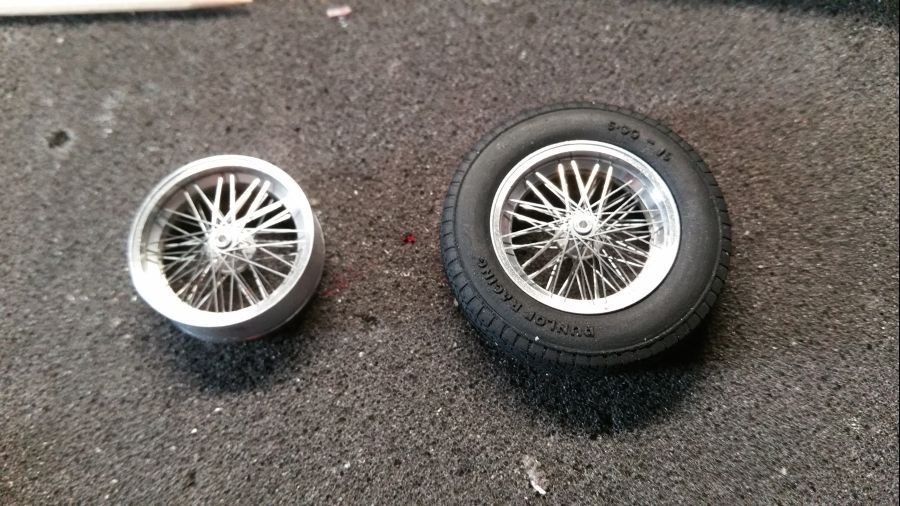
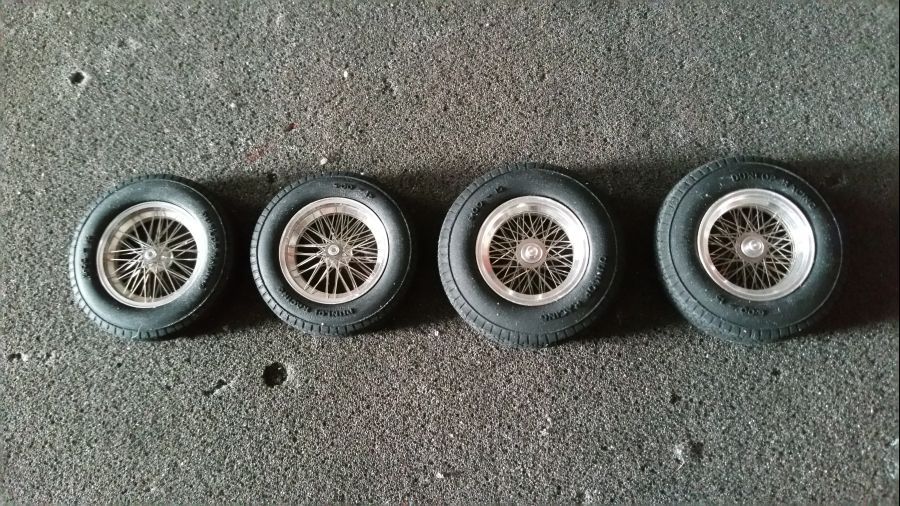
De wielen gaan er op...
The wheels are on...
Dan de vloer...
Next is the floor...
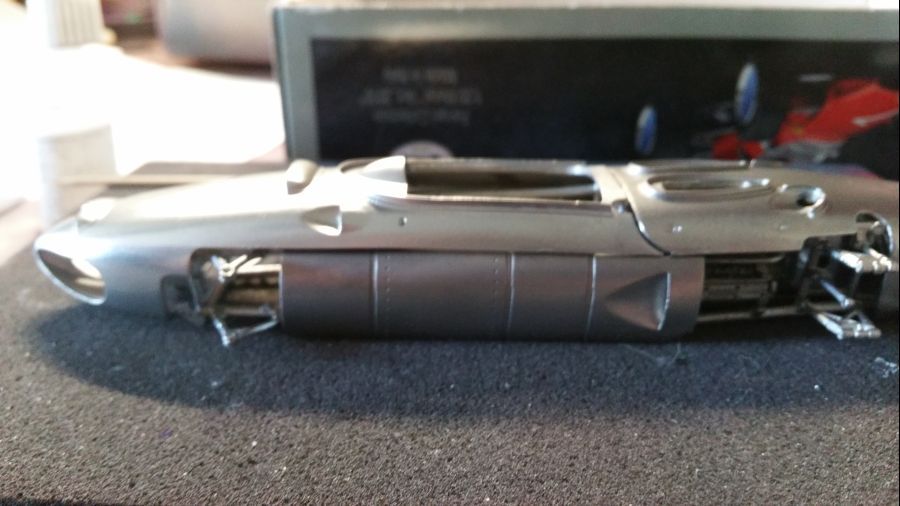
Tijd voor de uitlaten...
Time for the exhausts...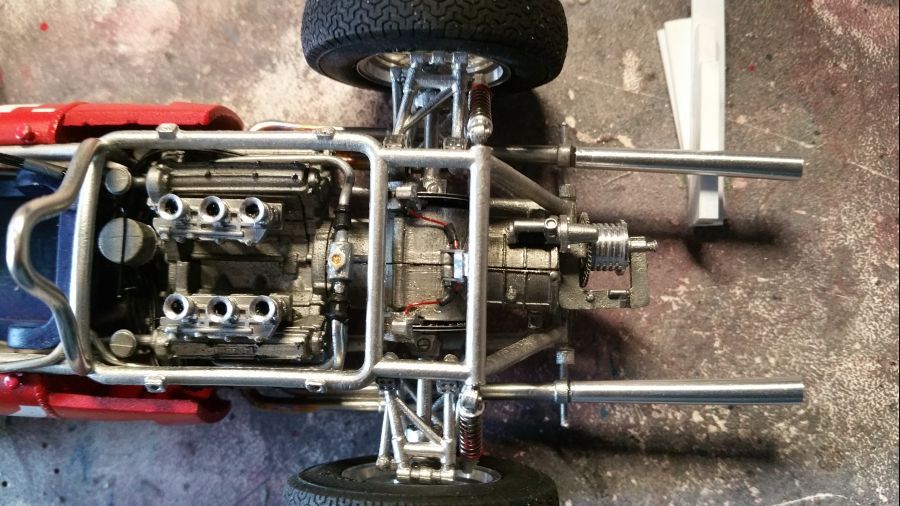
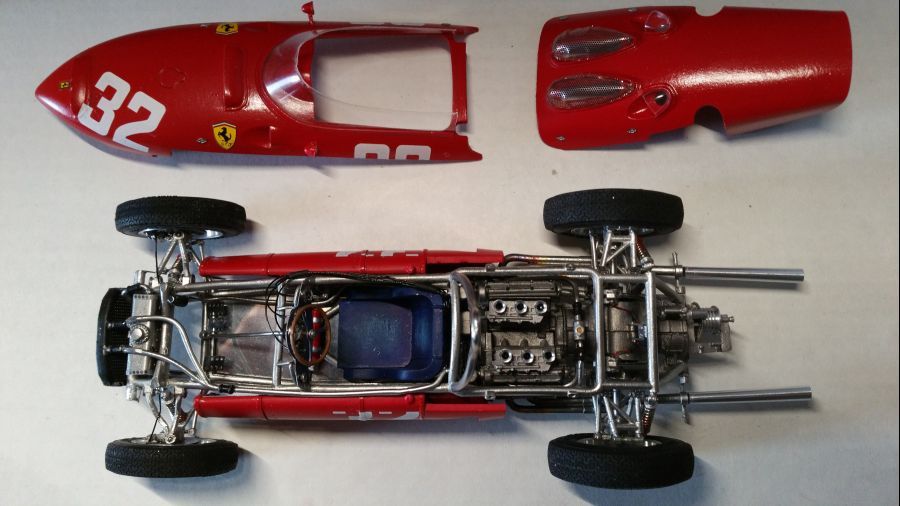
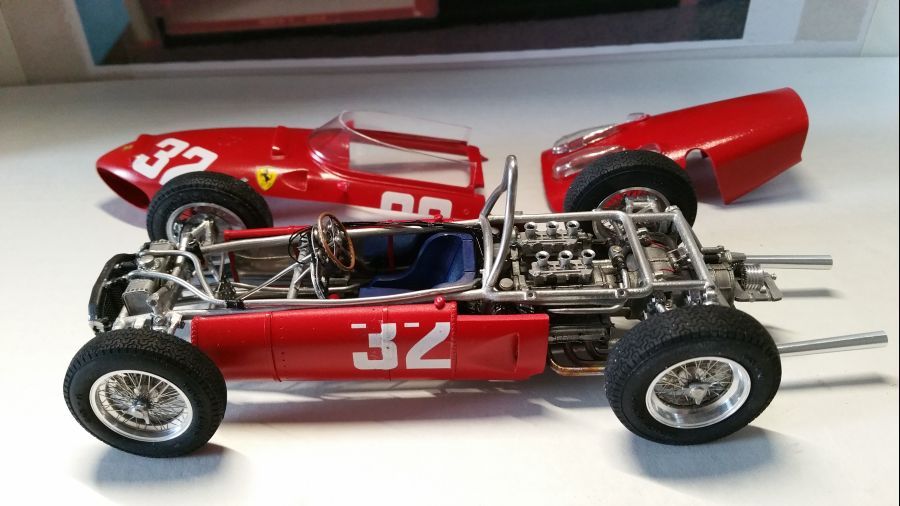
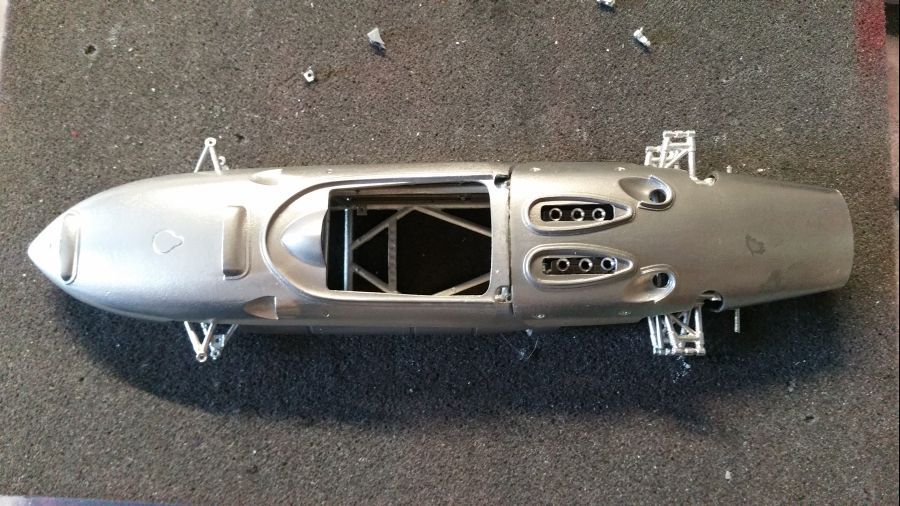
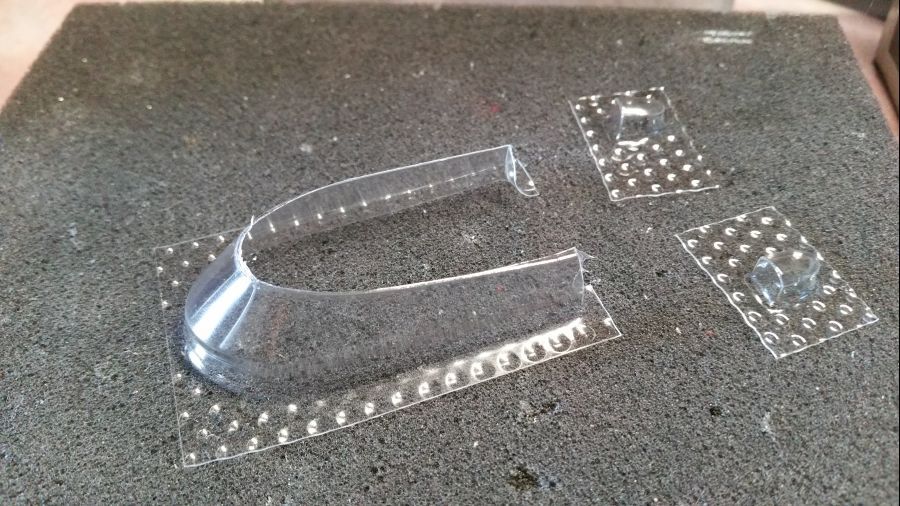
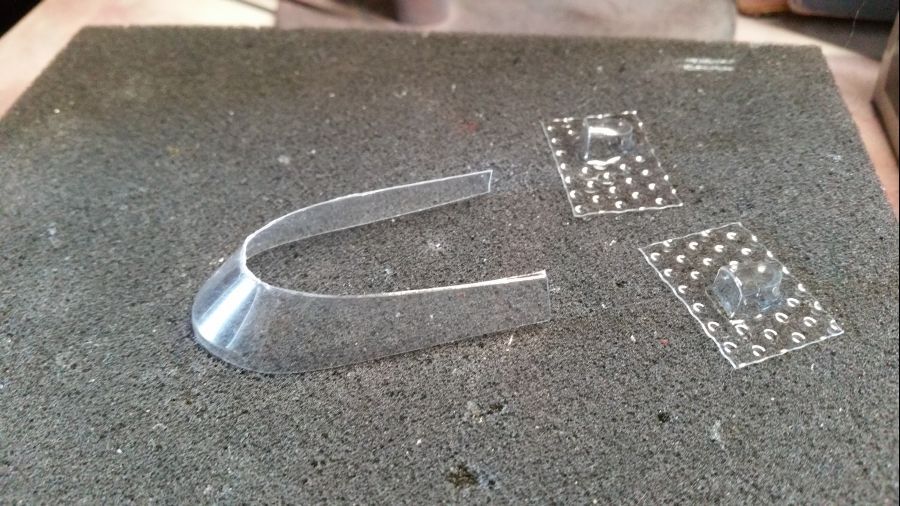
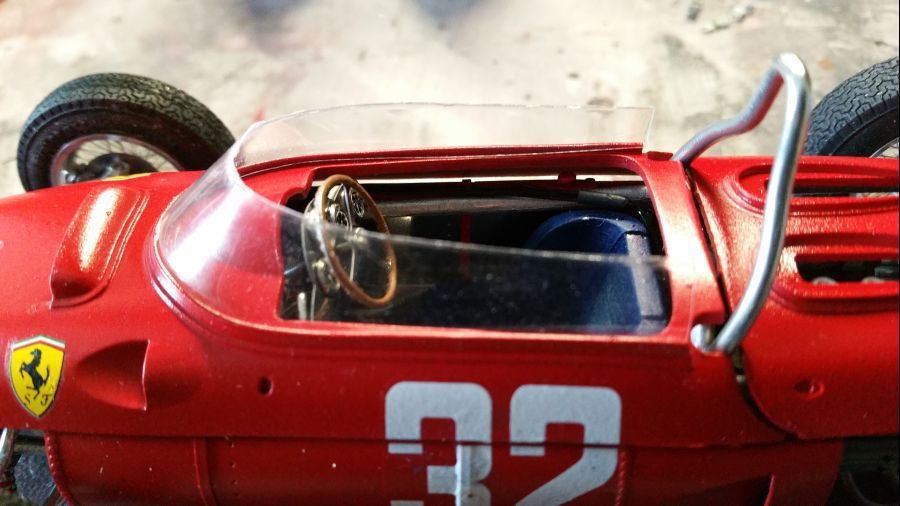
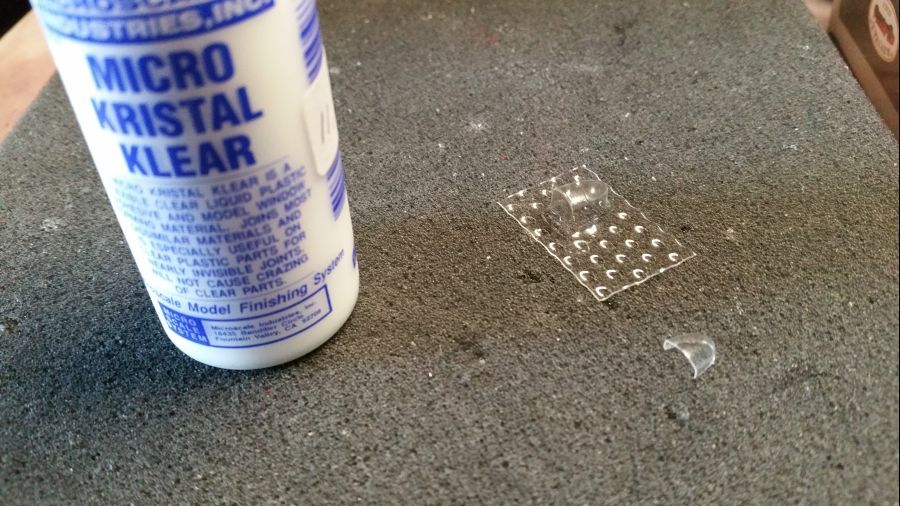
Het plaatwerk wordt weer geplaatst en dan ga ik verder met het knippen en vijlen van de vacuum onderdelen... Ik plak deze altijd met Kristal Clear.
The body work is attached again and then i will continue with cutting and filing the vacuum parts... I always glue these with Kristal Clear.
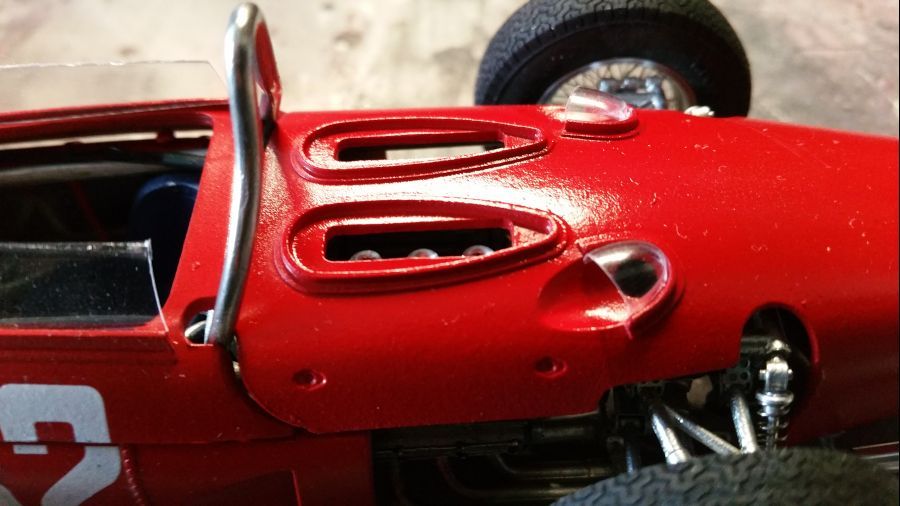
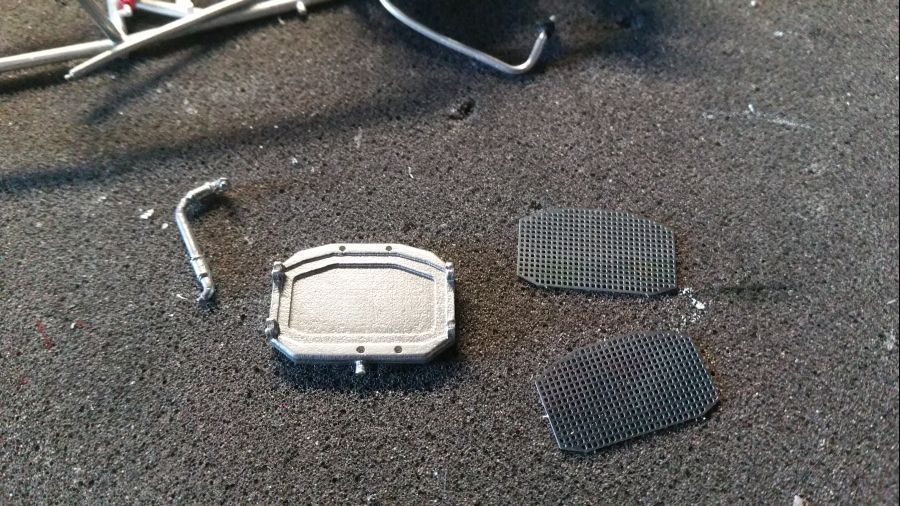
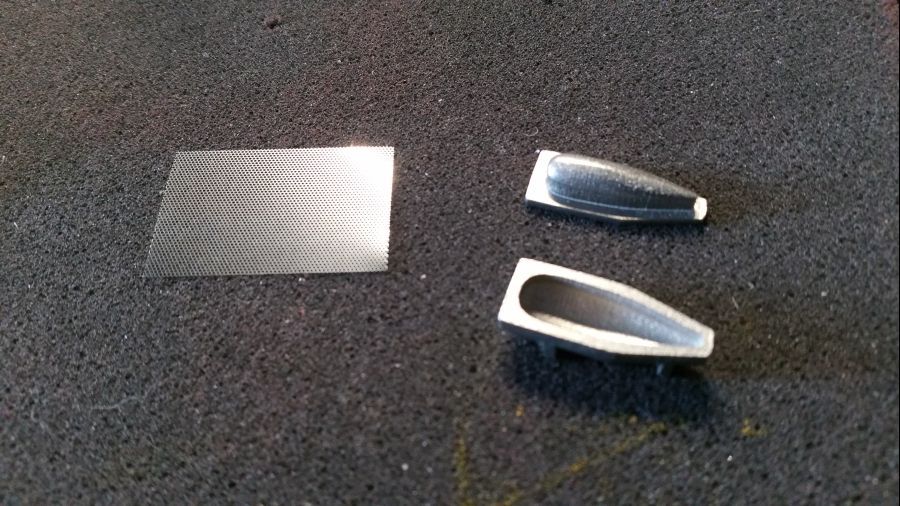
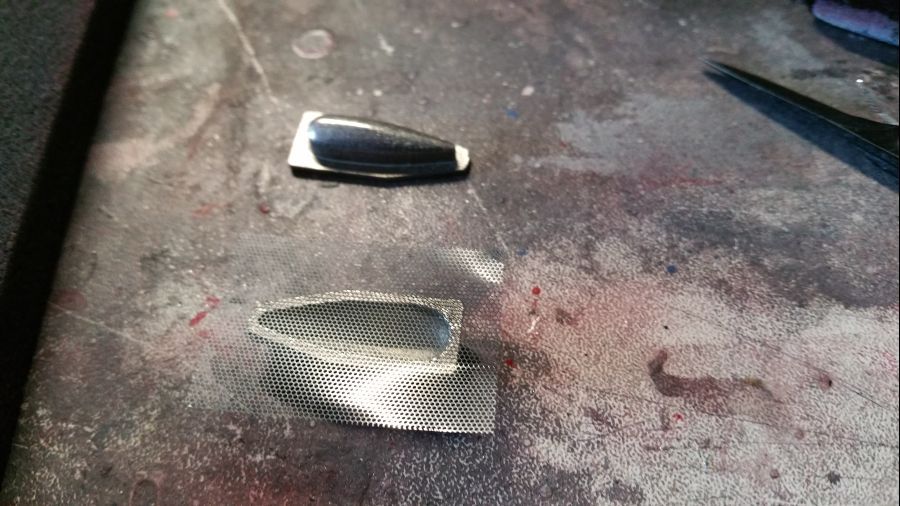
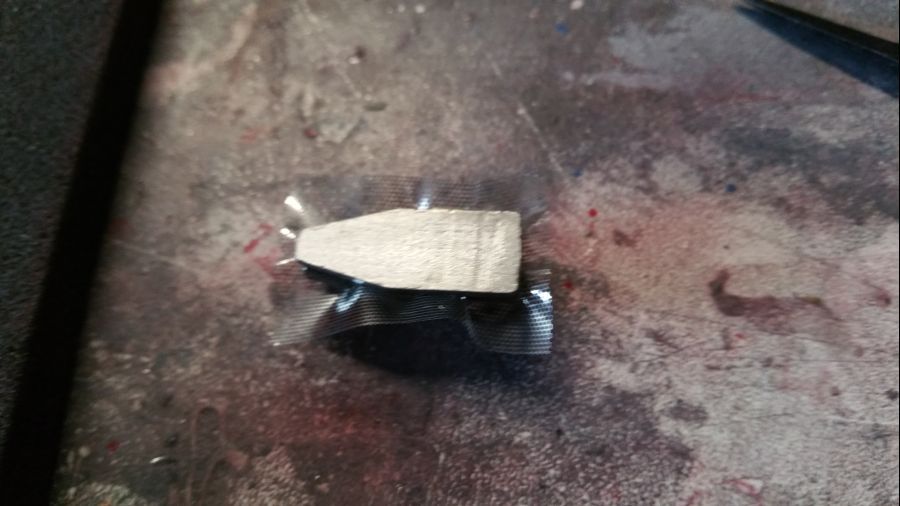
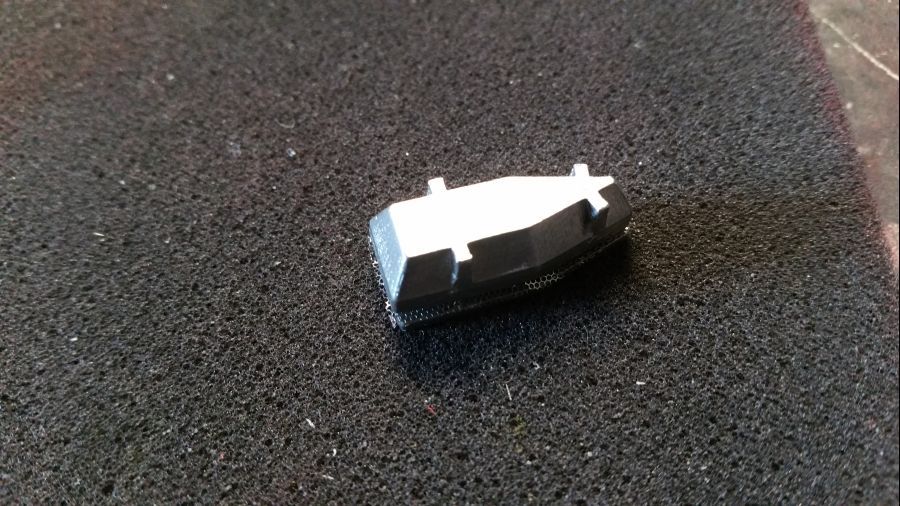
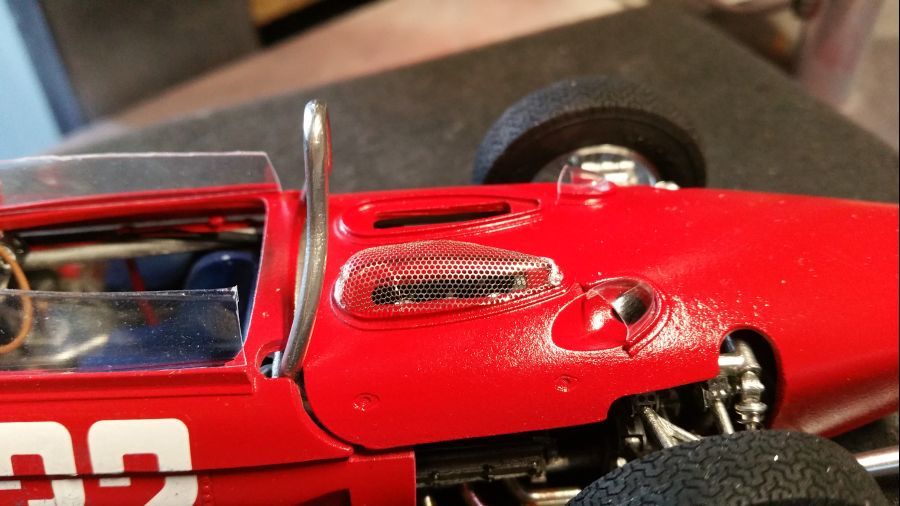
Dan verder met de gaas covers.... Uiteraard gebruik ik de bijgeleverde tool. Een kwestie van goed stevig in elkaar persen en wat knipwerk.
Next are the mesh covers.... Of course i will use the tool that was included. Just press everything firmly and do the cutting.

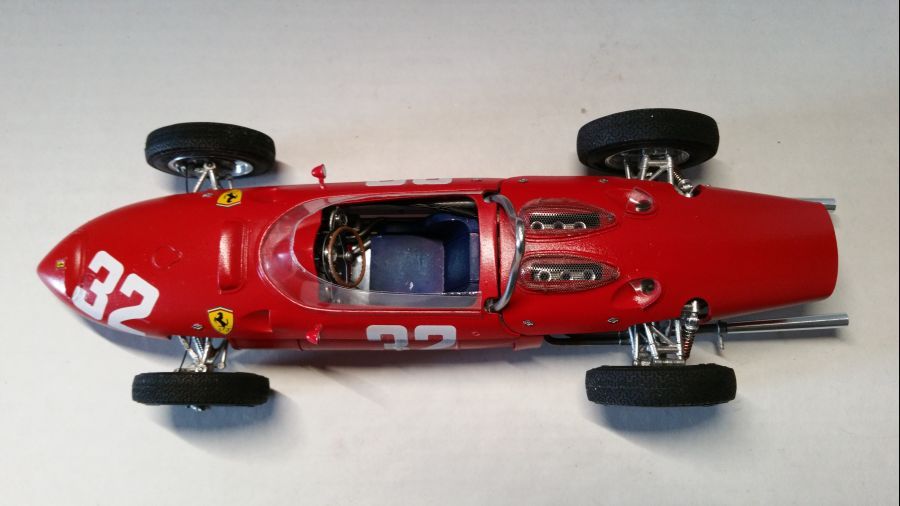
Na het plaatsen van de snelsluiters en de wieldoppen, kan ik zeggen dat er weer 1 op de plank kan...
After attaching the fasteners and the wheel nutters, i can say another one can be added to the shelf...
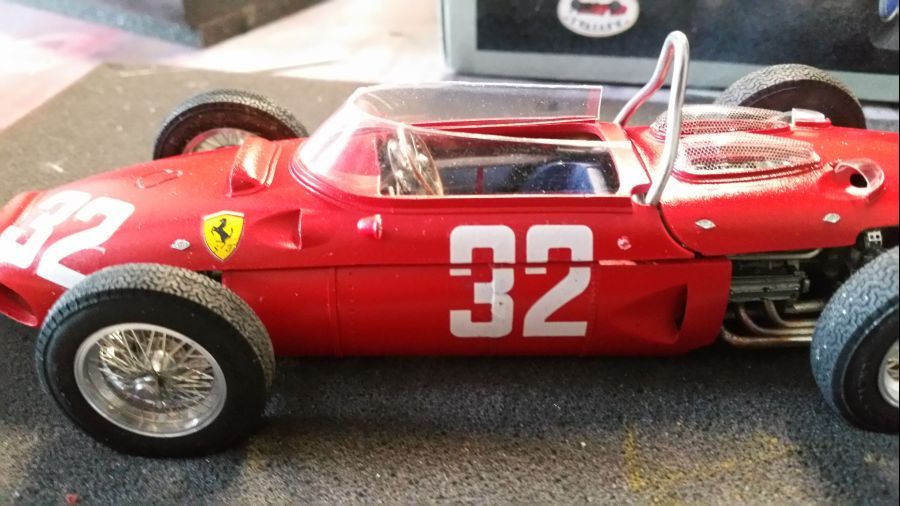
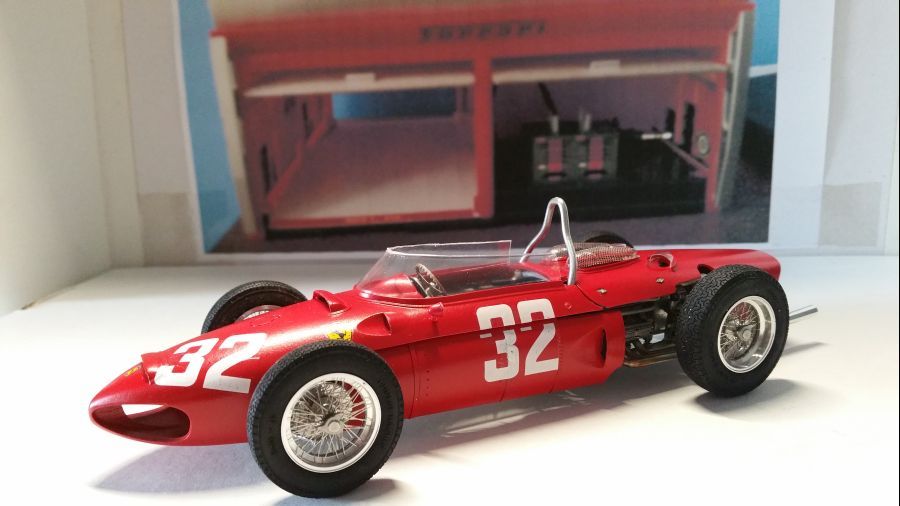
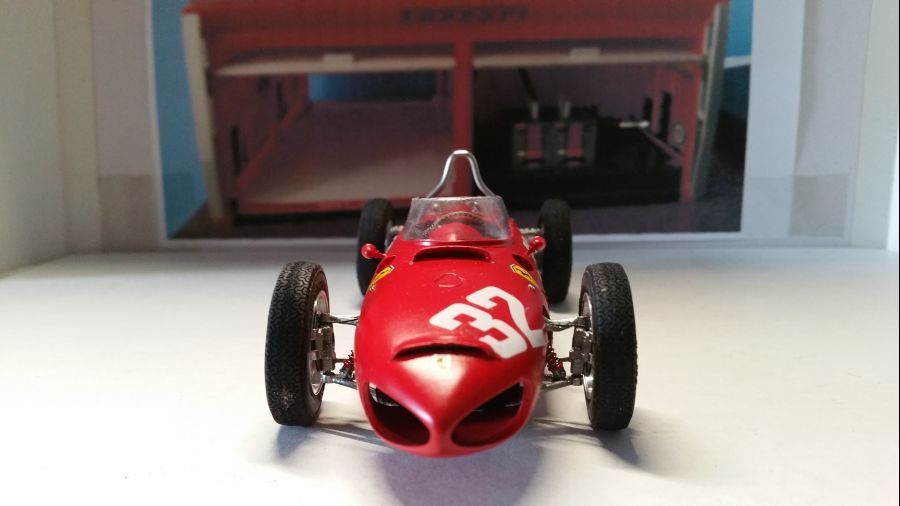
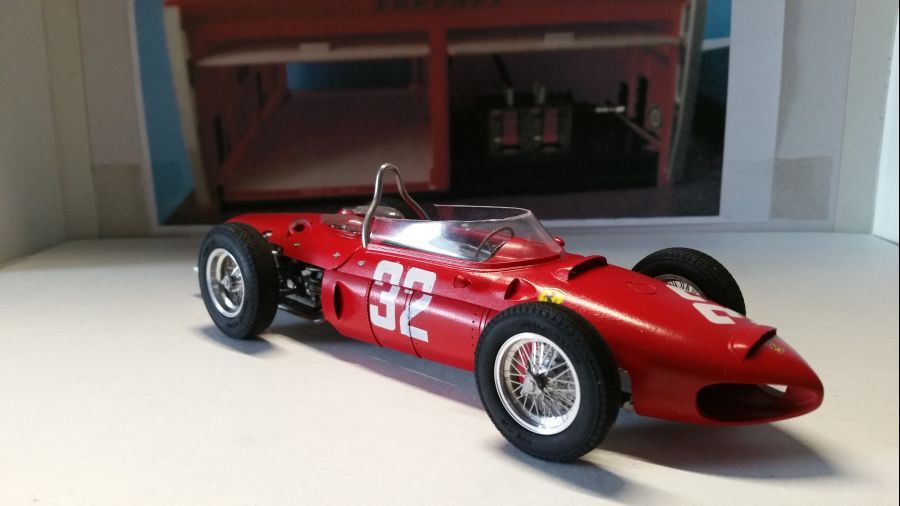
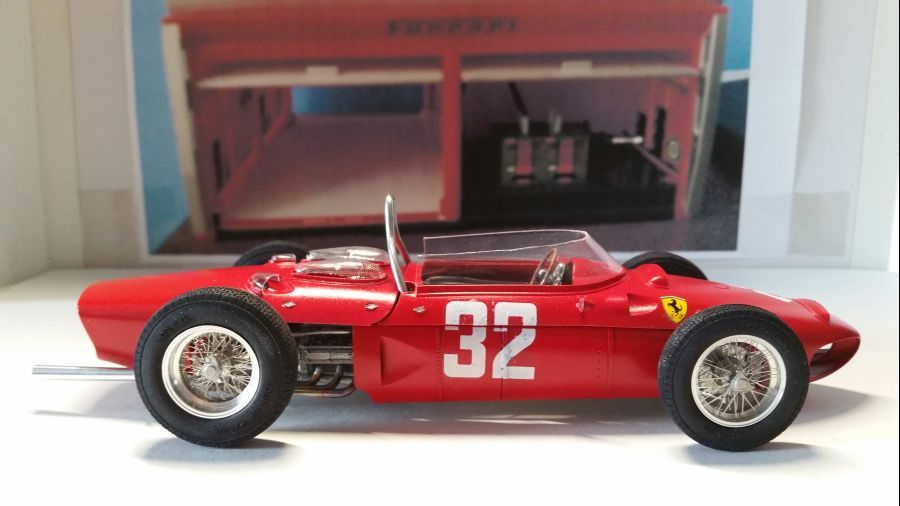
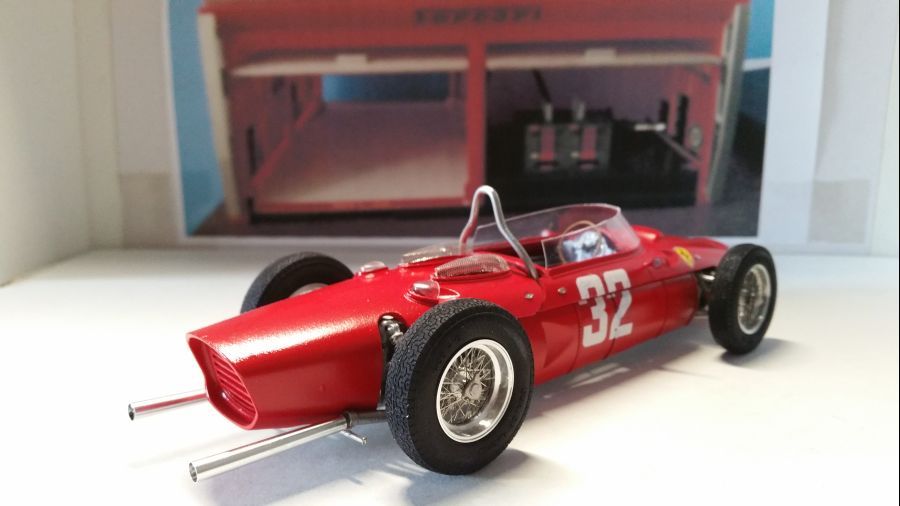
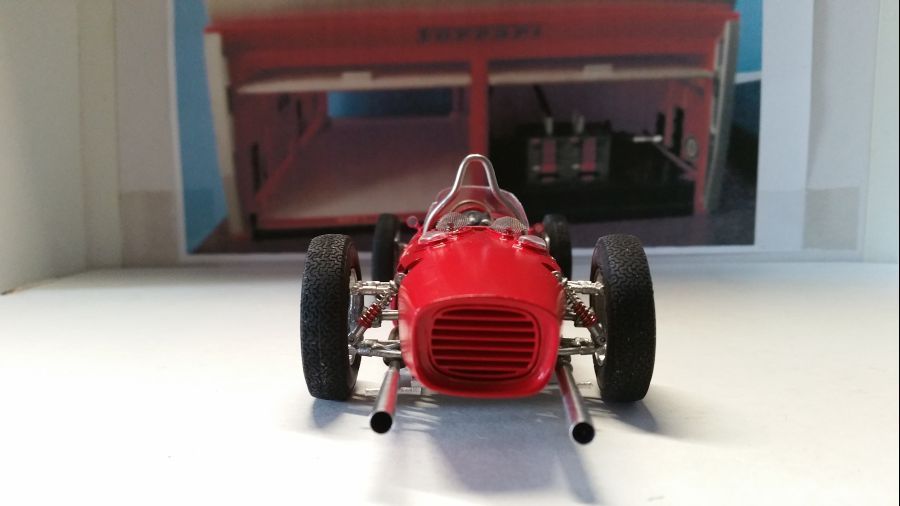
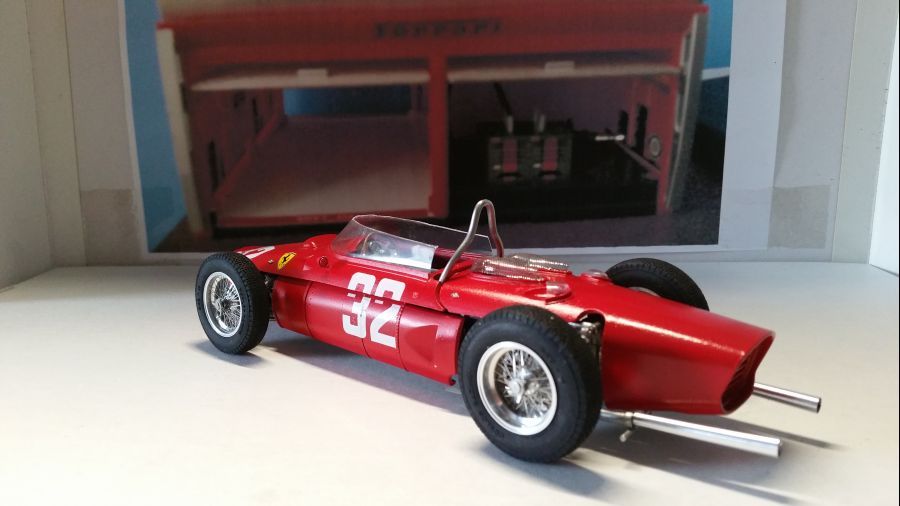
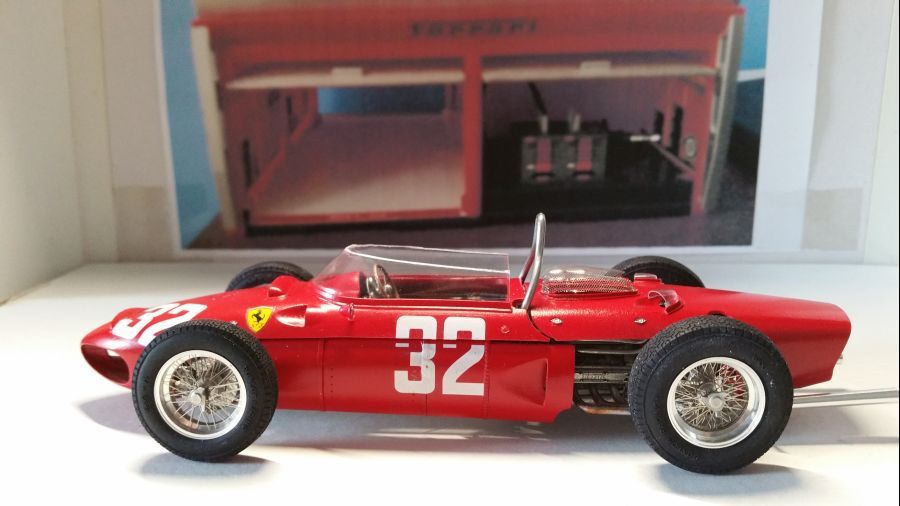
Dus dit is het resultaat.
So here is the result.