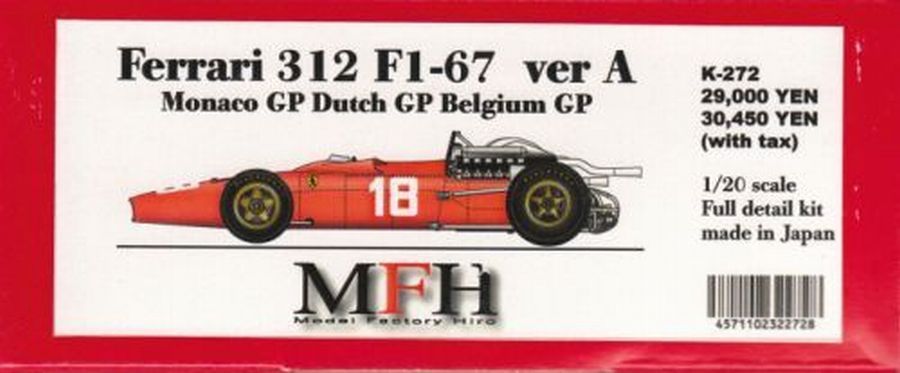
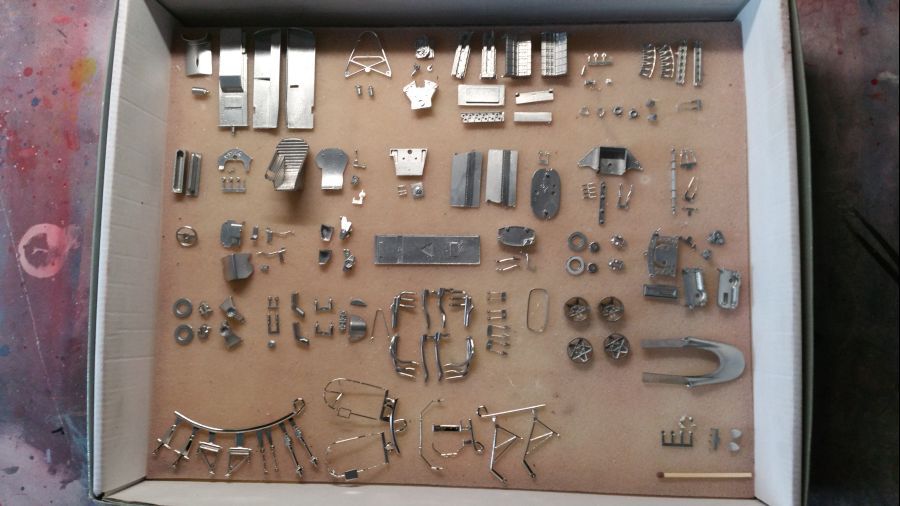
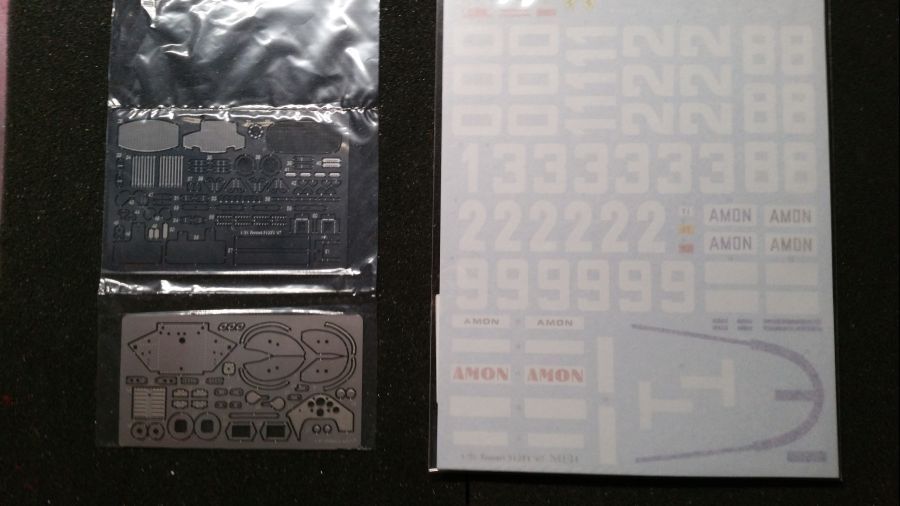
Ik ga beginnen met de bouw van Ferrari 312 F1 uit 1967, zoals deze werd bestuurd door Lorenzo Bandini tijdens de Grand Prix van Monaco. Het verhaal gaat dat Ferrari problem met de koeling had bij deze GP. Op een gegeven moment besloot men de neus in te korten voor een betere luchttoevoer. Het is een schaal 1/20 kit van Modelfactory Hiro (kit nr. K-272). MFH heeft deze kit ook uitgebracht in schaal 1/12. Die is ook in mijn bezit. Tijdens de GP in Monte Carlo reed Bandini deze wagen in een short nose versie. Het vreemde is dat MFH de kit in schaal 1/12 wel heeft uitgebracht met 2 neuzen, een lange en een korte neus, maar de kit in schaal 1/20 niet. Ik moet dus de neus aanpassen. Leuke klus aan een kit van ongeveer 250 euro. Bandini overleefde deze race niet. Hij raakte een paar strobalen en eindigde met de auto in de haven van Monte Carlo. Eerst maar weer het standaard werk. De foto's van de inhoud van de kit. Alleen al de wit metalen onderdelen bestaan uit 165 stukjes. Totaal van de kit dus over de 200 stukjes.
I will start the build of a Ferrari 312 F1 from 1967, as driven by Lorenzo Bandini during the Grand Prix from Monaco. The story is, Ferrari had a problem with cooling the car at this GP. So they decided to cut the nose to get a better air flow. It's a scale 1/20 kit from Modelfactory Hiro (kit no. K-272). MFH also produced this kit in scale 1/12. I own that one as well. During the GP at Monte Carlo Bandini drove the short nose version of this car. Strange it is, MFH produced the 1/12 car with 2 noses, a long and a short nose cone, but not the 1/20 car. So i have to adjust the nose. Not nice cutting a 300 usd car. Bandini did not survive this race. He hit some hay packs and ended up in the harbour of Monte Carlo. First the regular info. The photo's of the content of the kit. The white metal parts are than 165 pieces. So the complete kit contains over 200 pieces.

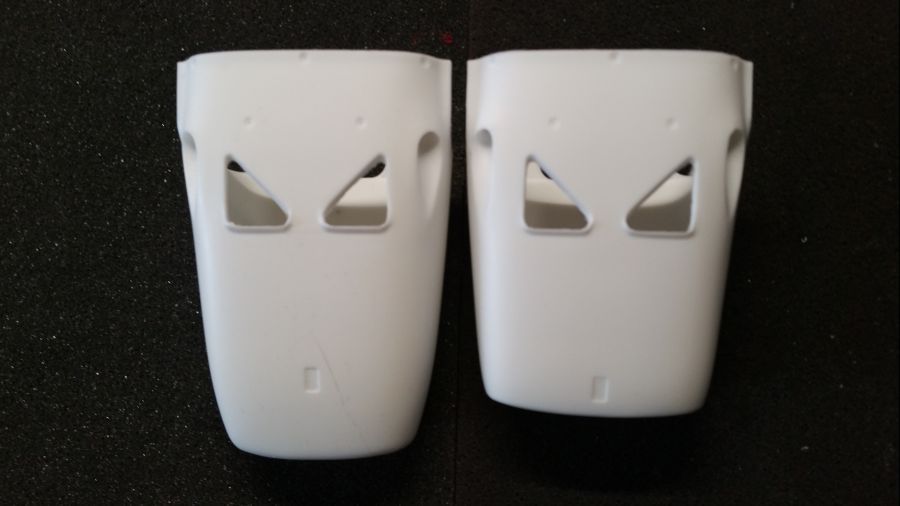
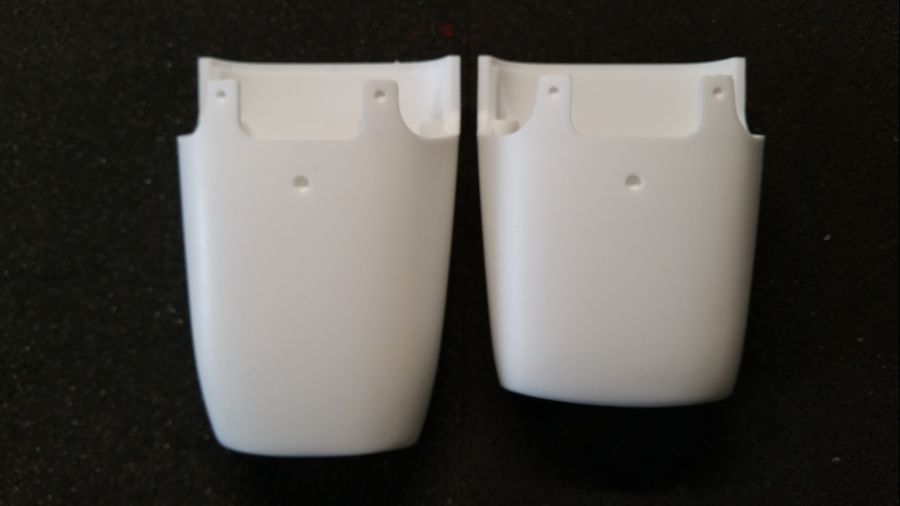
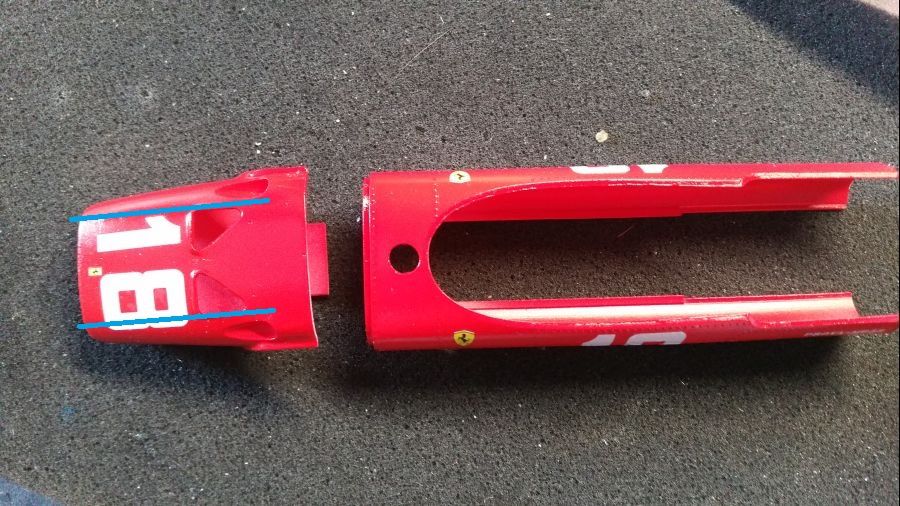
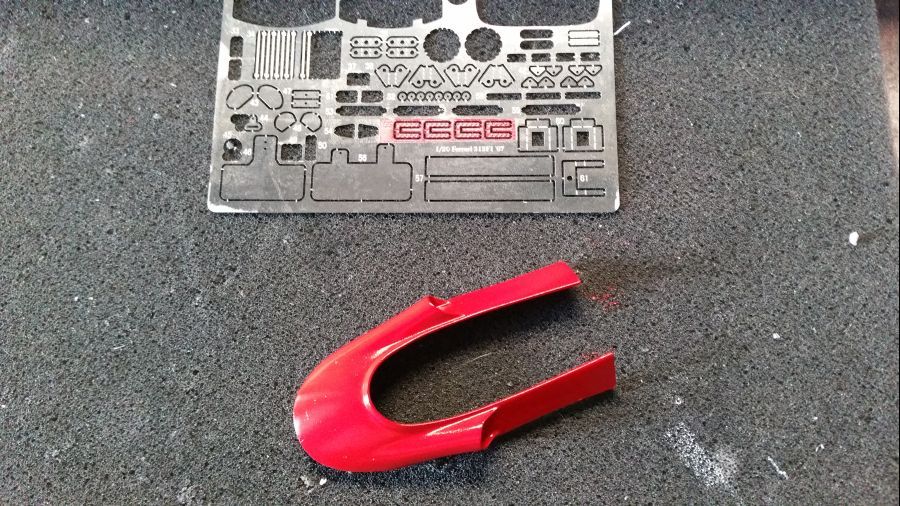
Ik ga eerst de neus aanpassen. Wanneer dit niet lukt is immers het gehele project mislukt. Dan kan de kit of de prullebak in, of ik moet het weer kunnen repareren, of ik moet bij MFH nieuwe onderdelen kopen. Vingers gekruisd. Op bijgaande foto's zie je de 2 neuzen zoals deze bij de 1/12 kit zitten. Ik ga de korte neus opmeten en met behulp van een excel programma de maten omzetten naar schaal 1/20. Dit ga ik op de lange neus van de 1/20 kit uitmeten en de zaag erin....
First i will adjust the nose. If this fails, the whole project is down the drain. Then the kit ends up in the bin, unless i can repair it, or buy replacement from MFH. Cross your fingers. On these pics you can see the 2 noses as delivered in the 1/12 kit. I will take measurements on the nose and convert it with my excel software to scale 1/20. I will then put these measurements on the long nose of the 1/20 kit and cut it....
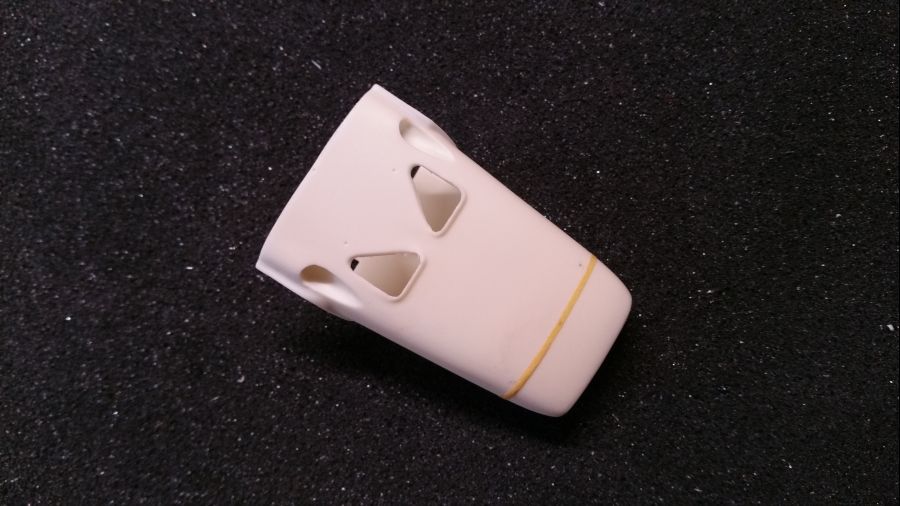
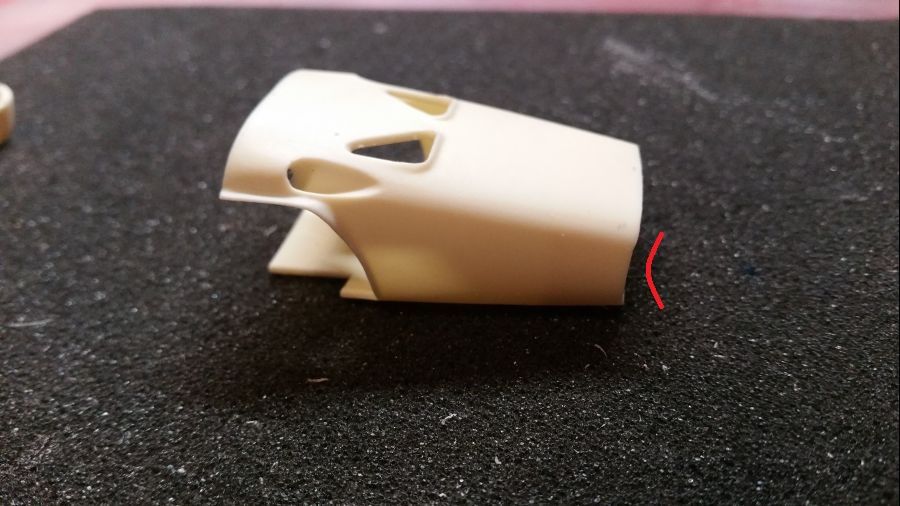
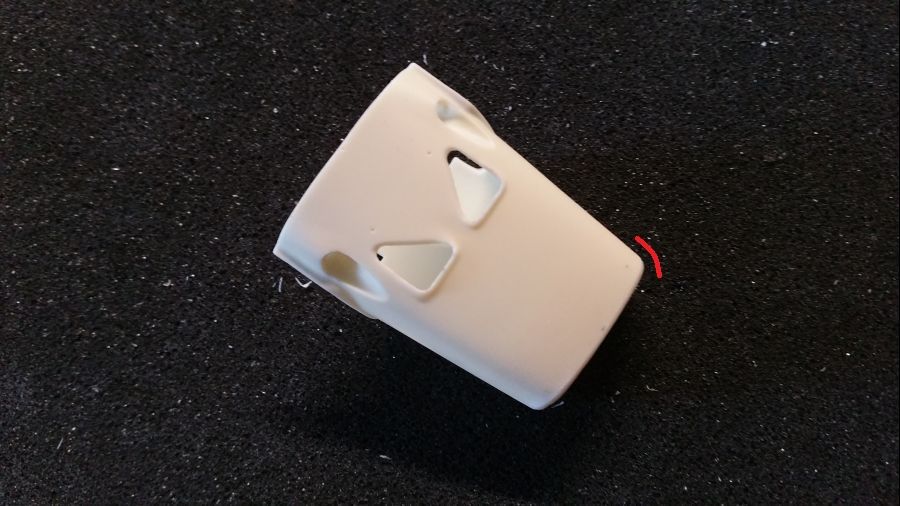
Dus de maten uitzetten en de zaag erin...
So put on the measurements and cut it...

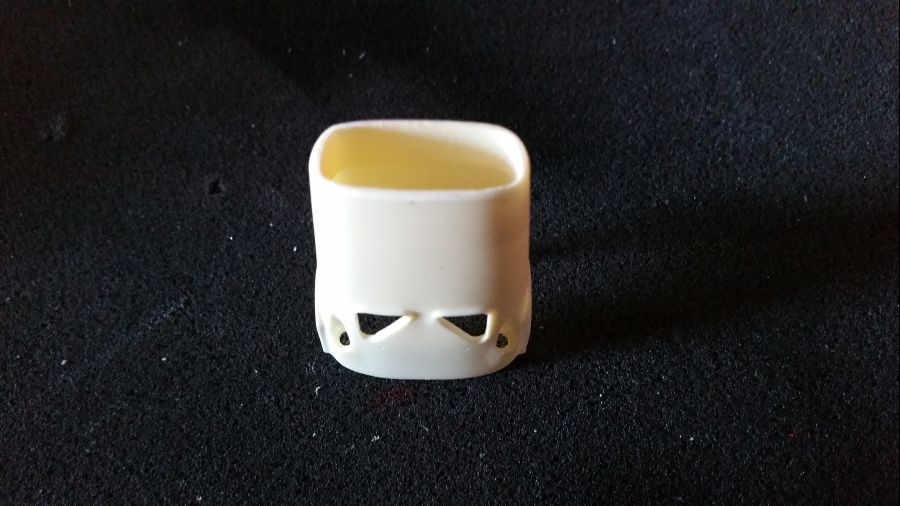
De eerste stappen aan de kuip....
First steps on the tub...
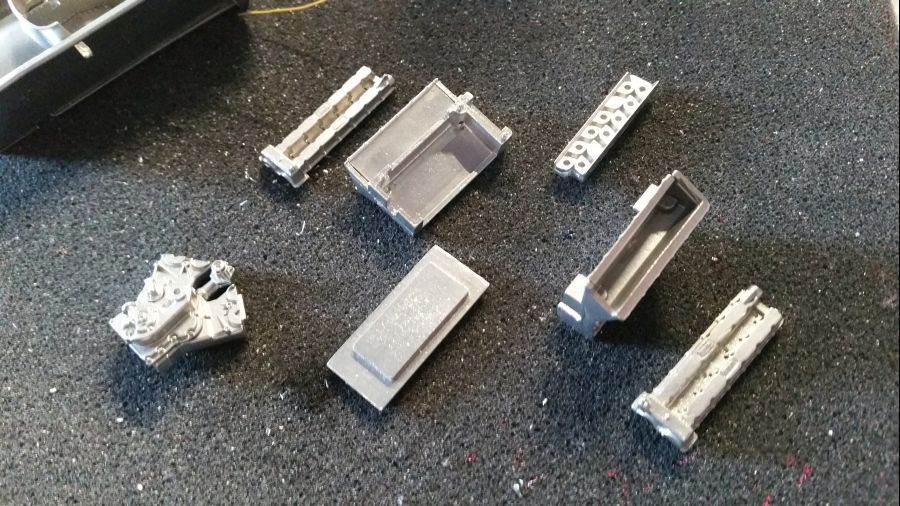
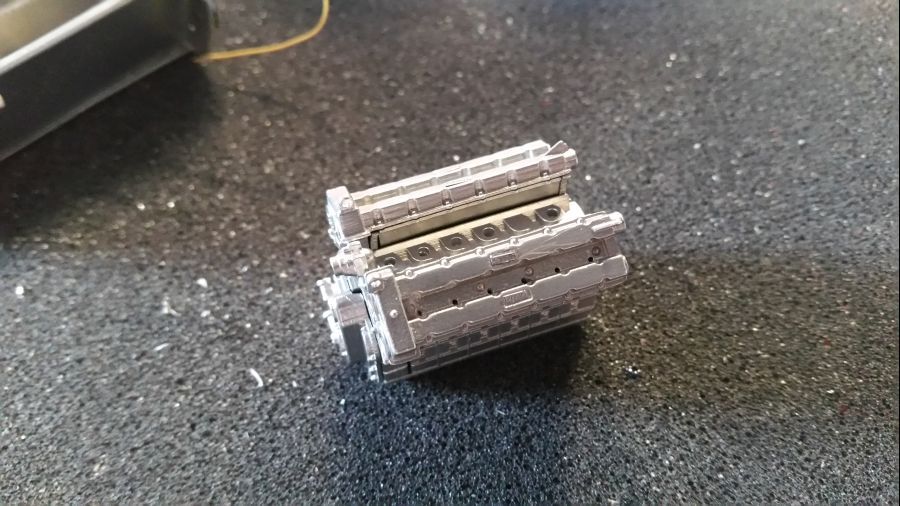
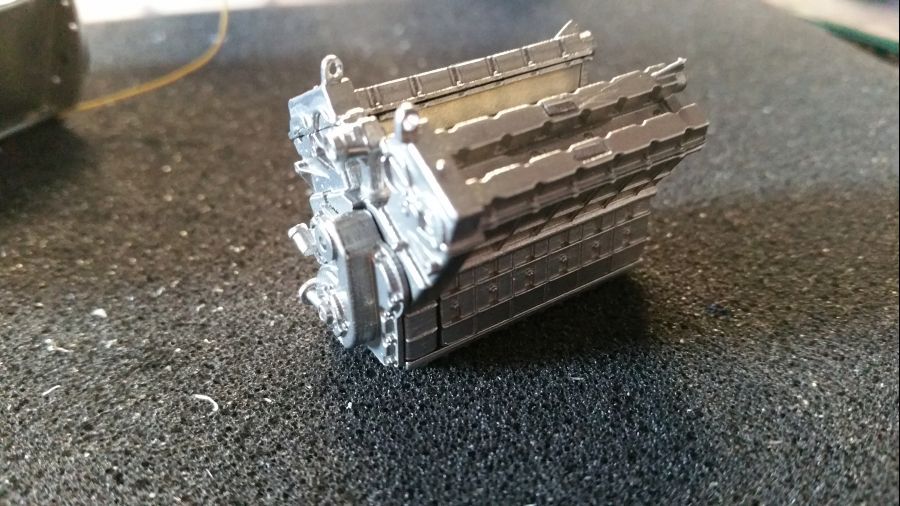
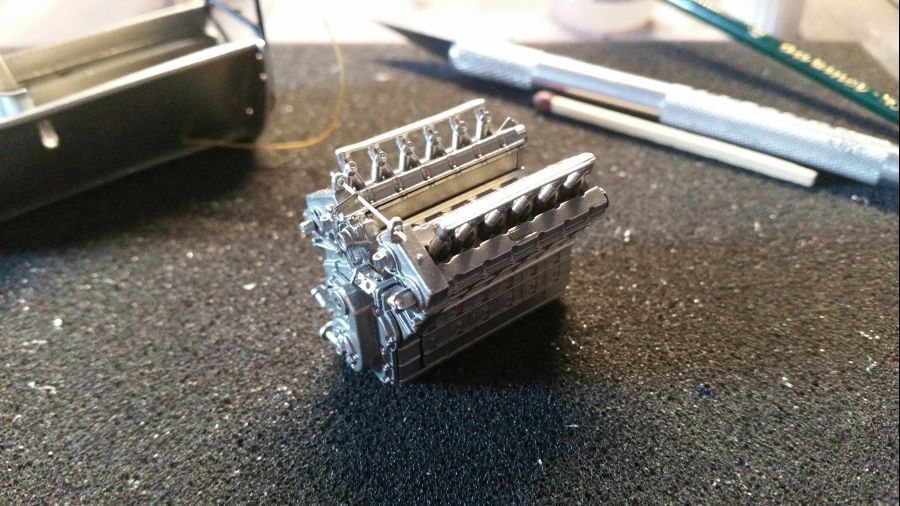
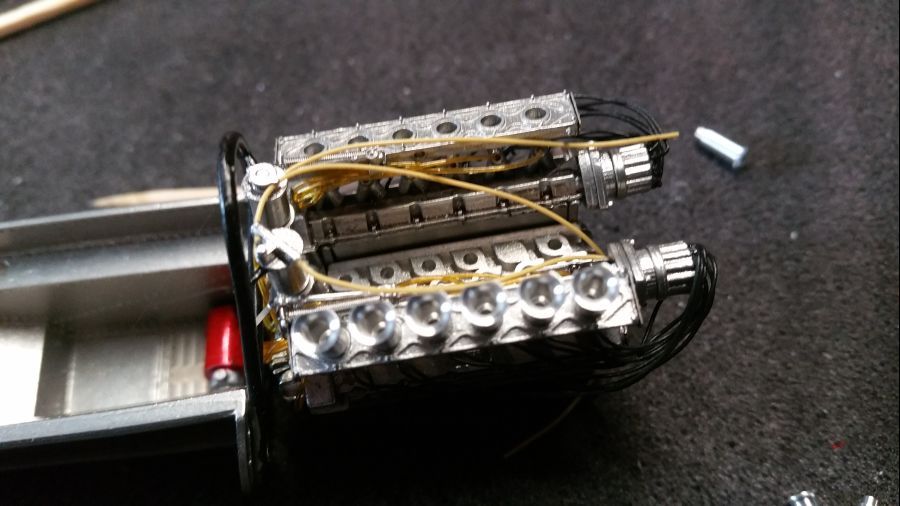
De eerste stappen aan de motor... Uiteraard zijn alle gaatjes alvast geboord, om later geen problemen te krijgen.
The first steps to the engine... Of course all holes are drilled to avoid problems at a later time.
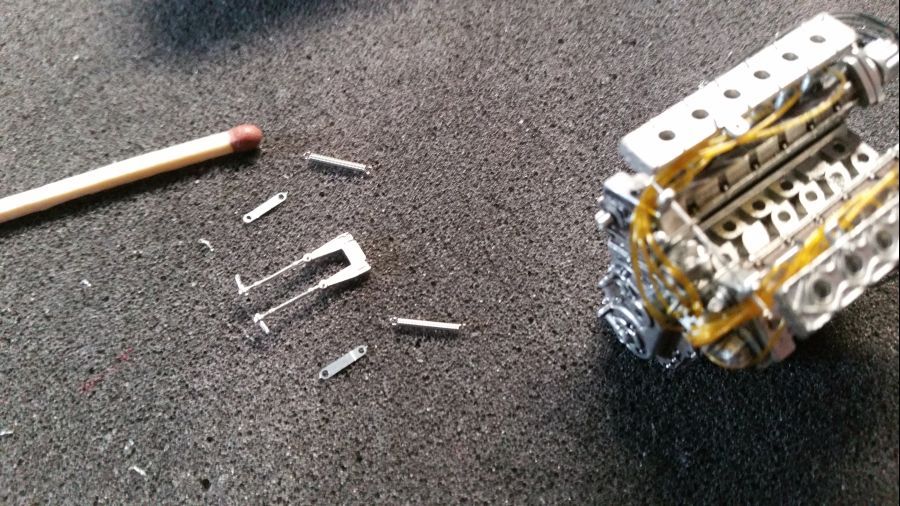
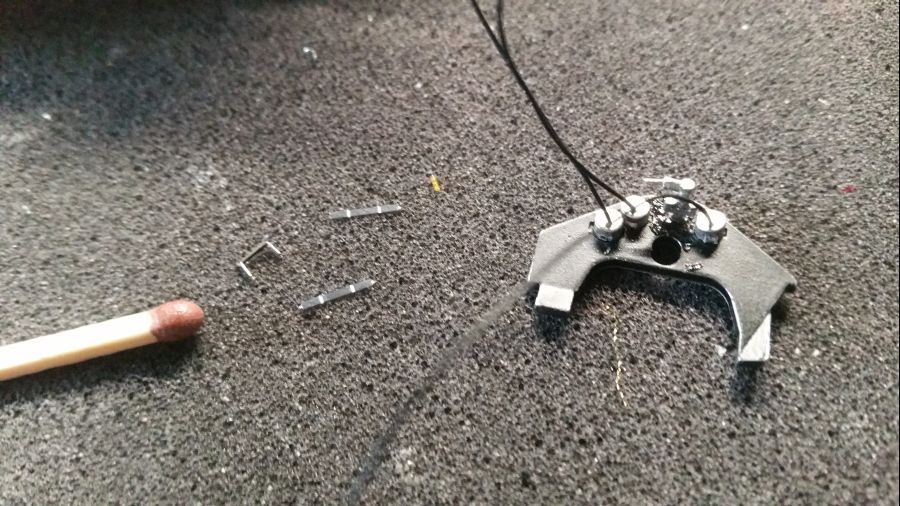
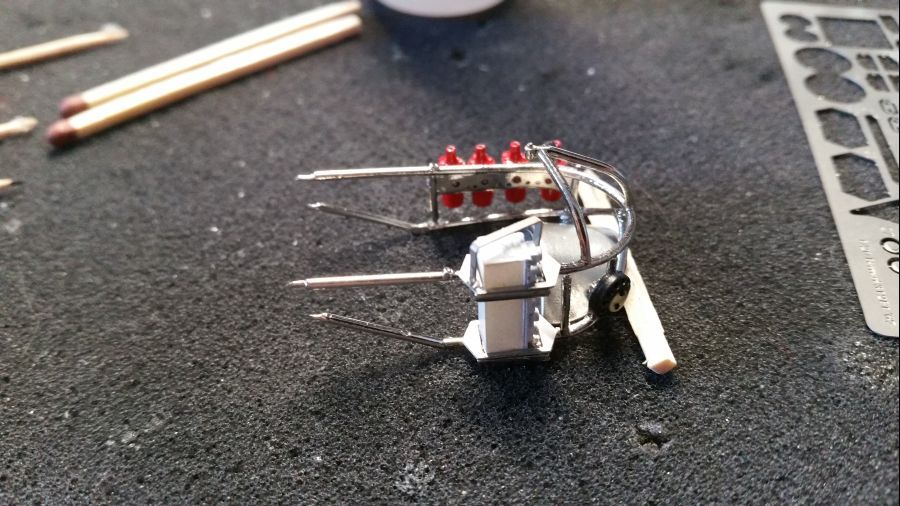
Het systeem waarmee gas wordt gegeven...
The system that allows you to speed up...
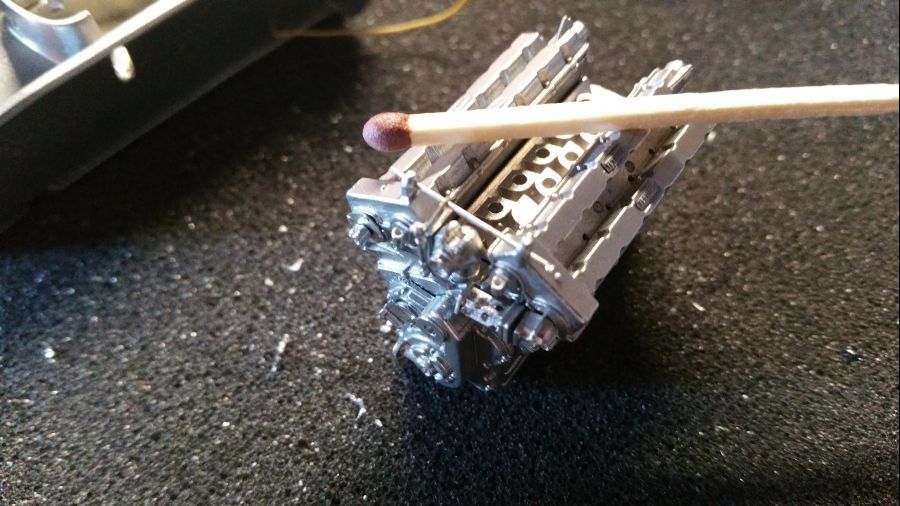
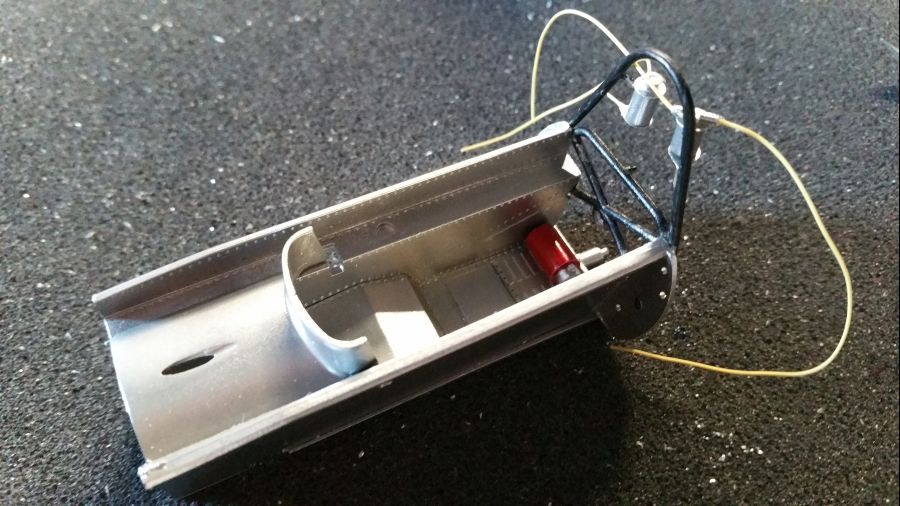
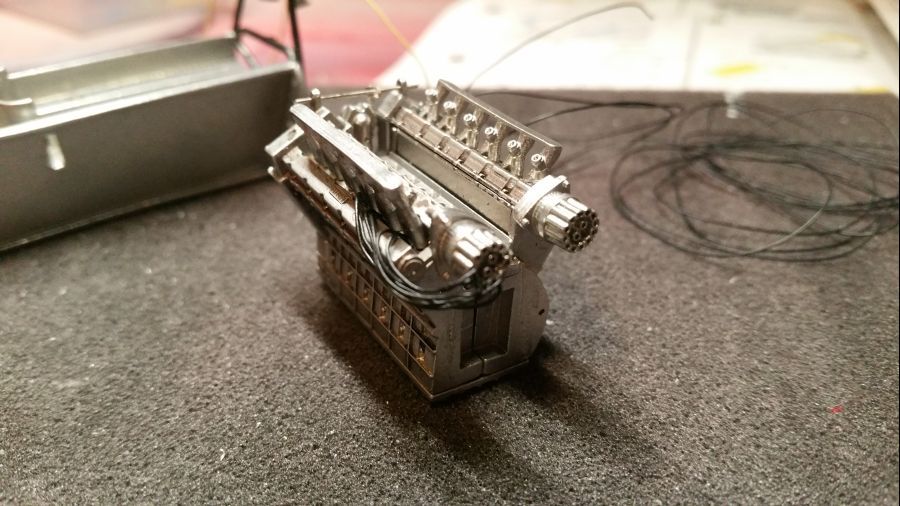
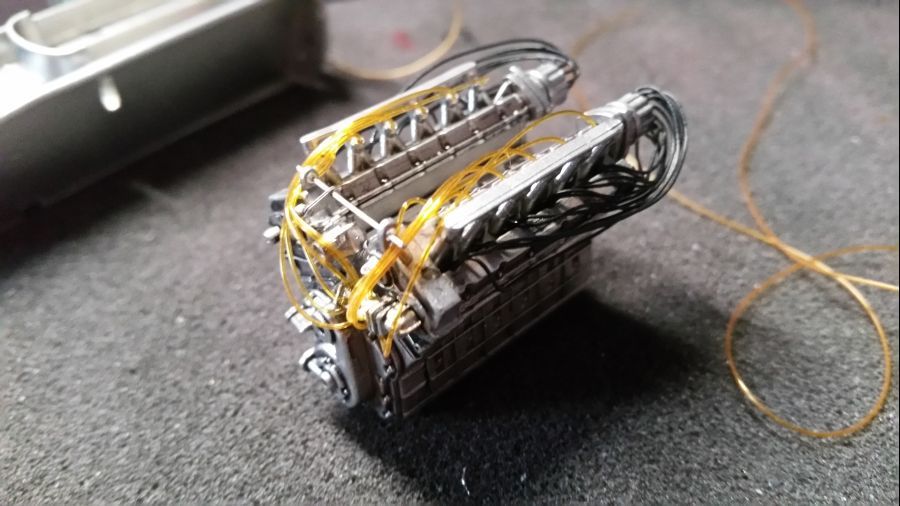
Weinig vooruitgang vandaag... te druk.... De motor heeft een lichte wash gehad met zwart en bruin. Daarna gaatjes 0.5 mm boren en kabels aanbrengen aan de ontsteking....
Slow progress today... too busy... The engine received a slight wash with black and brown. Then drill 0.5 mm holes and started with the wiring for the ignition...
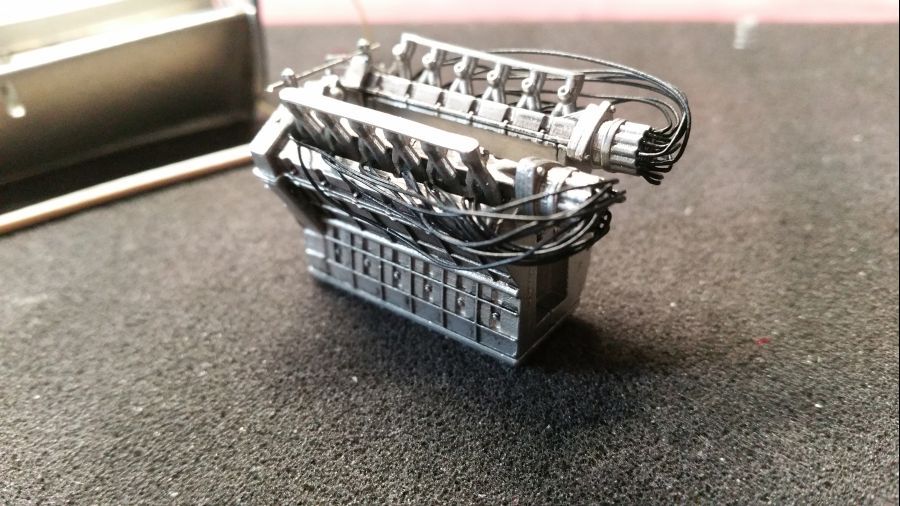
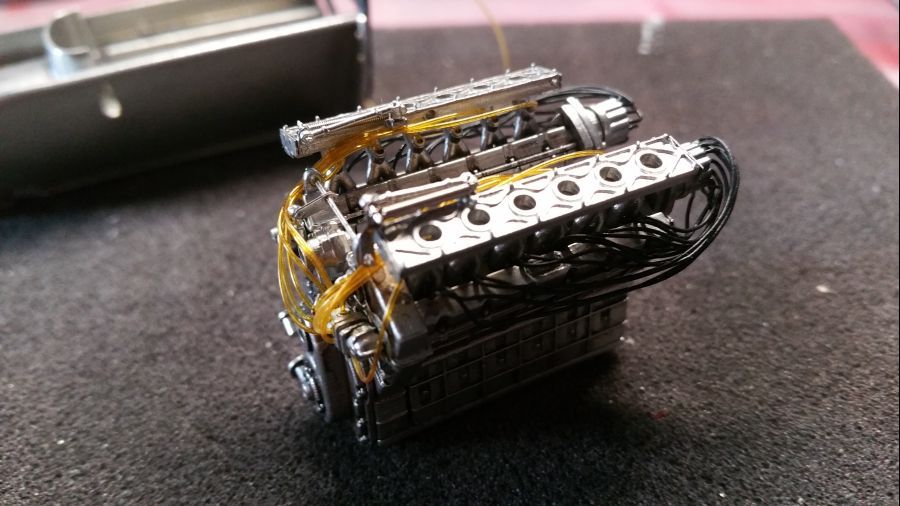
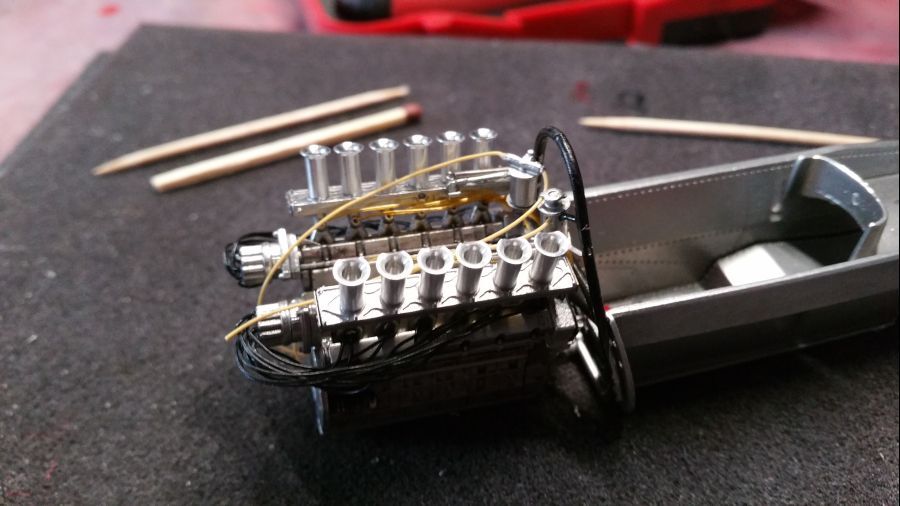
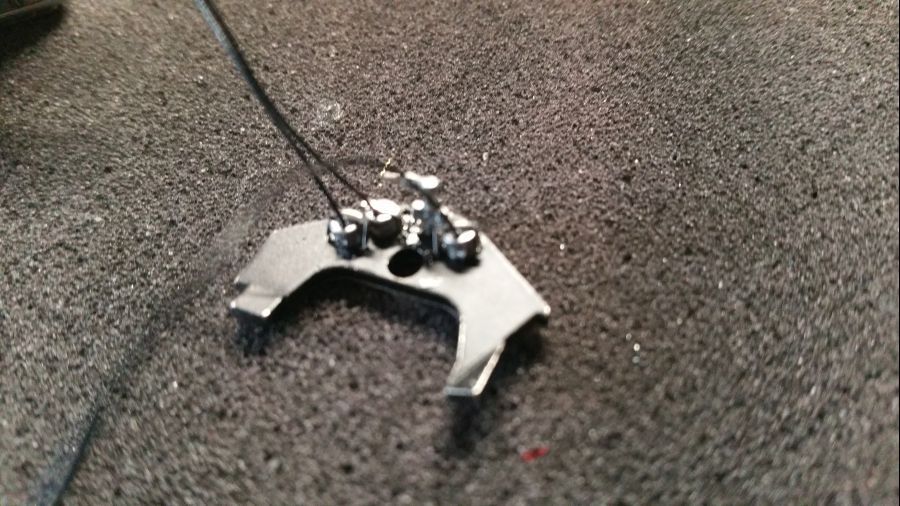
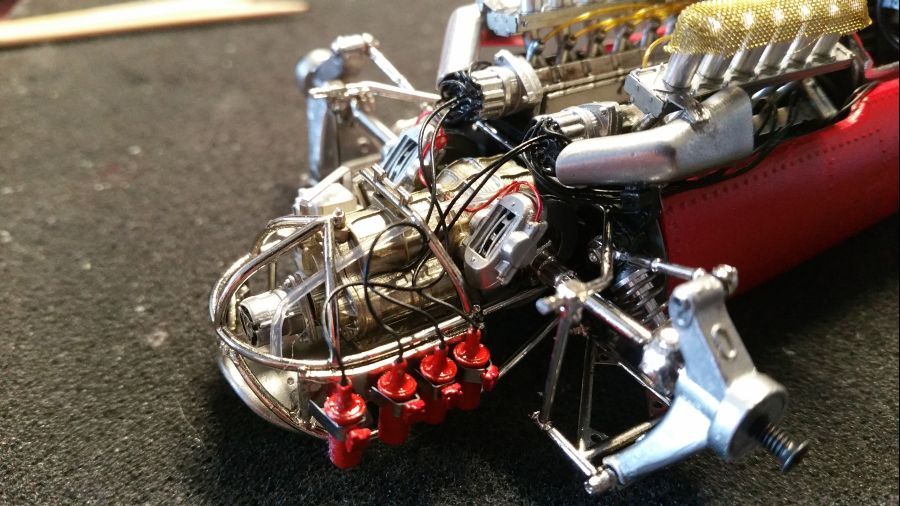
Dan de benzineleidingen... van de benzinepomp naar de injectoren...
Then the fuel lines... from the fuel pump to the injectors...
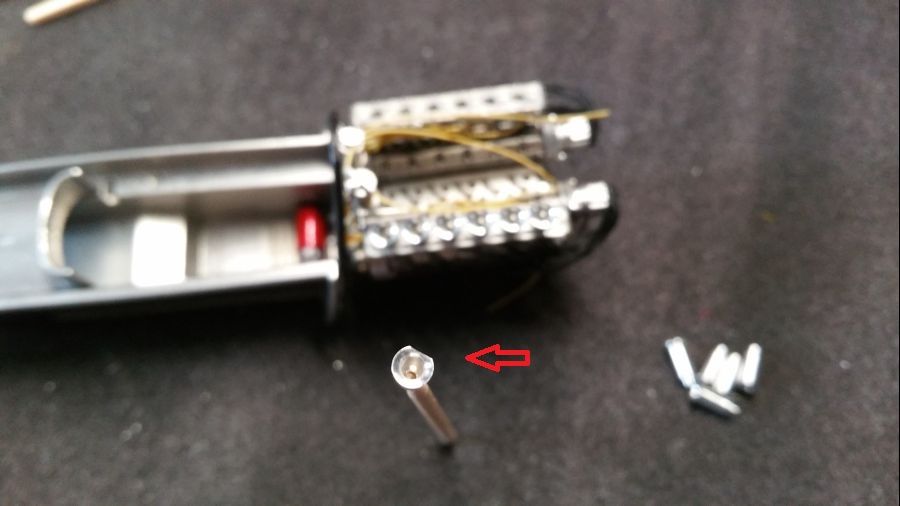
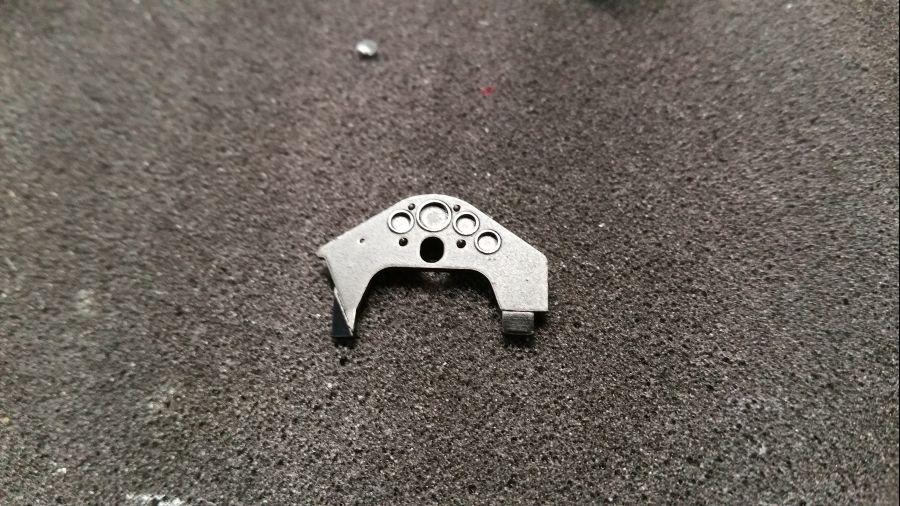
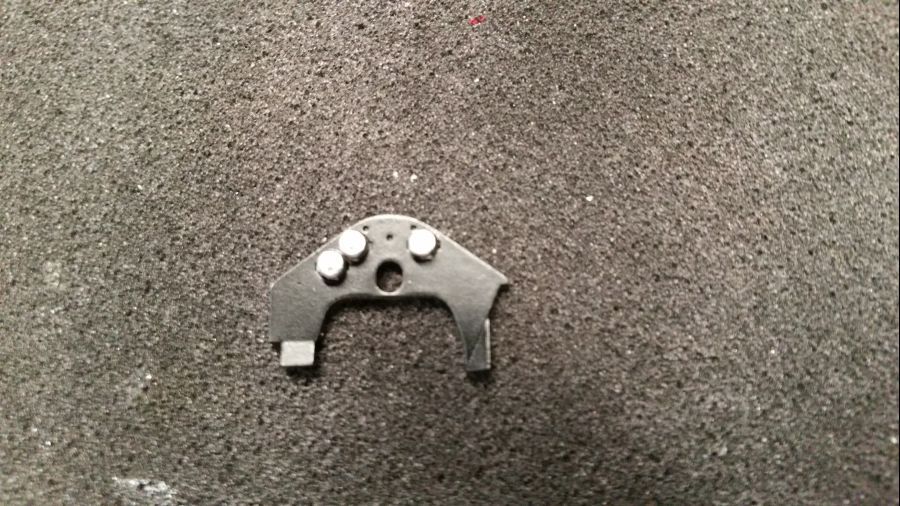
Nu weer wat meer werk aan het snelheidsregelsysteem...
Now more work to the throttle system...
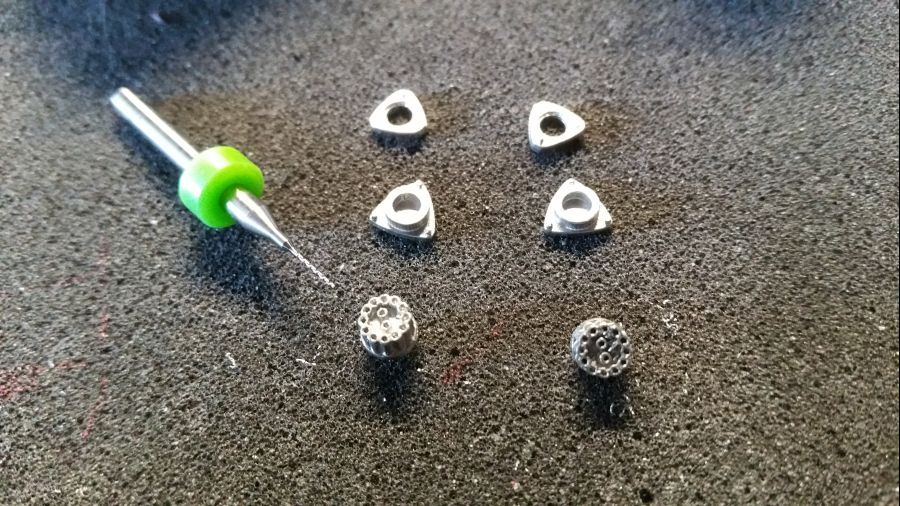
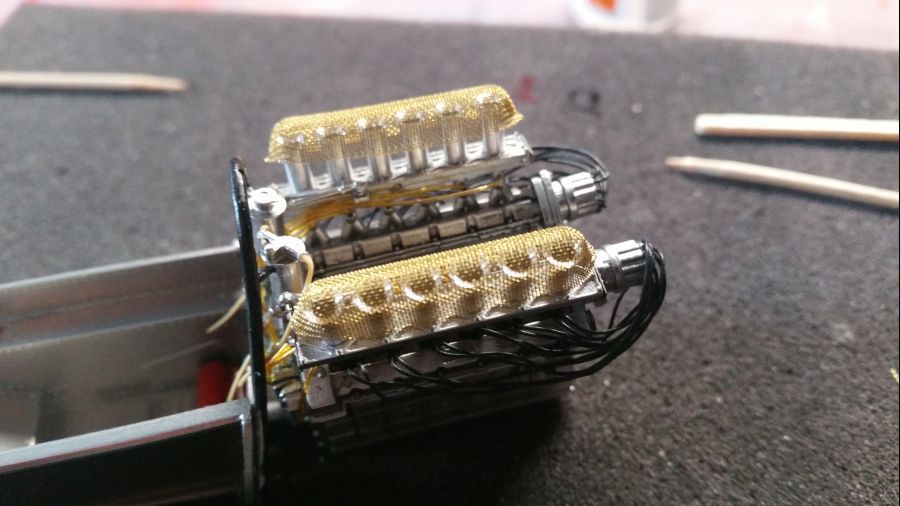
Leuk om te weten dat MFH erop vertrouwde dat ik de Monaco versie zou maken. Voor de Nederlandse of Belgische versie waren dit niet de juiste trompetten. Deze zouden dan rond moeten zijn. Die zijn niet bijgevoegd, hoewel er op de tekening wel melding van wordt gemaakt.
Nice to know MFH trusted me to make the Monaco version. If i would make the Dutch or Belgian version this would not be the correct funnels. They should be roud. These are not included in the kit, though they mention the difference in the instructions.
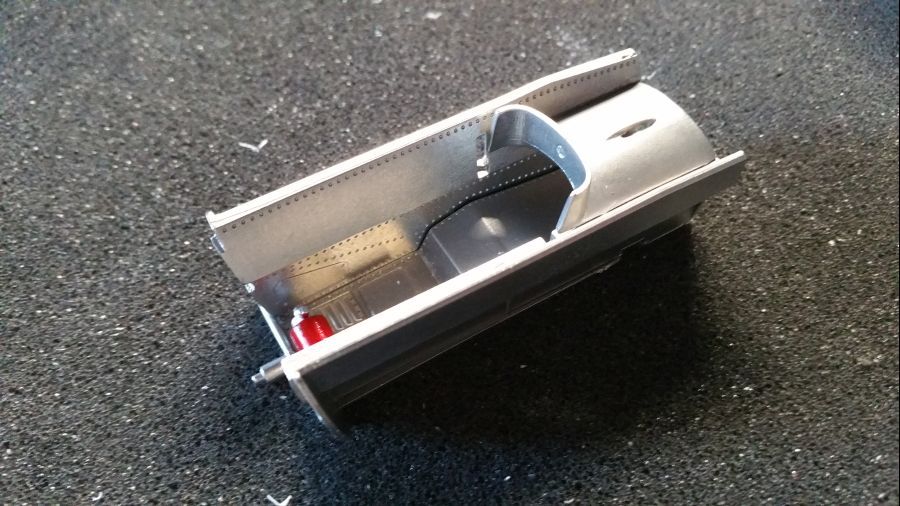
Verder met het werk aan het dashbord...
Continuing with work on the dash...
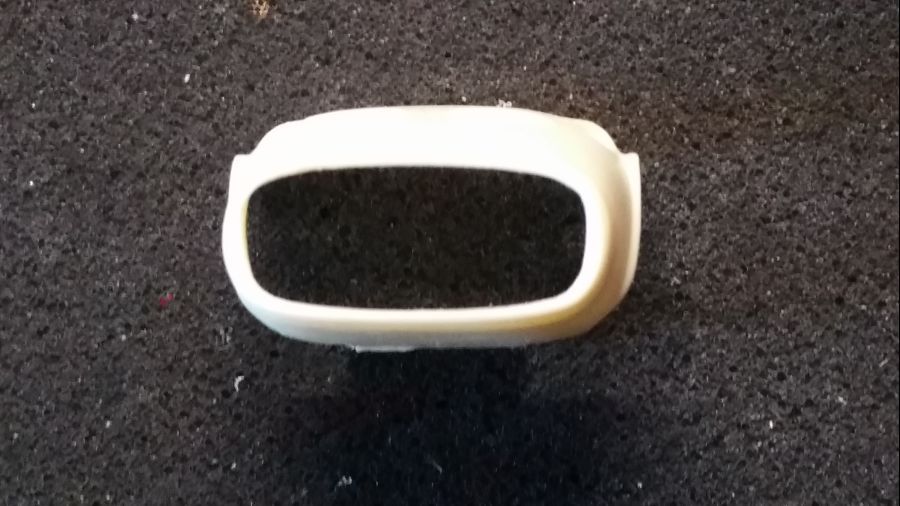
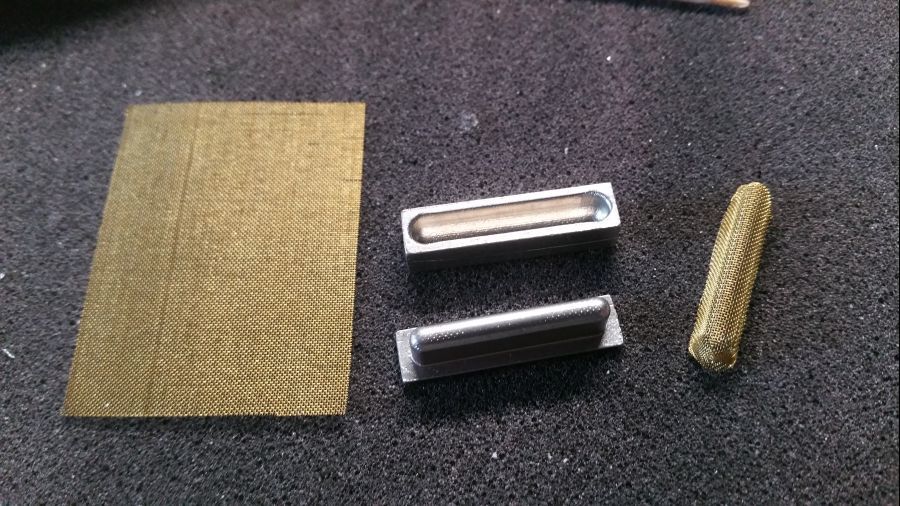
De lijm even laten drogen. Daarom ga ik eerst verder met de afdekking van de trompetten. Vanuit een stukje gaas moeten 2 covers worden gemaakt met behulp van een mal. Niet echt moeilijk, wel even oppassen met het afknippen van de randen.
Let the glue dry for a while. That's why i will continue with the covers for the velocity stacks. By using a piece of hardware one can make 2 covers out of a piece of mesh. Not really difficult, but be alerted when cutting it to size.
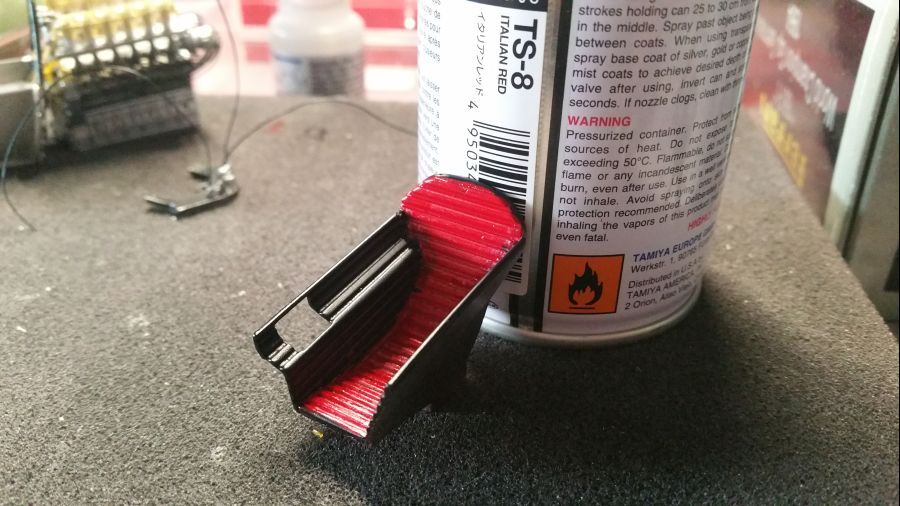
De stoel moet een combinatie worden van rood en zwart. Dat waren de kleueren voor de stoel van Lorenzo Bandini. De Chris Amon versie was helemaal zwart. Ik ga voor alle zekerheid nog even naar wat foto's zoeken.
The seat should be a combination of red and black. Those were the colours for the seat of Lorenzo Bandini. The Chris Amon version was all black. To be sure i will have a look at some more pics.
Een template maken voor het maskeren later.
Creating a template for masking at a later time.

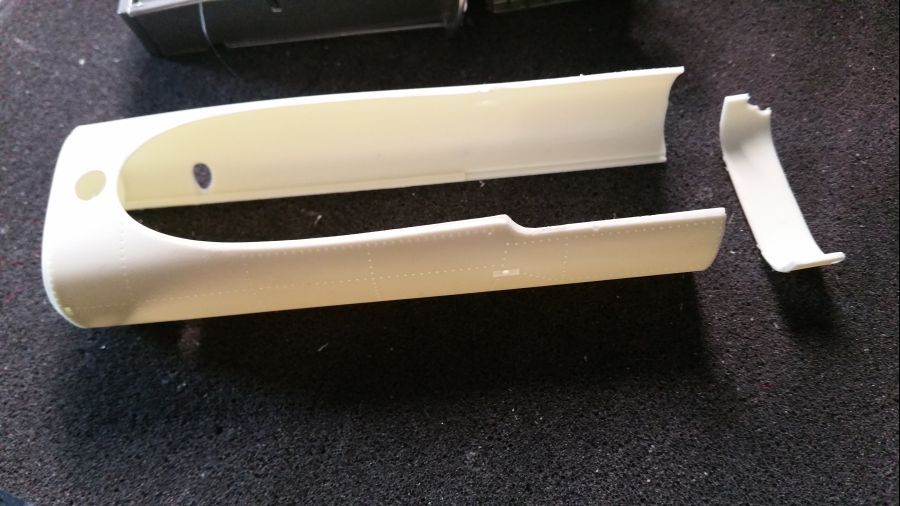
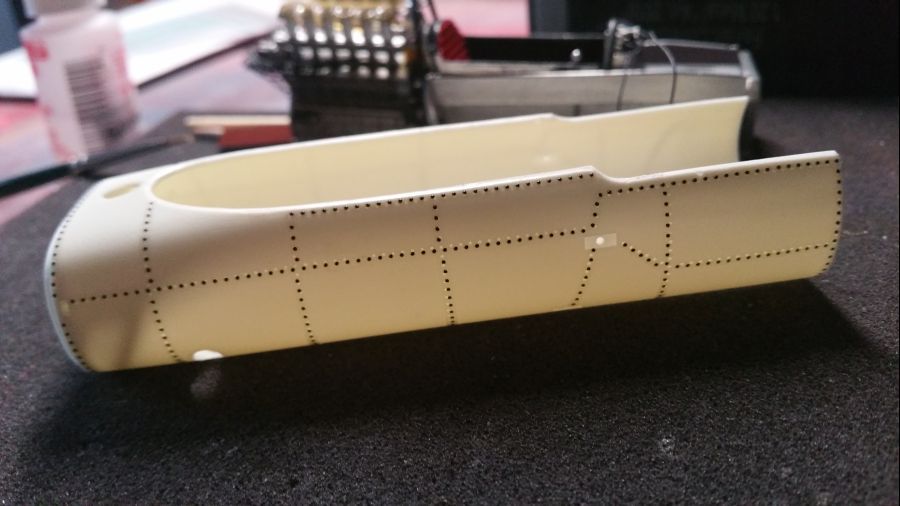
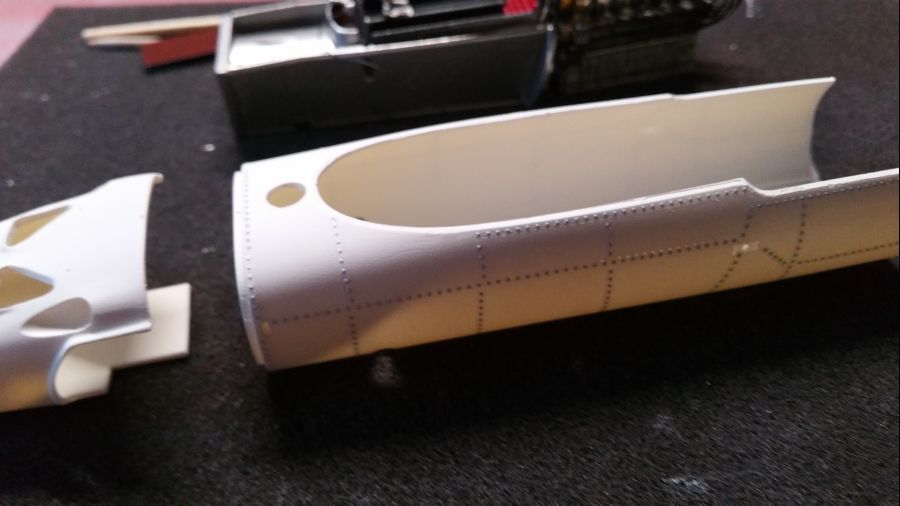
Nu eerst verder met de romp. Een overbodig deel wordt afgezaagd. Daarna volgt het aanbrengen van de popnagels. Ook deze keer gebruik ik weer de Archer transfers.
Now continue with the hull. A redundant piece has been cut off. Then the riveting starts. Also this time i will use the Archer transfers.


Dan de grondverf...
Then the primer...
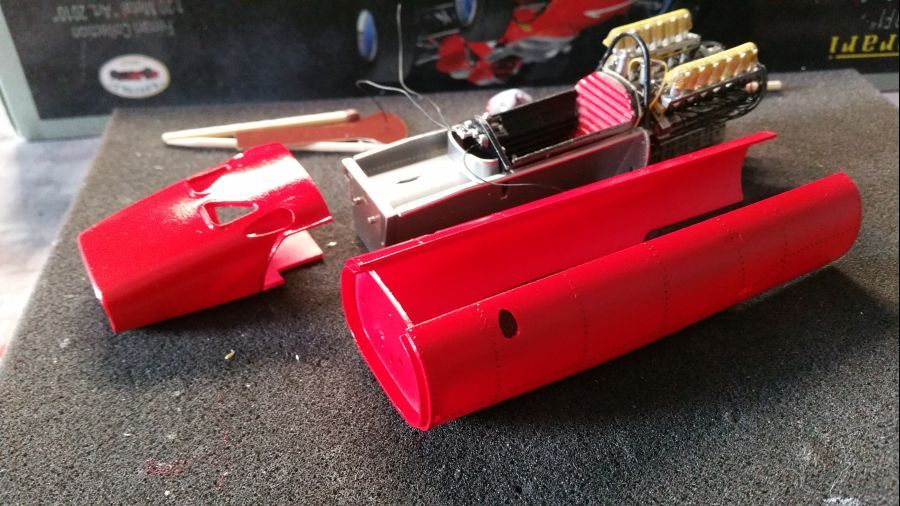
Het rood en de glanslak zitten erop. Ik heb weer Zero Paints gebruikt. Deze keer de net nieuwe kleur ZP-1007 1960's Rosso Formula 1. De kleur is iets donkerder dan de 1970's versie. Nu eerst goed laten drogen.
The red and the clear coat gloss have been airbrushed. Again i have use Zero Paints. This time the new colour ZP-1007 1960's Rosso Formule 1. The colour is slightly darker than the 1970's version. Now let it dry thoroughly.
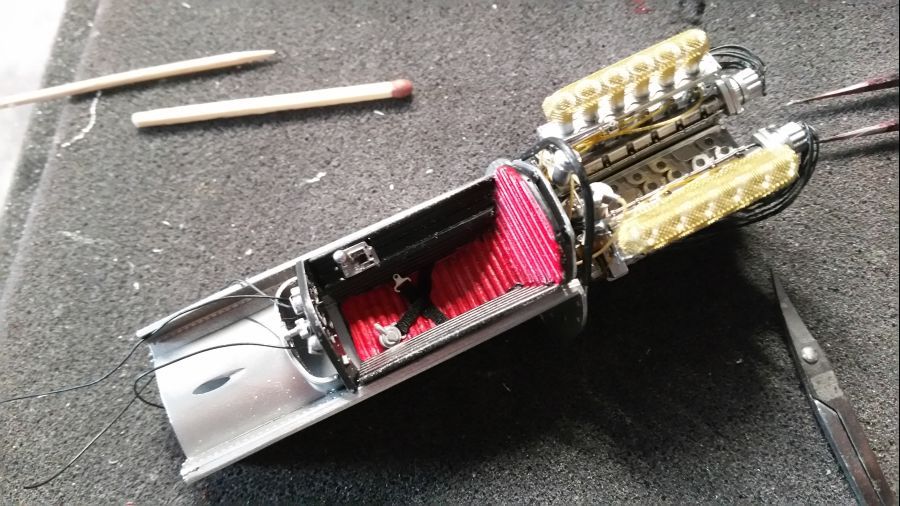
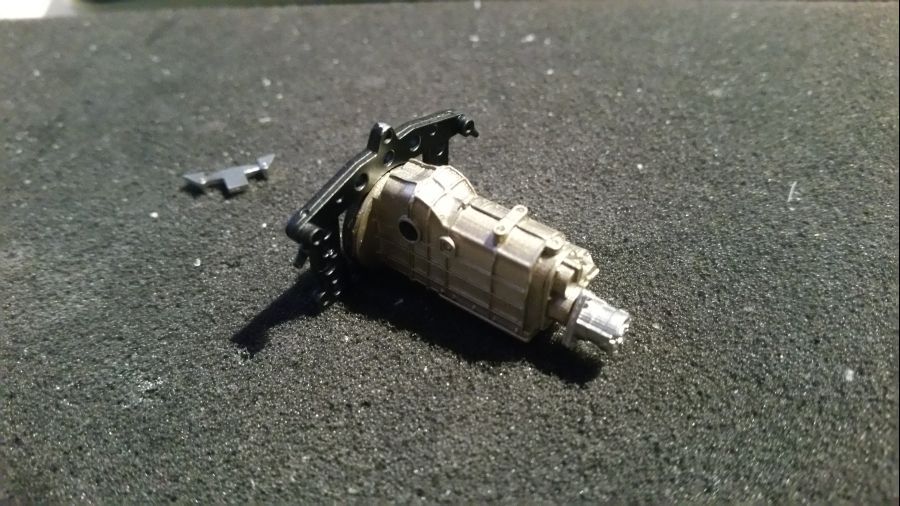
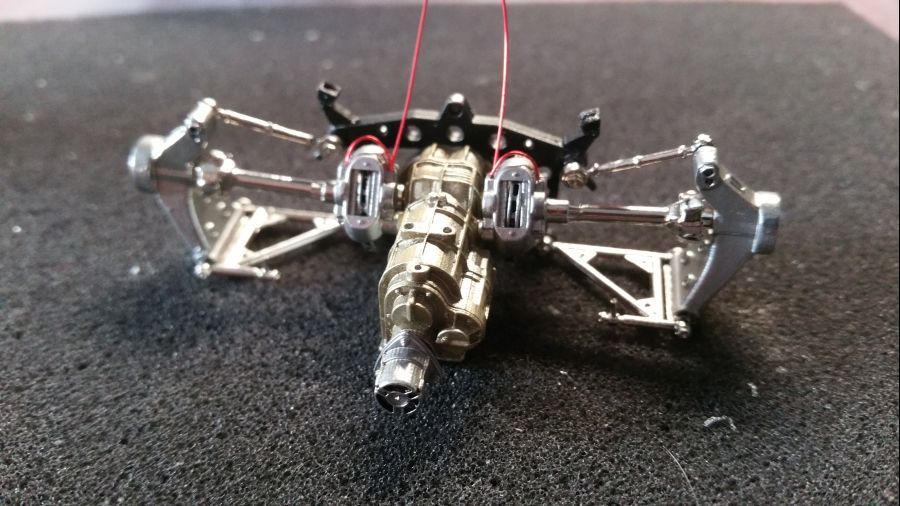
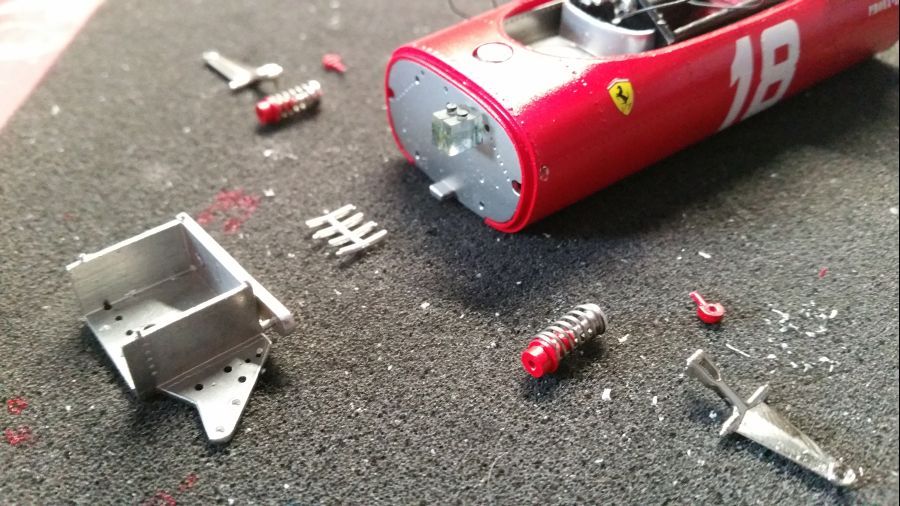
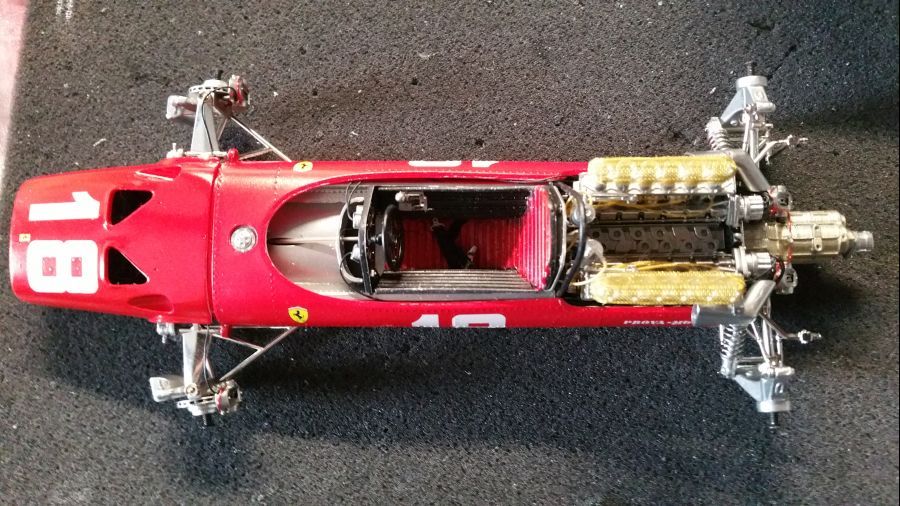
Terwijl de verf droogt, de decals nog moeten worden geplaatst en nog eens glanslak moet worden gespoten, kan ik niet met de voorkant van de wagen aan de gang. Daarom begin ik nu vast met de versnellingsbak en de achterwielophanging. Wat zwart en titanium goud gespoten op een paar onderdelen.
While the paint dries, the decals need to be applied, and another coat of gloss clear needs to be sprayed, i cannot continue with the front of the car. Therefore i am now starting with the gear box and rear wheel suspension. Some parts got their black and titanium gold.
Eerst wordt wat detail aan de remschijven aangebracht. De zijkanten zijn uitgeboord en een beetje verf is aangebracht.
First some detail to the brake discs was applied. The sides were drilled and some black paint was applied.
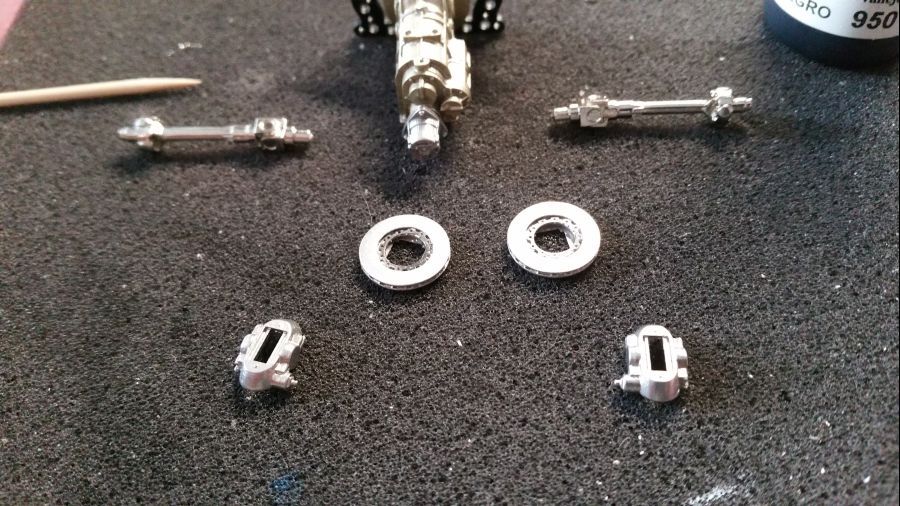
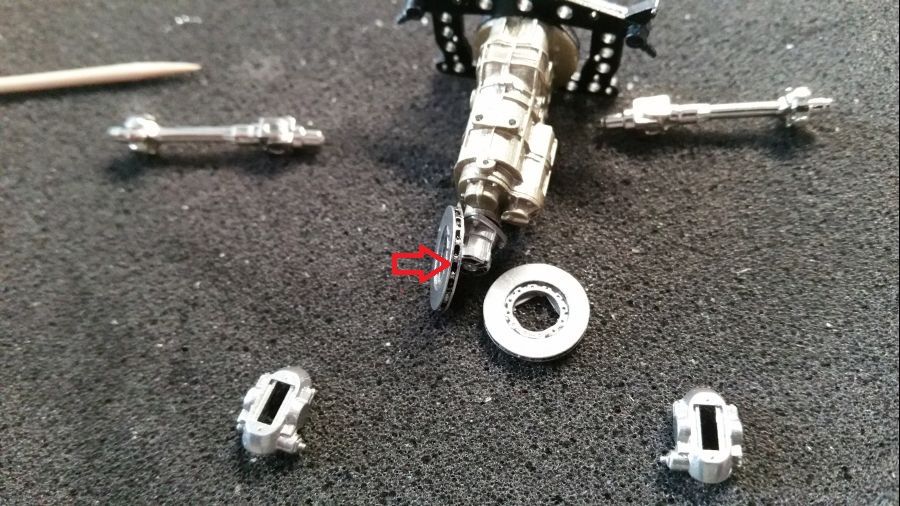
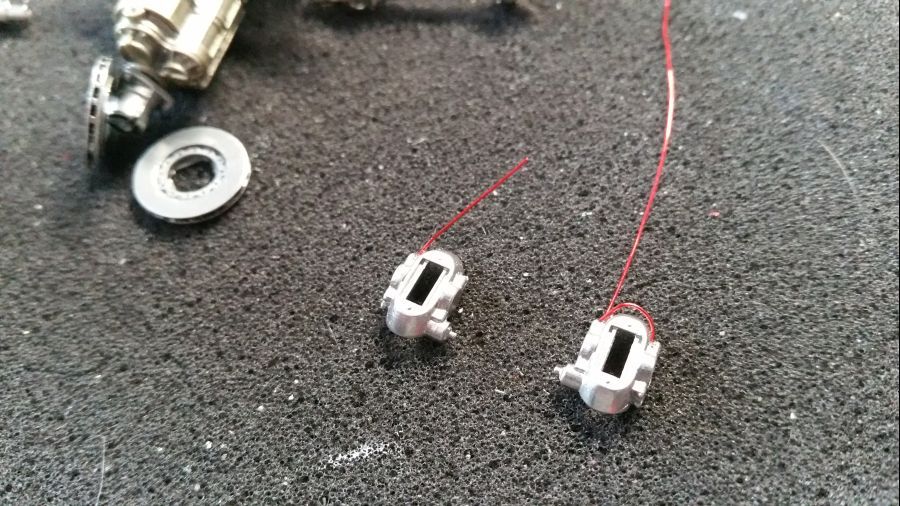
Ik ga nu remleidingen maken voor de remklauwen. Daarvoor heb ik een paar 0.35 mm gaatjes geboord en de draadjes erin gelijmd.
Now i will make the brake lines for the brake calipers. I drilled some 0.35 mm holes for this and glued the wires in.
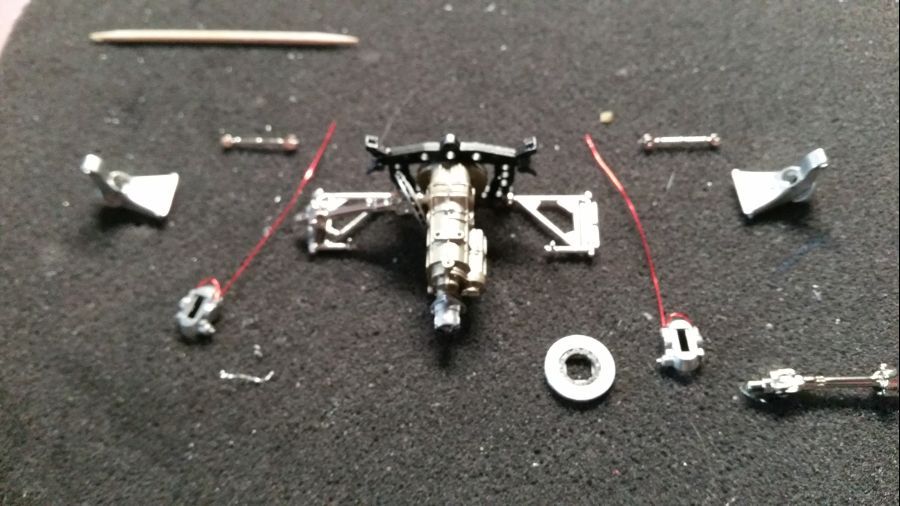
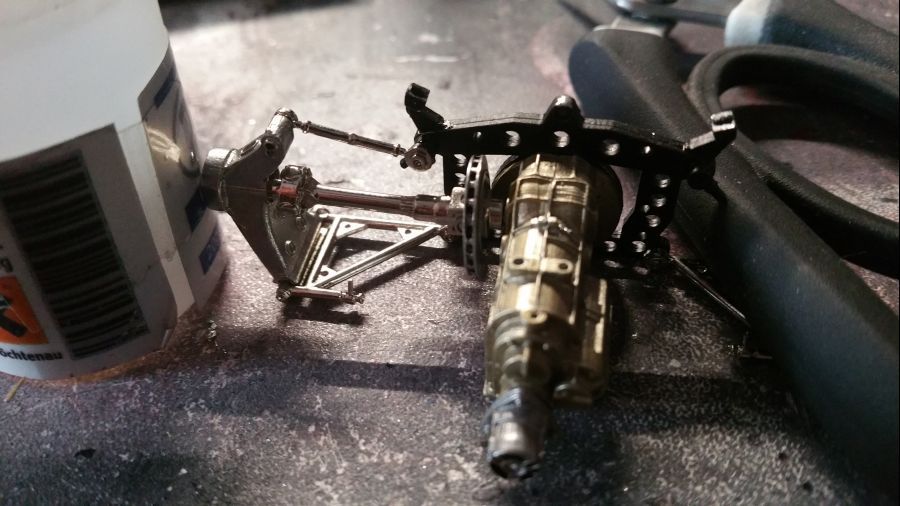

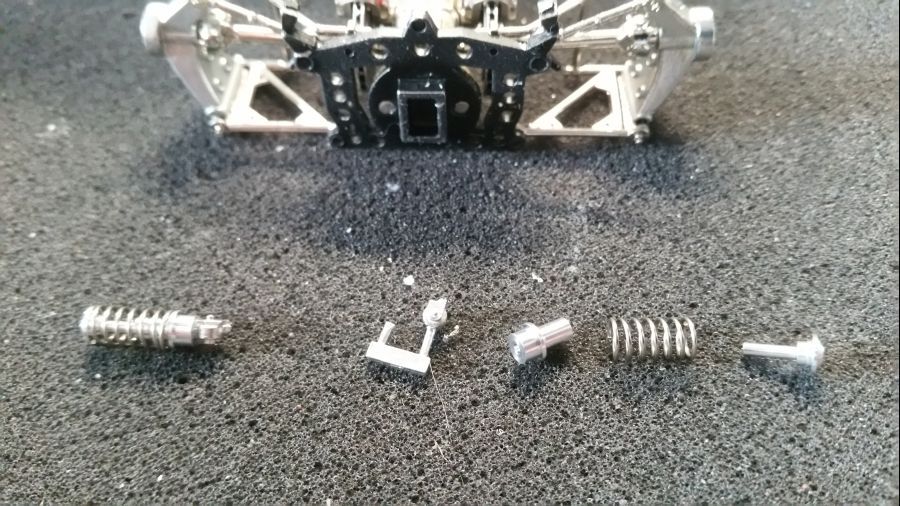
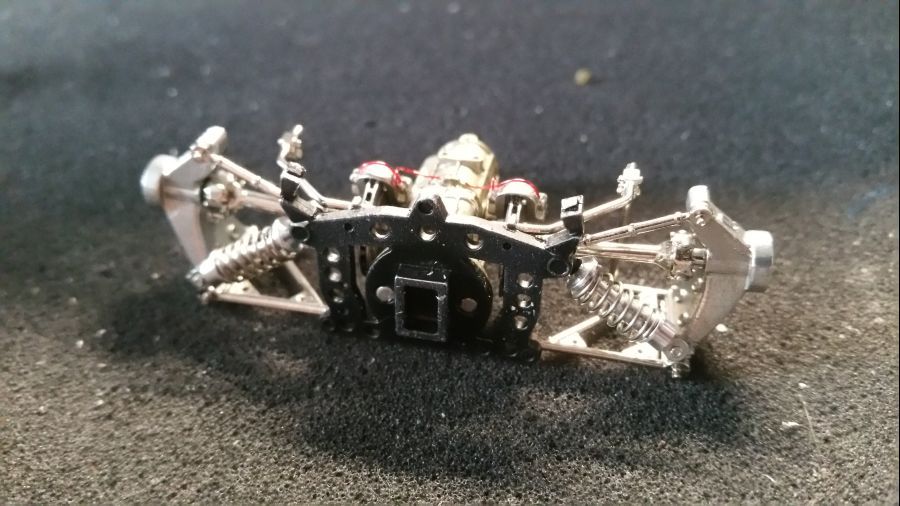
Daarna worden de schokbrekers in elkaar gezet en geplaatst. Volgens de foto's waren de schokbrekers deze keer gewoon zilver, heel misschien een beetje goud, zeker niet rood. Ik laat het voor wat het is.
Then the shocks are assembled and attached. According to the pictures the shocks were silver, maybe a bit goldish, certainly not red. I will leave it like this.
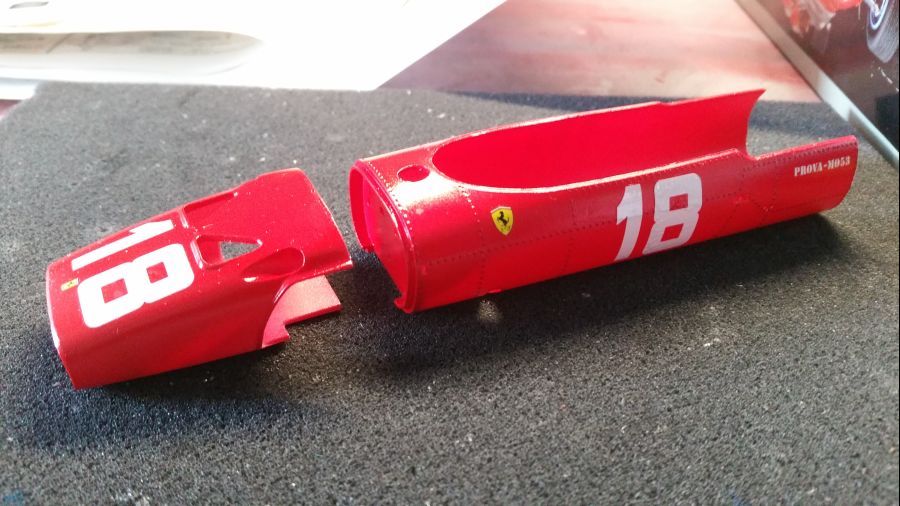
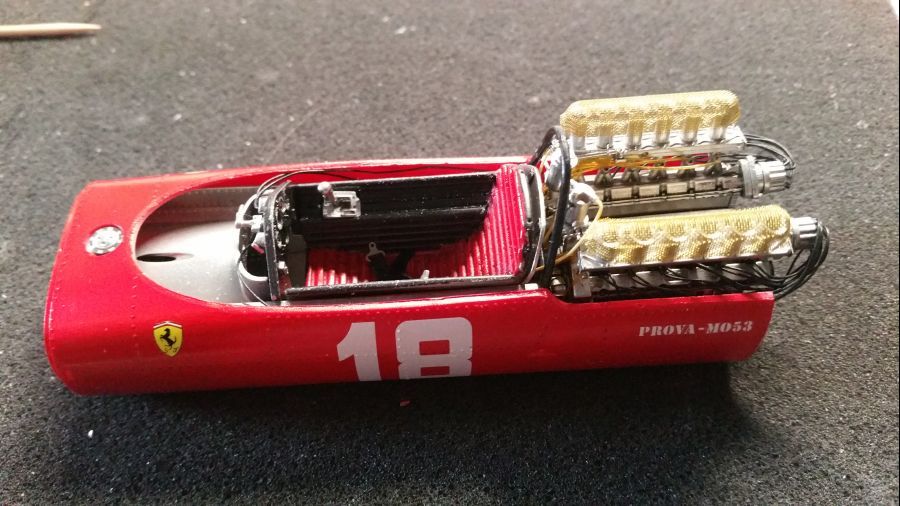
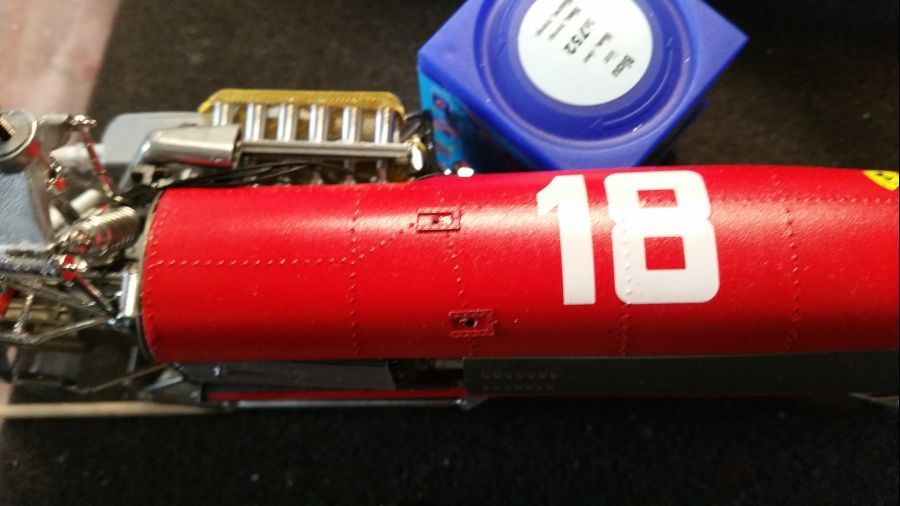
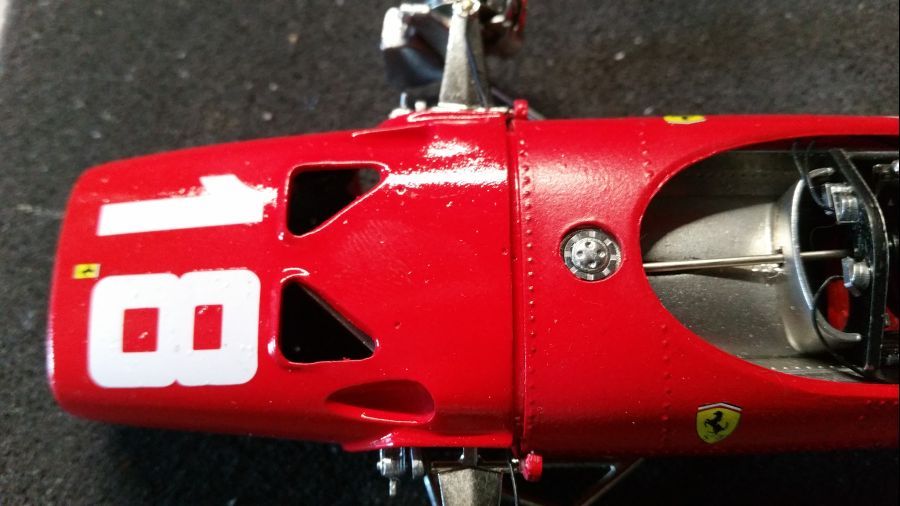
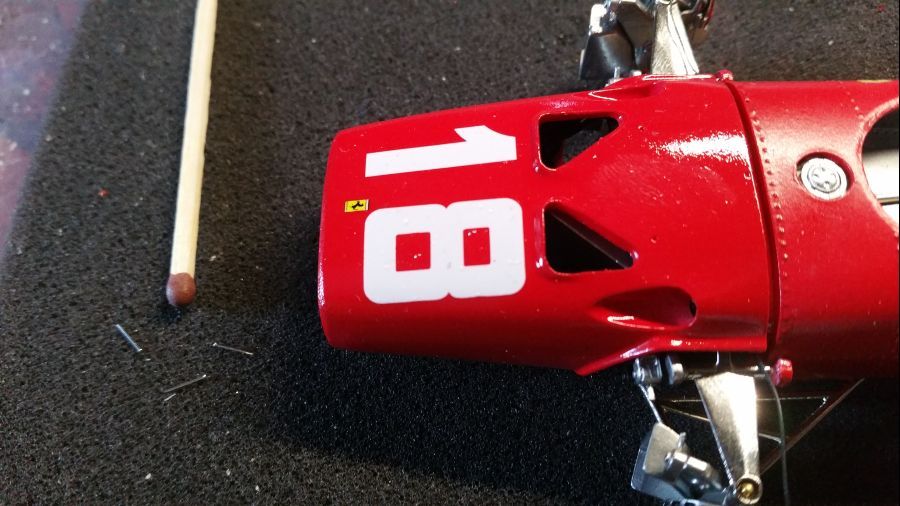
Dan krijgt de body de benodigde decals. Niet veel bijzonders te melden. Let er wel op dat de cijfers op de neus een beetje uit balans moeten worden geplaatst. Dan weer een paar lagen glanslak, dus weinig vooruitgang...
Then the body gets it's decals. Nothing special. Please be sure the digits on the nose need to be applied a little off set. Then a couple of layers of gloss clear, so not much progress...
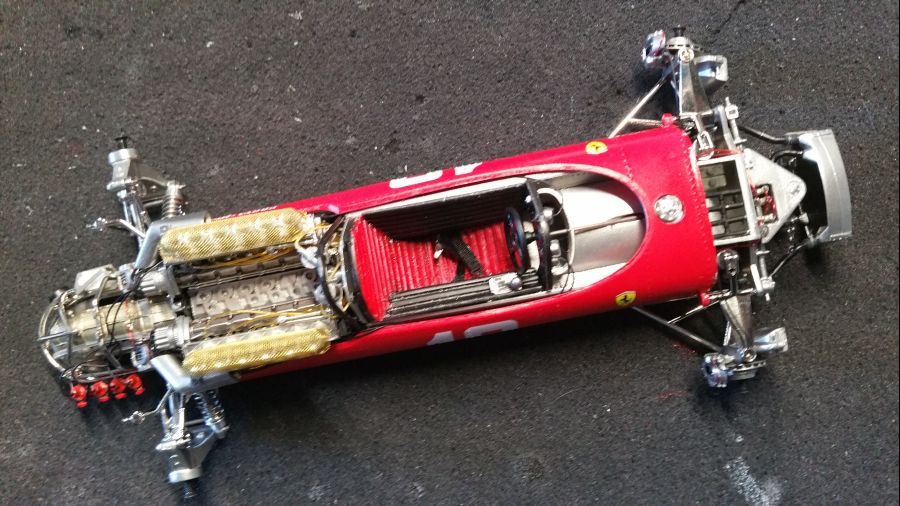
Na de lak kan de body met de kuip worden verbonden...
After the clear coat the body can be attached to the tub...
Dan kunnen de zijwanden erop...
Then the side walls can be attached...

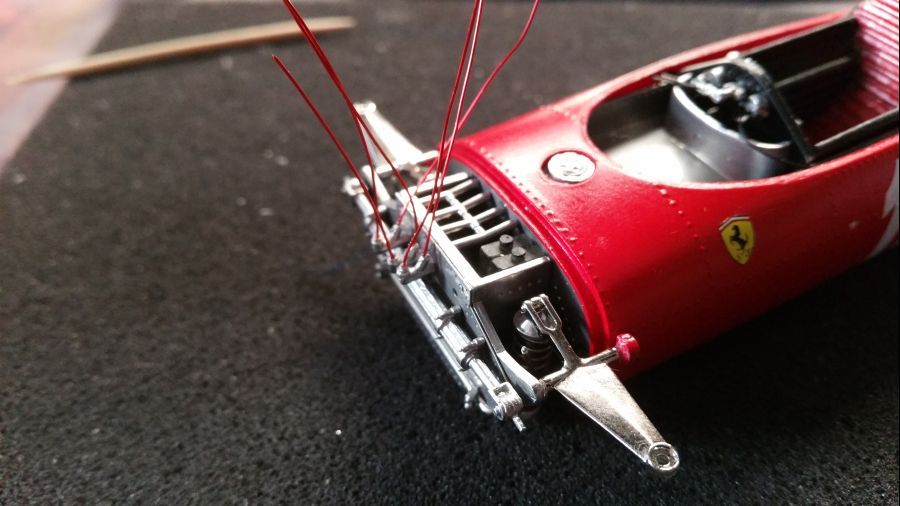
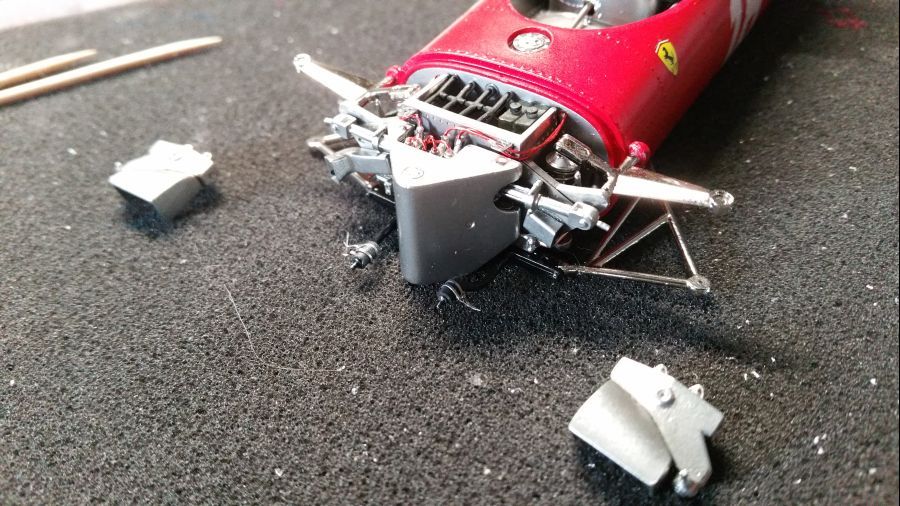
Nu is het tijd voor de voorkant en de voorwielophanging...
Now it's time fro the front and the front wheel suspension...
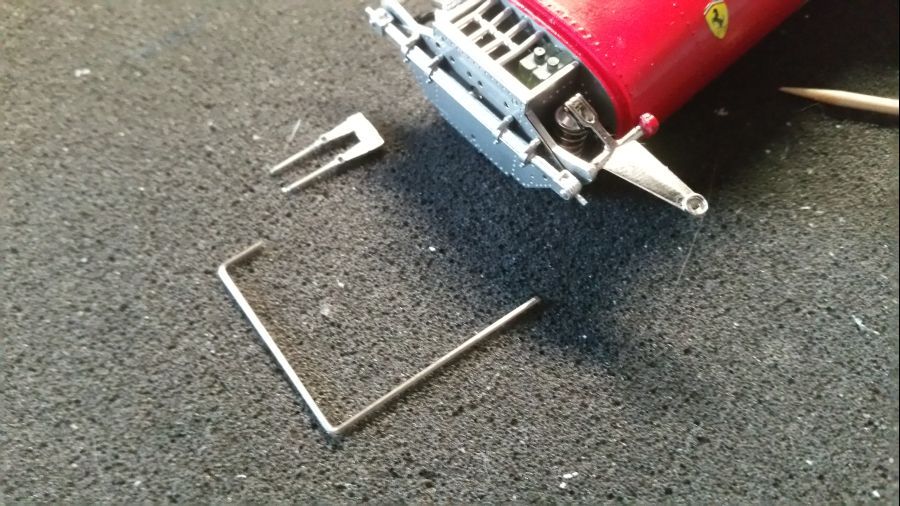
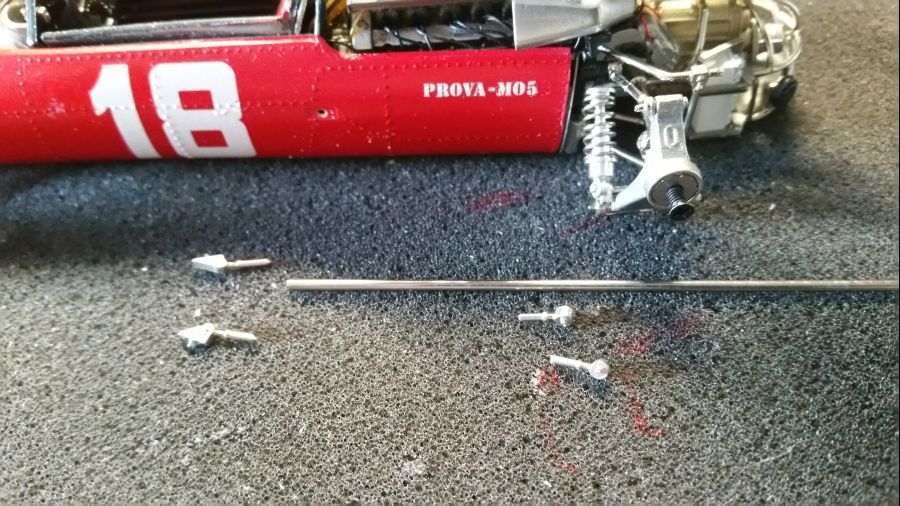
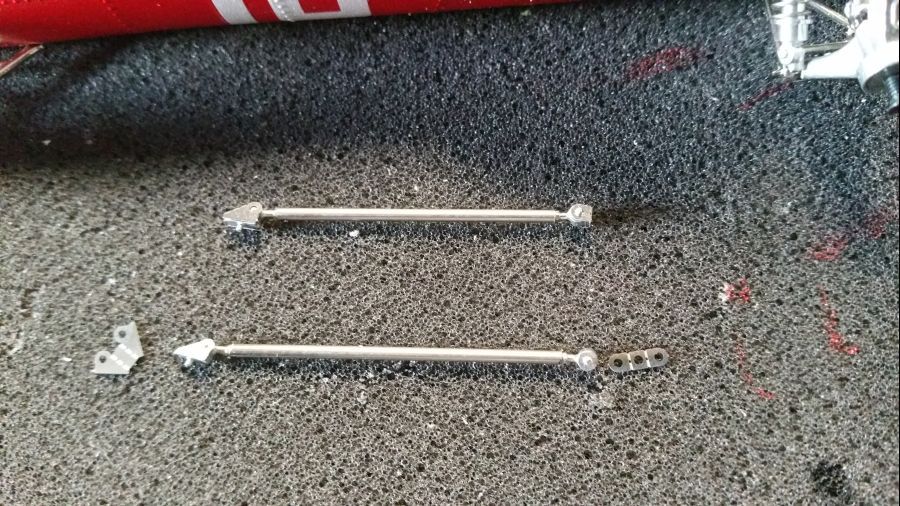
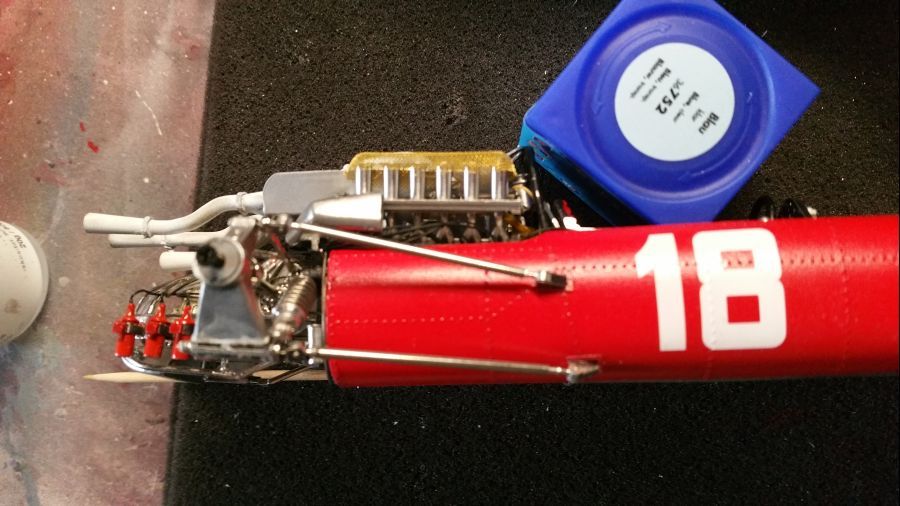
Wat extra bedrading...
Some extra wiring...
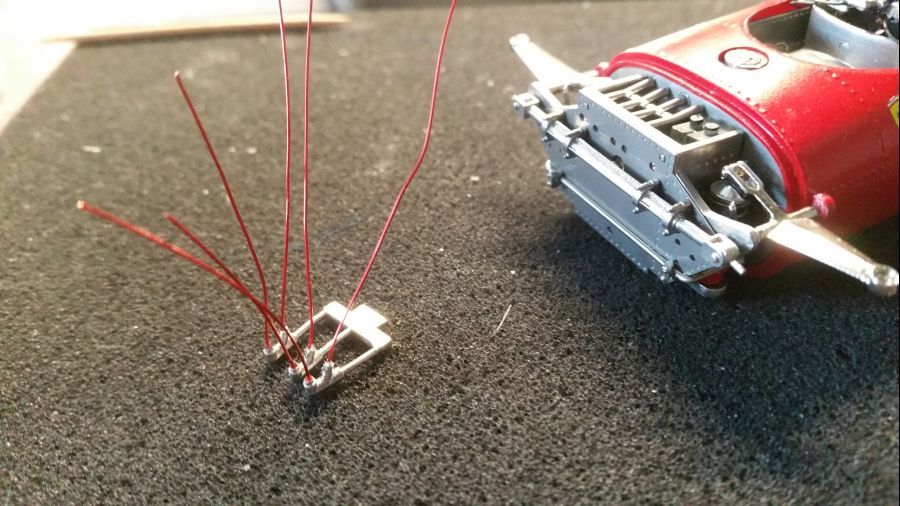
Dan de tie raps maken.... Deze moeten over de krimpkous.
Next is creating the tie raps.... They will go over the shrink tube.
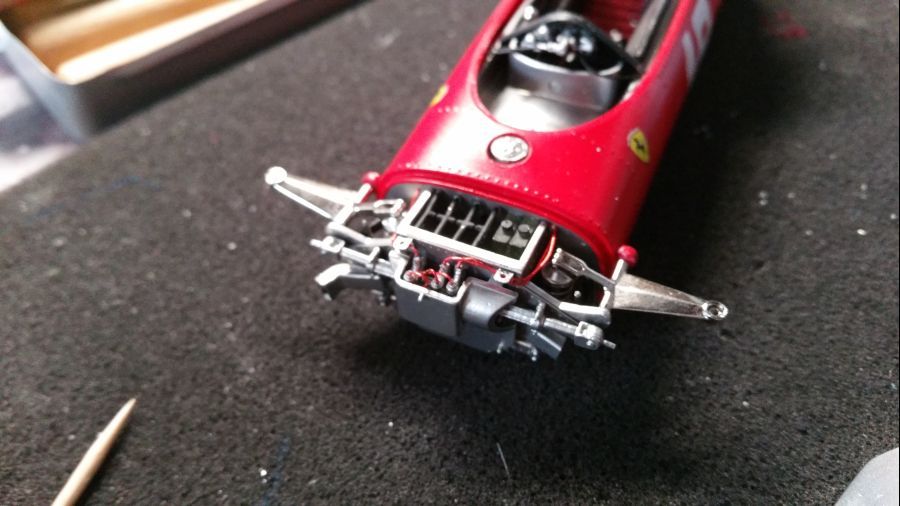
De onderste draagarmen worden gemonteerd en daarna de vloer.. Volgens MFH moet de vloer rood worden gespoten. Mijn foto's laten een zilverkleurige onderkant zien.
The lower suspension arms are mounted and then the floor.. According to MFH the floor needs to be painted red. My photo's show a silver coloured floor.

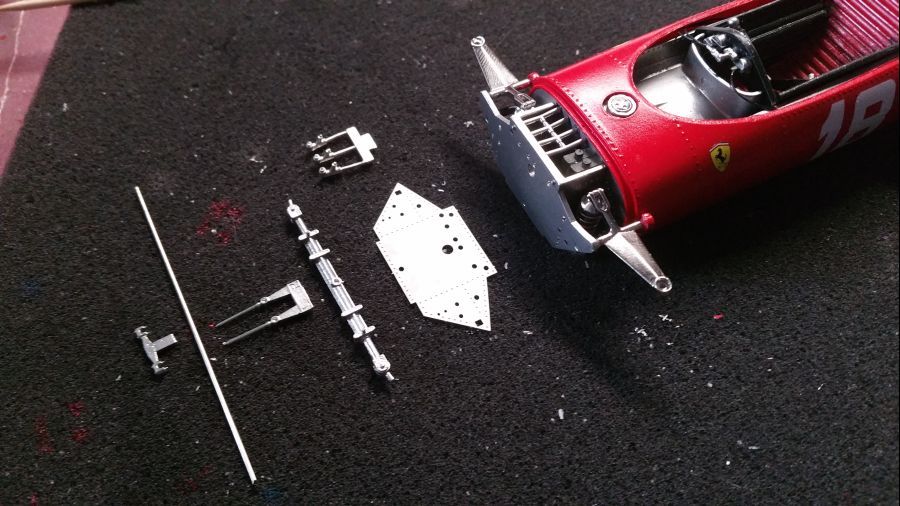
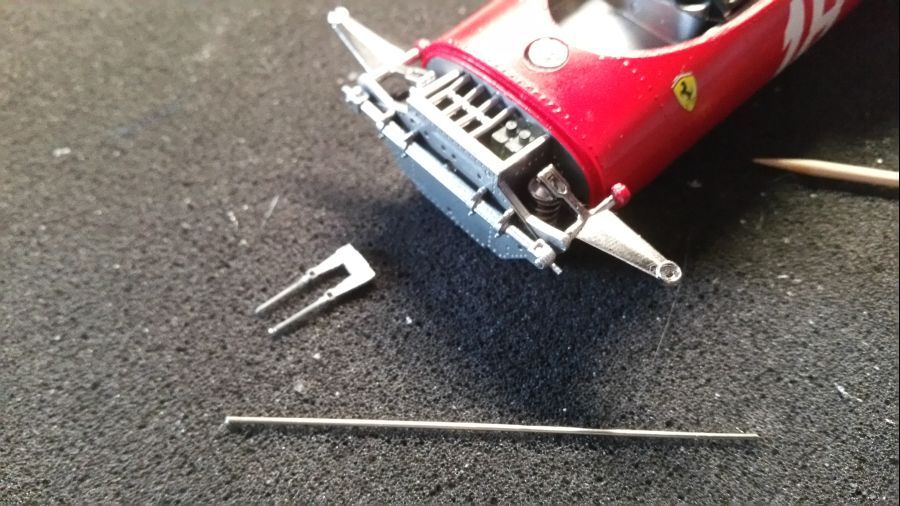
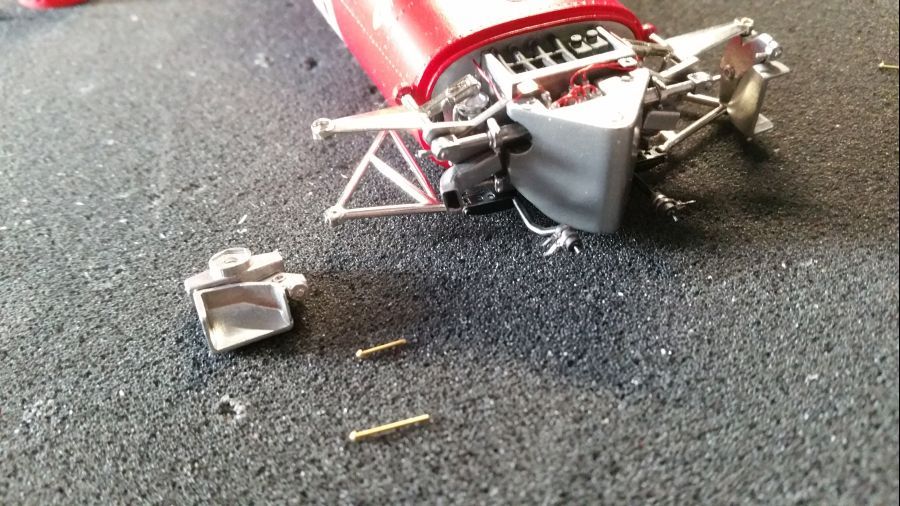
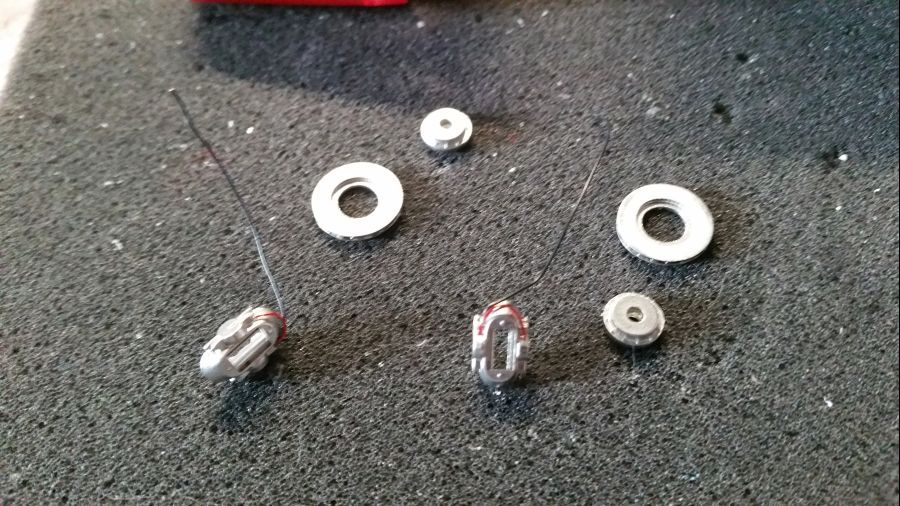
De stuurinrichting monteer ik met popnagels in plaats van de zwarte schroeven. Dit heeft mijn voorkeur. Met regelmaat werd bij het gebruik van de zwarte schroeven de boel verbogen. Daar heb ik nu geen last van.
The steering will be mounted by use of rivets instead of the black screws. I prefer this method. Many times the everything was bent when i used the screws. Now this problem is solved.
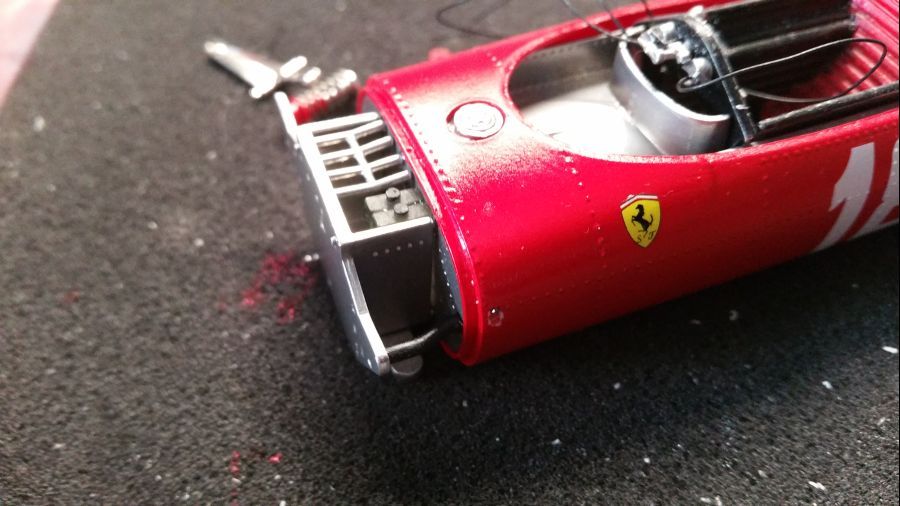
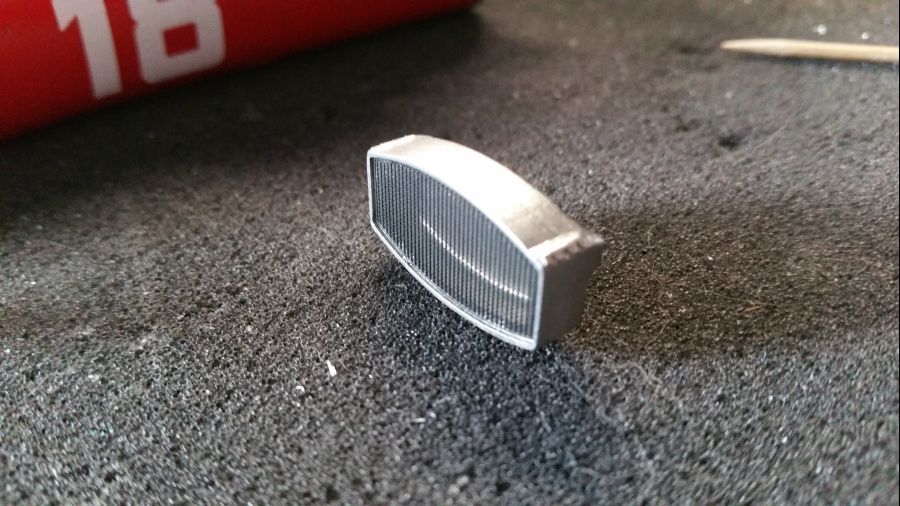
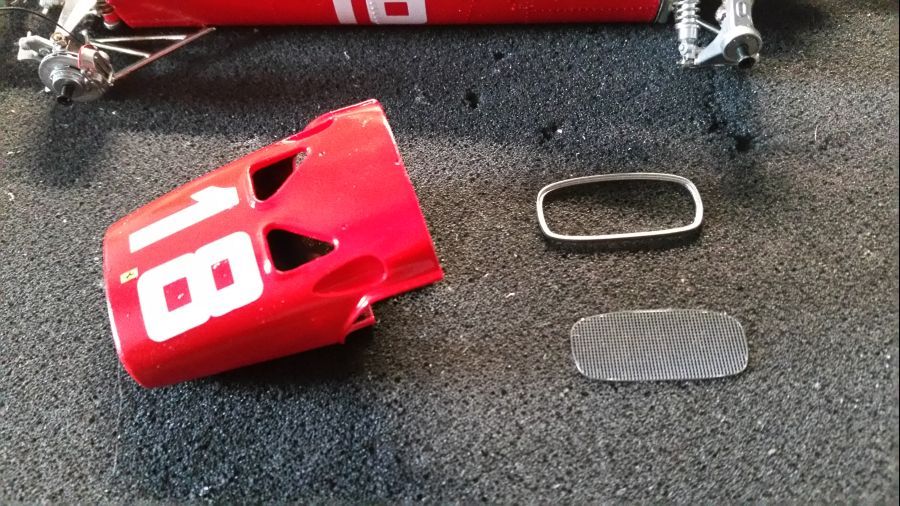
Nu verder met de voorkant...de koeling. Ik zie dat deze verschillende kleuren kan hebben. Mijn foto's laten een zilver frame met zwarte roosters zien, dus...
Now continue with the front...the cooler. I see this can have multiple colours. My photo's show a silver frame with black mesh, so...
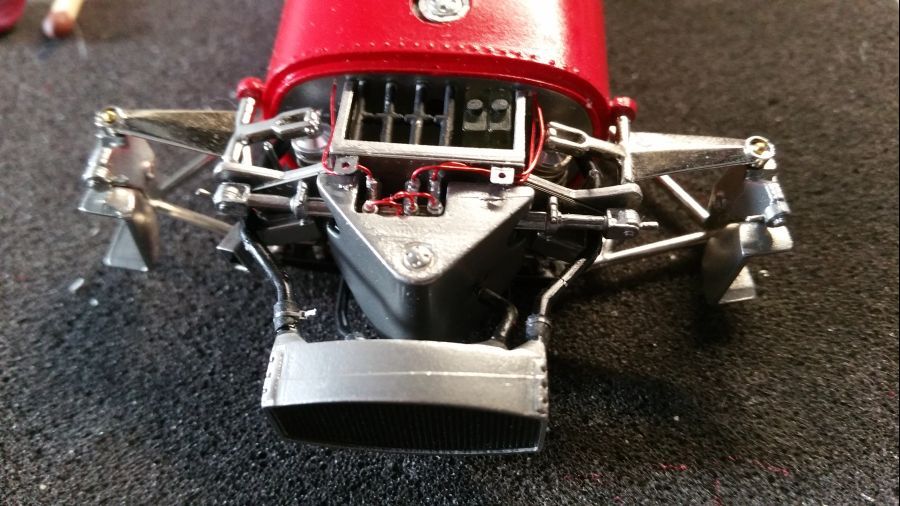

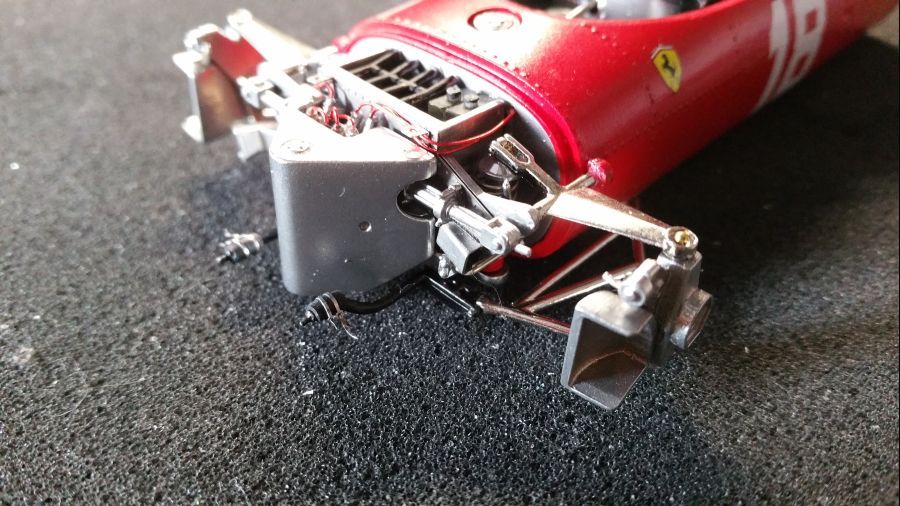
De remmen aan de voorkant ondergaan dezelfde procedure als die aan de achterkant. Dus gaatjes boren, verf in de gaatjes, leidingen aanbrengen.
The brakes for the front get the same procedure as those at the back. So drilling holes, paint the holes, adding brake lines.
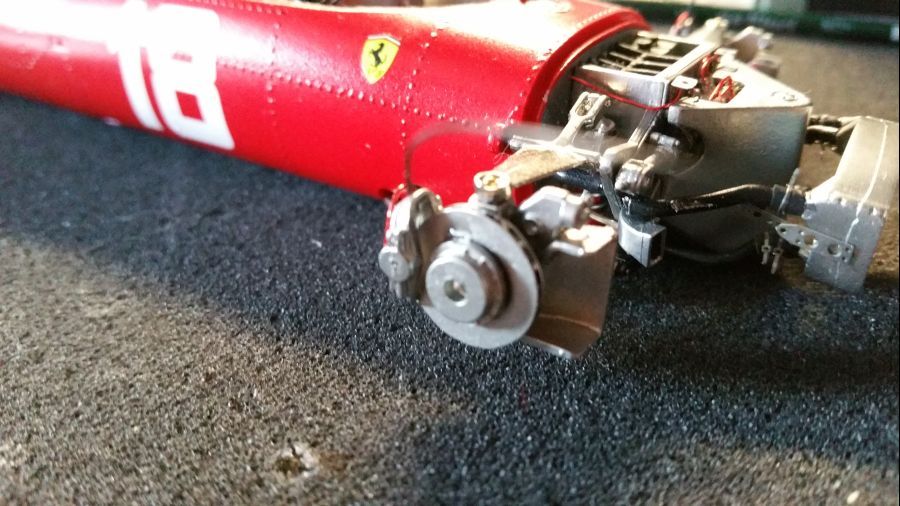
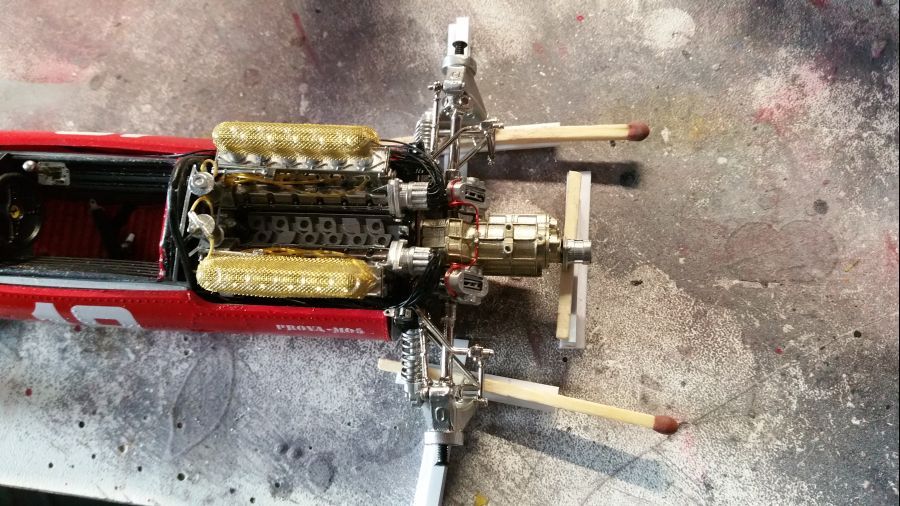
Daarna kan de versnellingsbak gemonteerd worden aan de motor... Uiteraard wordt alles ondersteund om te zorgen dat alles goed uitgelijnd is.
Then the gearbox gets attached to the engine... Of course everything is supported to make sure it's lined up correctly.
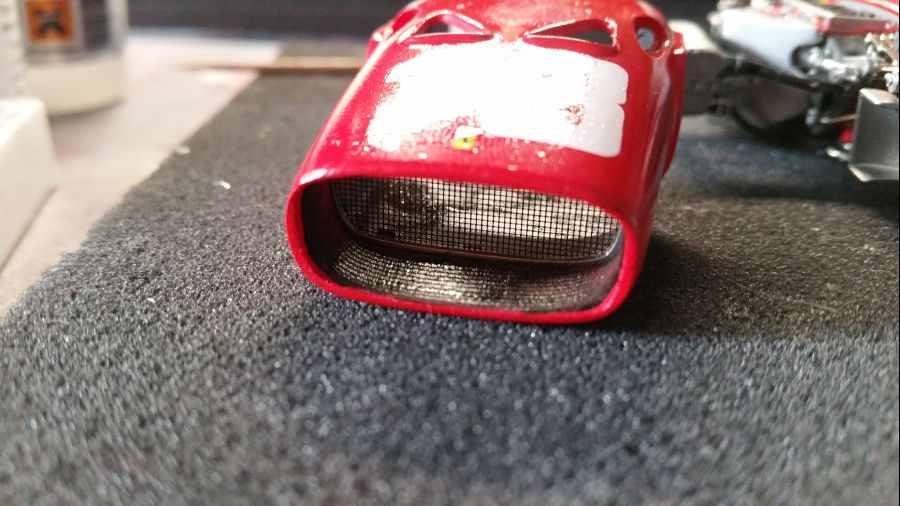
De neus wordt zwart geverfd van binnen, het gaas wordt zwart gespoten en het geheel wordt gemonteerd binnenin de neus.
The nose gets painted black on the inside, the mesh gets a black coat and everything is being mounted on the inside of the nose.
Dan worden de achterste luchthappers klaargemaakt en geplaatst..
Then the rear intakes are being prepared and put into place..
Even passen....het begint er op te lijken...
Test fit.... coming along nice i guess....
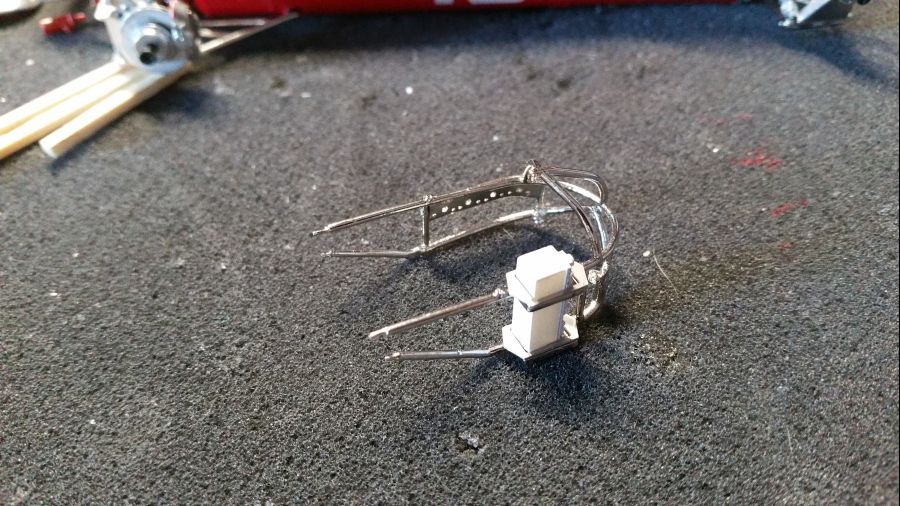
Nu verder met de beugels van de versnellingsbak met daaraan de accu enz. Een secuur werk..
Now i will continue with the brace around the gearbox and the battery etc. A delicate job..
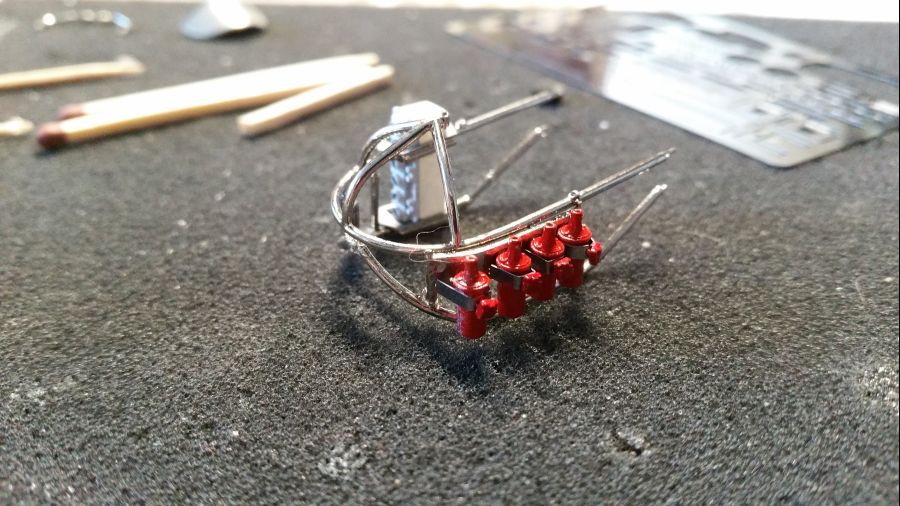

Vervolgens wat meer leidingen aan de achterkant...
Then some more tubes added to the back side...
Tot nu toe...
So far...
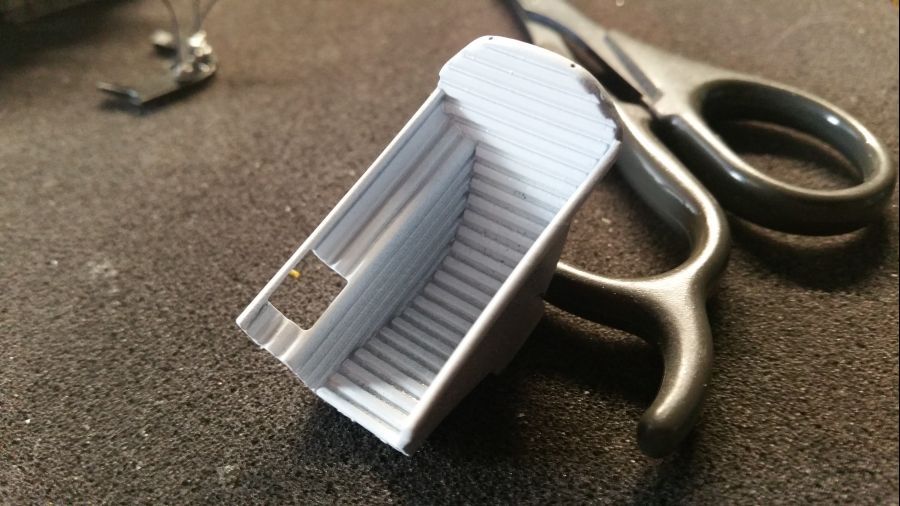
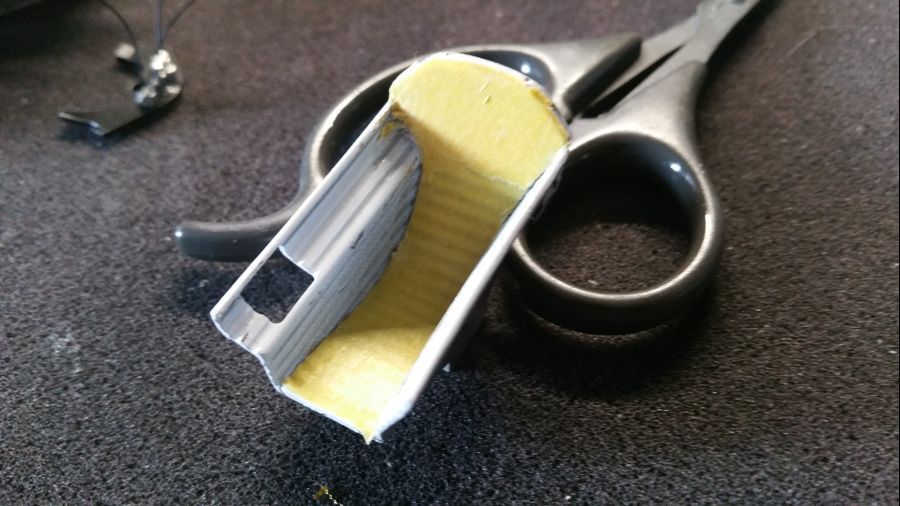
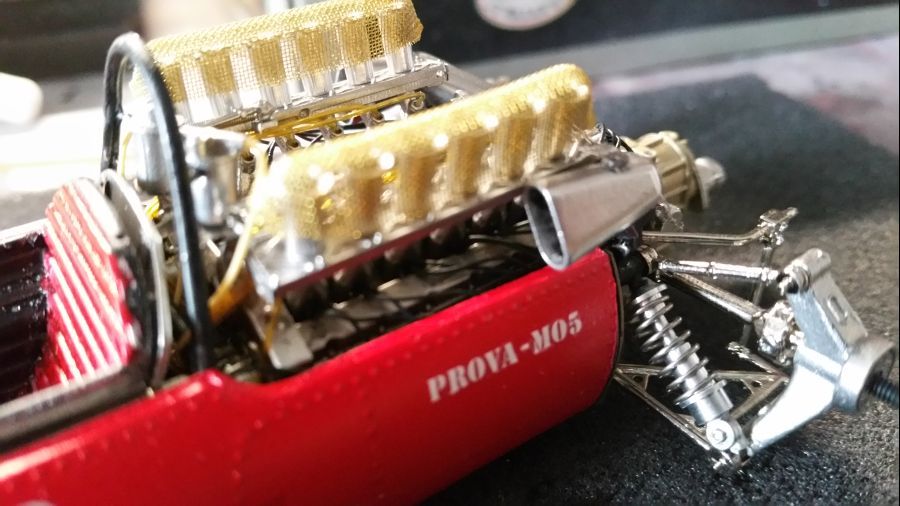
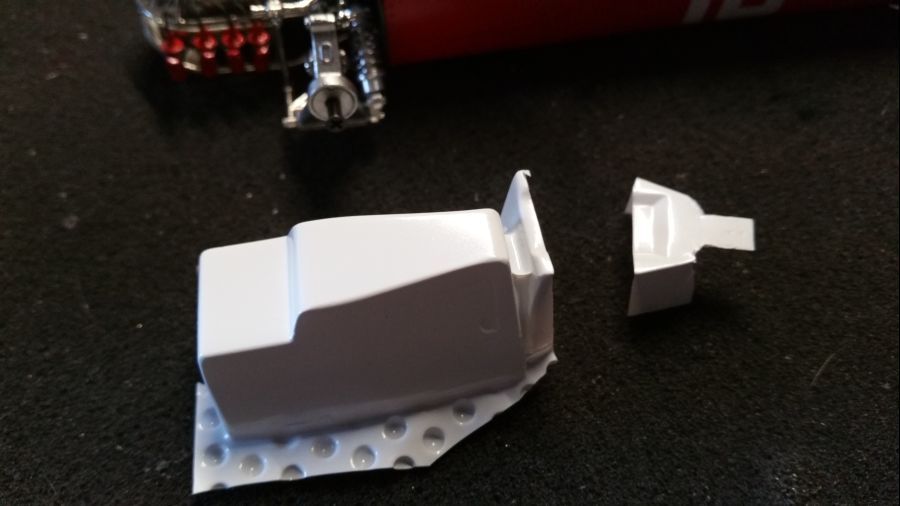
Nu moet het vacuumvorm op maat worden geknipt om de hitteschilden voor de uitlaten te maken.
Now the vacuum form needs to be cut to create the heat shield for the exhausts.
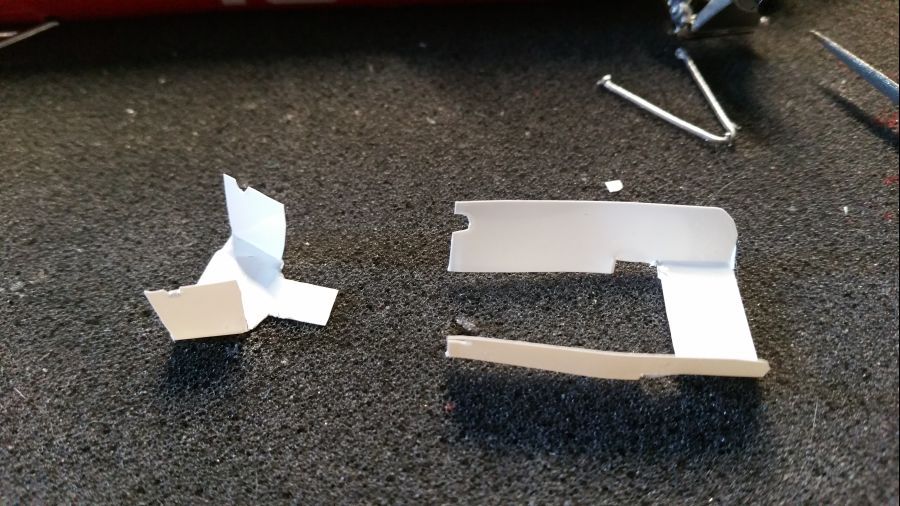
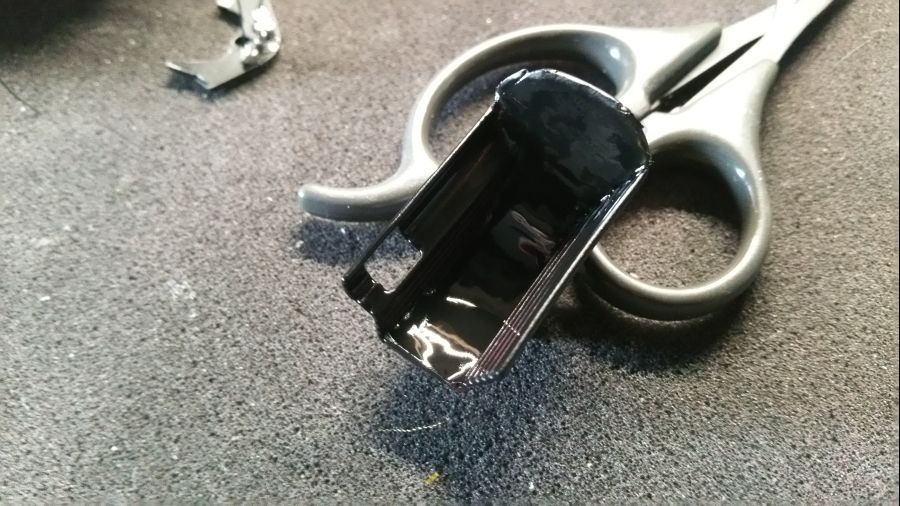
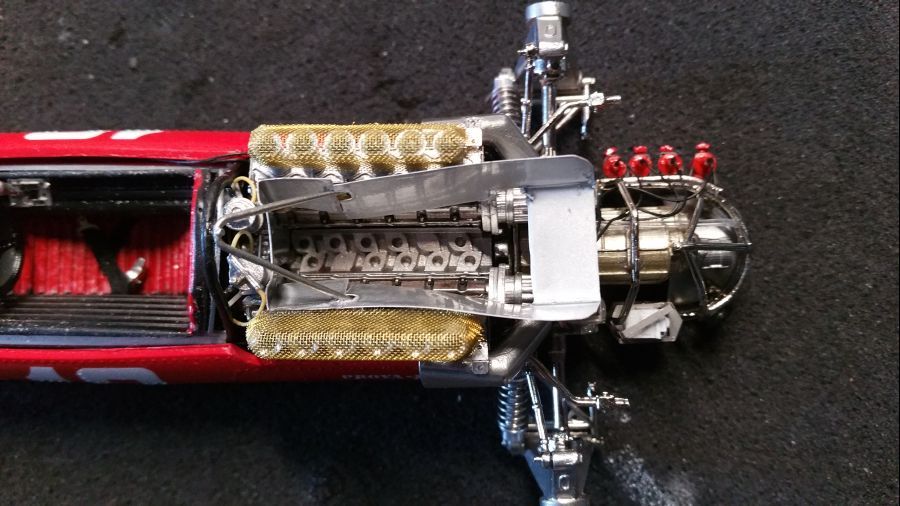
Na het spuiten met gloss aluminium kunnen de delen geplaatst worden.
After painting with gloss aluminium the parts can be attached.
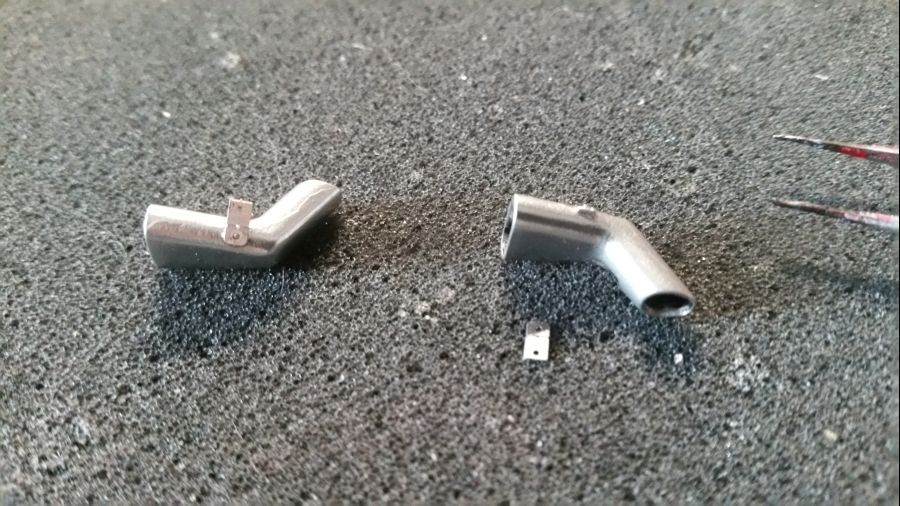
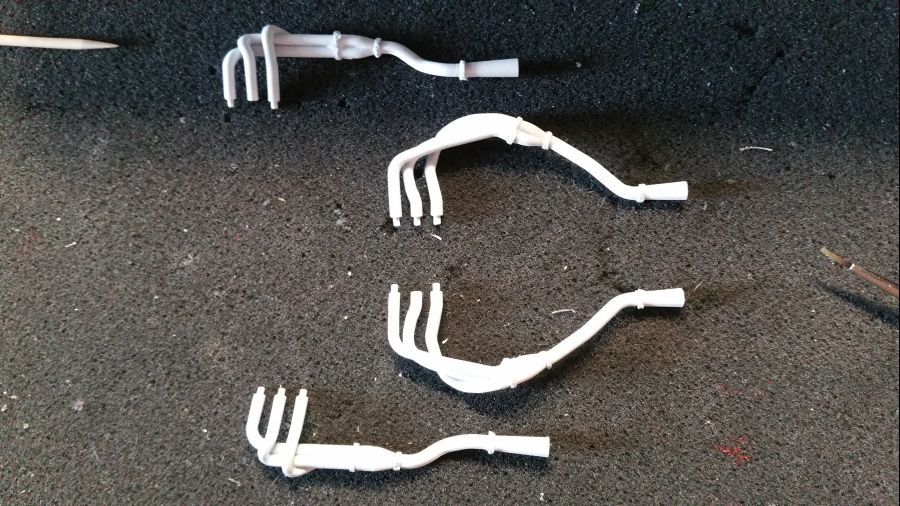
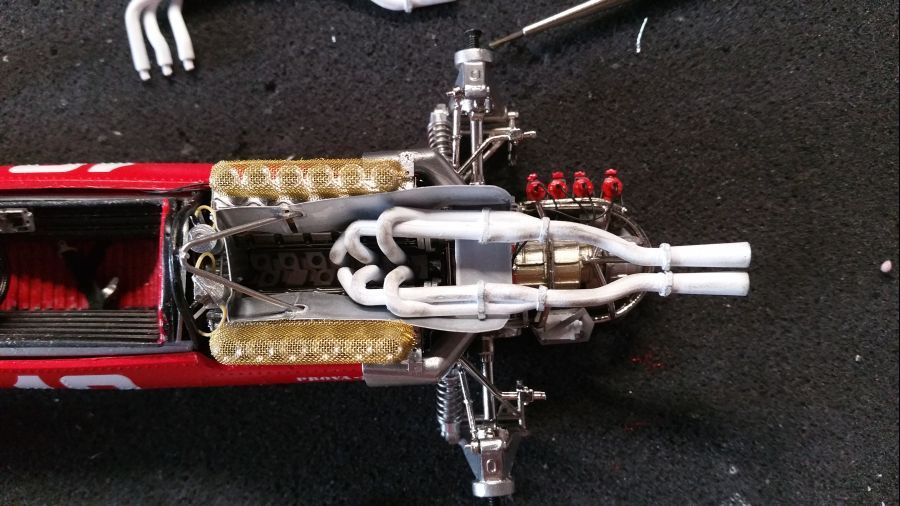
Tijd om de uitlaten samen te stellen...
Time to combine the exhausts...
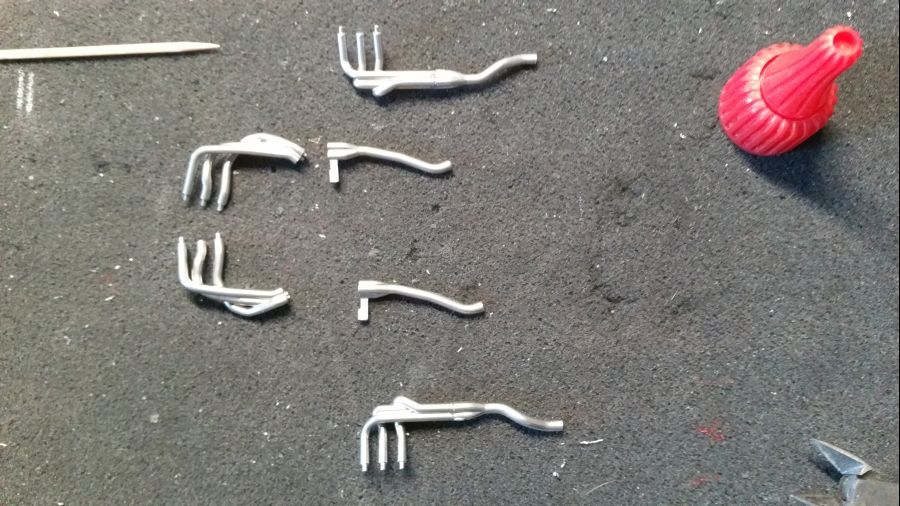
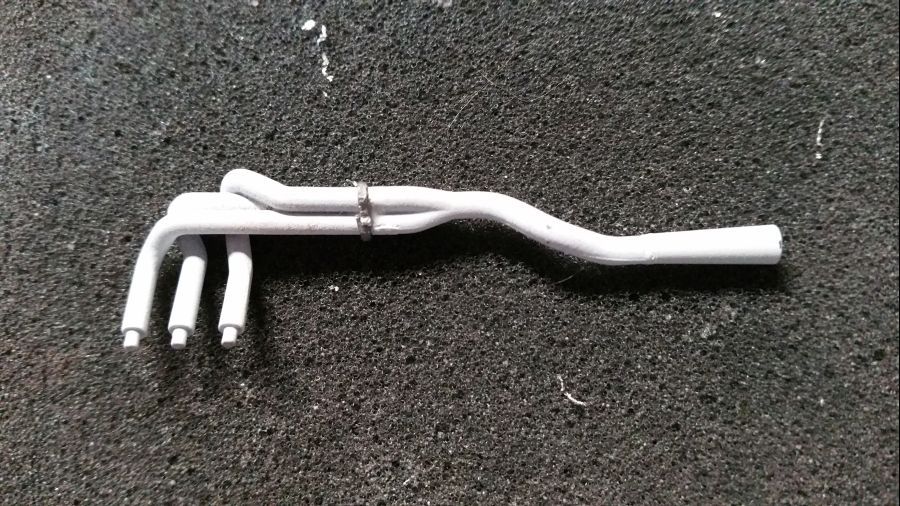
Wit gespoten...
Painted white...
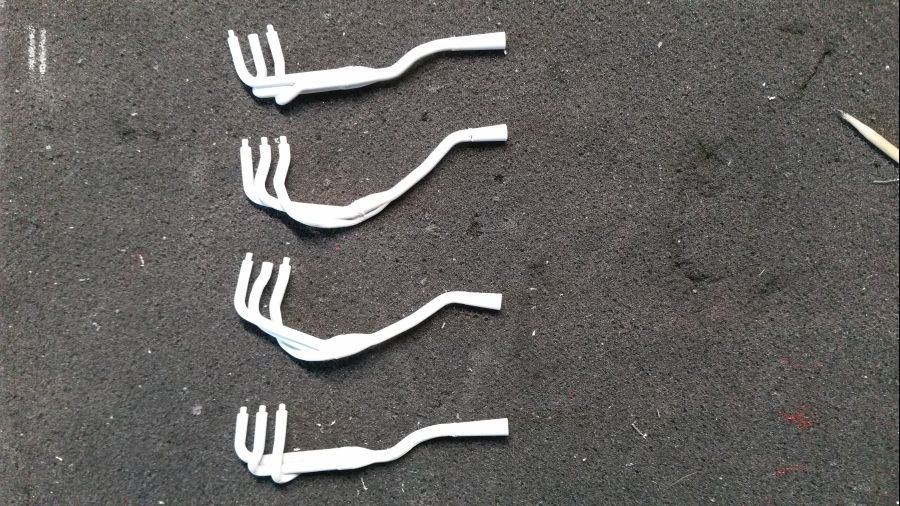
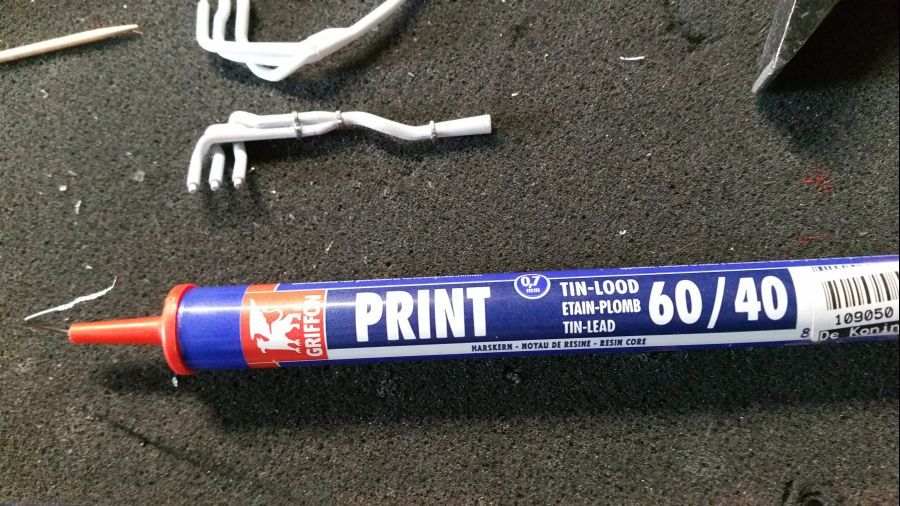
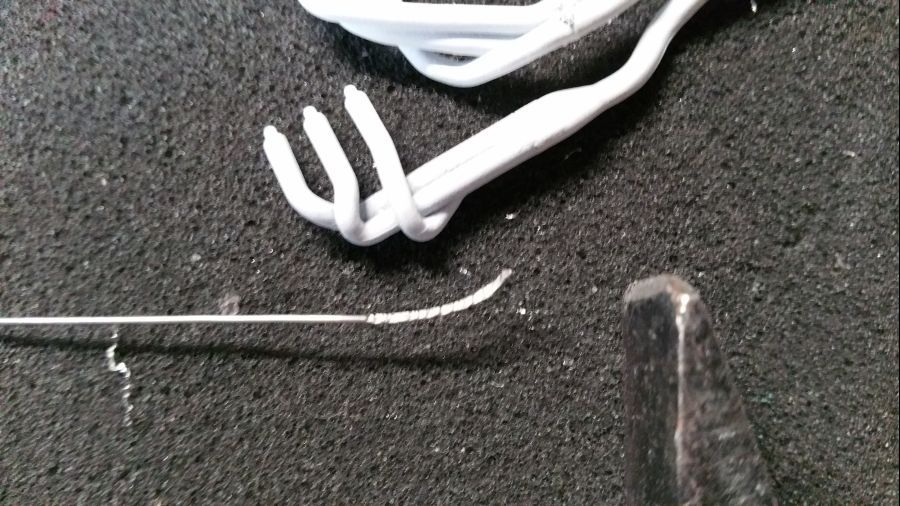
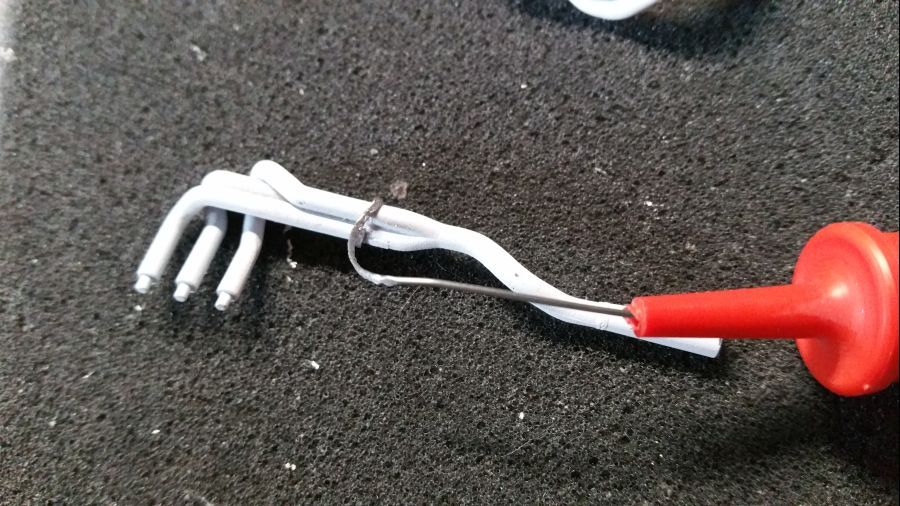
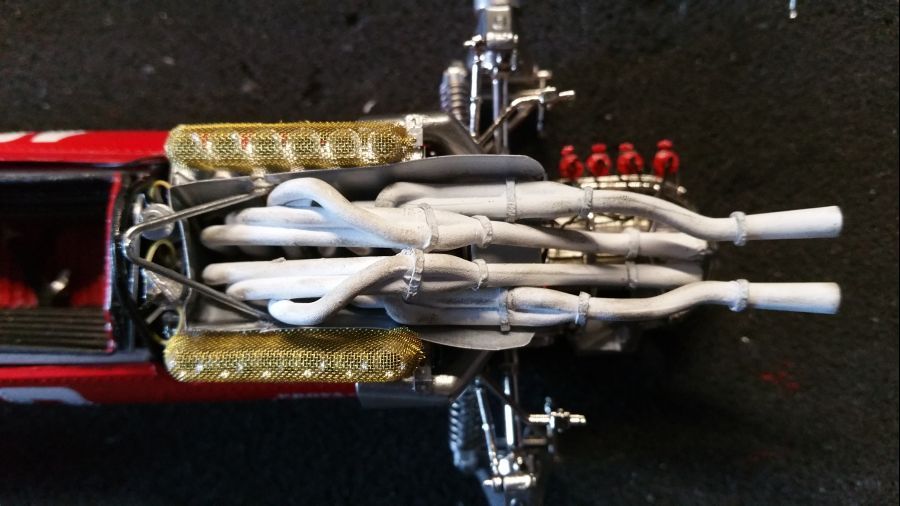
Nu proberen de lasnaden te simuleren. Ik ga het proberen met wat platgeslagen soldeer... Simpel plaatgeslagen met de puntige kant van een kleine hamer. Ik ga dit op de lasplekken om de uitlaten vouwen en vastlijmen met superglue. Daarna nog weer een laagje wit eroverheen.
Now i will try to simulate weld lines. I will try it by using flattened solder... Simply flattened with the pointy side of a small hammer. I will apply this to the weld spots and stick it with superglue. Then some white paint will be applied.


Ik heb ze daarna wat verouderd met de bekende Tamiya poeders. Dan worden ze gemonteerd.
I have weathered them a bit with the famous Tamiya powders. Then they are attached.
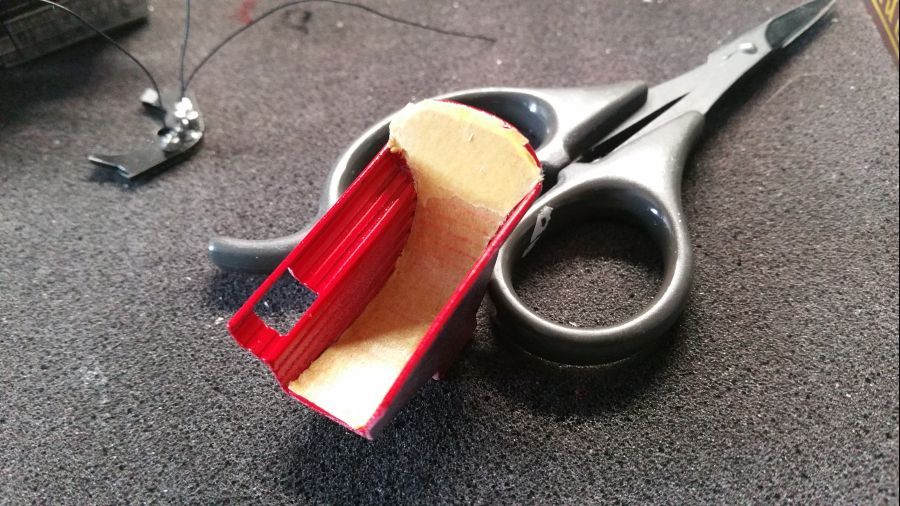
De laatste onderdelen zijn rood gespoten...
The last parts which needed a red paint...
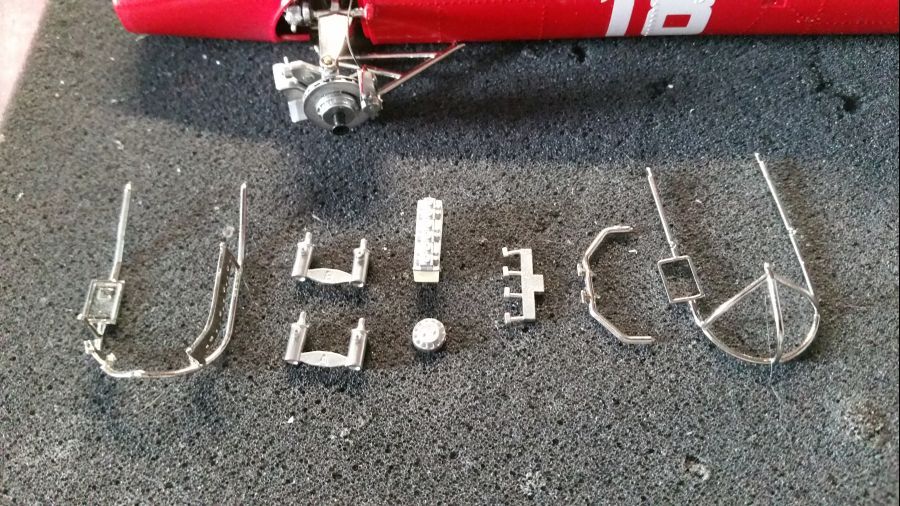
Dan het werk aan de steunen....
Then the work on the uprights....

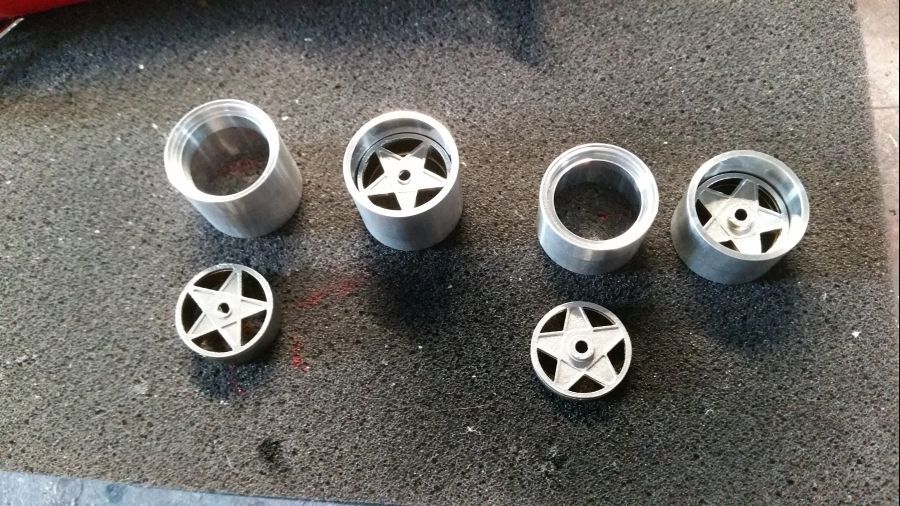
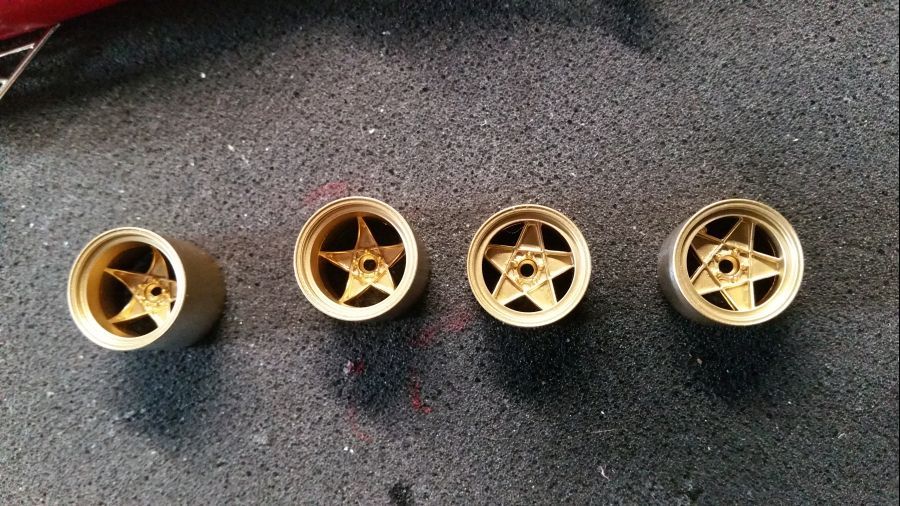
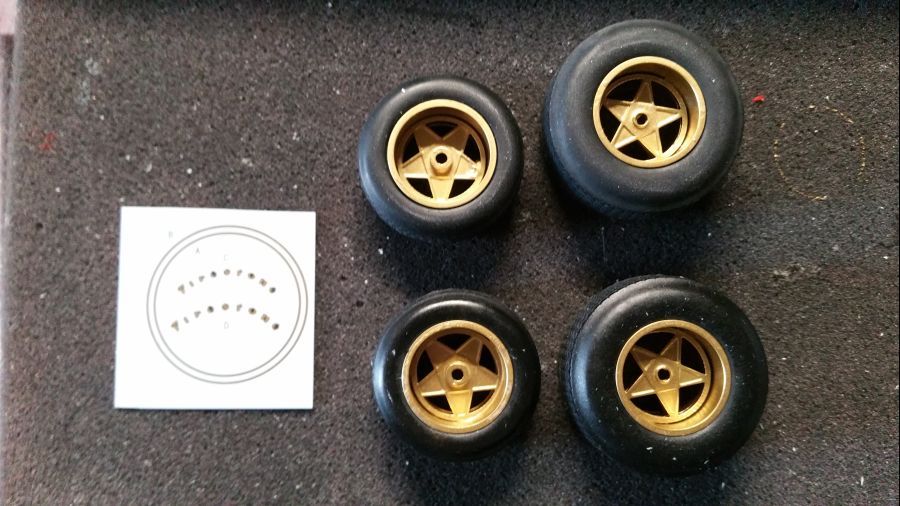
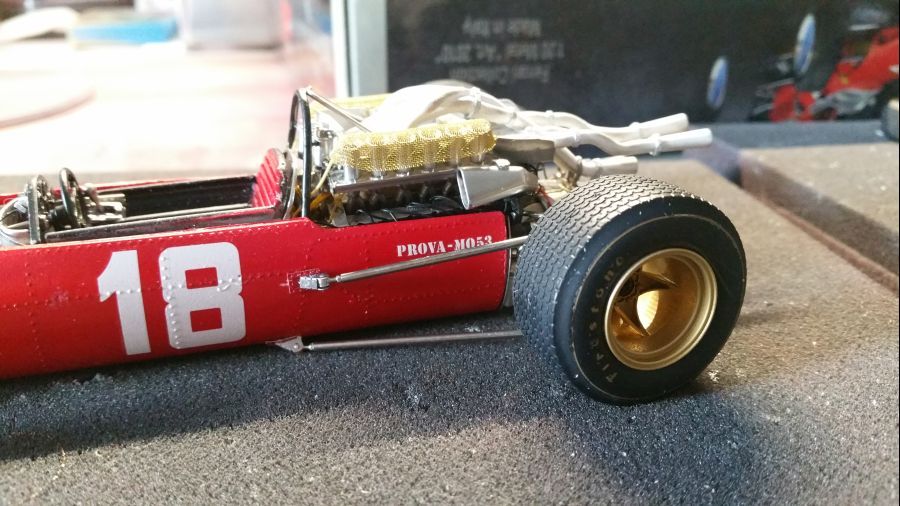
Tijd voor de velgen en banden...
Time for the rims and tires...
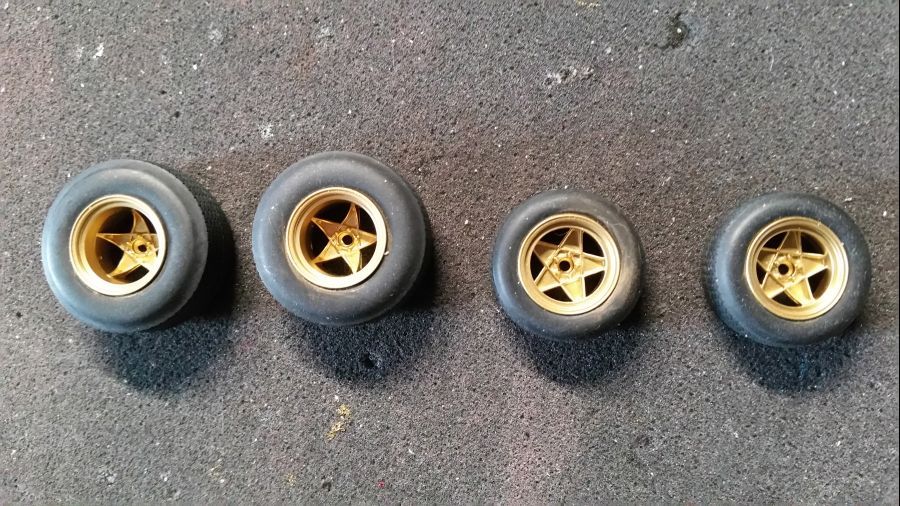
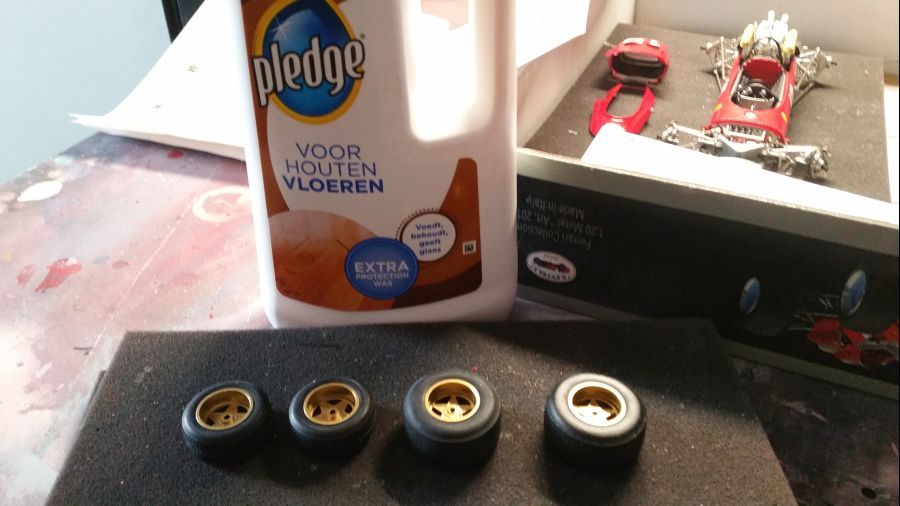
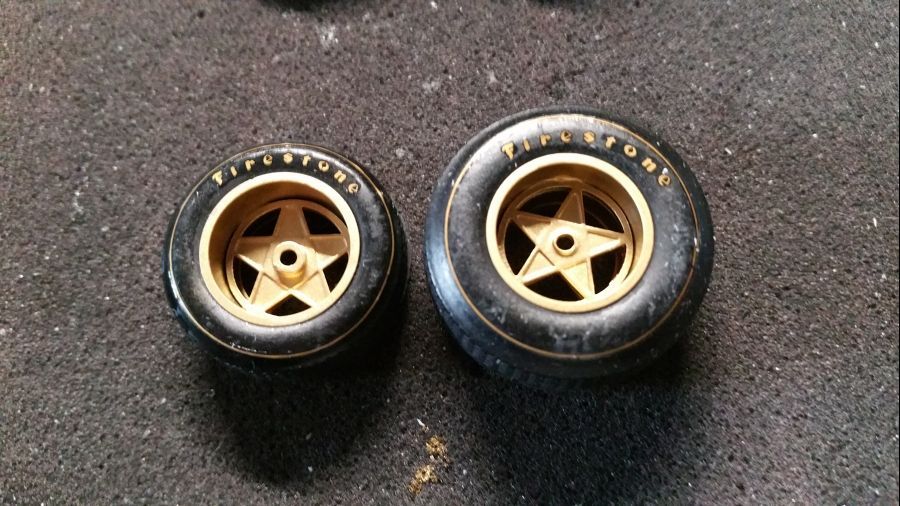
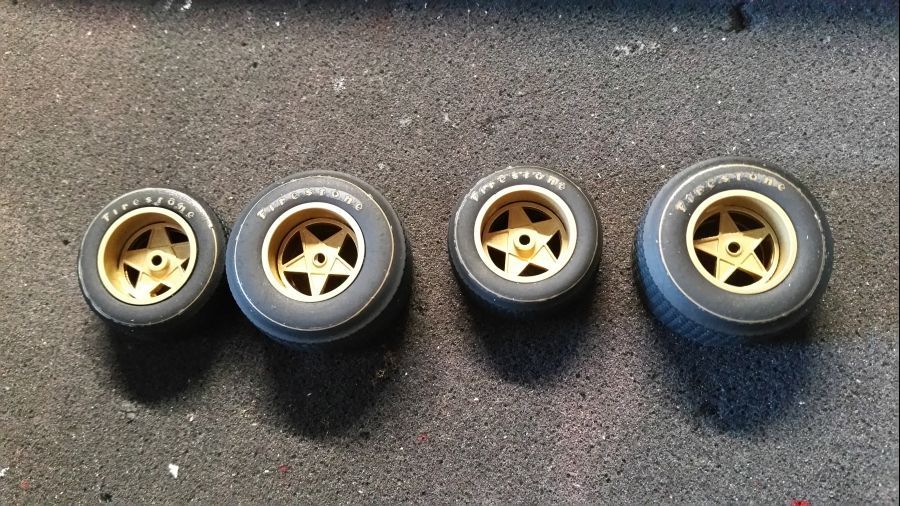
Dit is het deel waar ik het meest een hekel aan heb. Het plaatsen van decals op de banden. Om een of andere reden blijft dit vaak slecht zitten. Bovendien zijn deze al helemaal niet gemakkelijk. MFH heeft alle decals op een zeer klein oppervlak geplaatst. En ook nog eens rond... Veel mensen gebruiken Future Floor Polish om de banden wat glad te maken. Men zegt dat de decals dan beter hechten. Ik ga het proberen. Bij ons heet dat volgens mij Pledge... We gaan het zien... Uiteindelijk moet er nog een mat laklaagje aangebracht worden om de boel te sealen...
This is the part i hate most. Applying decals to the tires. For some reason they don't seem to stick. And they are not easy at all. MFH has put them on a very small surface. And they are round... Many people use Future Floor Polish the create a more smooth surface on the tire. They claim the decals would stick better. I will try it. In my country it's called Pledge... Let's see... Eventually a layer of matt clear needs to be applied to seal the decals.
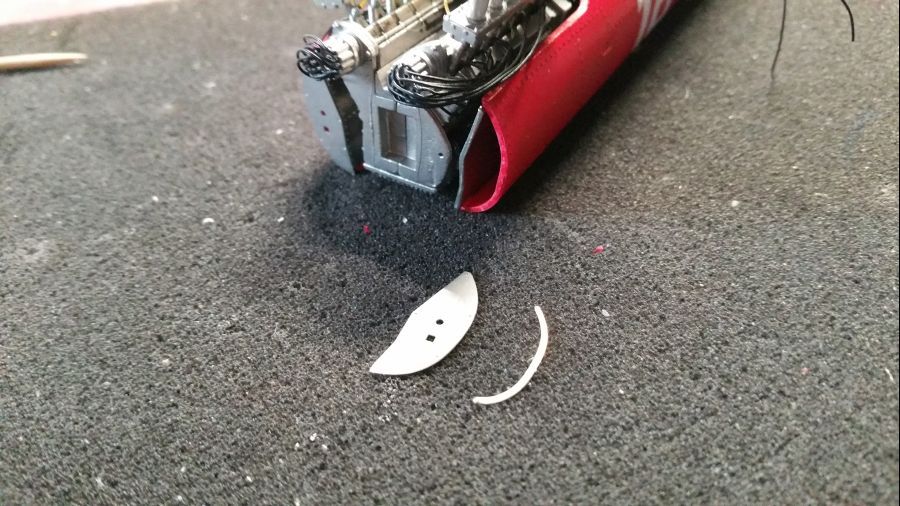
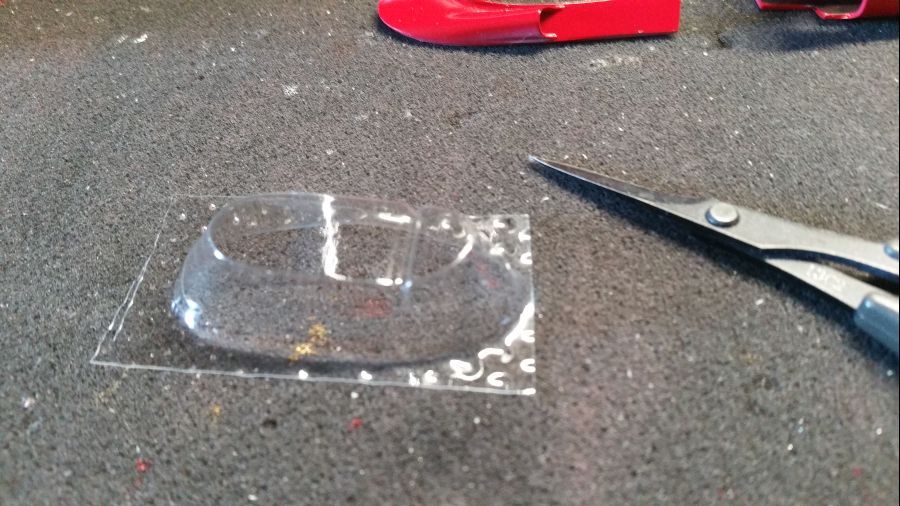
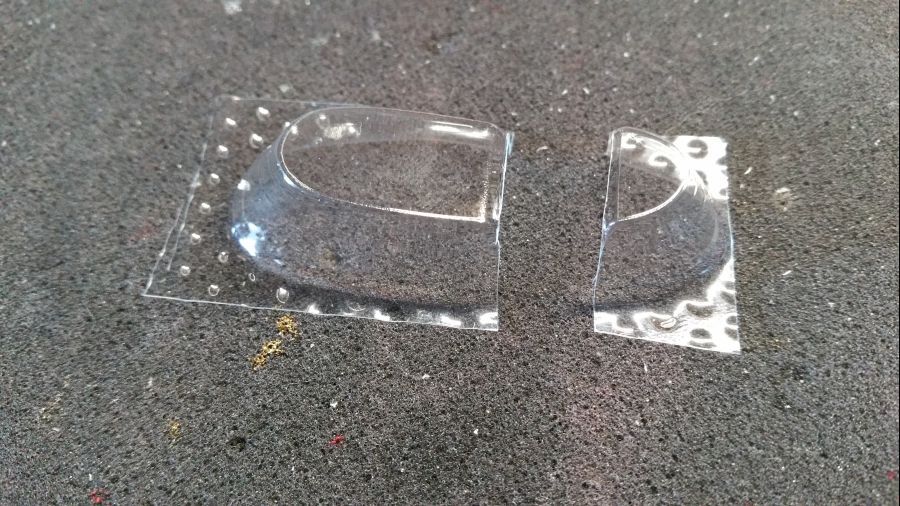
Terwijl de lak van de banden even droogt, ga ik het raam knippen en de achteruitkijkspiegels klaarmaken. Er zitten 2 soorten ramen bij. De 1967 Ferrari 312F1 Monaco had een kort raam.
While the lacquer on the tires is allowed to dry, i will cut the window and finish the rear view mirrors. There are 2 types of windows included. The 1967 Ferrari 312F1 Monaco had a short window.

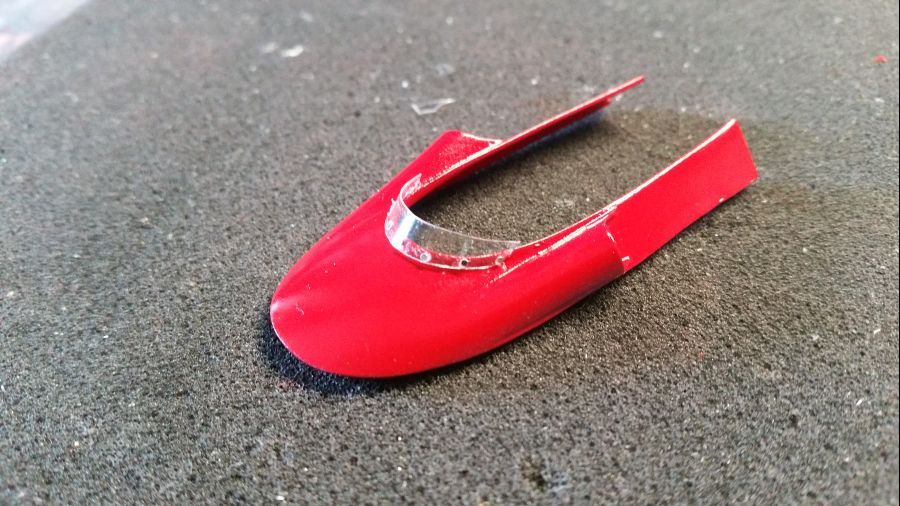
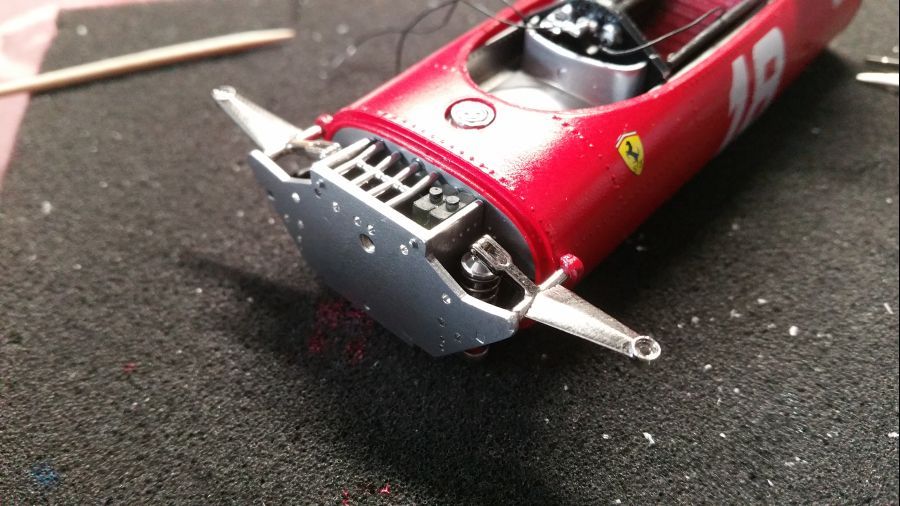
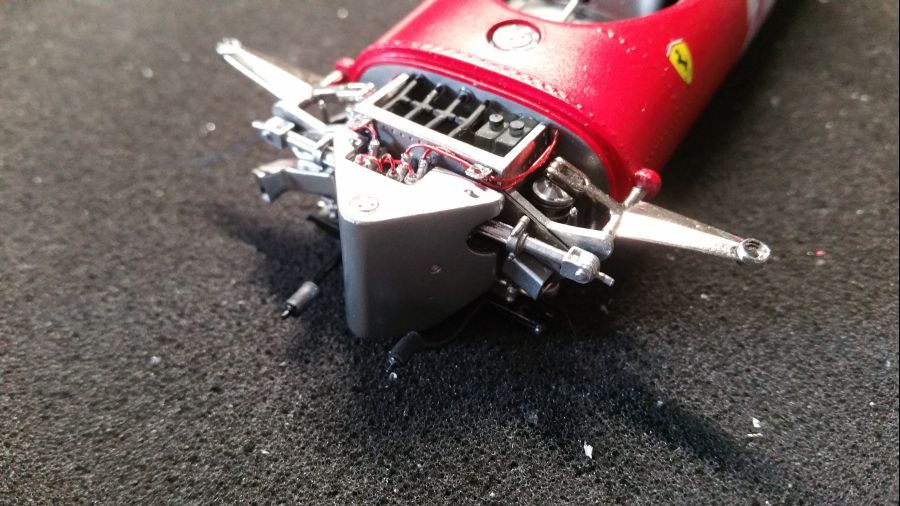
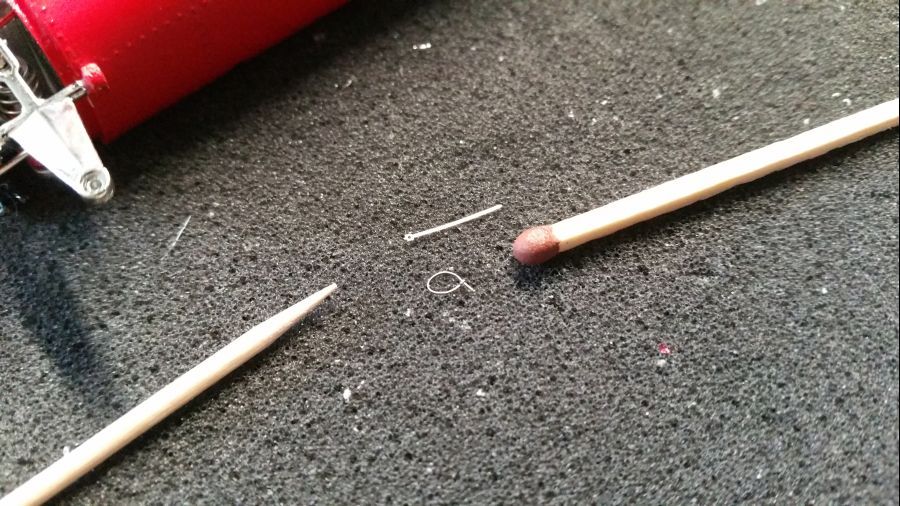
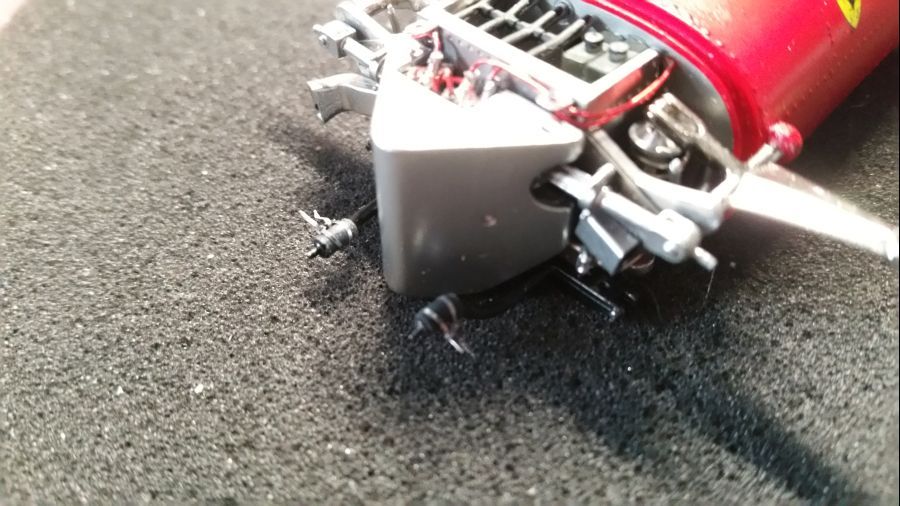
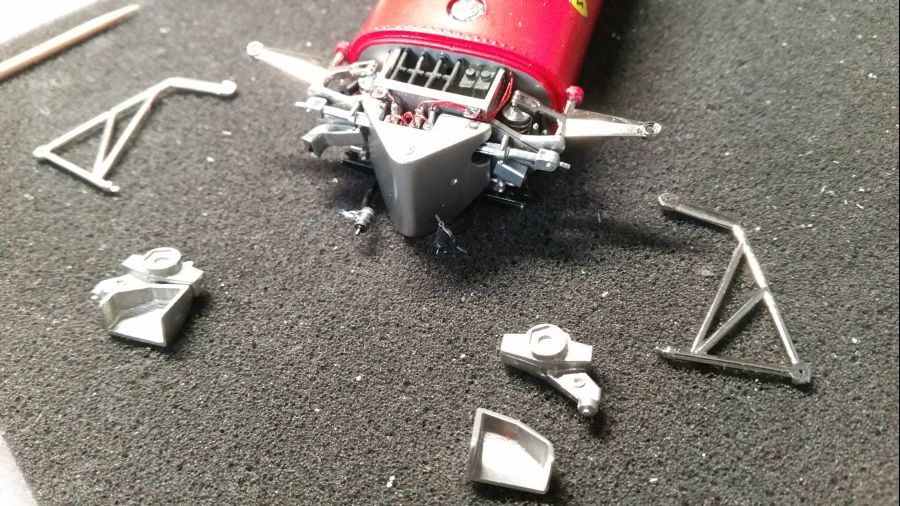
Dan wordt de neus geplaatst en vastgemaakt met kleine popnagels en o-ringen. De neus kan weer verwijderd worden, maar een leuke klus is anders. :-)
Then the nose gets attached and fastened with small rivets and o-rings. The nose can be de-attached again, but it's not a nice job. :-)

Dan de wielen erop.... en het laatste werk aan de besturing.
Then the wheels are placed into position.... and the final work to the steering.

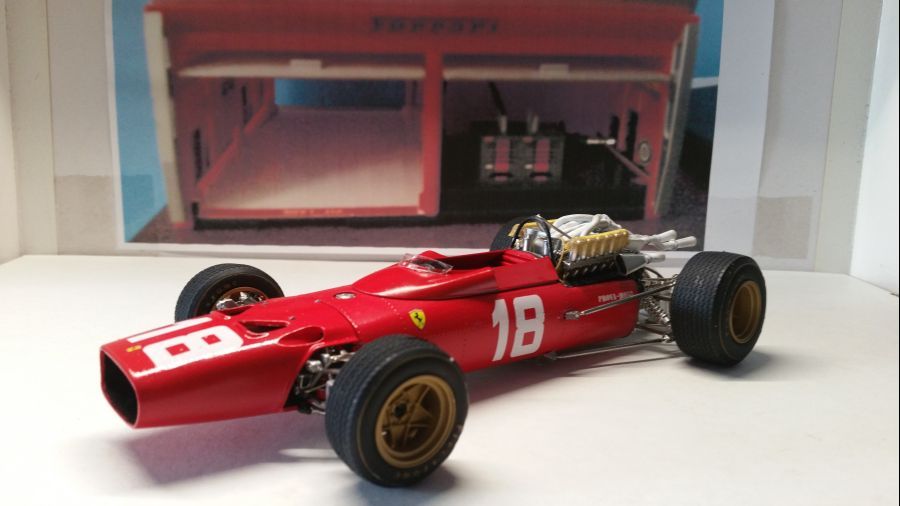
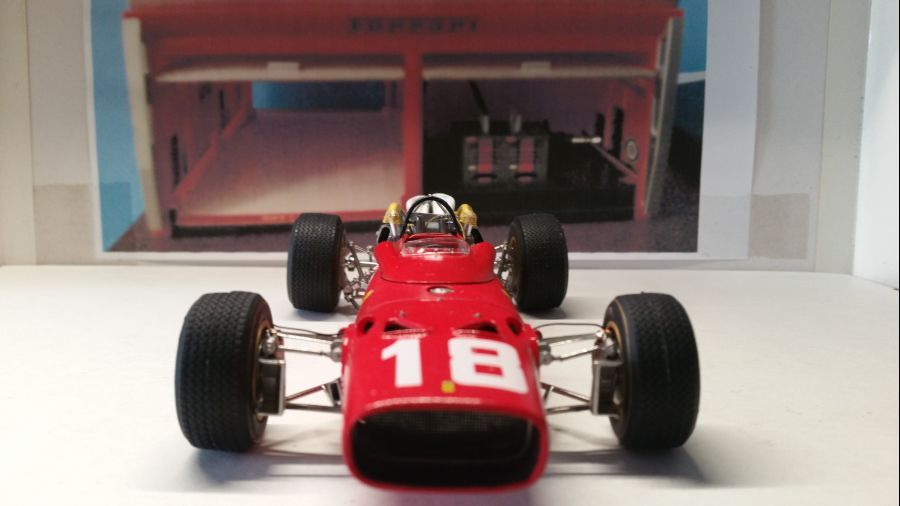
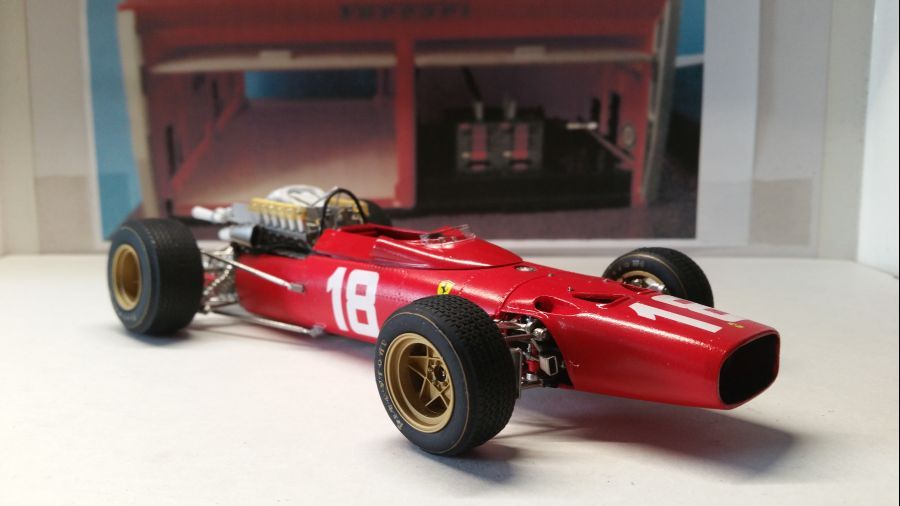
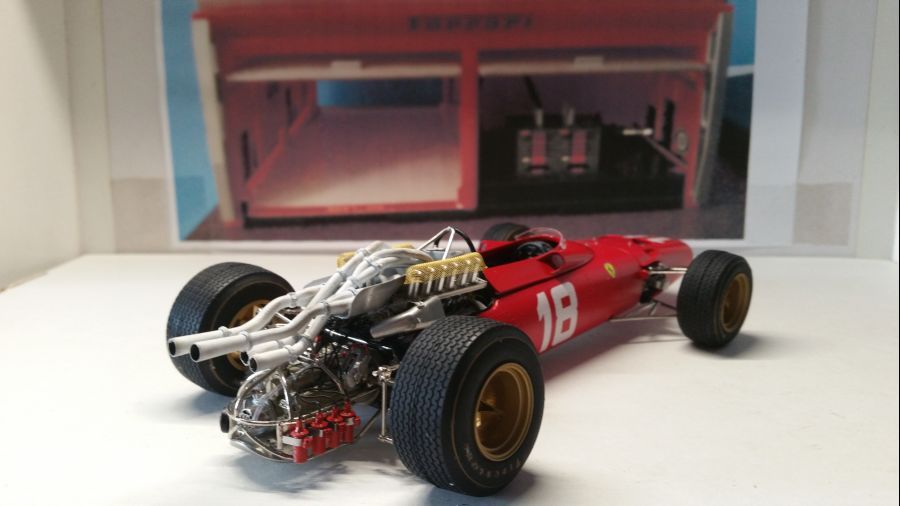
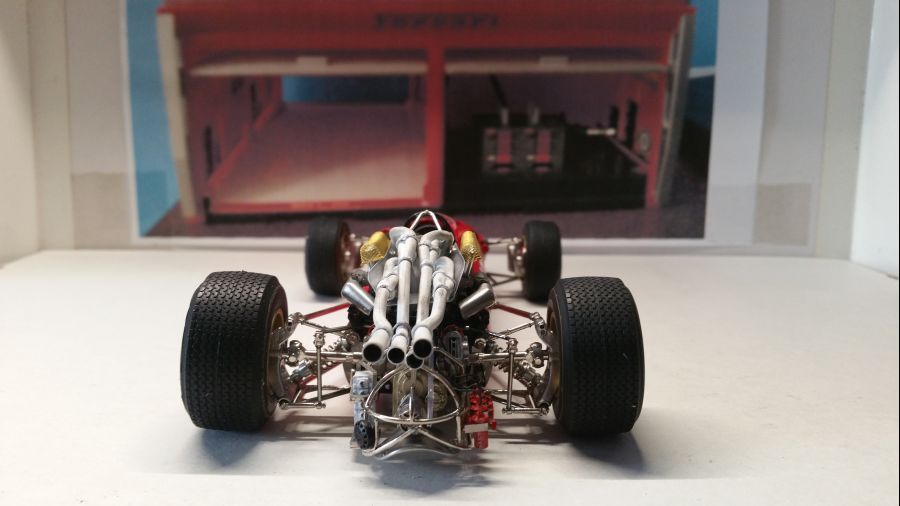
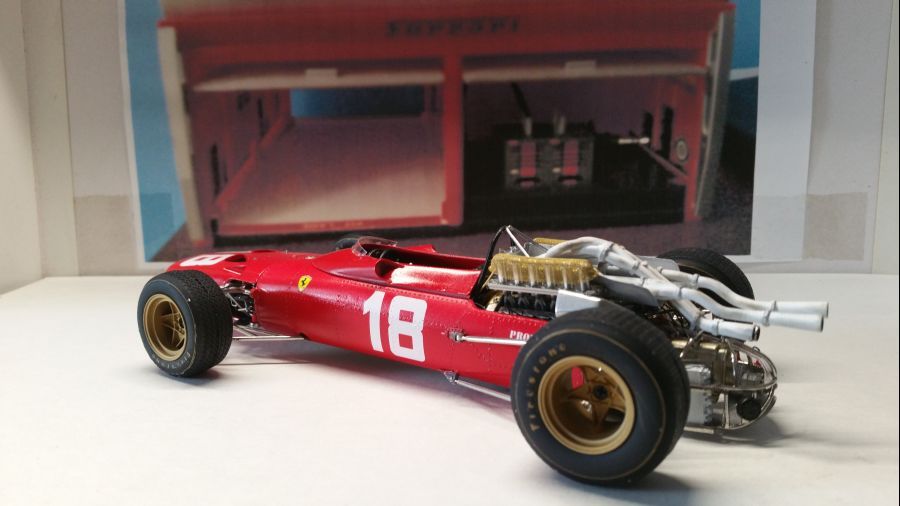
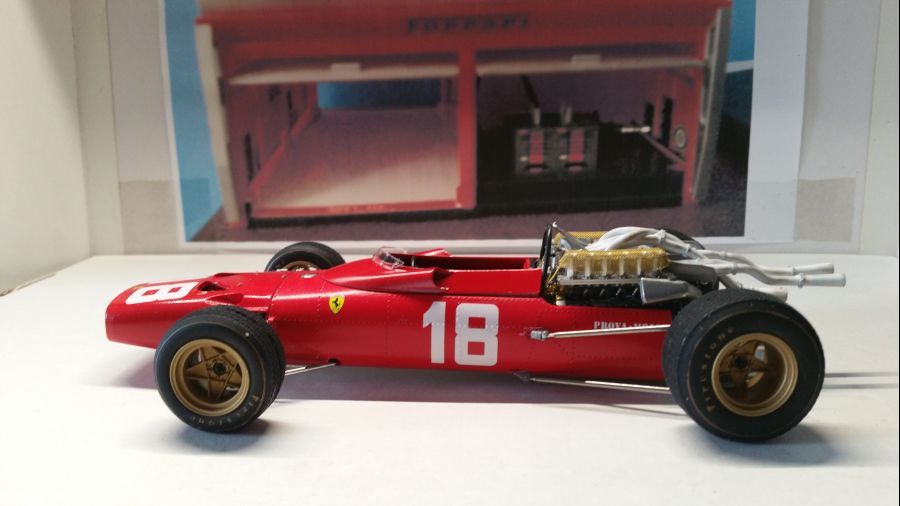
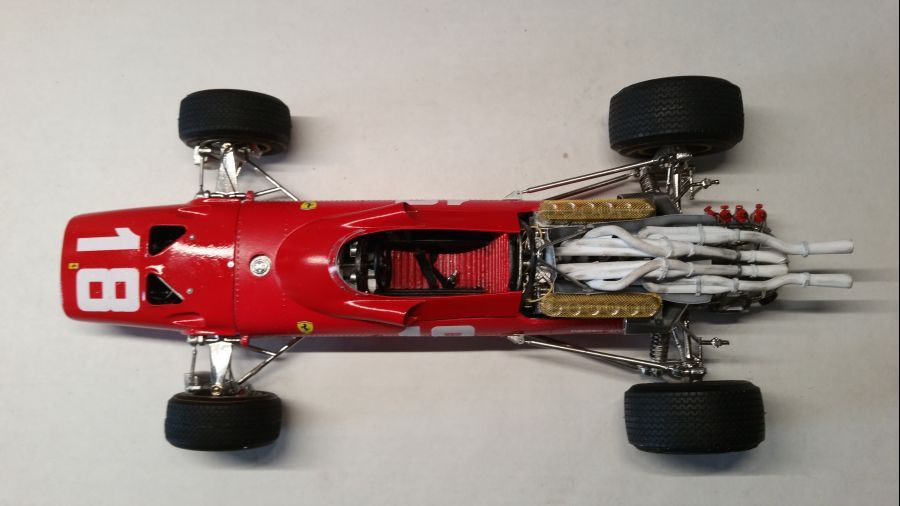
En weer is er een aan de finish....
And another one made it to the finish....