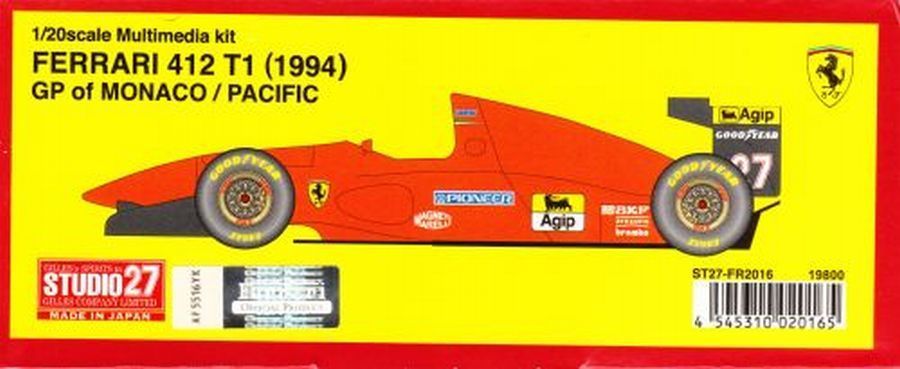
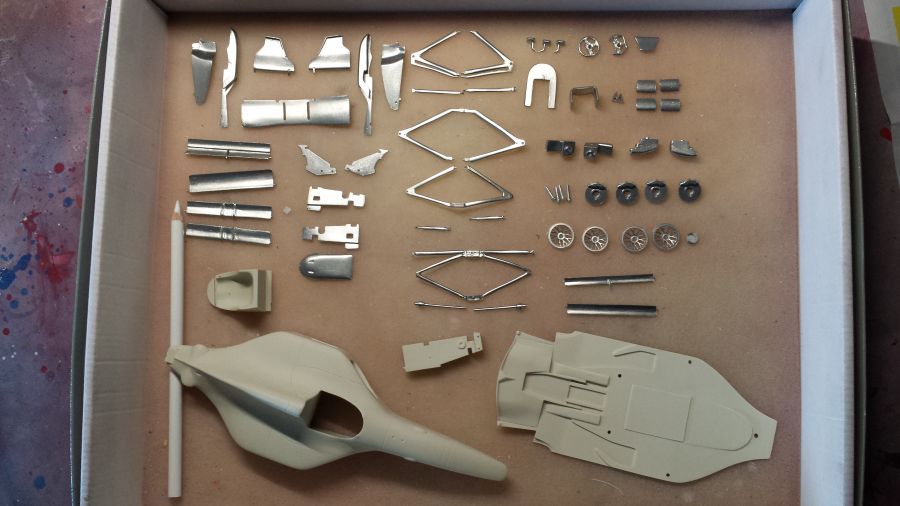
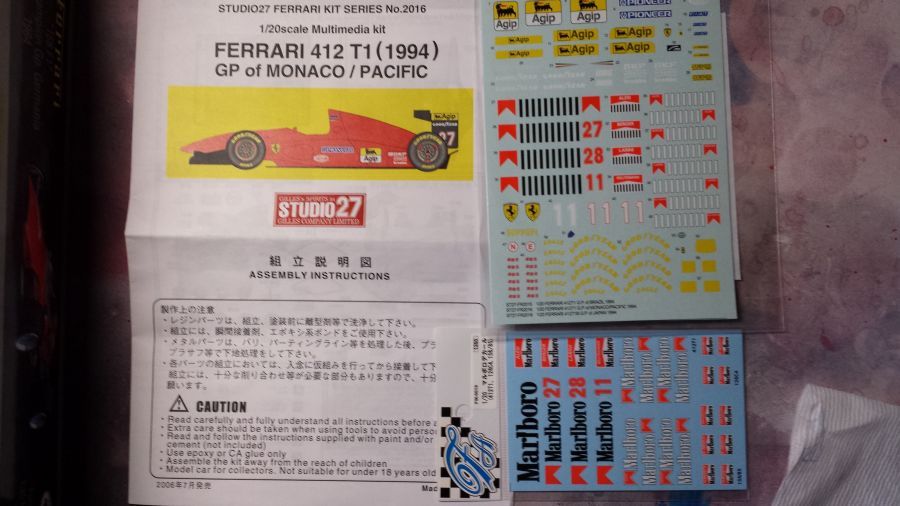
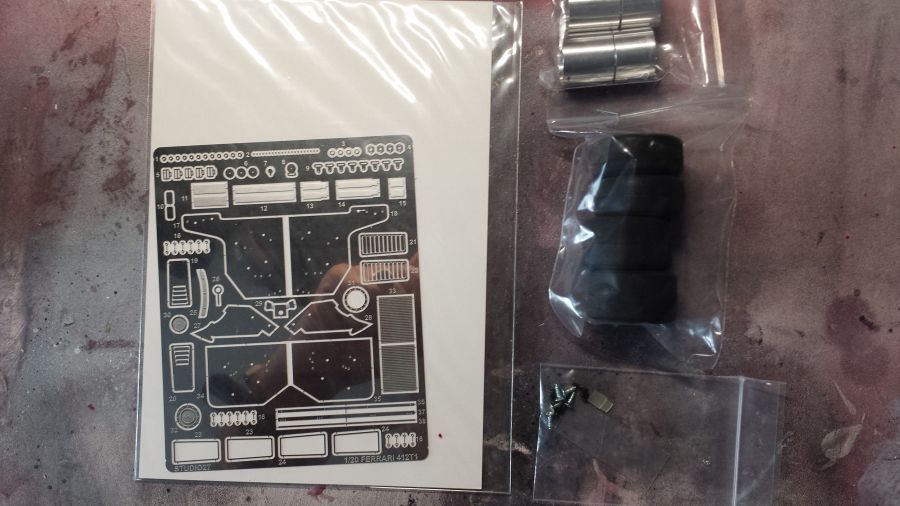
Hier de beschrijving van de bouw van de Ferrari 412 T1 van Studio27 (ST27-FR2016) zoals deze in 1994 werd gereden door Gerhard Berger tijdens de GP van Monaco. Het is een kit van Studio27. Bij de kit zijn de decals van het bekende cigarettenmerk niet inbegrepen. Deze heb ik daarom op Ebay gekocht. Eerst weer de foto's van de inhoud en decals.
Here i will describe the build of the Ferrari 412 T1 from Studio27 (ST27-FR2016) as driven in 1994 by Gerhard Berger during the GP of Monaco. It is a kit from Studio27. The famous cigarette decals are not included in this kit. Therefor i bought these on the aftermarket. First the pictures of the content and decals.
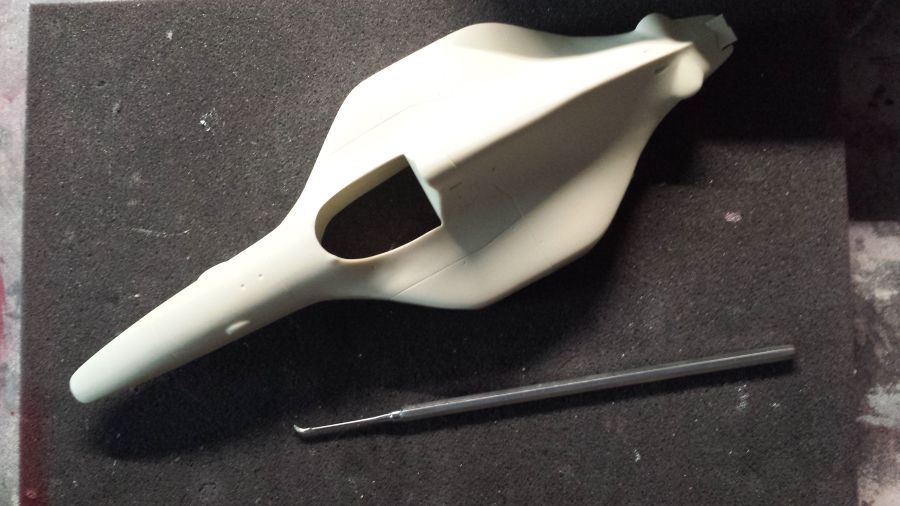
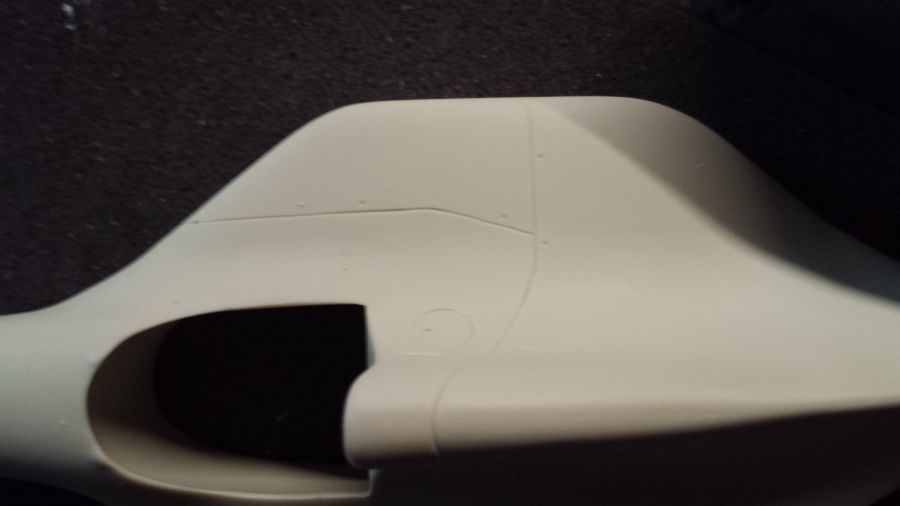
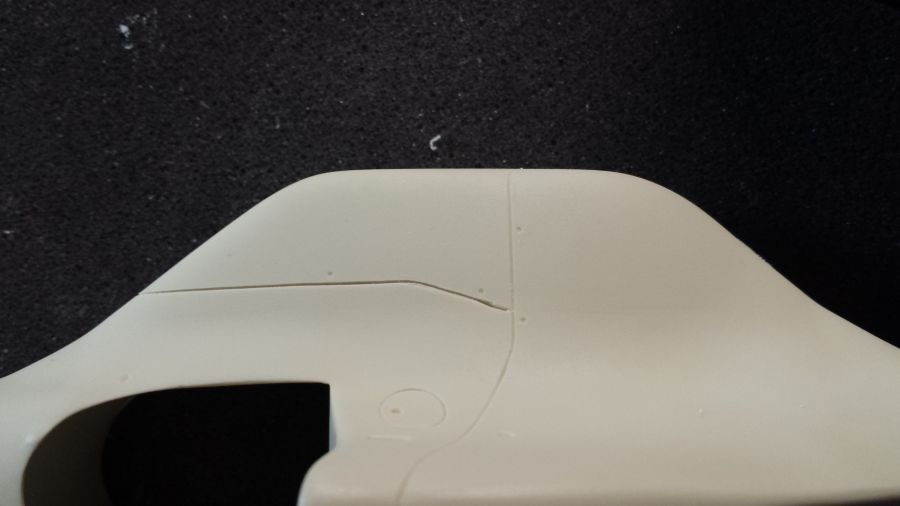
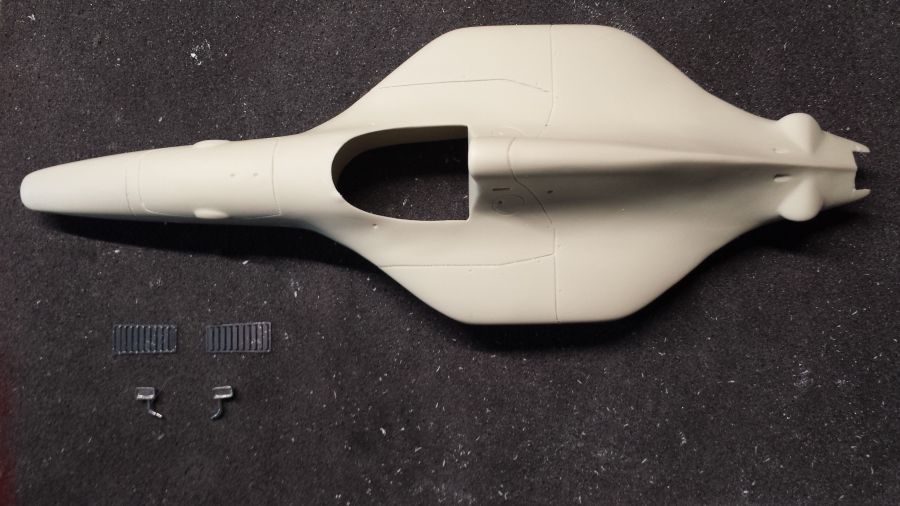
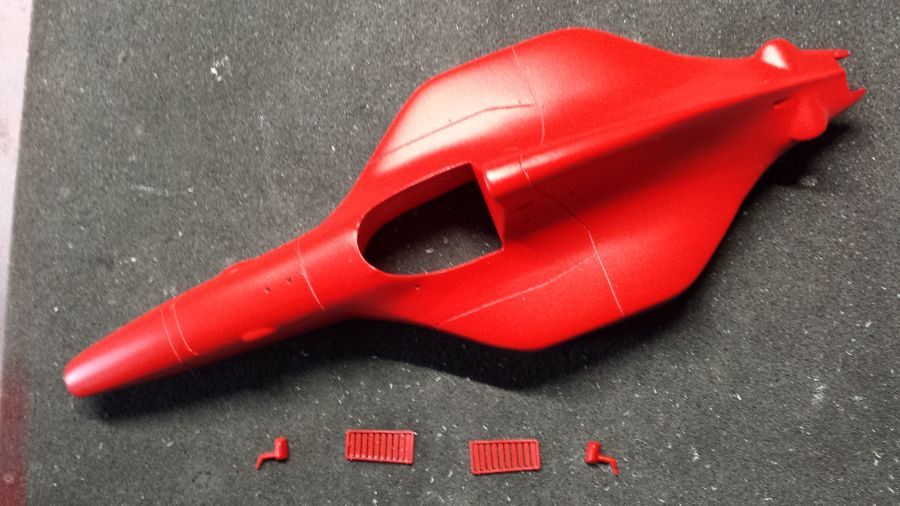
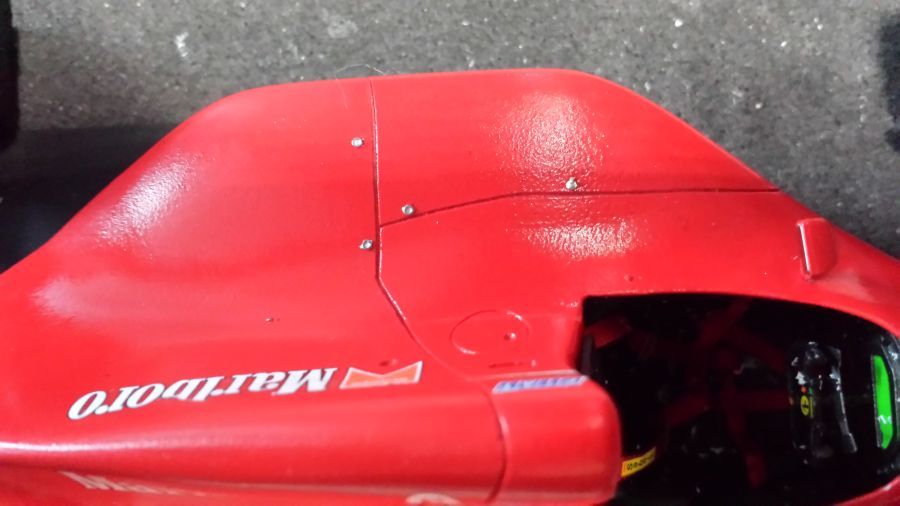
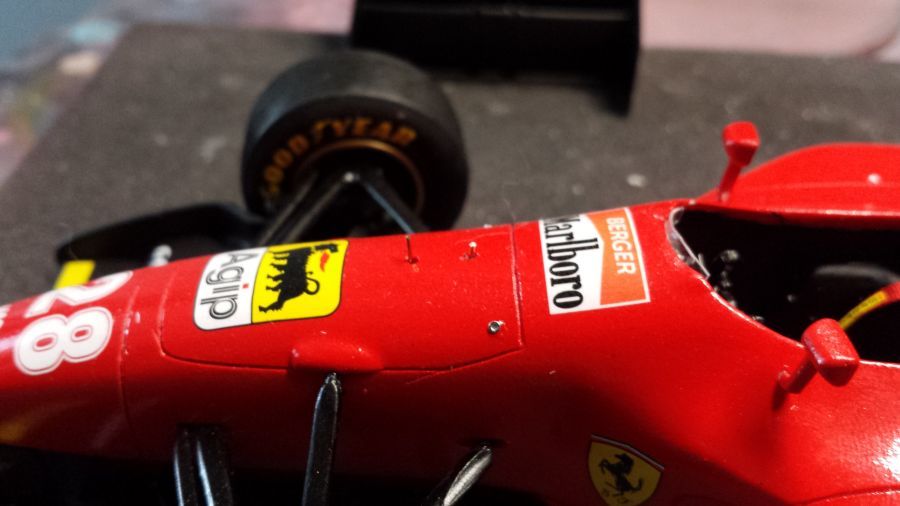
Eerst wat werken aan de paneellijnen. Deze zijn zeker niet diep genoeg. Wanneer ik hier niets aan doe, zullen deze na het spuiten met grondverf en verf helemaal verdwijnen.
First some work on the panel lines. These are not deep enough. If i don't do anything about it, they will disappear for sure after spraying primer and paint.
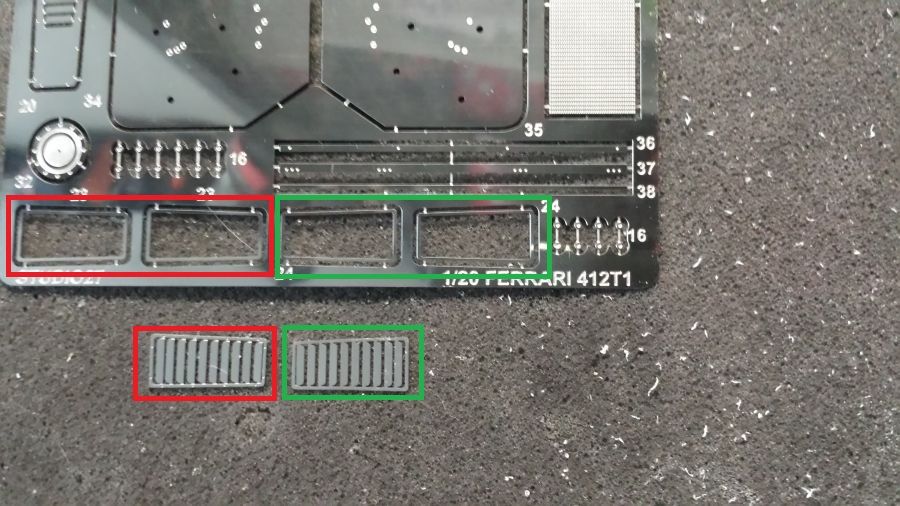
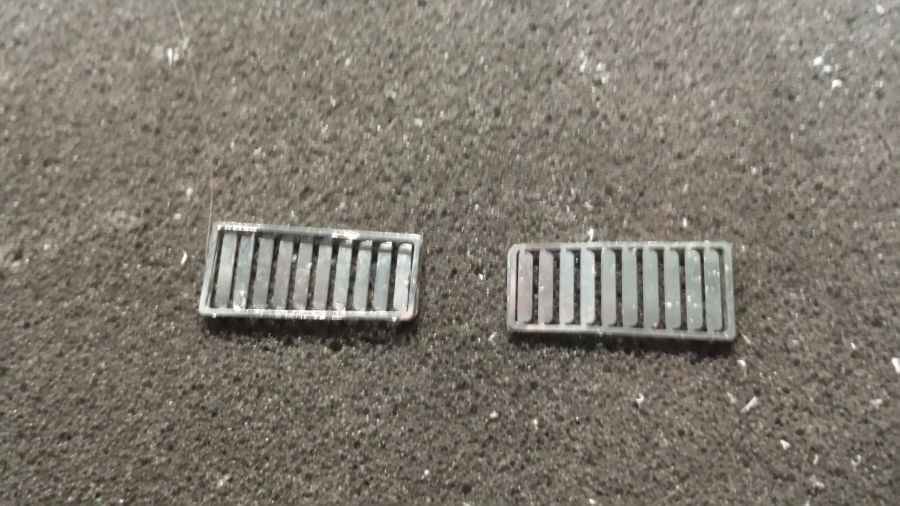
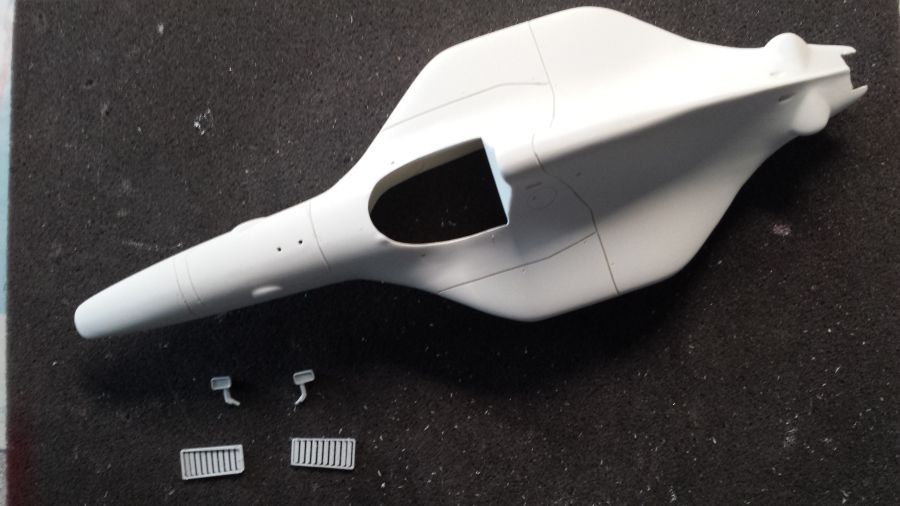
Daarna zijn alle onderdelen die rood moeten worden gespoten verzameld. De etched louvres worden voorzien van extra randen, zodat ze straks op kunnen. Daarna wordt alles gespoten met grondverf.
All parts which have to be painted red are collected. The etched shutters will get extra edges, so they can be opened later. Then everything will be painted with primer.
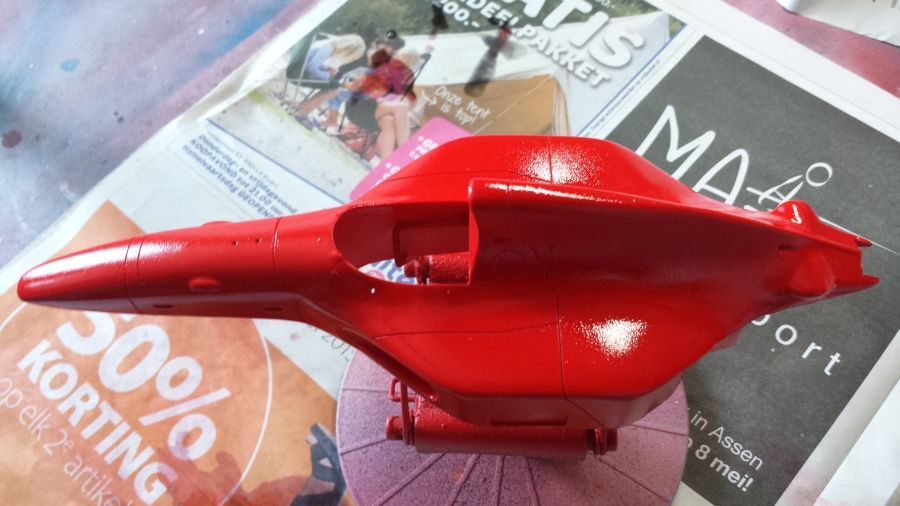
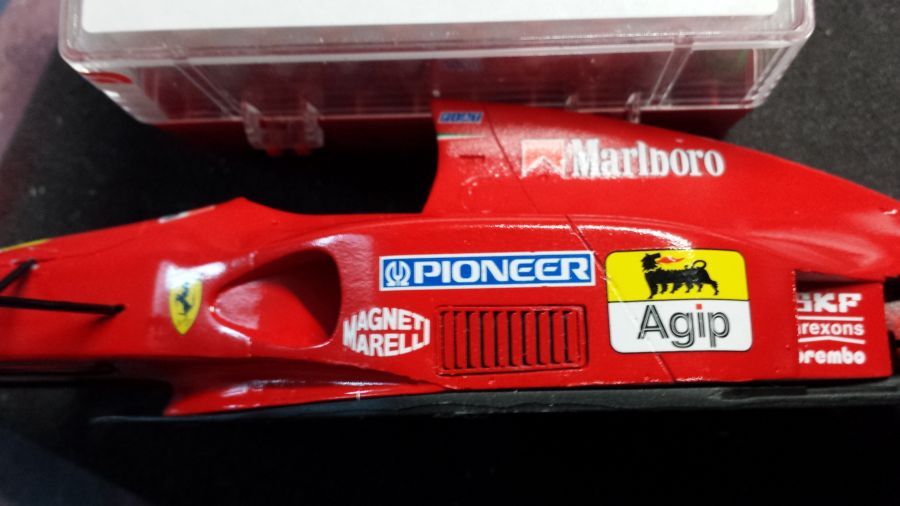
Vervolgens kan de verf erop. Ik gebruik Zero Paints ZP-1007 Pre-2004 Rosso Formula 1. Daarna de glanzende lak. Daarvoor gebruik ik Zero Paints ZP-3003 Clearcoat Lacquer.
Then it kan be painted. I use Zero Paints ZP-1007 Pre-2004 Rosso Formula 1. Next is the gloss lacquer. I use the Zero Paints ZP-3003 Clearcoat Lacquer.
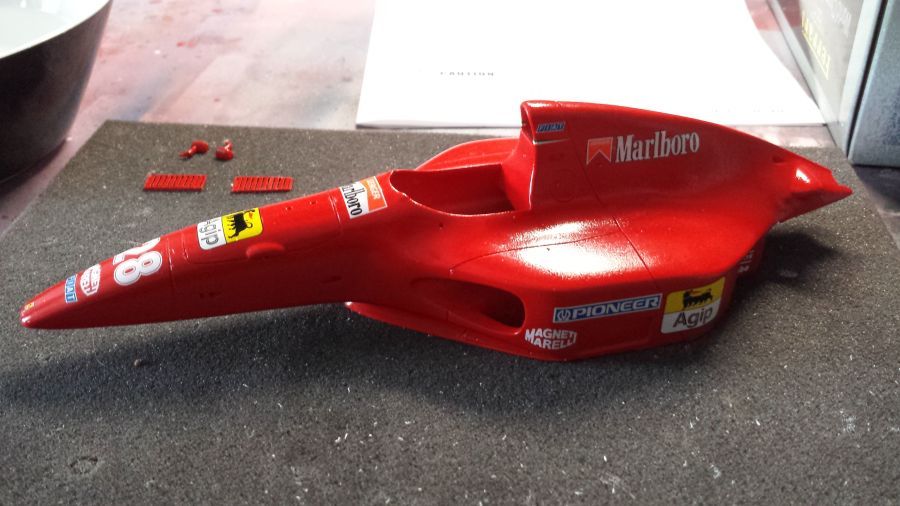
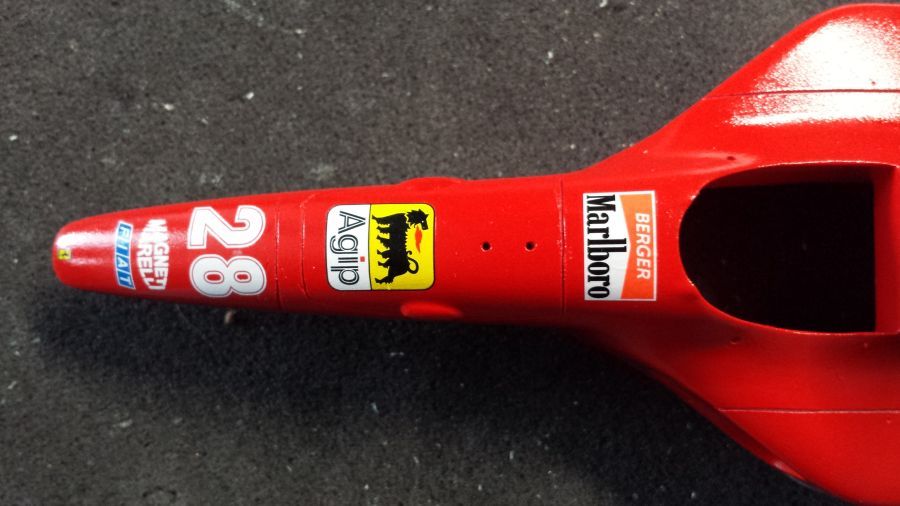
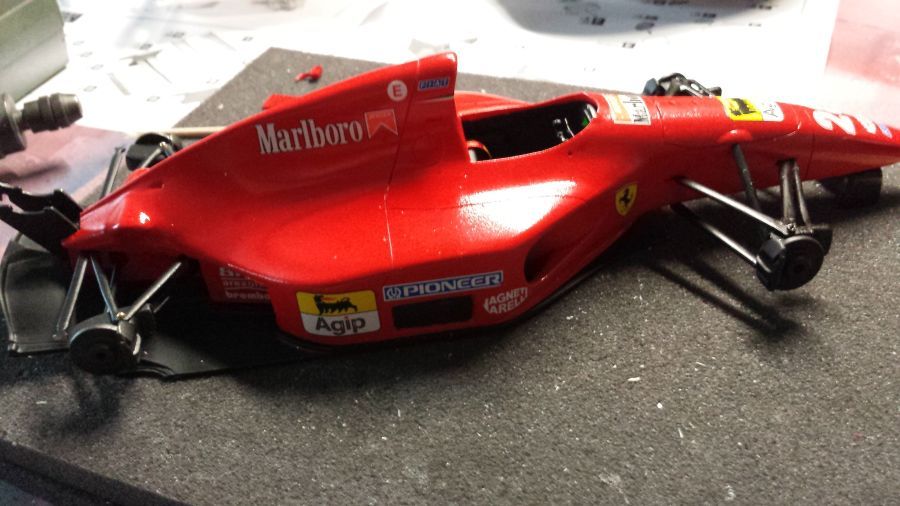
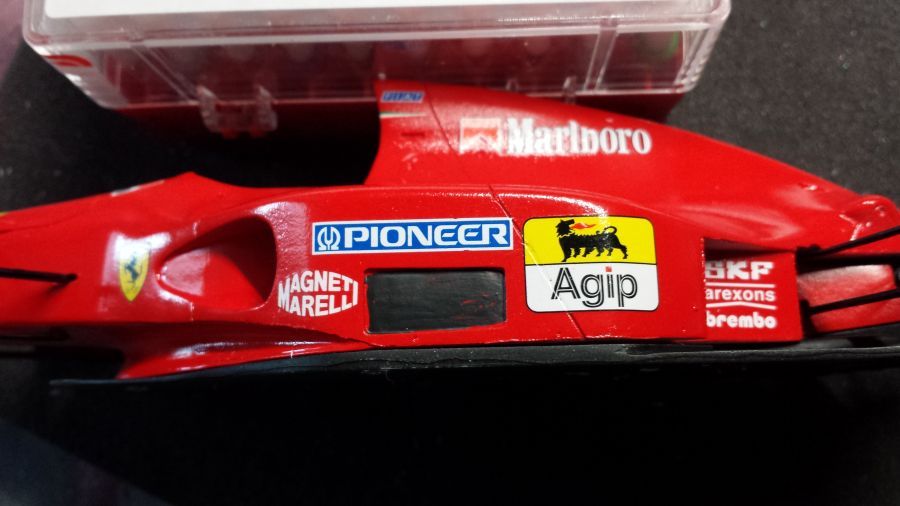
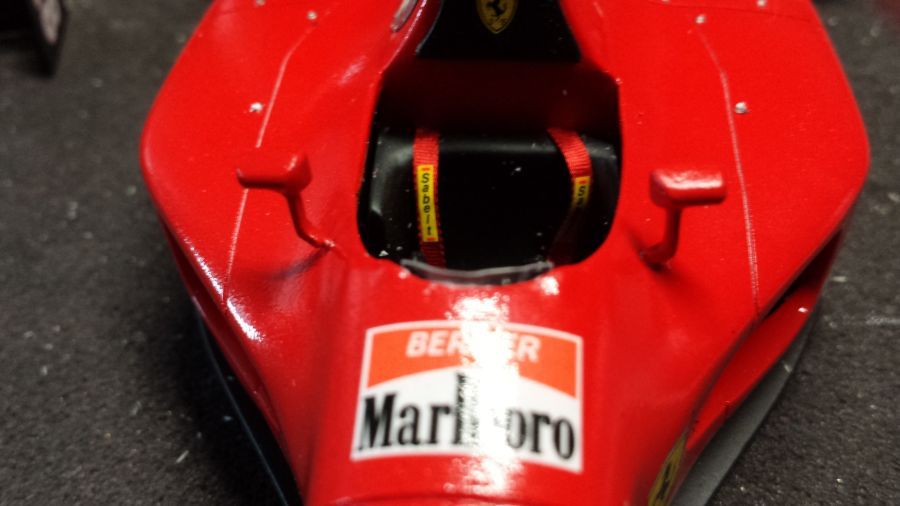
De decals worden aangebracht.
The decals are applied.
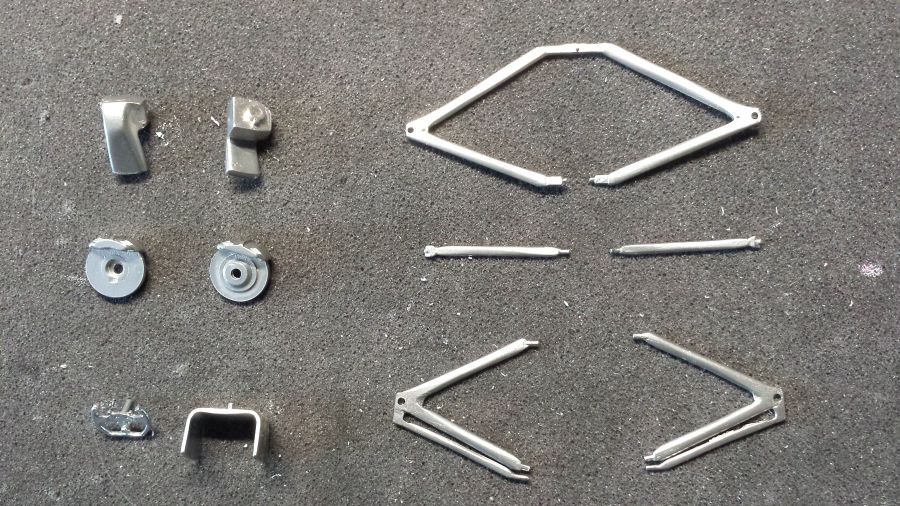
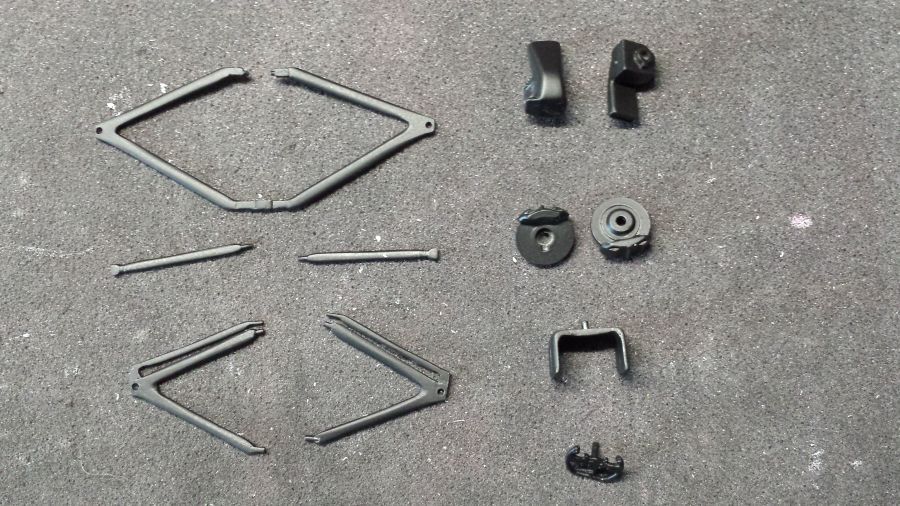
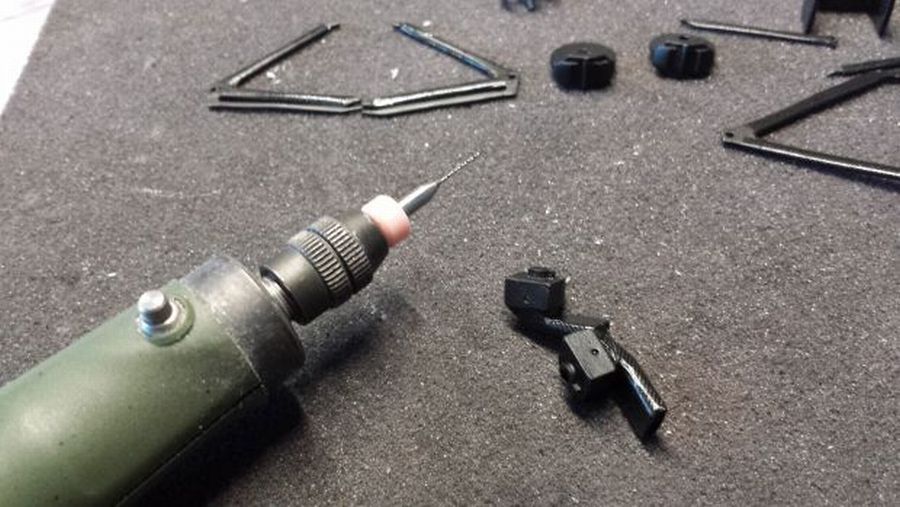
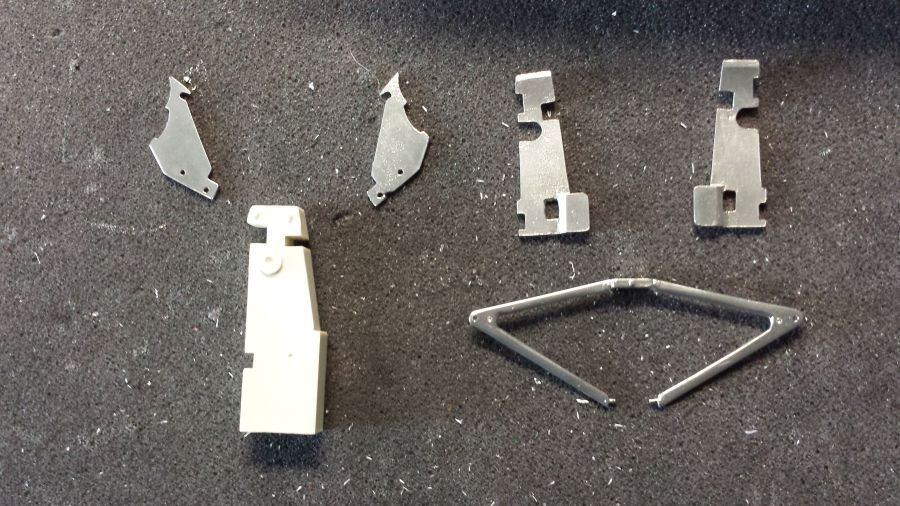
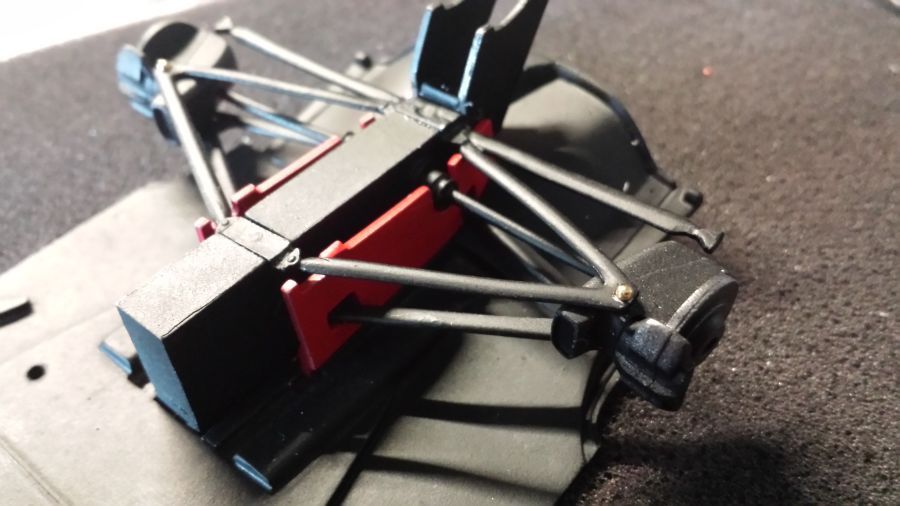
Wat klein werk aan de onderdelen van de voorwielophanging. Alles is gespoten met zwarte grondverf.
Some small work to the front wheel suspension. Everything has been sprayed with black primer.
Een Facebook vriendin die bij Studio27 werkt, heeft me kortgeleden een carbon decal aangeboden. Ik denk dat ik deze nu ga gebruiken. IK heb dit nog nooit eerder gedaan, dus ik weet niet hoe het uitpakt.
Lately i was offered a carbon decal by a Facebook friend who works at Studio27. I think i will use it now. I have never done this, so i hope it will turn out well.

De carbon decals waar ik tot nu toe mee heb gewerkt (templates) waren altijd zeer stug. Soms zeer moeilijk om te verwerken , zelfs met decalvloeistoffen als Micro Set en Micro Sol of zelfs de extra sterke versie van Daco. Deze van Studio27 zijn top. Ze reageren zeer goed op de vloeistoffen van Micro.
The carbon decals i worked with until now (templates) always were stiff. Sometimes it was very hard to work with them, even when using decal solutions like Micro Set and Micro Sol or even the strong version from Daco. These from Studio27 are top. They react very good with the fluids from Micro.
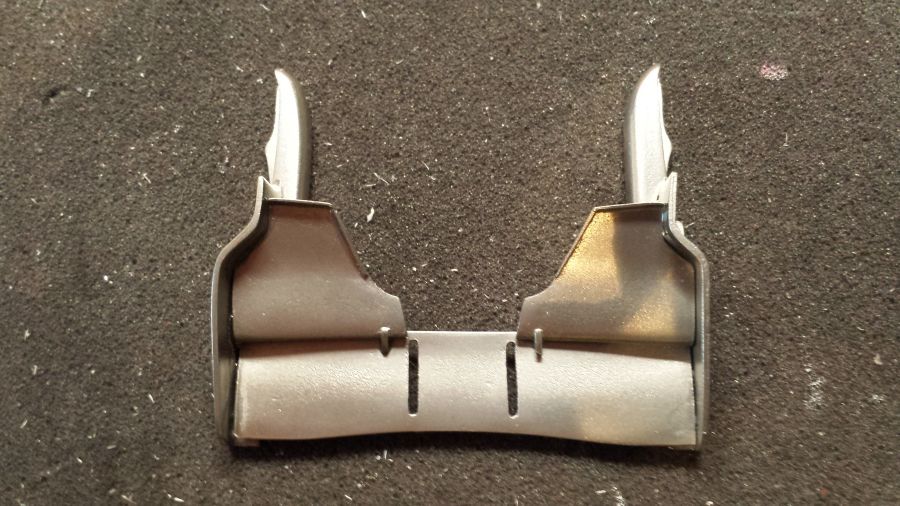
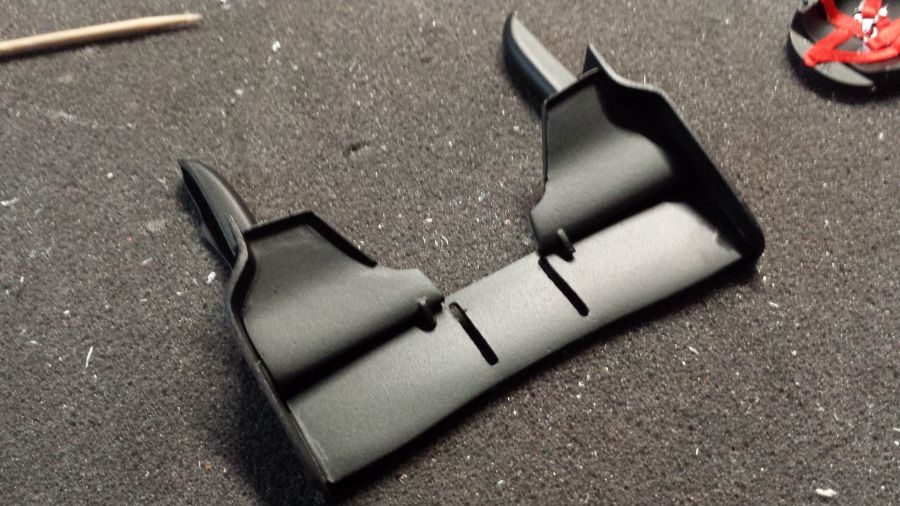
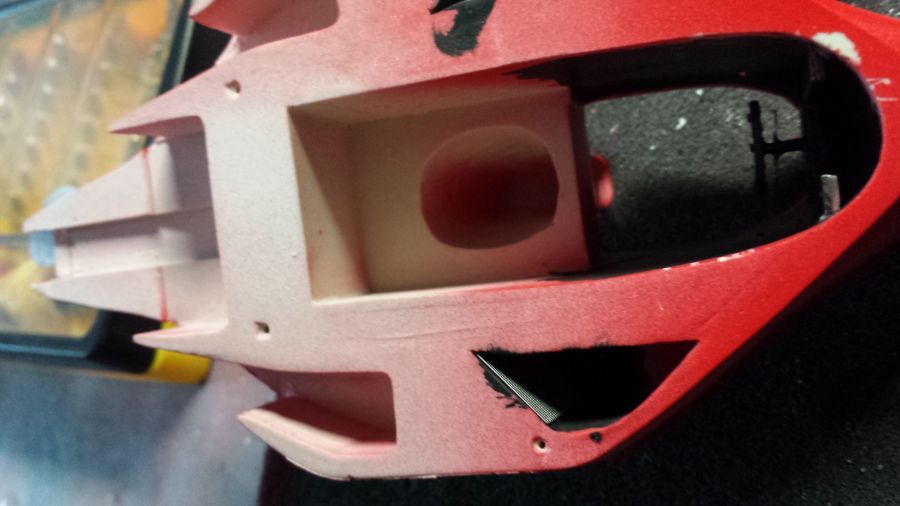
De vlakken waar de roosters worden geplakt worden eerst zwart gemaakt.
The parts where the vents are mounted first are painted black.
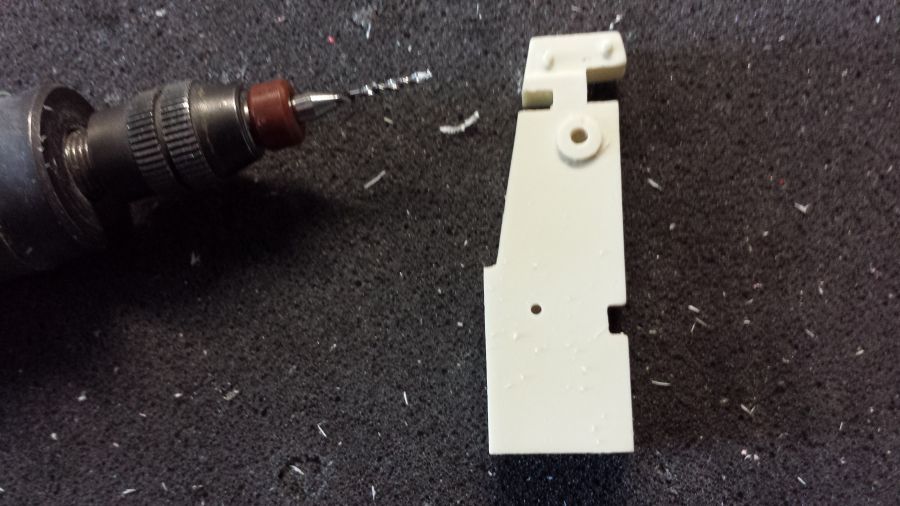
Eerst worden weer de remschijven op de trommels vastgezet en daar de gaten geboord voor de schroeven.
First the break discs are attached to the brakes and some holes are drilled for the screws.
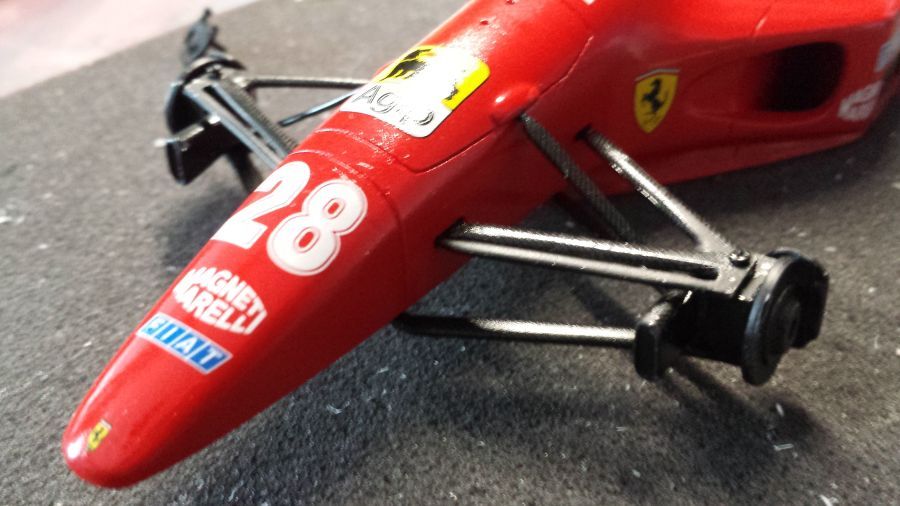
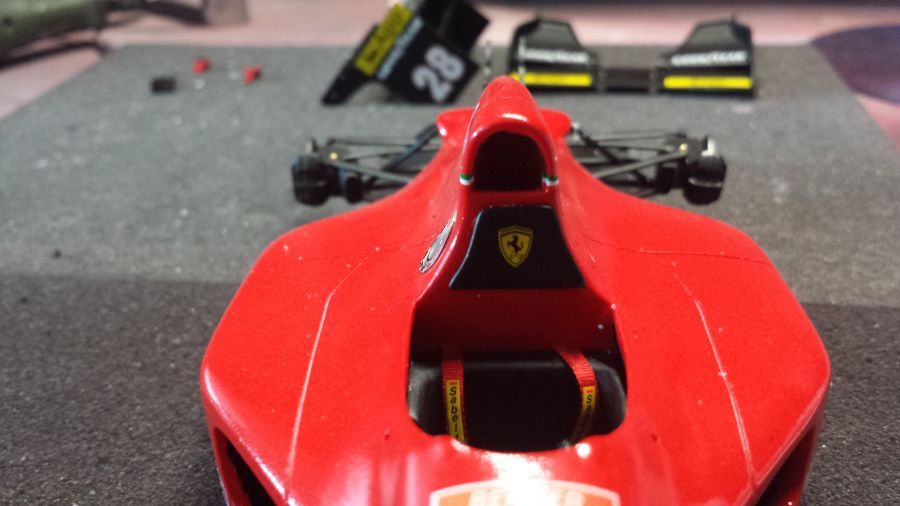
Daarna wordt de voorwielophanging vastgezet aan de body.
Then the front wheel suspension is attached to the body.
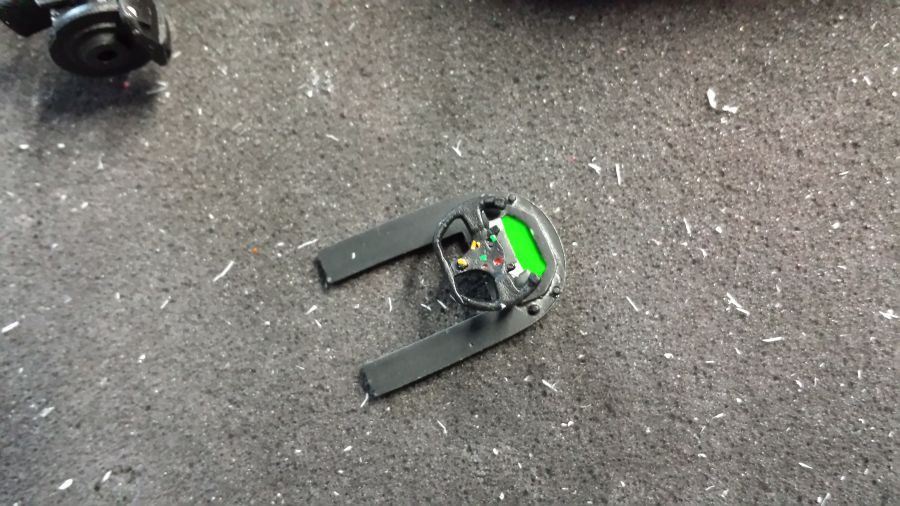
Verder met het dashboard.
Next is the dash.


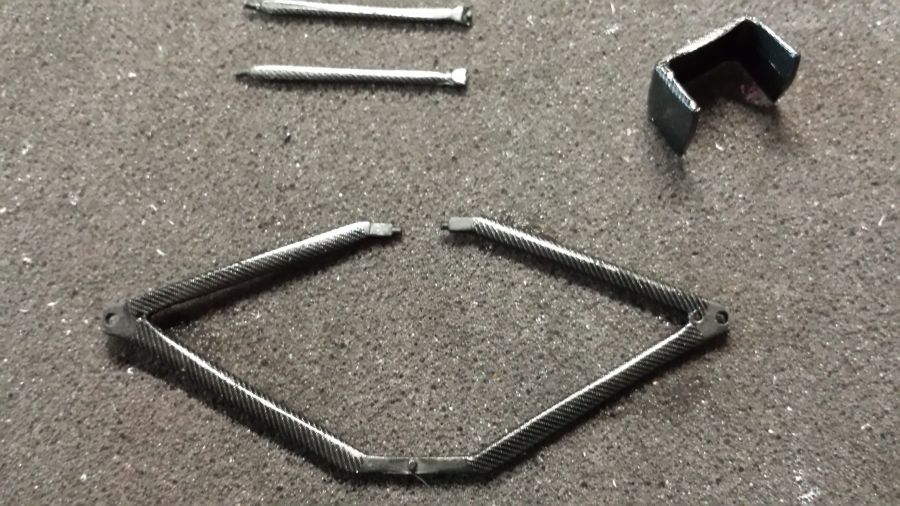
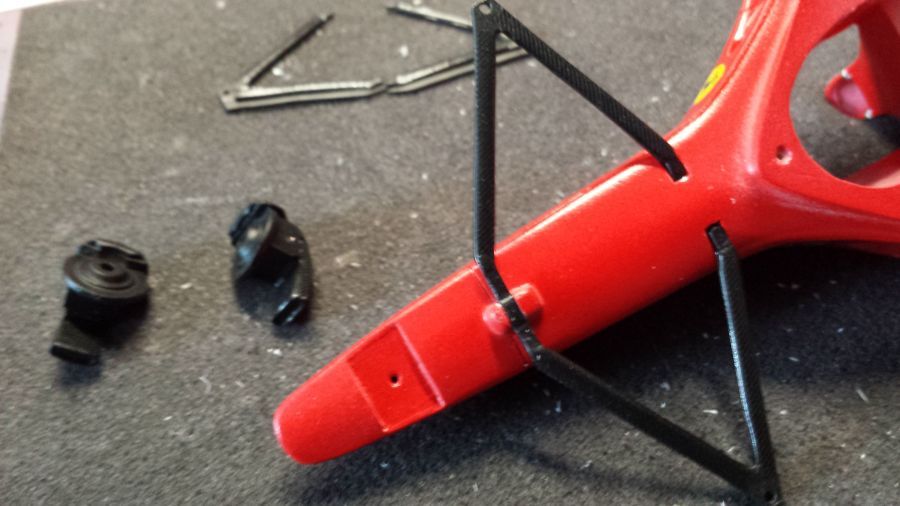
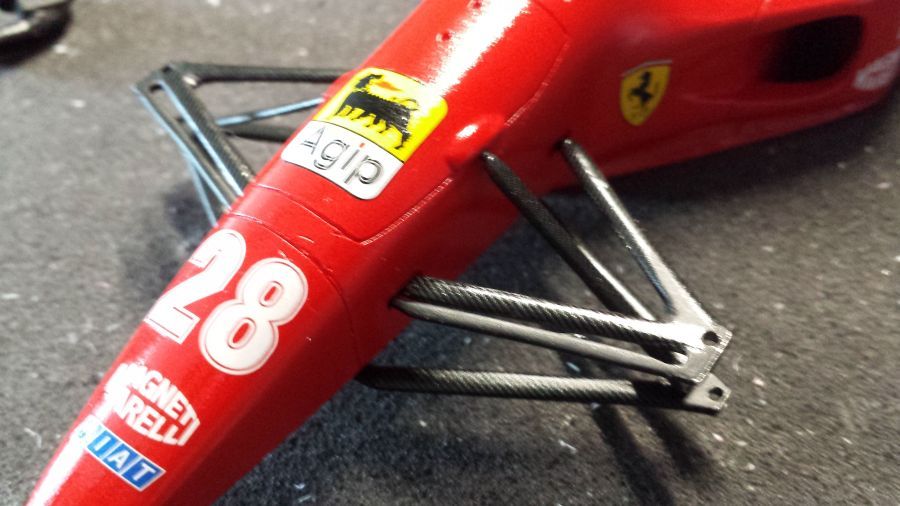
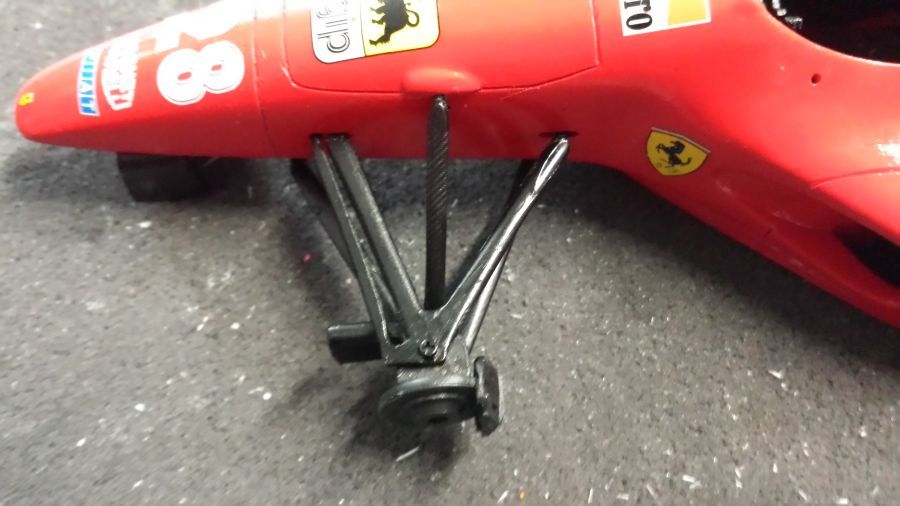
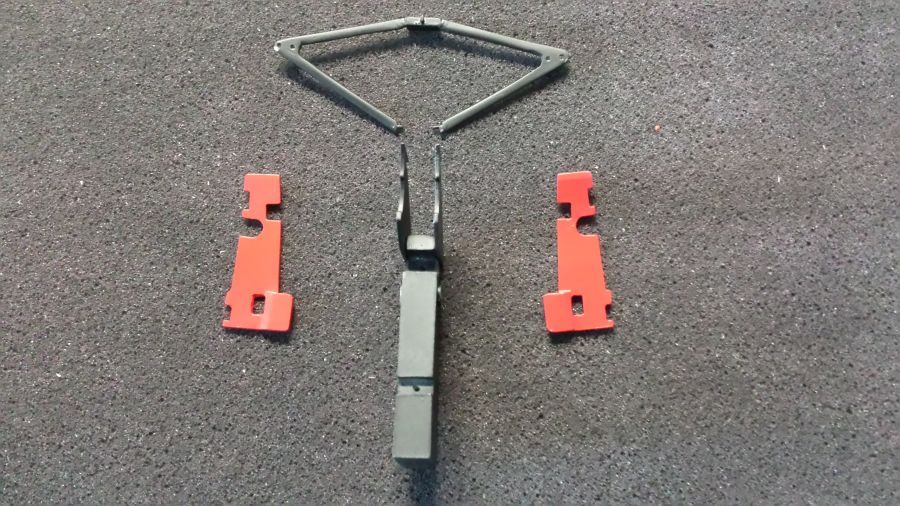
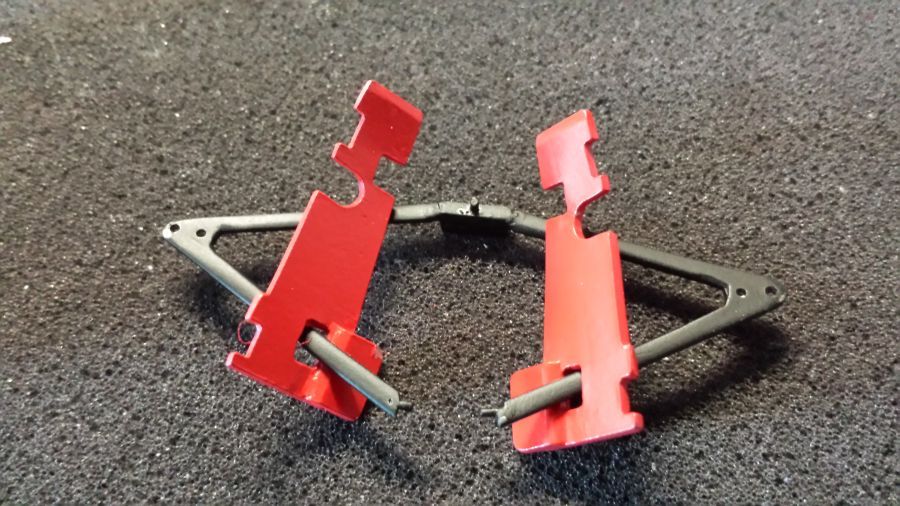
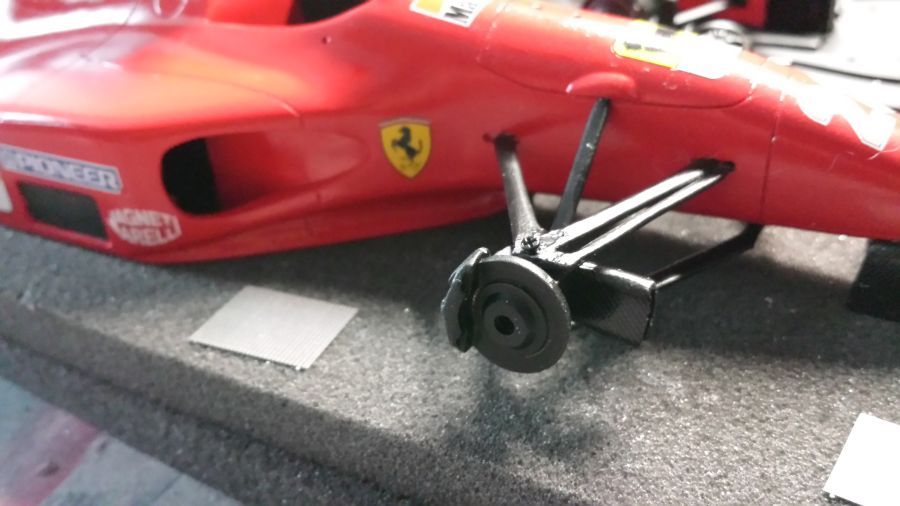
Een Faceboekvriend maakte me opmerkzaam dat de 412 T1 nog geen carbon armen had. Dank Martijn. Dat is natuurlijk eenvoudig te wijzigen. Het verschil is te zien.
A Facebook friend told me the 412 T1 did not have carbon arms. Thank you Martijn. This is easy to change of course. You can see the difference.
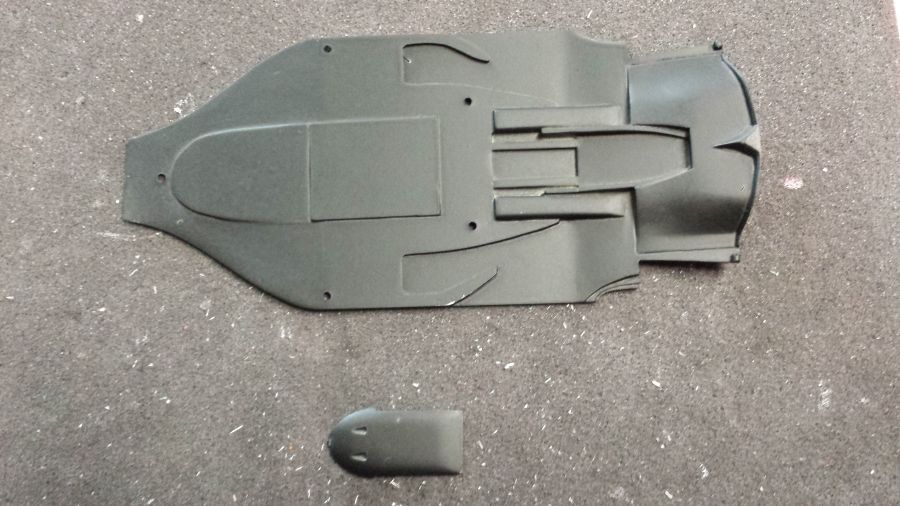
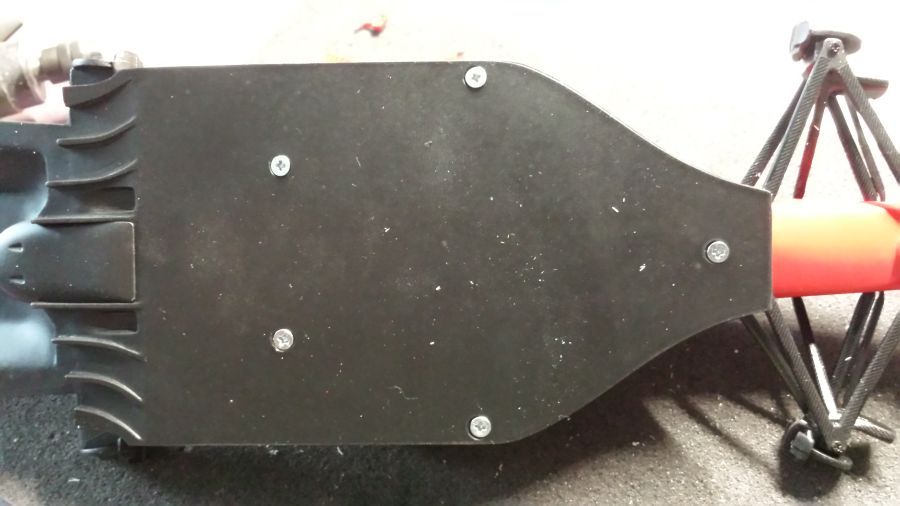
Vervolgens door met de bodem.
Then we continue with the floor.
Vervolgens gaan we door met de motor en de achterwielophanging. Eerst de gaten boren, daarna alles in de primer.
Then we will continue with the engine and the rear wheel suspension. First drilling some holes, then everything sprayed with primer.
Daarna zijn alle delen gespoten en wordt de boel in elkaar gezet. Lijm de rode delen niet. Deze blijven los en worden later op de bodemplaat op hun plek gezet.
Then all parts are painted and everything will be assembled. Do not glue the red parts. They keep loose and will be attached to the floor later.
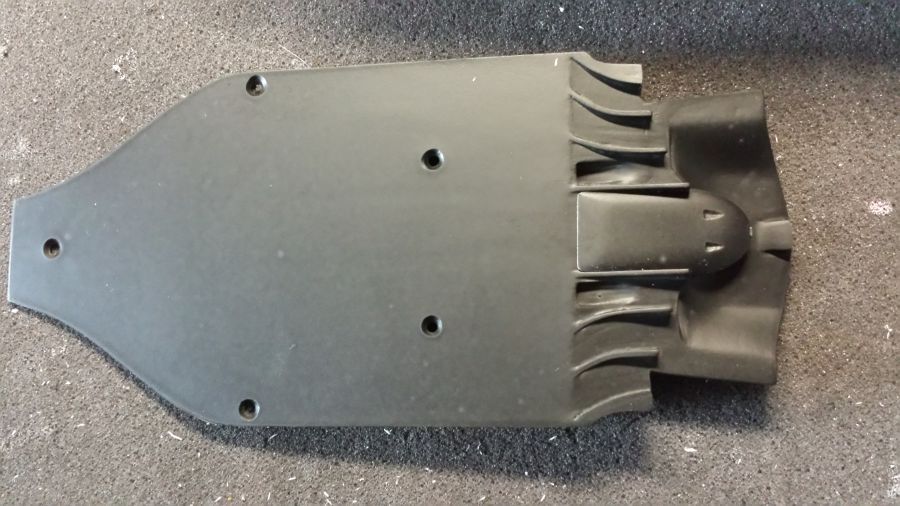
Vervolgens wordt dit deel op de bodemplaat bevestigd.
Then this part will be attached to the floor.
Daarna maar even passen en proberen of de hoogte van de achterwielophanging een beetje kan worden bepaald.
Then i will do a test fit and try if i can determine the height of the rear wheel suspension.
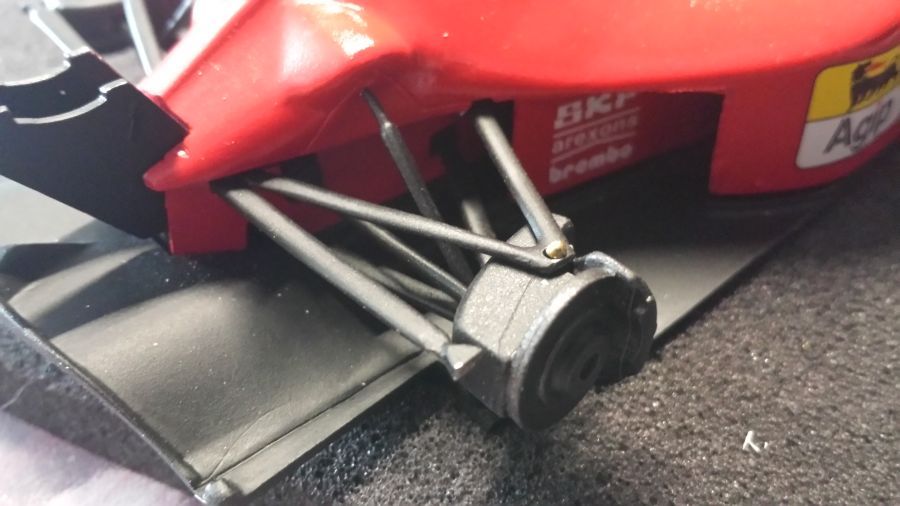
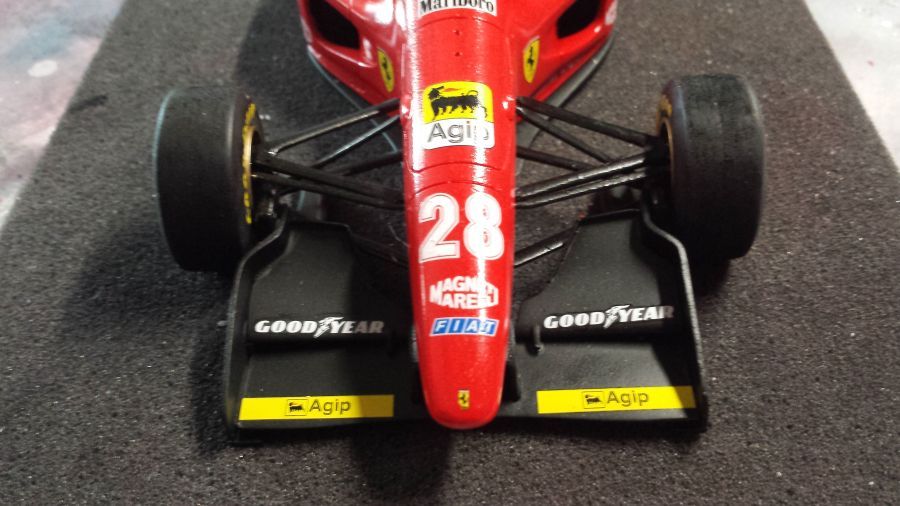
De remmen worden gemonteerd met behulp van popnagels met een kop van 1,6 mm van Scale Hardware.
The brakes are mounted with rivets from Scale Hardware with a 1,6 mm head.
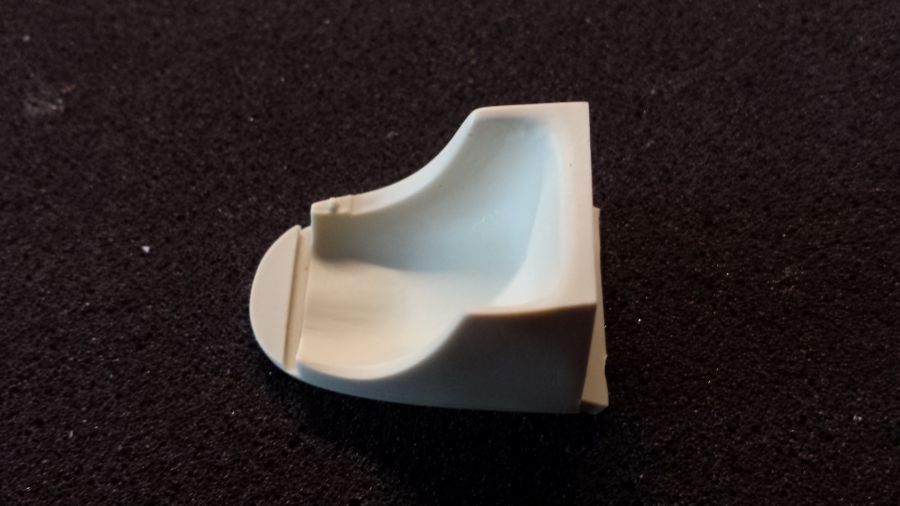
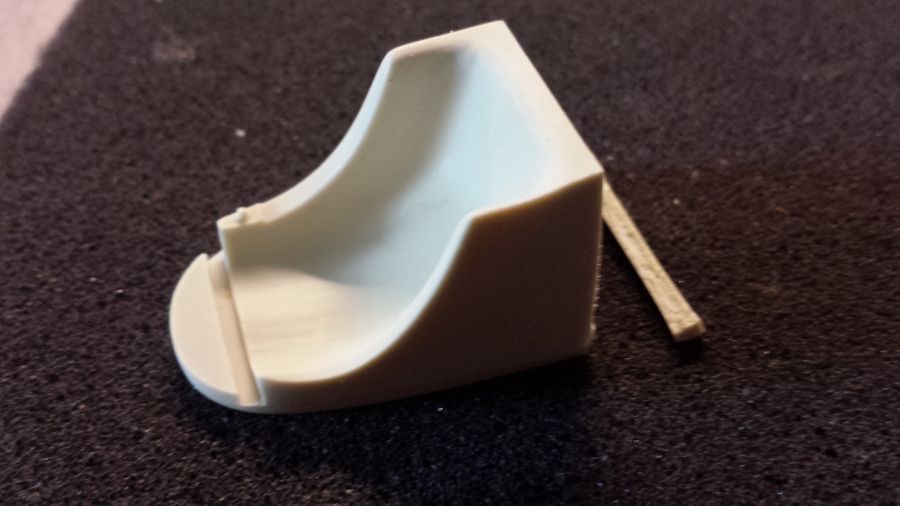
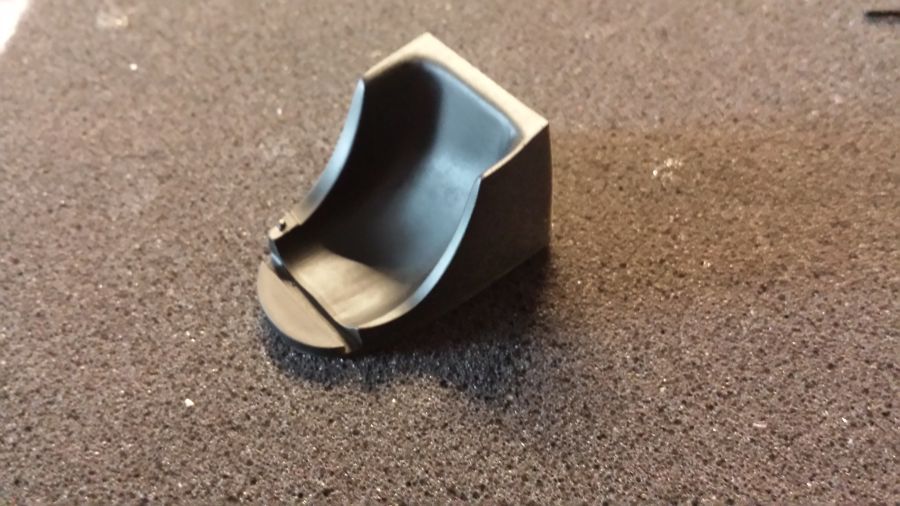
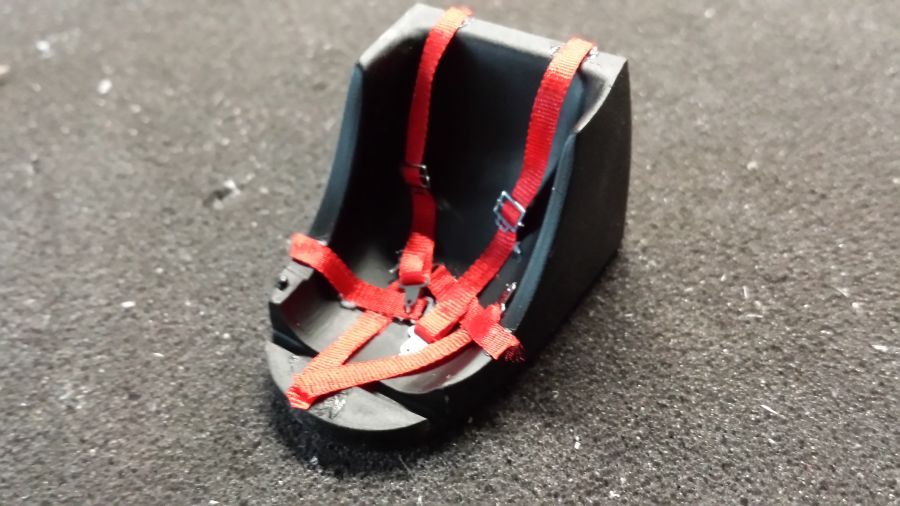
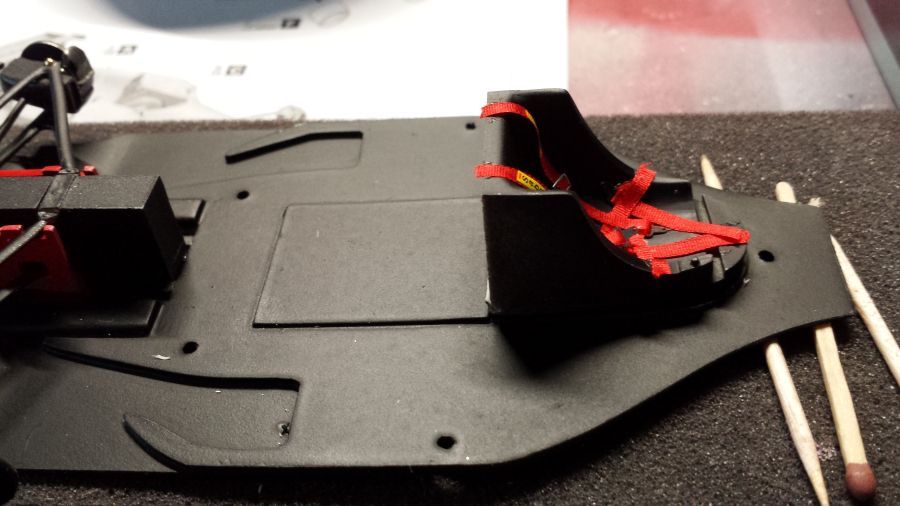
De stoel is aan de beurt, eerst alle overtollige giethars eraf en spuiten.
Then the seat. First get rid of the excessive resin and paint it.
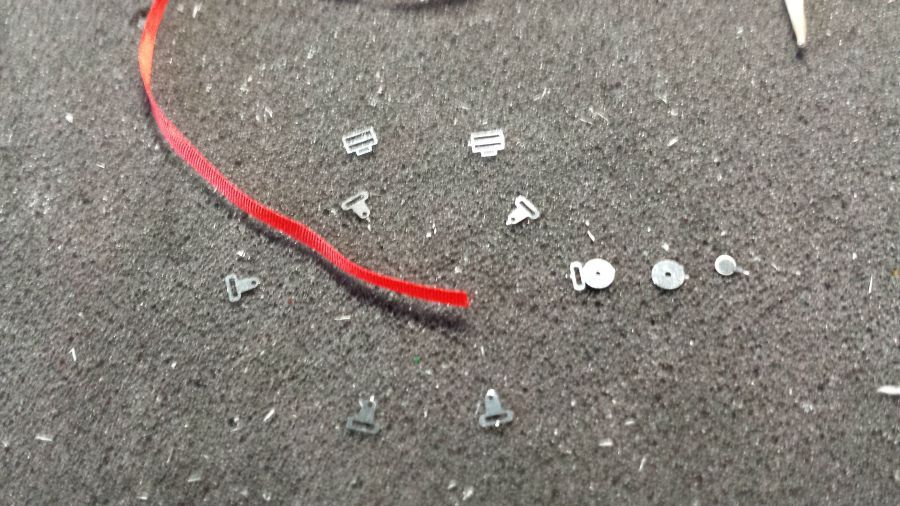
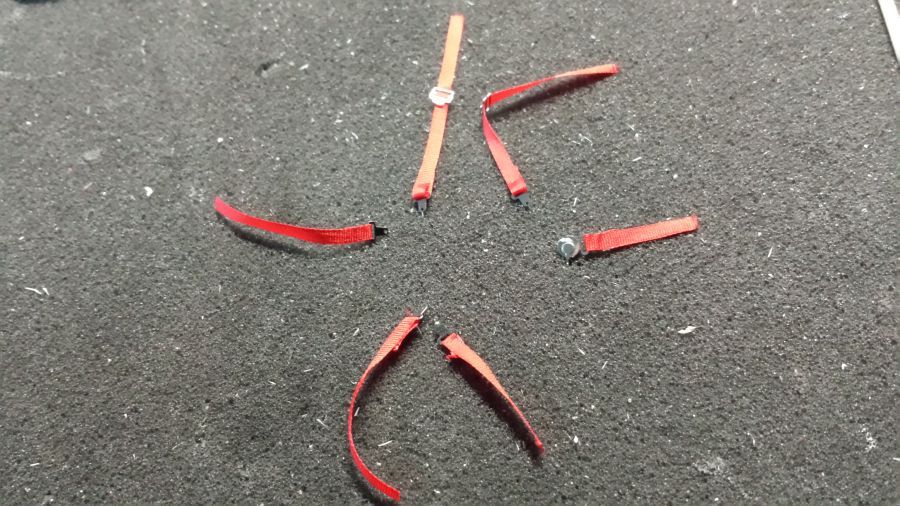
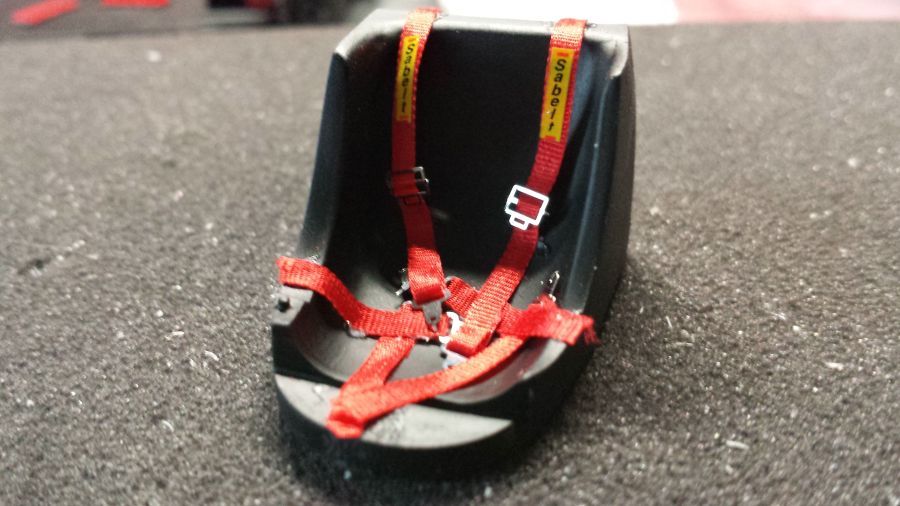
Dan eerst de gordels. Ik gebruik niet de etched gordels, maar maak ze weer van zijdelint. Ik gebruik houtlijm om de stof te plakken.
First the belts. I will not use the etched belts, but create them with the use of silk ribbon. I use white glue for the cloth.
En de stoel verder afmaken. Weer wordt dit gelijmd met houtlijm. Dit droogt mooi onzichtbaar op.
And finish the seat. Again everything is glued with white glue. This is invisible when dry.
Dan verder met de voorvleugel.
Then i will continue with the front wing.
Dan wordt de stoel op de vloer geplaatst.
The seat is being attached to the floor.
Voordat de body aan de vloer wordt bevestigd moeten de radiateuren worden geplaatst.
Before attaching the body to the floor the radiators have to be put in place.
Dan de zijkanten afwerken.
Next the sides are finished.
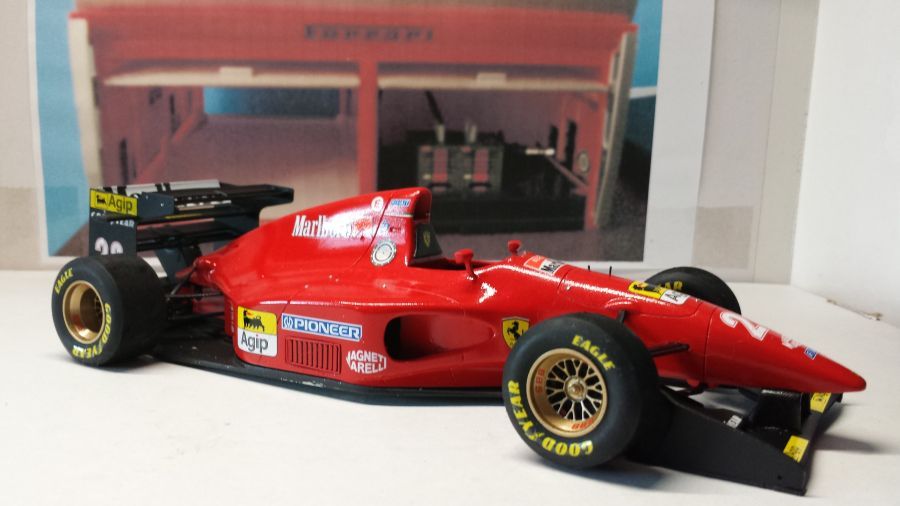
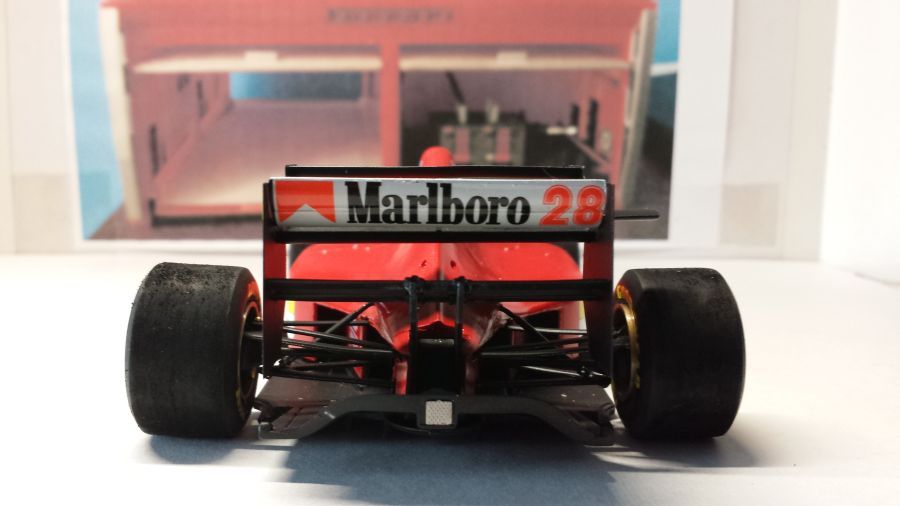
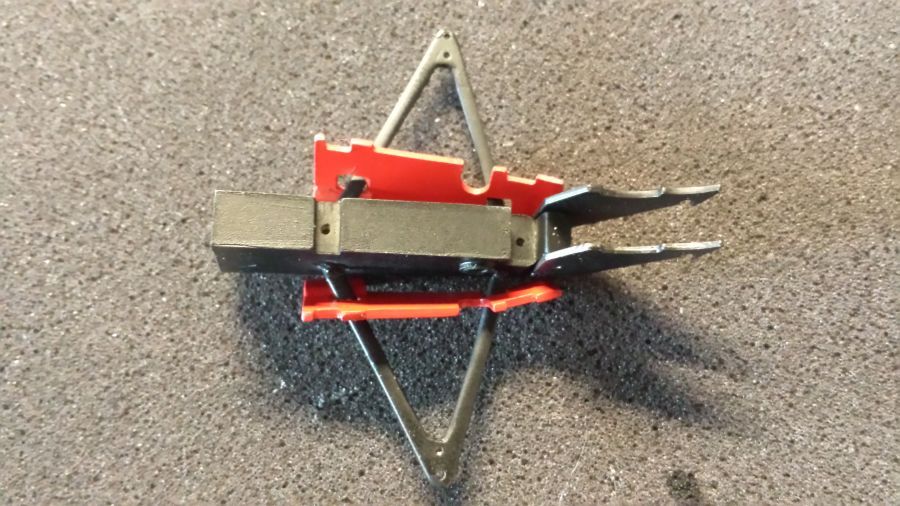
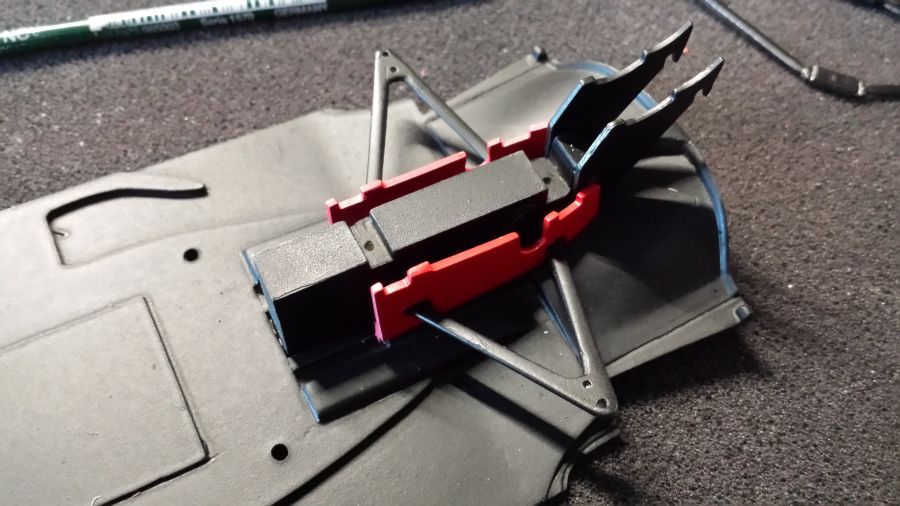
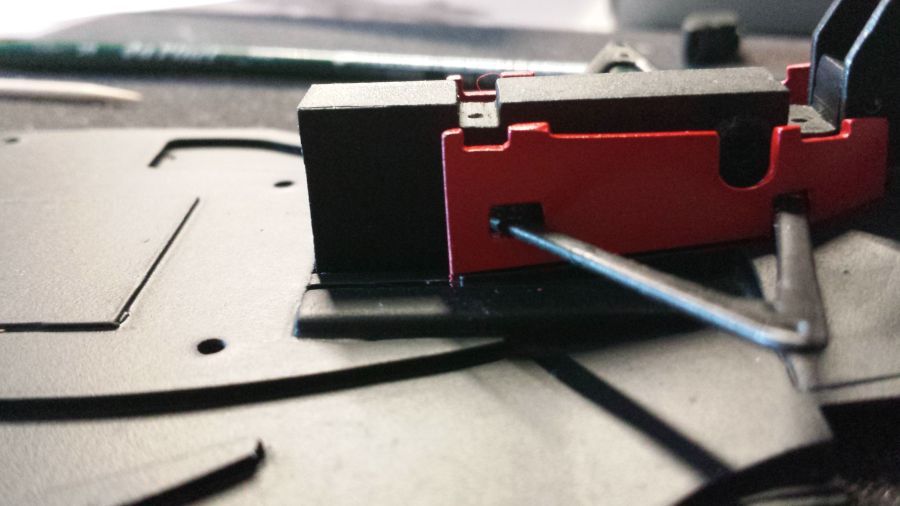
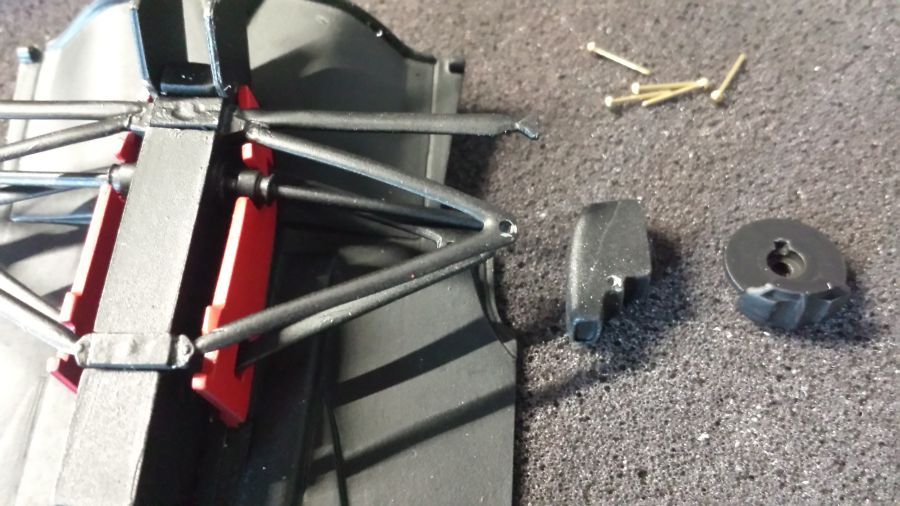
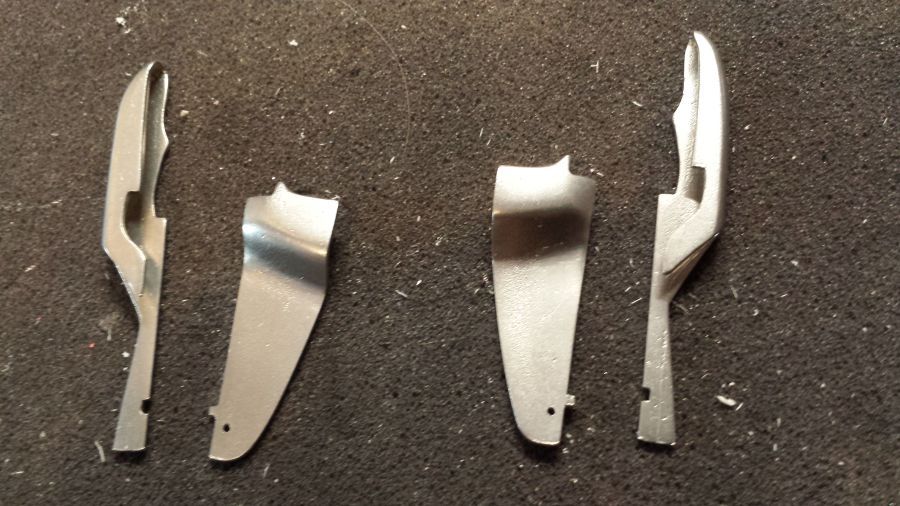
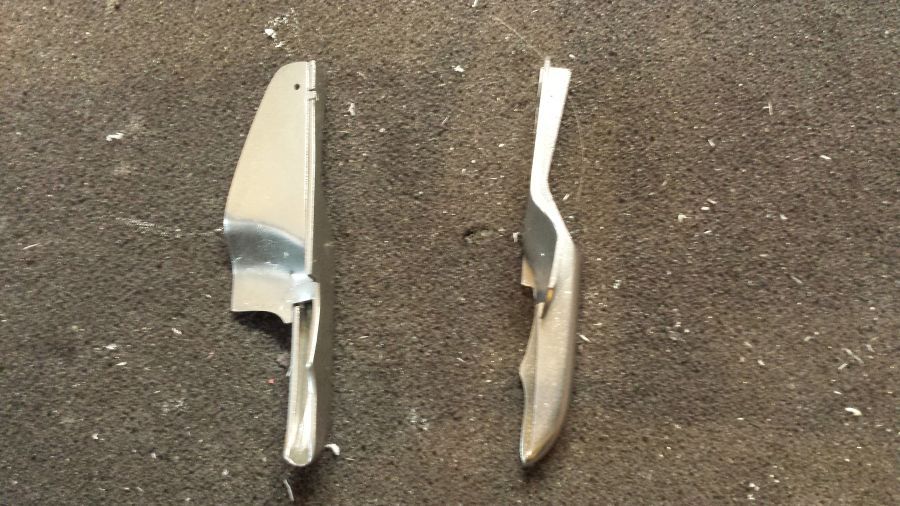
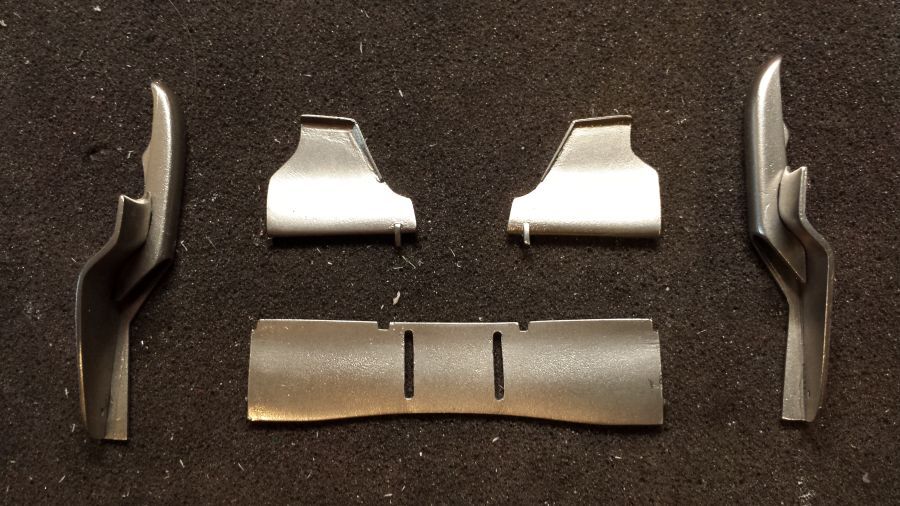
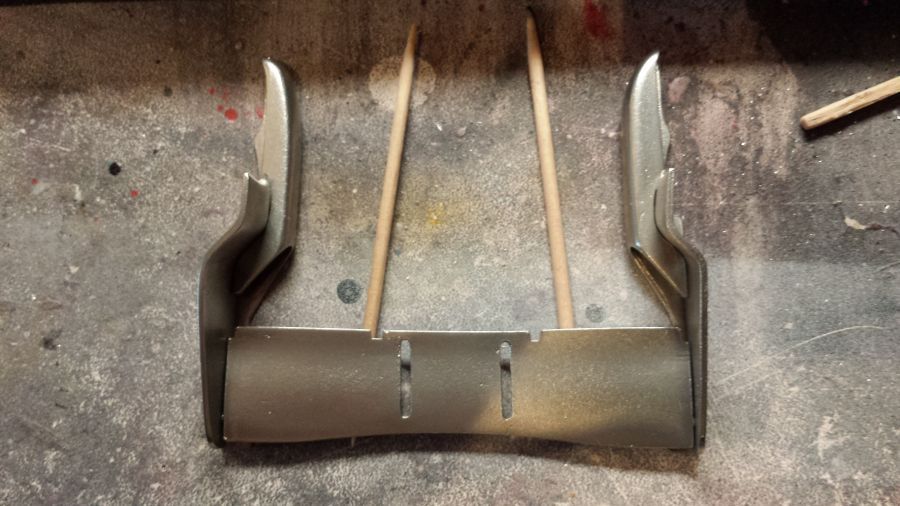
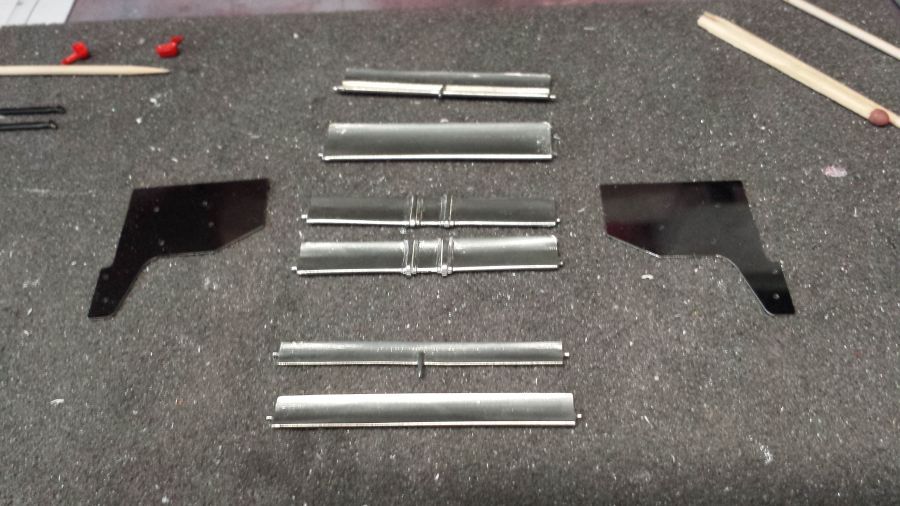
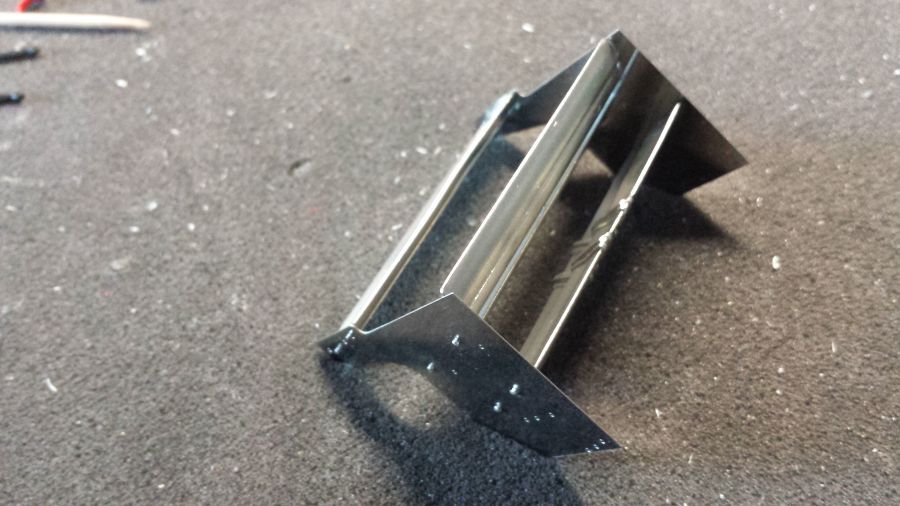
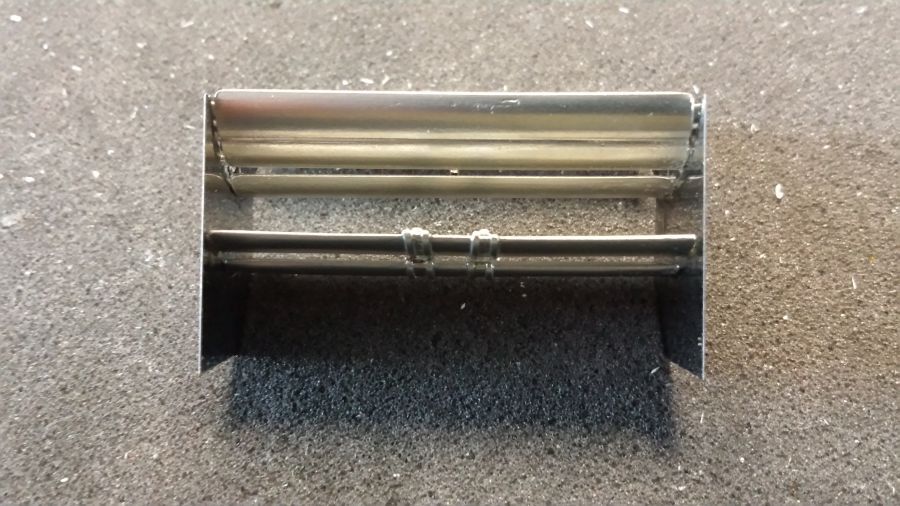
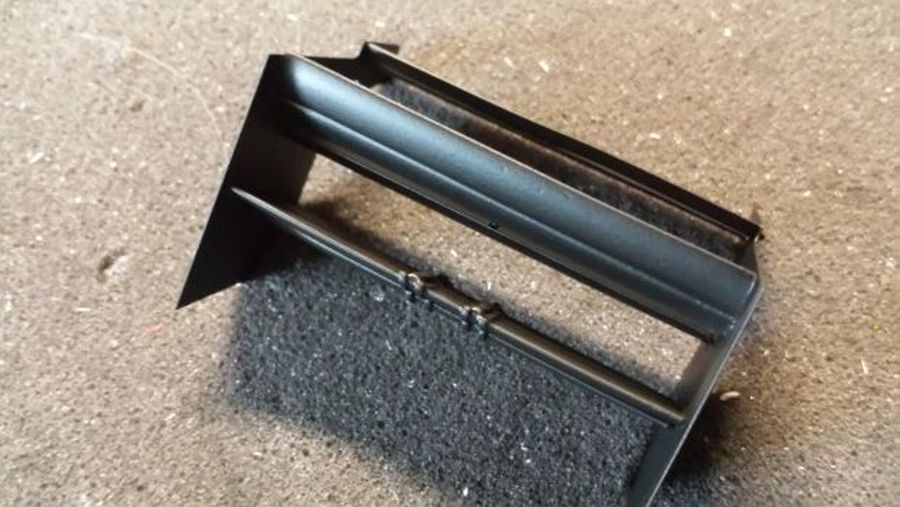
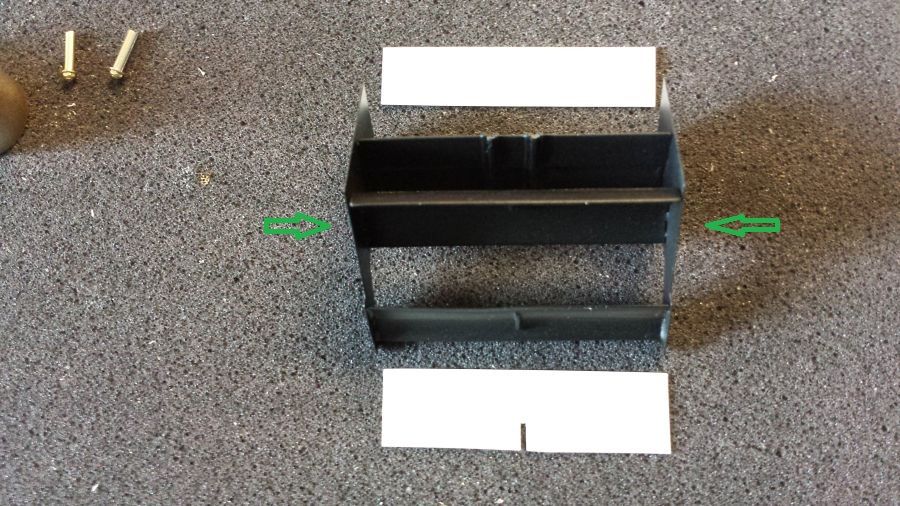
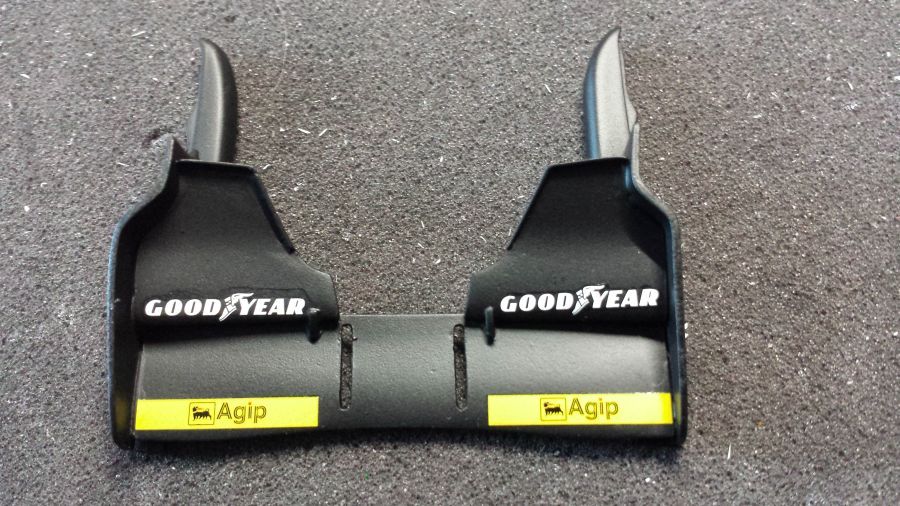
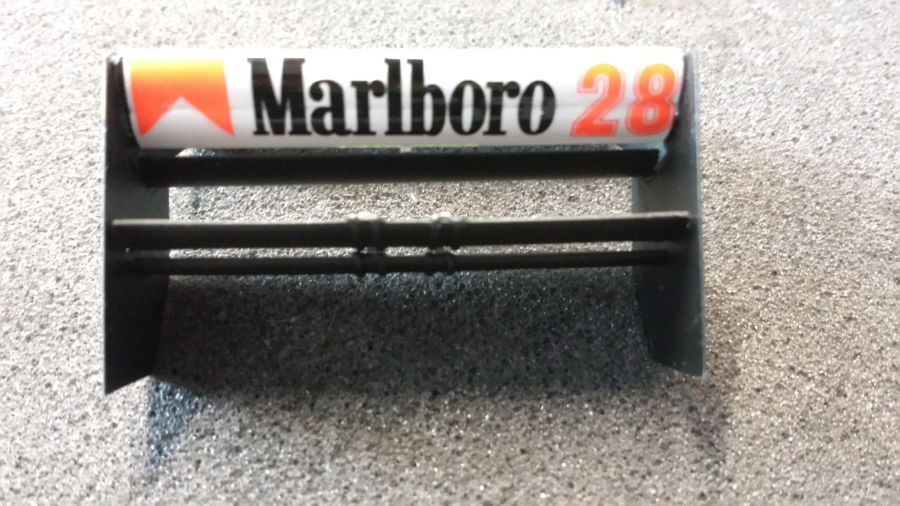
Dan verder met de achtervleugel. Moeilijke klus met 6 horizontale elementen. Er zijn tijden dat je zou willen dat je 4 handen had.
Next is the rear wing. A tough job with 6 horizontal elements. There are times you wish you would have 4 hands.
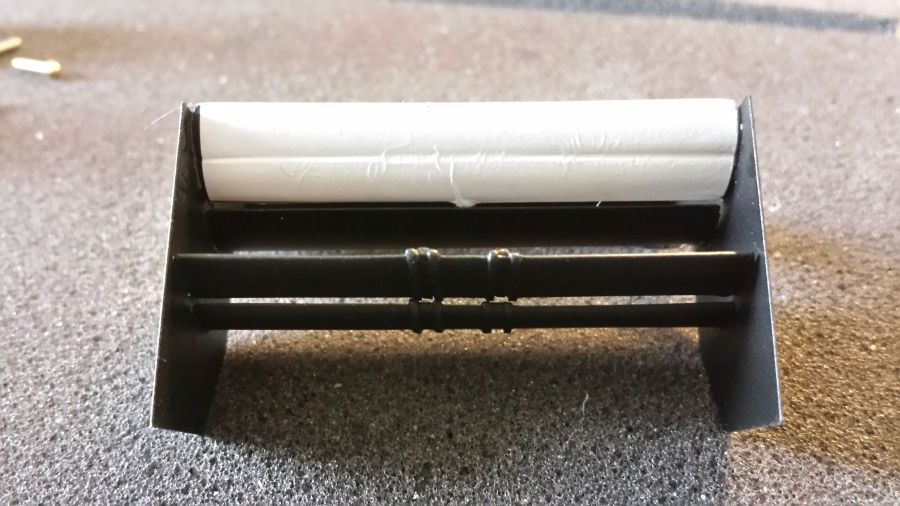
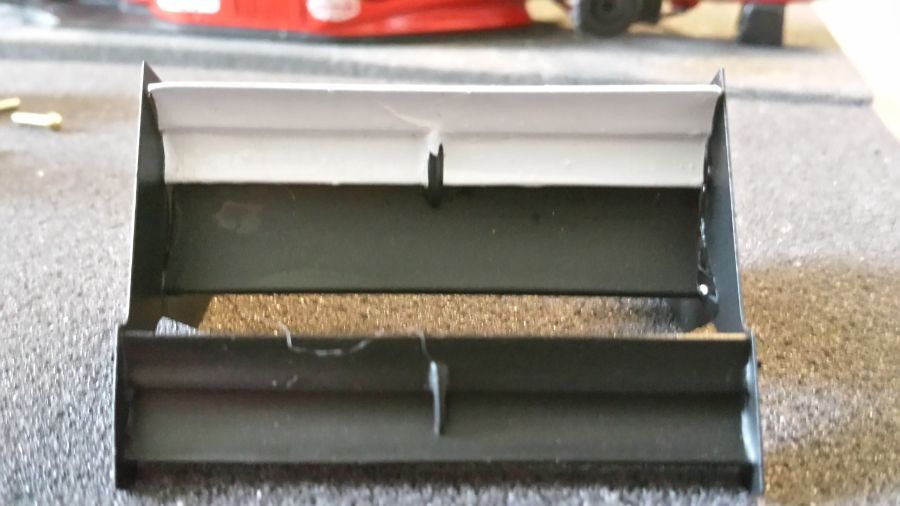
Een paar delen moeten wit worden. Ik gebruik daarvoor wit decalpapier dat ik op maat heb geknipt. Wanneer de Micro Set en Micro Sol droog is zullen de vouwtjes verdwijnen.
A few parts have to be white. I will use white decal paper, which i have cut to size. Once the Micro Set and Micro Sol have dried the wrinkles will be gone.
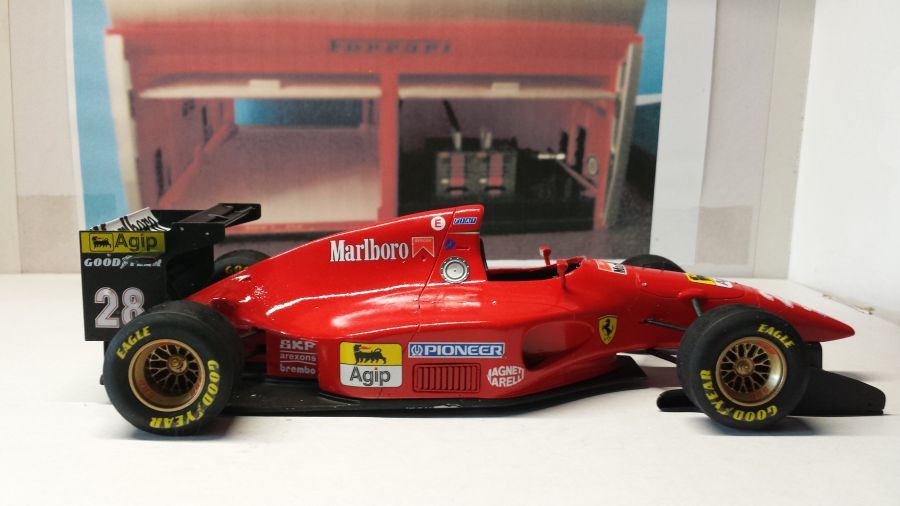
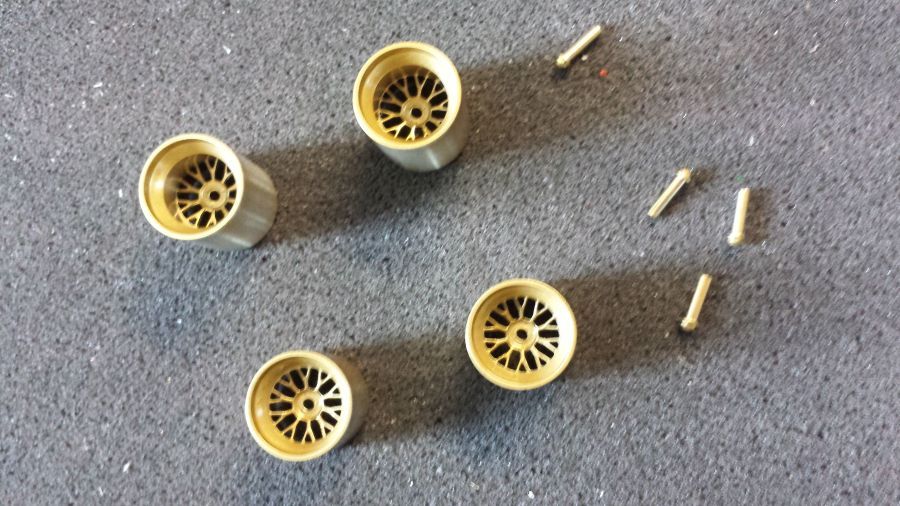
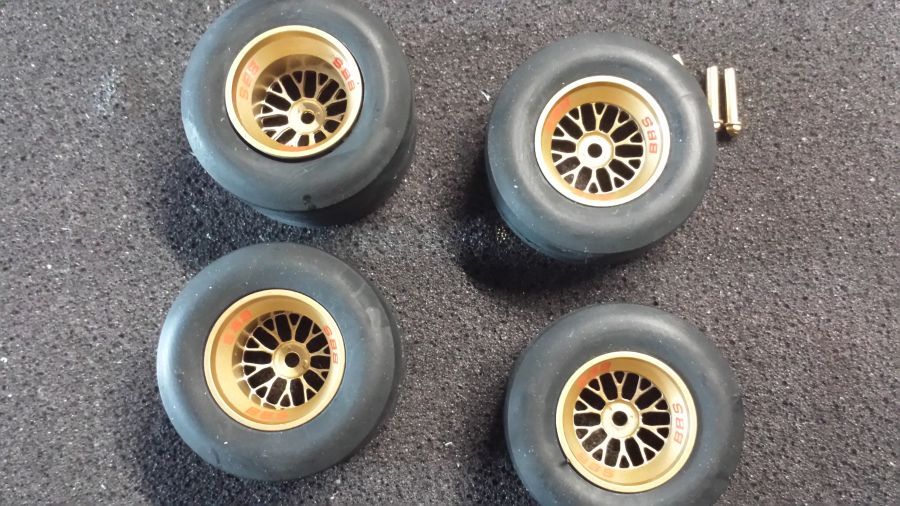
Terwijl de boel droogt zet ik de velgen in elkaar en ga deze goud spuiten met Tamiya TS-21 Gold.
While drying i will combine the rims and spray them with Tamiya TS-21 Gold.

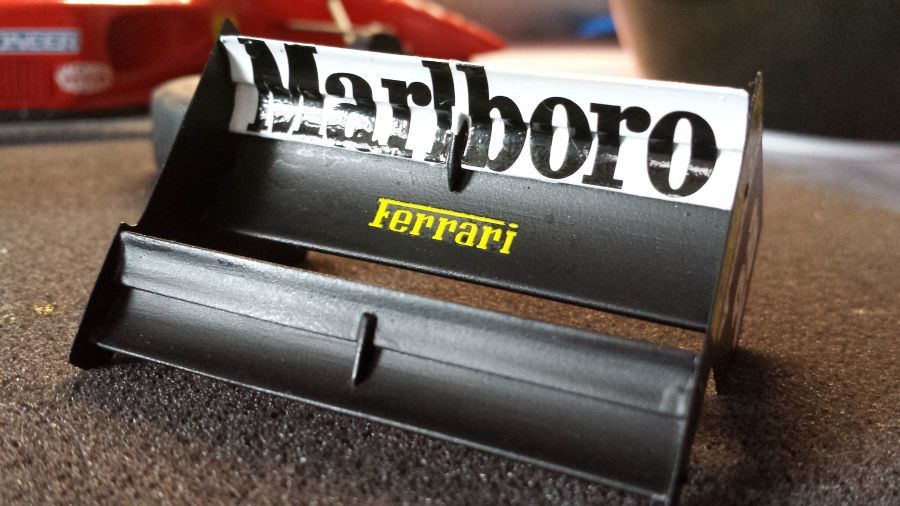
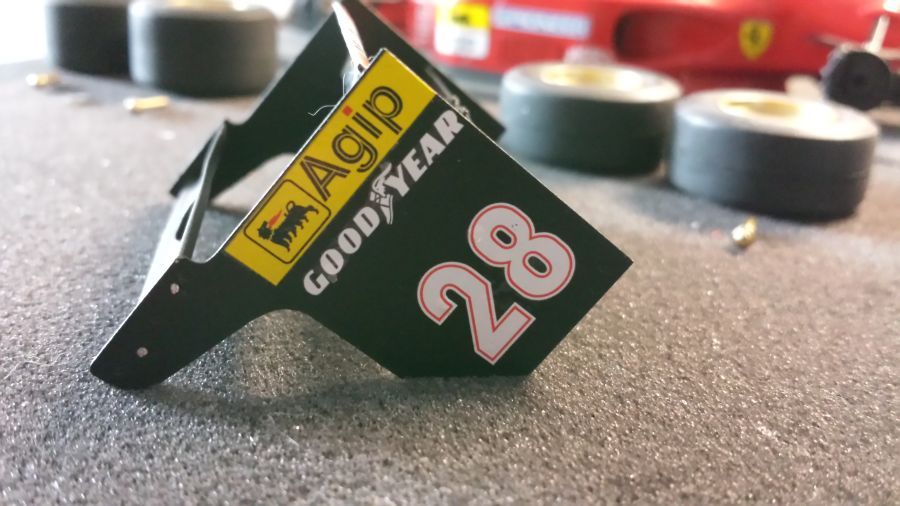
Terwijl de verf droogt ga ik de resterende decals op de vleugels plakken.
While the paint dries, i will apply the rest of the decal to the wings.
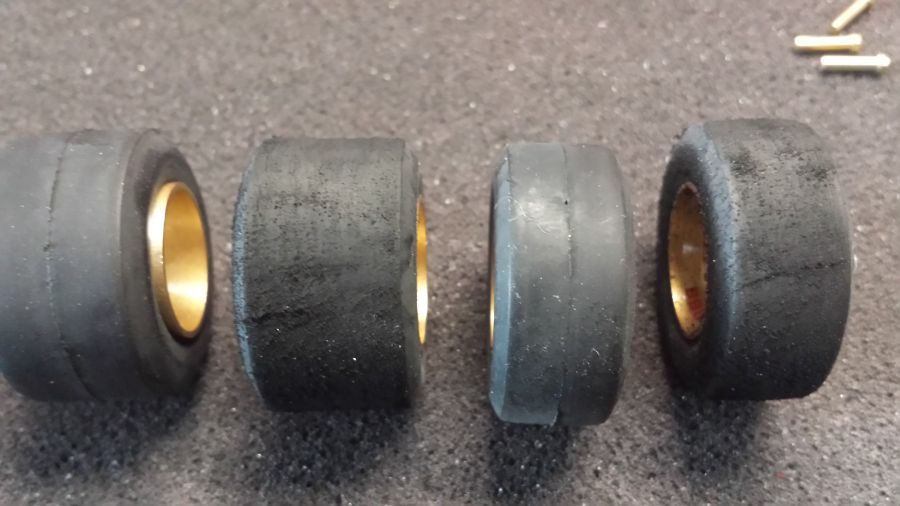
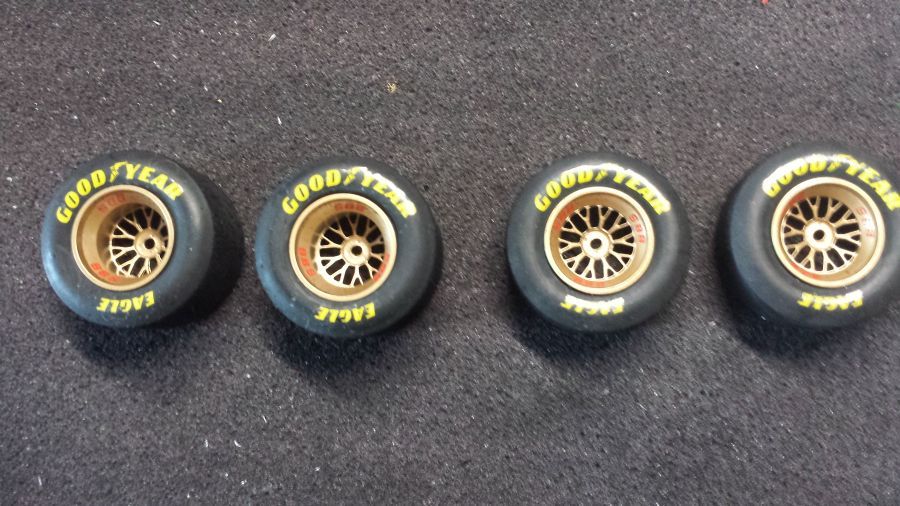
Dit weer laten drogen, dus maar weer verder met de banden. Decals erop, de banden opruwen en weer decals.
This has to dry again, so let's continue with the tires. Decals on it, make the tires rough and more decals.
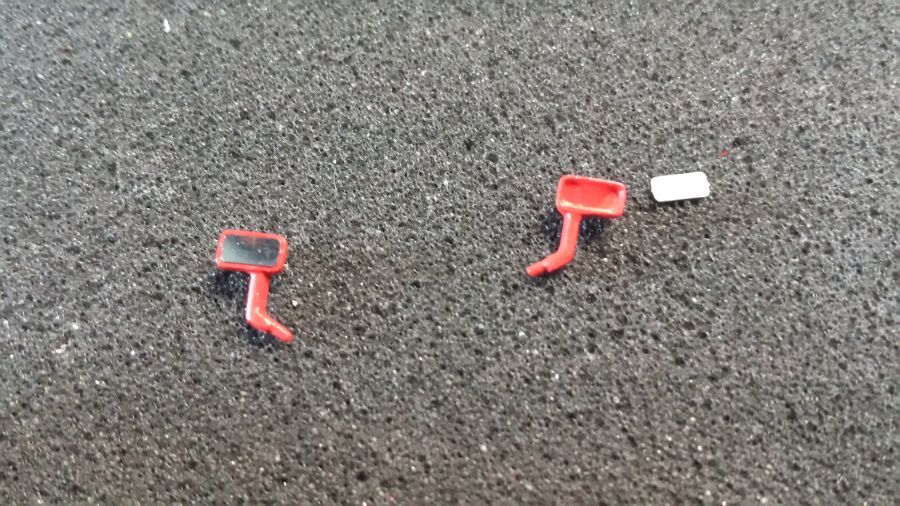
Dan een paar kleine onderdelen, nog een paar onderdelen aan de achterwielophanging, de spiegels, de hoofdsteun.
Then some small parts, a few parts to the rear wheel suspension, the mirrors, the head rest.
De wielen kunnen er op.
The wheels can be mounted.
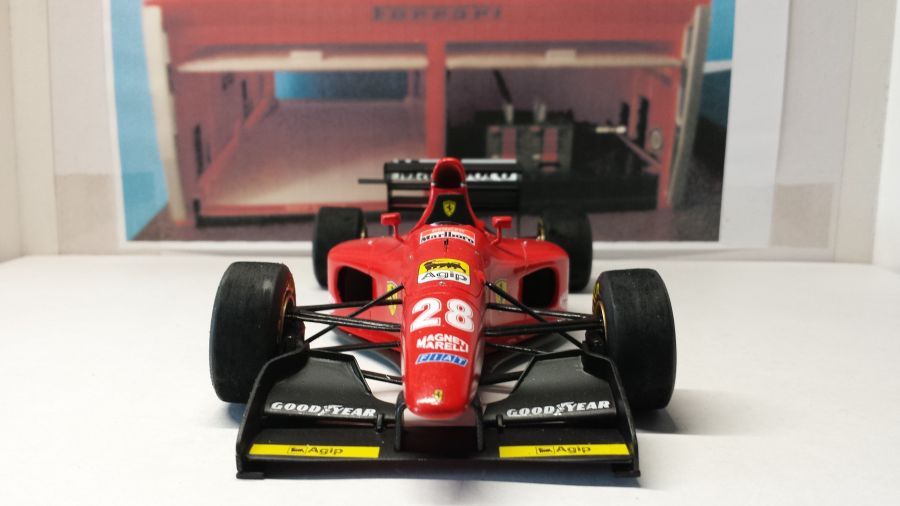
De voorvleugel...
The front wing...
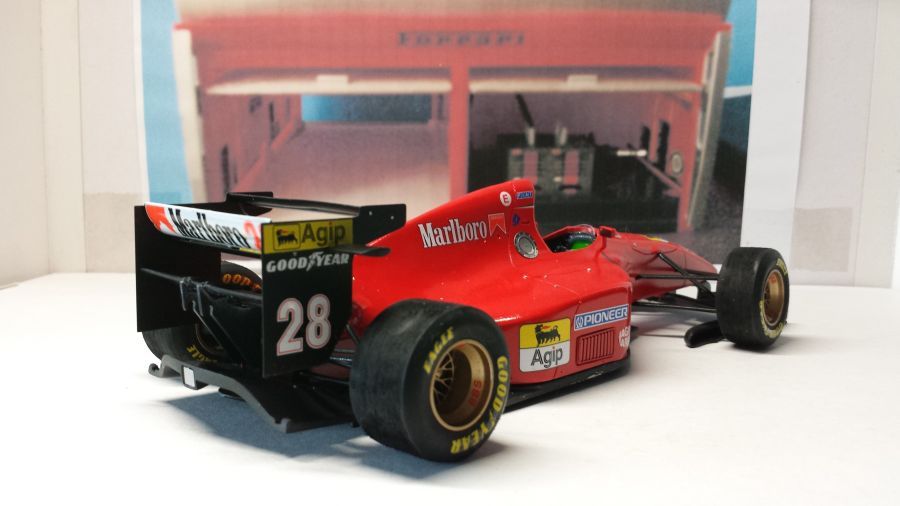
De snelsluitingen worden geplaatst, de spiegels, de antennes, het raampje, de camera en de achtervleugel.
The fasteners are attached, the mirrors, the antennas, the wind shield, the camera and the rear wing.

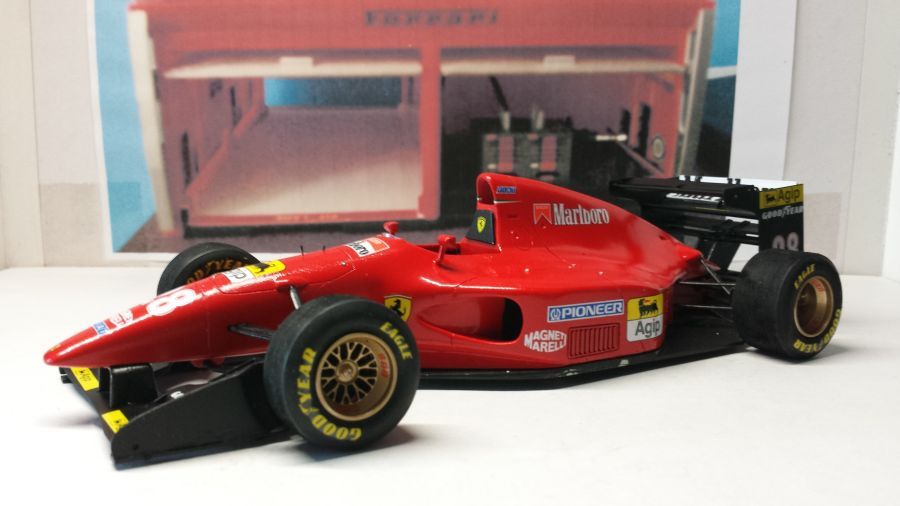
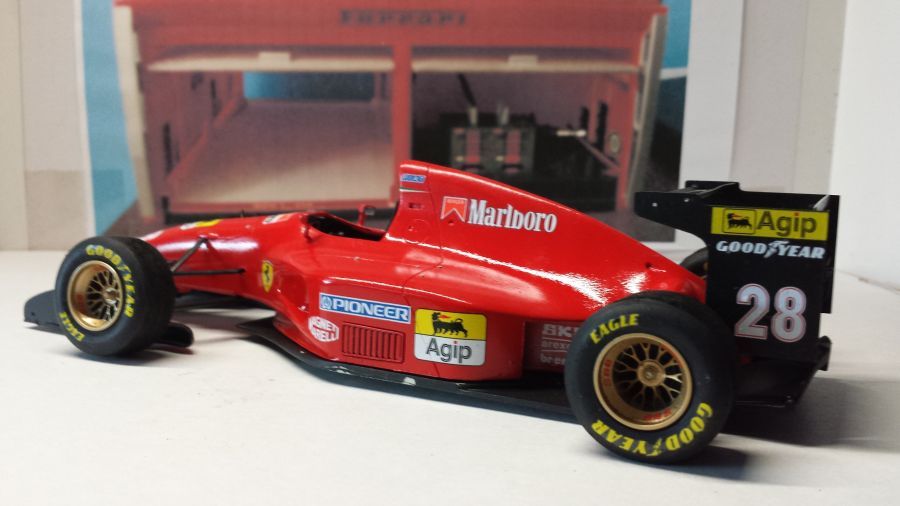
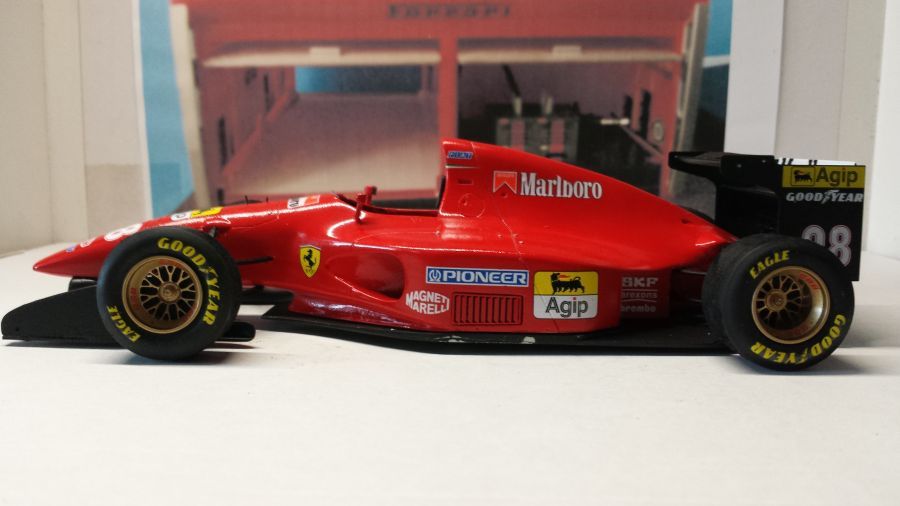
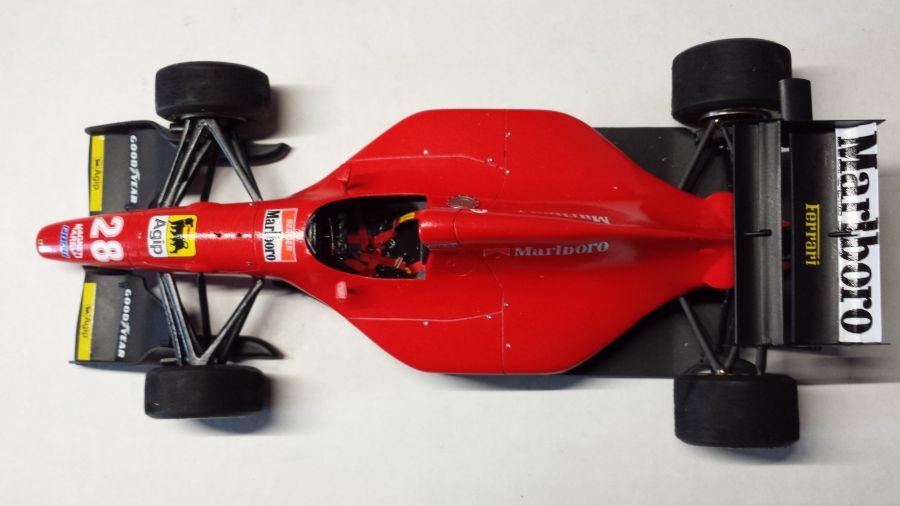
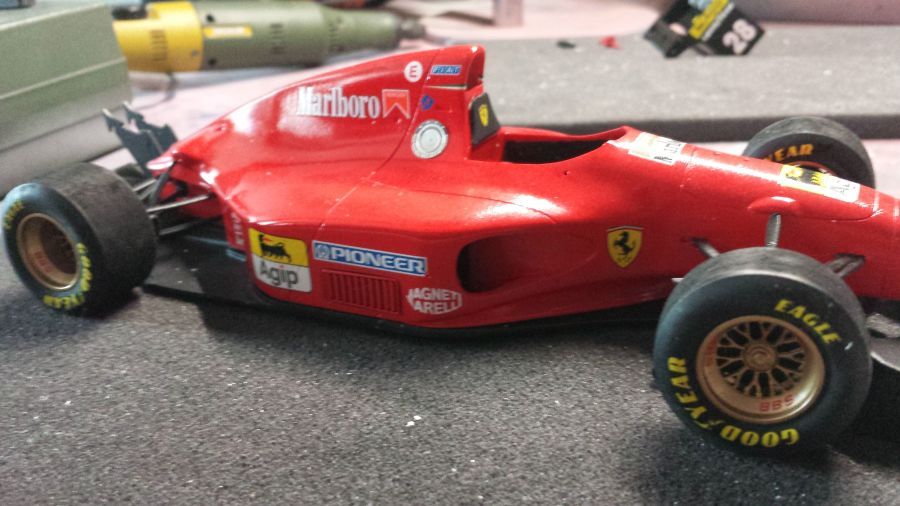
En er kan weer 1 in de vitrine.
And i have another one for the cabinet.