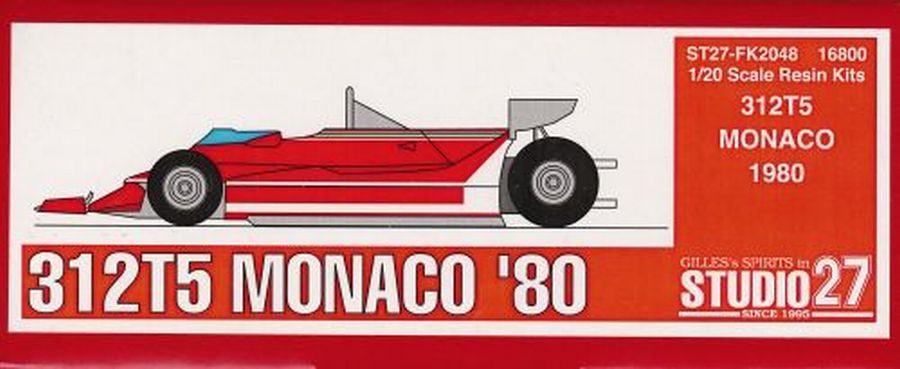
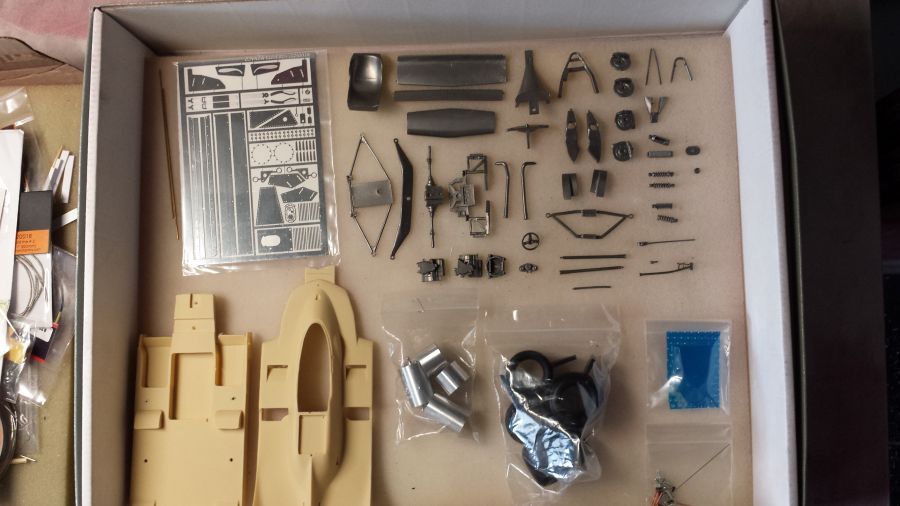
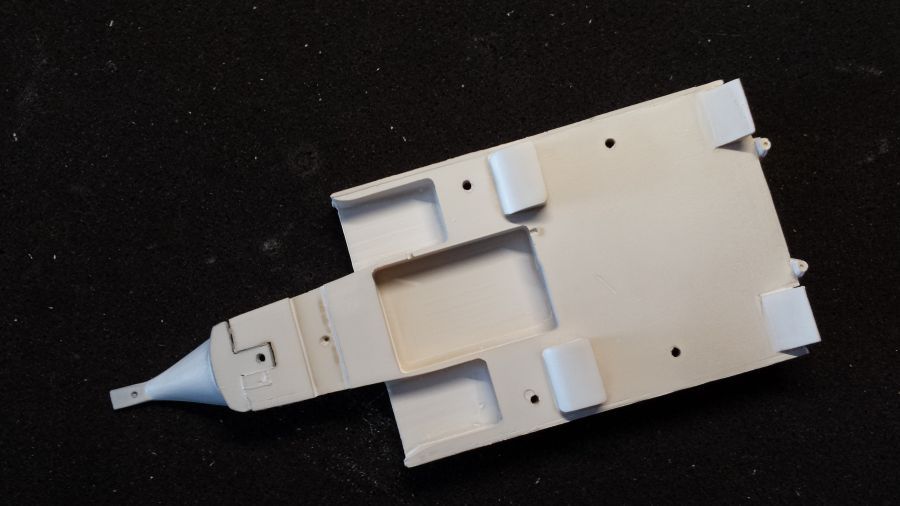
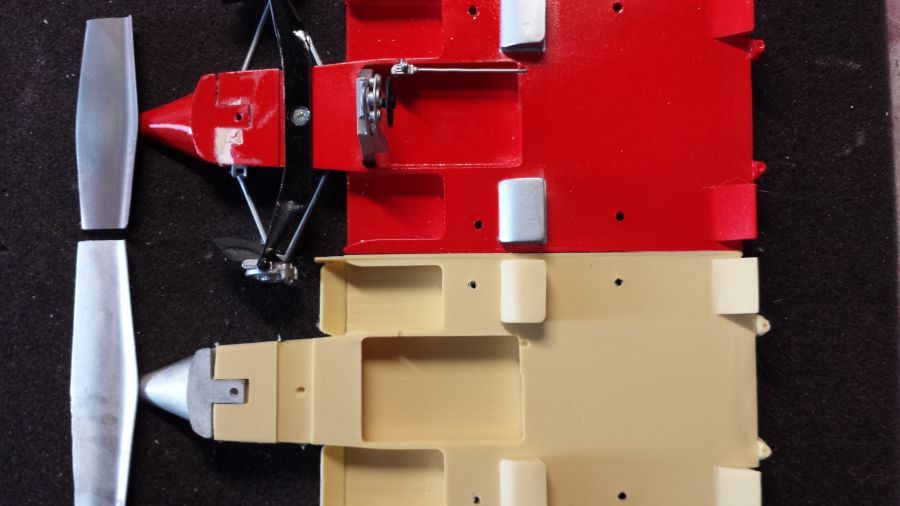
Deze Studio27 Ferrari 312 T5 Monaco kit (nr ST27-FK2048) heb ik kort gelden gekocht. Voor mij een must om deze in de verzameling te hebben. Hoewel in feite de MFH 312 T4 Monaco kit deze 312 T5 wel overbodig maakt. Bij inspectie zag ik dat de decals in slechte staat waren. De beschermfolie plakte aan de decals vast. Mede daarom wil ik deze wagen zo snel mogelijk bouwen. Daarnaast wilde ik hem doen, voordat ik aan de MFH 312 T4 begin. Ik ben bang dat ik anders niet meer zoveel plezier aan het bouwen van de 312 T5 zou hebben. Hieronder de onderdelen van de bouwdoos.
This Studio27 kit (no ST27-FK2048) of the Ferrari 312 T5 Monaco was bought by me a short while ago. To me a must to have it in my collection. Though the MFH 312 T4 Monaco might make this one obsolete. On the inspection i noticed the decals were in bad shape. The protection foil sticks to the decals. That is why i decided to build this one first. I also wanted to do this before the MFH 312 T4. I am afraid i wouldn't have much fun on this one, if i would do it the other way around. Below the parts of the kit.
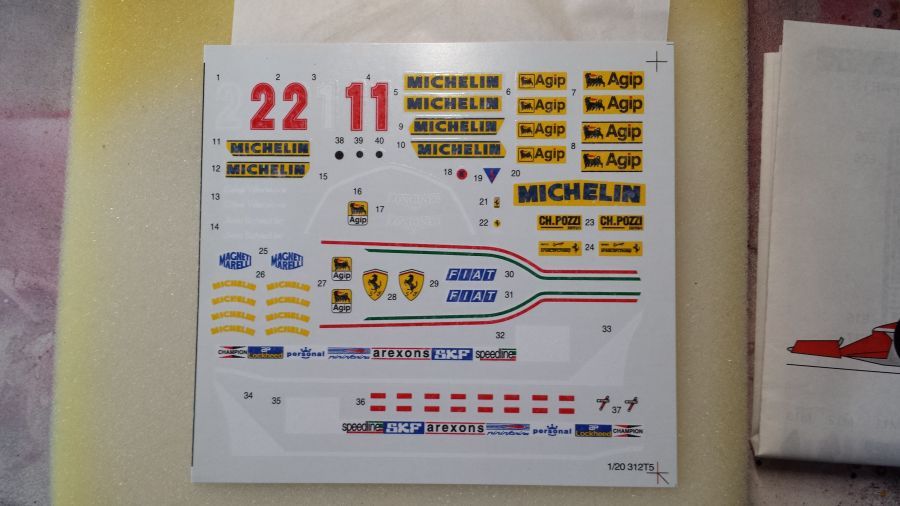
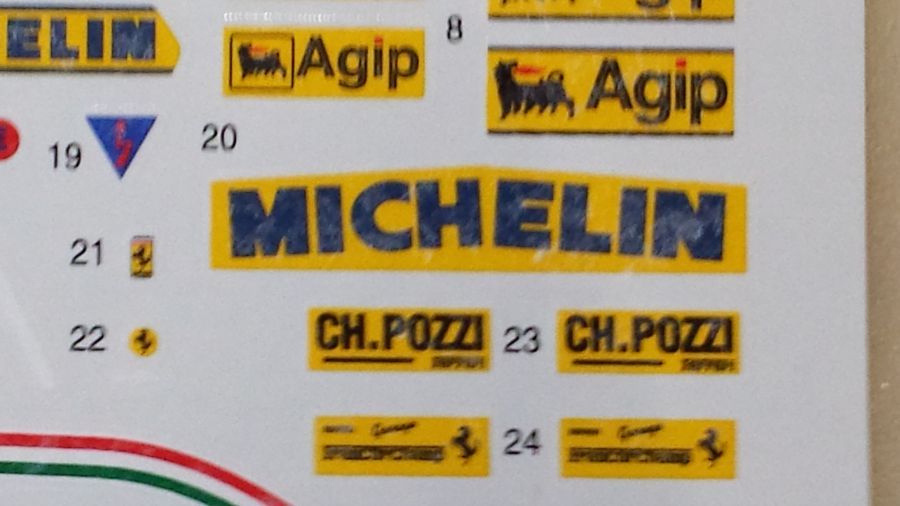
De schade aan de decals. Ik hoop dat de papierlaag eraf gaat wanneer de decals in water komen.
The damage to the decals. I hope this paper layer will come off when they are dipped in water.
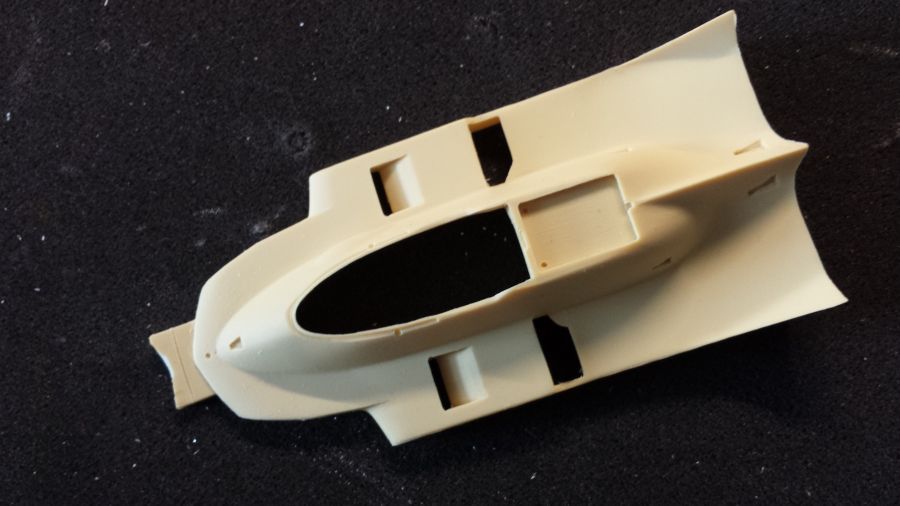
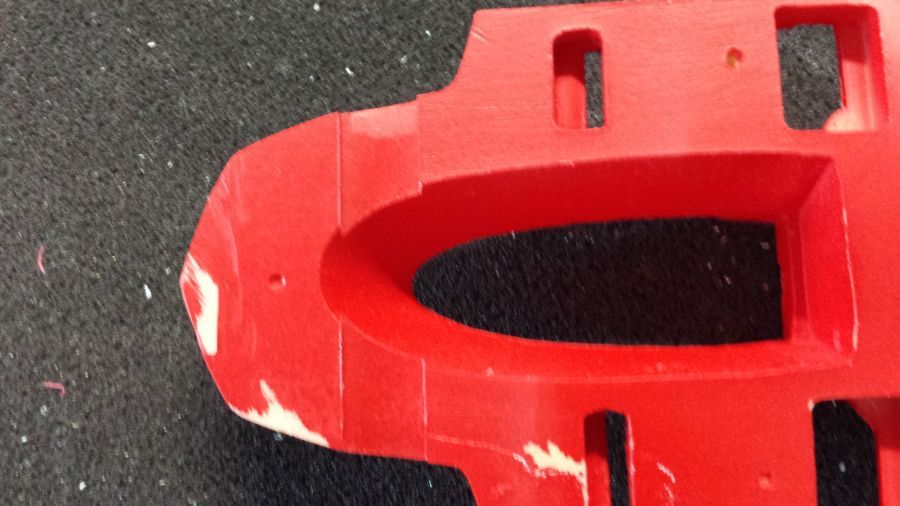
Eerst moeten een paar delen verwijderd worden en de voorkant wat bijgewerkt voor het bevestigen van de neus.
First a few pieces have to be removed and the front needs to be smoothed before attaching the nose cone.
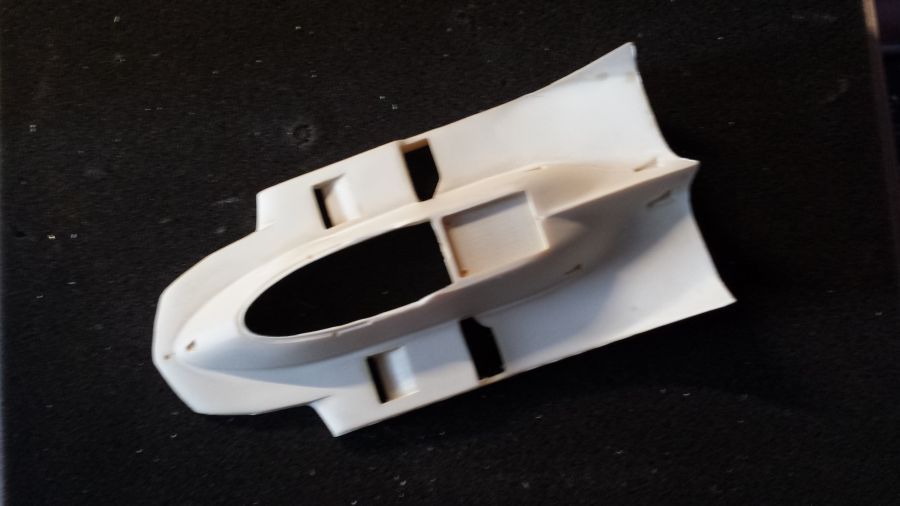
Dezelfde procedure voor de bovenkant.
The same procedure for the top side.
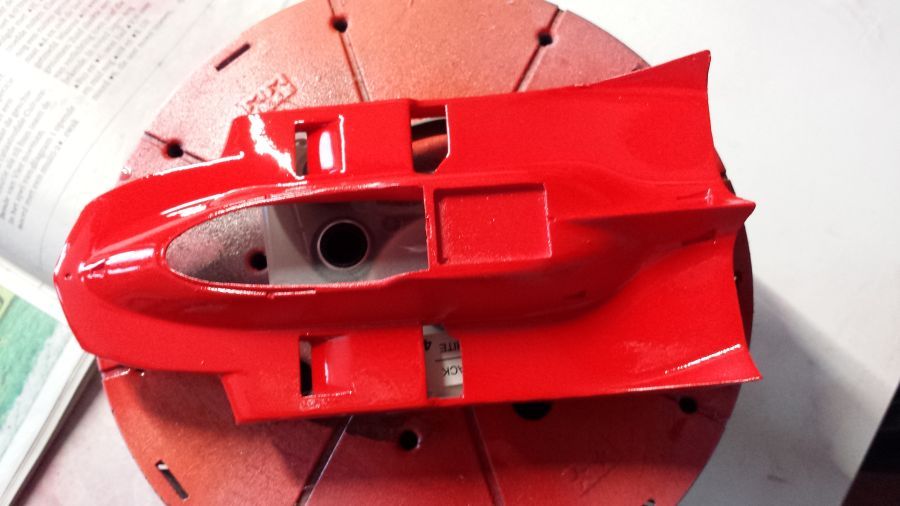
De neus is bevestigd en het gehele deel is in de grondverf gezet. Het schroefje voor de neus past niet, dus is de boel maar verlijmd.
The nose cone has been attached and the whole part has been primed. The screw for attaching the nose did not fit, so i glued it.
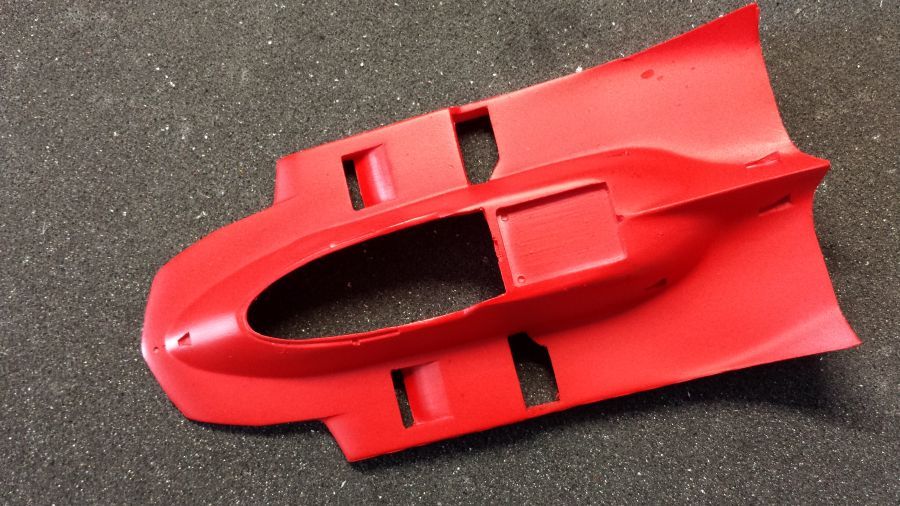
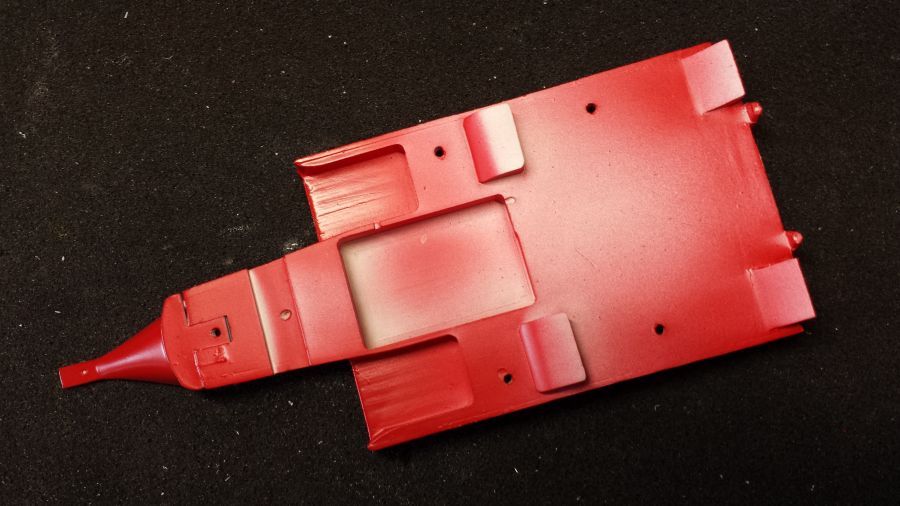
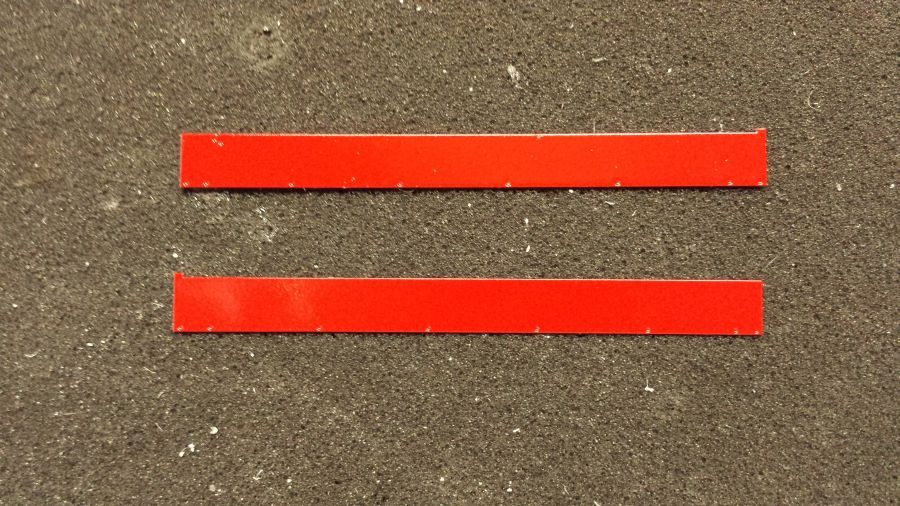
De eerste lagen rood (Zero-Paints ZP-1007 1970's-1980's Rosso Formula 1) zijn aangebracht.
The first layers of red (Zero-Paints ZP-1007 1970's-1980's Rosso Formula 1) have been applied.
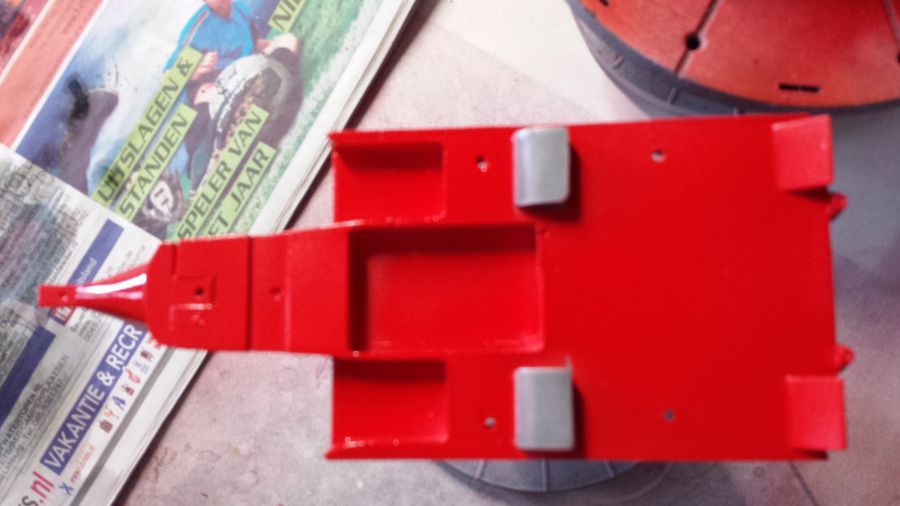
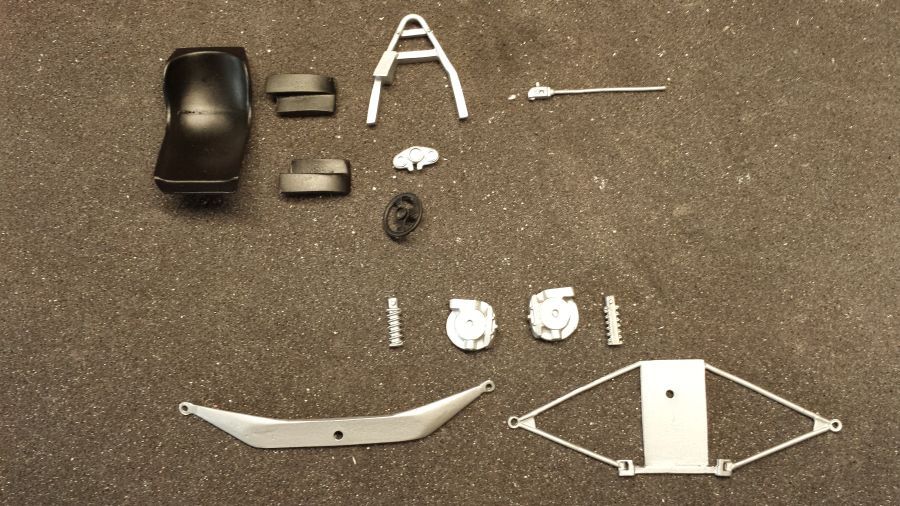
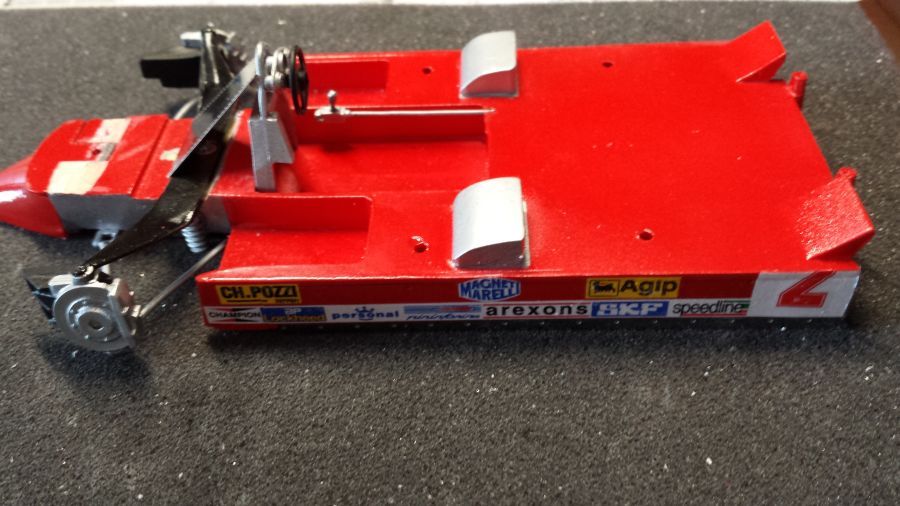
Van de bodemplaat zijn de koelers zilver gespoten en daarna alles met glanslak.
Of the undertray the coolers have been sprayed silver and then everything with clear coat.
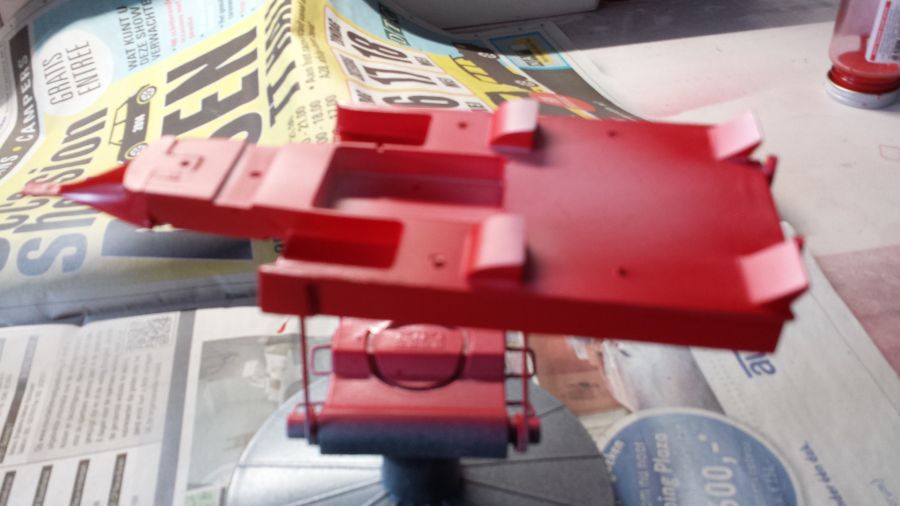
Nog een paar onderdelen gespoten met grondverf en vervolgens zilver en zijdemat zwart.
Another few parts have been primed and lacquered with silver and semi gloss black.
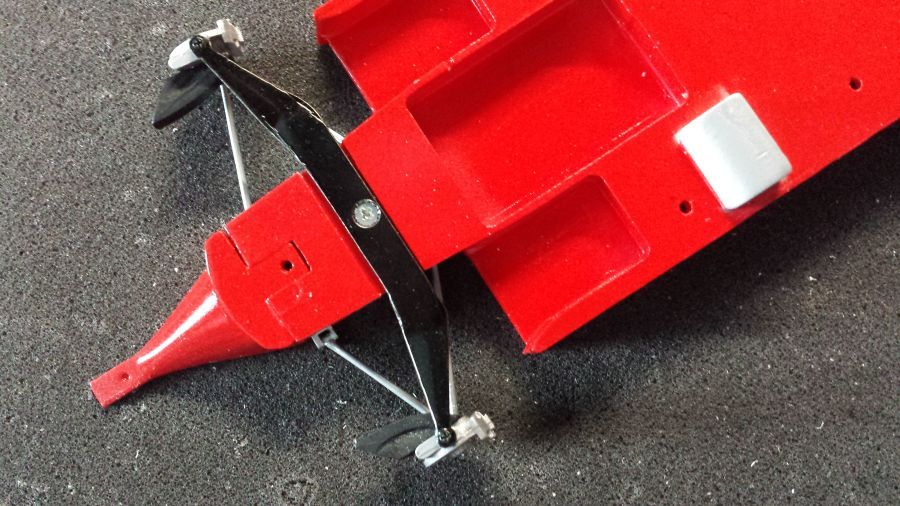
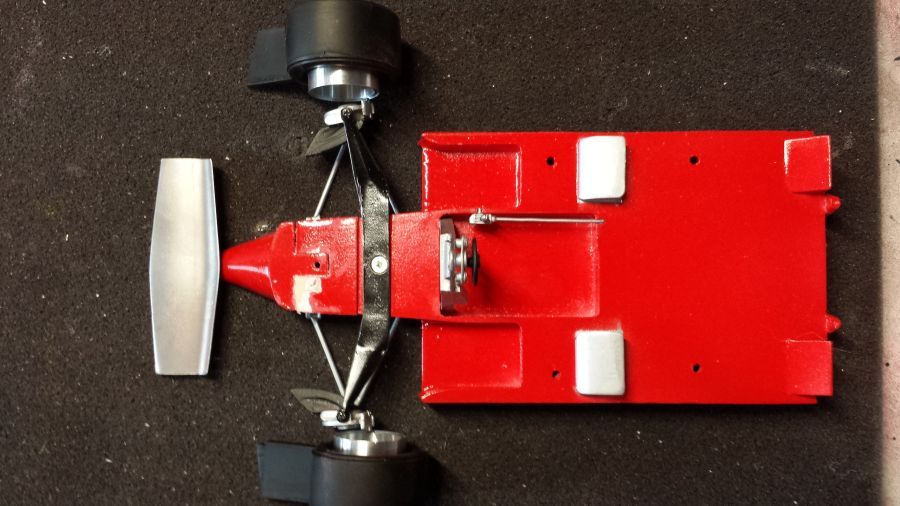
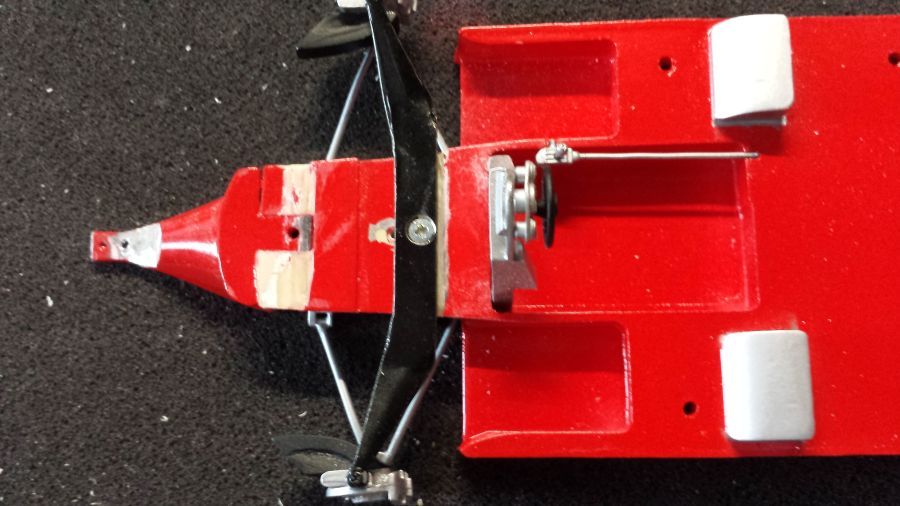
De voorwielophanging zit op zijn plek. Maar de positie blijkt niet juist (zie verder beneden).
The front wheel suspension is attached. But at a wrong position (see further downwards).
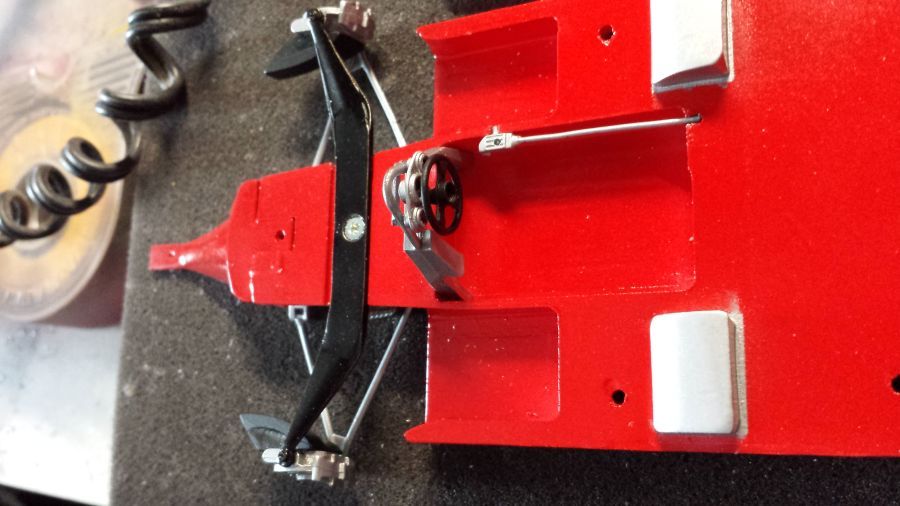
Het dashboard is gemonteerd.
The dash has been mounted.
Nu eerst de skirts klaarmaken. Anders kan het model niet meer met glanslak worden gespoten, nadat de decals zijn aangebracht.
First finish the skirts now. Otherwise it will be impossible to finish the hull with clear coat, after the decals have been applied.
Een paar delen van de kit zijn niet correct uitgevoerd door Studio27. Hieronder een plaatje van de technische info over de Ferrari 312T5 Monaco. Let op de positie van de voorwielen, voorvleugel (blauw is Monaco versie). Op het tweede plaatje zie je dat er volgens Studio27 geen verschil is tussen het Monaco model (bovenste) en het normale model (onderste).
A few parts of the kit are not made correct by Studio27. Below a picture of the technical info on the car. Mind the position of the front wheels, the front wing (blue is Monaco version). On the second picture you can see there is no difference according to Studio27 between the Monaco model (top) and the normal model (bottom).
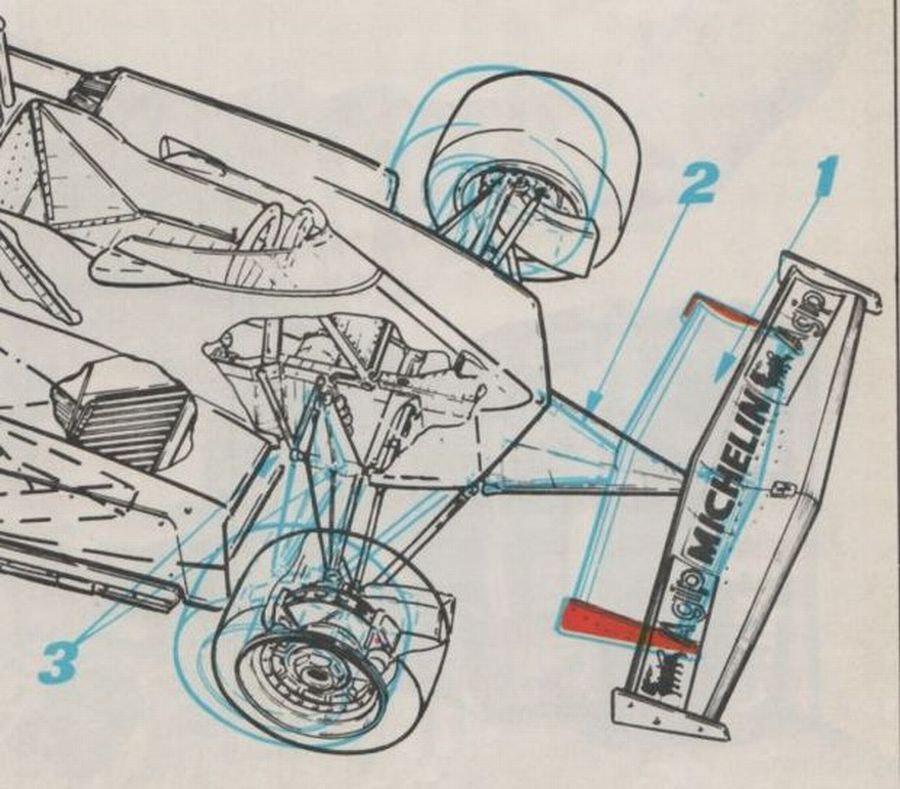
Ik denk dat het erg lastig is om de positie van de voorwielen te wijzigen. De vleugel is te doen. Het bovenste wiel staat in de kit stand, het onderste is hoe het zou moeten zijn. De kit positie is 0,5 cm te veel naar voren.
I think it will be very harsh to change the position of the front wheels. The wing is doable. The top wheel is in the kit position, the lower is how it should be. The kit position is 0,5 cm too far to the front.
Ik heb besloten het toch te proberen. Ik ga van de bodemplaat de postitie van de ophangingdelen 0,5 cm naar achteren verplaatsen. Hetzelfde geldt voor de voorvleugel.
I have decided to try it. I will change the under tray by changing the postion of the suspension parts 0,5 cm backwards. The same for the front wing.
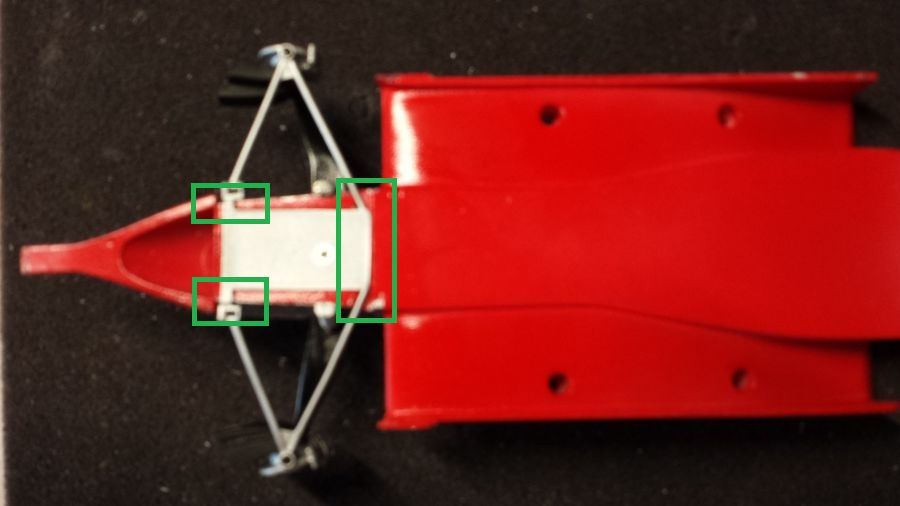
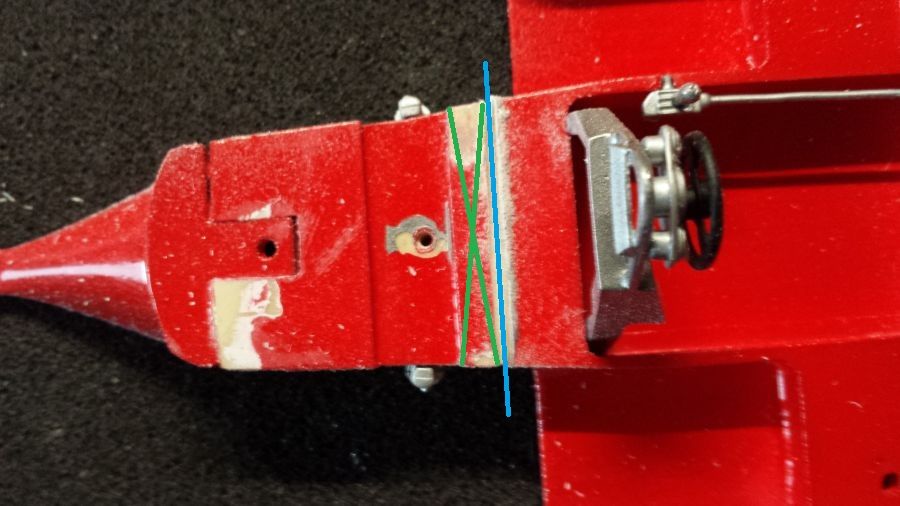
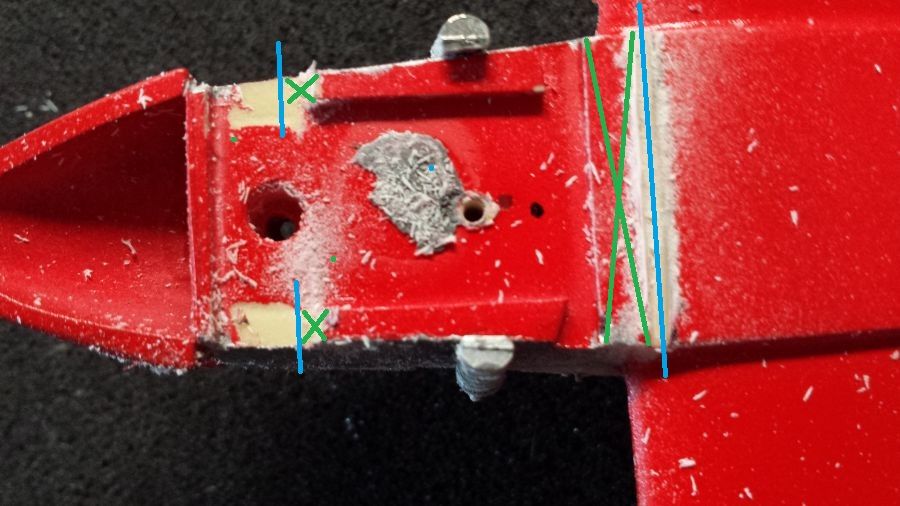
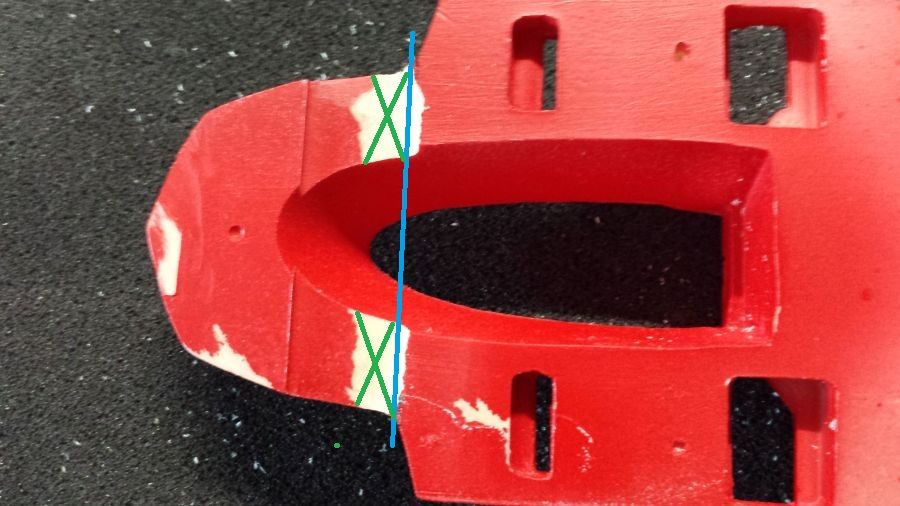
De plekken van de insnijdingen zijn bepaald (blauw). Het overtollige resin wordt verwijderd (groen). Dit is gedaan voor de onderkant en de bovenkant.
The cuts have been made (blue). The expendable resin has to be deleted (green). This has been done for the bottom side and the top side.
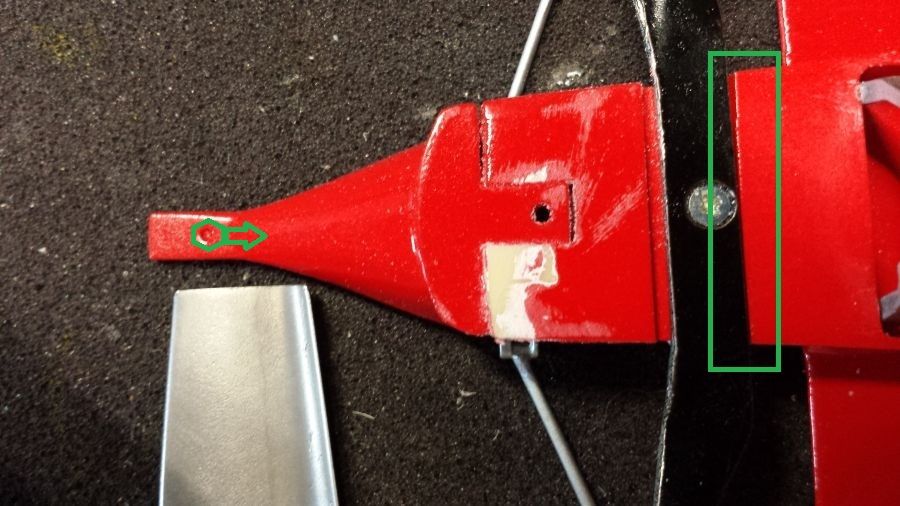
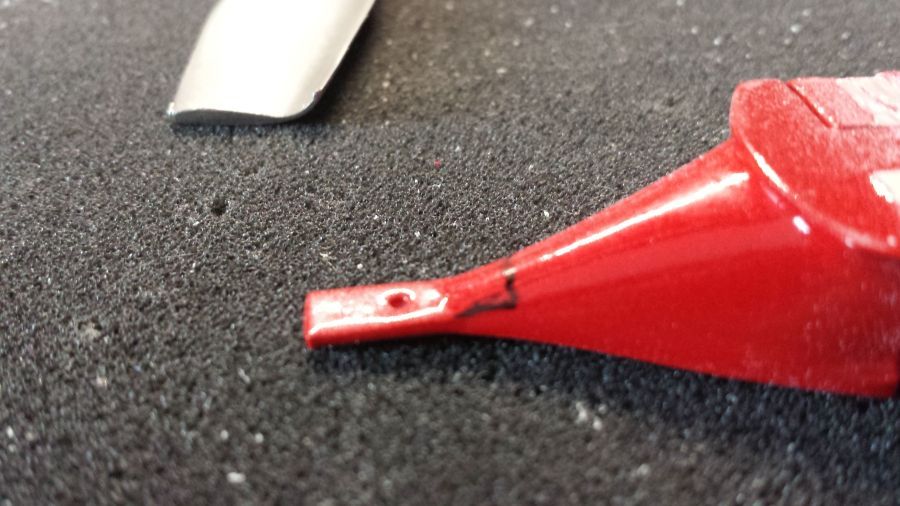
Om de voorvleugel te kunnen verplaatsen slijp ik een stuk van de metalen neus weg. Ik ga niet de gehele neus
opnieuw vormen. I denk dat er dan een ramp ontstaat.
To be able to move the front wing i will grind a bit from the metal nose. I will not fully reshape the
nose. I think it could be a disaster.
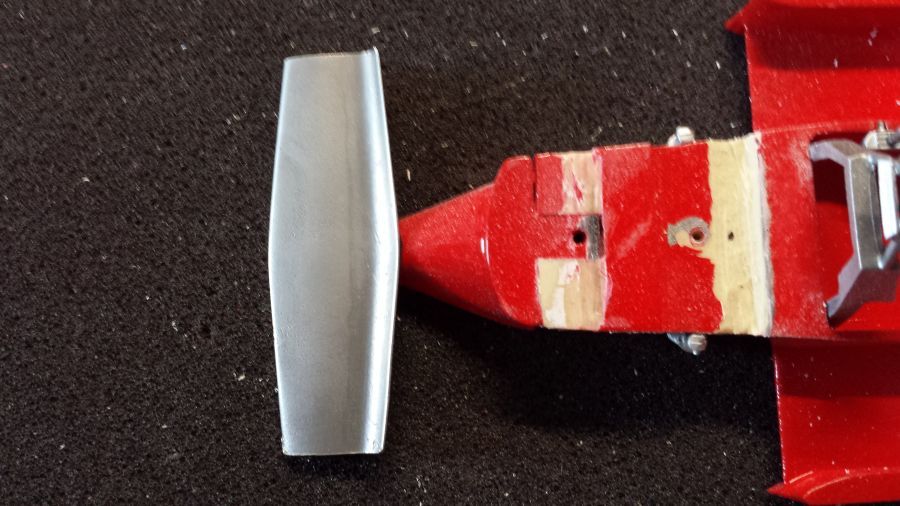
Dit zou moeten lukken.
This should do the trick.

De voorwielophanging is opnieuw gemonteerd. Ook de bovenkant moet dezelfde verandering ondergaan.
The front wheel suspension has been reattached. Also the same procedure for the upper cover.
Natuurlijk zou het beter zijn dit voor het spuiten te doen, maar ik kwam de tekening met de verschillen te laat tegen op internet. Gelukkig heeft de verf en de lak deze acties goed doorstaan.
Of course it would be better to do this before the paint job, but i found the drawing on the internet too late. Luckily the paint and the lacquer survived the action well.
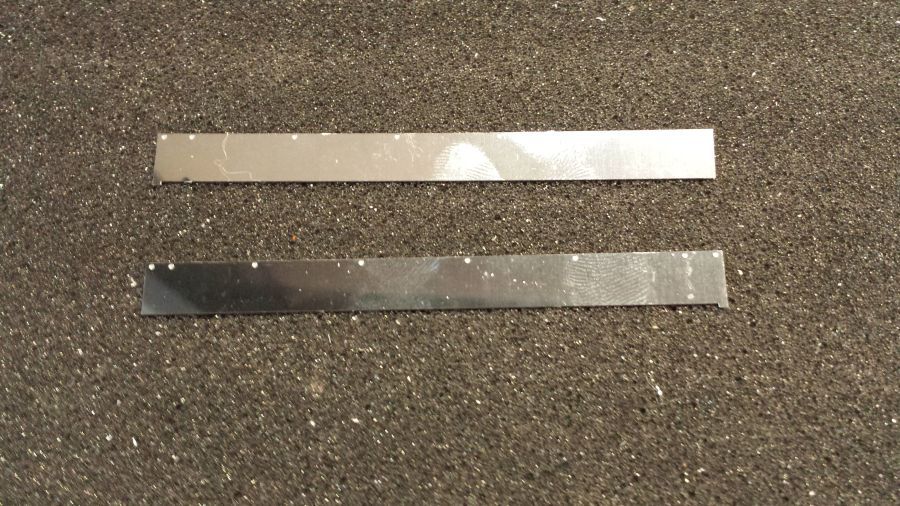
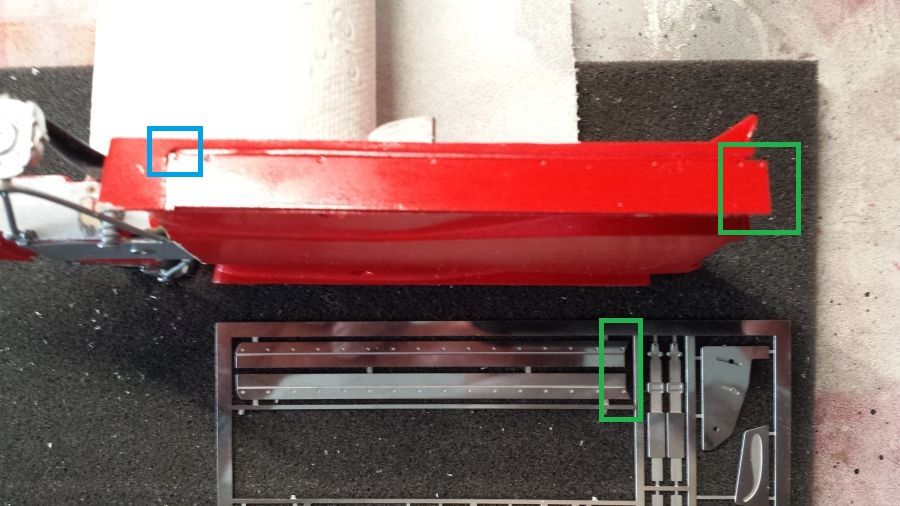
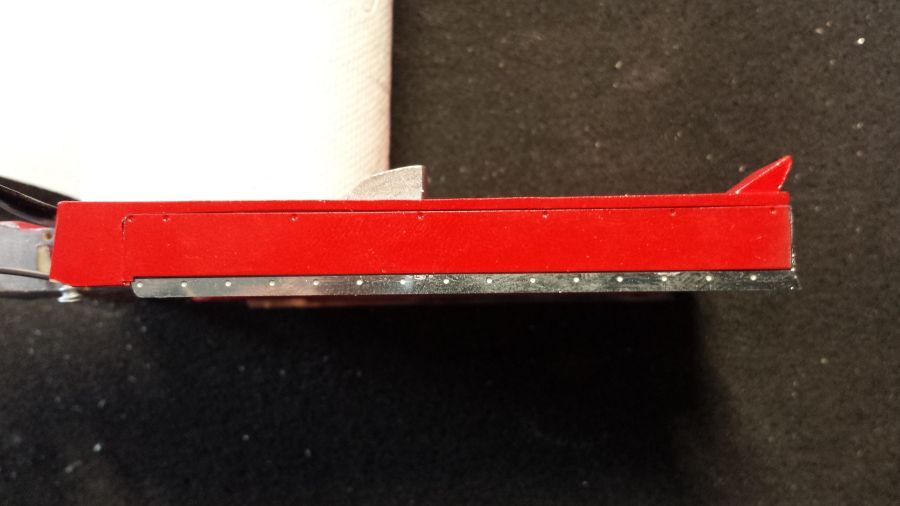
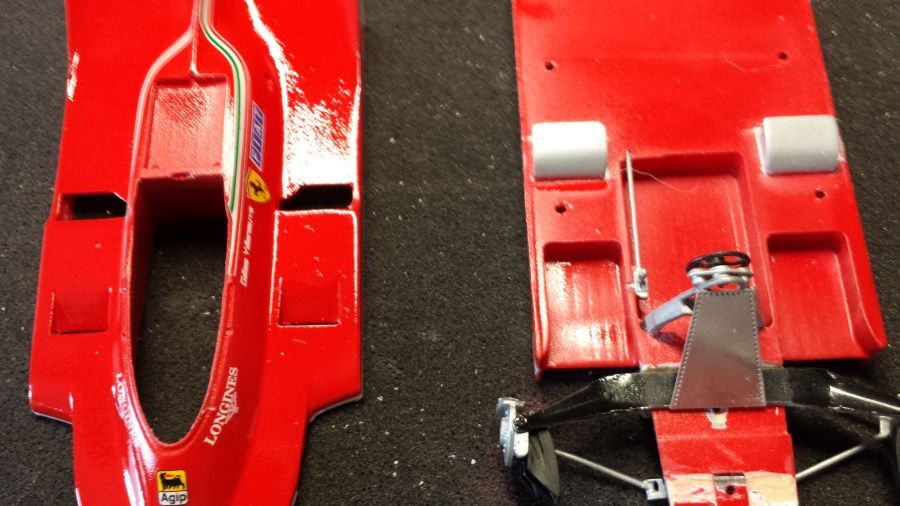
De zijpanelen en skirts zijn iets te lang (groen). Deze ga ik dus inkorten. De bovenkant moet worden afgerond opdat het paneel goed past (blauw).
The side panels and the skirts are too long (green). So i will shorten them. The top has to be rounded so the panel will fit perfectly (blue).
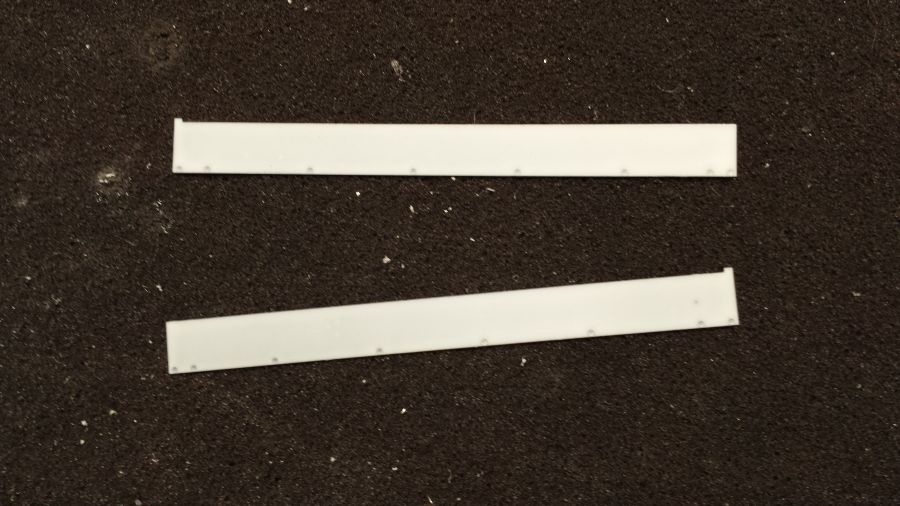
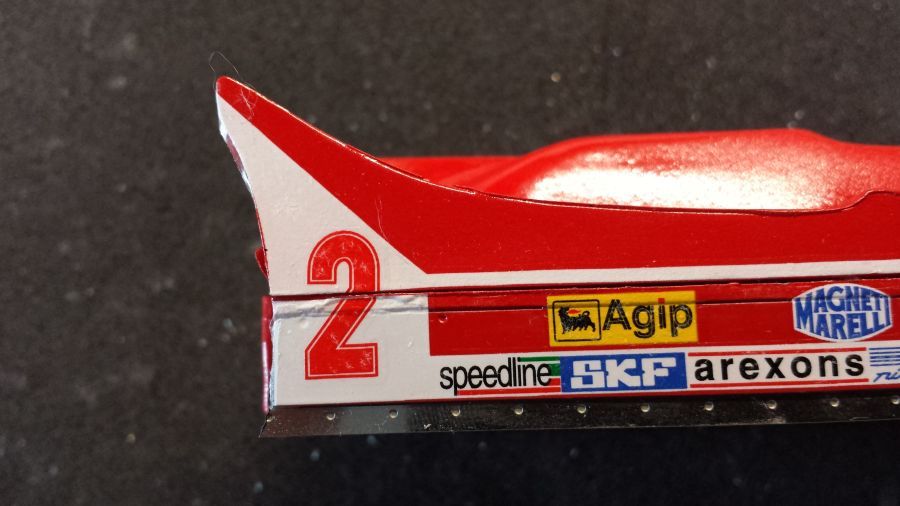
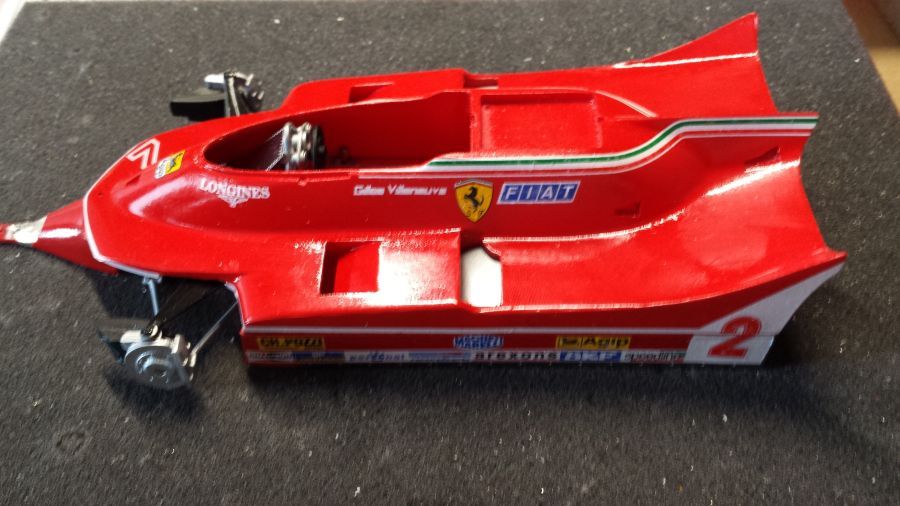
De zijpanelen en de skirts zijn gemonteerd. Nu door met de decals.
The side panels and skirts have been mounted. Next will be the decals.
Zoals ik al aangaf zijn de decals beschadigd door de beschermlaag. Helaas is de film er niet af gegaan tijdens het weken. Ik probeer of Microscale Liwuid Decal een oplossing is. Ik hoop dat de glanslak verder verbetering brengt.
Like i said, the decals have been damaged by the protection layer. Unfortunately the film did not go off during the soaking. I will try if Microscale Liquid Decal will bring a solution. I hope the spray of the lacquer will improve them more.
De glanslak is aangebracht. Nu goed laten drogen.
The gloss coat has been applied. Let it dry thoroughly.
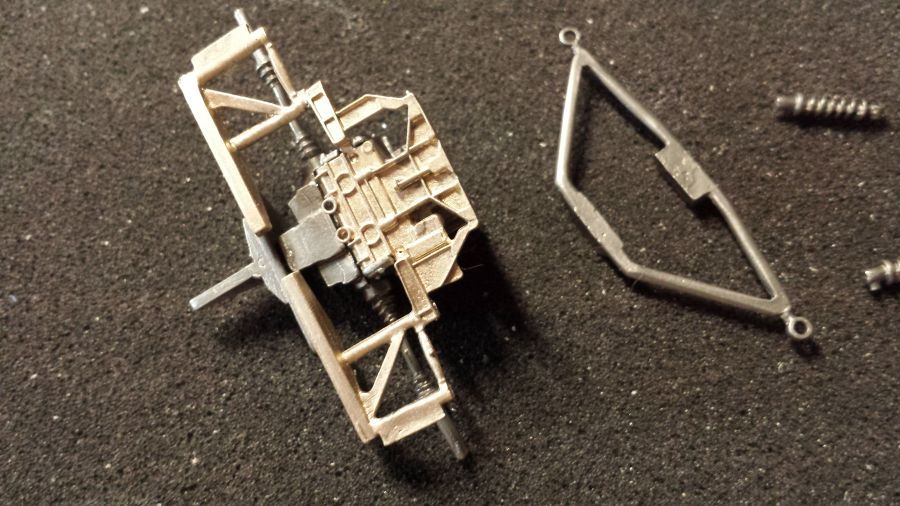
Nu beginnen met de eenvoudige motor. Ik zal zien of ik nog wat kan verbeteren.
Now starting the simple engine. I will see if i can improve anything.
Het gebruik van Microscale Liquid Film samen met de glanslak heeft geholpen. De decals zien er beter uit nu.
The usage of Microscale Liquid Film as well as the clear cote helped. The decals look better now.
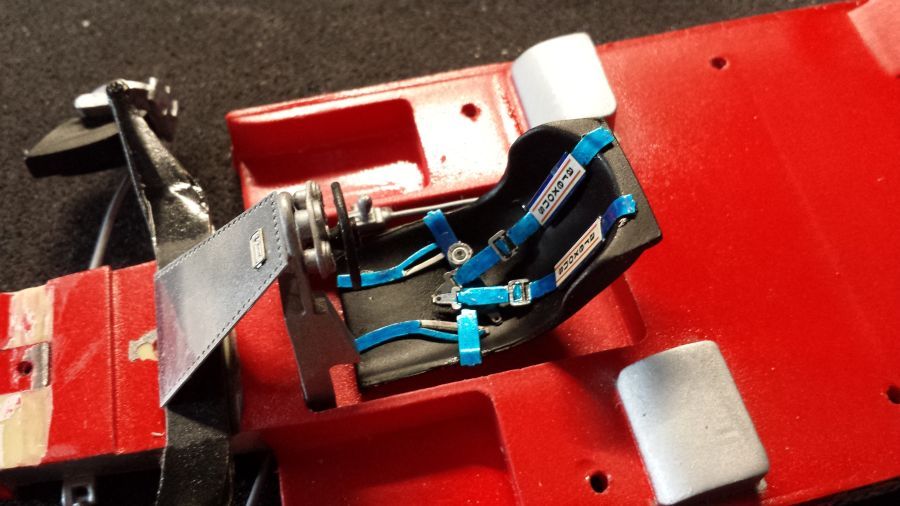
De stoel is voorzien van de gordels. Helaas had ik geen stof lint meer. Daarom heb ik de bij de kit geleverde etched gordels gebruikt.
The seat has been applied with the belts. Unfortunately i had no more cloth. Therefor i used the etched belts as delivered with the kit.
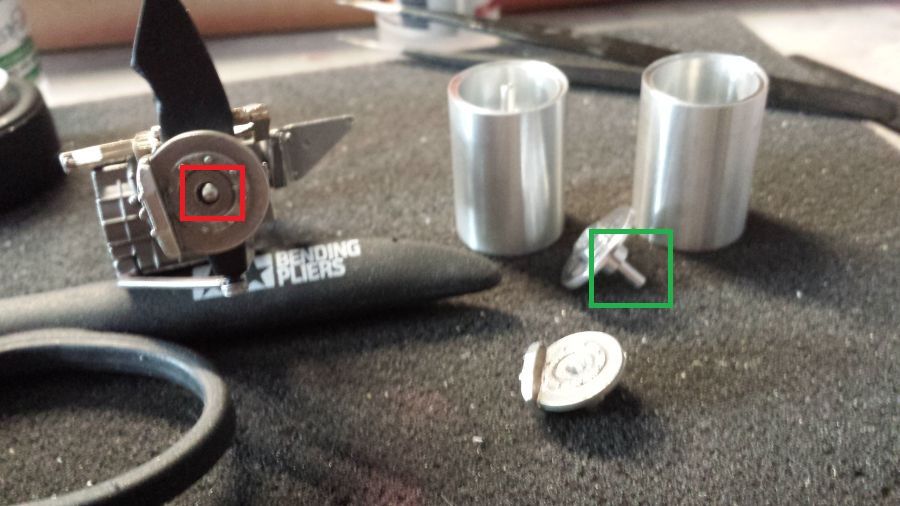
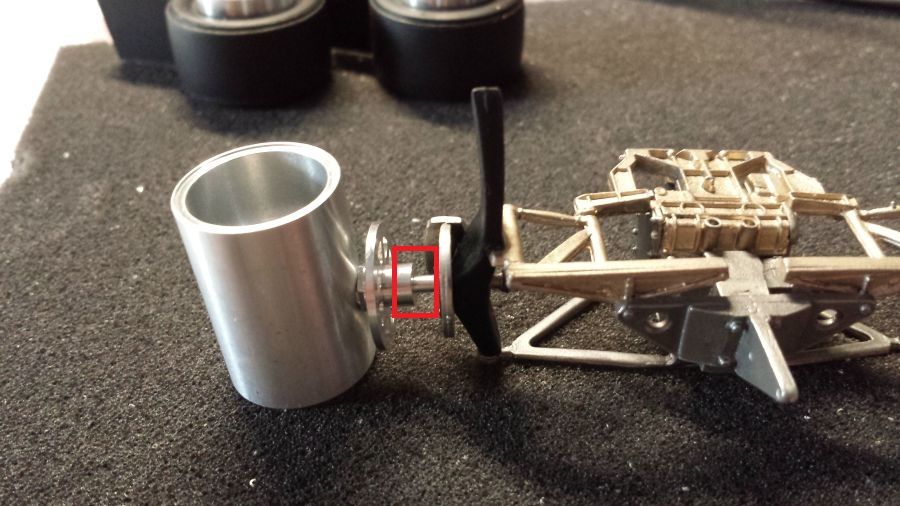
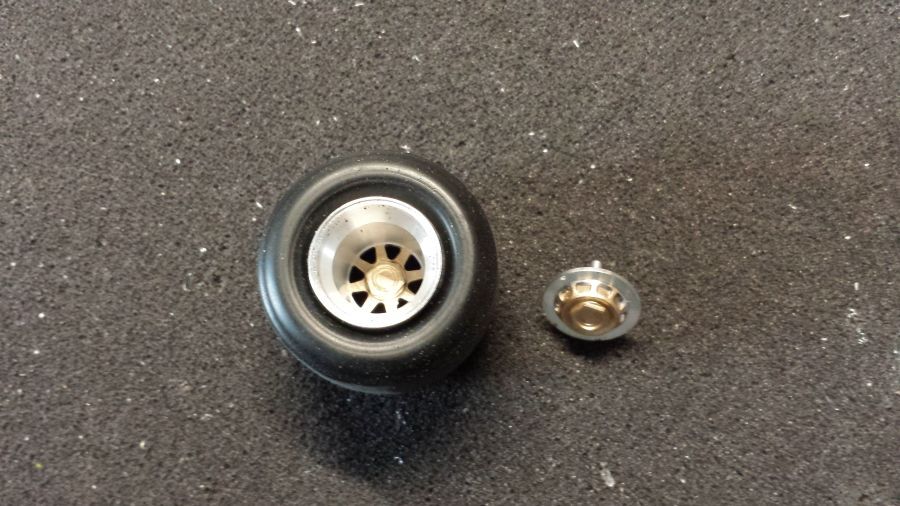
Het volgende probleem doet zich voor. Wanneer de remschijven worden gemonteerd is er geen enkele mogelijkheid om de velgen daarna te monteren. Ik denk dat ik een stuk van de aandrijfas en de velgas ga verwijderen.
The next problem occurs. When mounting the brakes there is no way the rims will fit on it. I think i will cut off a piece of the rear axle and the rim axle.
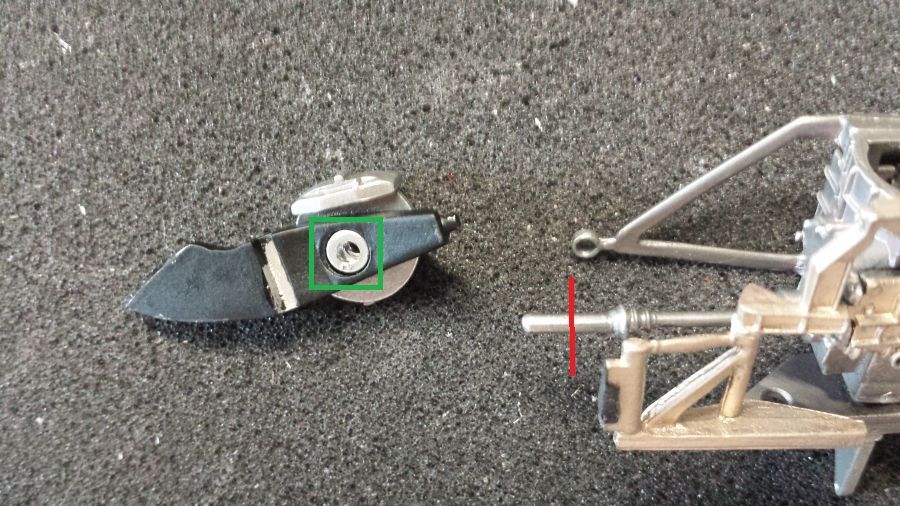
De remschijf komt bijna tot aan het montagepunt van de achteras. Er kan dus een behoorlijk stuk van de as worden verwijderd (rood). Dit is niet nodig bij de voorwielen. Anders passen de luchthappers niet meer.
The brake disc almost comes up to the mounting point of the rear axle. So i can cut a significant piece from the axle (red). No need to do this on the front wheels. Otherwise the air intakes will not fit.
De banden worden opgeruwd met een slijpsteen.
The tires will be roughened with a grindstone.
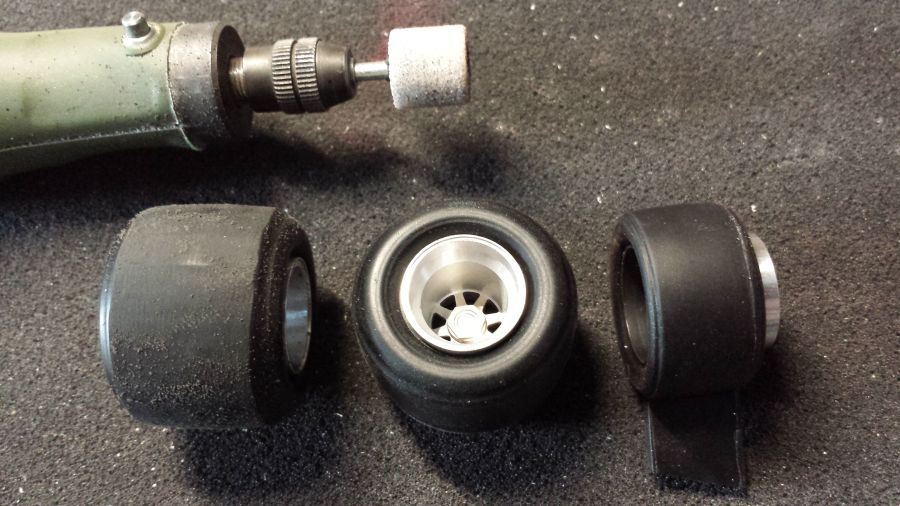
Een paar delen van de velgen worden goud gekleurd.
Some parts of the rims need to be gold colored.
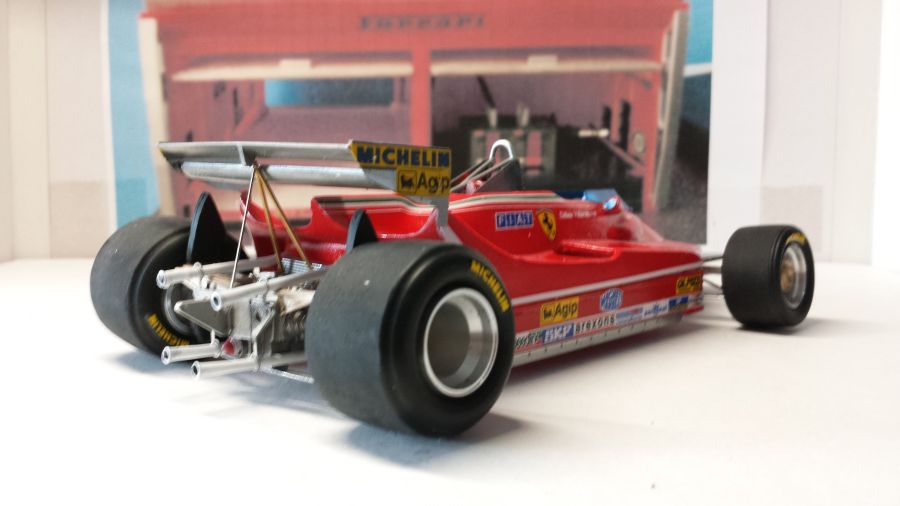
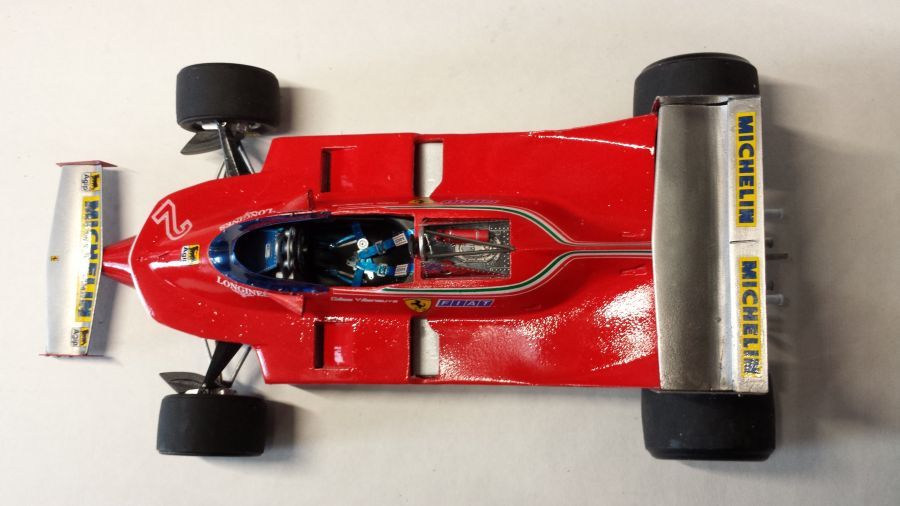
De wielen en de witte uitlaten zijn gemonteerd.
The wheels and the white exhaust pipes have been mounted.
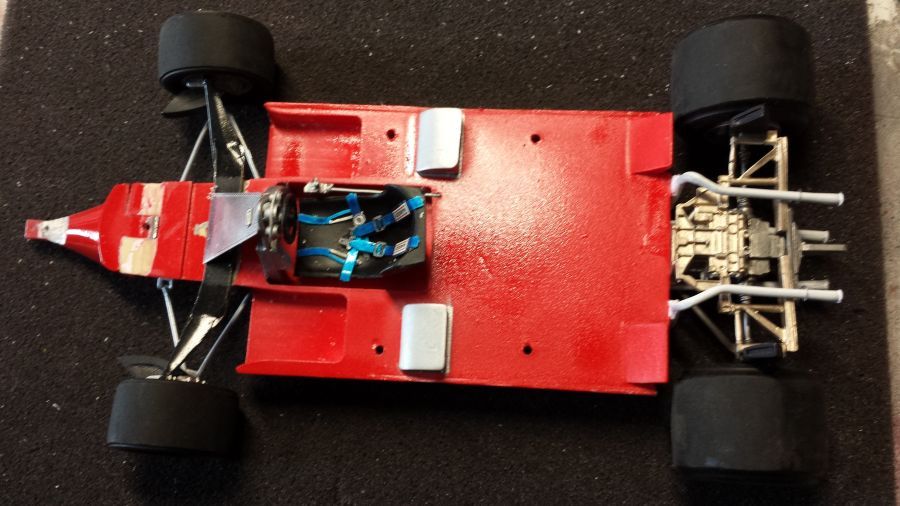
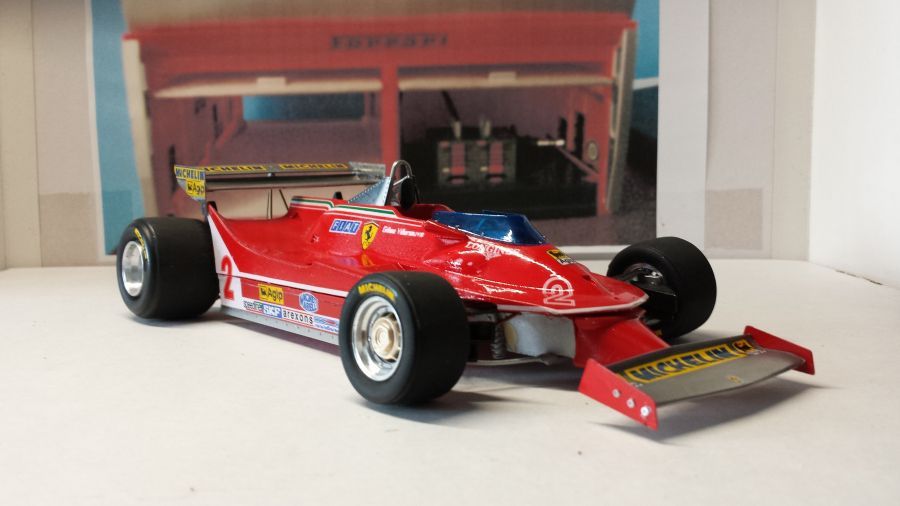
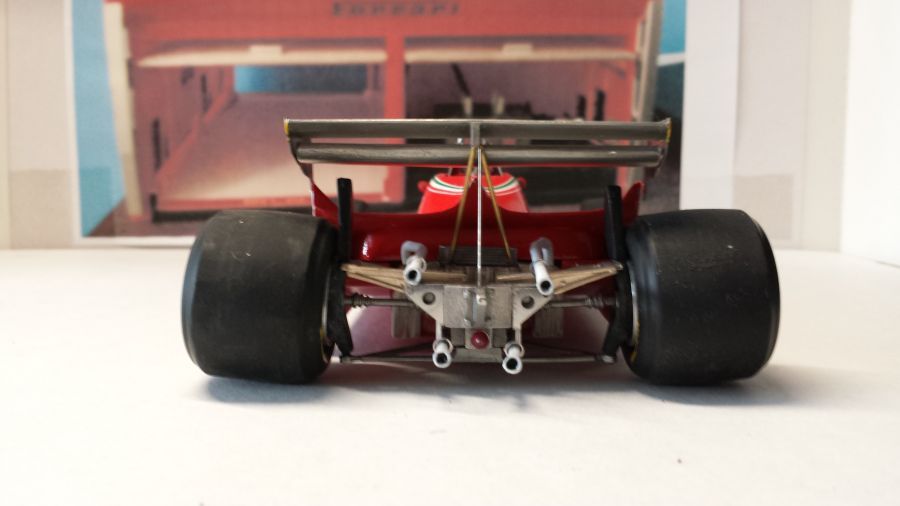
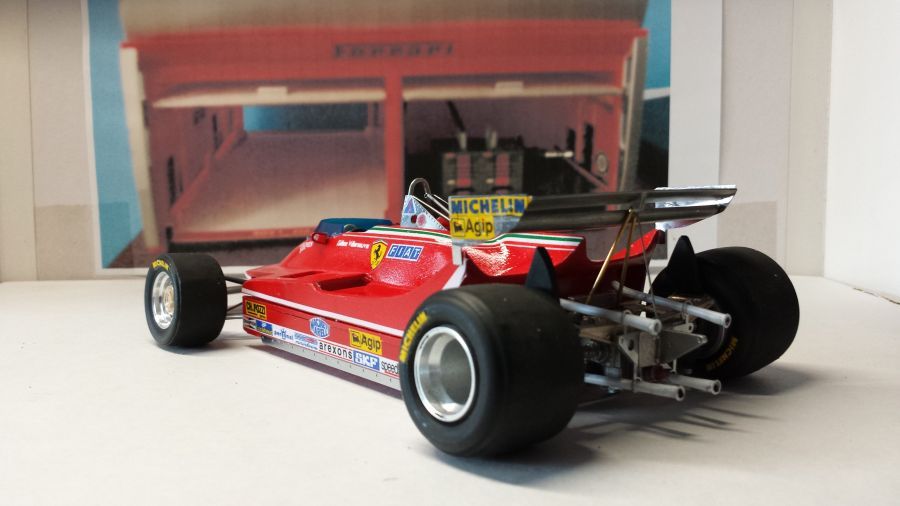
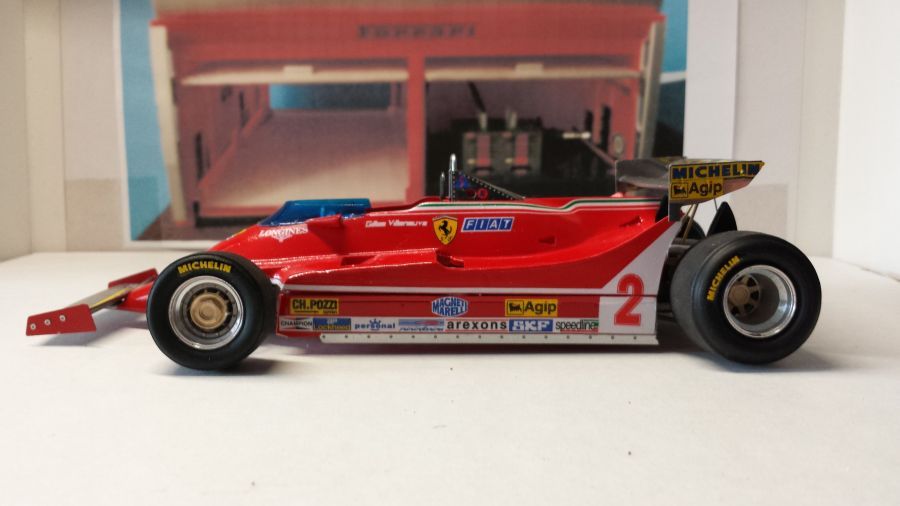
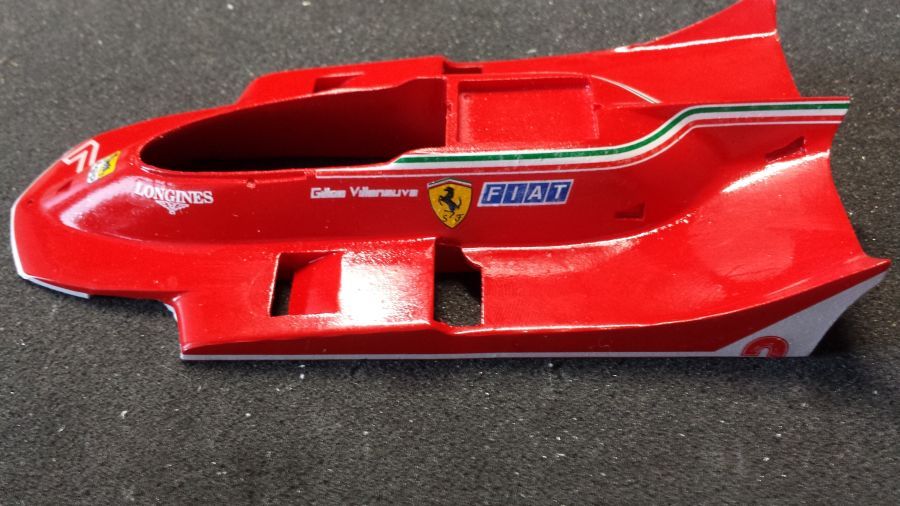
De bovenkant is aangebracht en een paar onderdelen zijn toegevoegd, zoals de brandblusser. De voor- en achtervleugel zijn in elkaar gezet.
The upper side has been attached as well as a few parts, like the fire extinguisher. The front and rear wing have been assembled.
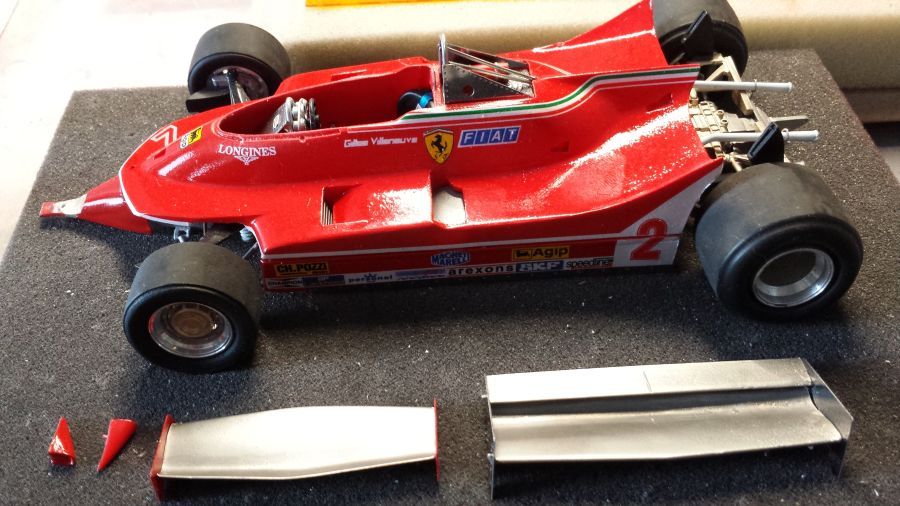
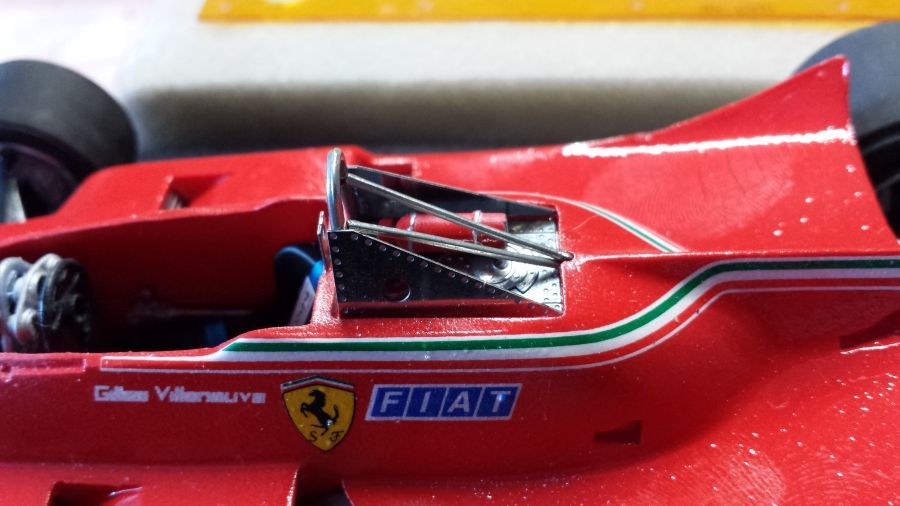
De steun voor de achtervleugel is klaar na veel passen.
The support for the rear wing is ready after a lot of test fitting.

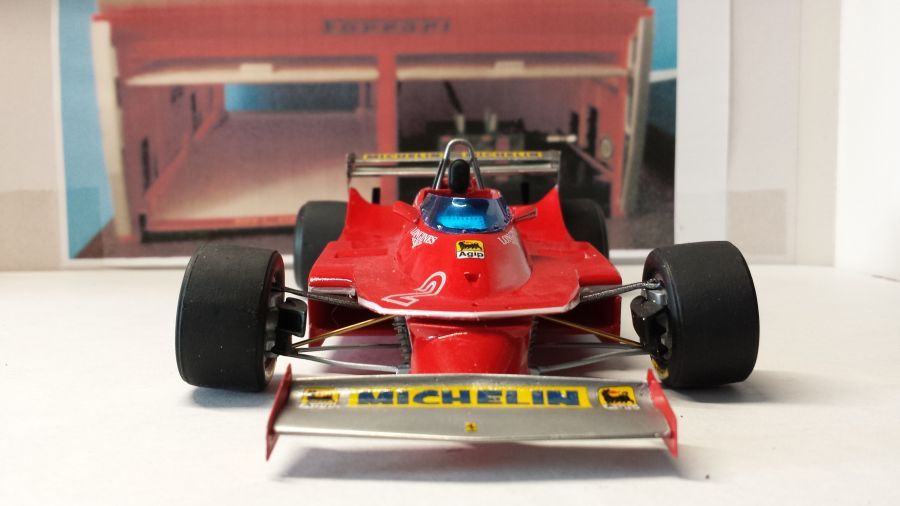
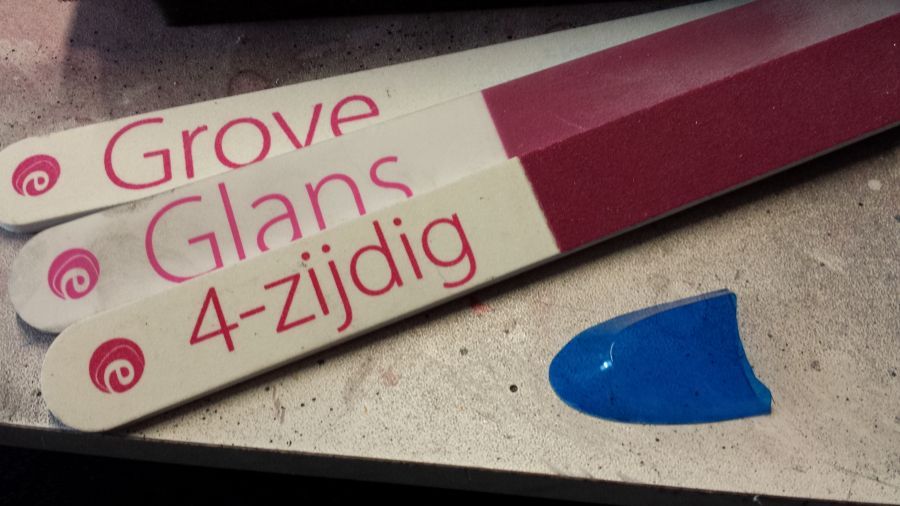
Het knippen en vijlen van de voorruit. Een nauwkeurig werkje. Pas op, knip niet direct teveel af.
The cutting and filing of the windshield. A precise job. Beware, don't cut too much at once.
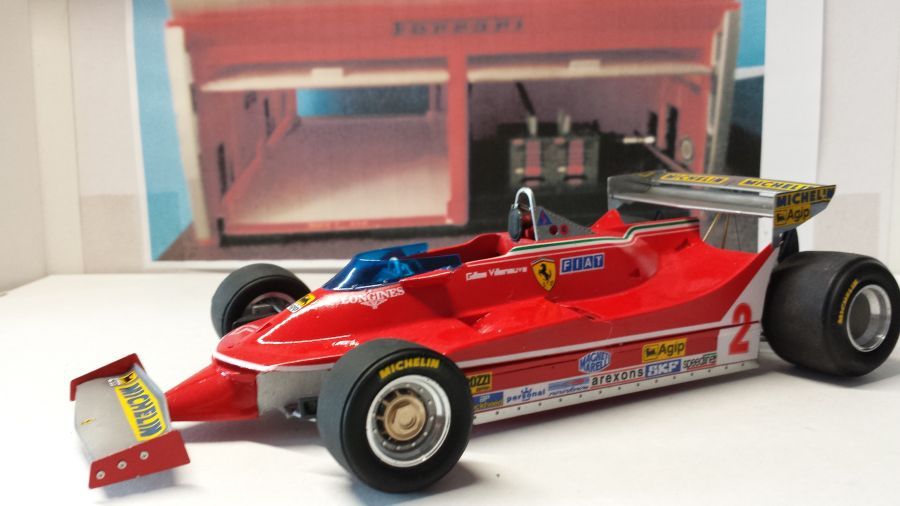
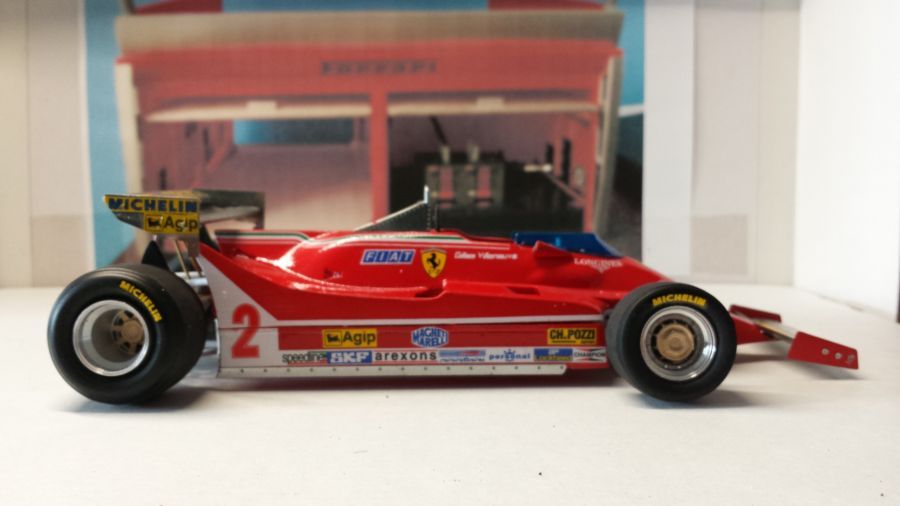
En klaar na het aanbrengen van spiegels en overige details.
And ready after mounting the mirrors and othe details.