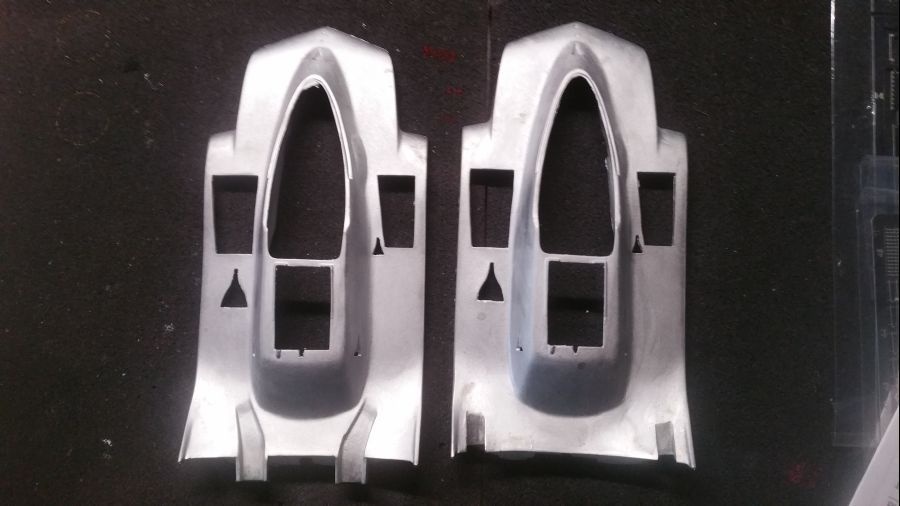
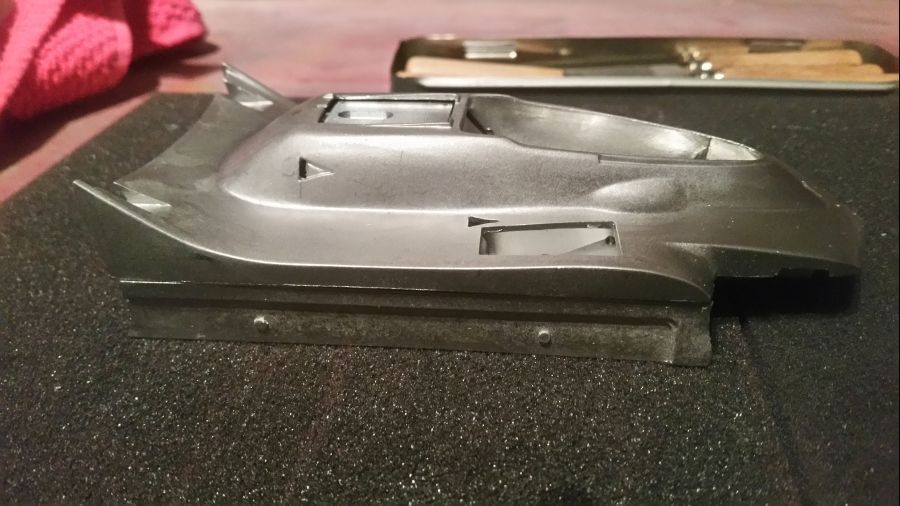
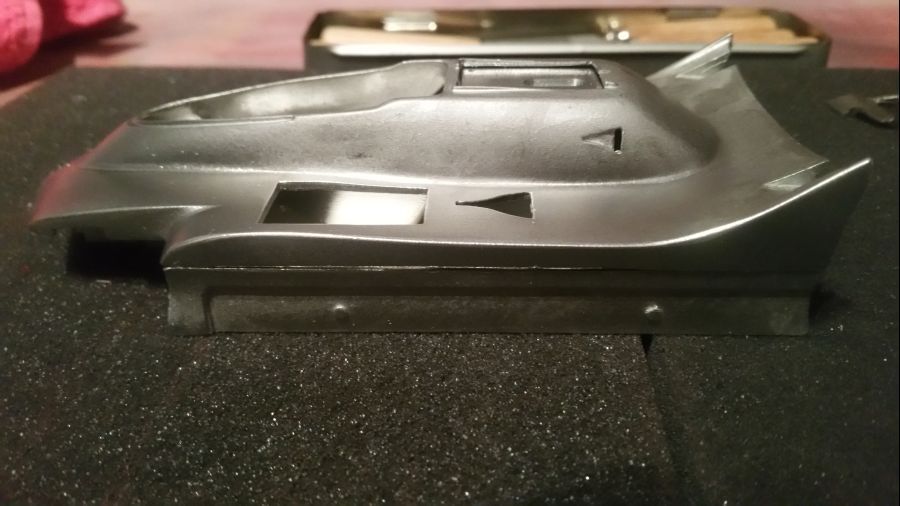
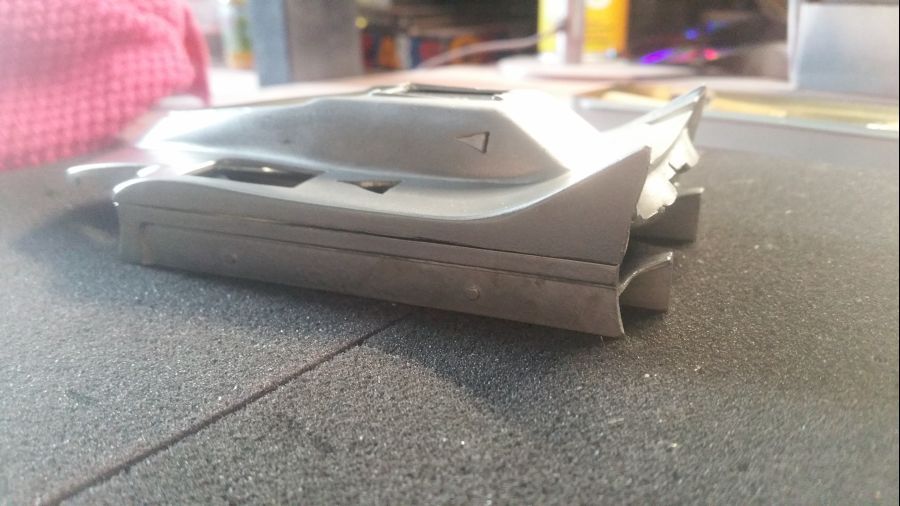
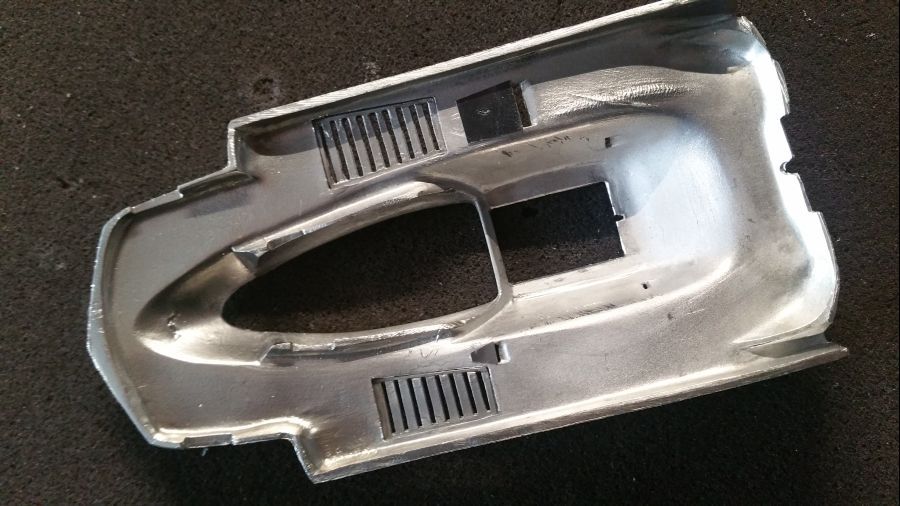
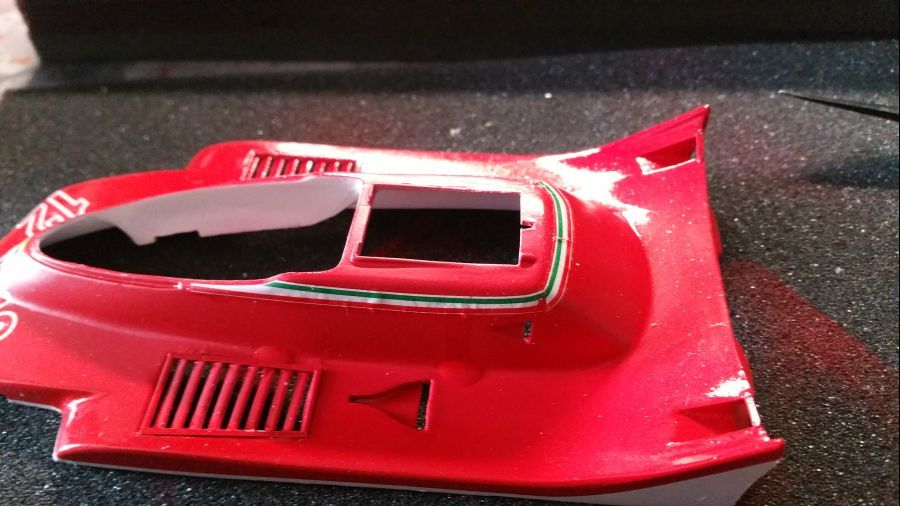
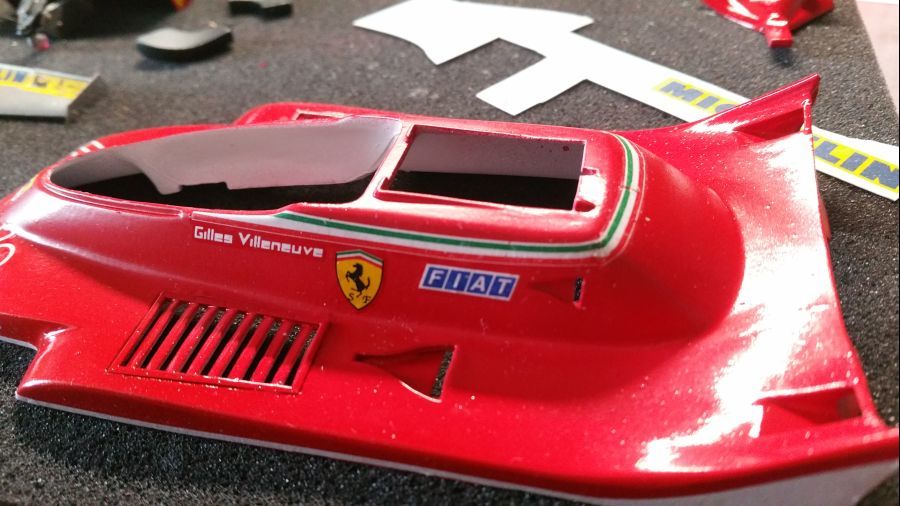
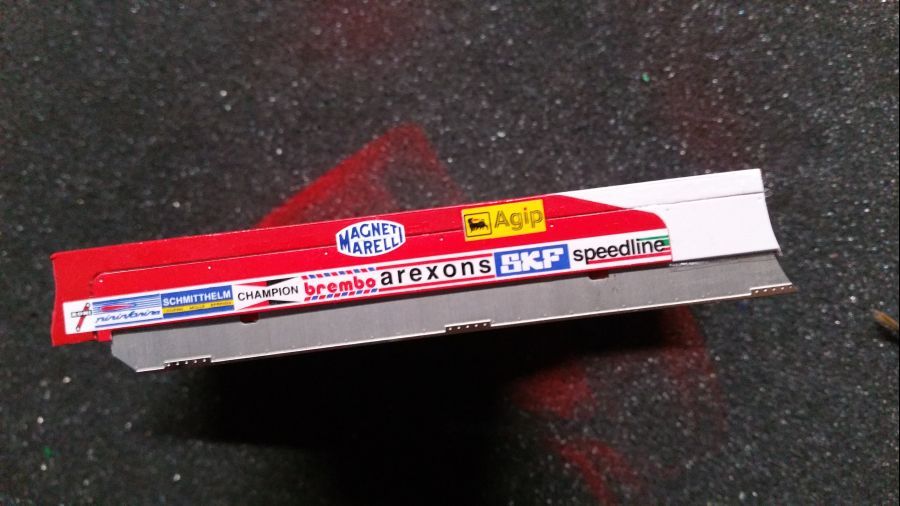
Mijn nieuwste project wordt een schaal 1/20 kit van Modelfactory Hiro (kit nr. K-015). Het is de Ferrari 312 T4B zoals deze bestuurd werd door Gilles Villeneuve tijdens de GP van Italië. Toen ik de doos openmaakte viel me op dat er 2 verschillende body covers waren. Uit onderzoek bleek dat je zowel de Ferrari 312 T4 van Jody Scheckter als de Ferrari 312 T4B van Gilles Villeneuve kunt bouwen. Omdat ik ook nog de 2 hybrid kits van MFH heb, heb ik besloten de laatste versie te doen. Deze ziet er anders uit dan de 2 hybrid kits, daar ga ik natuurlijk voor. Zie onderstaande foto voor het verschil. Links de Scheckter body, rechts de Villeneuve body.
My new project will be a scale 1/20 kit from Modelfactory Hiro (kit no. K-015). It's the Ferrari 312 T4B as driven by Gilles Villeneuve during the GP of Italy. When i opened the box i noticed there were 2 different body covers. Some investigation showed me you can either build the Ferrari 312 T4 from Jody Scheckter or the Ferrari 312 T4B from Gilles Villeneuve. As i have also the 2 hybrid kits from MFH, i decided to build the last version. This one looks different than the 2 hybrid kits, so that's what i am going for. Have a look a the picture below to see the difference. To the left the Scheckter body, to the right the Villeneuve body.
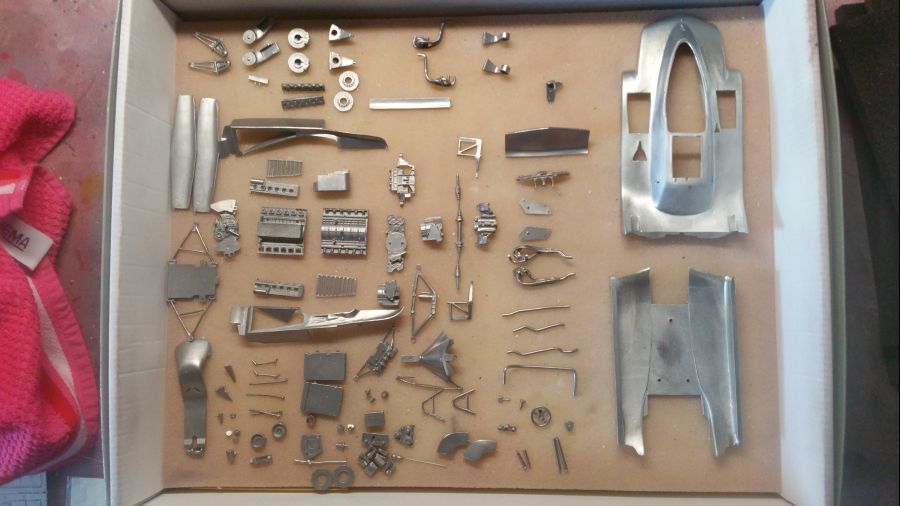
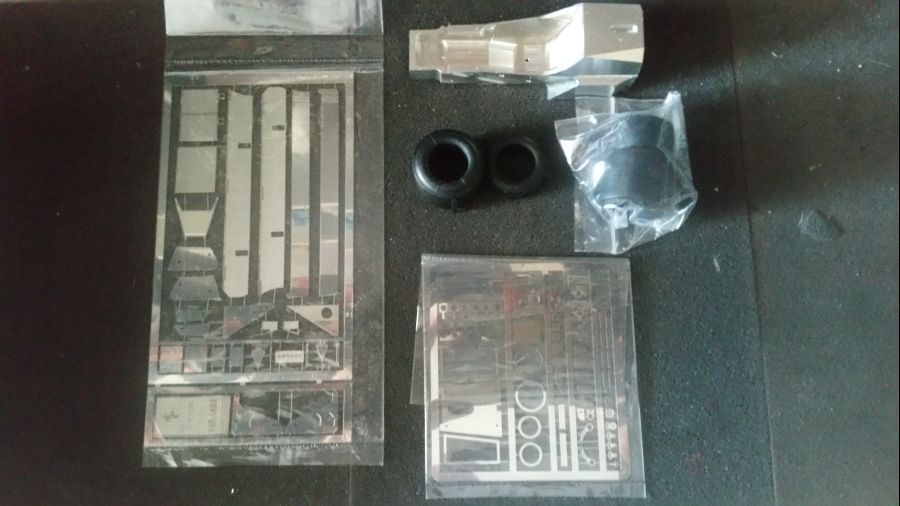
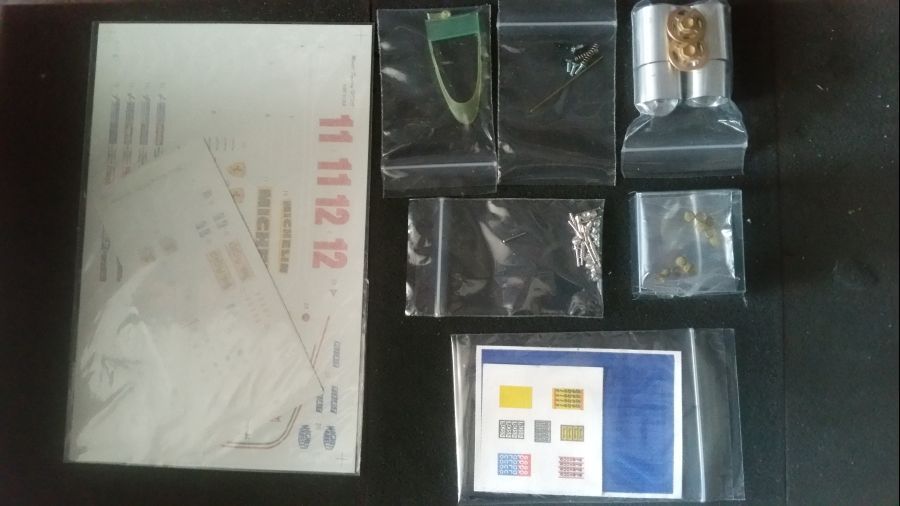
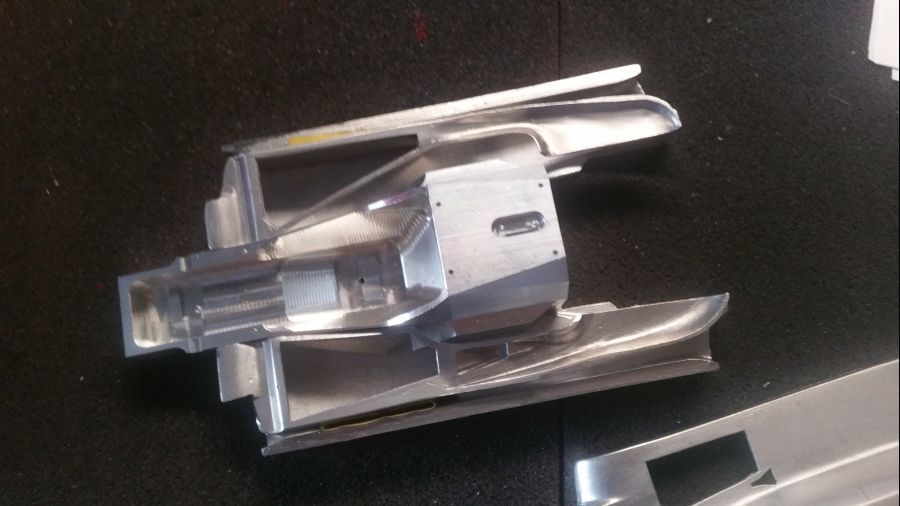
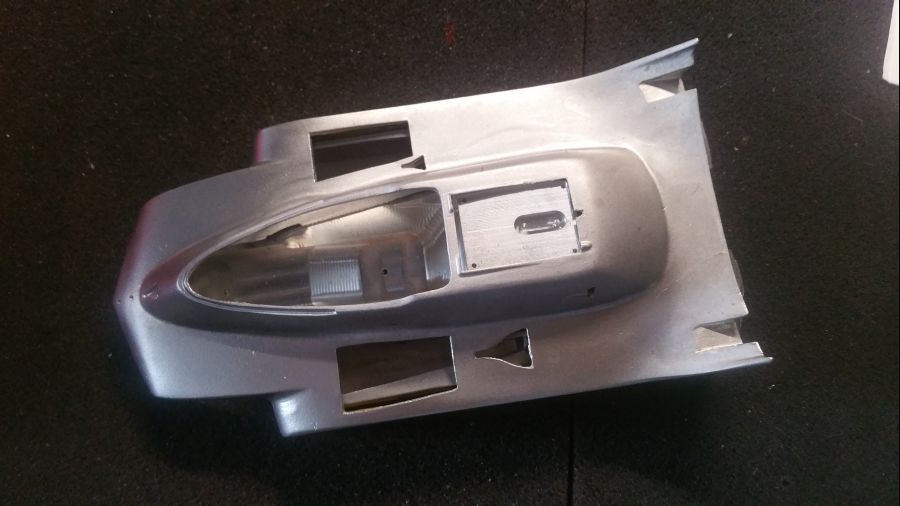
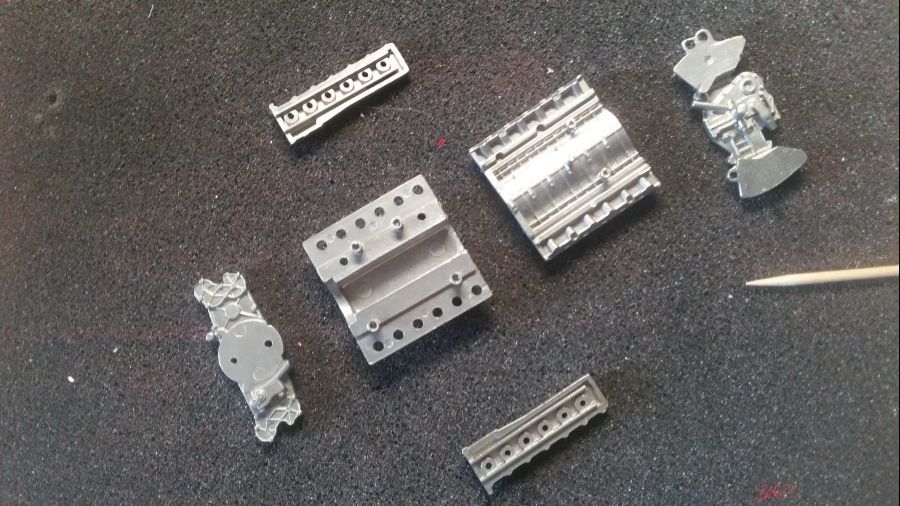
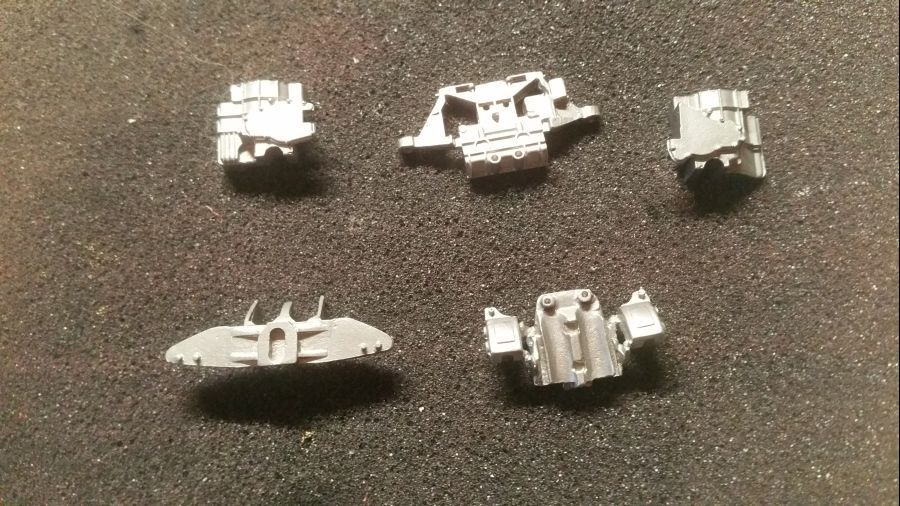
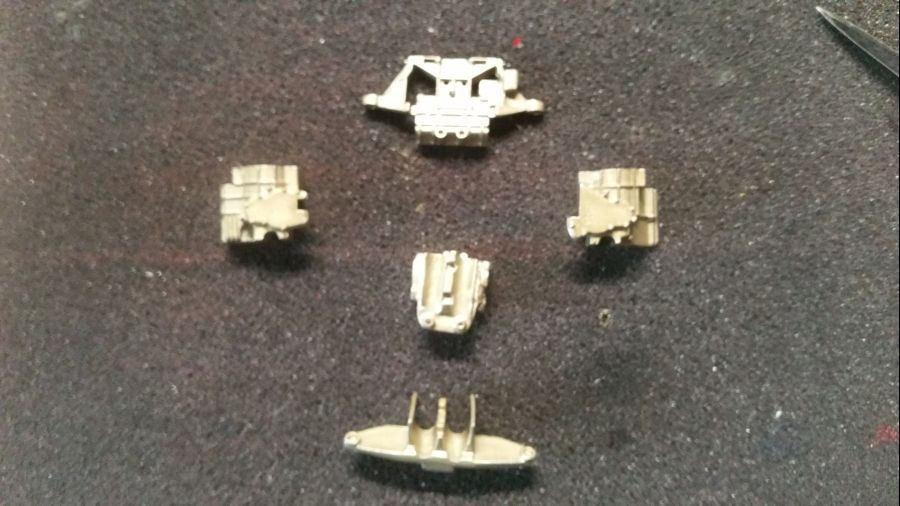
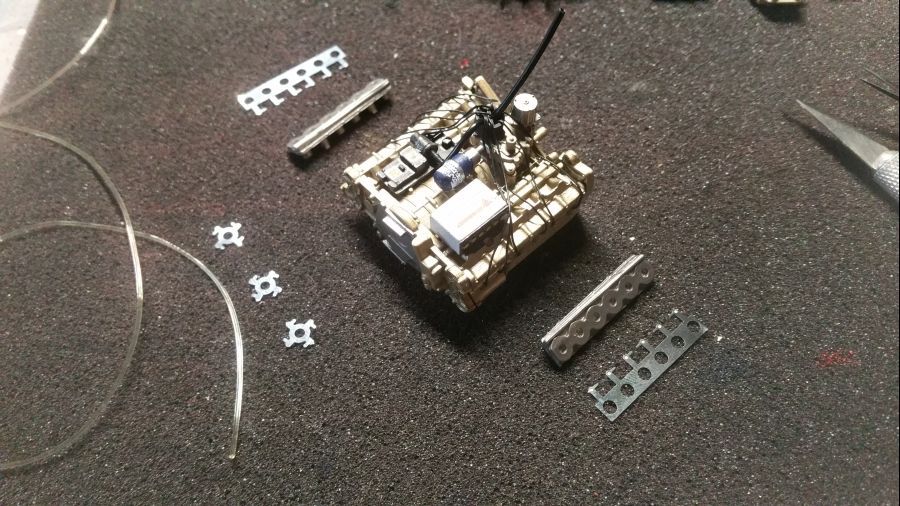
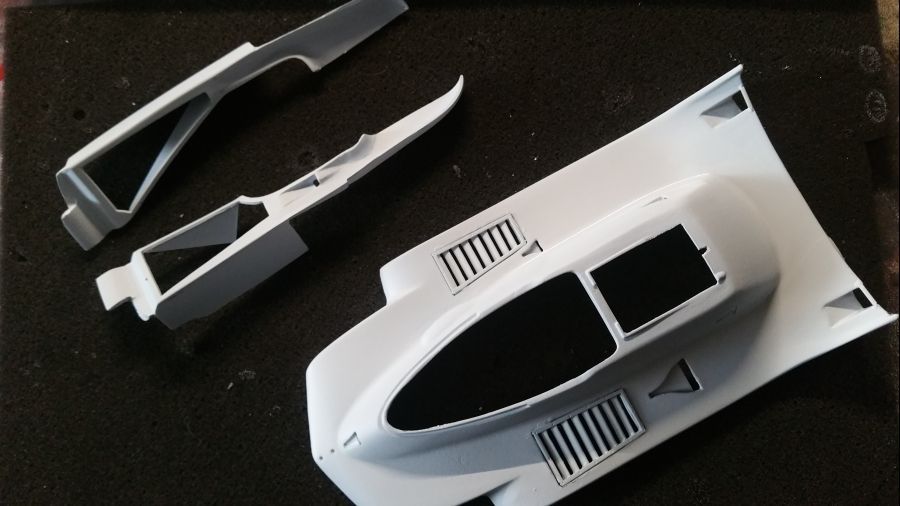
Hieronder weer de inhoud van de kit.
Below the content of the kit.
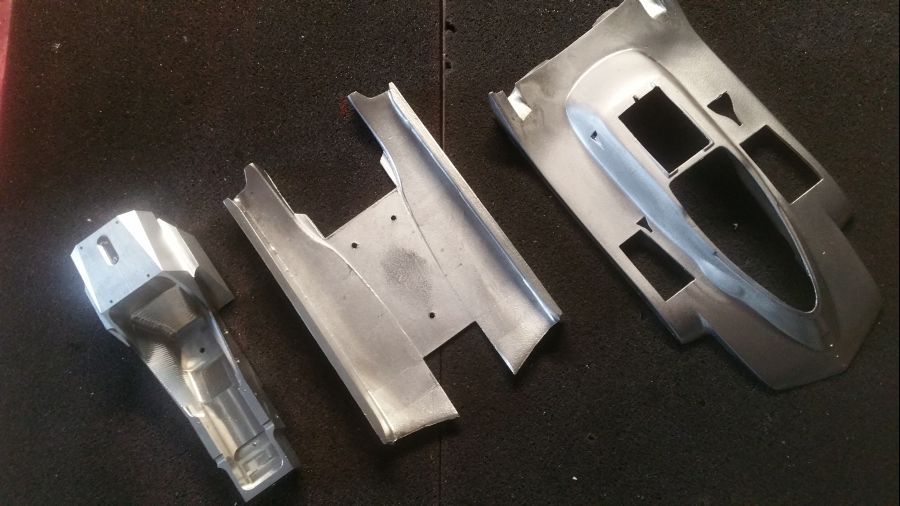
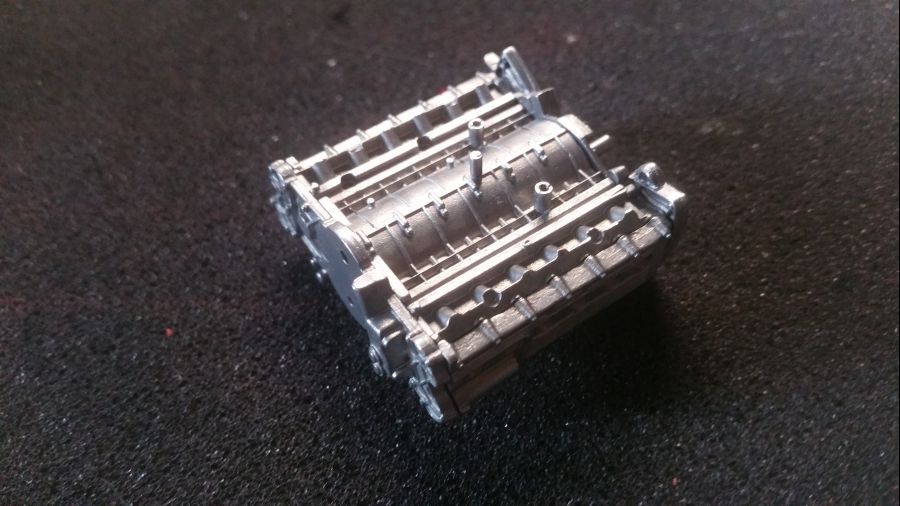
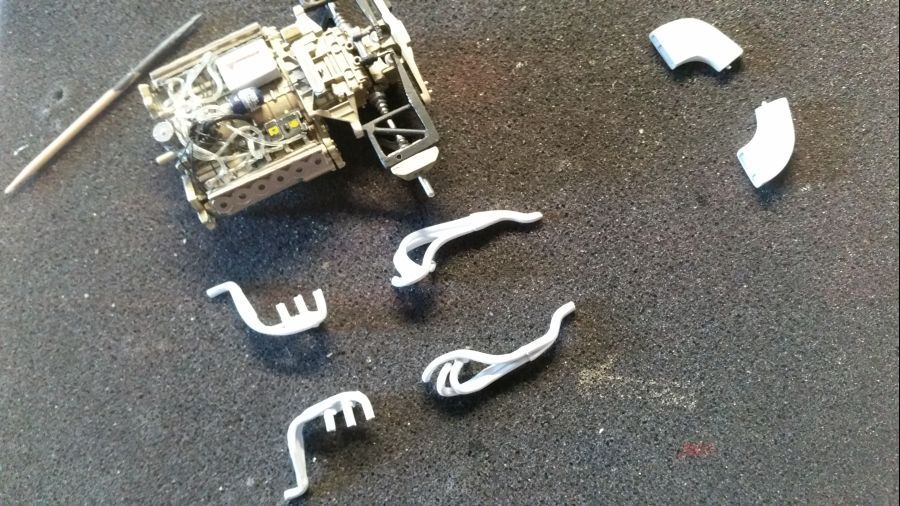
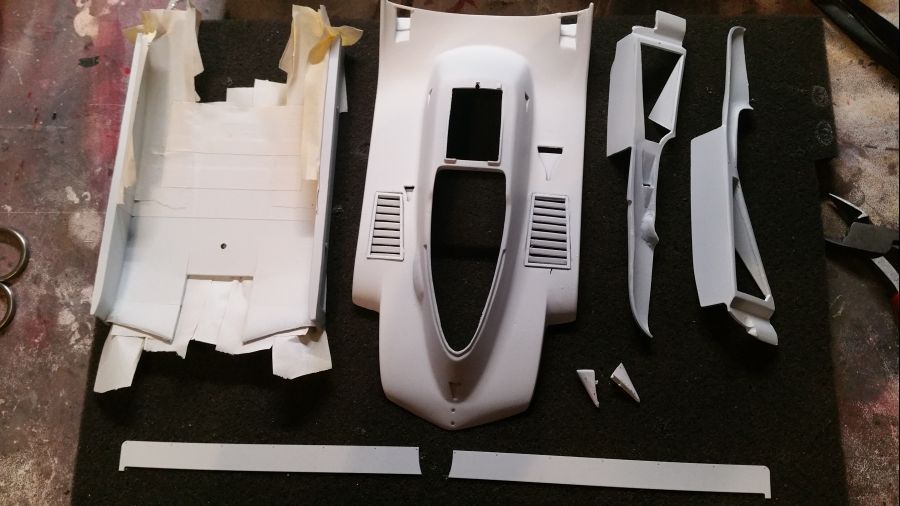
Eerst maar het meest belangrijke. Zorgen dat deze 3 onderdelen goed op elkaar passen. Dus een kwestie van buigen, draaien, vijlen, totdat het allemaal op elkaar aansluit.
First things first. Be sure these 3 parts fit together well. So, bending, twisting, filing, so everything connects nicely.
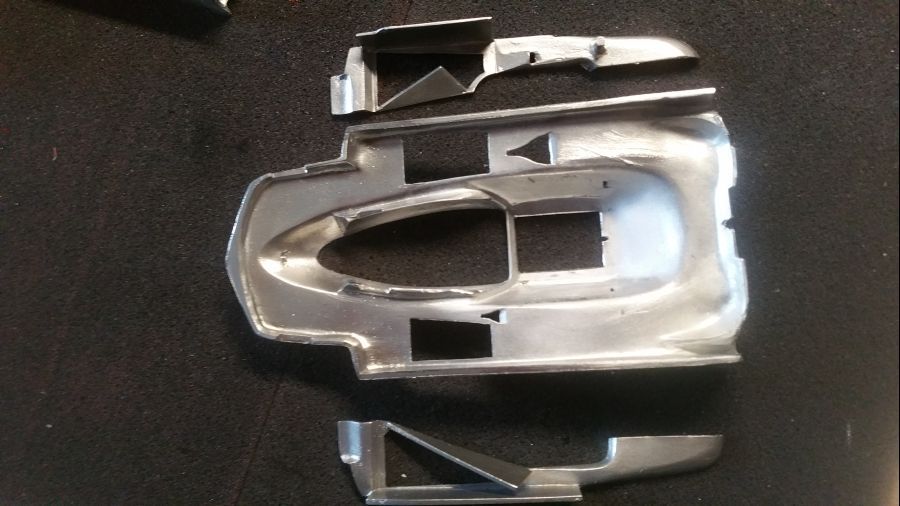
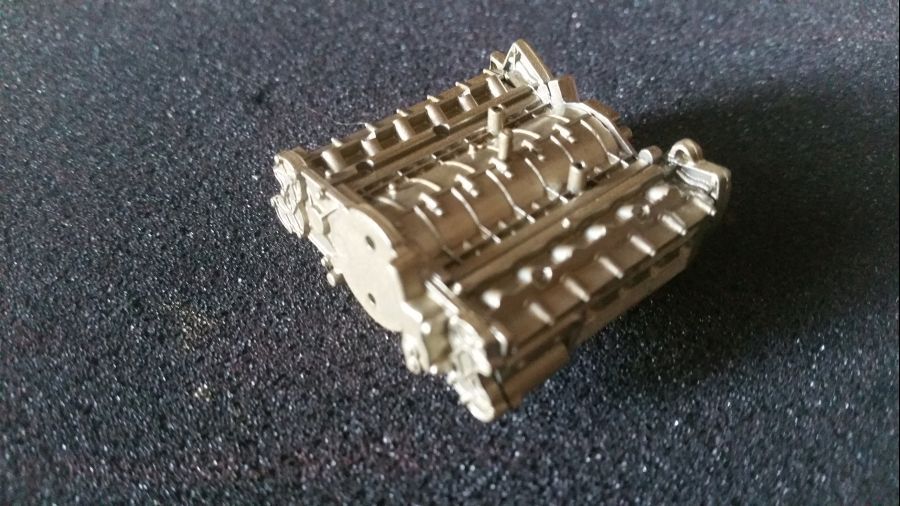
Dat geldt ook voor de binnenkanten...
The same goes for the insides....
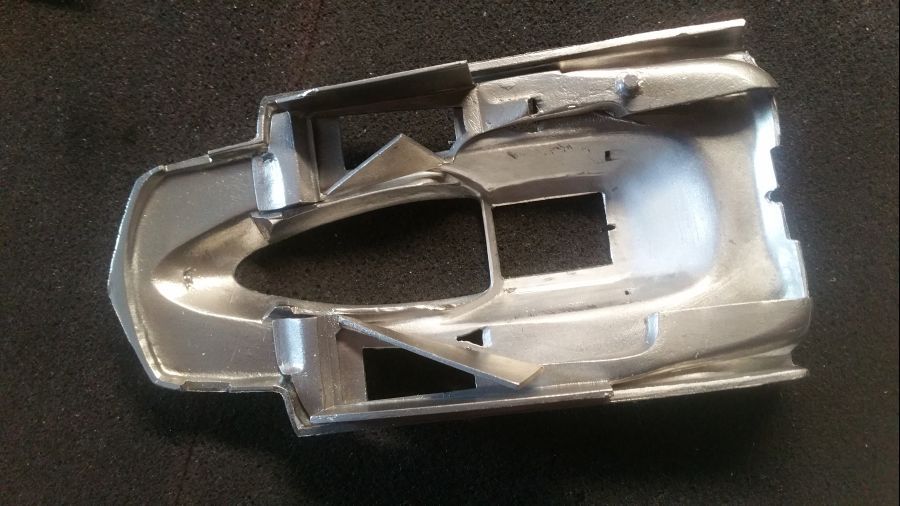
Het lijkt erop.. Het doel is om de bovenkant verwijderbaar te maken. Gaat dat lukken?
Coming close... The goal is to make the top detachable. Will it succeed?
En alles bij elkaar nog weer passen...
And a test fit of everything together...
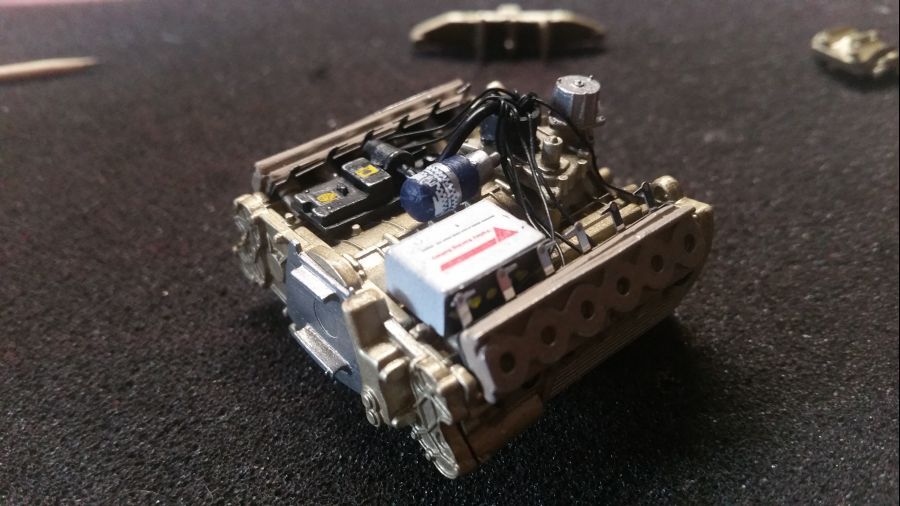
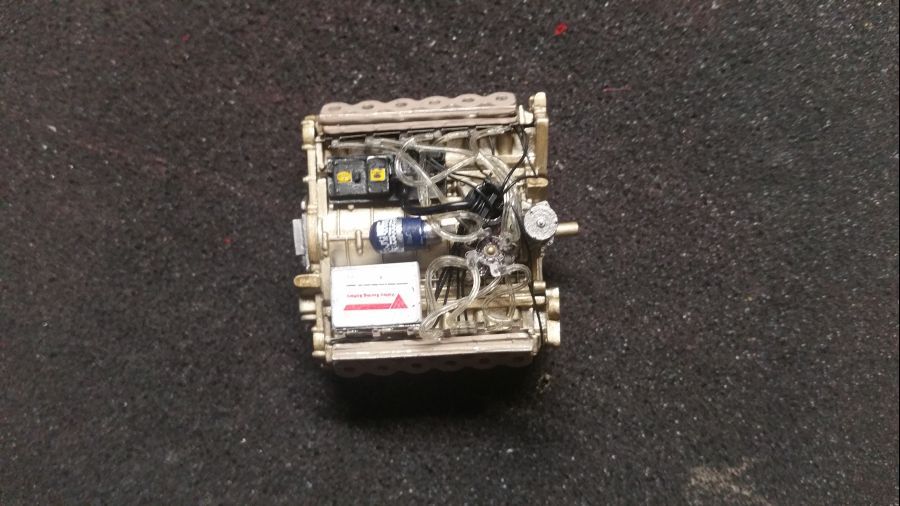
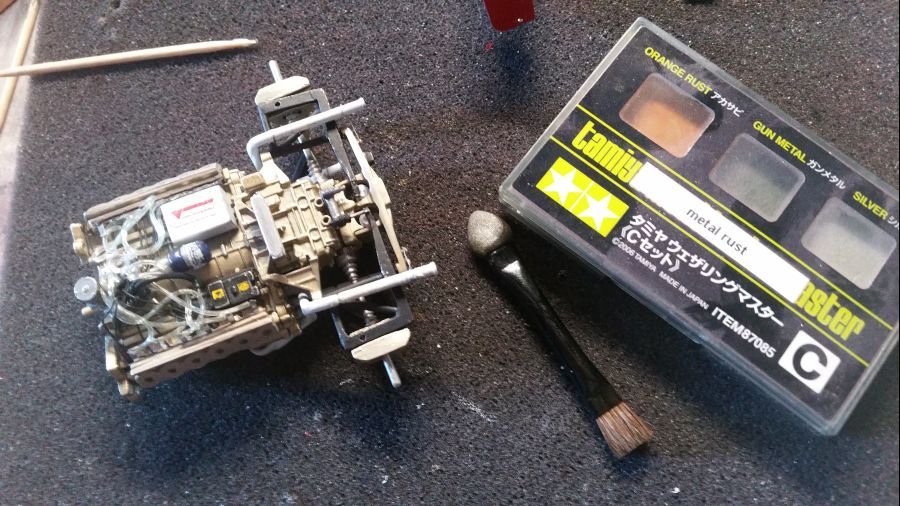
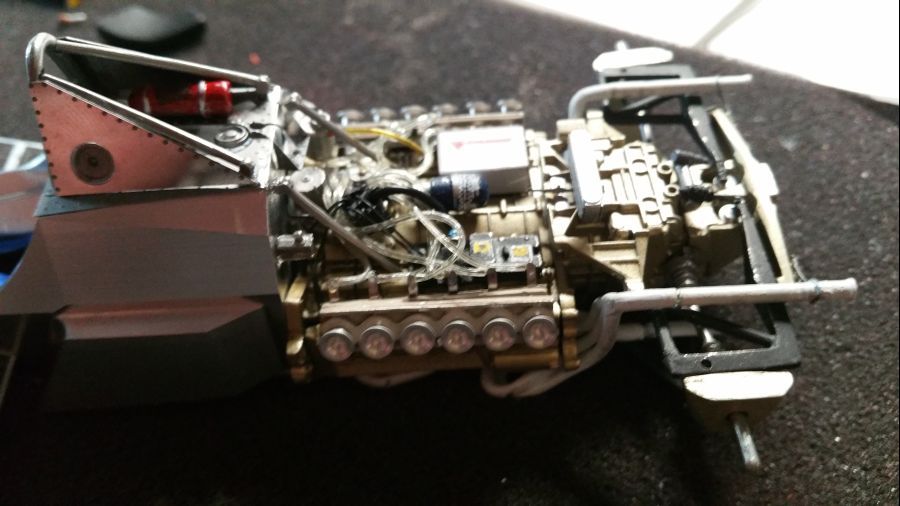
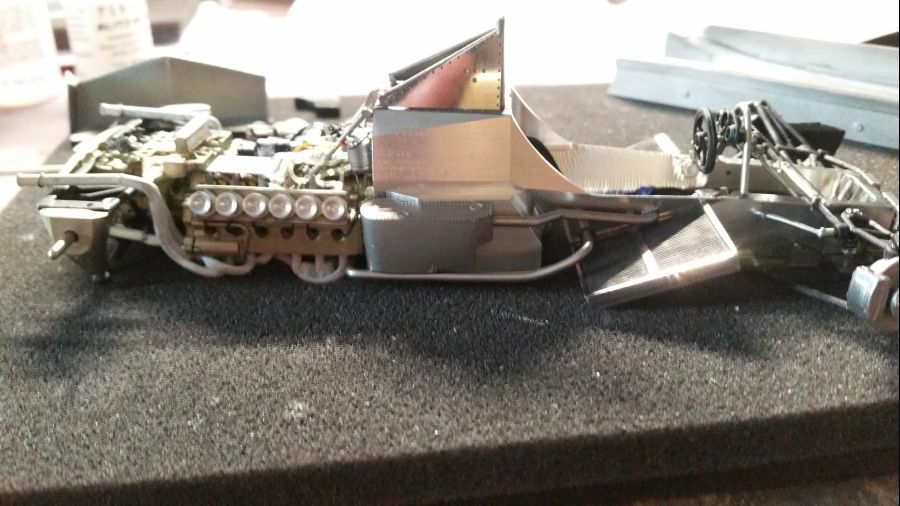
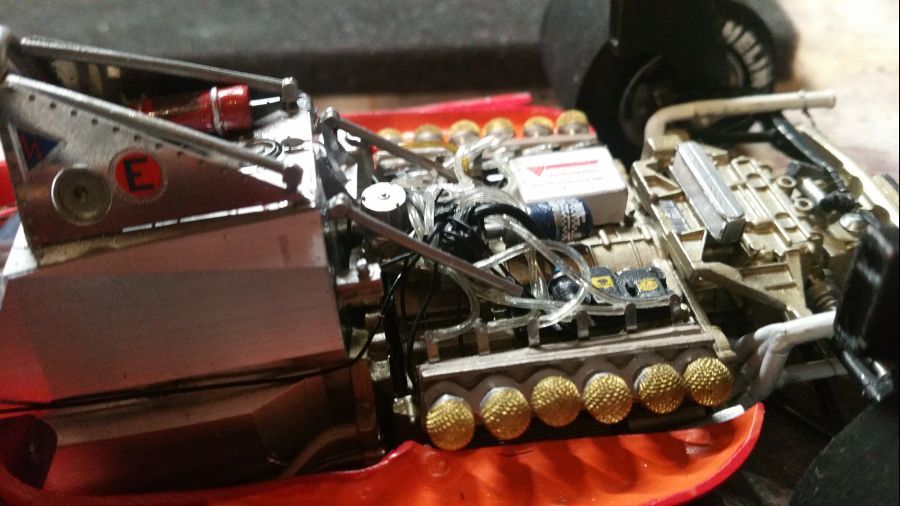
De eerste stappen aan de motor... Uiteraard eerst weer goed passen. Dan Tamiya Metal Primer erop....
The first steps to the engine... Of course first a test fit. Then Tamiya Metal Primer was sprayed....
Dan Tamiya TS-87 Titanium Gold erop en klaar maken voor een wash...
Then Tamiya TS-87 Titanium Gold on it and get ready for a wash...
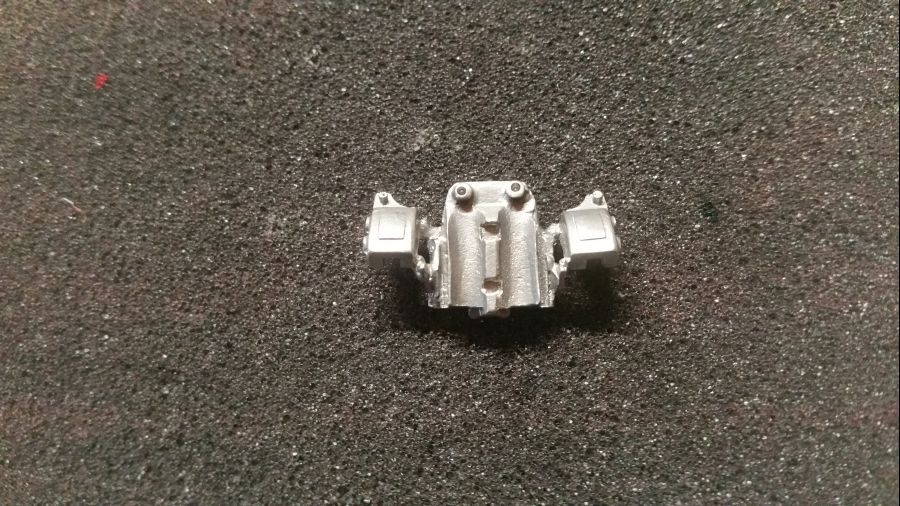
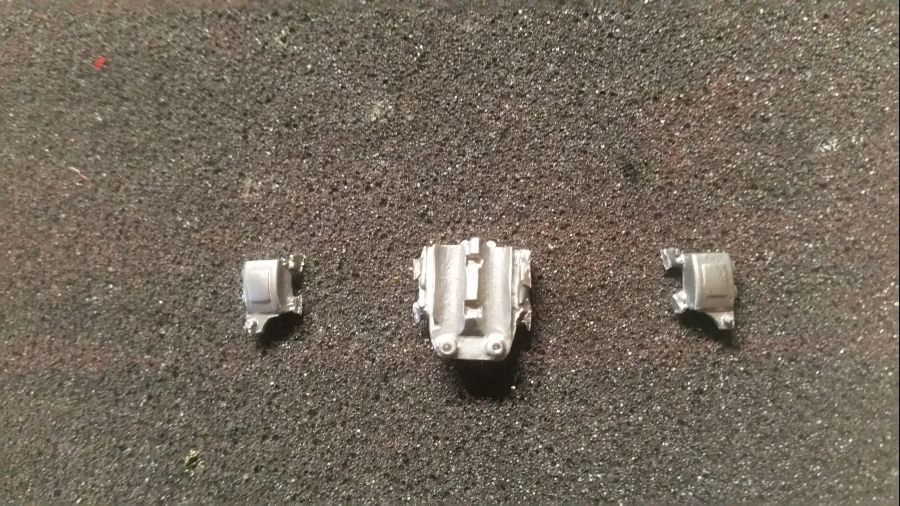
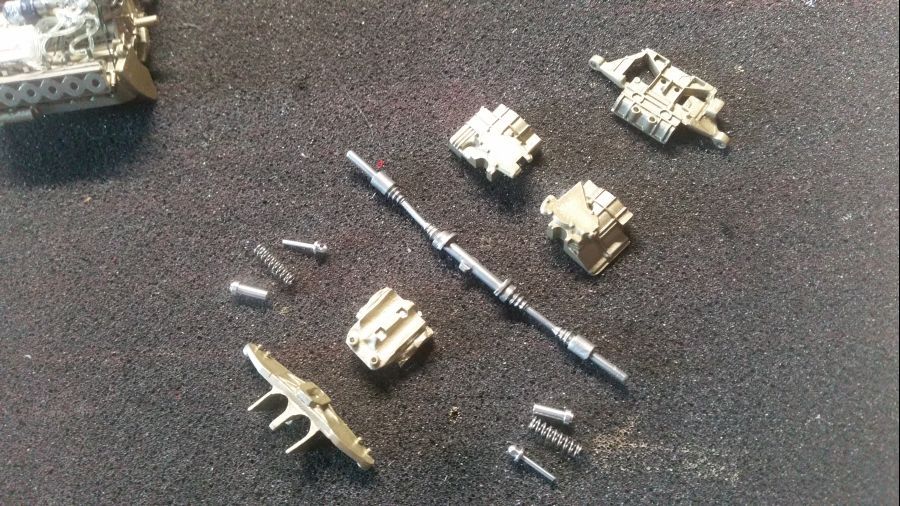
Voordat ik verder ga met het motorblok zoek ik de onderdelen voor de versnellingsbak bij elkaar. Deze worden ook alvast gespoten in Titanium Gold, maar eerst....
Before i continue the work on the engine, i take all parts for the gearbox. These also get the Titanium Gold color, but first....
...voor mijn versie moeten de remklauwen worden verwijderd...
...for my version, the brake calipers need to be removed...
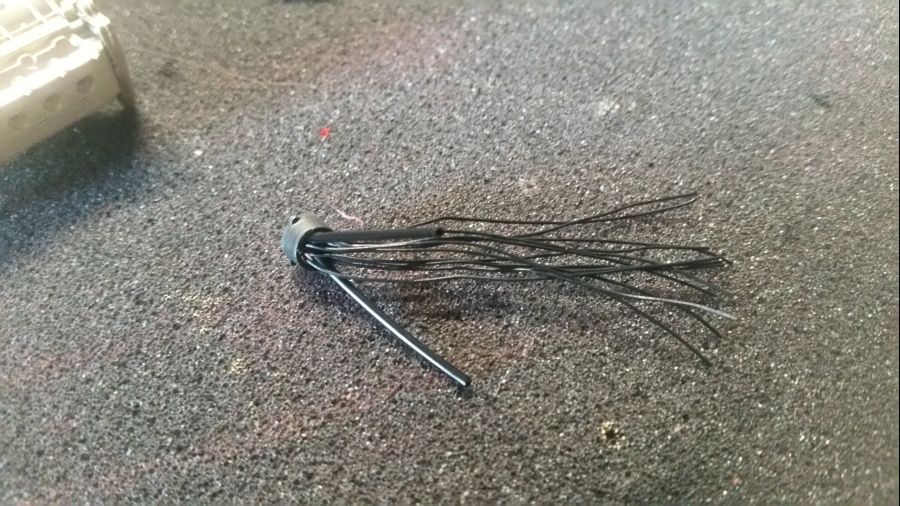
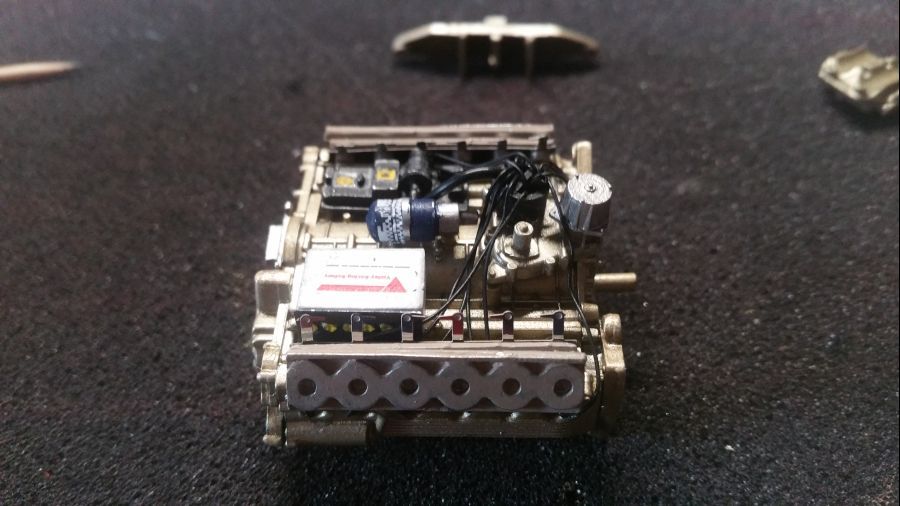
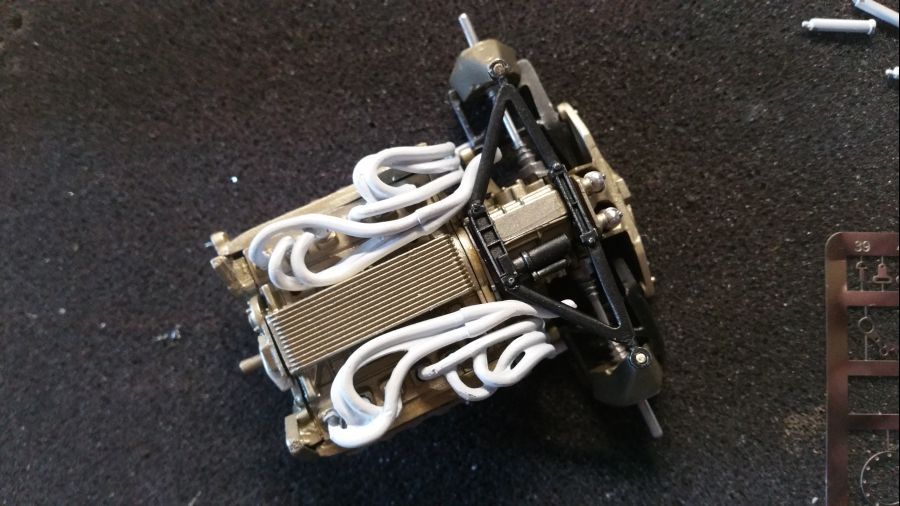
Het werk aan de ontstekingskabels...
Working on the ignition cables...
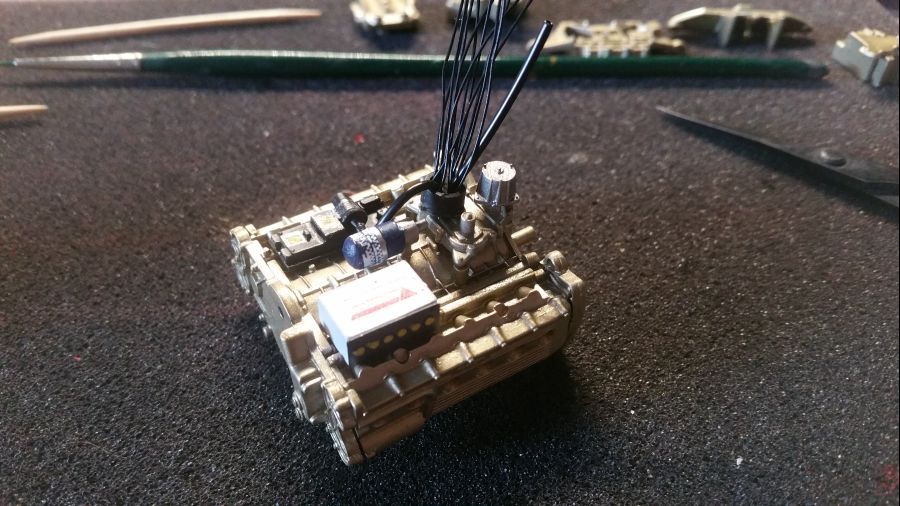
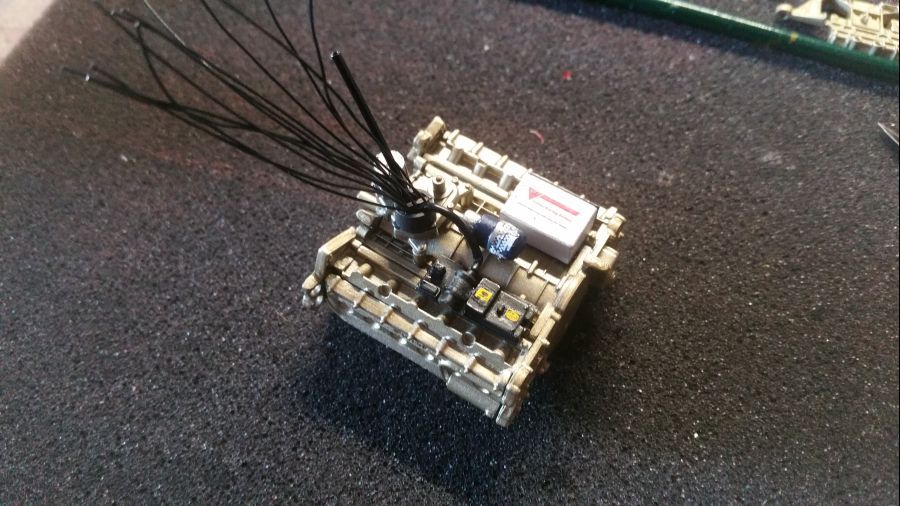
Meer onderdelen zijn bevestigd aan de motor...
More parts have been attached to the engine...
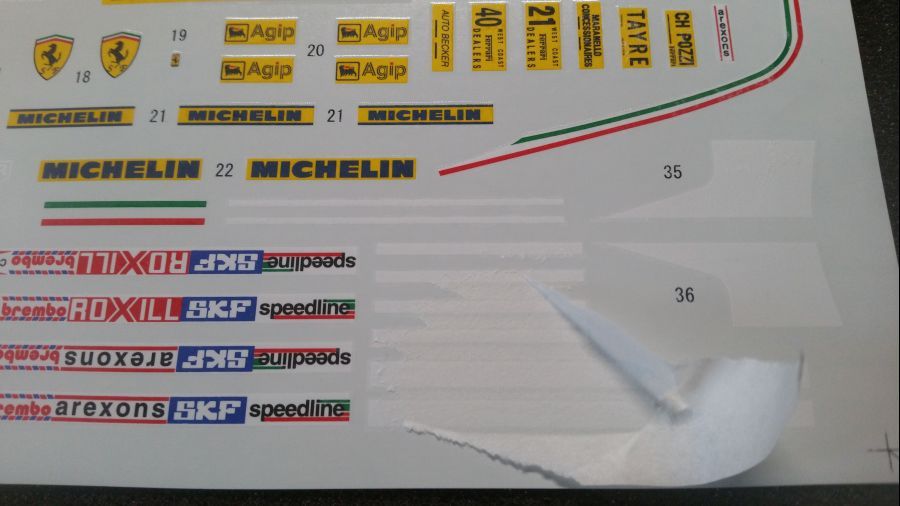
Terwijl ik bezig was met de decals op de accu enz. kwam ik tot de ontdekking dat het papier vastplakte aan de decals. Ik hoop dat ze niet beschadigd zijn.
While getting the decals for the battery etc. i noticed the paper sticks to the decals. I surely hope they are not damaged.
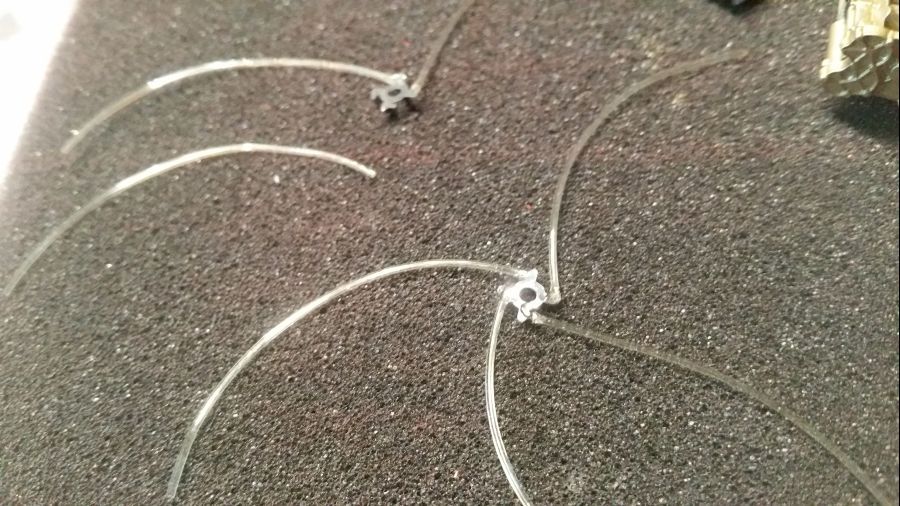
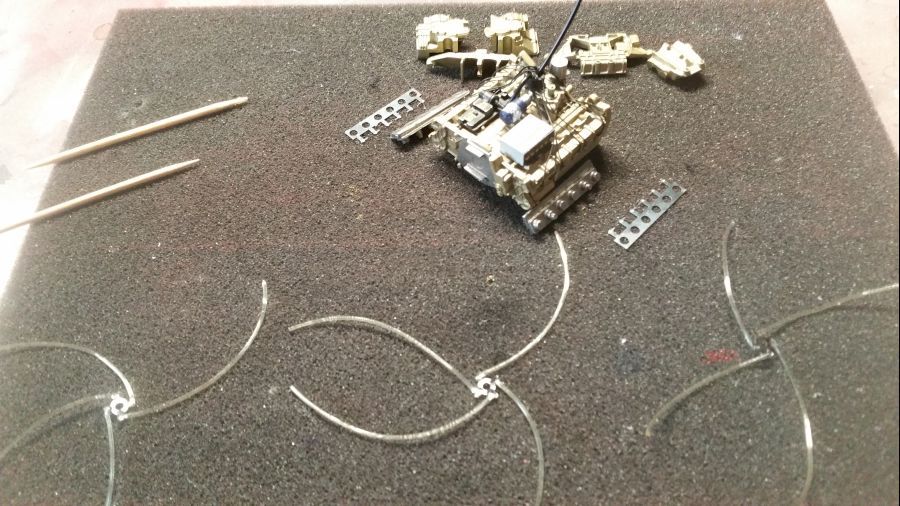
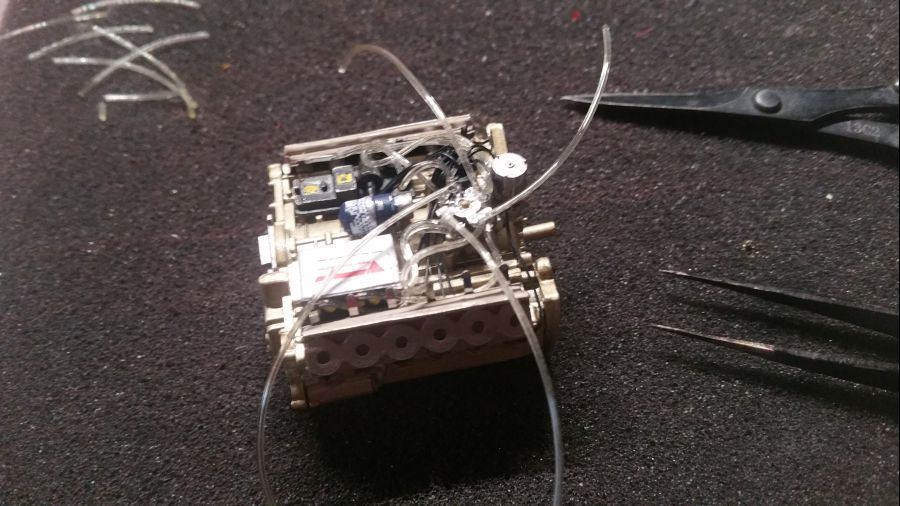
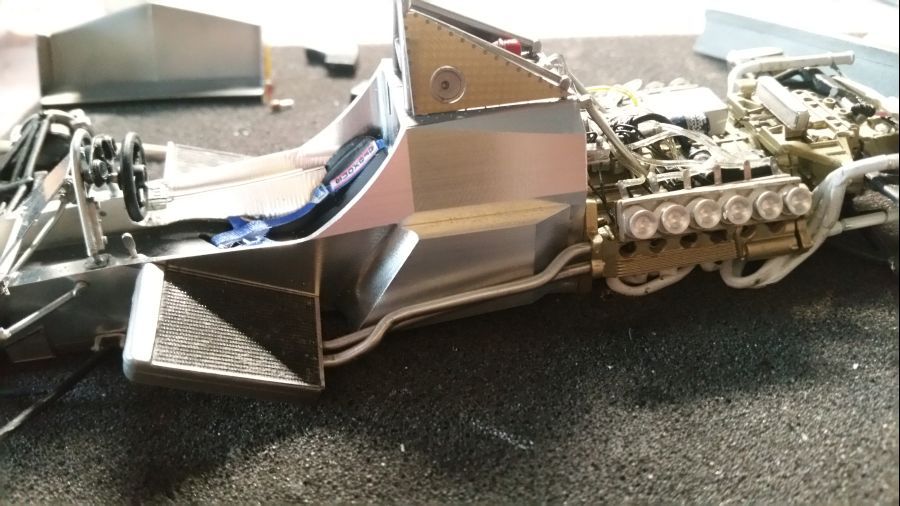
Dan de benzineleidingen...
Next are the fuel pipes...
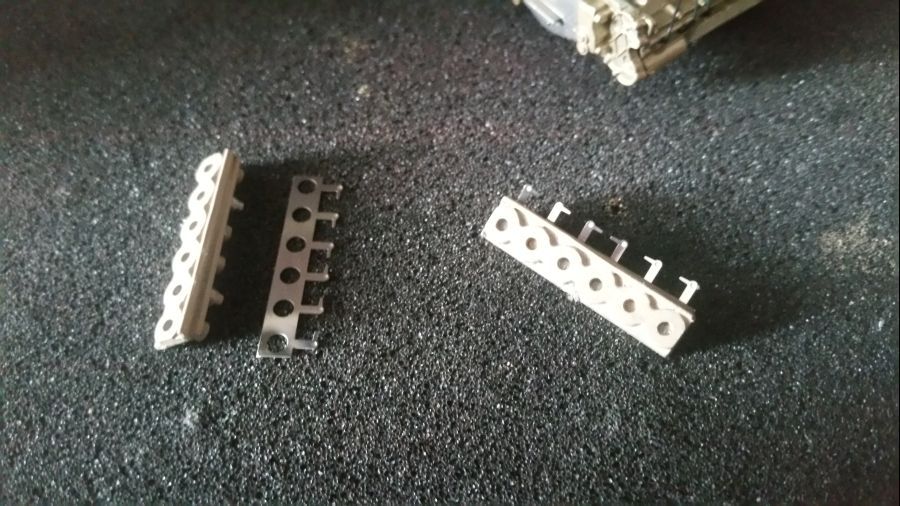
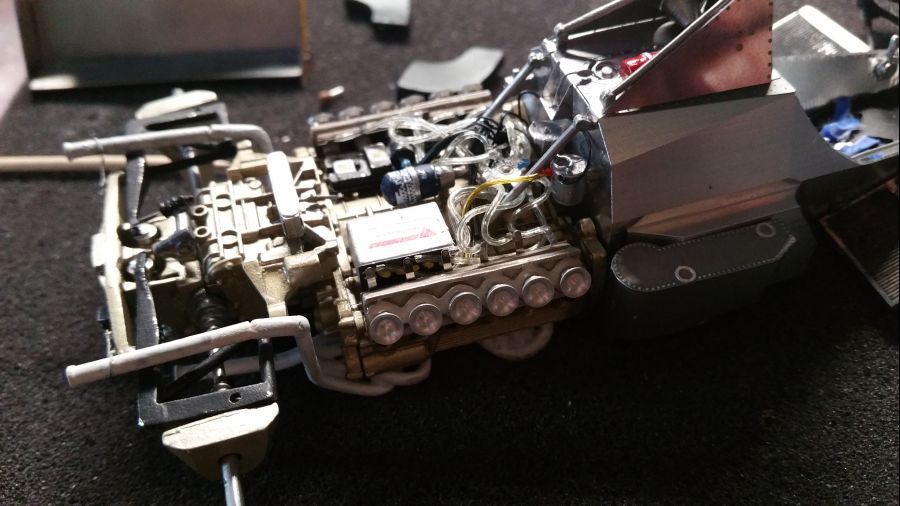
Er moeten 3 sets van deze verdelers worden gemaakt. Geen simpel karwei. De pijpleiding past niet op de verdelers. De pennetjes zijn te breed. Ik heb een sneetje gemaakt in de uiteinden van de pijpleiding en de vervolgens op de verdeler gelijmd.
You need to make 3 sets of these. Not easy. The pipes do not fit the distributors. The pins are too wide. I made cuts at the end of the pipes and glued them to the distributor.
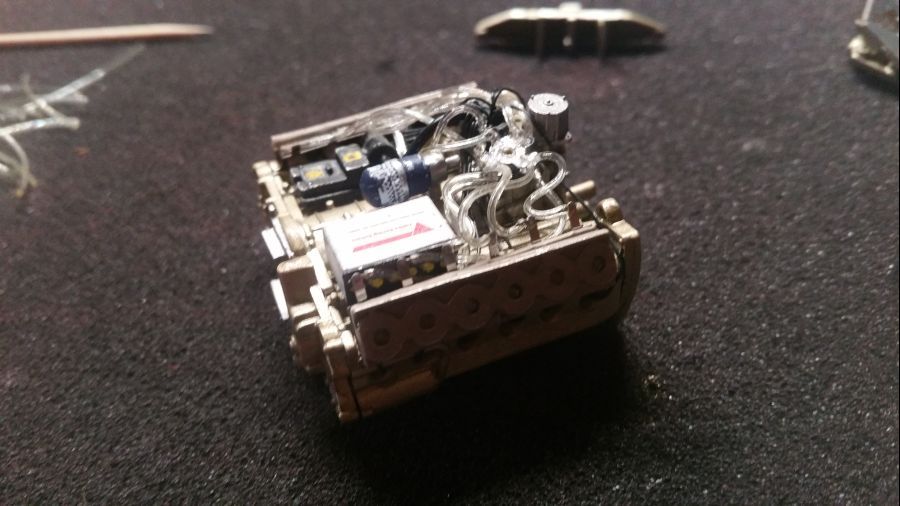
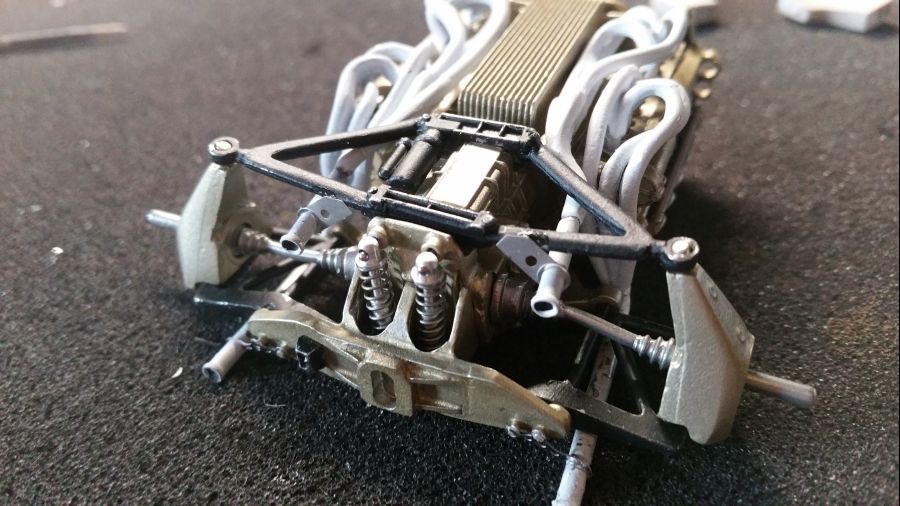
De houders voor de trompetten worden geplaatst en het systeem voor brandstofinspuiting.
The supports for the funnels are attached as well as the fuel injection.
De leidingen worden aangesloten...
Attaching the hoses...
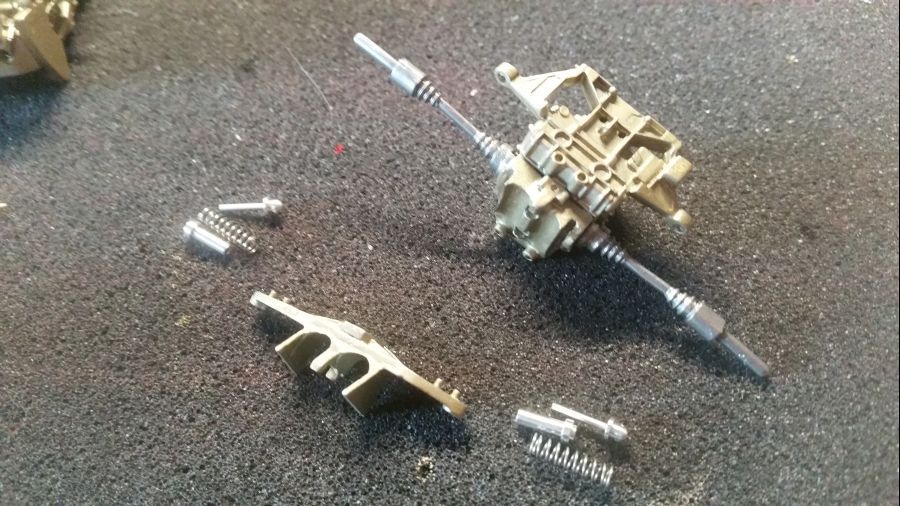
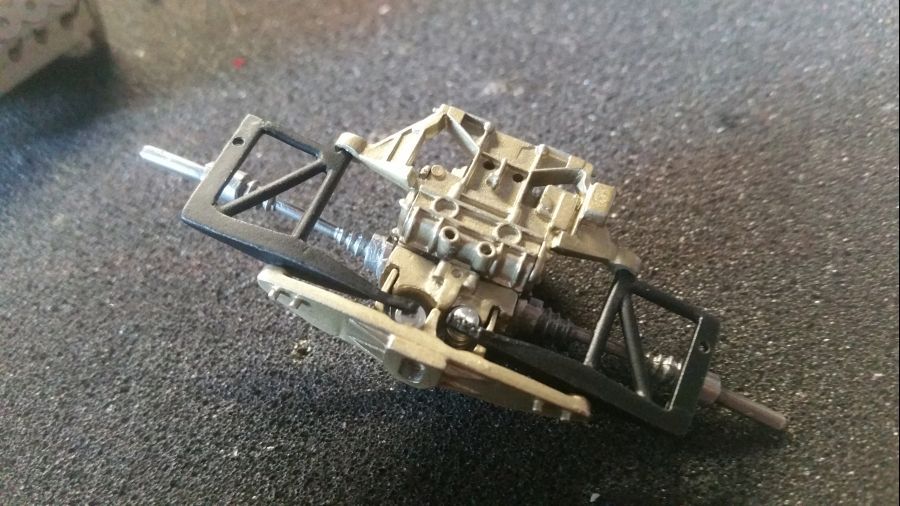
Nu maar even naar de versnellingsbak kijken... Voor het maken van de 312 T4B moeten nu de remmen worden verwijderd. In een later stadium worden andere geplaatst.
Now let's turn to the gear box... To make the 312 T4B the brakes need to be removed. Later some new ones will be added.

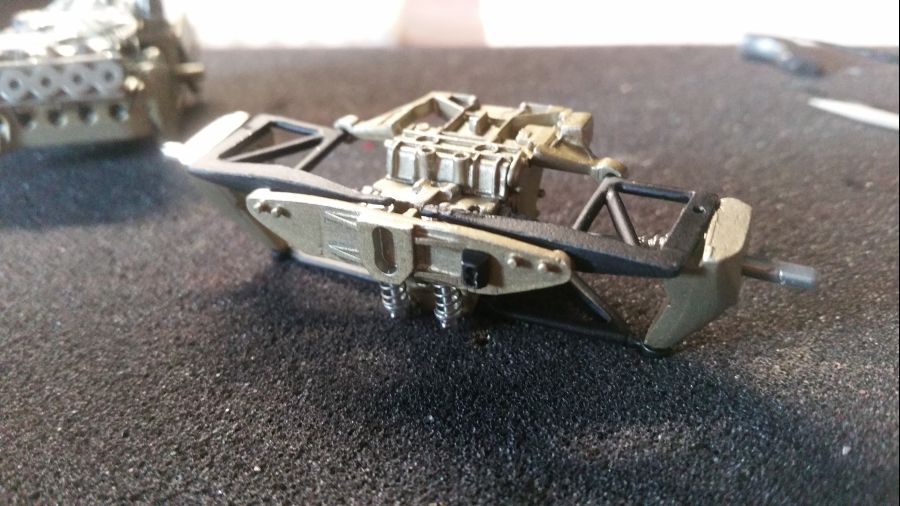
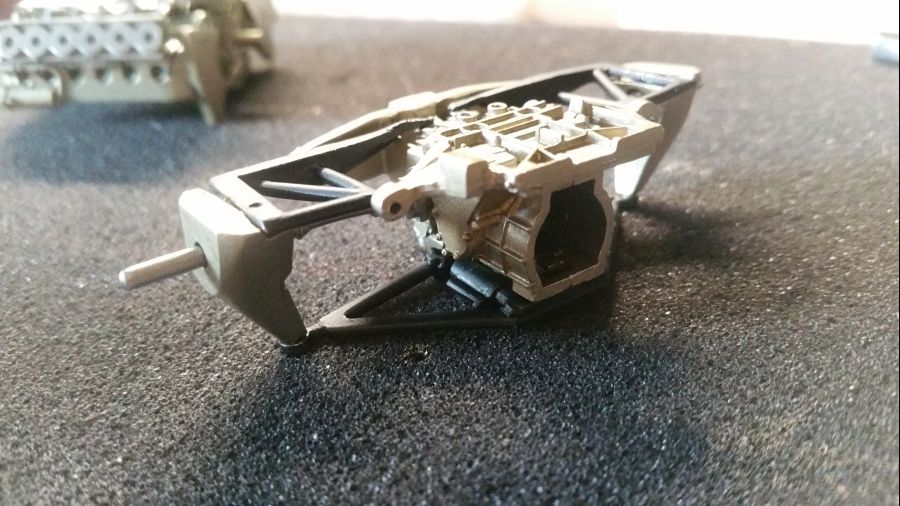
Passen...
Test fit...

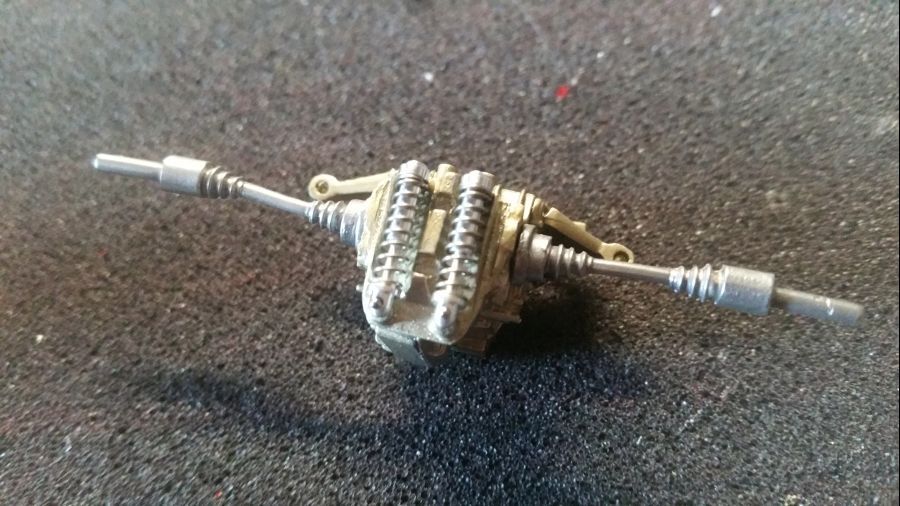
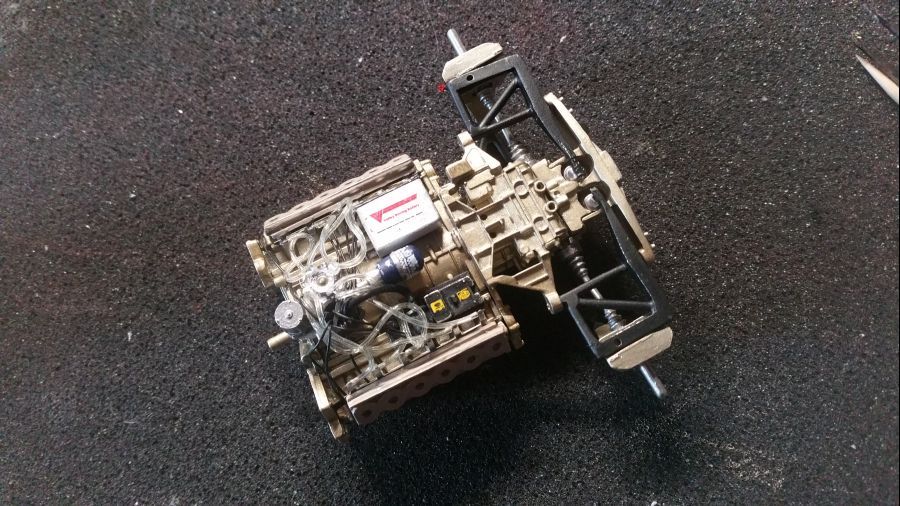
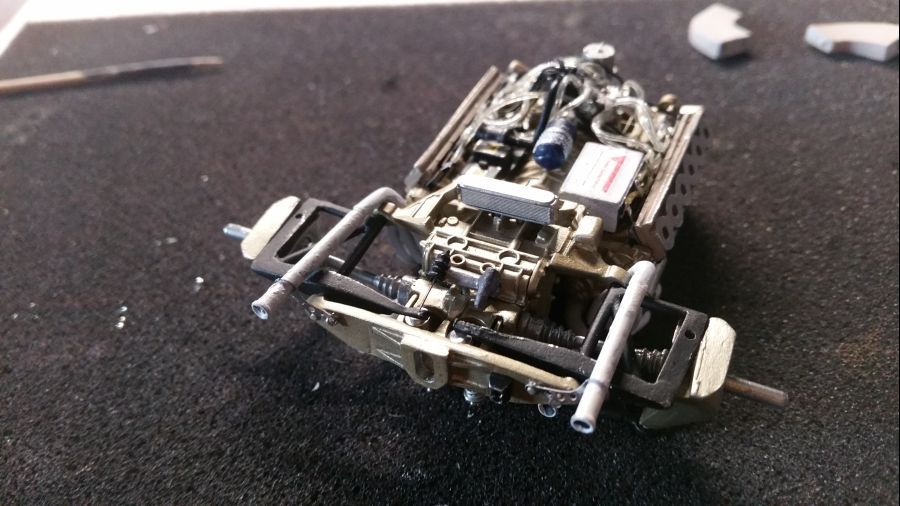
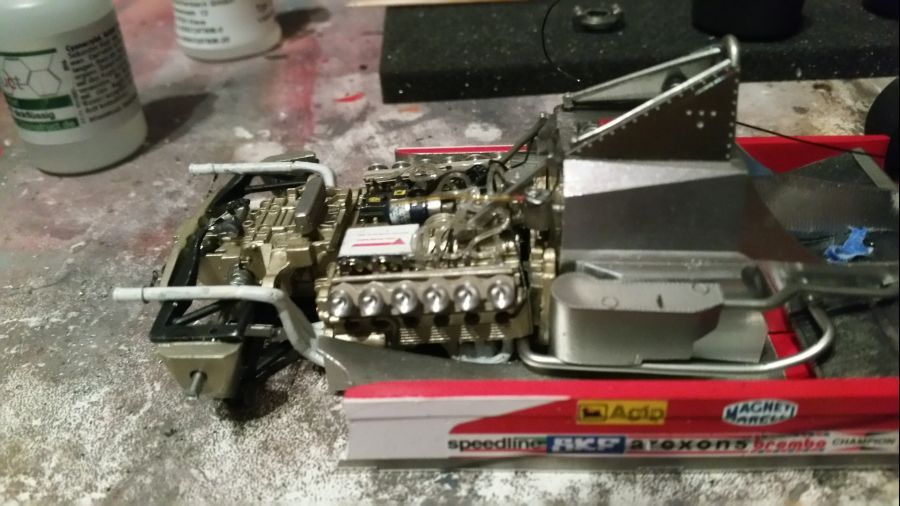
Tijd om de motor met de versnellingsbak te verbinden.
Time to connect the engine with the gear box.
Verder met het uitlaatsysteem...
Continuing with the exhausts system...
Hier heeft Studio27 een fout gemaakt. Voor het maken van de Ferrari 312 T4B moet je in een eerder stadium de remmen verwijderen. Laat nu juist deze dingen de steunen voor de onderste uitlaten zijn! Improviseren dus.
Here is where Studio27 has made a mistake. To create the Ferrari 312 T4B you need to remove the brakes in an earlier stage. And now these brakes are need as a support for the lower exhausts! So improvise.
Dan nog wat zilverpoeder op de uitlaten aanbrengen.
Adding some silver powder to the exhausts.
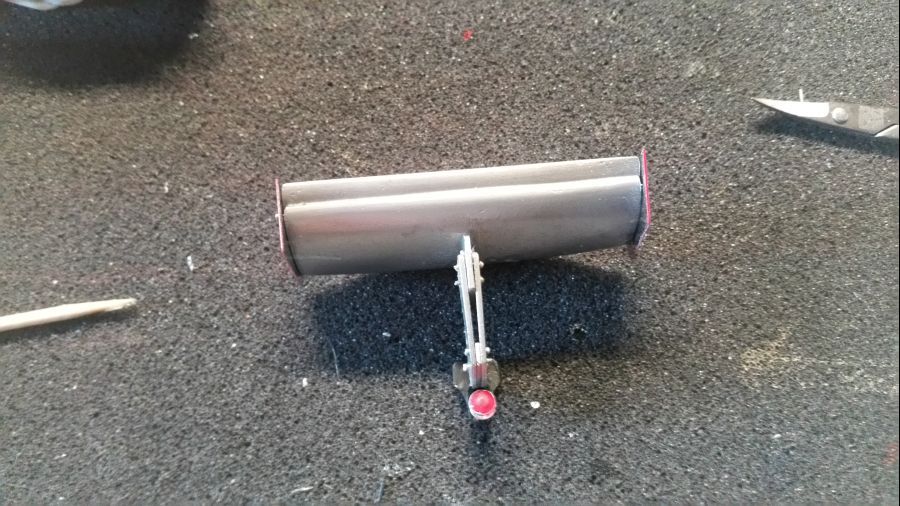
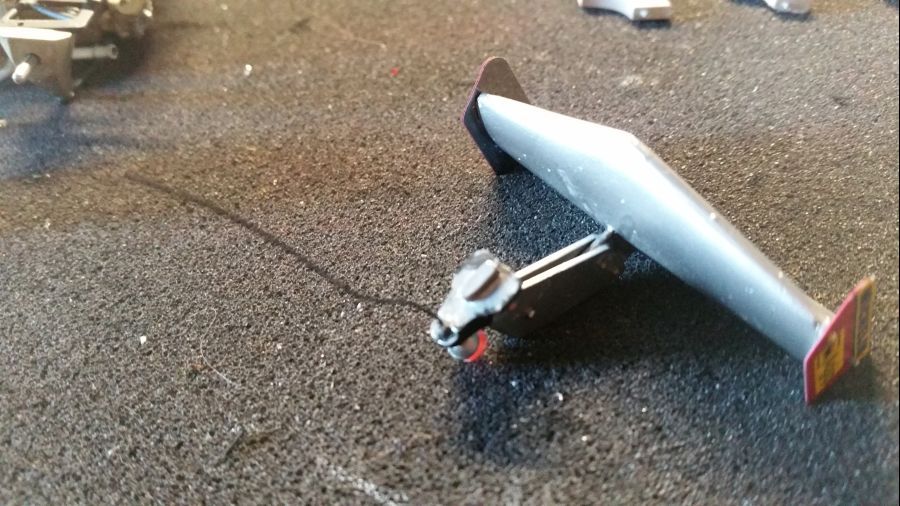
Tijd voor de achtervleugel. De goede uitlijning moet wel een beetje in de gaten worden gehouden. Voordat je het weet staat de voorkant te hoog of te laag.
Time for the rear wing. I have to beware of a correct lineup. Before you know it the front side is too high or too low.
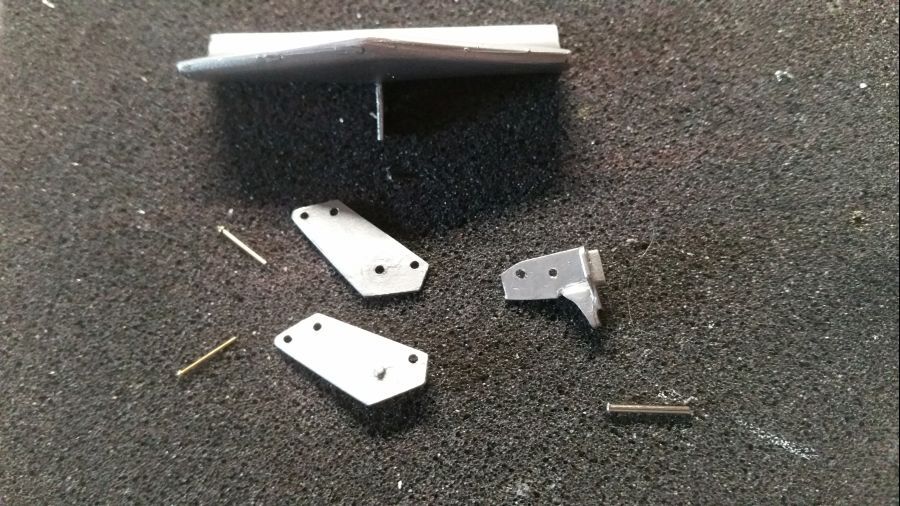

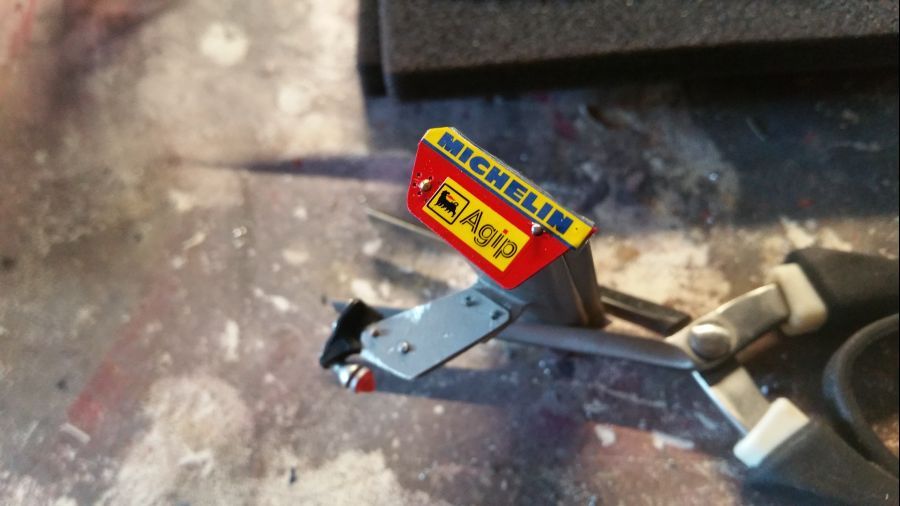
En de stroomtoevoer. Ik wacht met het plaatsen van de vleugel aan het motordeel. Ik doe dat liever wanneer de wagen op de wielen staat.
And the power wire. I will wait with attaching it to the body. I will rather do it when the car is on it's wheels.
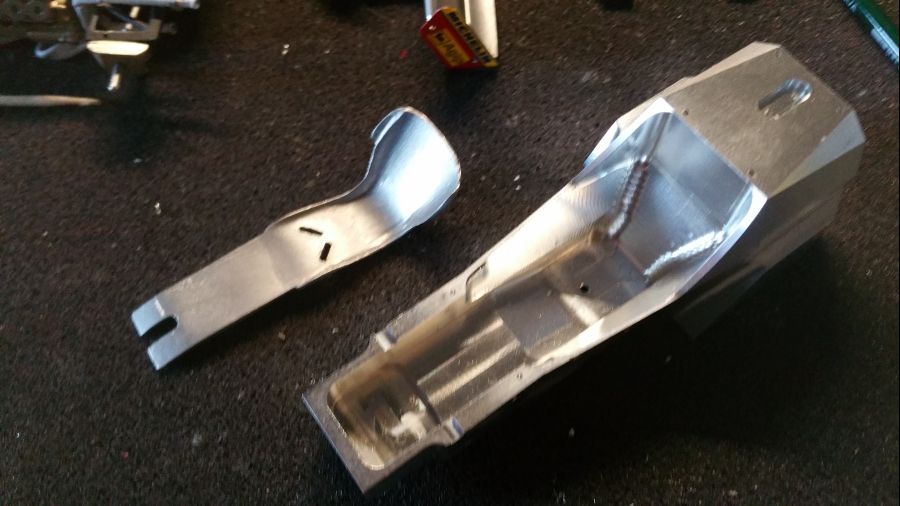
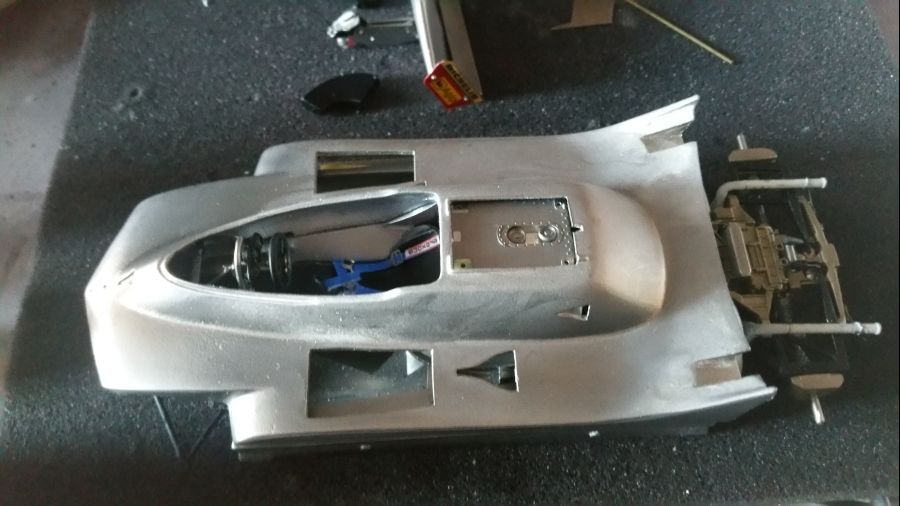
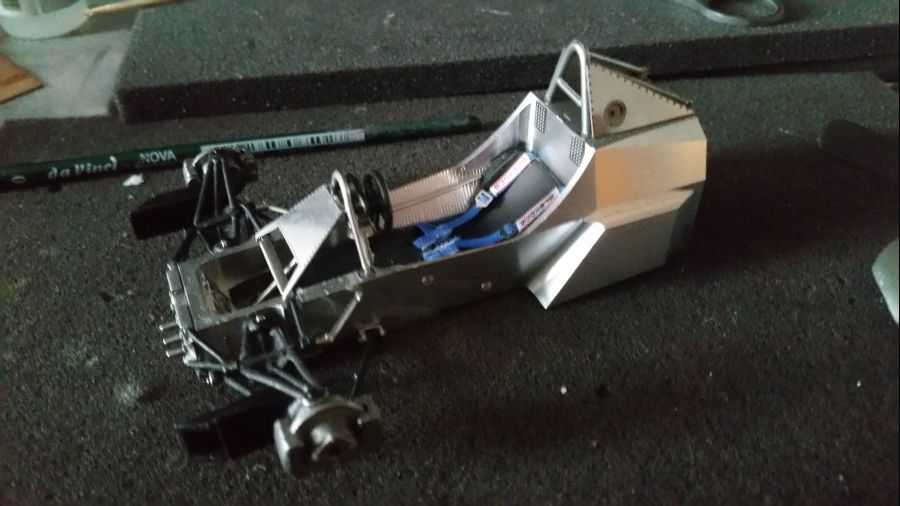
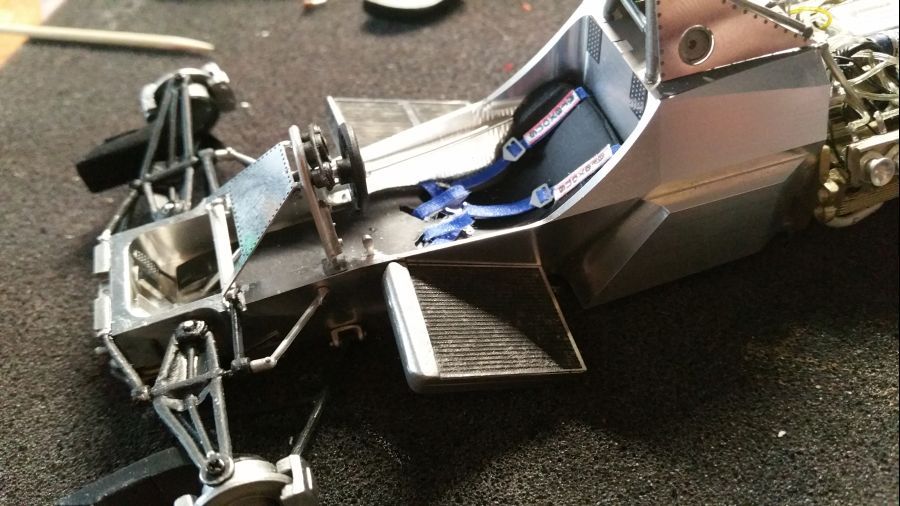
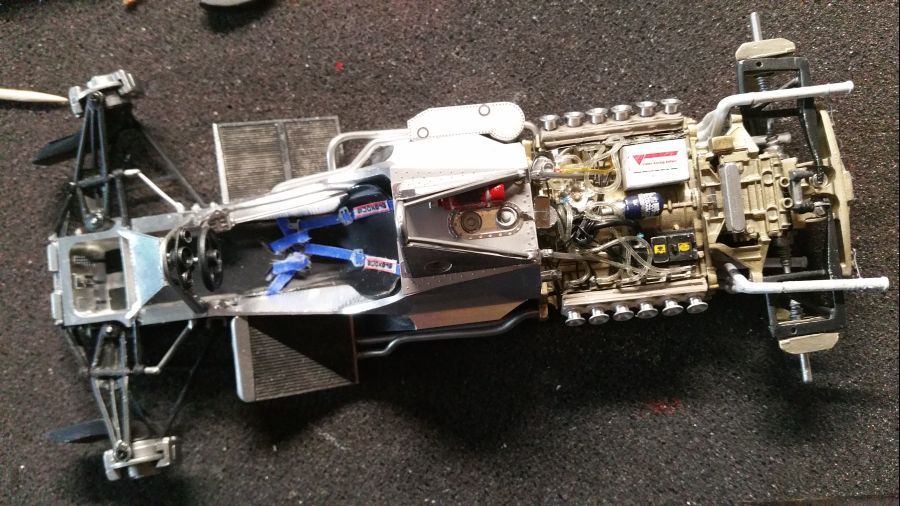
Door met de stoel en de kuip.
To continue with the seat and the tub.
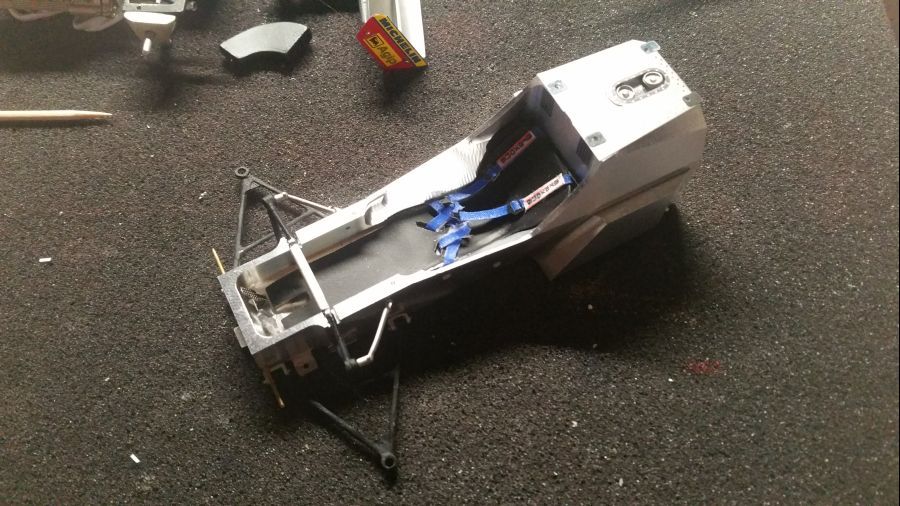
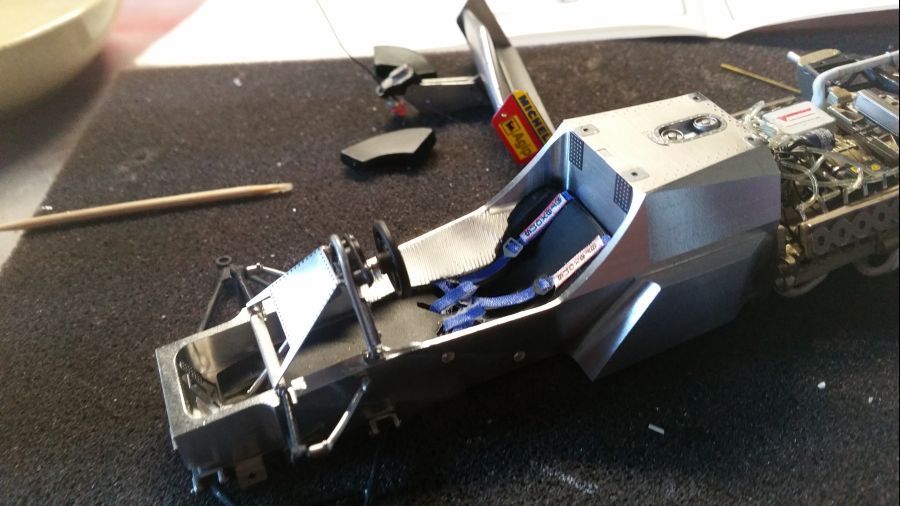
Het dashbord en het stuur..
The dash and the wheel..
Weer even passen in verband met de aangebrachte onderdelen...
Test fit again after adding the extra parts...
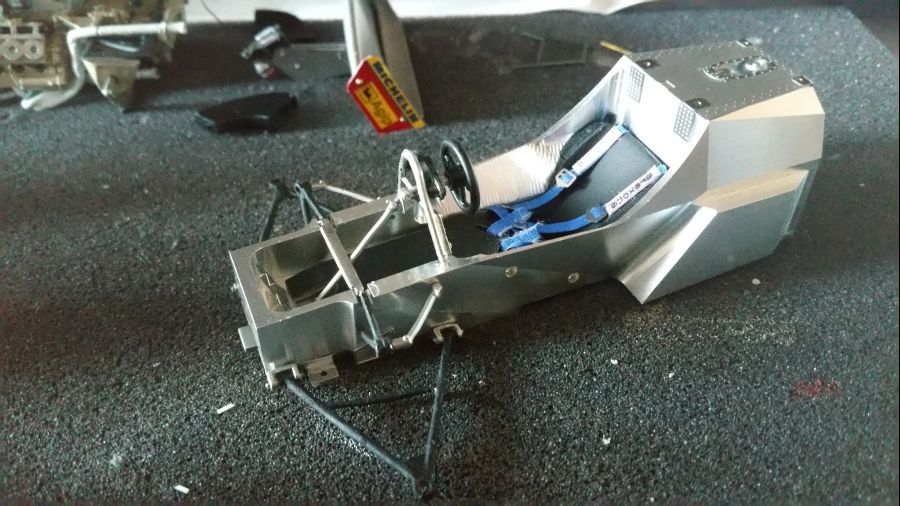
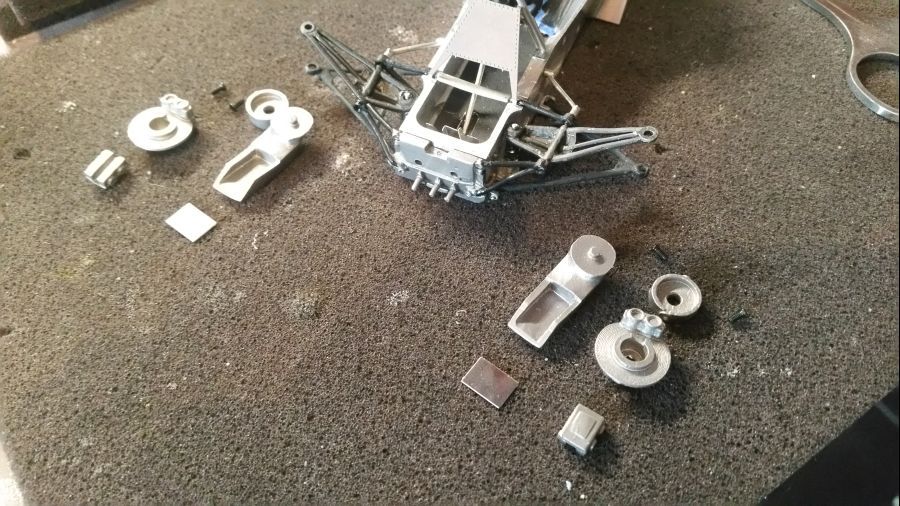
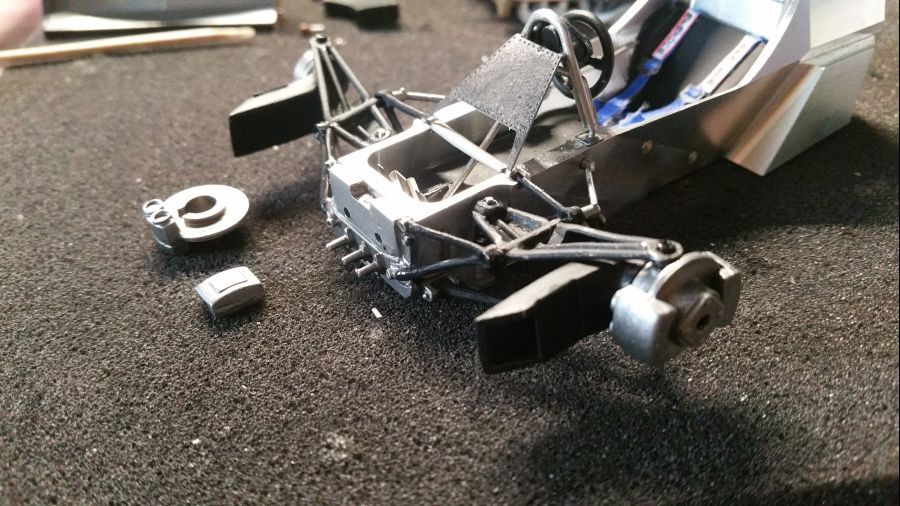
Verder met de kuip en de voorwielophanging... Niet gemakkelijk.
To continue with the tub and the front wheel suspension... Not an easy job.


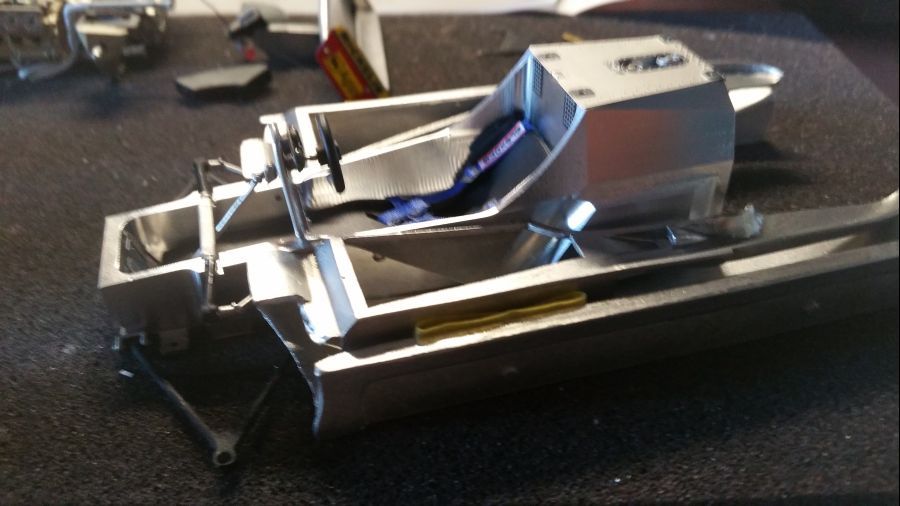
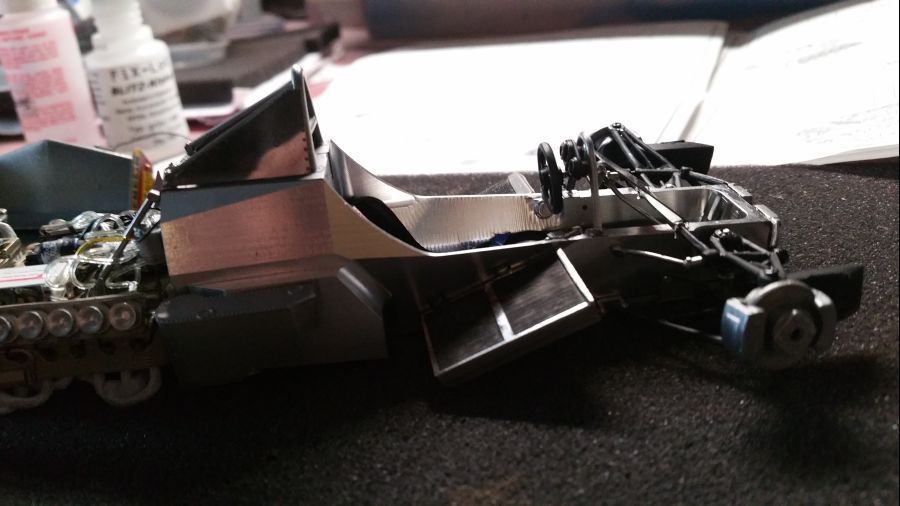
Dan de luchtinlaten en de remmen.
Next are the air intakes and the breaks.
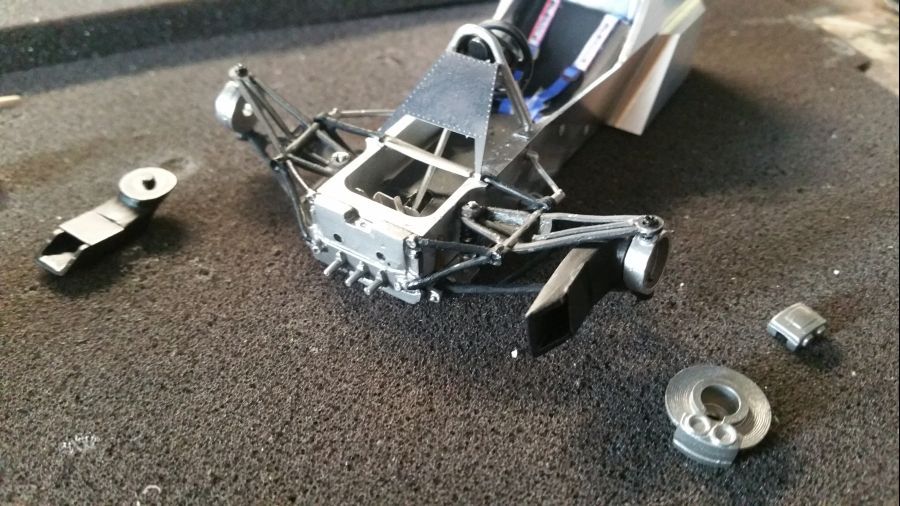
Door met de roll bar.
Next is the roll bar.
En weer passen. Dit kun je niet vaak genoeg doen.
And another test fit. It is wise to do it often.
Het sluiten van het ´huwelijk´....
The ´marriage´....

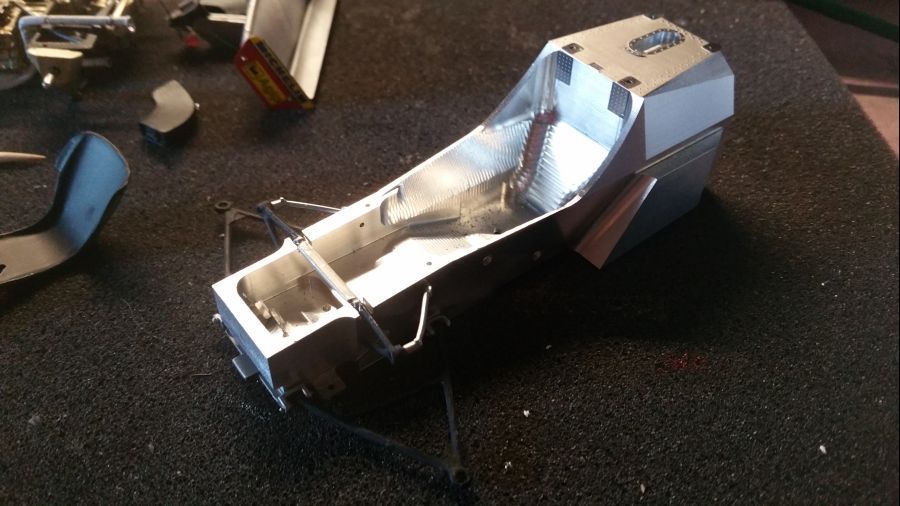
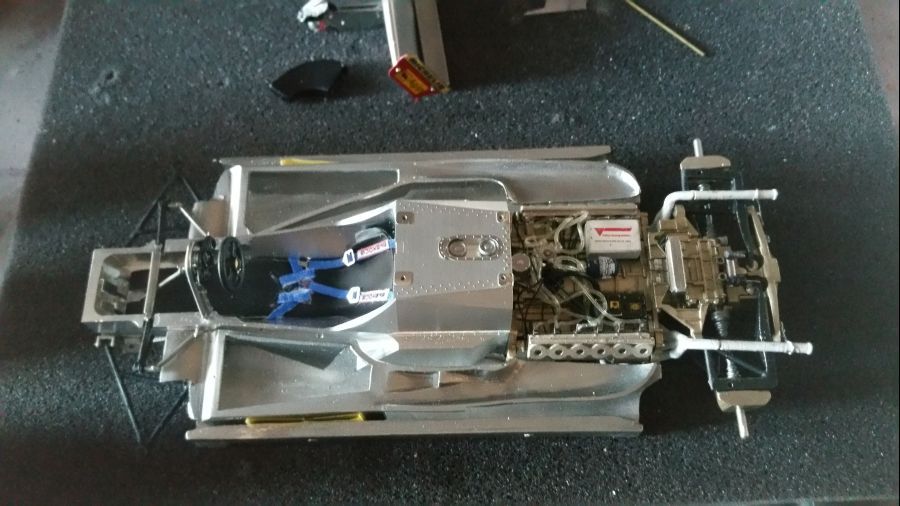
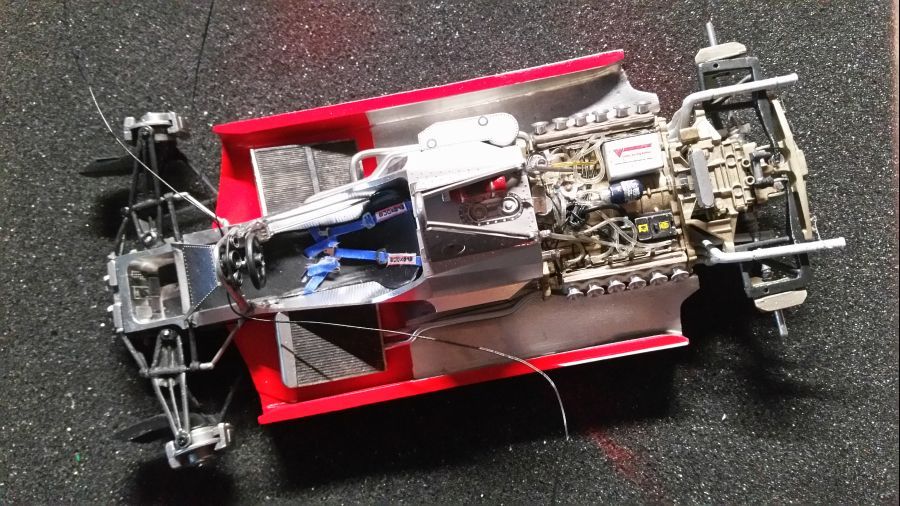
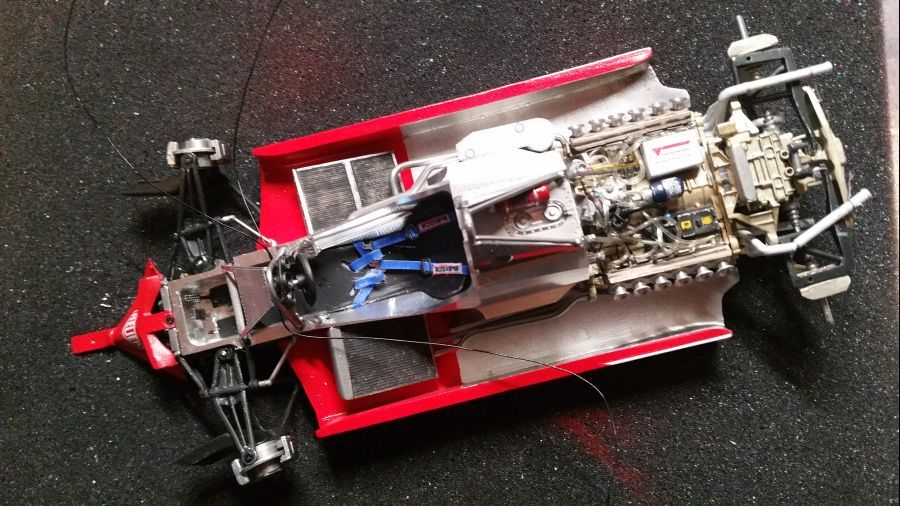
Veel onderdelen geplaatst aan de motor en de body...
Many parts have been applied to the engine and the body...
Verder met de koeling...
On with the cooling...
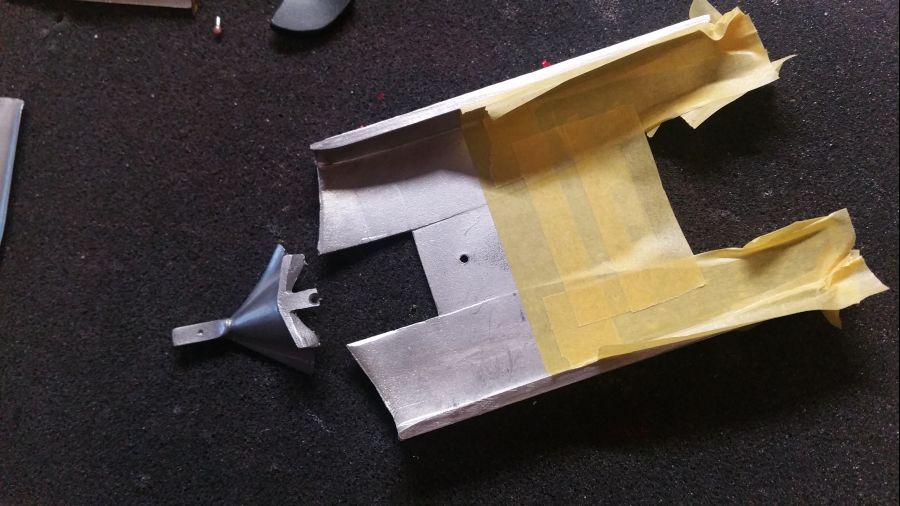
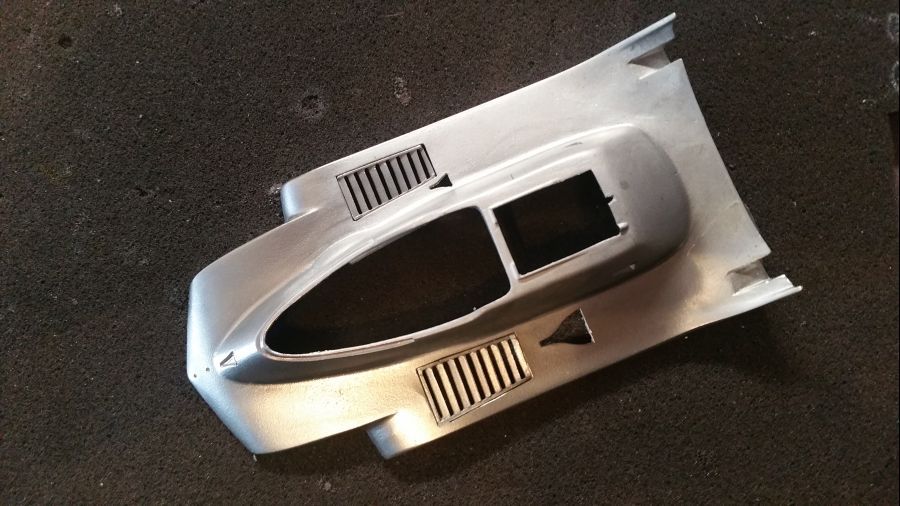
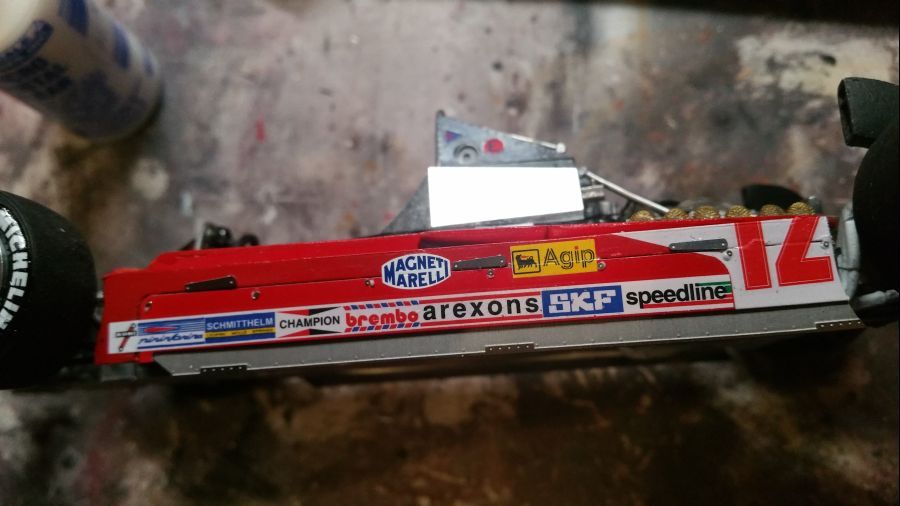
De bodemplaat wordt afgeplakt vóór het aanbrengen van de primer.
The undertray is being masked before adding the primer.
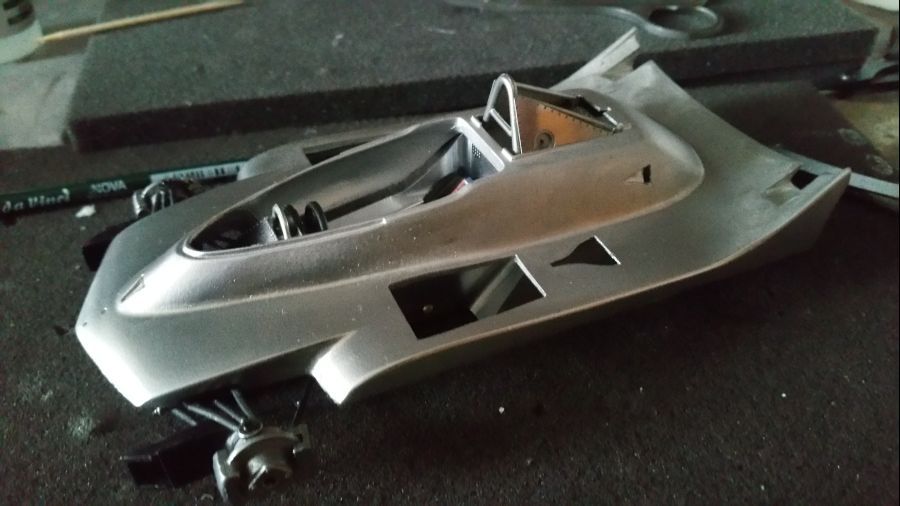
Dan worden wat onderdelen aan de body geplaatst.
Some parts are added to the body.
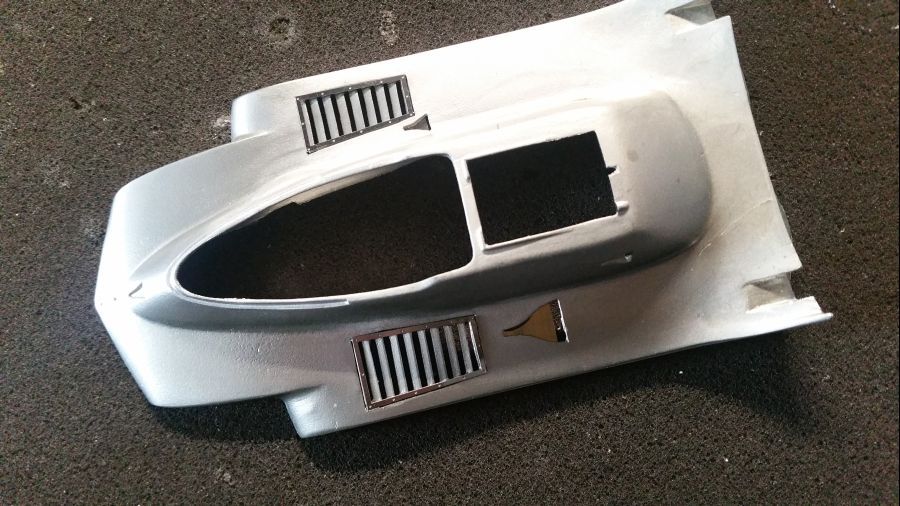
Deze onderdelen (2 verbindingen) staan niet op de instructies, maar volgens de foto's horen deze er wel. Ik heb wat gevonden in de rommeldoos.
These parts (2 connections) are not on the instructions pages, but according to photos they need to be attached. I found some parts in the scrap box.
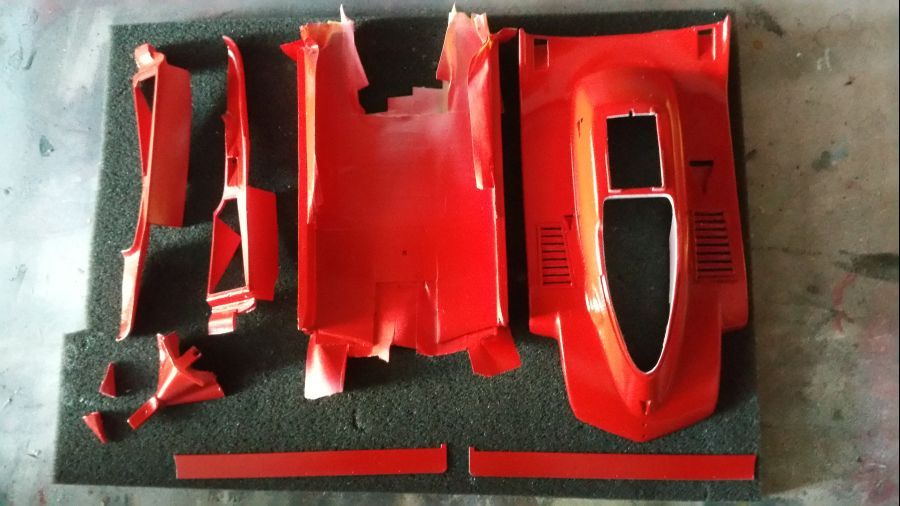
Alles klaar voor de rode kleur...
Everything prepared for the red colour...
Het rood en de heldere lak zitten erop. Ik heb weer Zero Paints ZP-1007 1970's-1980's Rosso Formula 1 gebruikt.
The red and the clear lacquer have been applied. I use Zero Paints ZP-1007 1970's-1980's Rosso Formula 1 again.
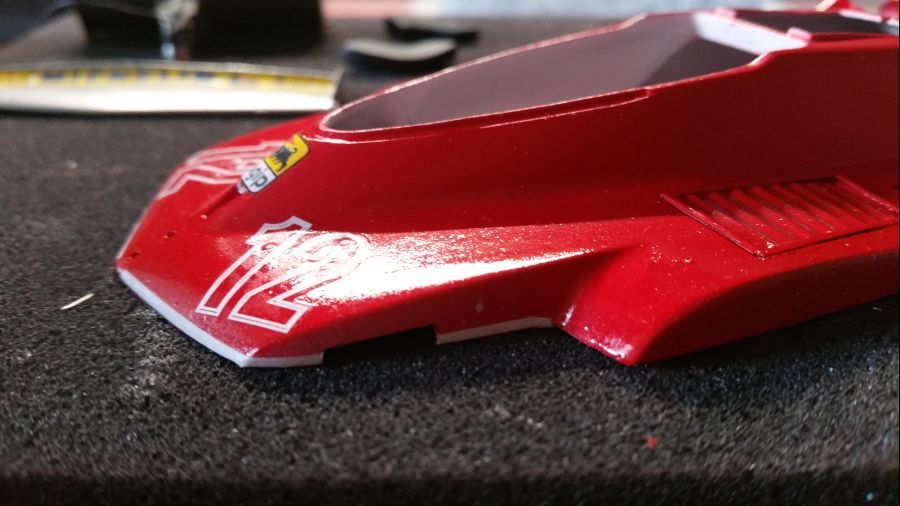
Interessante punten bij het aanbrengen van de witte belijning...
Points of interest at adding the white lines...
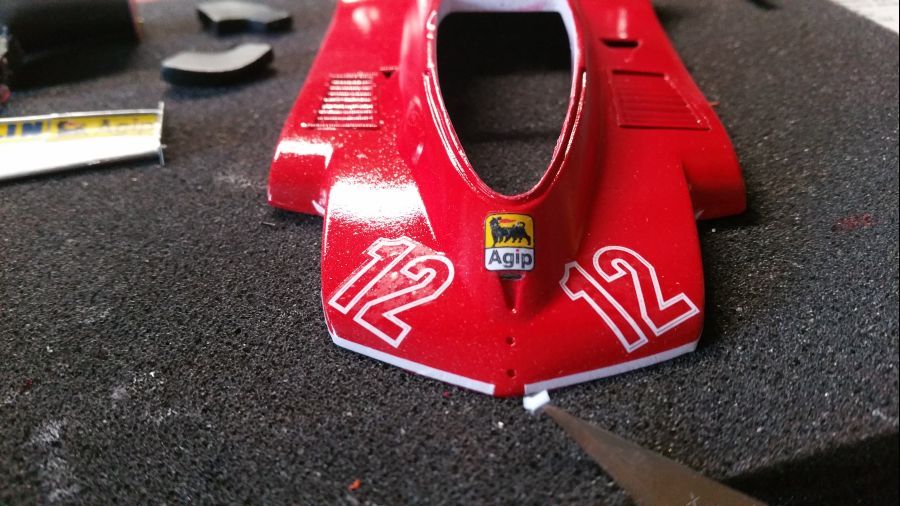
Aaargh, decals vallen uit elkaar.... schadecontrole...
Aaargh, decals falling apart.... damage control...
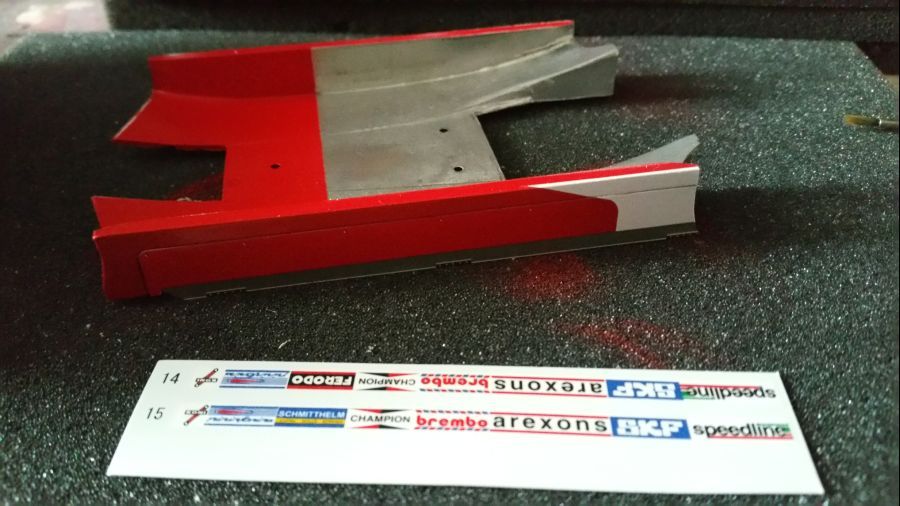
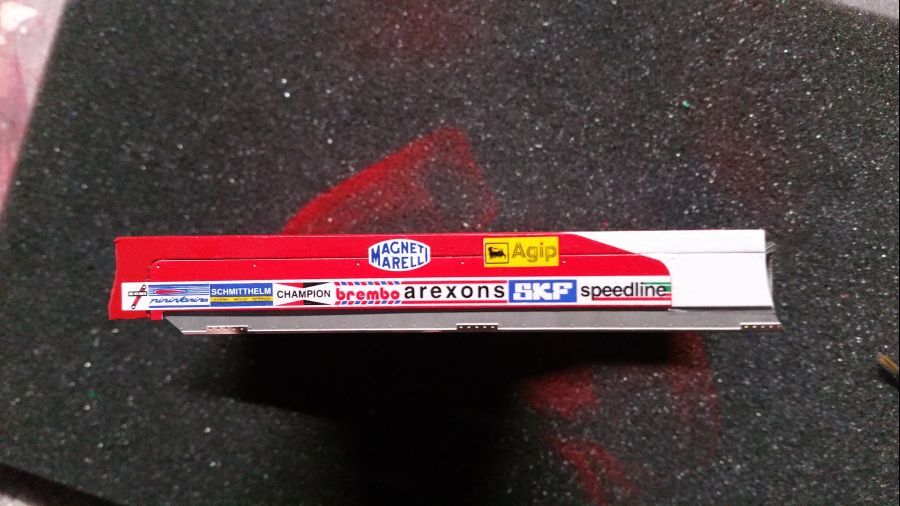
De skirts worden geplaatst en de decals aangebracht.
The skirts are added and the decals are being applied.
De skirts zijn beweegbaar.
The skirts are movable.
Het binnenwerk wordt geplaats op de vloer.
The inside parts are being connected to the floor.
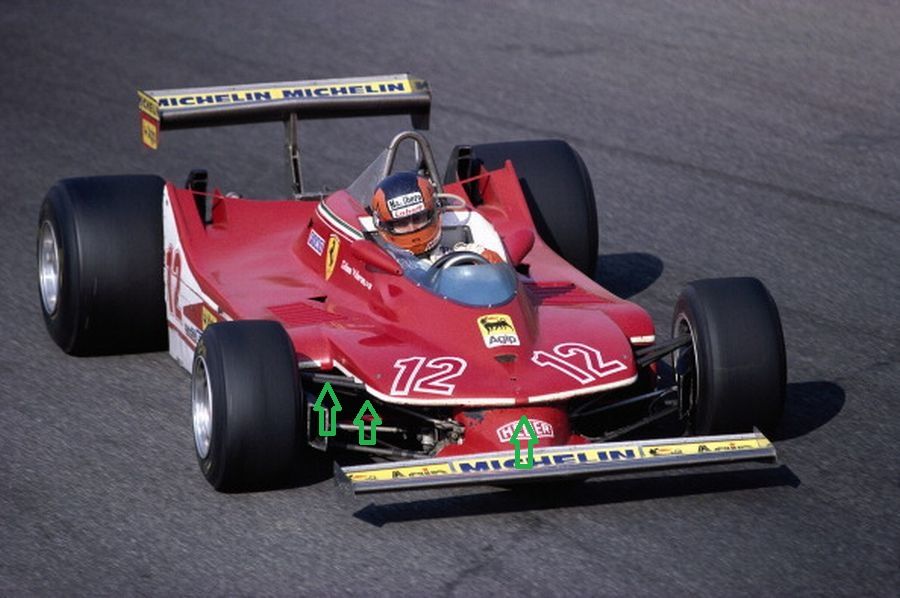
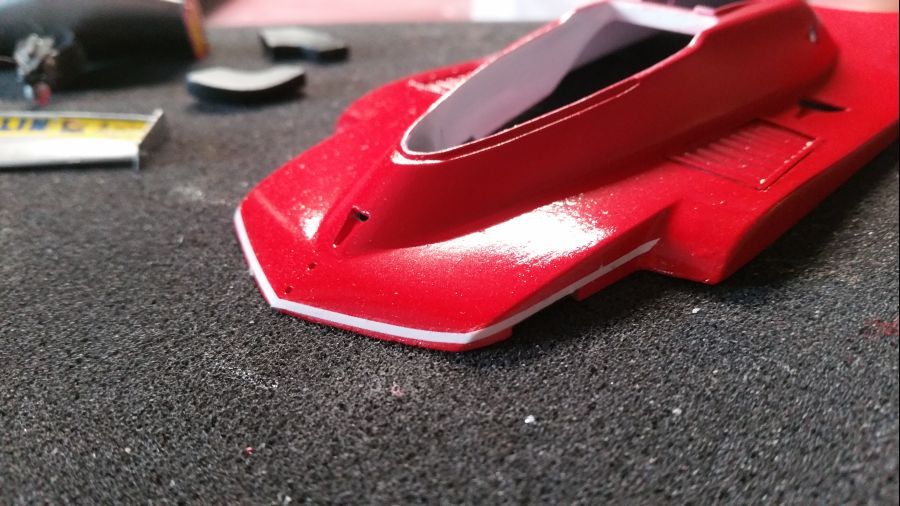
En de neus.
And the nose.
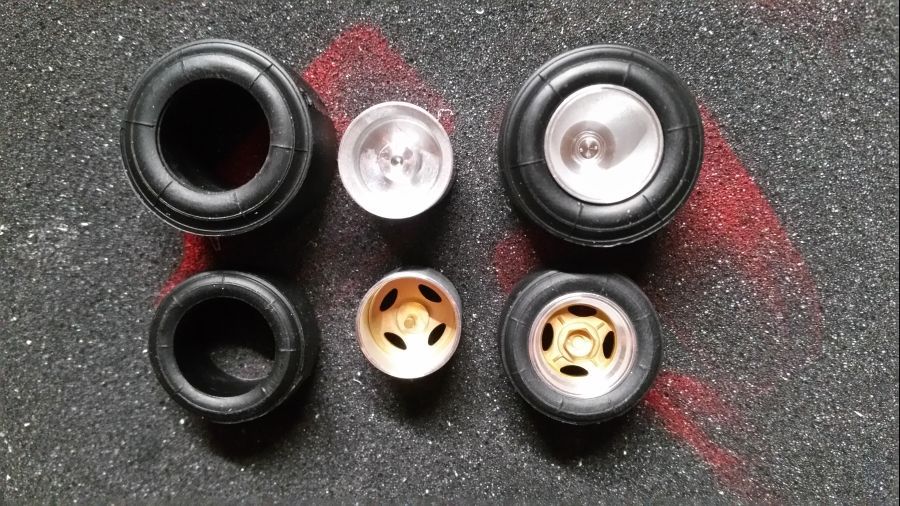
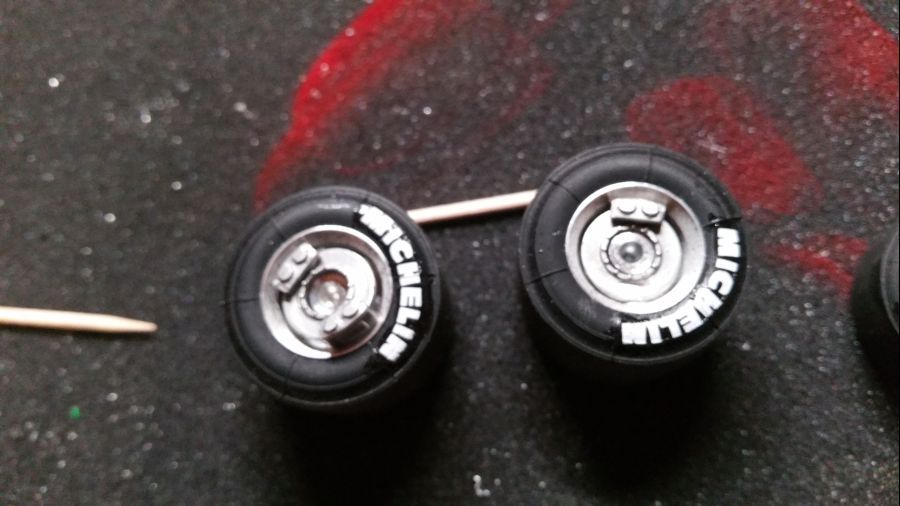
Ik ben de wielen nodig om de juiste hoogte van de wagen te bepalen, dus in elkaar zetten.
I need the wheels to determine the height of the car, so assembled.
De hoogte van de neus wordt definitief bepaald.
The height of the nose is being set.
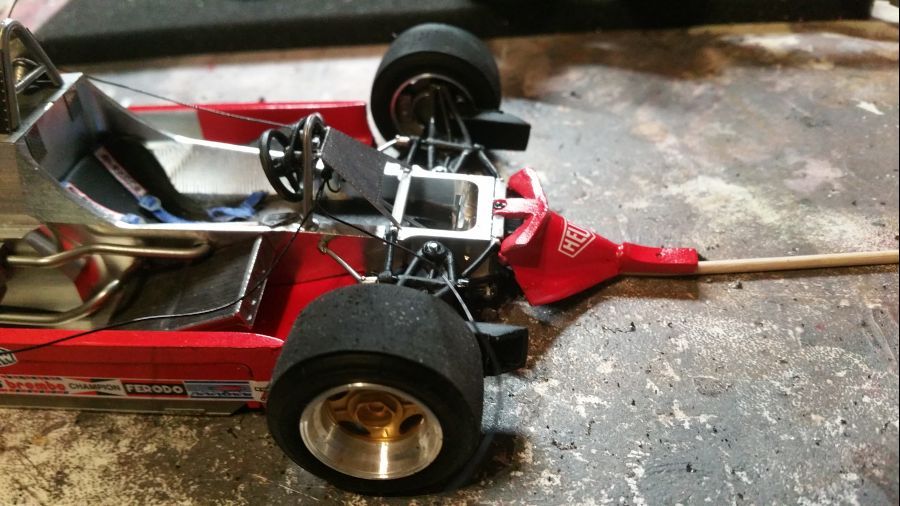
De motor moest nog een heel klein beetje worden gekanteld. Anders raken de wielen de grond niet.
The mounting of the engine had to be adjusted a little bit. Otherwise the wheels would not touch the ground.
De Ferrari 312 T4B behoort dubbele achterremmen te krijgen. MFH heeft deze toegevoegd in de kit, maar dat past in het geheel niet in de velgen. Ik besluit daarom maar 1 rem te plaatsen.
The Ferrari 312 T4B should have double breaks at the rear. MFH added them to the kit, but it doesn't fit inside the rims. I decide to attach 1 break only.
De wielen en de binnenkanten bij de koeling zijn geplaatst.
The wheels and the insides near the coolers are added.
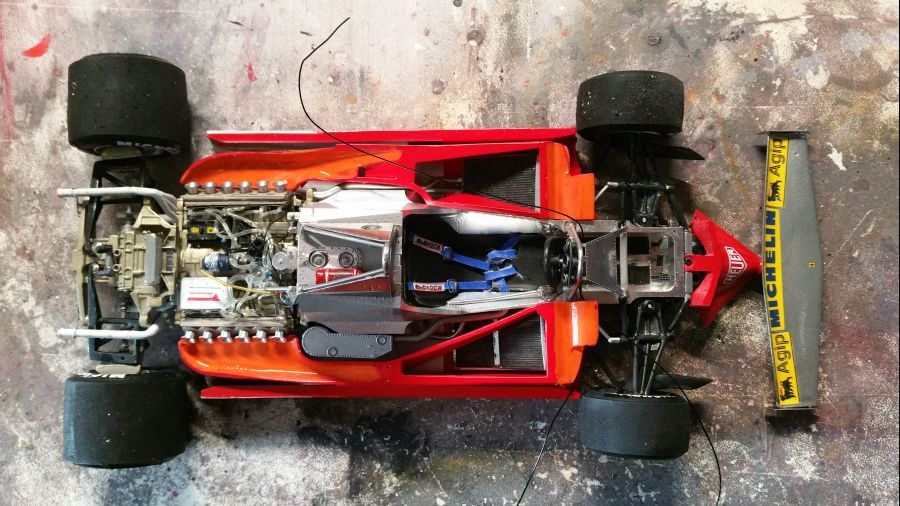
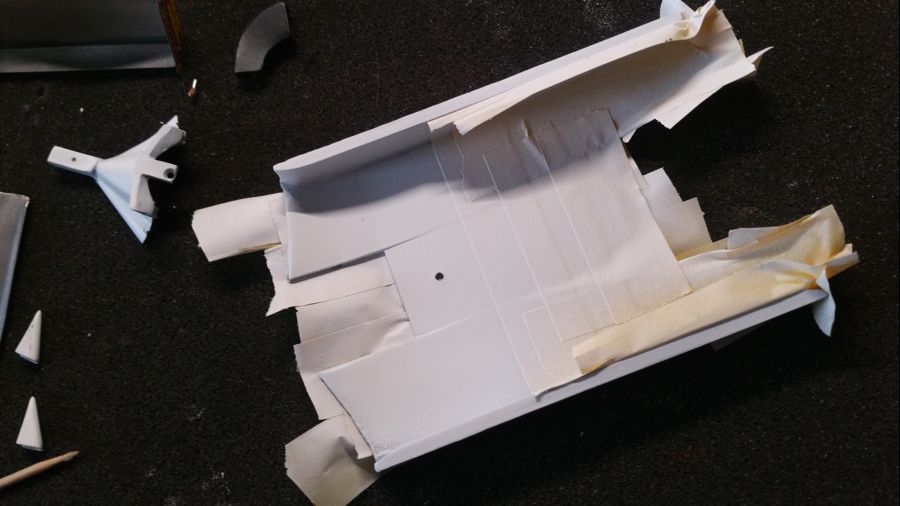
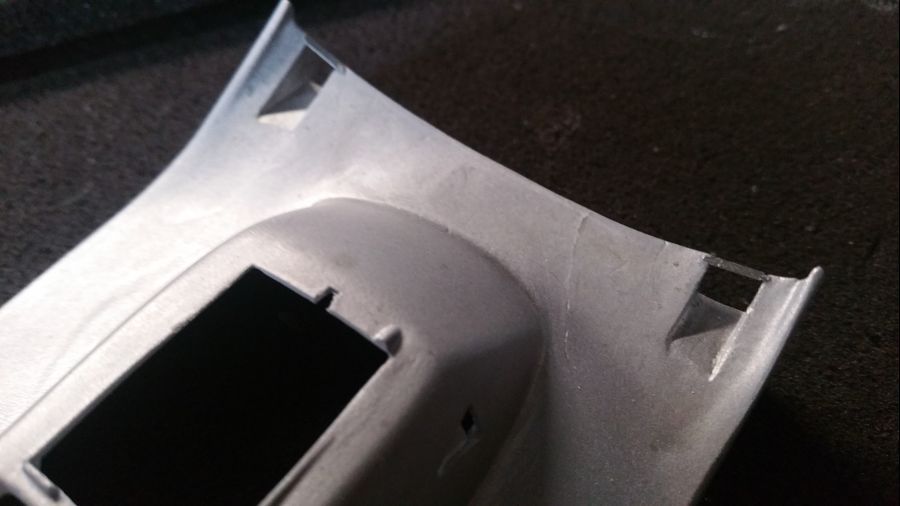
Onverwacht toch nog heel veel werk om de bovenkant te plaatsen.
Not expected, but still a lot of work to add the top of the body.
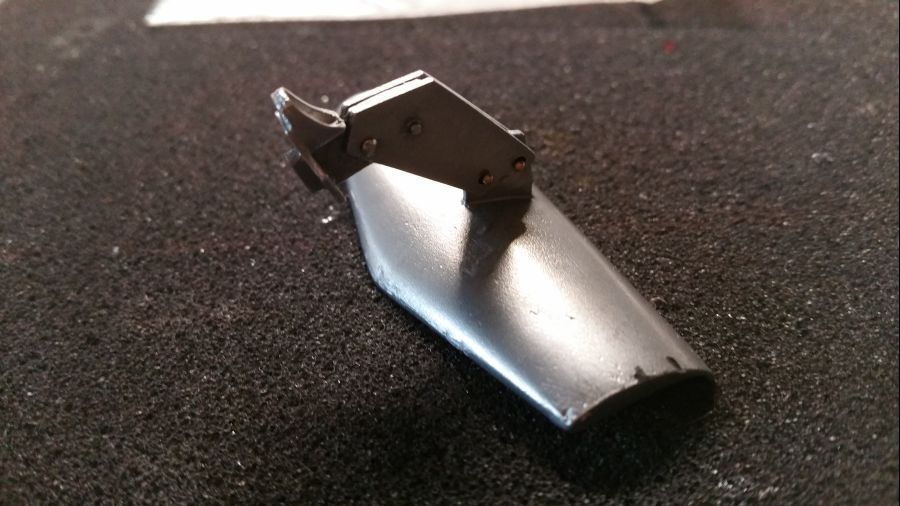
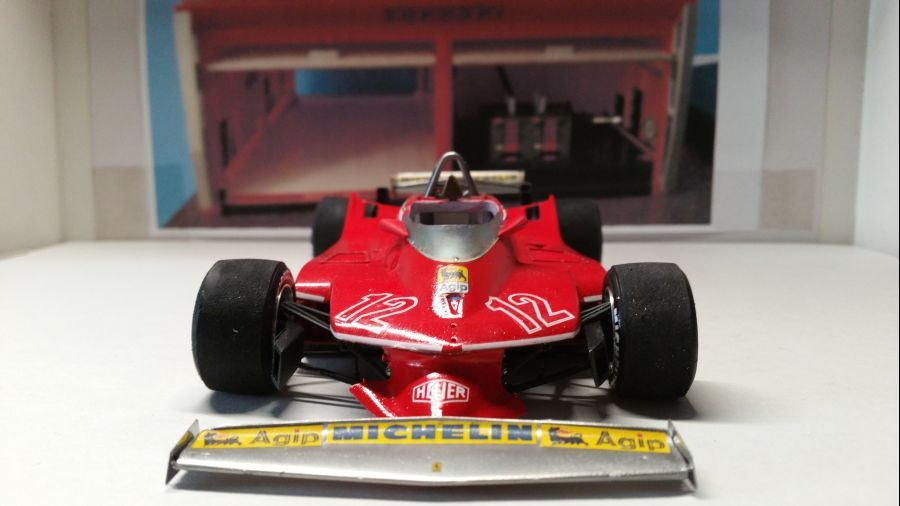
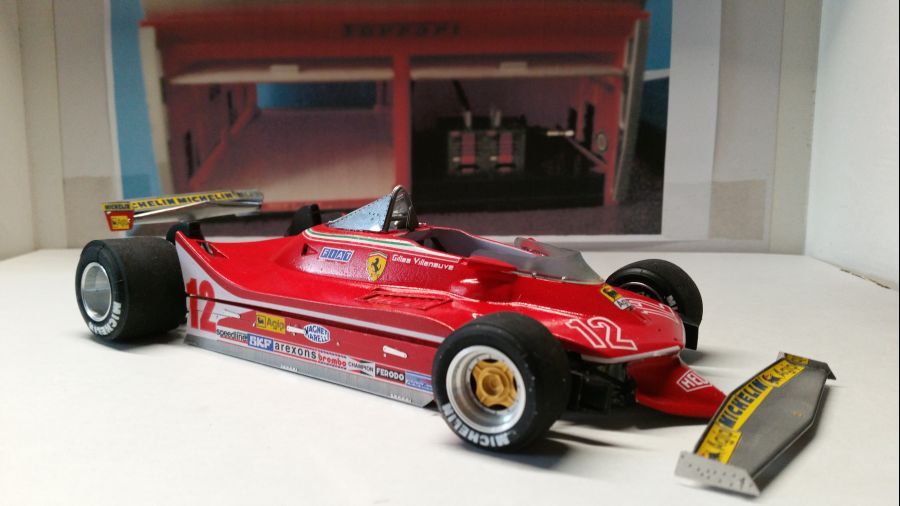
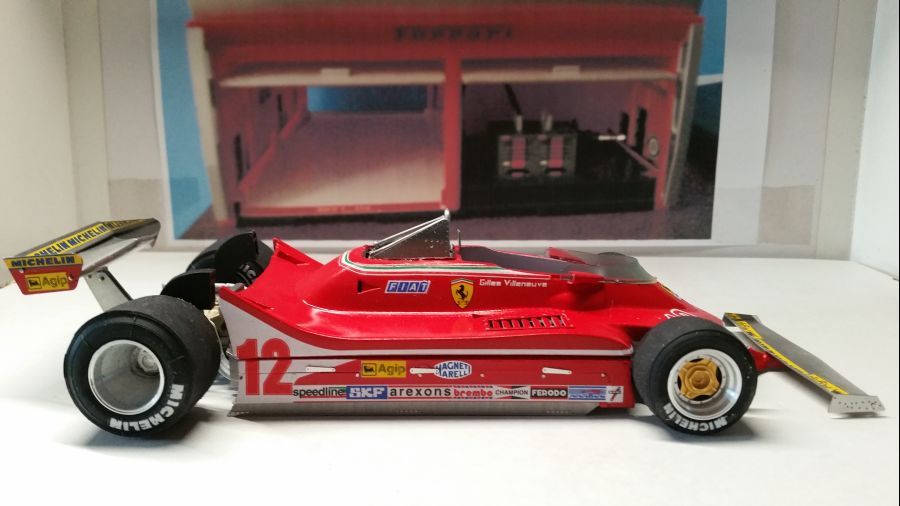
De achtervleugel wordt gemonteerd.
Attaching the rear wing.
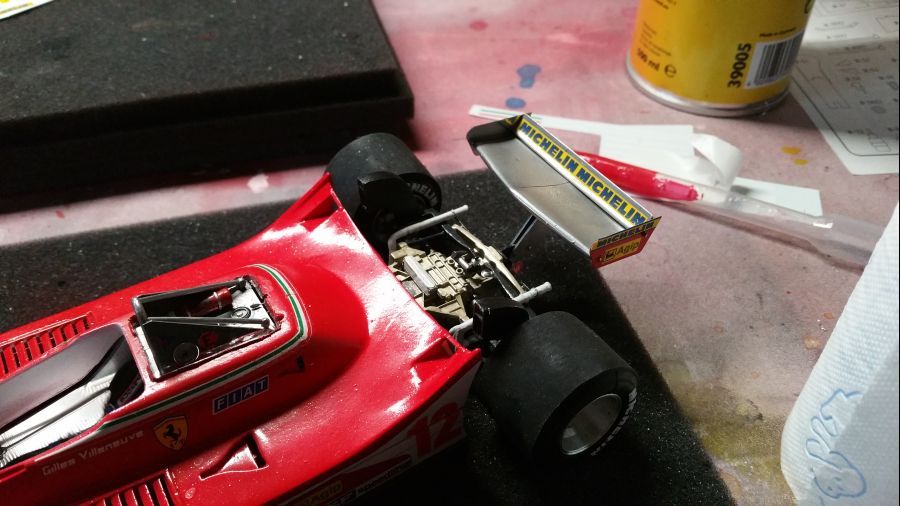
De afdekking van de luchtinlaten worden geplaatst.
The funnel covers are added.
De snelsluiters..
The fasteners..
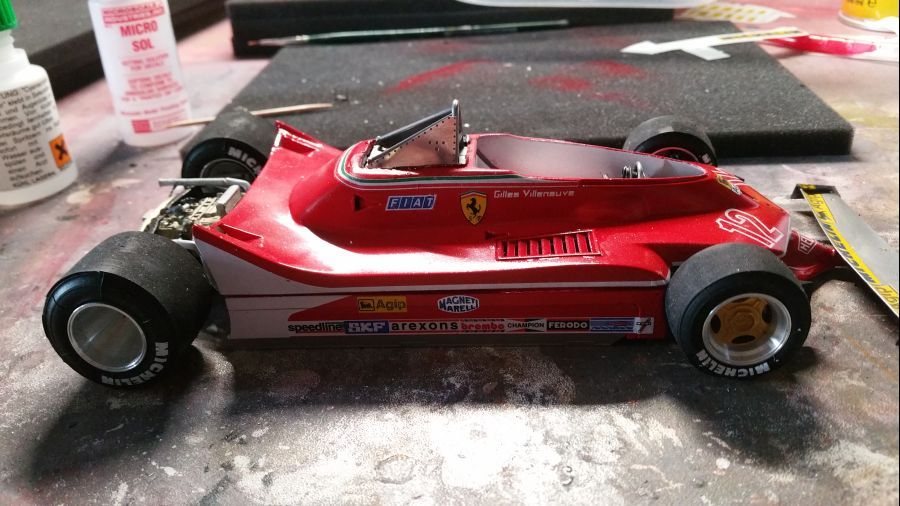
En weer 1 aan de finish...
And another one made it to the finish...
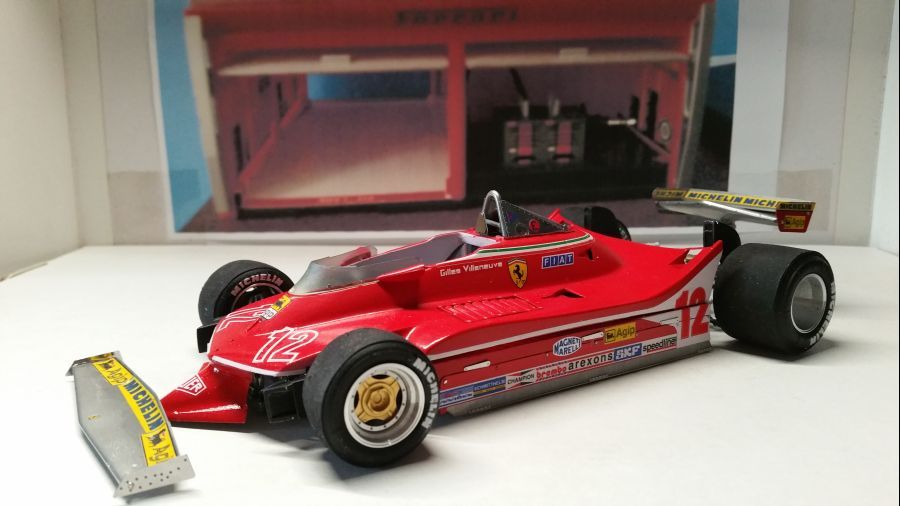
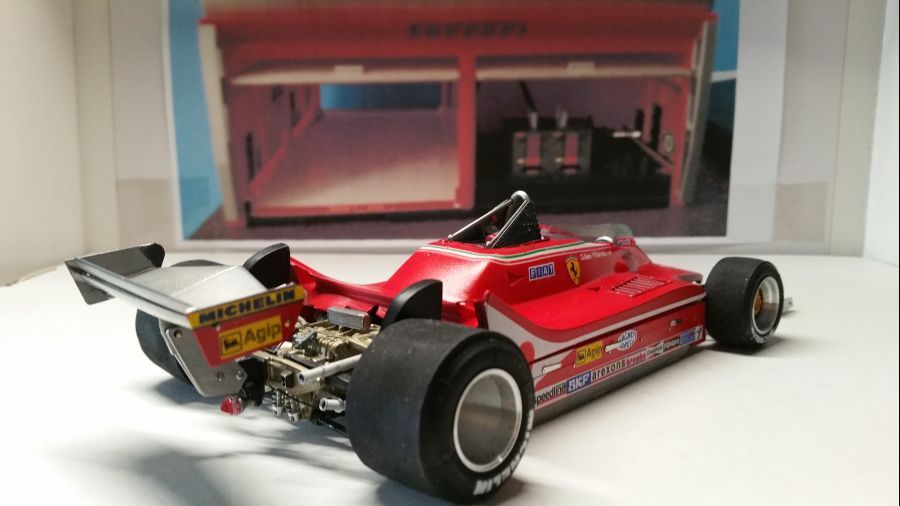
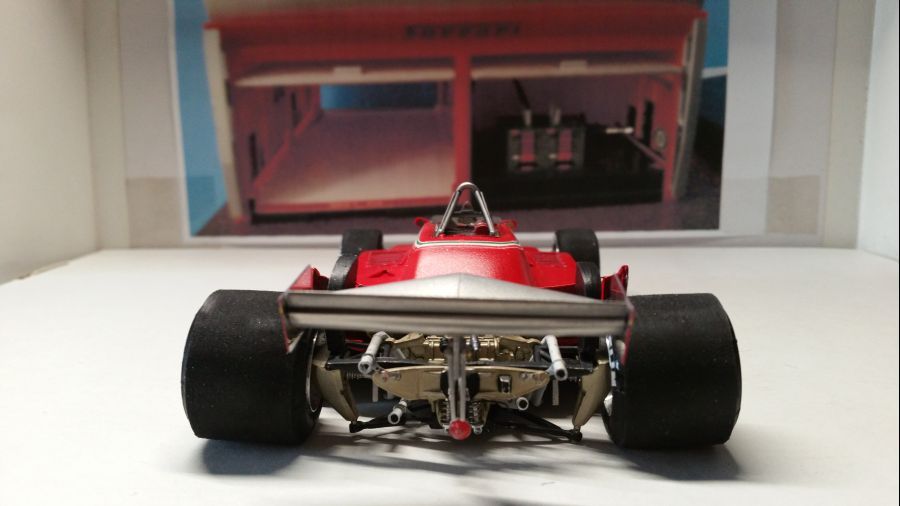
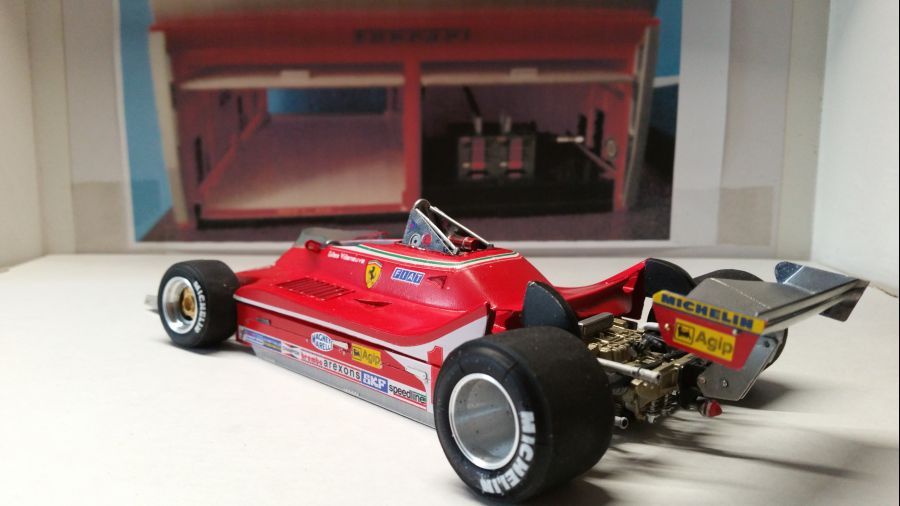
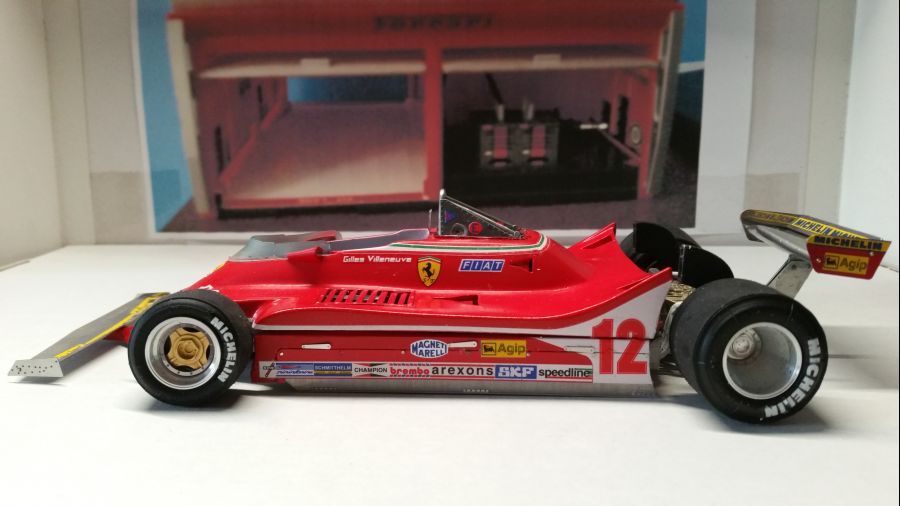
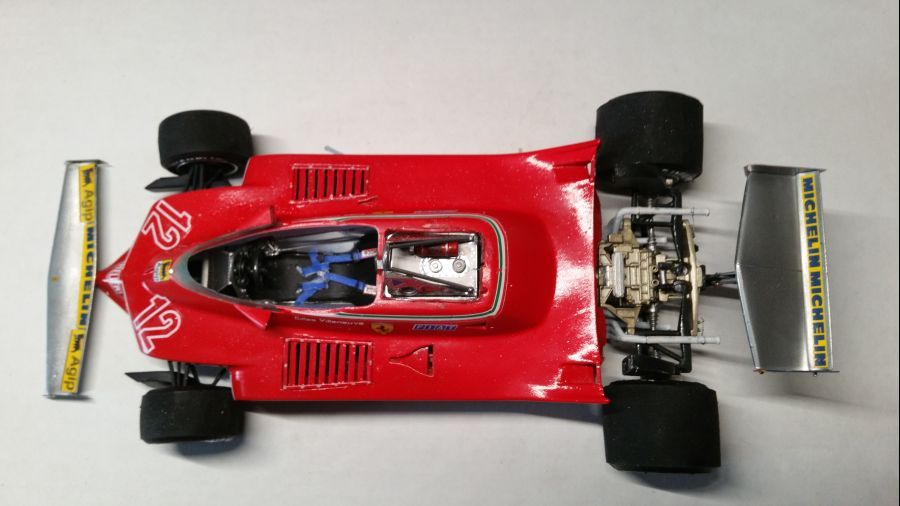
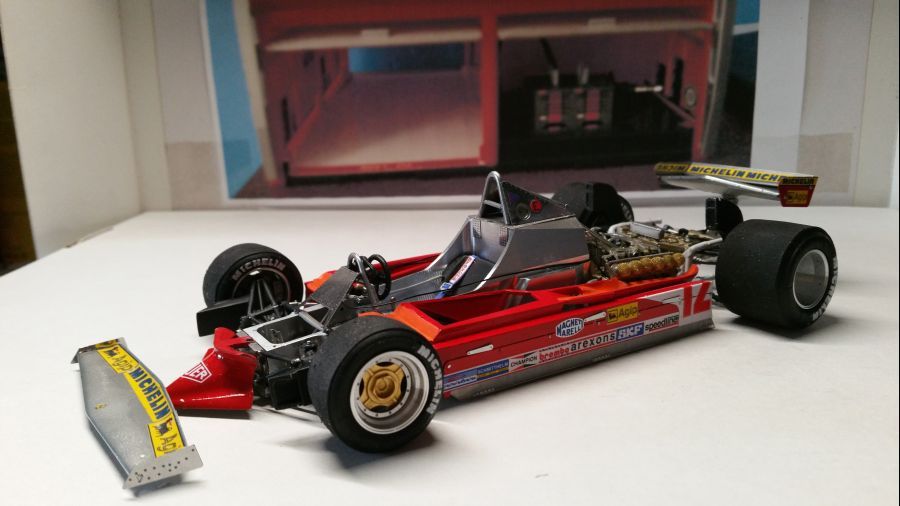
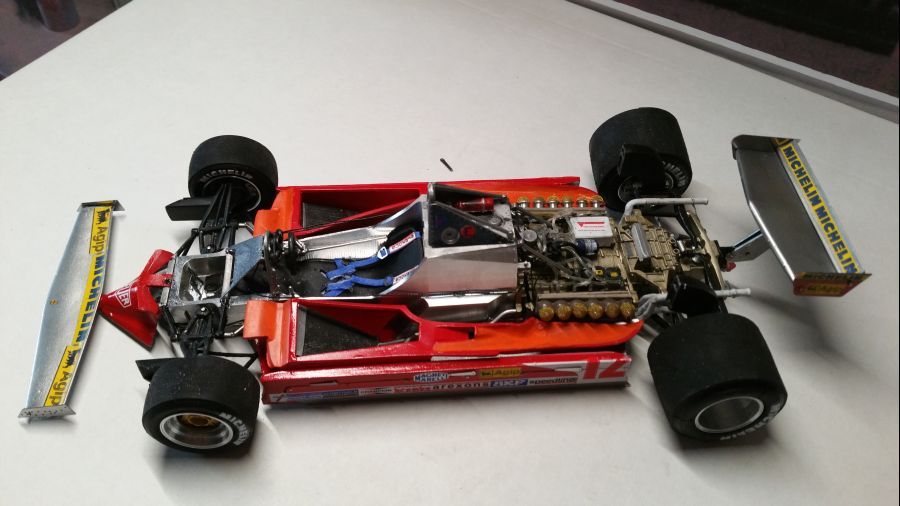
Geen gemakkelijke deze keer. Ik denk dat dit een van de oudere kits is waarbij alles nog niet zo 'perfect' was als de kits van nu. Aandachtspunten: De dubbele remmen achter passen niet, de opening voor de roll bar, de plaatsing van de motor, de voorwielophanging, de aansluiting van het bovenste deel van de body aan de vloer.
Not an easy one this time. I think this is one of the older kits where everything was not so 'perfect'as the kits are nowadays. Points of attention: The double breaks don't fit at the rear, the opening for the roll bar, attaching the engine, the front wheel suspension, the fit of the top of the body to the floor.