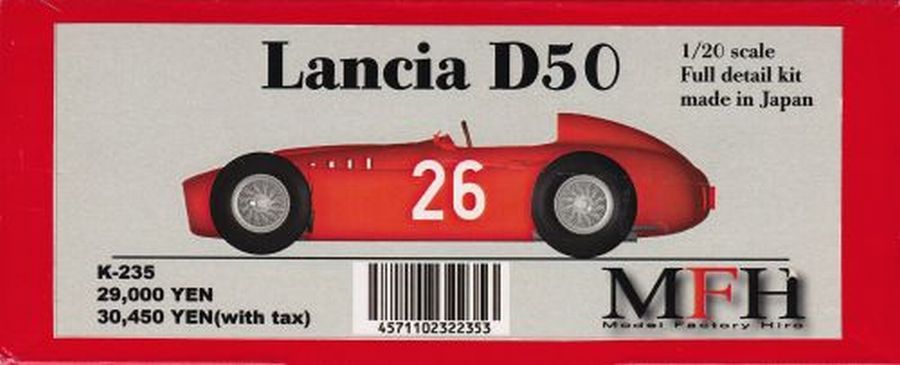
Hier de beschrijving van de bouw van de Lancia Ferrari D50 van Modelfactory Hiro (K-235) zoals deze in 1955 werd getest op Monza Italië door Luigi Villorese. In 1955 kwam Lancia in geldnood en de wagen en alle onderdelen werden gekocht door Ferrari. Ferrari wilde met de Lancia Ferrari D50 rijden in Monza, maar er waren problemen met de banden. Lancia had een contract met Pirelli, maar Ferrari met Englebert. Deze banden waren niet goed genoeg voor de D50. Daarom werd met deze auto alleen getest. In 1956 werd de auto door Ferrari gemodificeerd.
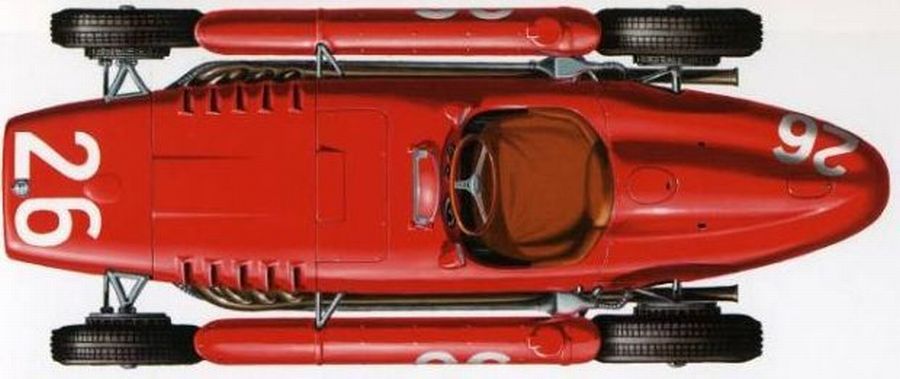
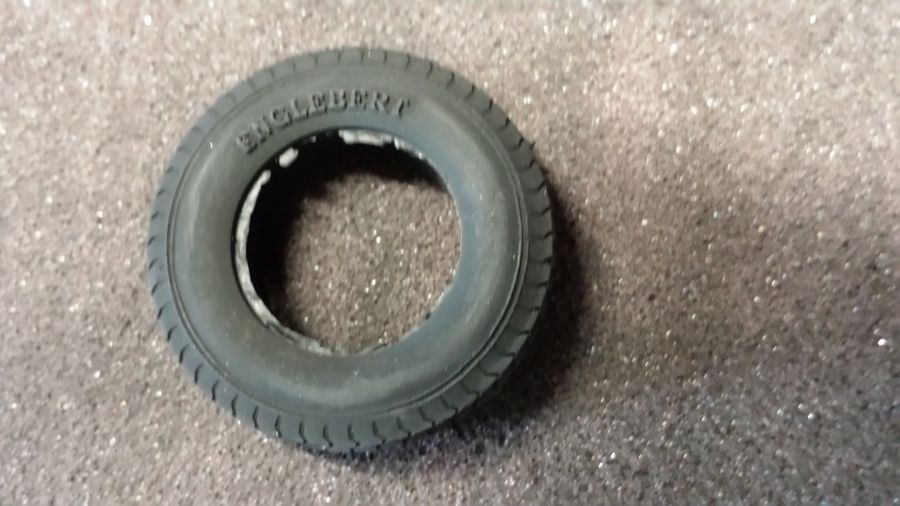
De kit van Model Factory Hiro bevat banden met het Englebert logo. Deze zijn correct voor de wagen die ik ga maken. De Monaco versie behoort dus banden te hebben met het Pirelli logo. Foutje dus van MFH. Daarnaast had alleen de Ascari Monaco versie bruin leer op de stoel. The Castelotti versie had zwart leer. De versie die ik ga bouwen had wel weer bruin leer.
Here the description of the build of the Lancia Ferrari D50 from Modelfactory Hiro (K-235) as tested in 1955 on Monza Italy by Luigi Villorese. In 1955 Lancia had financial problems and the car and all parts were bought by Ferrari. Ferrari wanted to drive on Monza with the Lancia Ferrari D50, but there were problems with the tires. Lancia had a contract with Pirelli, while Ferrari had a contract with Englebert. These tires were not good enough for the D50, so it only came to testing with this car. In 1956 the D50 was modified by Ferrari.
The kit from Model Factory Hiro contains tires with the Englebert logo. These are correct for the car i am going to build. The Monaco version should have tires with the Pirelli logo. A mistake from MFH. Also, only the Ascari Monaco version had a brown leather seat. The Castelotti version had black leather. The version i am going to build had brown leather.
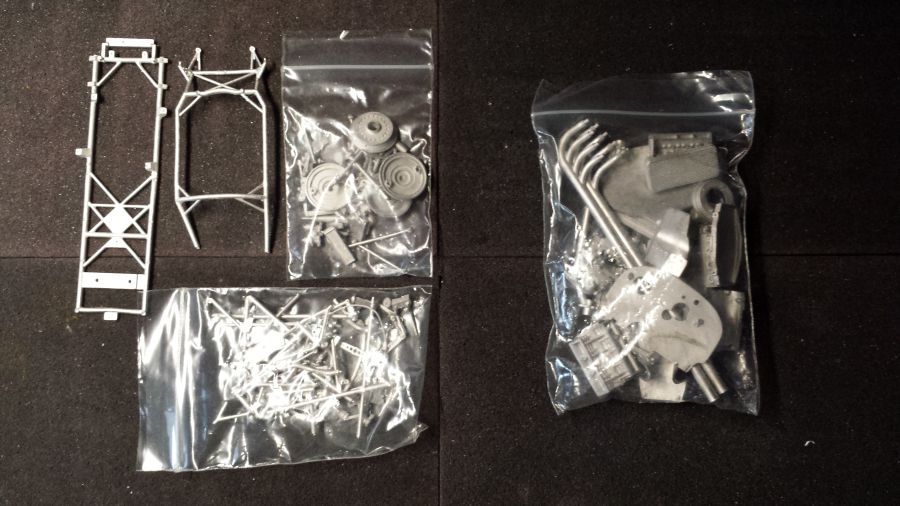
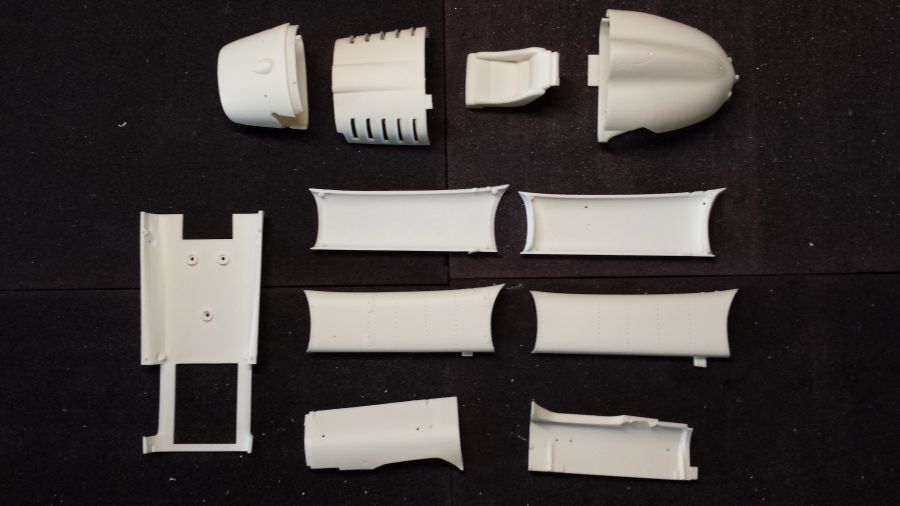
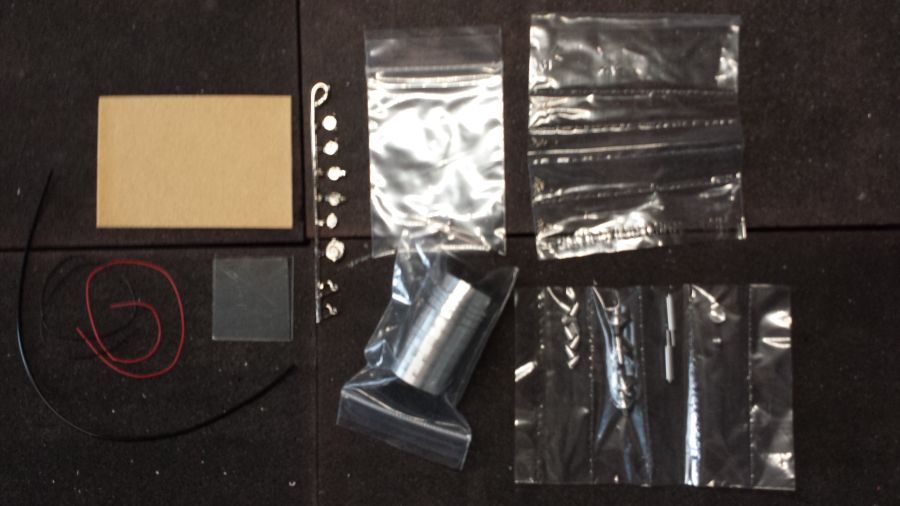
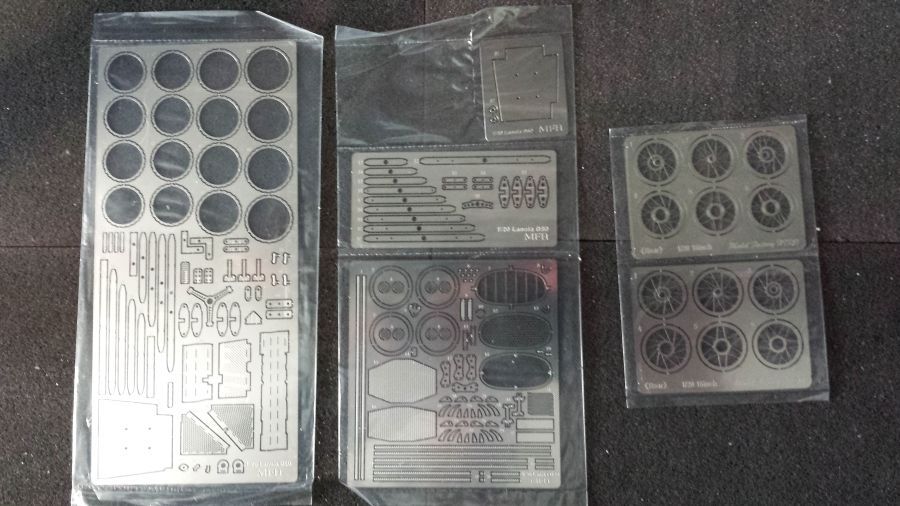
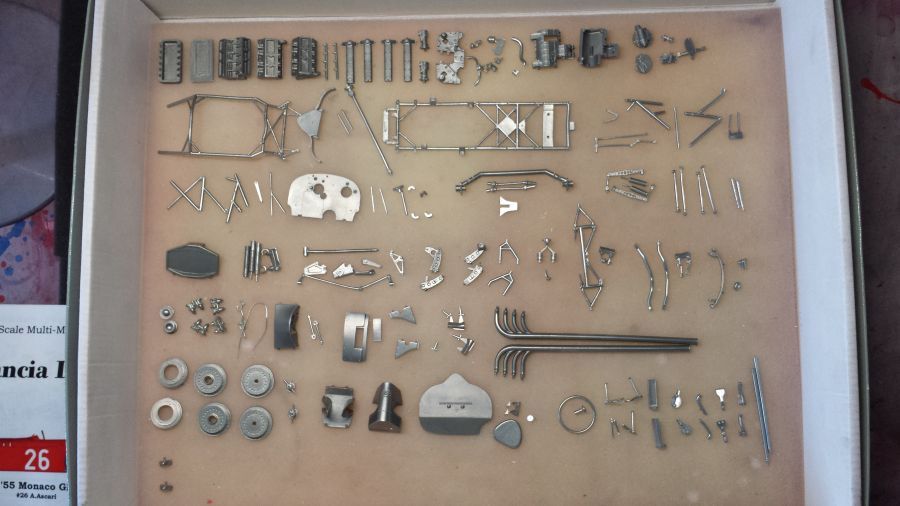
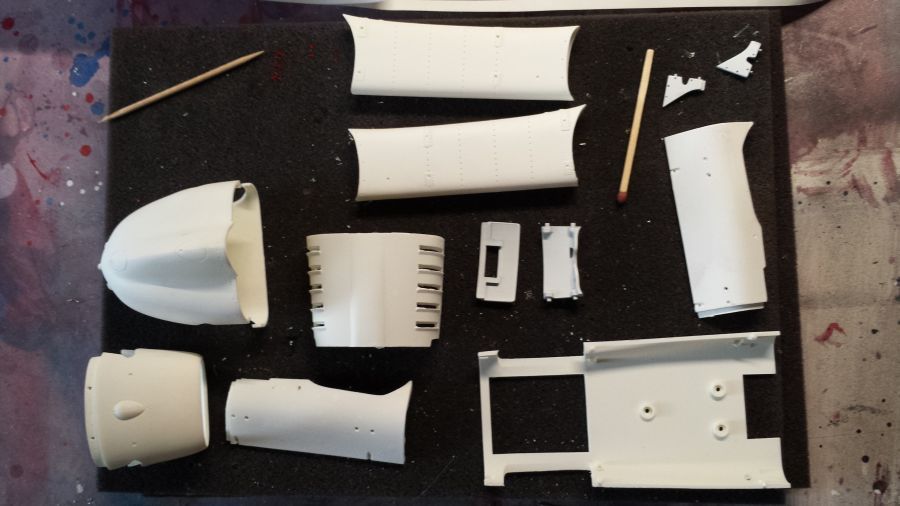
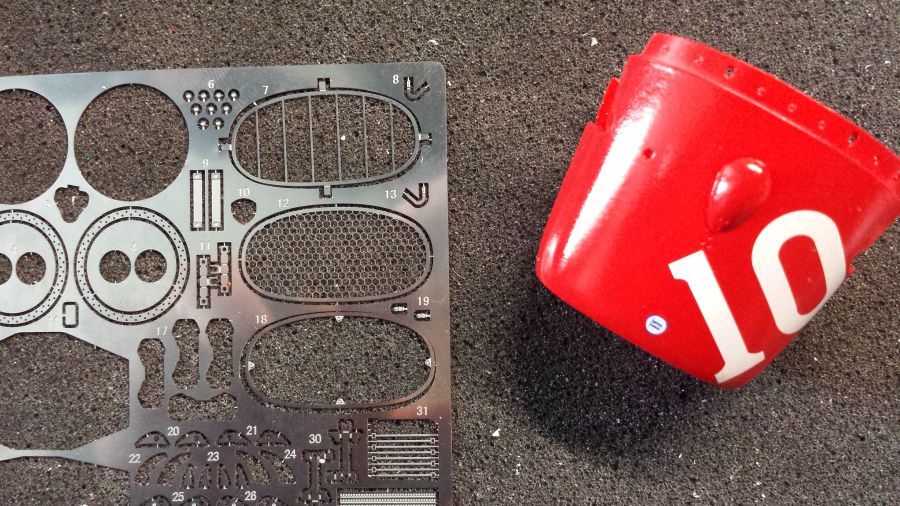
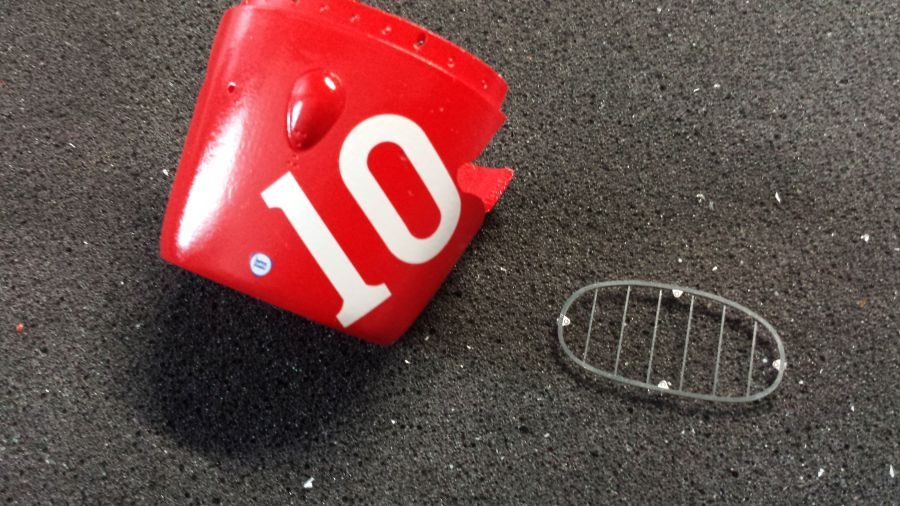
Eerst weer de foto's van de inhoud van de kit.
First the pictures of the content of the kit.
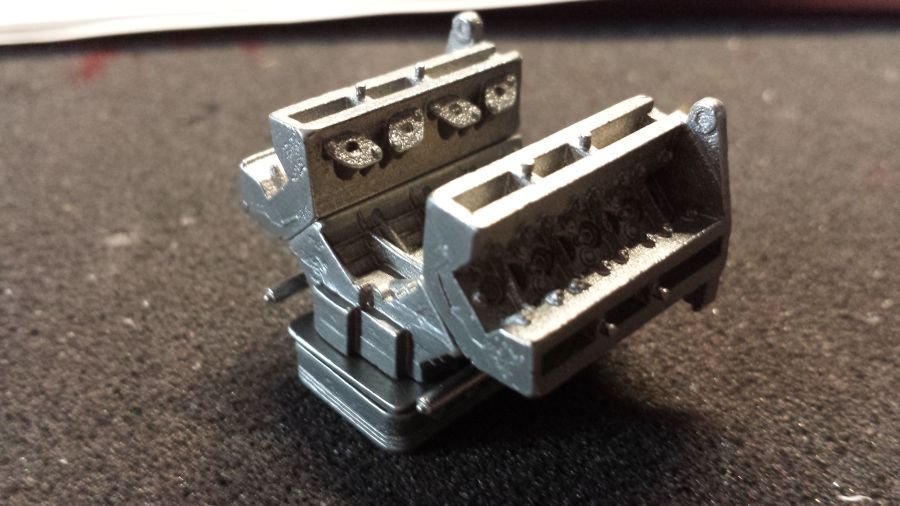
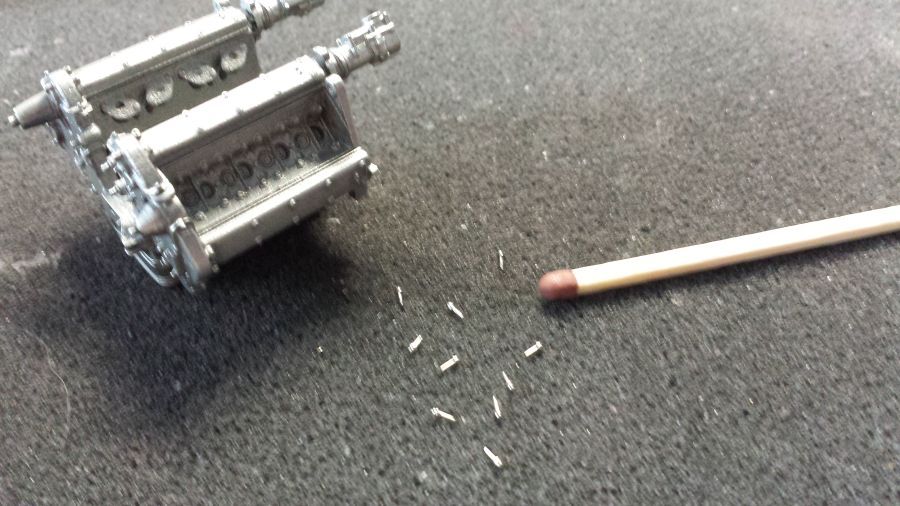
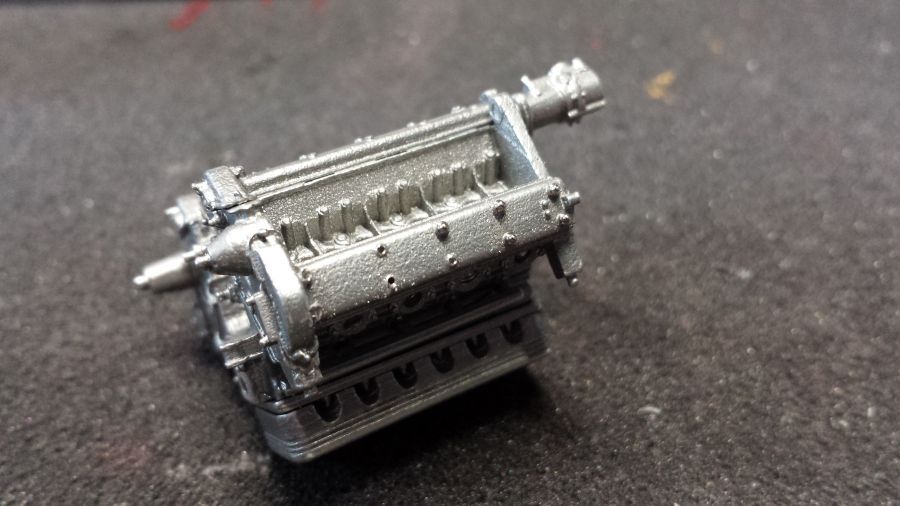
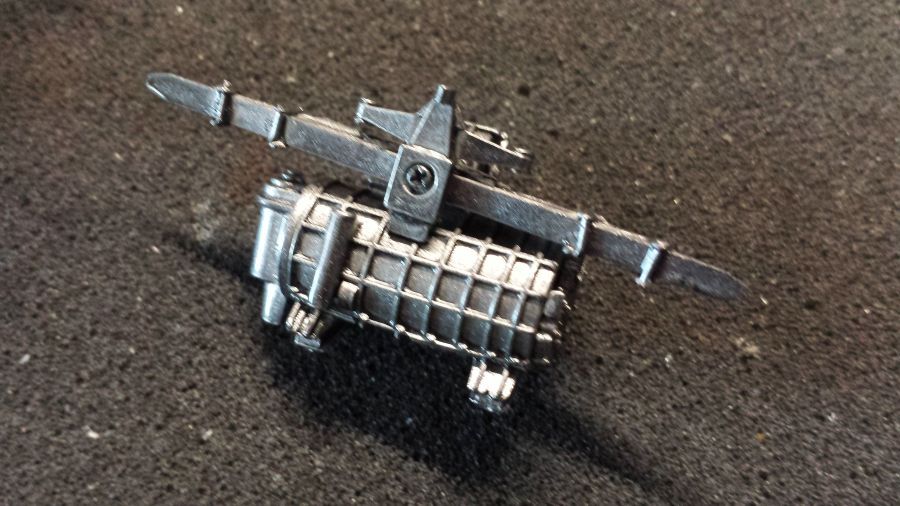
De eerste stappen aan de motor. In de 4 kleppendeksels worden gaatjes geboord met een 0,6 mm boortje om de bouten aan te brengen. In totaal 39 stuks. 1 Bout volgt later.
The first steps to the engine. Small holes are drilled in the 4 headcovers with a 0,6 mm drill to be able to apply the headbolts. 39 Pieces in total. 1 bolt later.
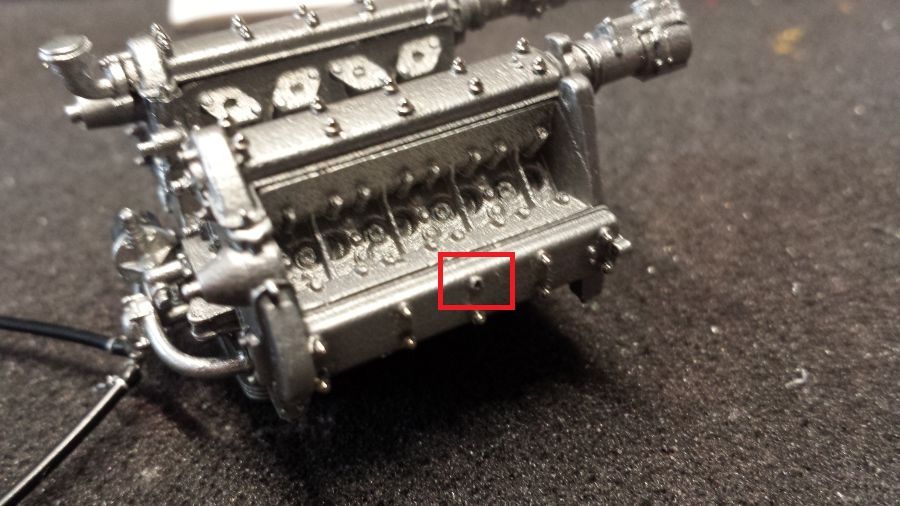
Eén boutgat wordt nog open gelaten. Deze bout volgt later voor de olieleiding.
One hole for a bolt needs to be kept open. This bolt will be done later together with the oil pipe.
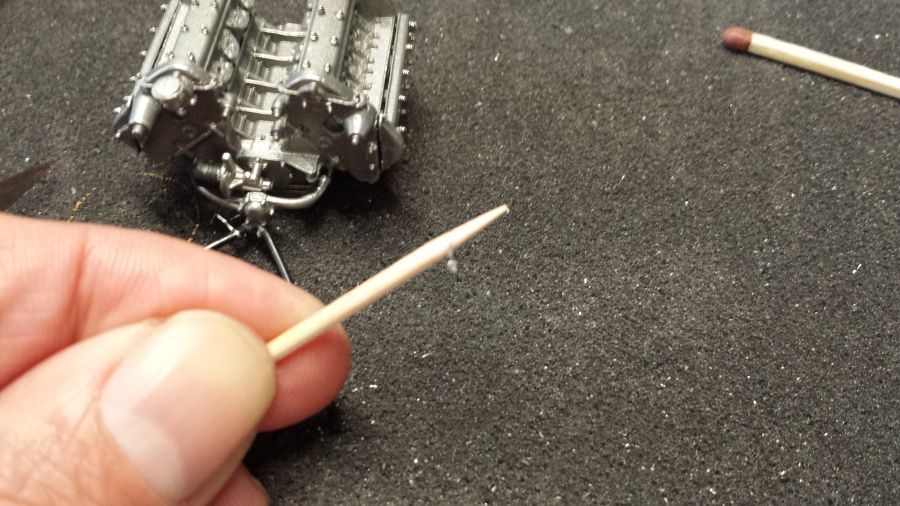
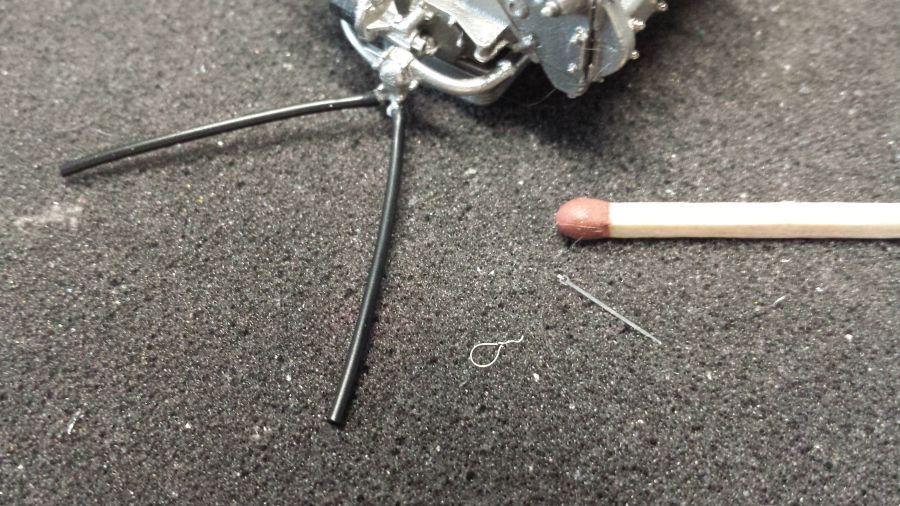
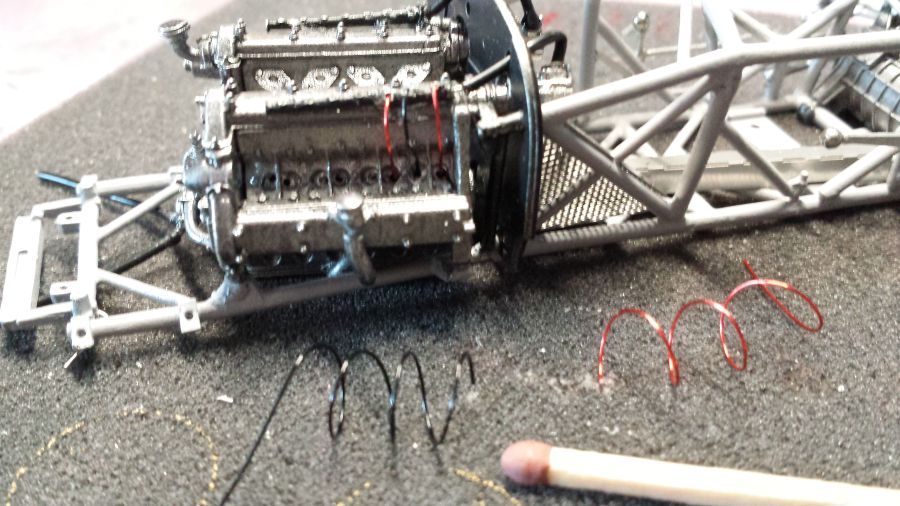
De slangen worden voorzien van tie-wraps. Ik gebruik een cocktailprikker om eerst een lus te maken. Deze kan er vervolgens overheen worden geschoven en aangetrokken. Wees voorzichtig. Ze knappen snel.
The hoses will get tie wraps. I use a cocktail stick to make a loop. This will easily slide across it and tightened. Be careful. They snap easily.
Nu wordt de olieleiding aangebracht. Hier komt de 40e bout om de hoek kijken.
Now the oil pipe will be attached. Here comes the 40th bolt of use.
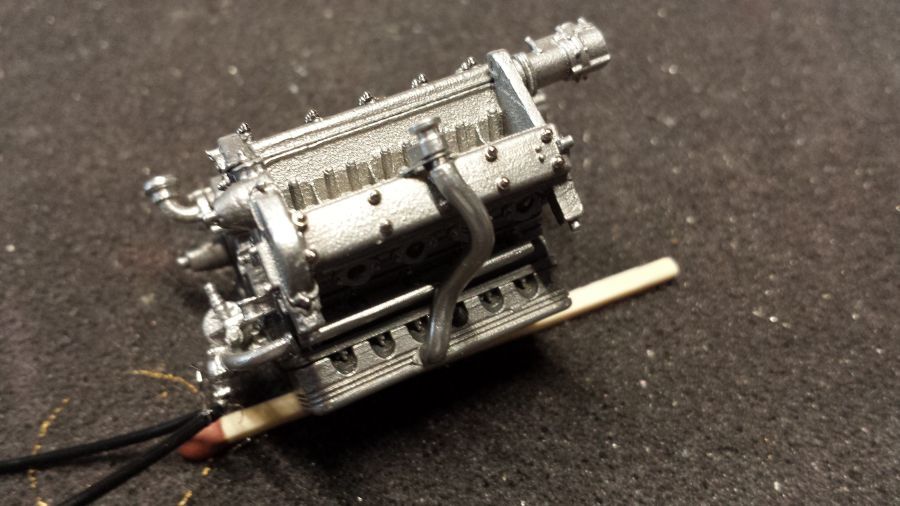
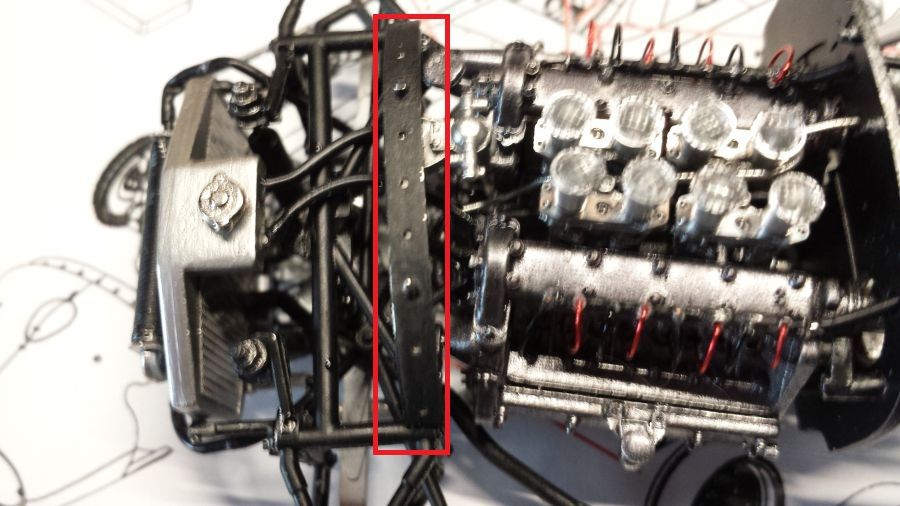
Ik boor alvast de gaten voor de bevestiging van de uitlaten. Ik gebruik een boortje van 1,5 mm. Het kan nu nog gemakkelijk en je kunt alles testen. Het lijkt raar met de uitlaten, maar weet dat de motor onder een schuine hoek aan het chassis wordt bevestigd.
I will drill the holes for mounting the exhaust pipes. I use a 1,5 mm drill. It's easy at this time and you can do a test fit. It might look a bit strange when looking at the exhausts, but be aware that the engine will be mounted to the chassis a bit off line.
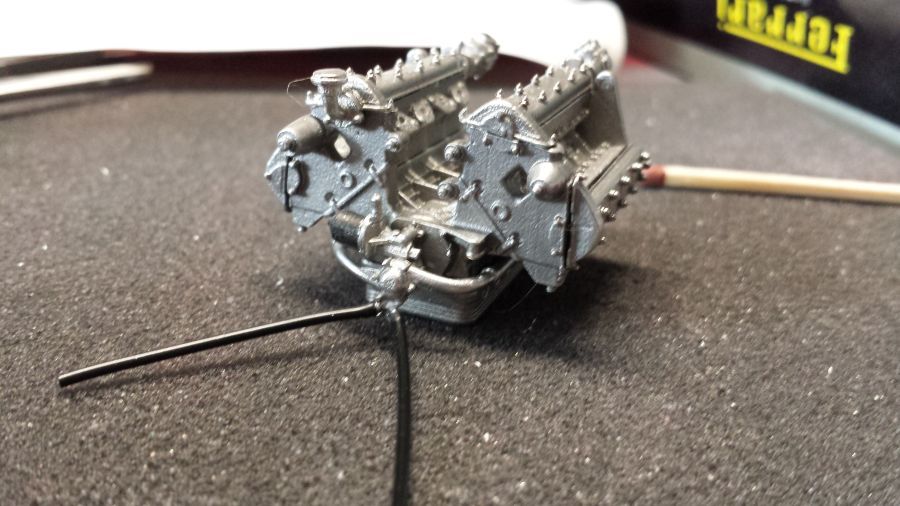
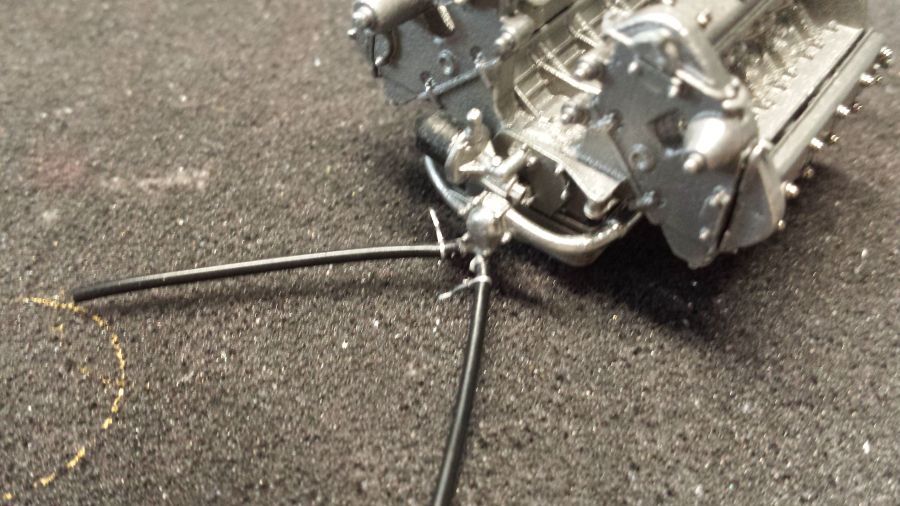
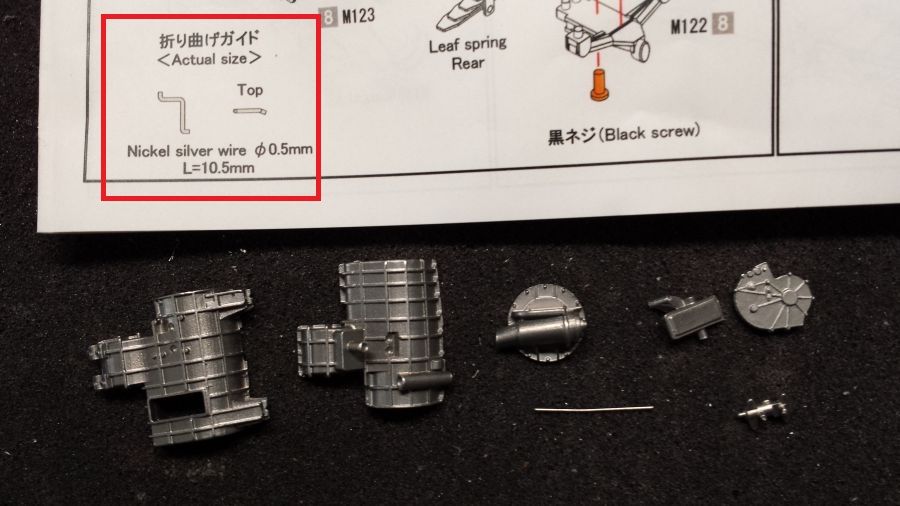
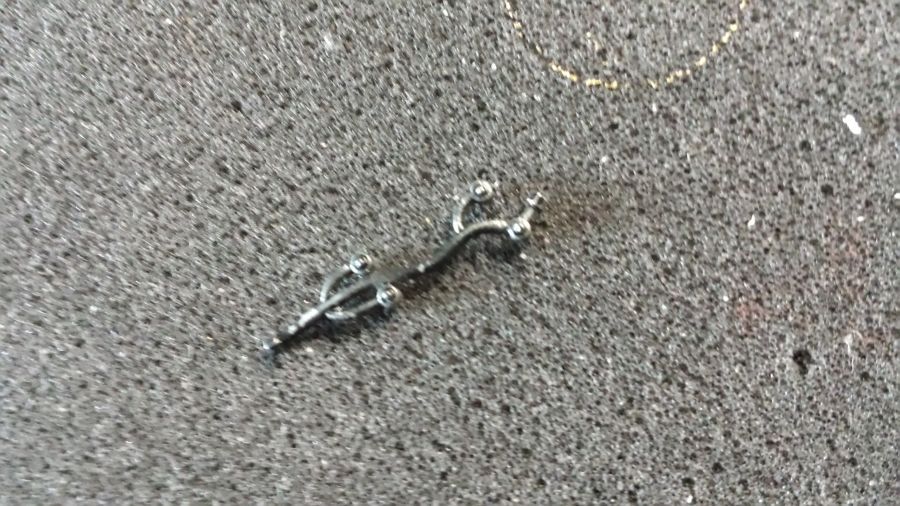
Daarna het werk aan de versnellingsbak. Het 0,5 mm ijzerdraadje moet gebogen worden volgens tekening.
Next is the gear box. The 0,5 mm wire needs to be bent according to the drawing.
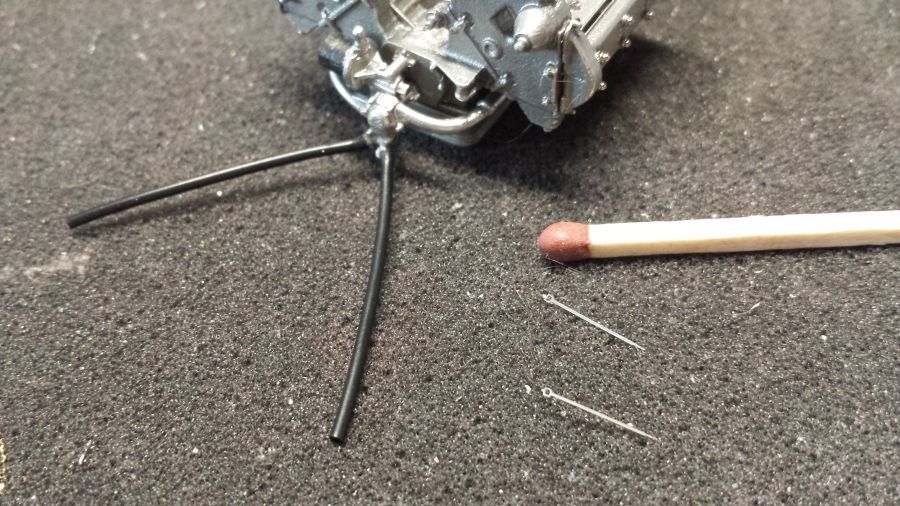
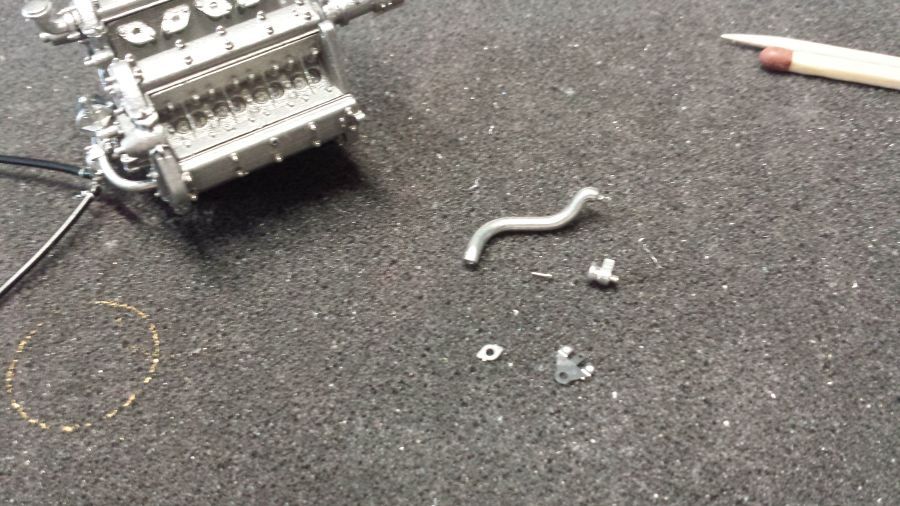
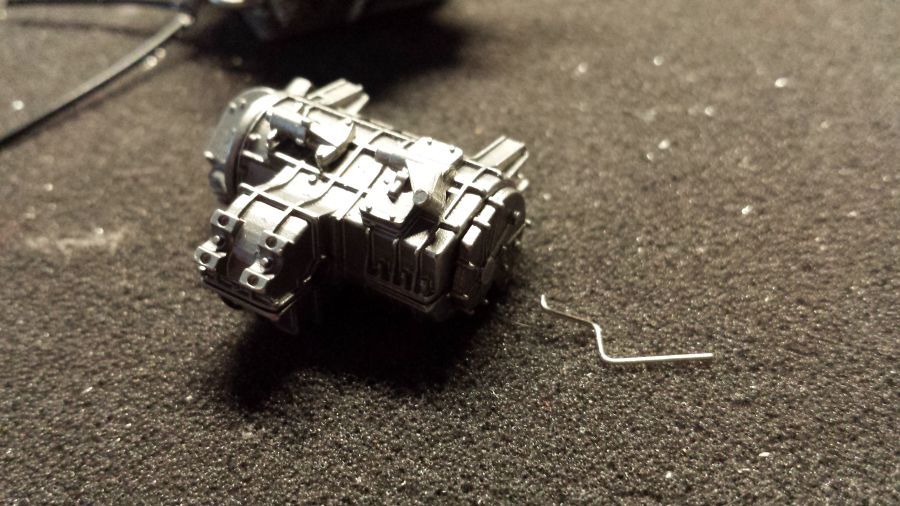
Ik weet niet zeker hoe het gebogen pijpje moet worden gemonteerd. Volgens mij wordt het uiteinde nergens op aangesloten en is het gewoon een soort overloop. Ik laat het even rusten.
I am not sure how the small pipe should be attached. I think the end leads to nowhere and it´s just an overflow. I will leave it for now.
Ik vond deze foto op internet. Het lijkt erop dat de leiding toch ergens naar toe loopt. Nog niet helemaal goed te zien. Ik maak iets verderop de leidingen, omdat ik moet weten of alles past.
I found this pic on the web. It looks like the pipe line actually goes somewhere. I am unable to see the details. I will do this piping a little bit later. I need to know everything will still fit.
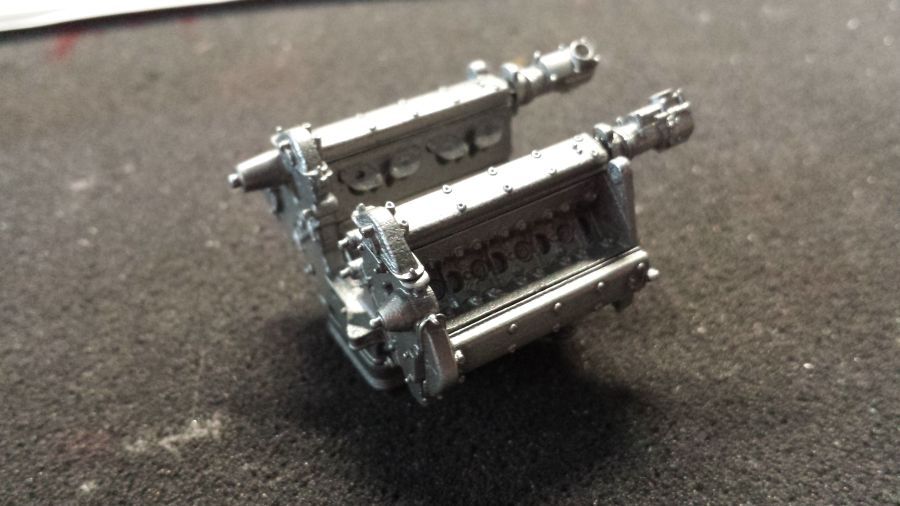
Ik heb het motorblok en de versnellingsbak een wash gegeven van zwaar verdund onderbruin. Het haalt de glans er een beetje af.
I gave the engine and the gear box a wash with heavily diluted dark brown. It takes away the shiny effect a bit.
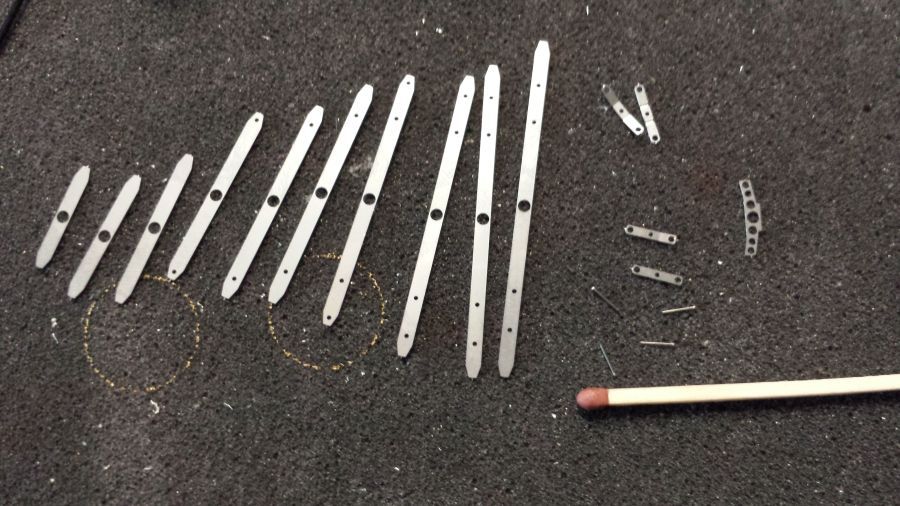
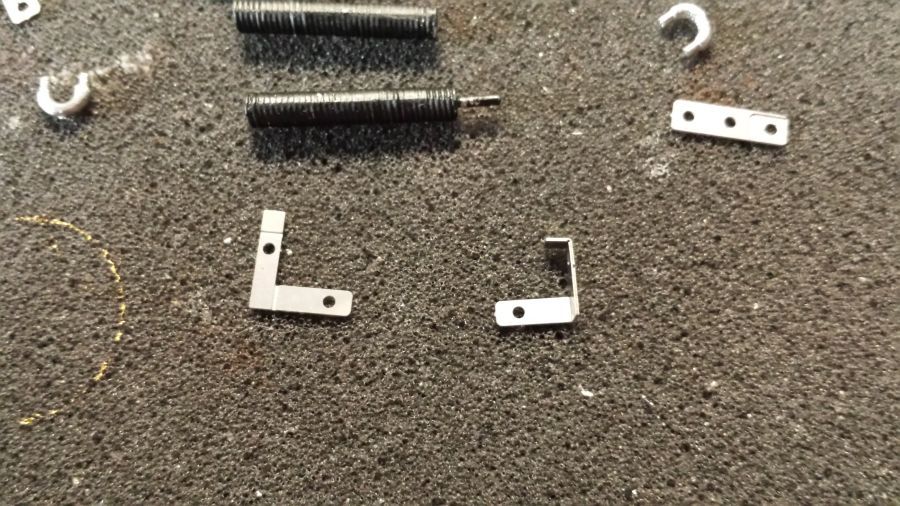
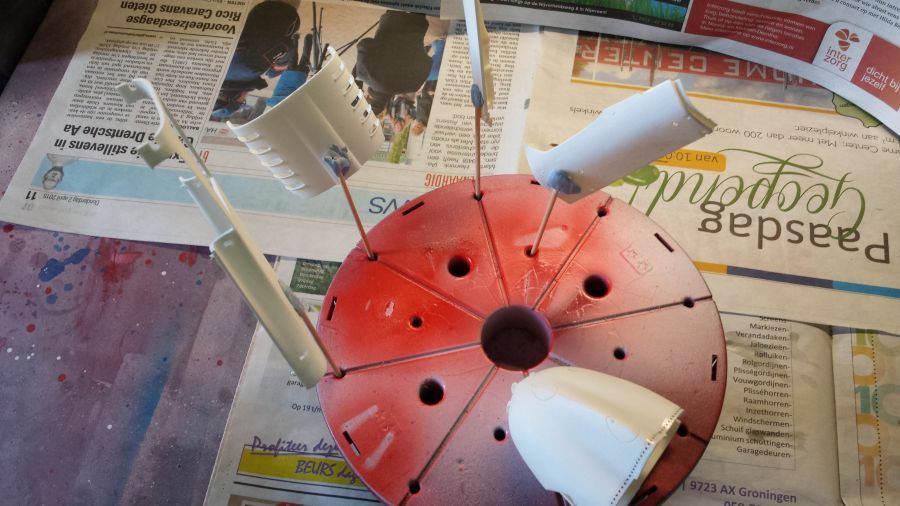
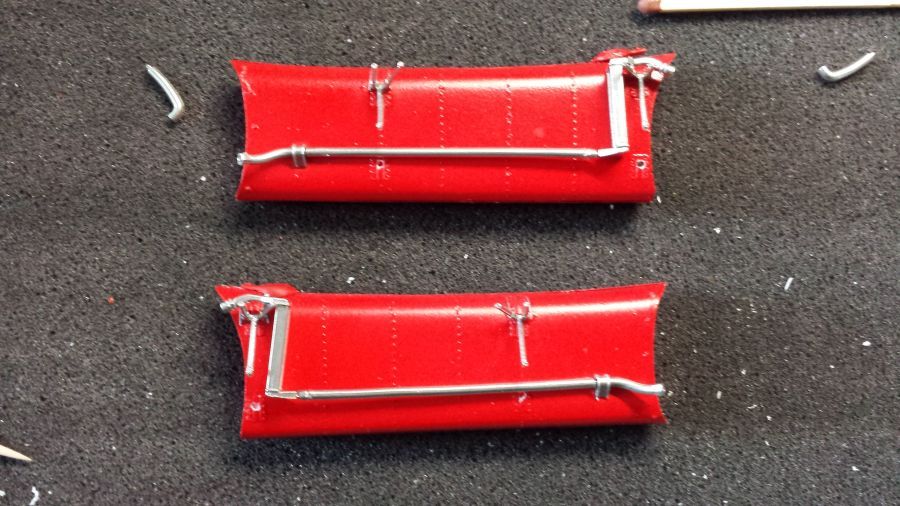
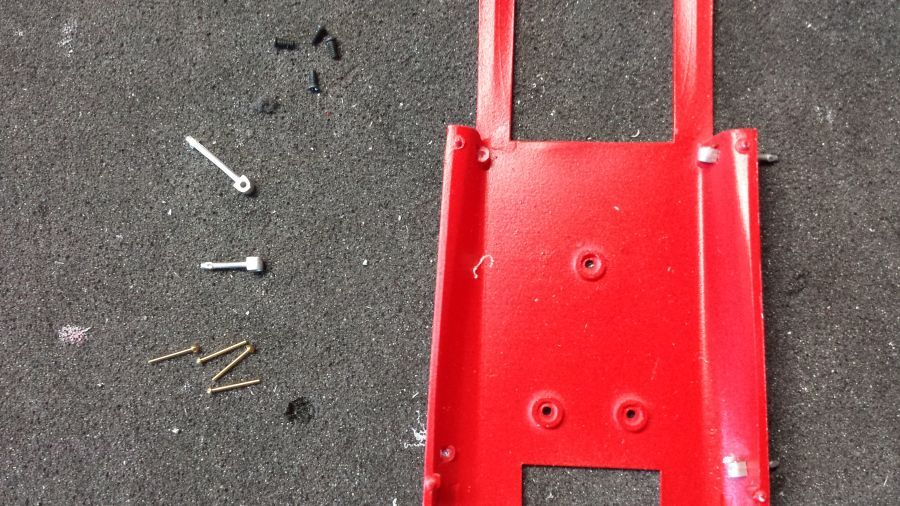
Hier de onderdelen voor het maken van de achterste bladveer.
Here the parts to create the rear leaf spring.
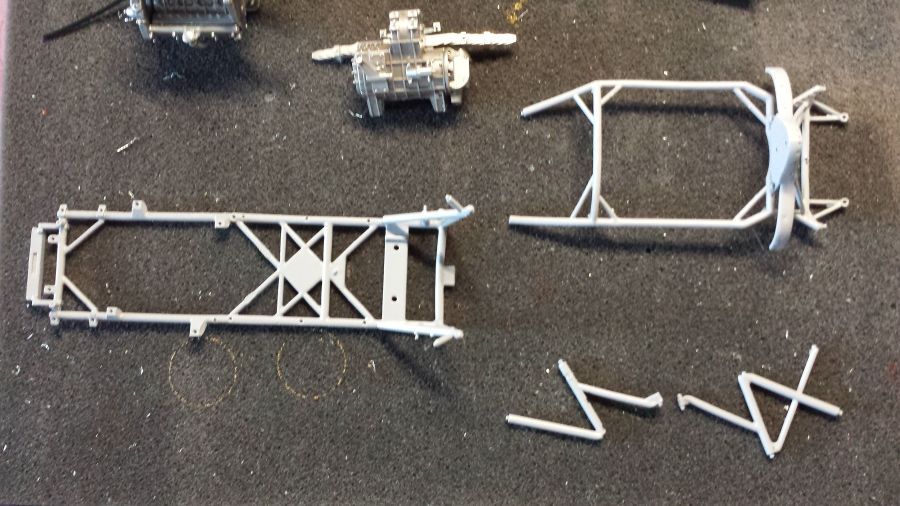
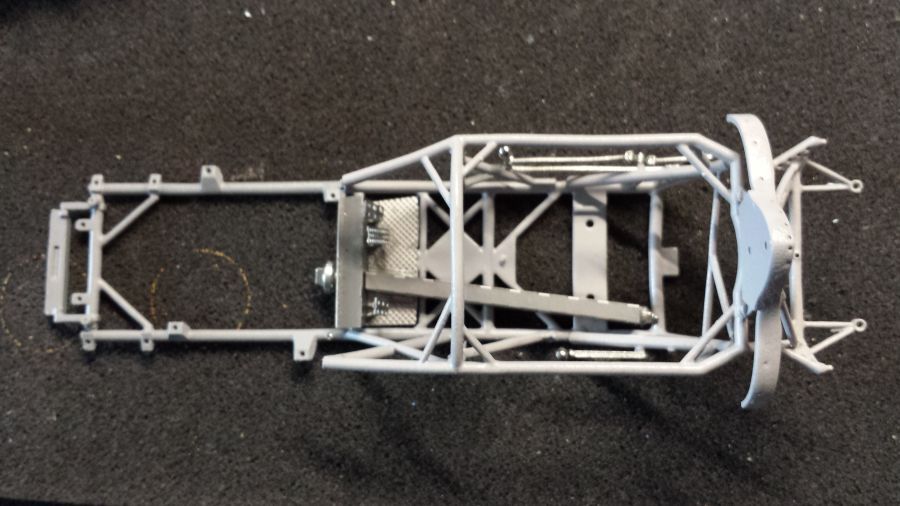
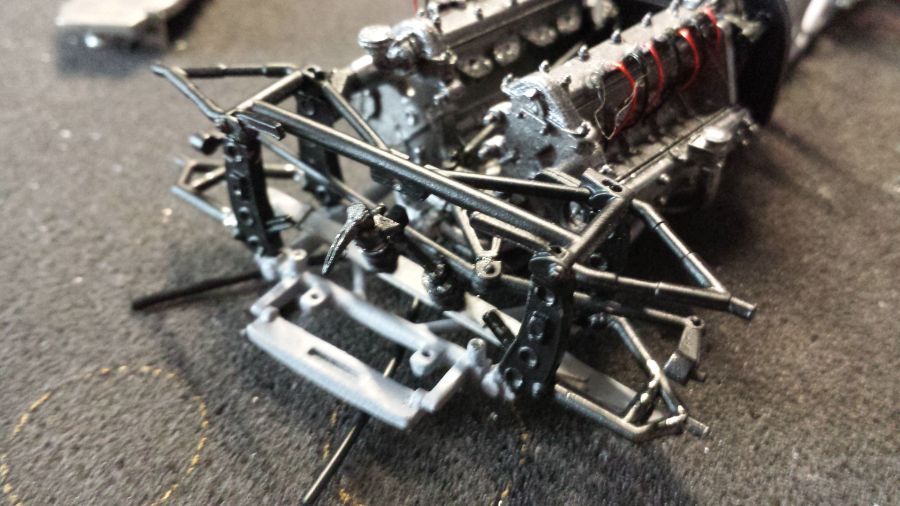
De eerste stappen aan het chassis.
The first steps on the chassis.
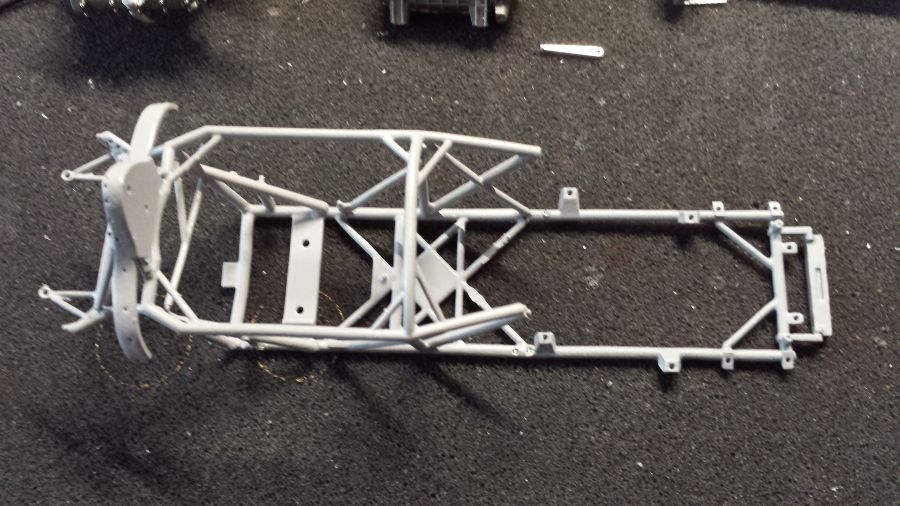
Ik ga nu eerst het frame grijs spuiten. Volgens mij de juiste kleur.
I will spray the frame grey now. I think it's the correct color.
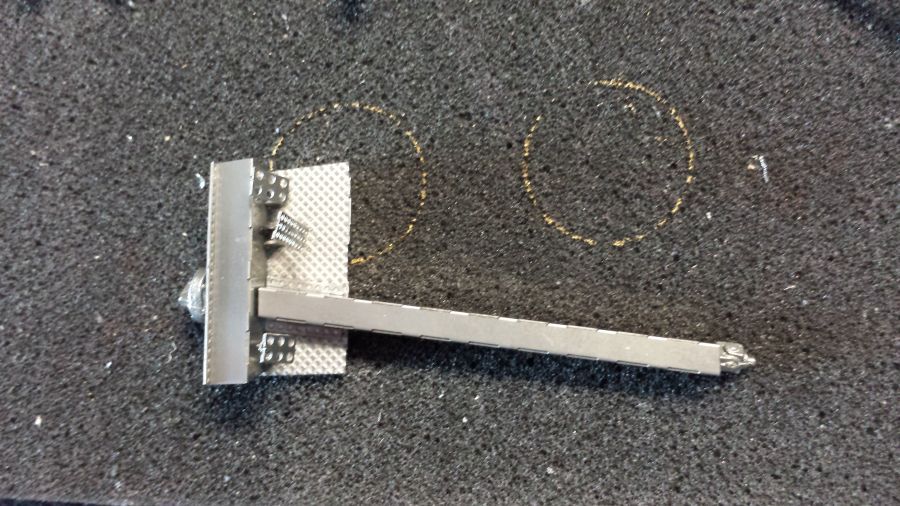
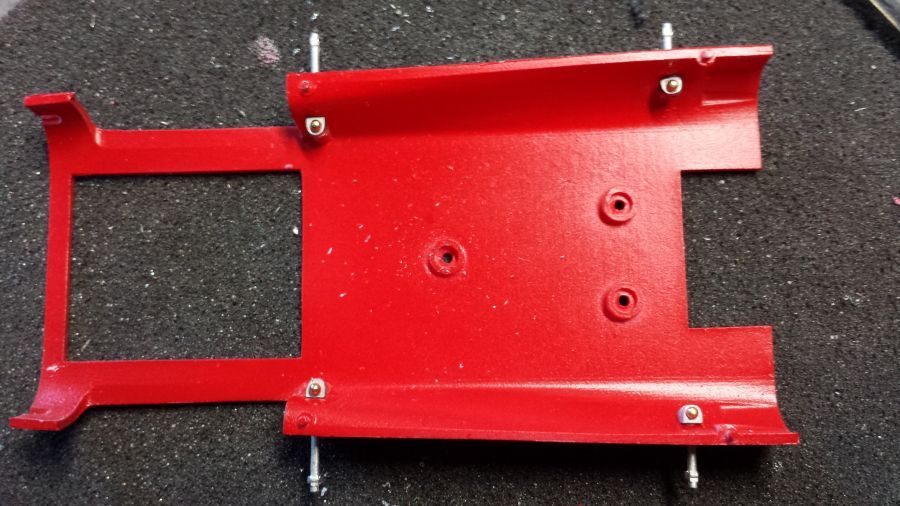
De assemblage van de grondplaat met de pedalen en de tunnel voor de as.
The assembly of the floor with the pedals and the tunnel for the axle.
Even passen.
Test fit.
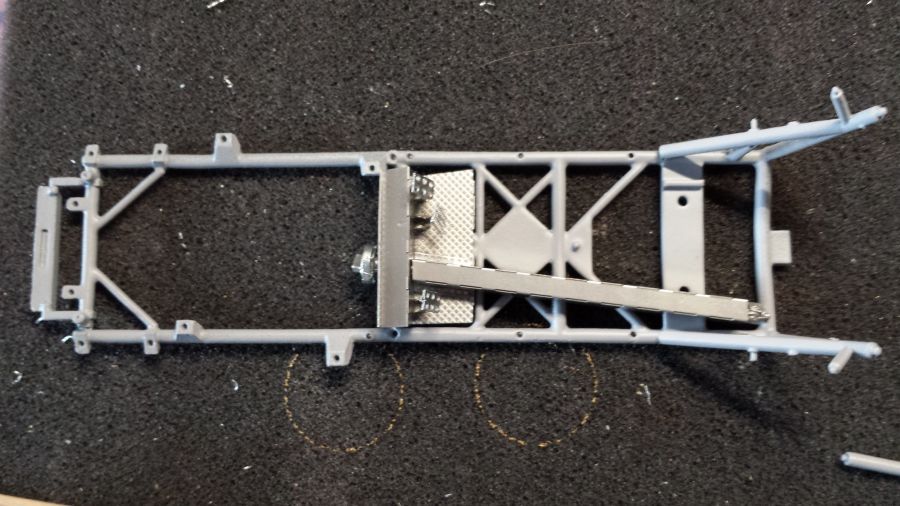
Het buizenframe wordt in elkaar gezet.
Assembly of the frame of tubes.

De pedalen en de as zitten op hun plaats.
The pedals and the axle are where they belong.
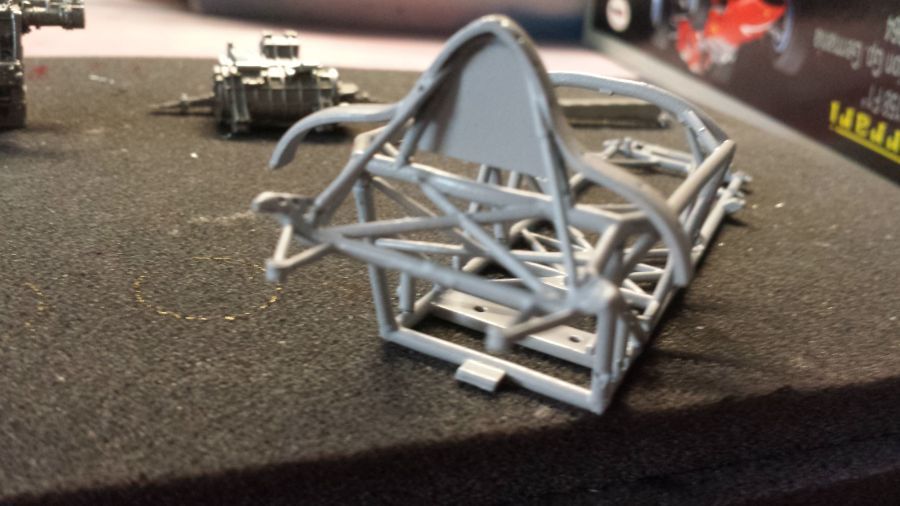
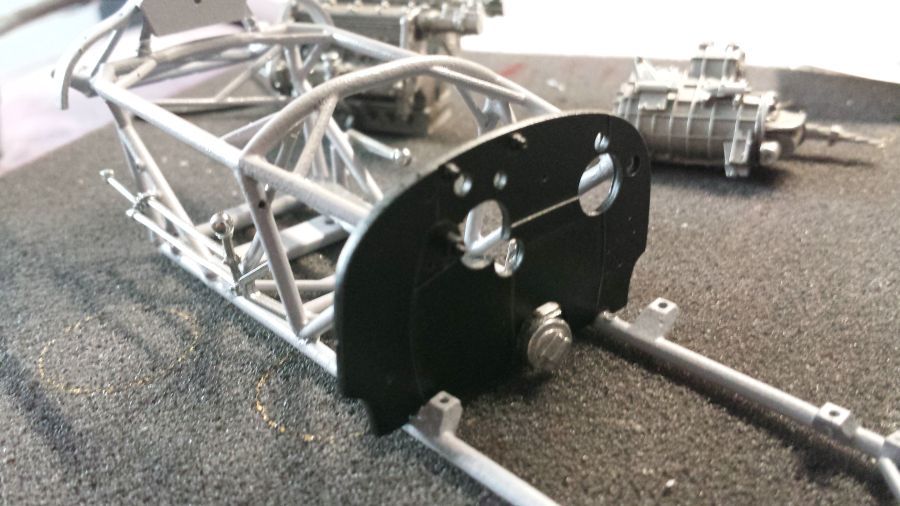
Daarna volgt het brandschot.
Next will be the bulkhead.
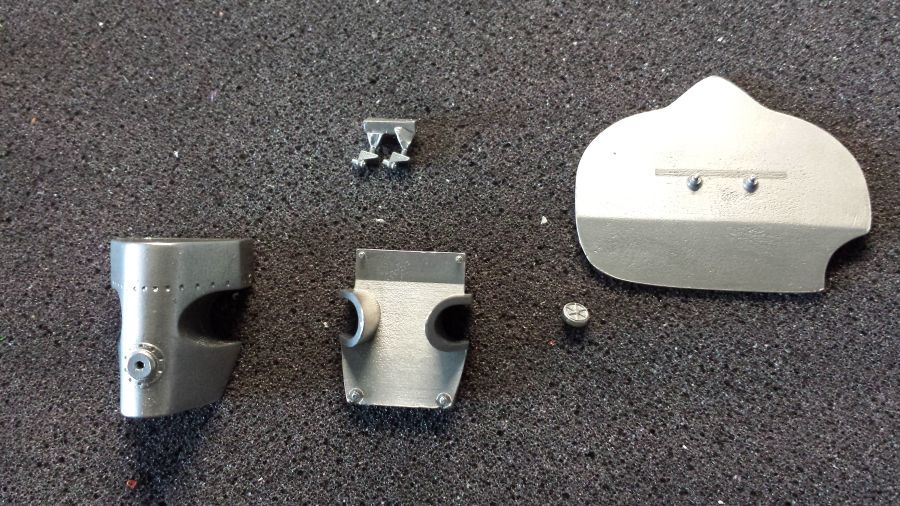
Wat kleine onderdelen.
Some small parts.
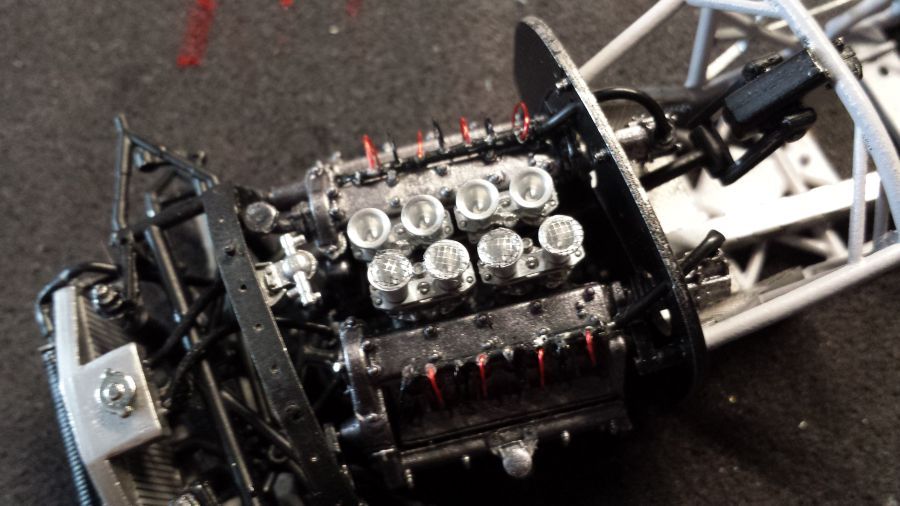
Nu even verder met de leidingen aan de versnellingsbak. Ik heb besloten de motor en de bak iets donkerder te spuiten met Tamiya TS-42 Light Gun Metal. Daarna de montage.
Now continuing with the pipes at the gear box. I have decided to spray the engine and gear box with Tamiya TS-42 Light Gun Metal. After this the mounting.

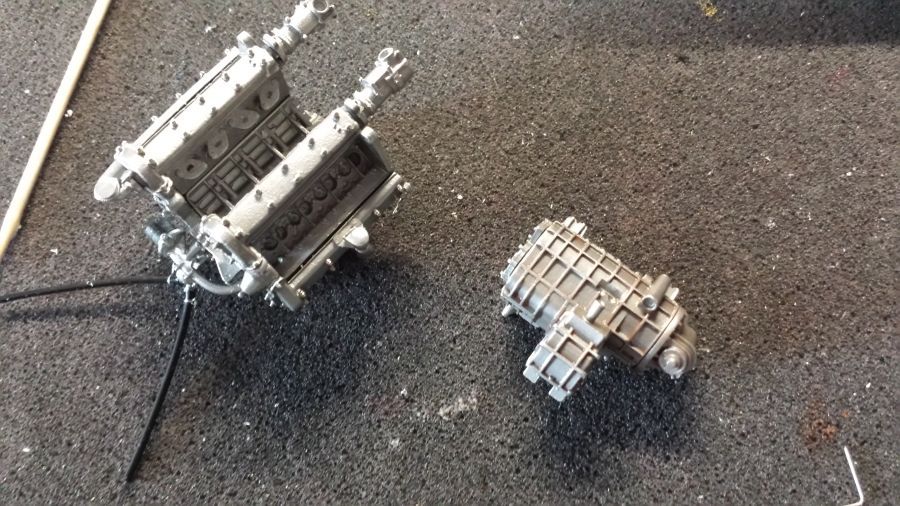
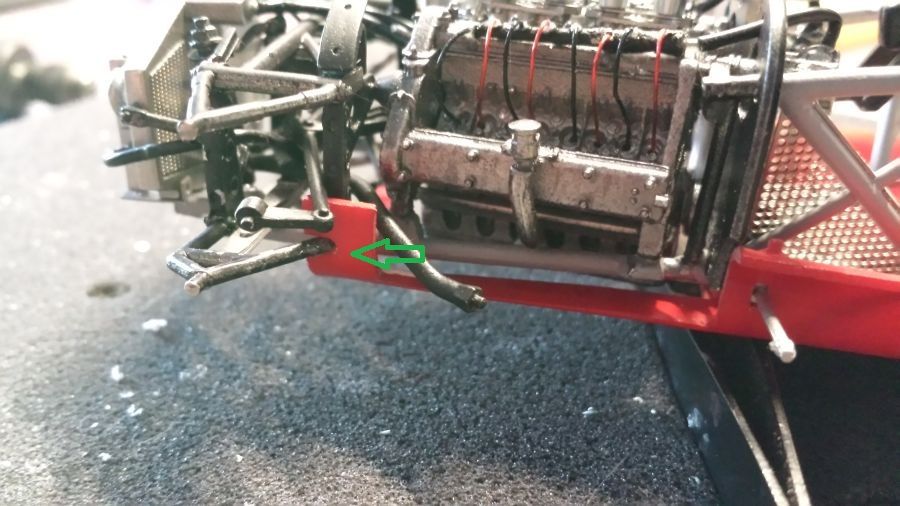
Voordat ik de achteras aan de bak ga monteren, plaats ik eerst de motor. Dit omdat ik verwacht dat er een beetje druk moet worden uitgeoefend om deze te plaatsen. Let op de hoek waaronder de motor wordt geplaatst.
Before mounting the rear axle to the bear box, i will attach the engine. This, because i think i will need to use some pressure to mount it. Notice the angle in which the engine needs to be mounted.
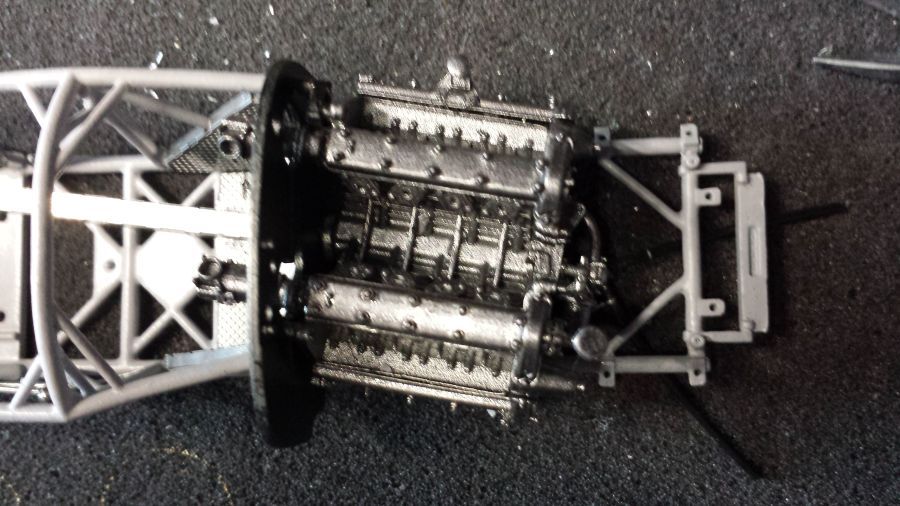
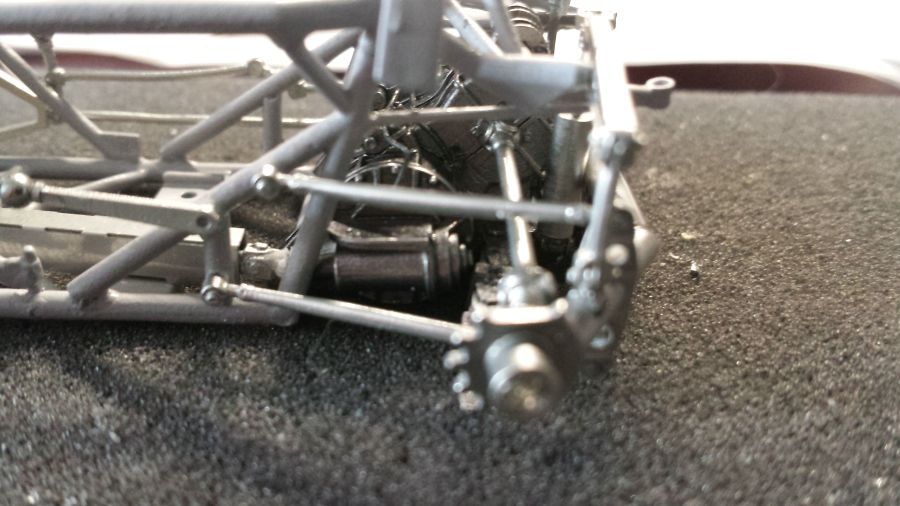
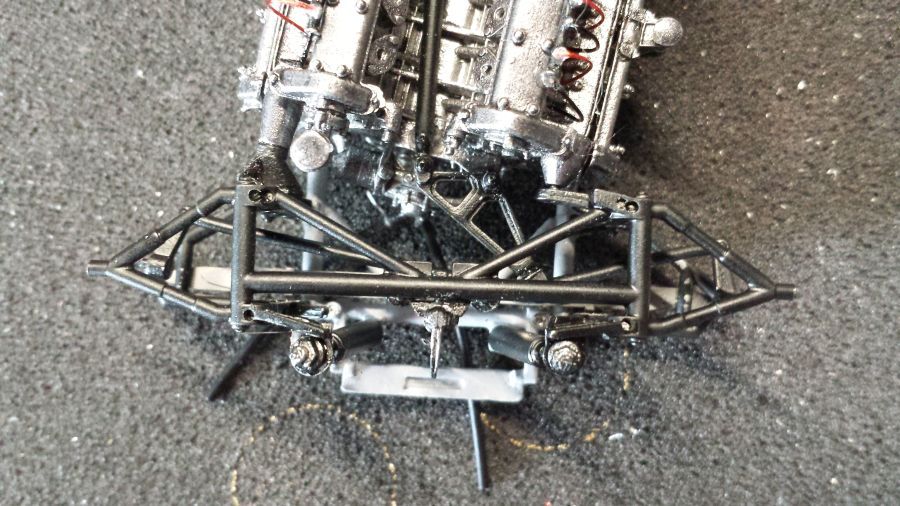
Dan de achteras.
Next comes the rear axle.

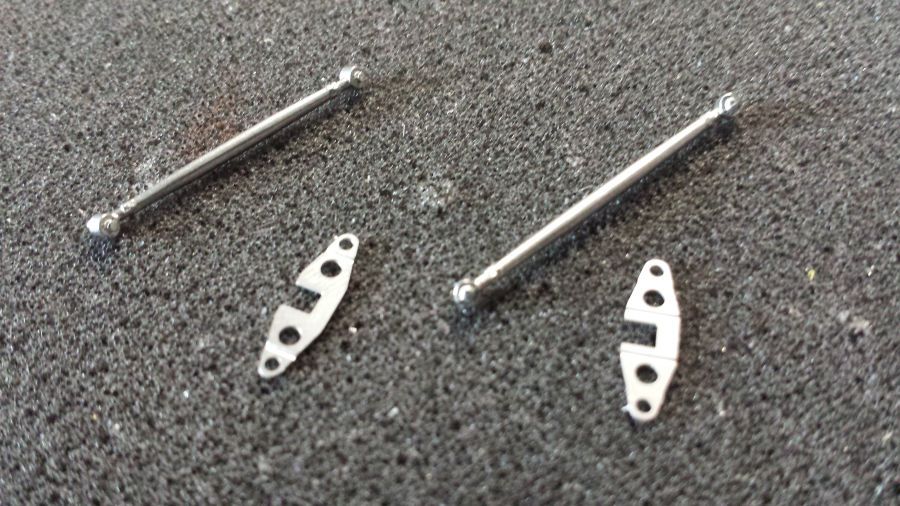
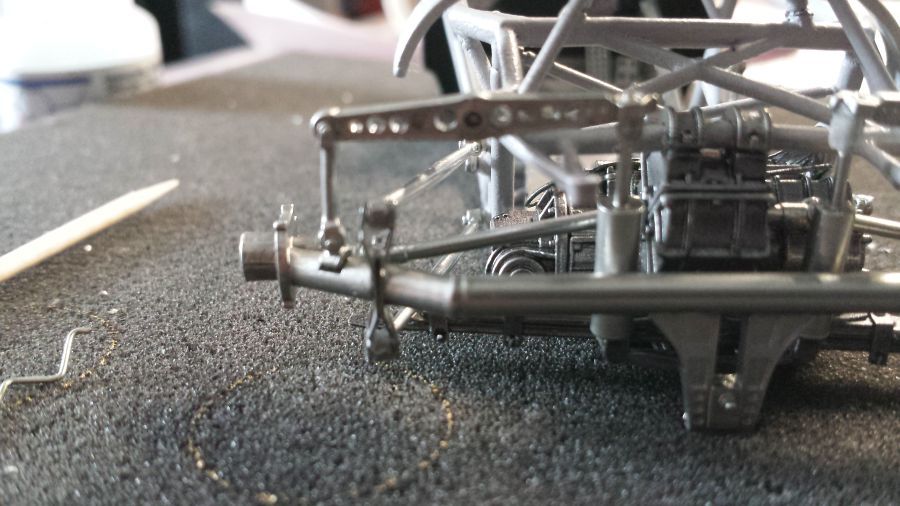
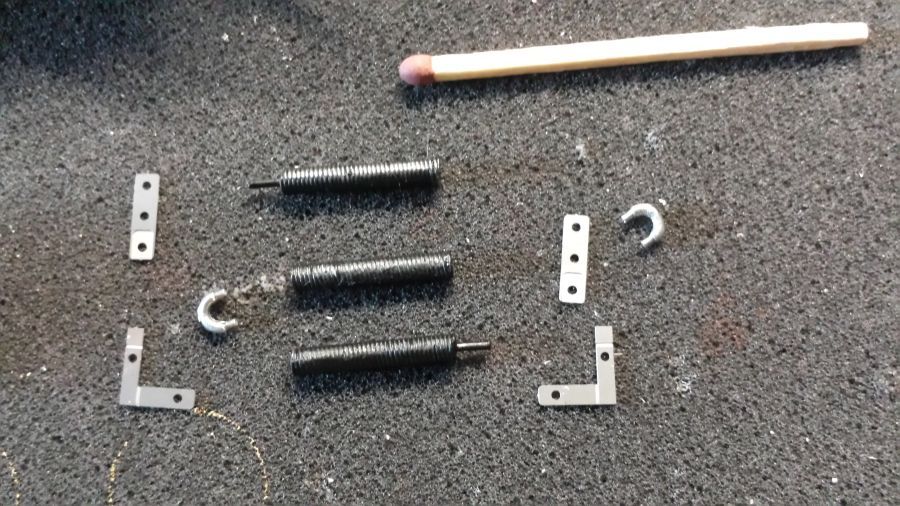
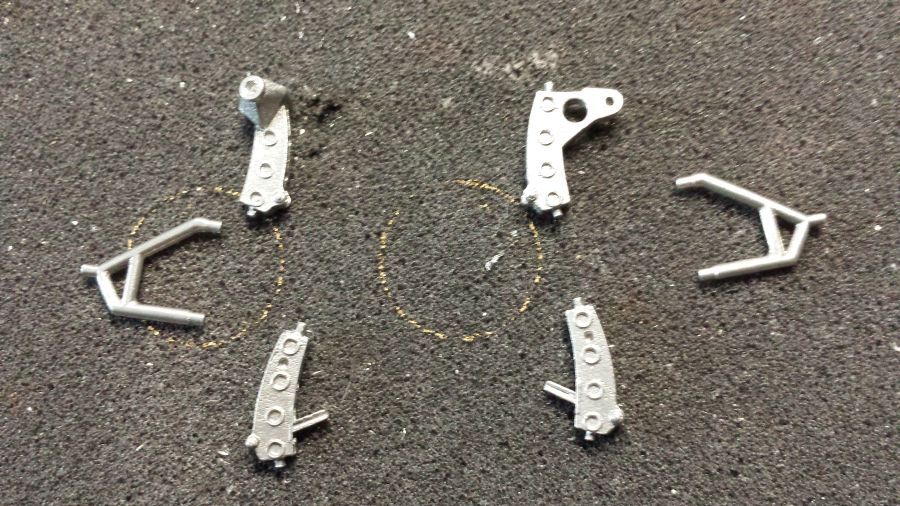
Het werk aan een paar steunen voor de achteras.
The works on a few rear axle supports.
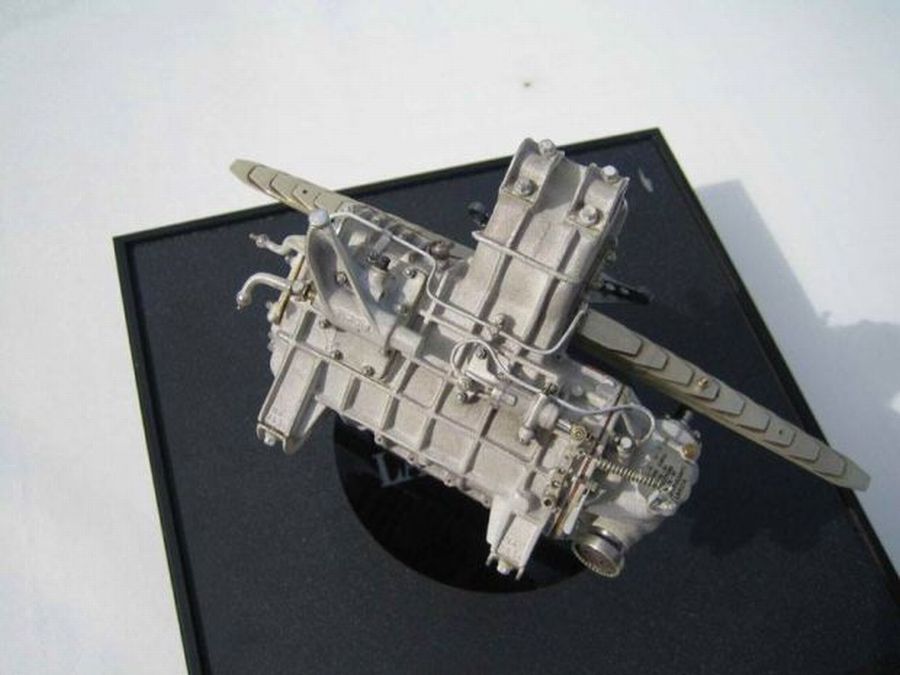
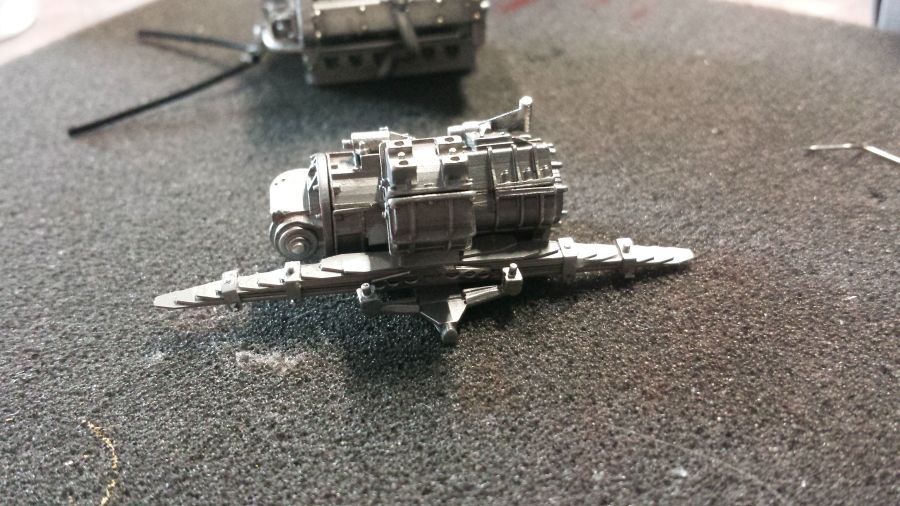
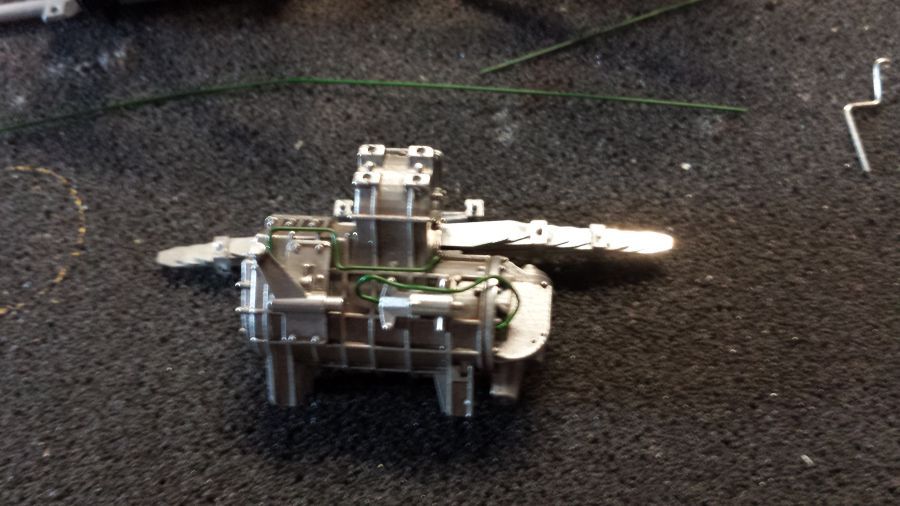
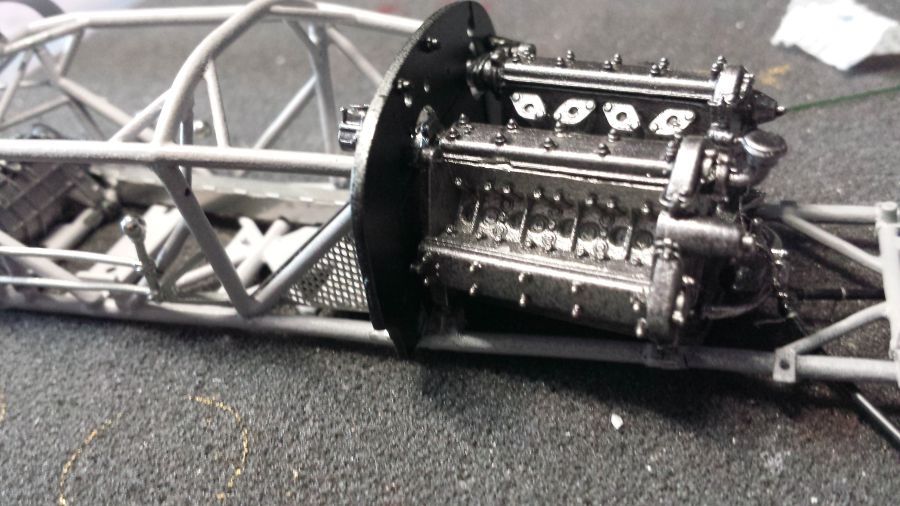
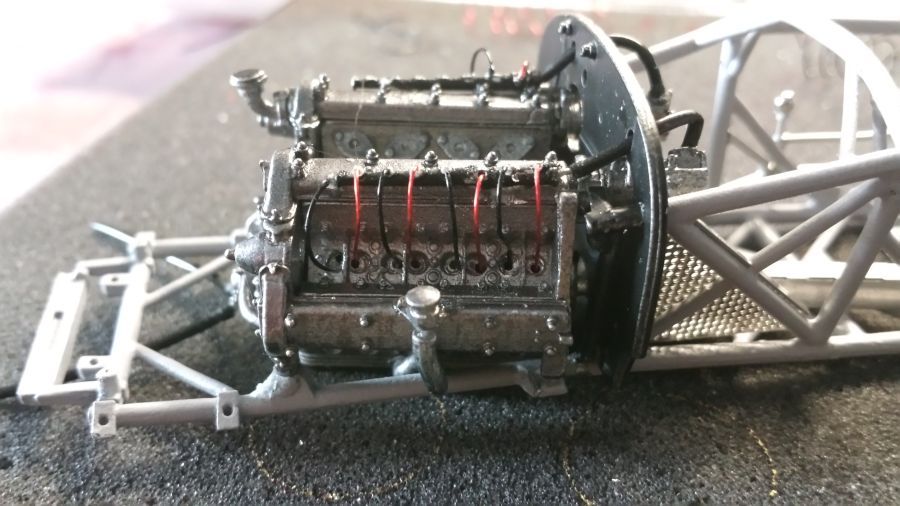
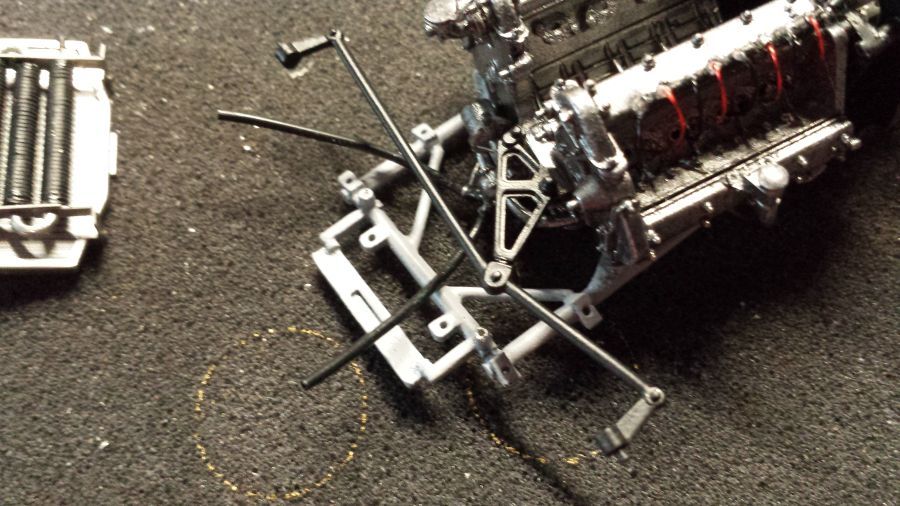
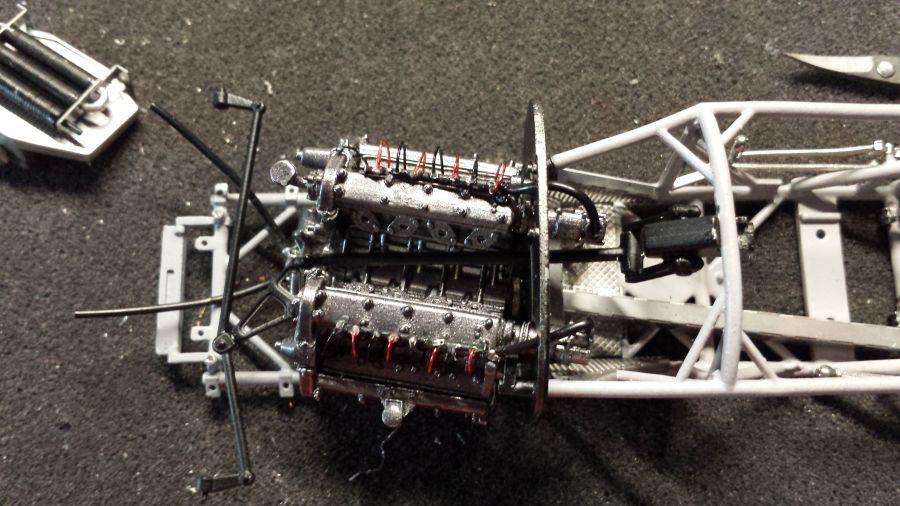
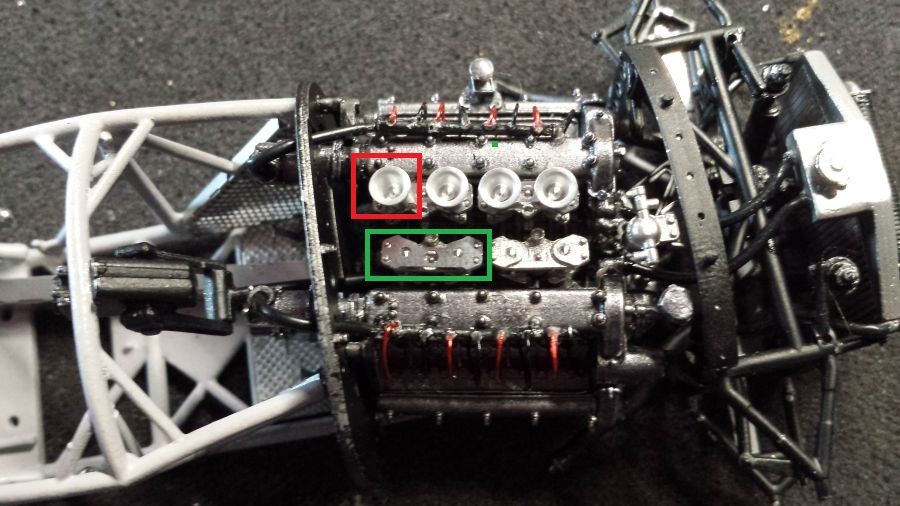
Meer details aan de motor.
Adding detail to the engine.
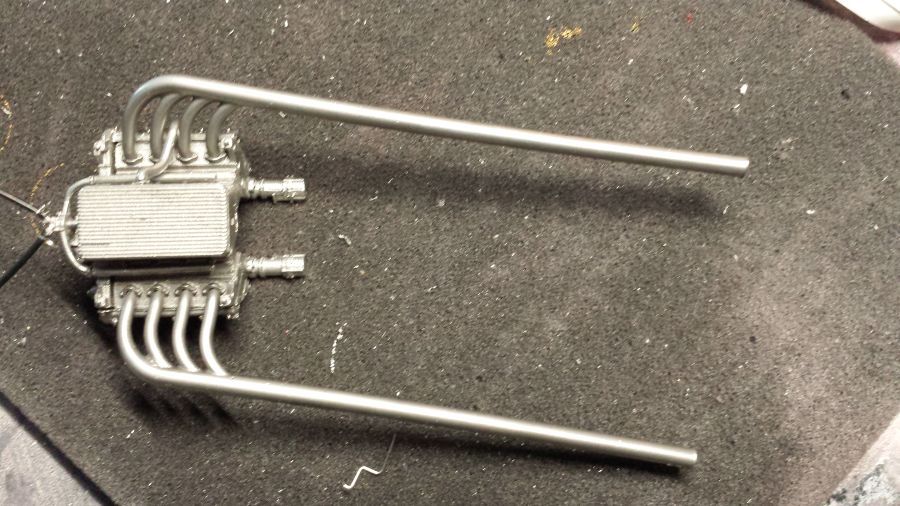
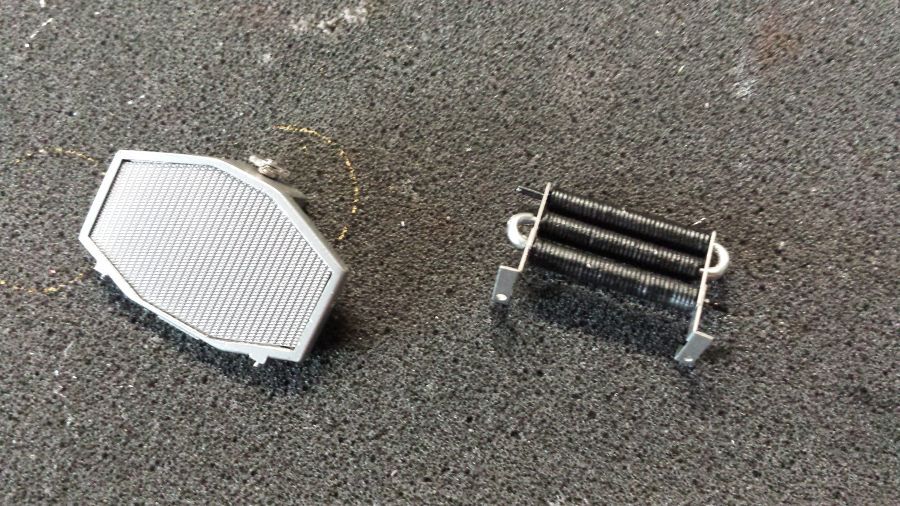
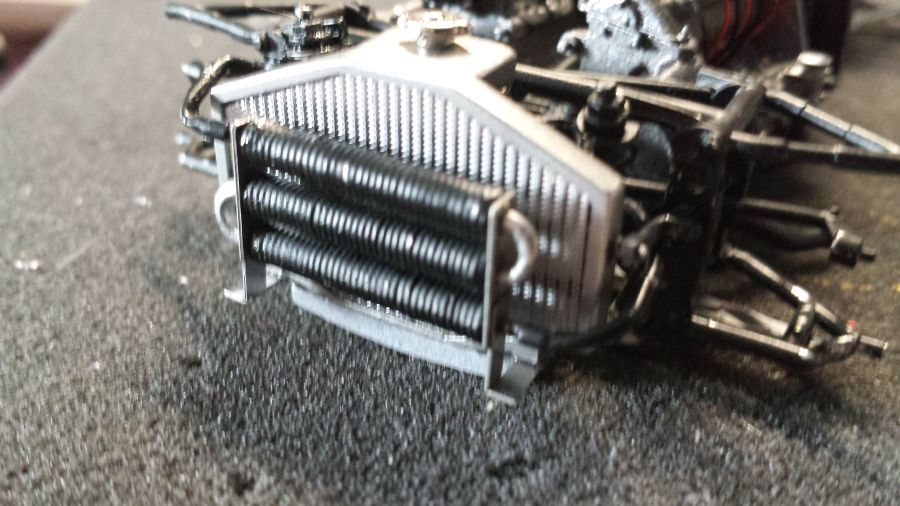
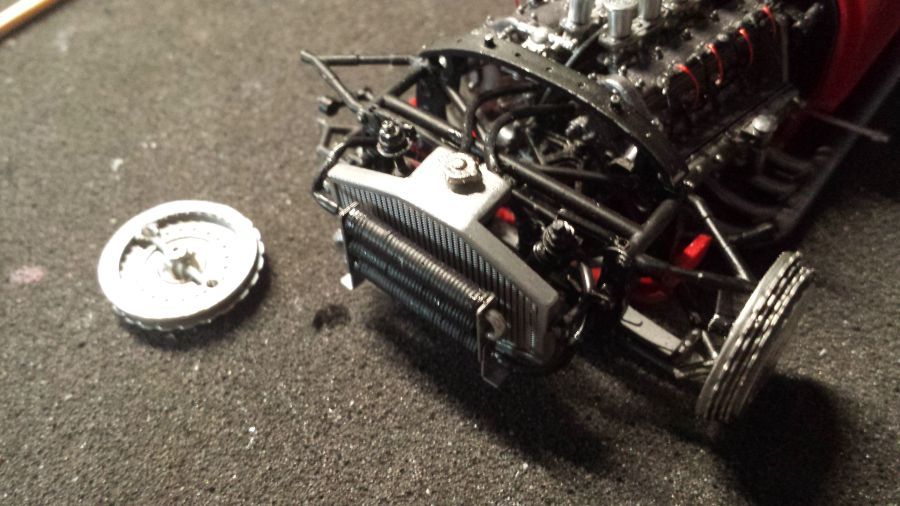
Het samenstellen van de radiateur.
The assembly of the radiator.
Een paar onderdelen moeten worden gebogen. Ik gebruik mijn tangen. Daarna wordt de boel in elkaar gezet.
A few parts need to be bent. I will use my pliers. Then everything will be combined.
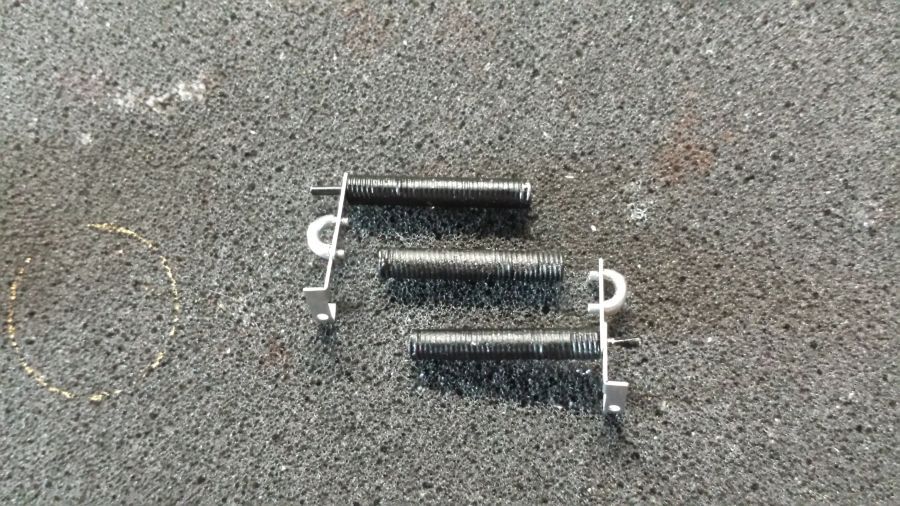
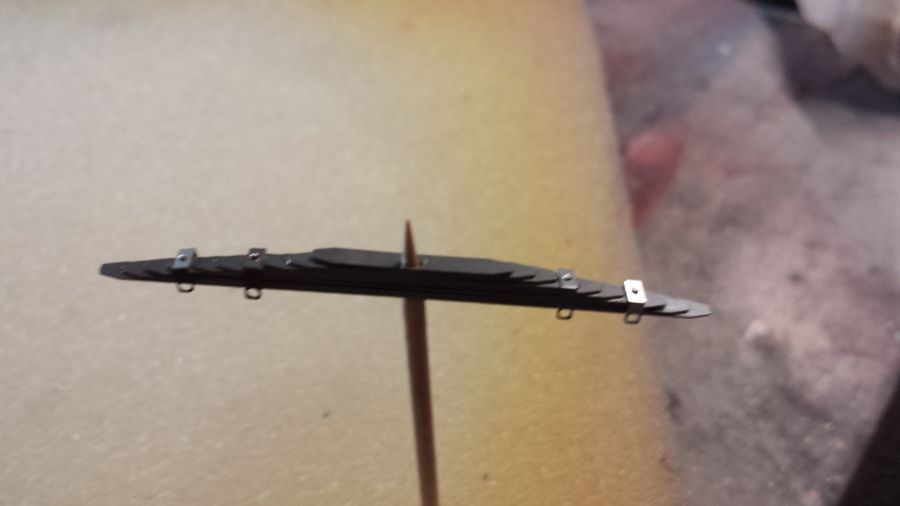
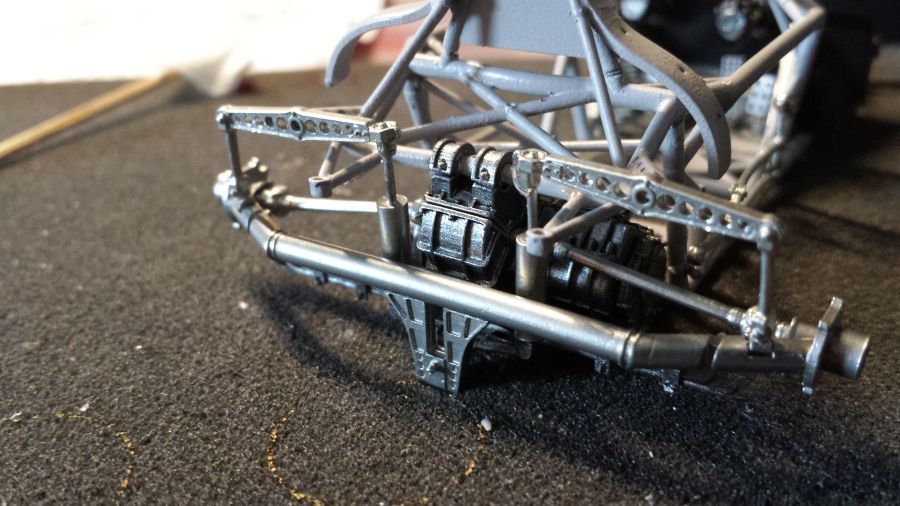
Dan volgt de voorste bladveer.
Next is the front leaf spring.
Dan door met de stuurinrichting.
Continuing with the steering rod.
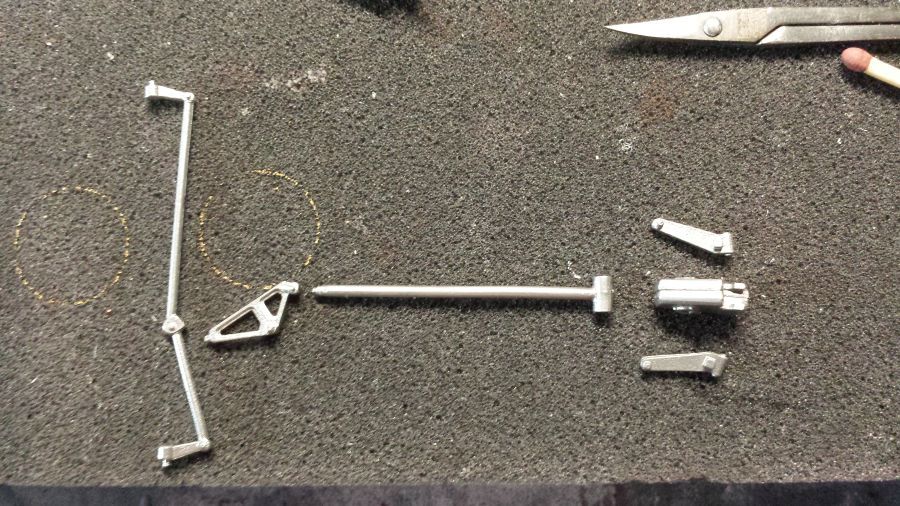
Daarna volgt de voorwielophanging.
After this, the front wheel suspension.
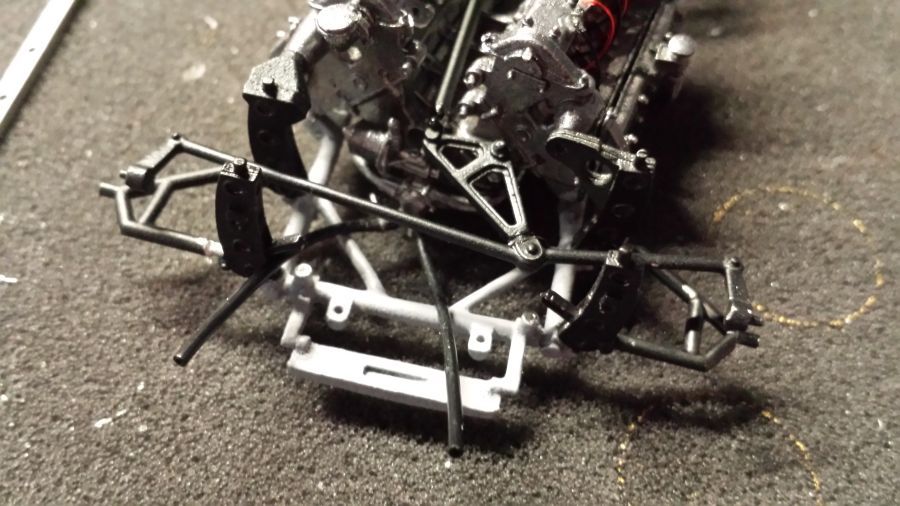
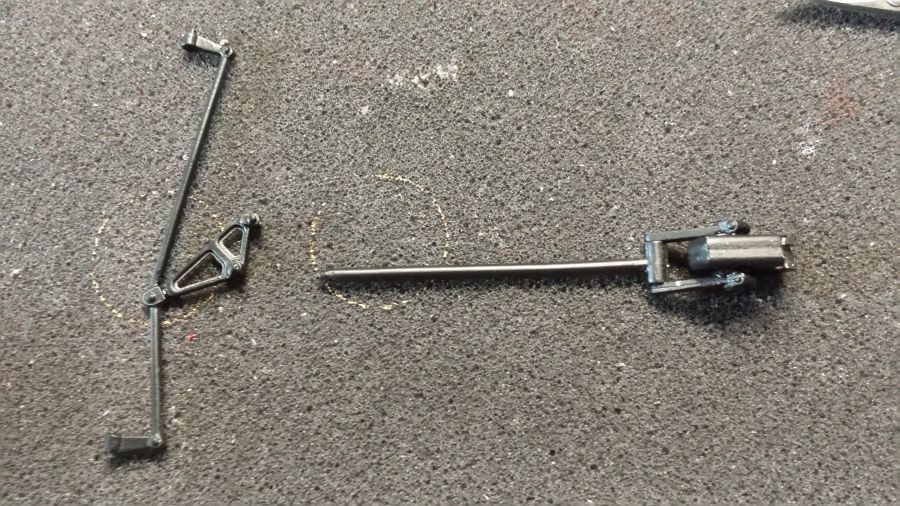
De voorste bladveer zit op zijn plek. Nu de bovenkant van de voorwielophanging.
The front leaf spring has been placed. Now the top from the front wheel suspension.
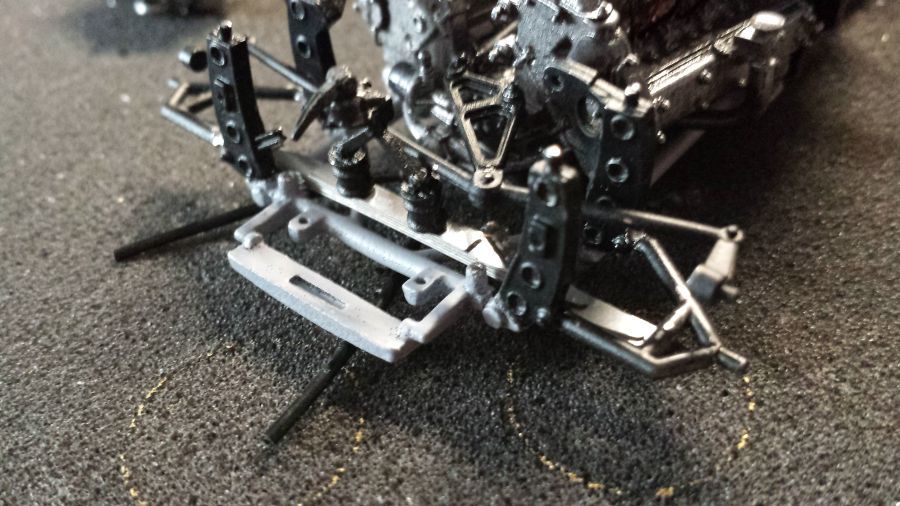
Daarna verder met de schokbrekers.
Then on with the shocks.
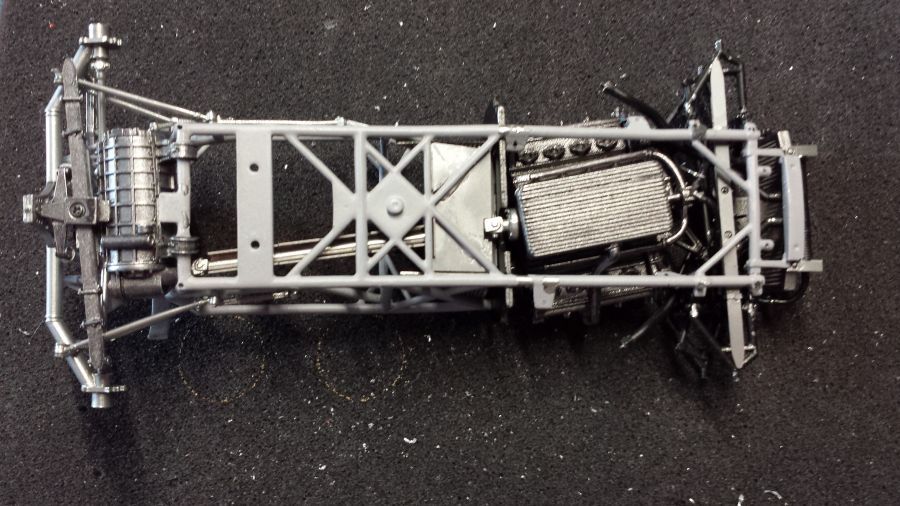
Van de bovenkant.
Topview.
Van de onderkant.
Downview.
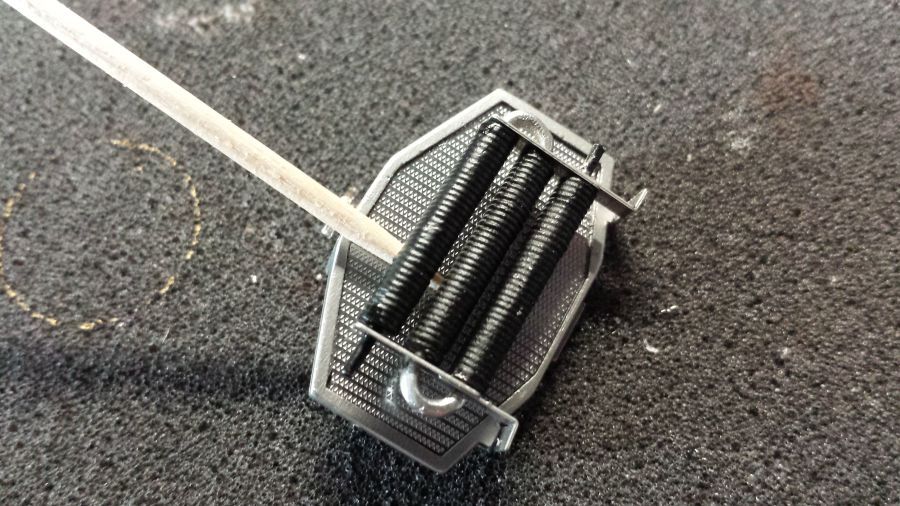
Voordat de radiator wordt geplaats schuif ik de pijpen op hun plaats. Dit om even te passen.
Before mounting the radiator, i will put the pipes into position. This to do a test fit.
Nu het monteren.
Now mounting it.
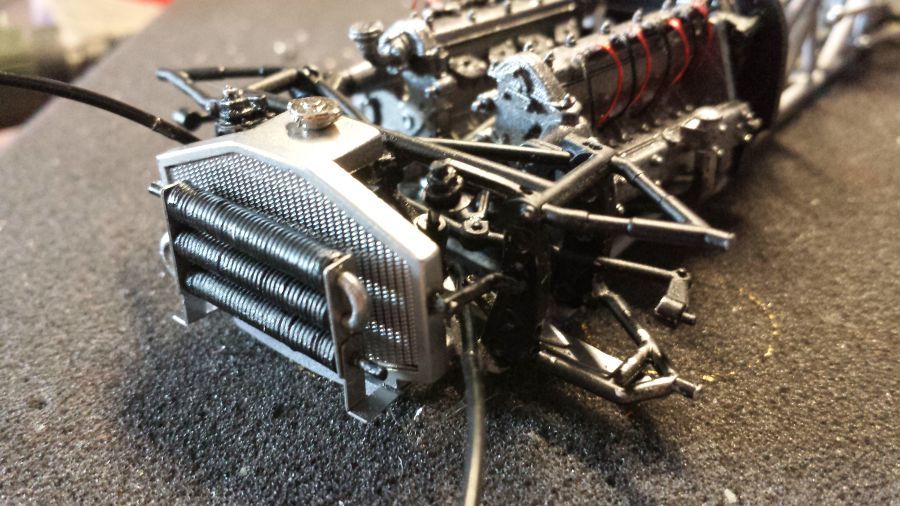
En de slangen en de pijpen.
And the hoses and the pipes.
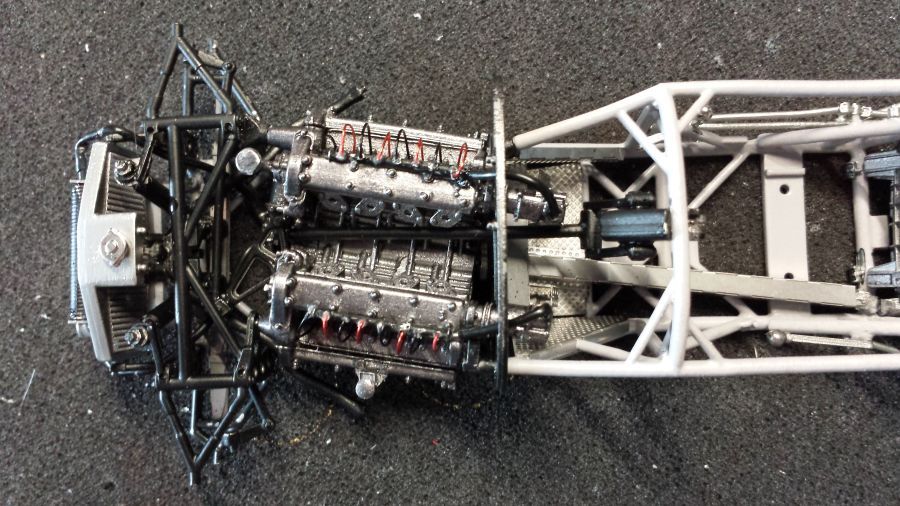
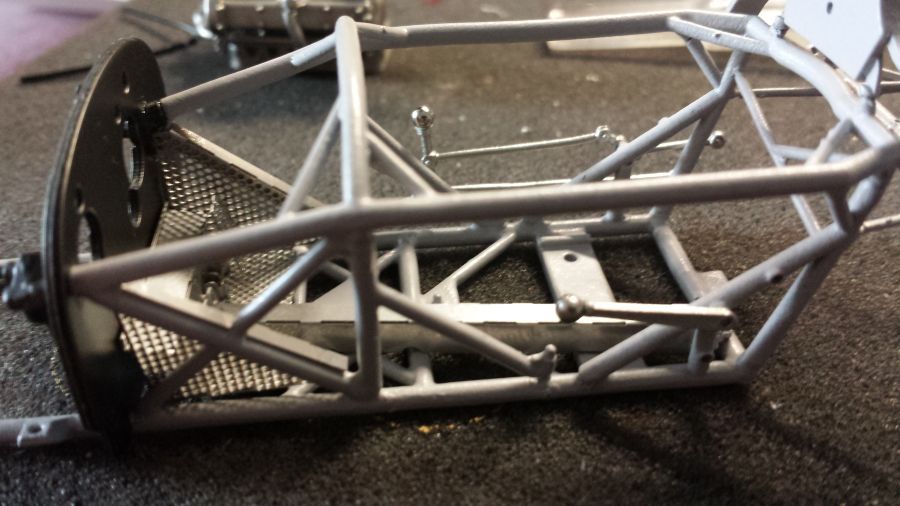
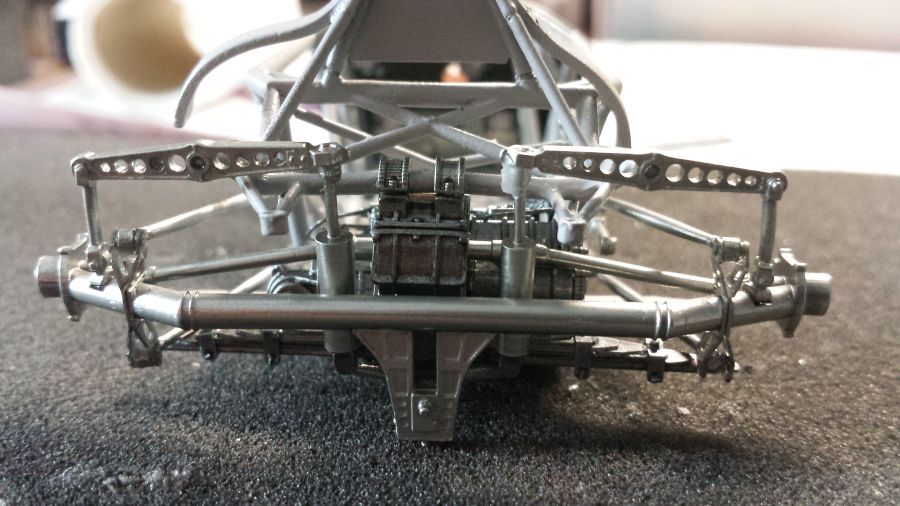
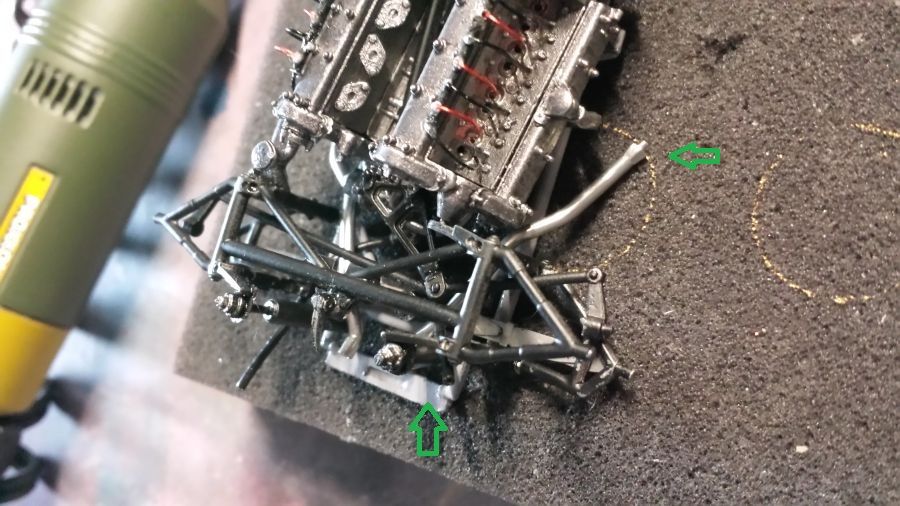
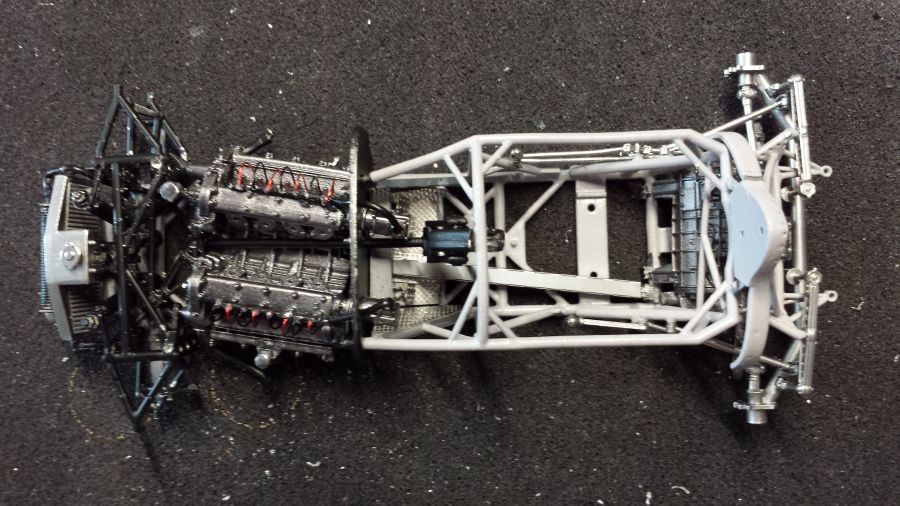
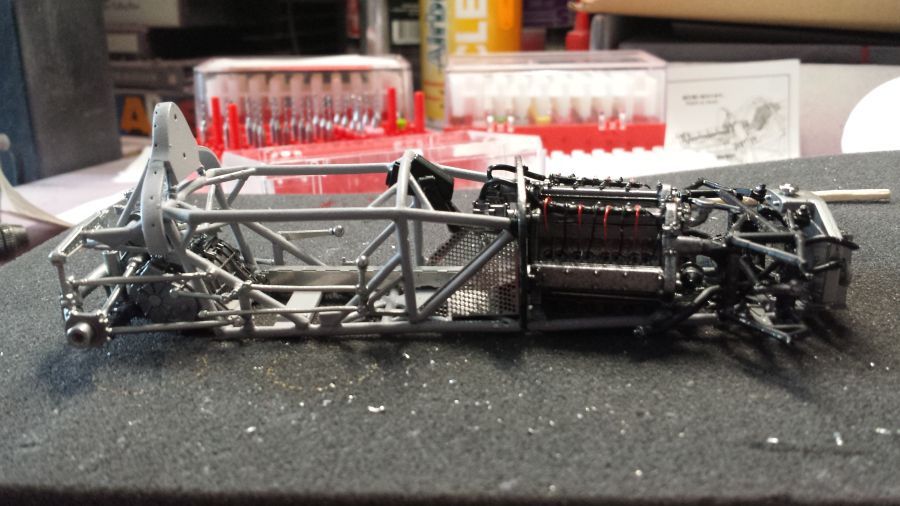
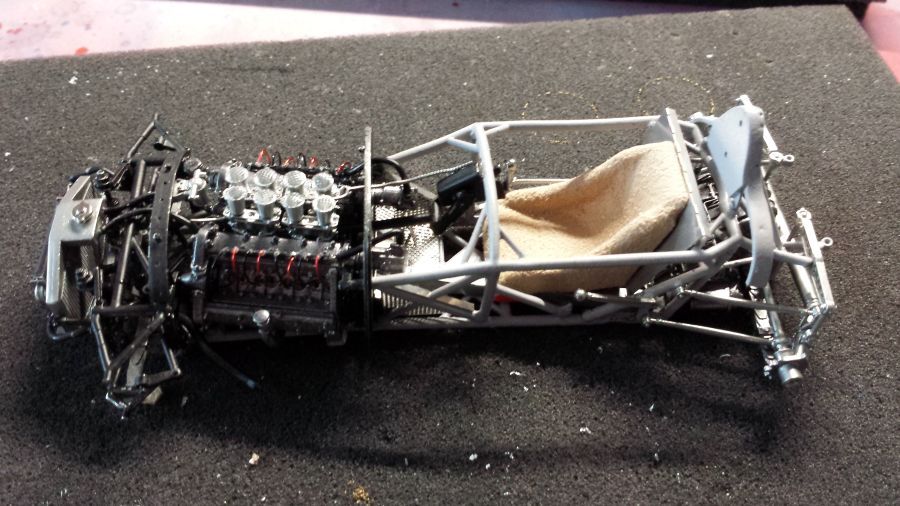
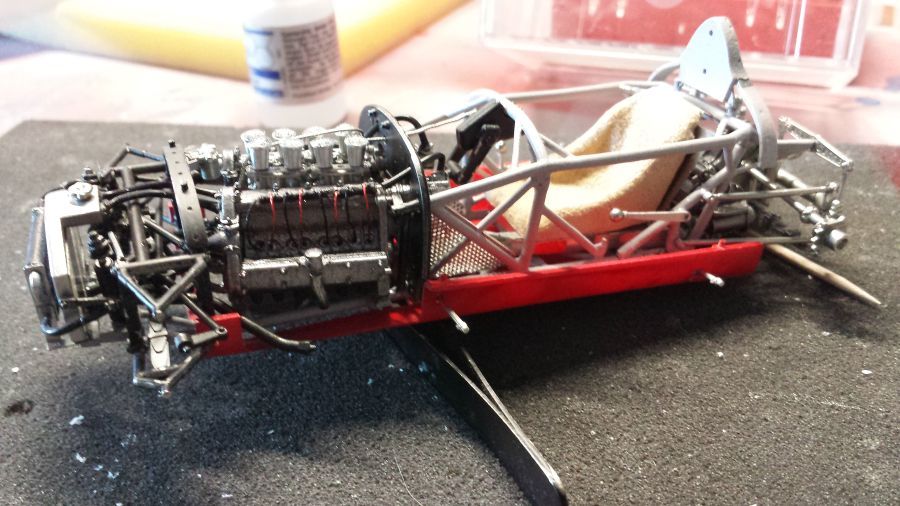
De vooruitgang to nu toe.
Progress so far.
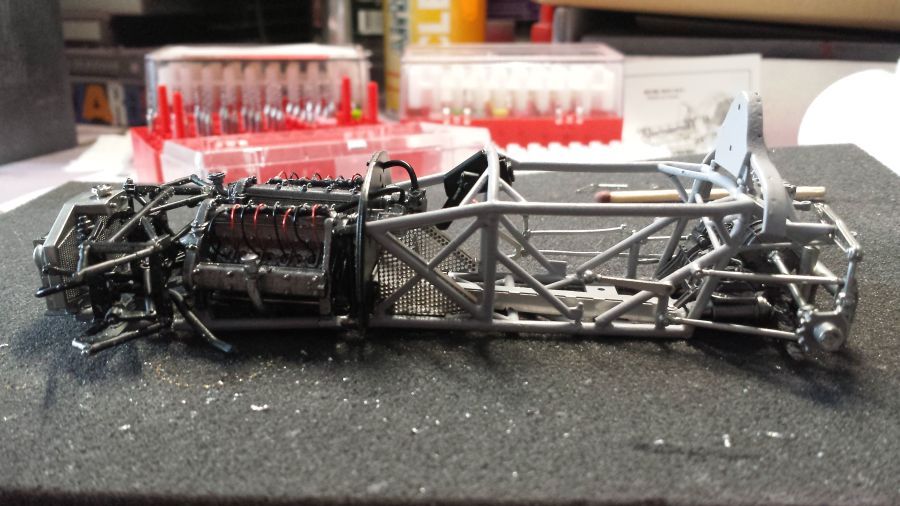
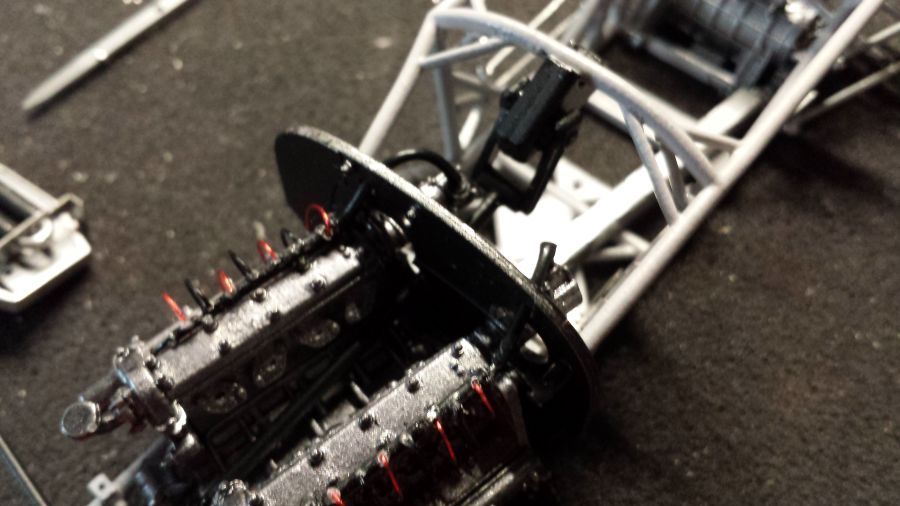
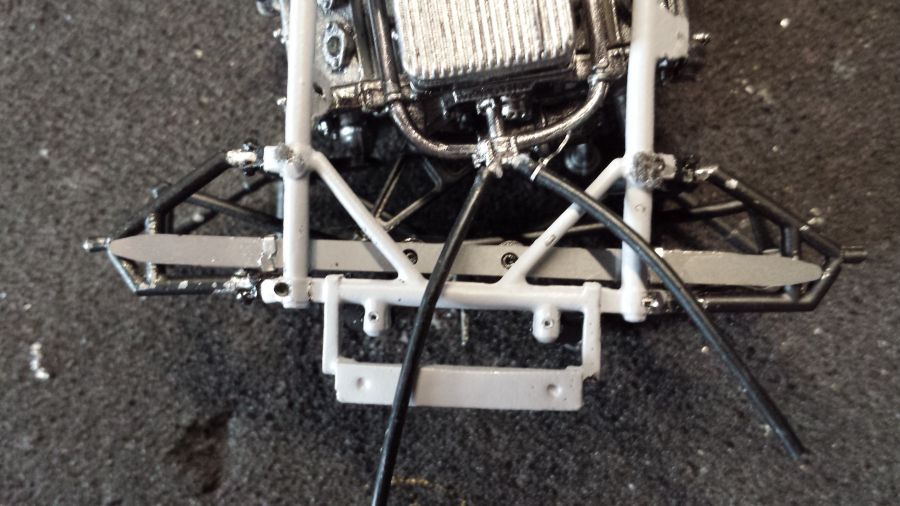
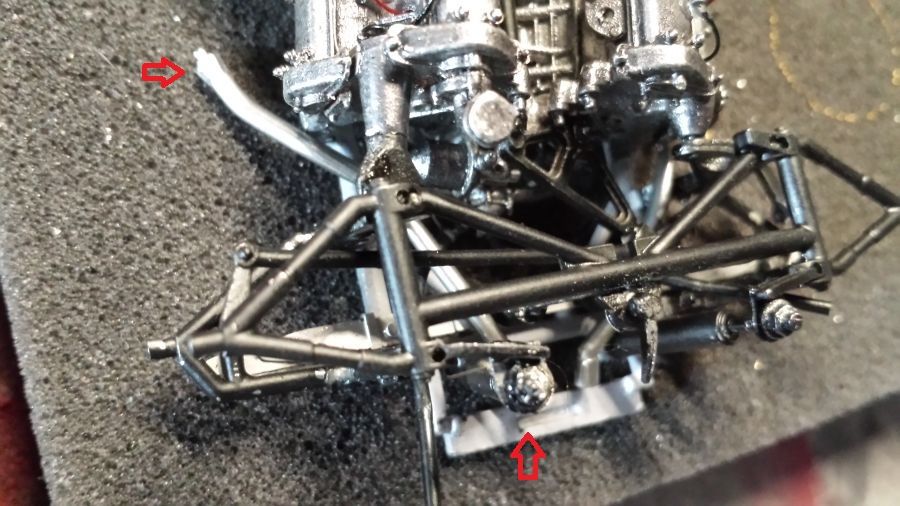
Nog een paar leidingen en de steun voor de neus.
A few more hoses and the support for the nose.
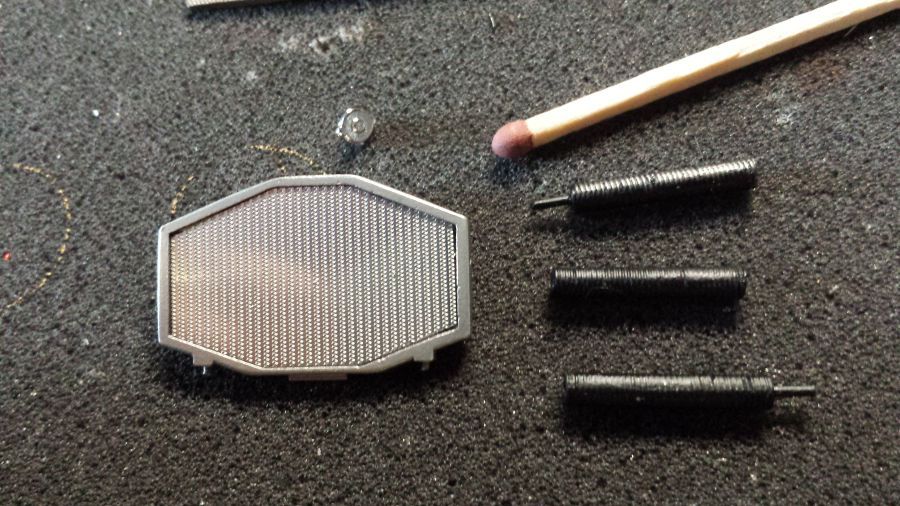
Nu volgt het werk aan de carburateurs. De metalen gaasjes moeten met het bijgeleverde gereedschap rond worden gemaakt. Ik kijk even hoe dat lijkt. Ik heb in mijn rommeldoos nog messing gaasjes. Misschien gebruik ik die.
Now the work on the carburetors. The funnel covers should be shaped by using the tools provided. I will see if this works. In my scrap box i still have mesh covers. Maybe i will use these.
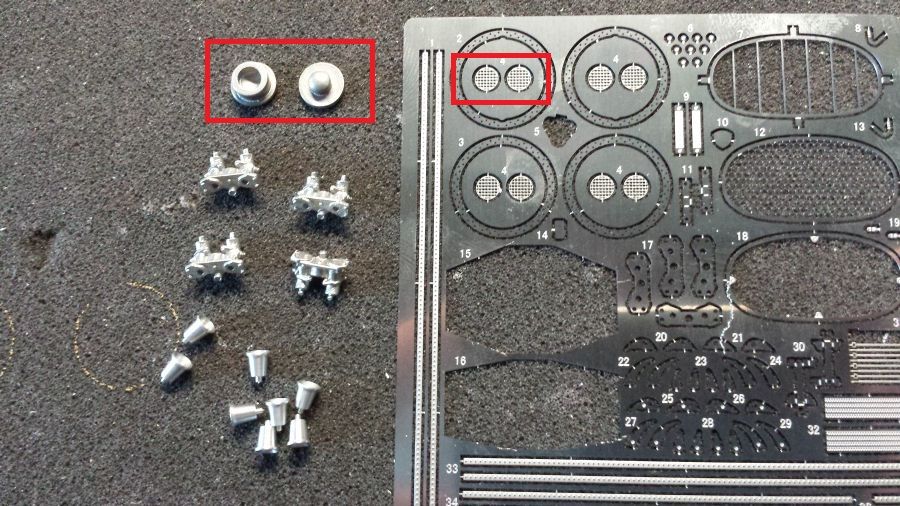
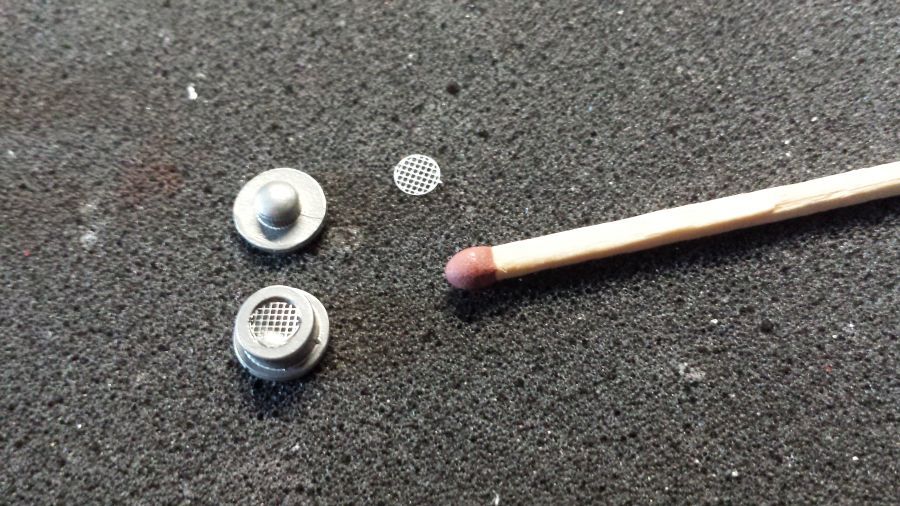
Het resultaat is een lichte bolling (linker item).
The result is a slight ball shape (left item).
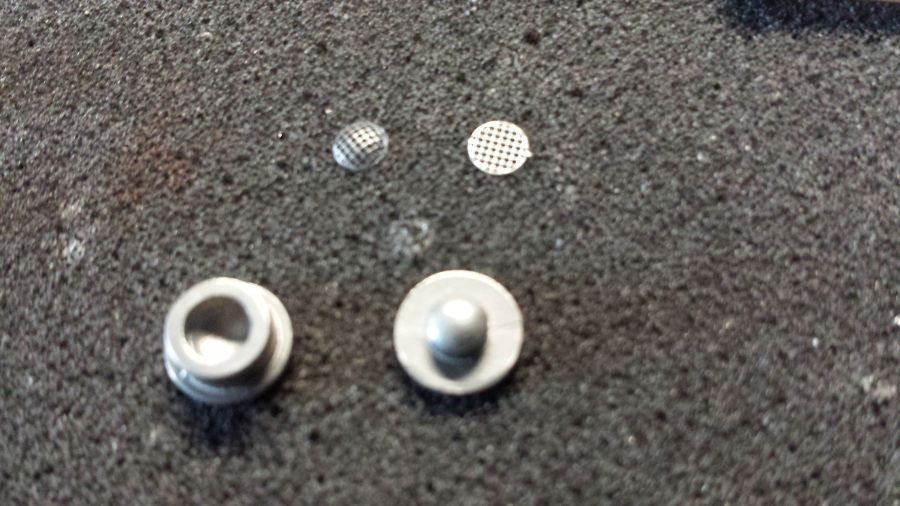
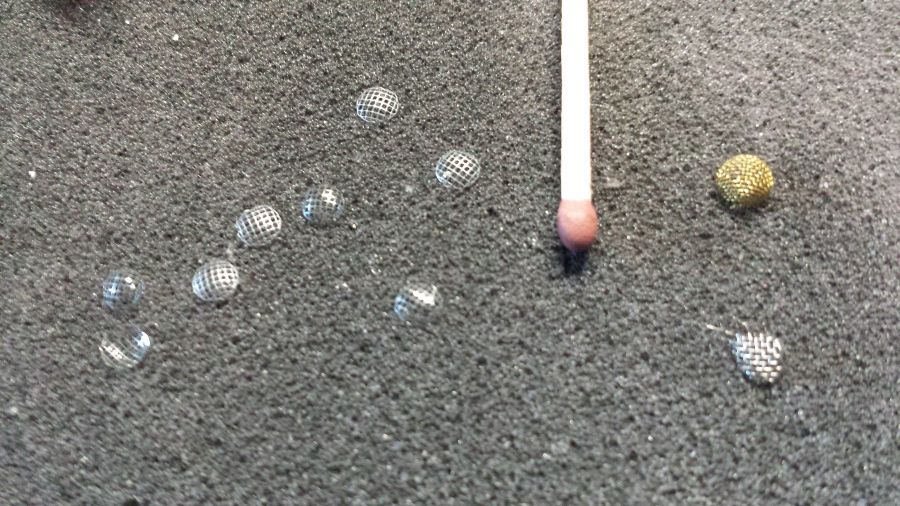
Ik vind de gemaakte roosters mooier dan die in mijn rommeldoos (goud en zilver rechts).
I think the shaped covers are better than those from my scrap box (gold and silver to the right).
Eerst de carburateurs op hun plek.
First mounting the carburetors.
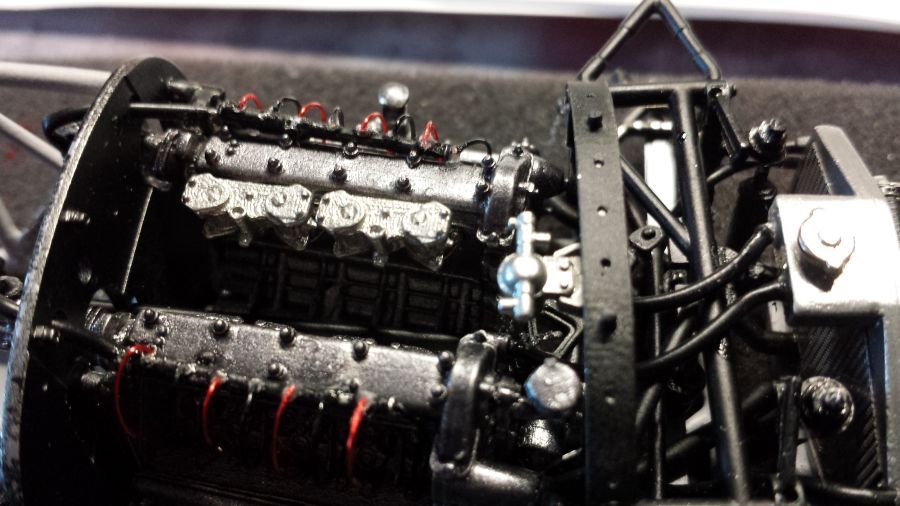
Dan een etched plaatje en vervolgens de trechter.
Then the etched part and next the funnel.
Wanneer je de metalen kabels wilt gebruiken, moet je dat doen voordat je de 2e rij trechters plaatst. Anders gaat dat niet meer lukken.
If you want to use the metal wires, you have to use it before mounting the 2nd row of funnels. Otherwise this will not work.
De roosters zijn geplaatst bij de onderste rij trechters.
The covers are mounted at the lower row of funnels.
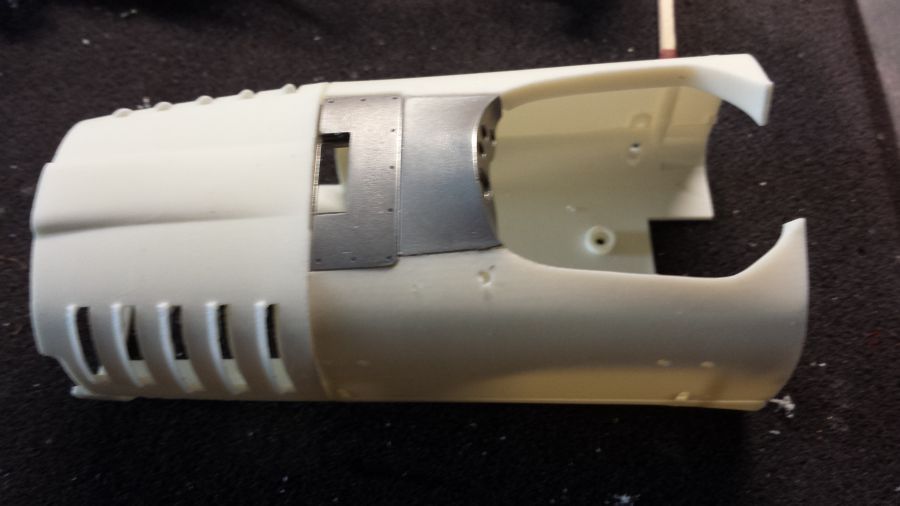
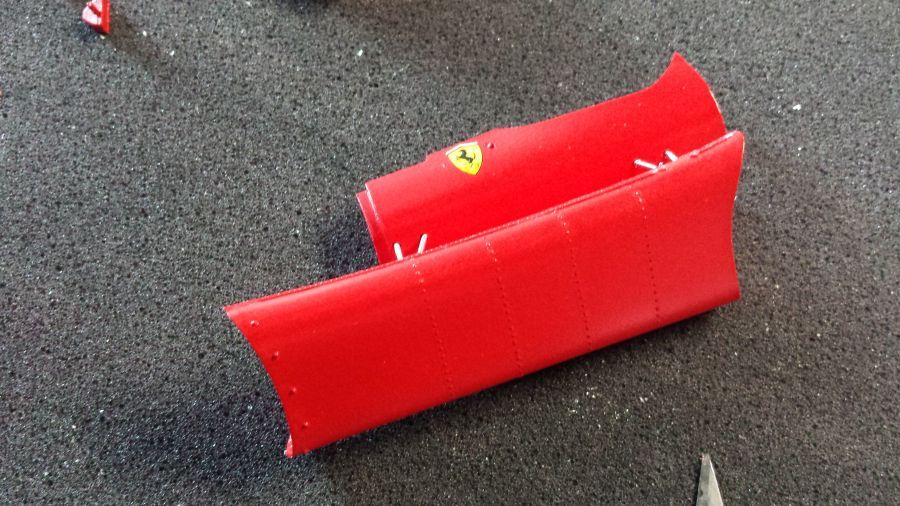
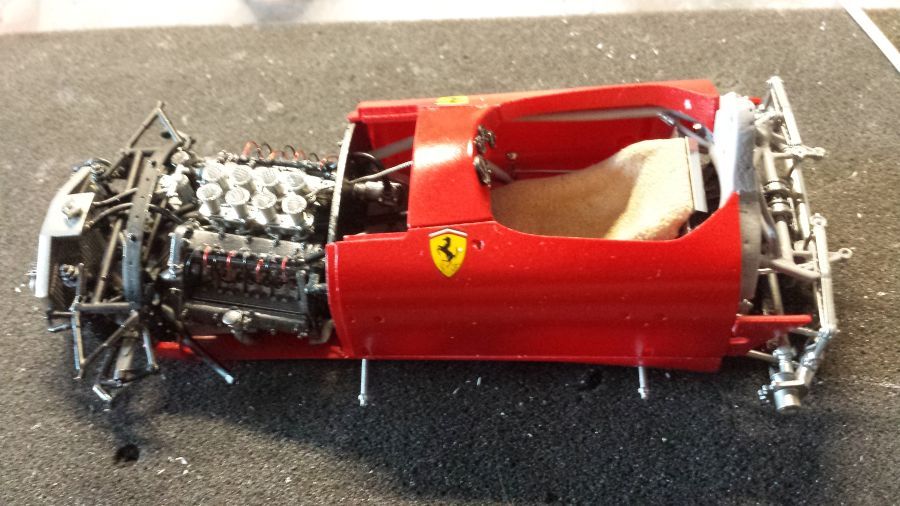
Door met de carosserie. Even passen. Bijna perfect.
Now continuing with the body work. A test fit. Nearly perfect.
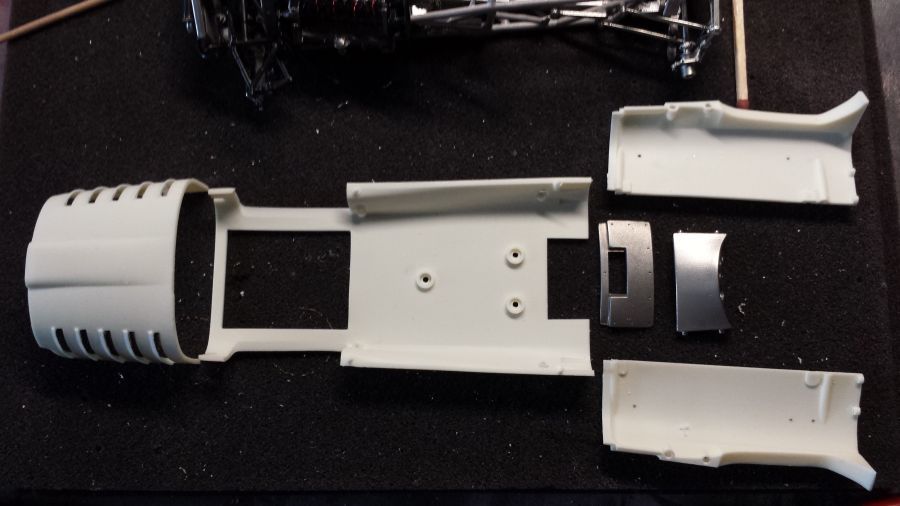
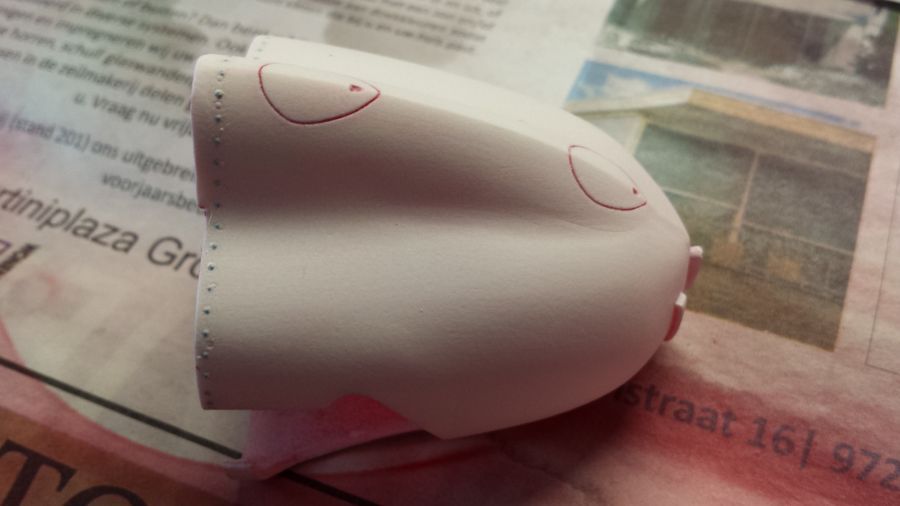
Alle onderdelen zijn in de grondverf gezet. Hierna gladschuren.
All parts have been painted with primer. After this some sanding.
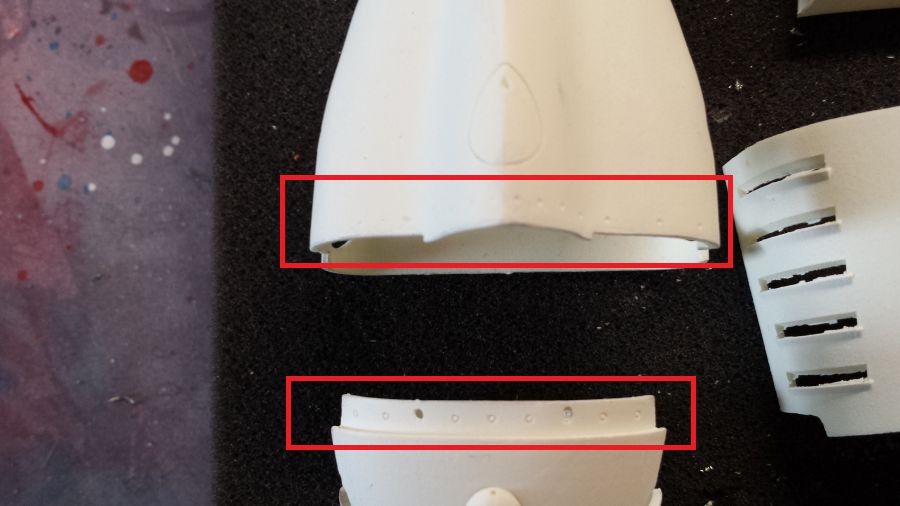
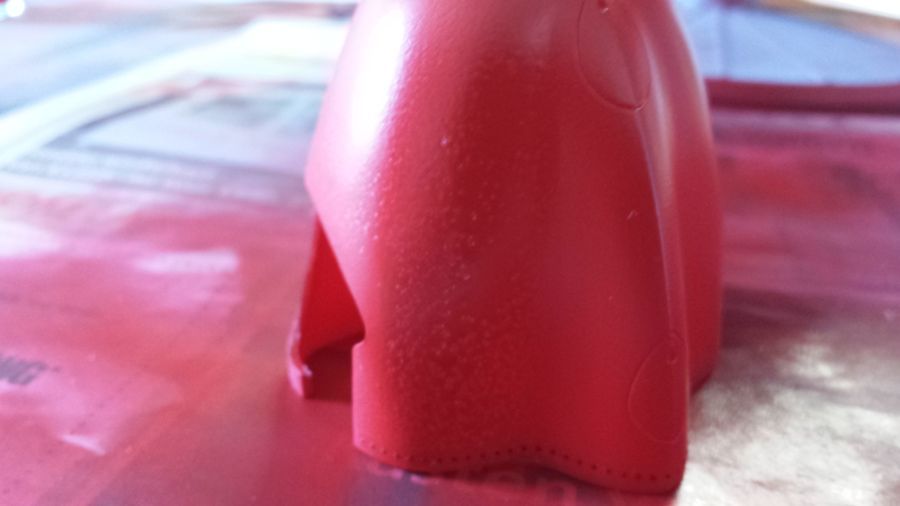
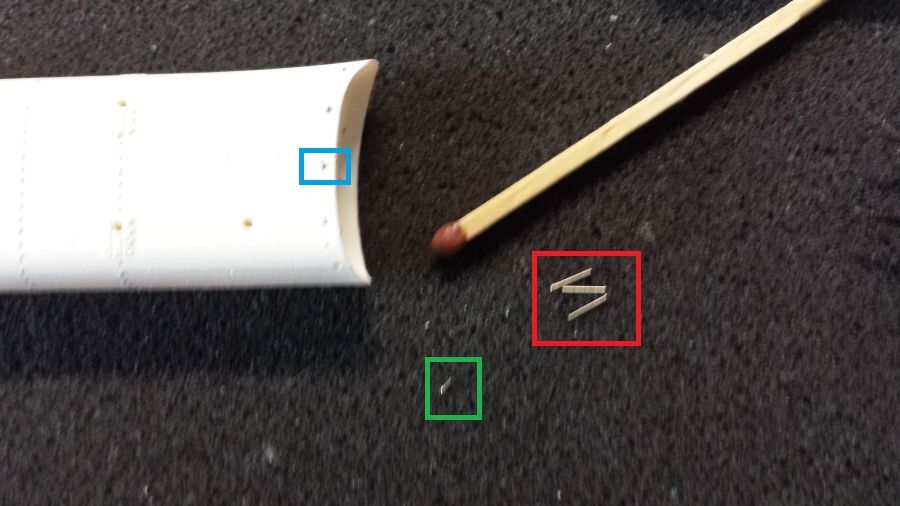
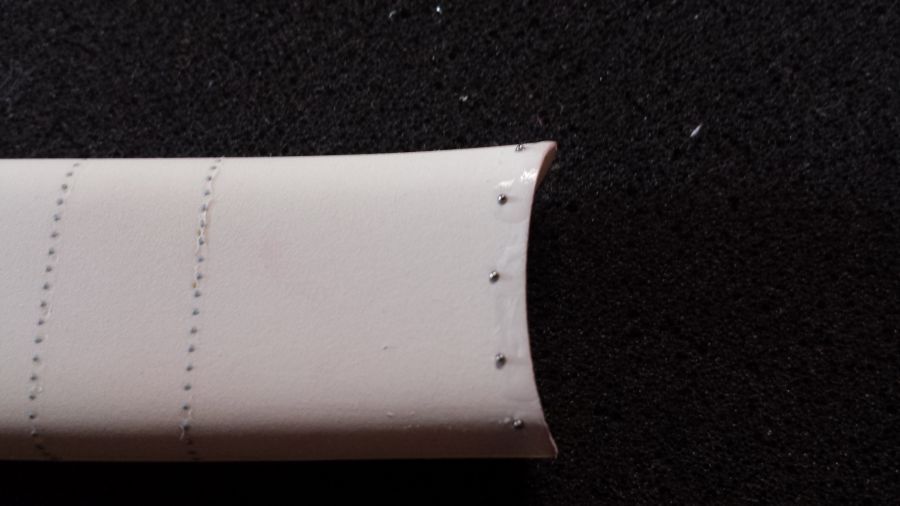
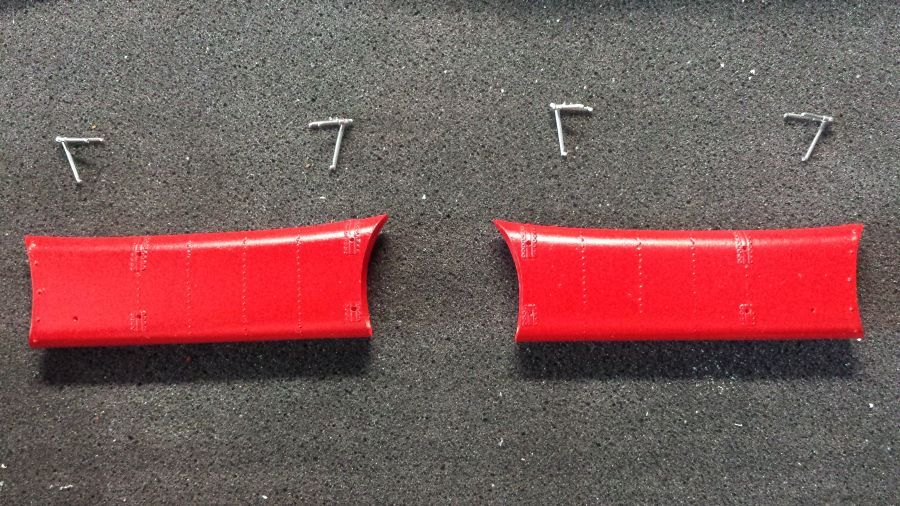
De tanks hebben deukjes op de plekken waar juist bubbeltjes moeten zitten (popnagels). Dit ga ik aanpassen.
The tanks have dents where there should be bumps (rivets). I will change this.
Dit geldt ook voor de randen van de neus en de achterkant. Omdat ik grote problemen verwacht bij het gebruik van echte popnagels, ga ik weer de transfers van Archer gebruiken. Dit mede omdat de popnagels rood moeten zijn. Het verven zou teveel problemen geven. Wellicht gebruik ik een paar nagels om de boel te fixeren.
This goes for the edges on the nose and back too. As i expect there will be a lot of problems using real rivets, i will use the Archer transfers again. Also because the rivets need to be red. Painting would be too much trouble. Maybe i will use some real rivets to attach the covers.
De popnagels zijn geplaatst.
The rivets have been applied.
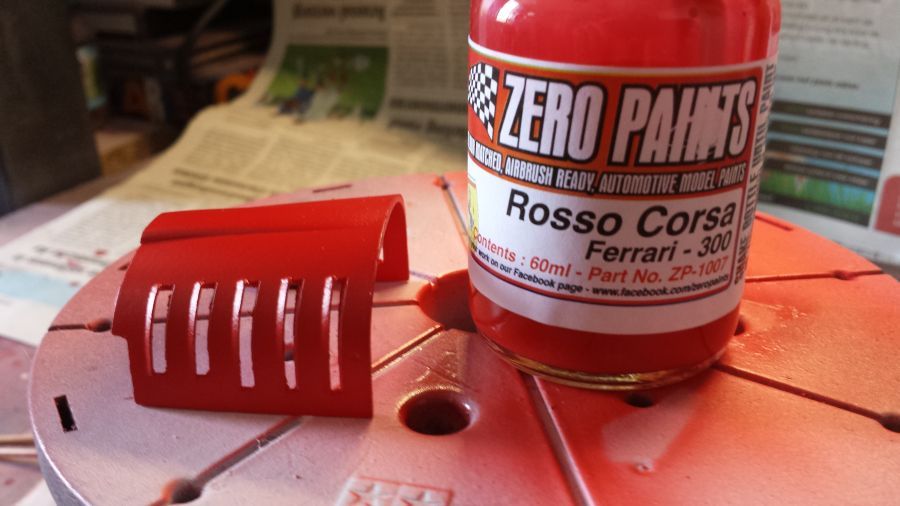
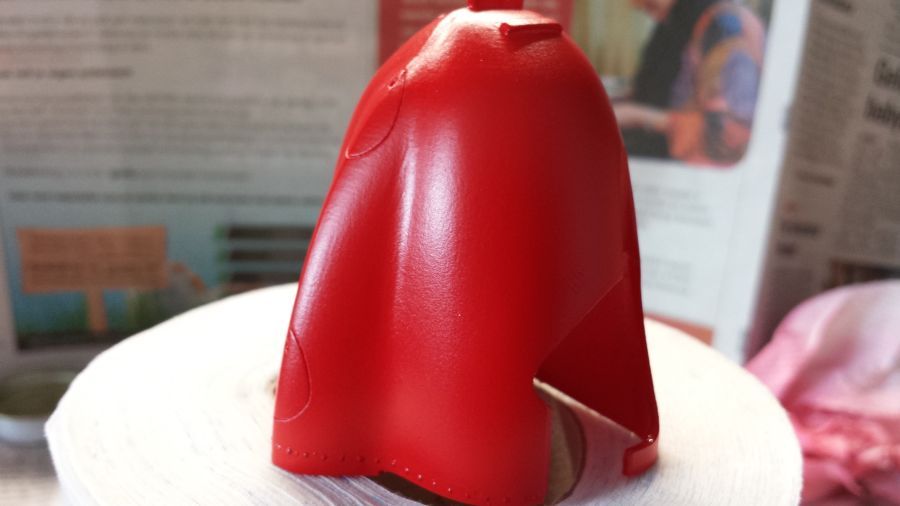
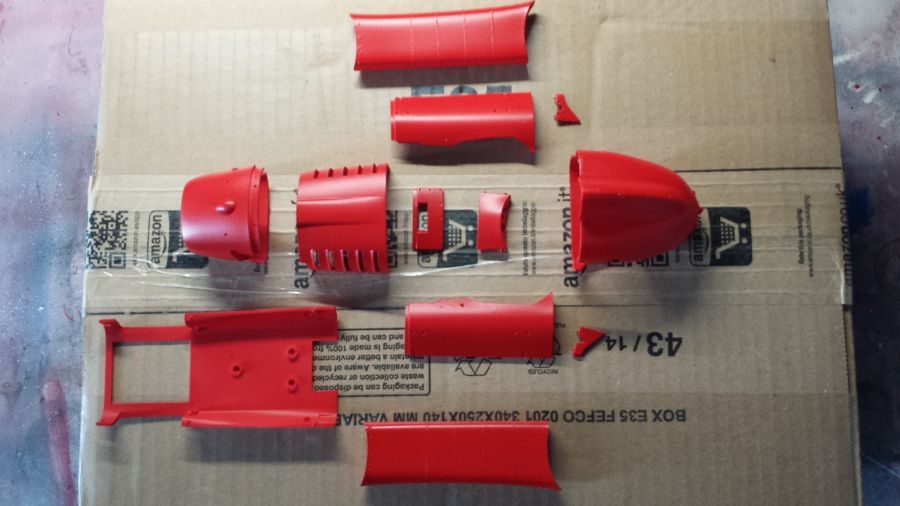
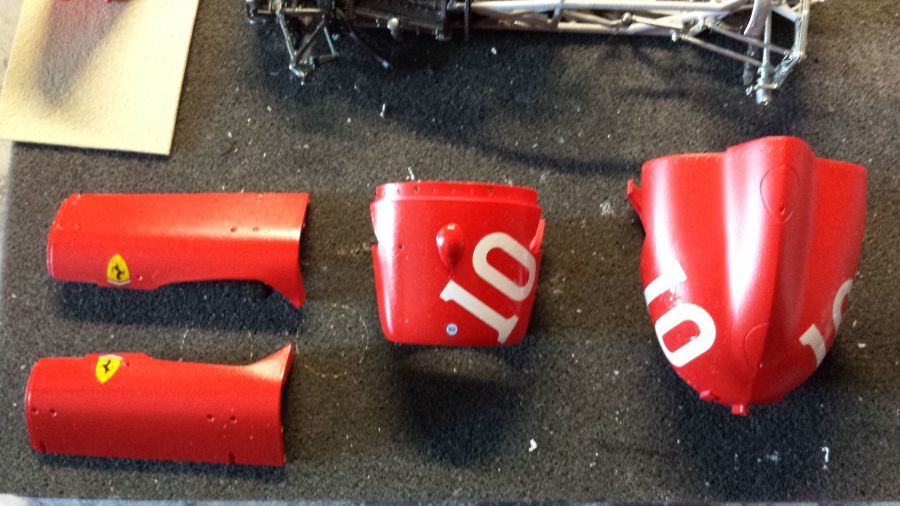
Het plaatwerk kan worden gespoten. Ik gebruik Zero Paints ZP-1007 Rosso Corsa Ferrari 300. Misschien niet donker genoeg, maar ik doe het ermee.
The body work can be painted. I use Zero Paints ZP-1007 Rosso Corsa Ferrari 300. Maybe not dark enough, but i will do with it.
Het laatste deel geeft problemen. Ik zal deze helemaal schoonmaken en opnieuw spuiten.
Some problems with the last part. I will clean it and spray it again.
Schoongemaakt, nieuwe popnagels, opnieuw primer.
Cleaned, new rivets, new primer.
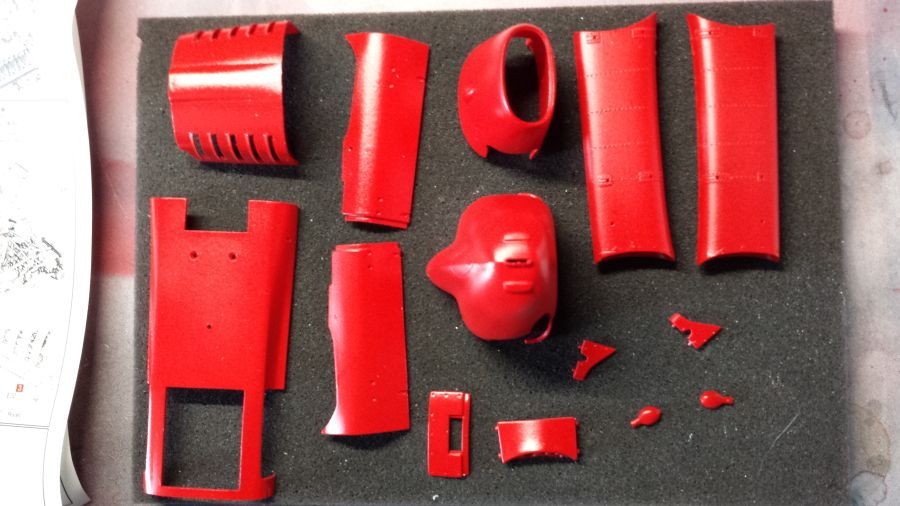
Daarna weer Zero Paints. Veel beter.
After this Zero Paints again. Much better.
Daarna de popnagels op de tanks.
Next rivets on the tanks.
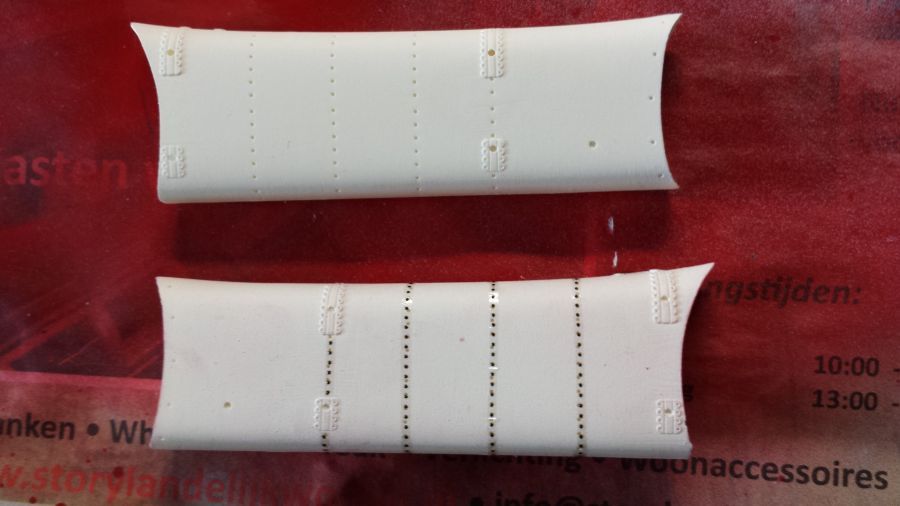
Ik knip een paar popnagels (rood) naar een korter formaat (groen) en plak deze in de gaatjes (blauw).
I will cut a few rivets (red) to shorten them (green) and glue them in the holes (blue).
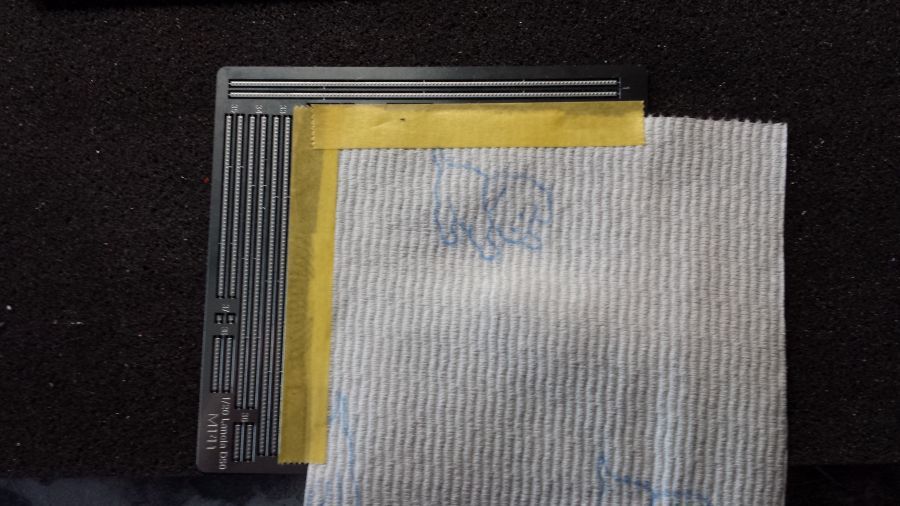
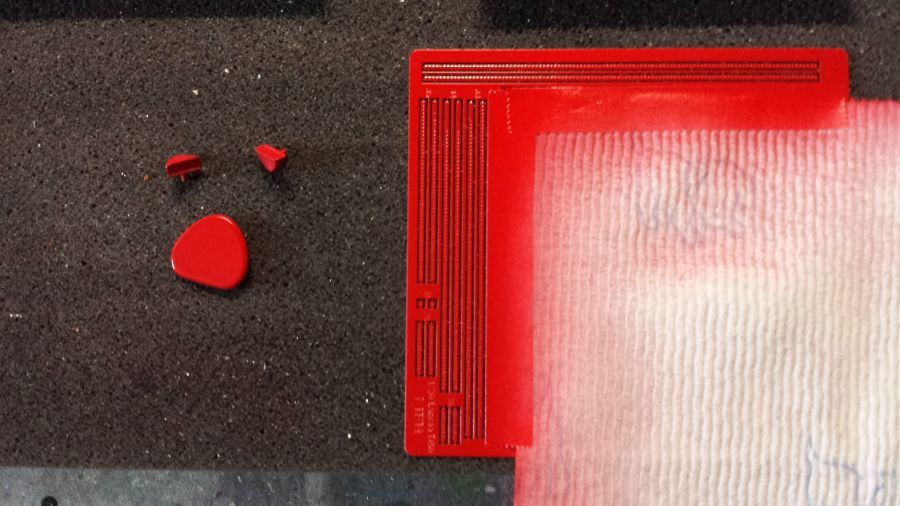
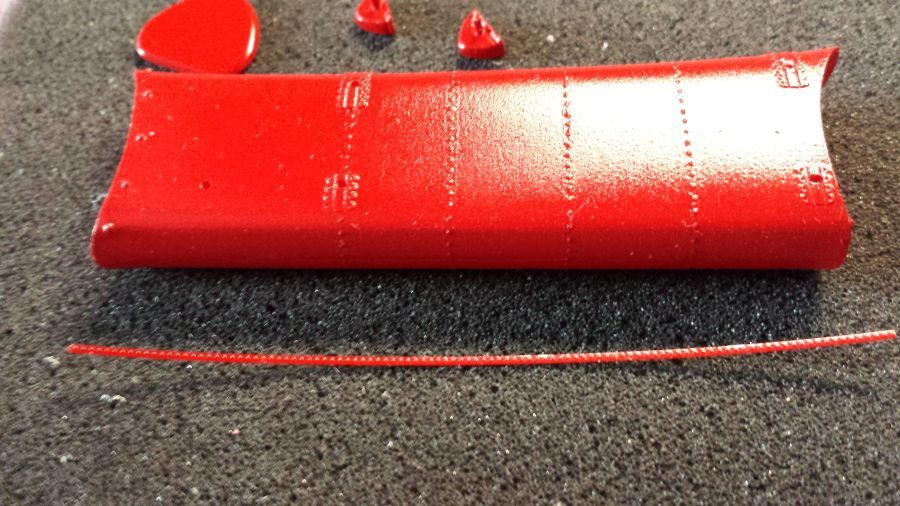
Eigenlijk kun je nu beter de etched strips op de tanks plakken. Ik heb het echter later gedaan. Een groot aantal delen is gespoten. Nu de lak erover. En laten drogen. Na het plakken van de decals komen er nog een paar lagen lak overheen.
It would be better to apply the etched parts to the tanks now. I have done it later. Many parts have been painted. Now clear coat over it. And let it dry. After applying the decals another few layers of clear will be applied.
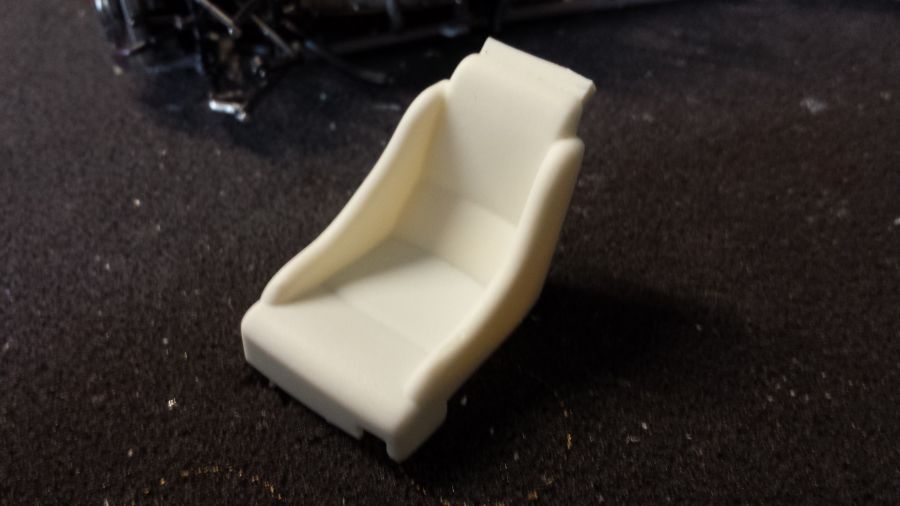
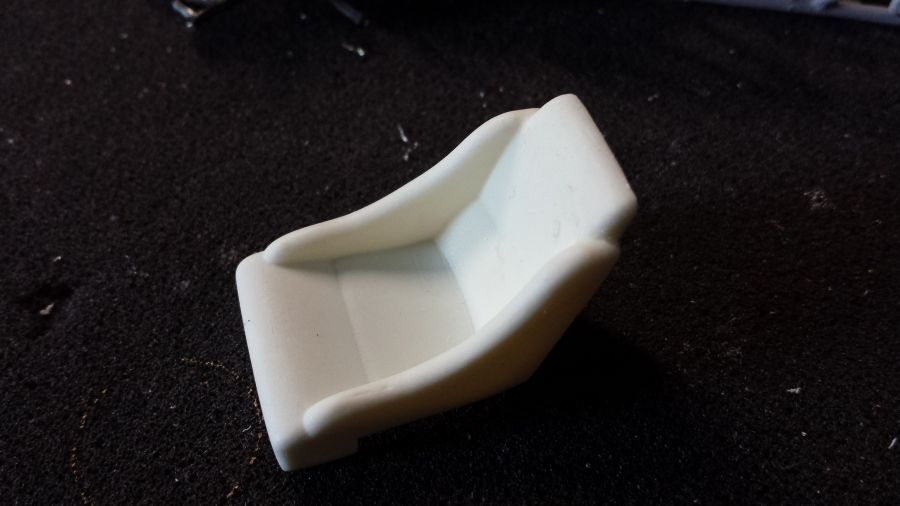
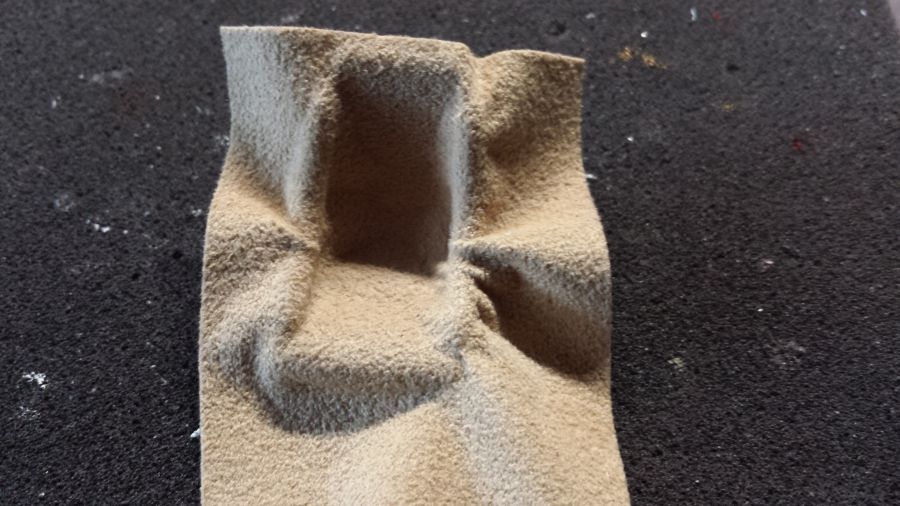
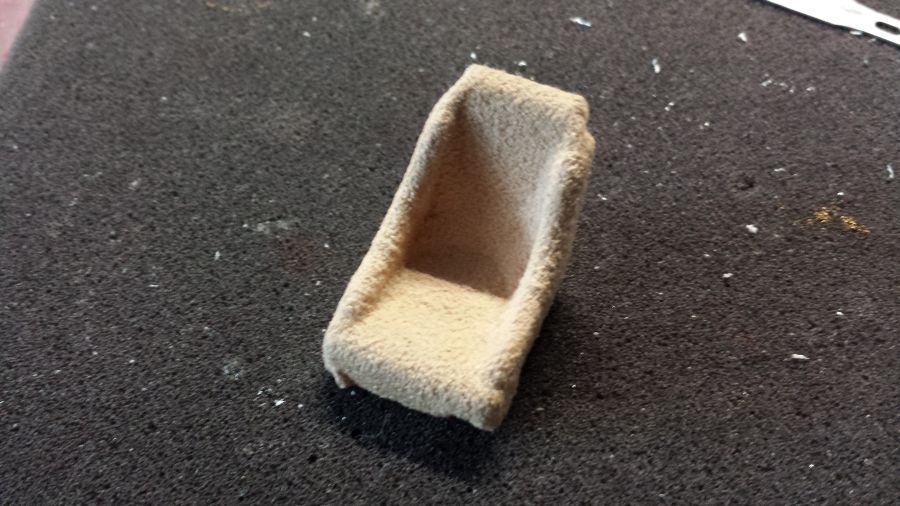
Intussen door met de stoel. Wat overtollig giethars verwijderen. Daarna rood spuiten met Tamiya TS-13
Meanwhile i continue with the seat. Cut off some excess resin. Next spray it red with Tamiya TS-13.
Ondertussen plak ik vast de decals op hun plaats.
Meanwhile i am putting the decals into place.
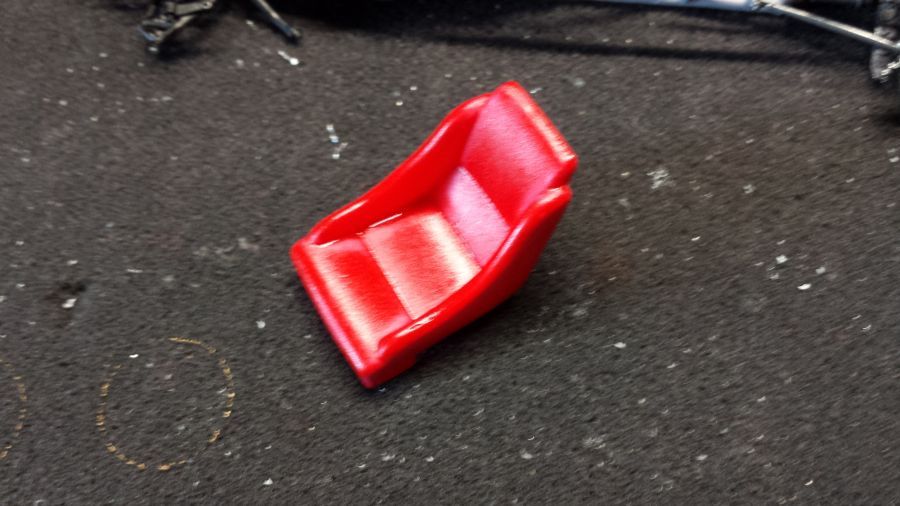
Terwijl de lak verder is gespoten, ga ik verder met de stoel.
While more lacquer has been sprayed, i will continue with the seat.
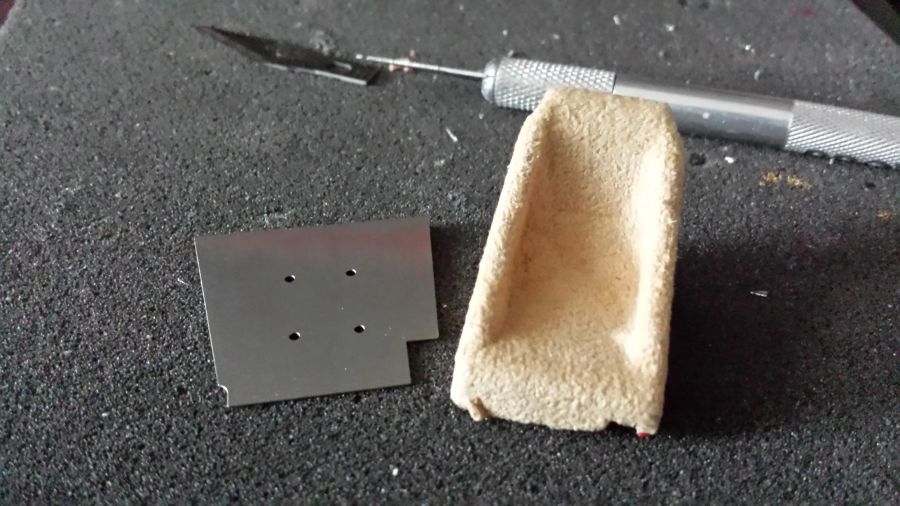
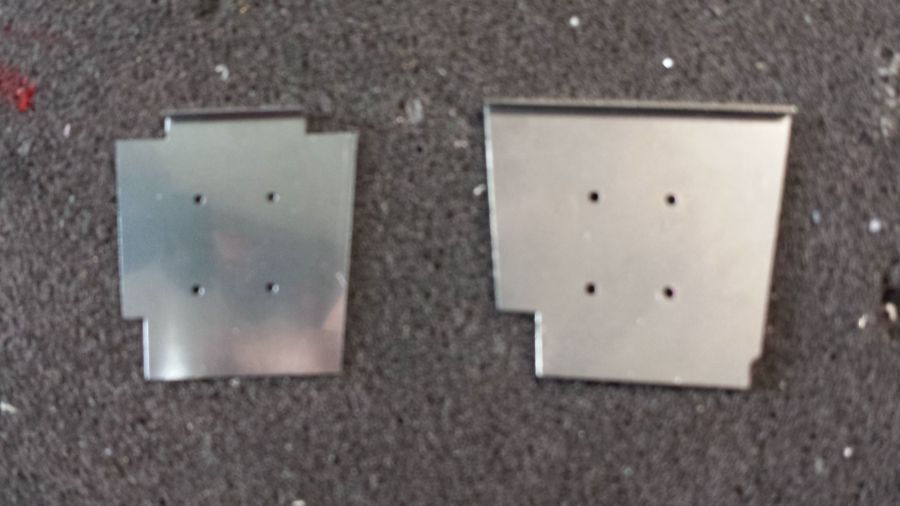
Wees er zeker van dat je de juiste nr 81 gebruikt van de etched (dus de linker).
Be sure to use the correct one of the etched nr 81 (so the left one).
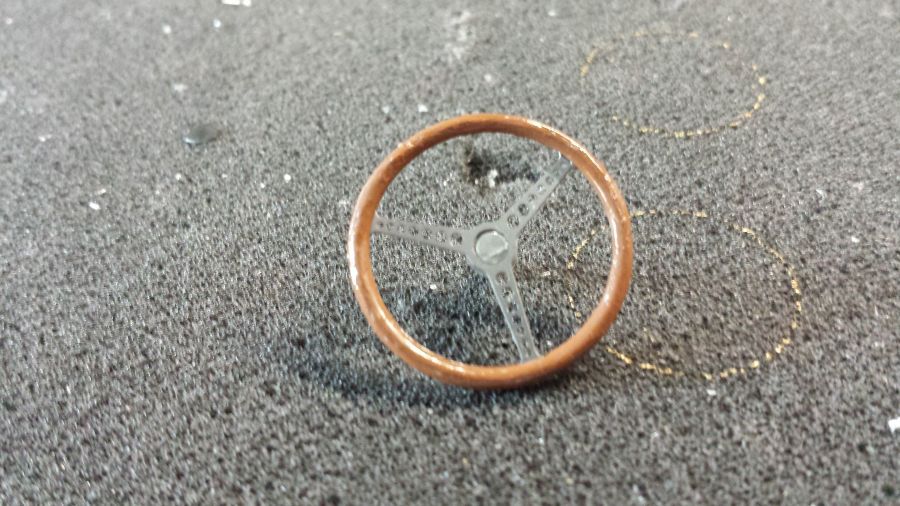
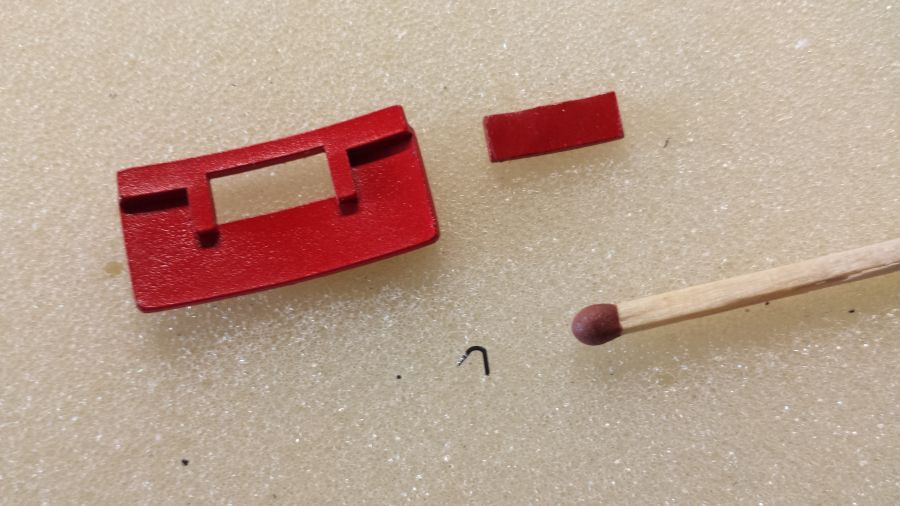
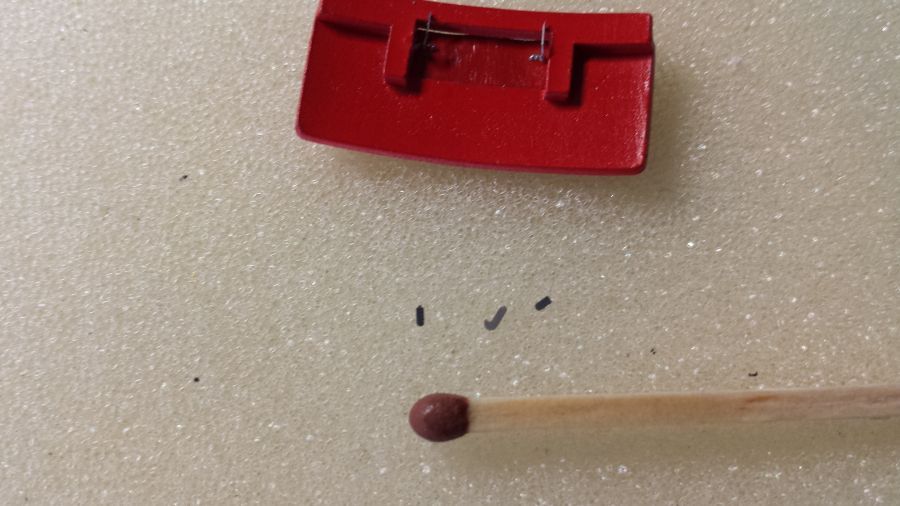
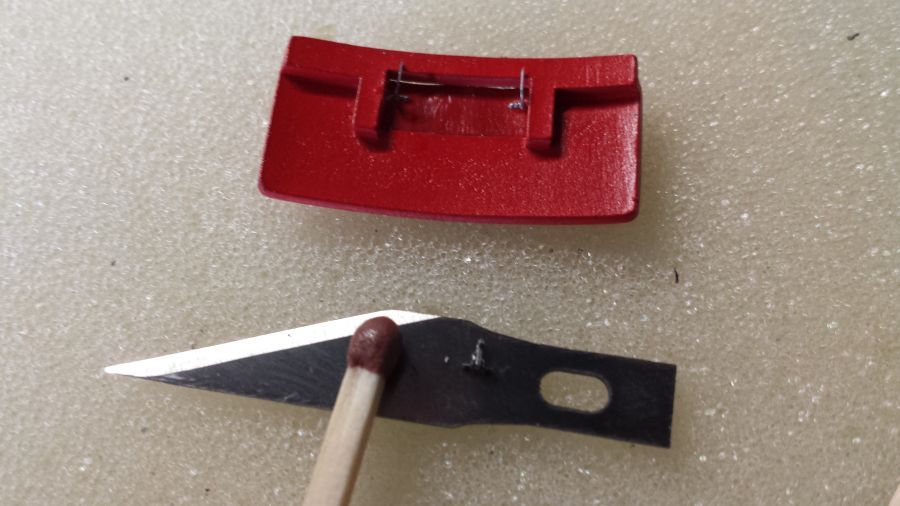
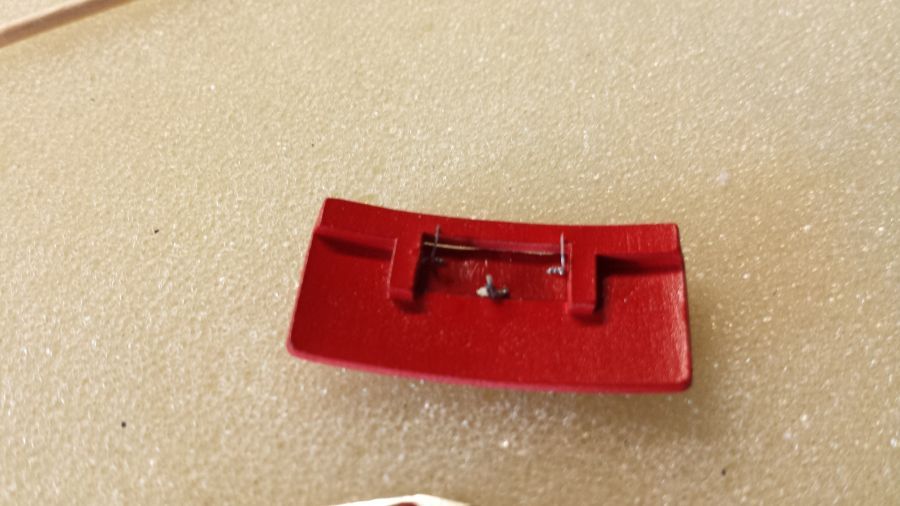
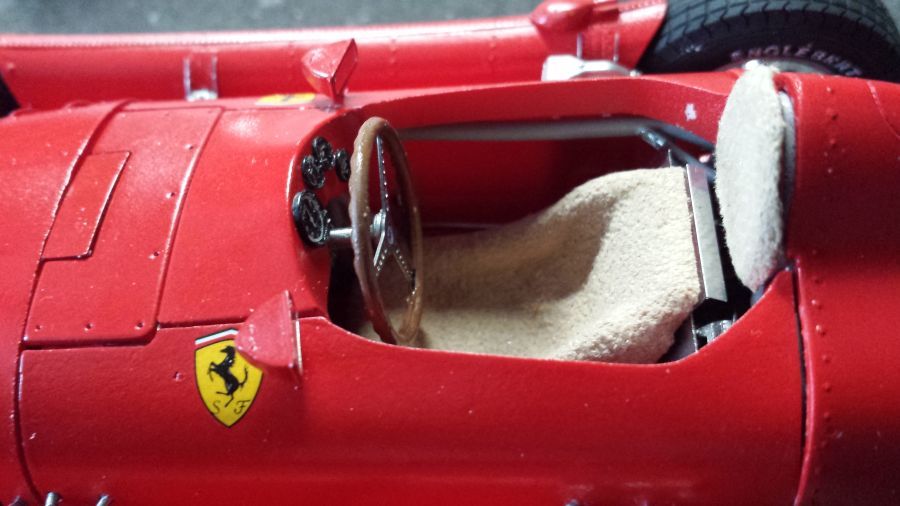
Het maken van het stuurwiel. Geverfd met Vallejo 875 Beige Brown.
The making of the steering wheel. Painted with Vallejo 875 Beige Brown.
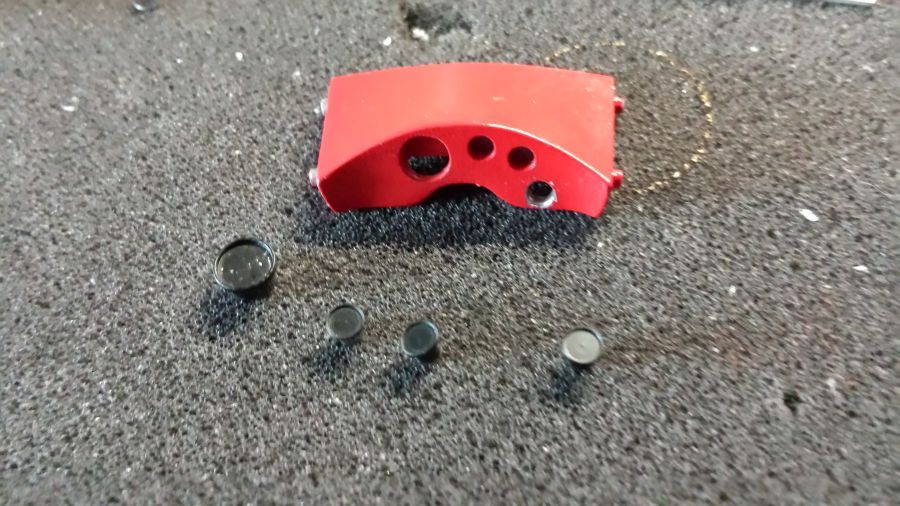
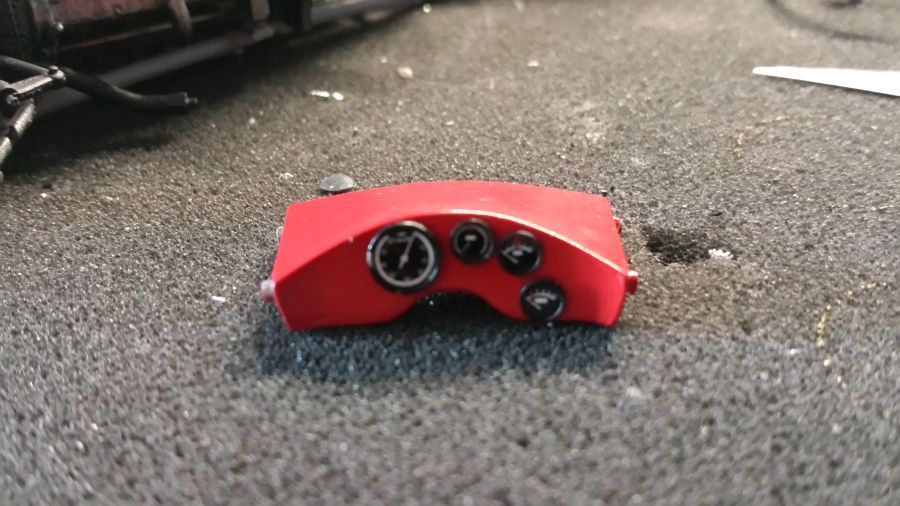
Daarna volgt het dashbord.
Next is the dash.
Dan met de remtrommels.
Then the brake drums.

Hetzelfde voor de voorwielen.
The same goes for the front wheels.
De tank wordt alvast in elkaar gezet.
Pre-assembly of the tank.
Door met de brandstoftanks.
Going further with the fuel tanks.
De smalle streepjes moeten rood gespoten. Dus maskeren die onderdelen.
The small parts need to be sprayed red. So first some masking.
Ik ga nu de etched strips aanbrengen voor het afwerken van de boven- en onderkant van de tanks. Je kunt dit dus beter doen, voordat je de tanks gaat spuiten.
I will now attach the etched strips to cover the top and down side of the tanks. It would be better to do this, before you paints the tanks.
De steunen zijn aangebracht en even passen voor de juiste afstand.
The supports have been attached and a test fit for the correct distance.

Meer onderdelen voor de tanks.
More parts for the tanks.
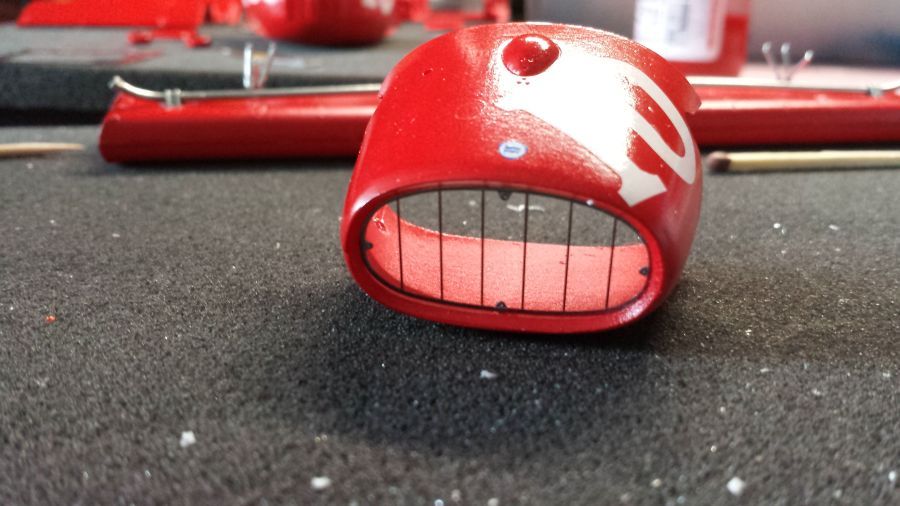
Voor de Lancia Ferrari D50 van Luigi Villoresi gebruik ik de bovenste grill.
For the lancia Ferrari D50 from Luigi Villoresi i will use the top grill.
De uitlaten zijn gespoten met Tamiya TS-42 Light Gun Metal.
The exhausts have been sprayed with Tamiya TS-42 Light Gun Metal.

De montage van de tank even passen.
Doing a test fit on mounting the tank.

Wat microwerk aan de luchtinlaat.
Some micro work to the air intake.
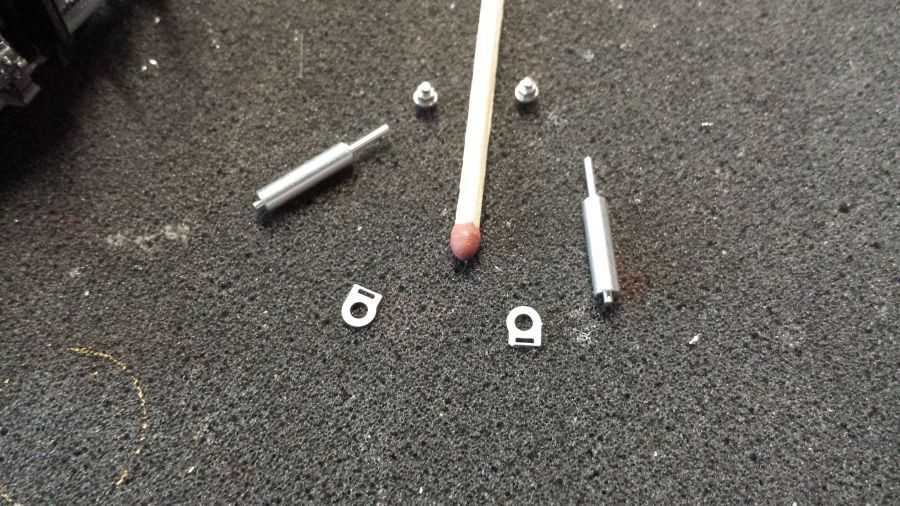
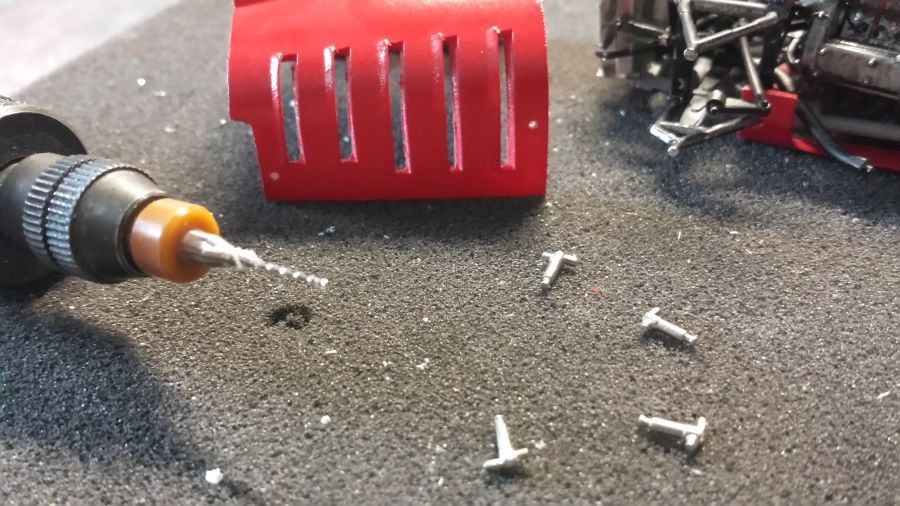
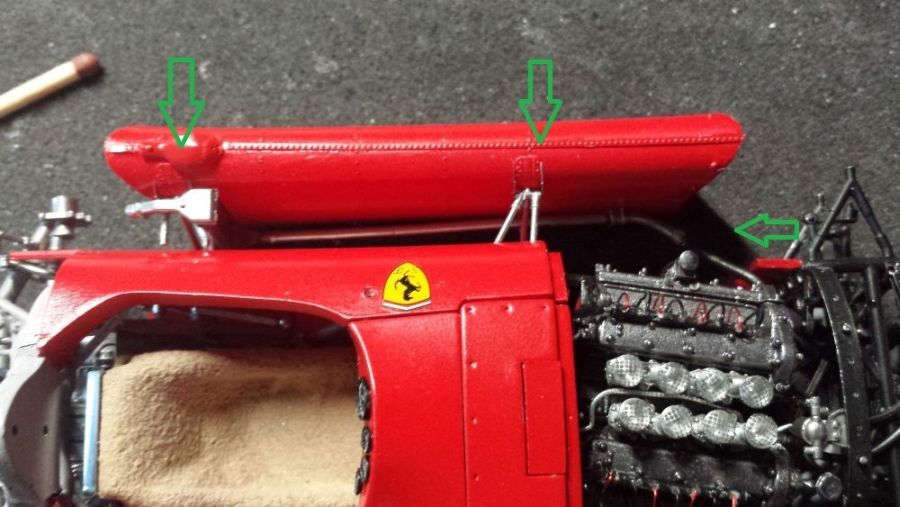
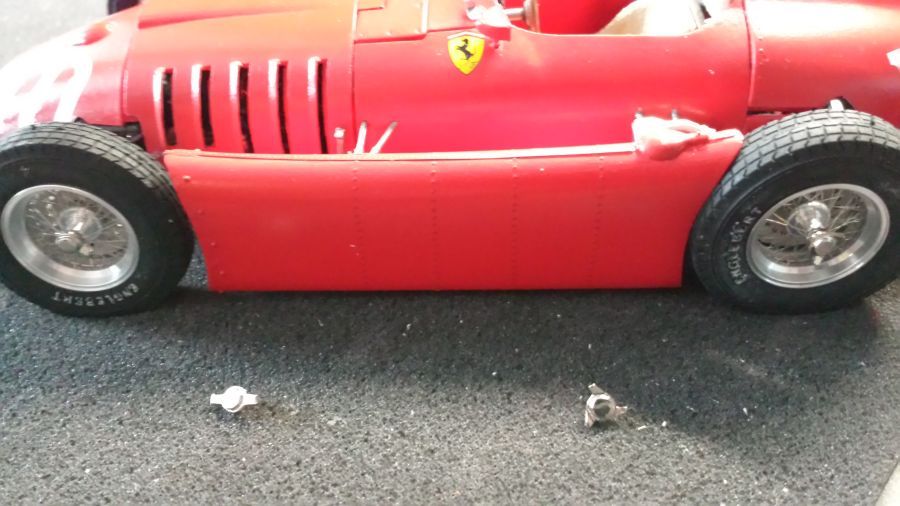
De steunen voor de tanks worden normaal gesproken met de zwarte schroefen bevestigd. Ik kies ervoor dit te doen met metalen pennen. De kans op het kapotdraaien van de openingen is daarmee weg.
The supports for the tanks are normally attached with the black screws. I chose to do it with metal pins (rivets 1.6 mm). This way there is no chance of damaging the openings.
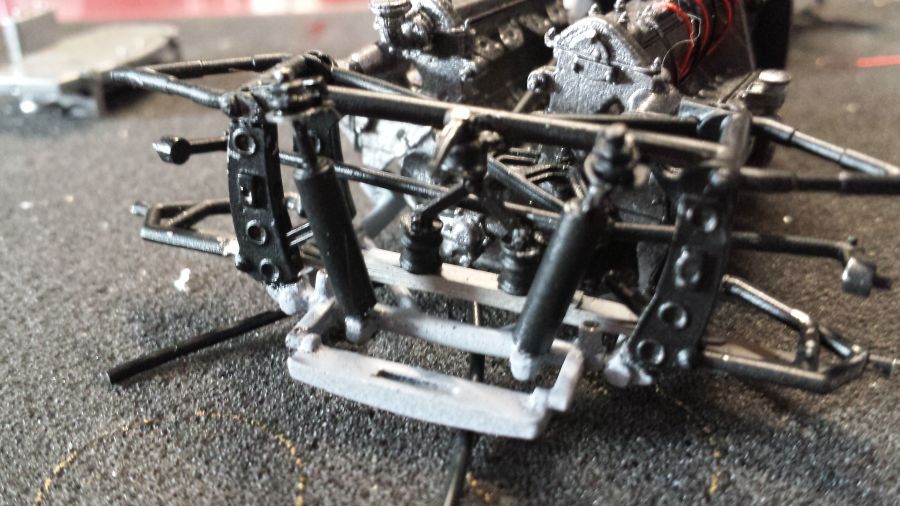
Daarna wordt het frame aan de bodem bevestigd. Let op dat de delen van de voorwielophanging in de uitsparing vallen.
After this the frame will be attached to the floor. Mind the parts of the front wheel suspension fit in the cuts.
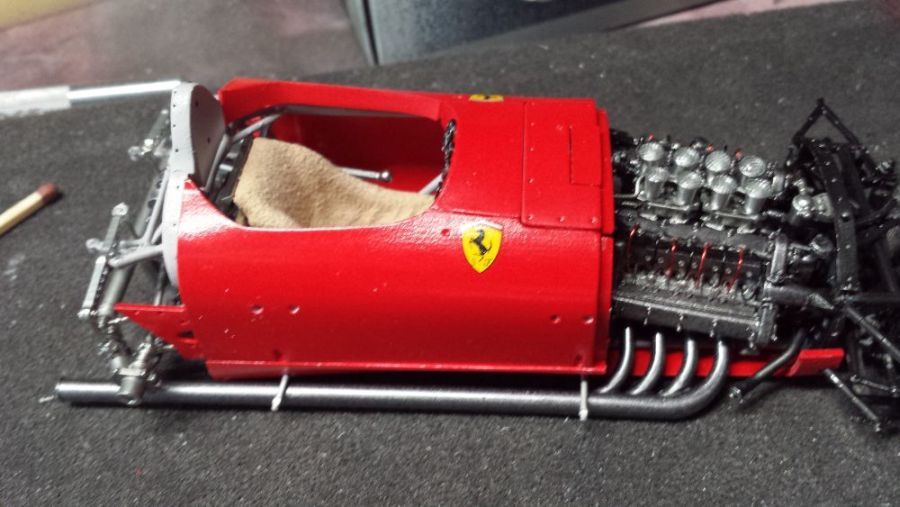
Daarna verder met wat plaatwerk.
Then continue with some bodywork.
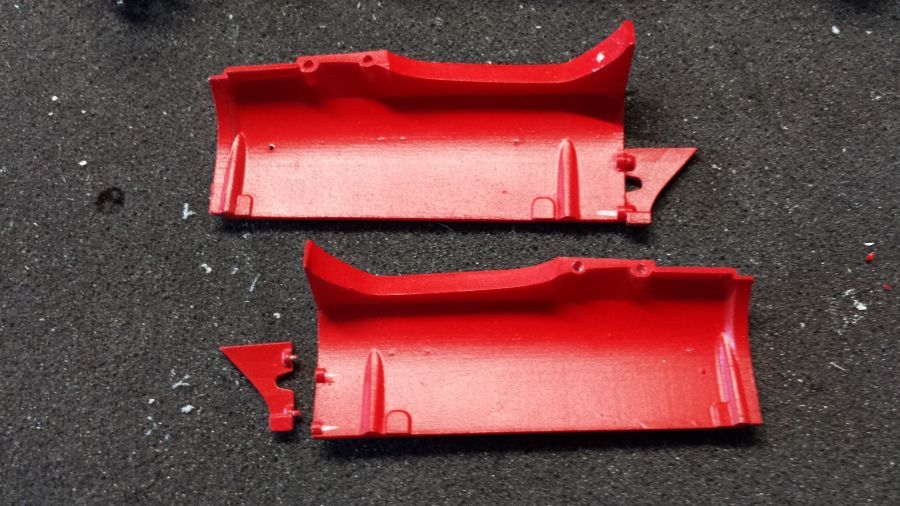
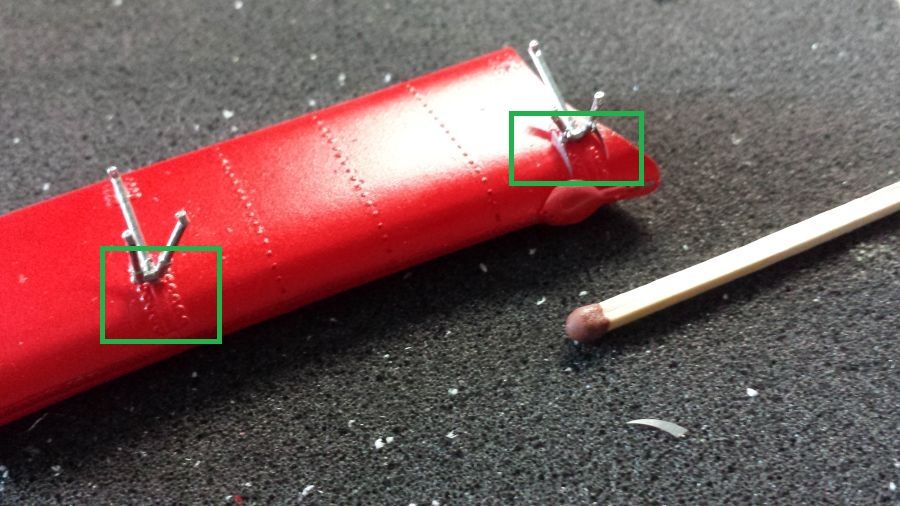
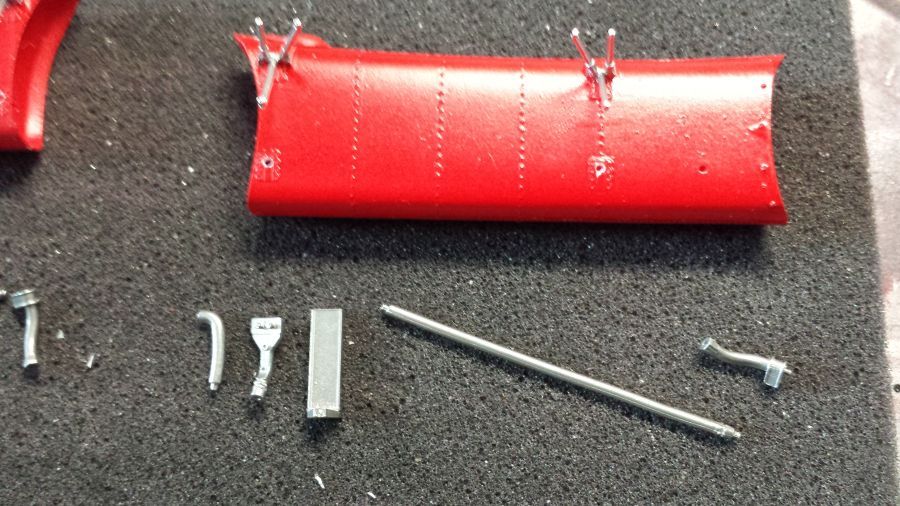
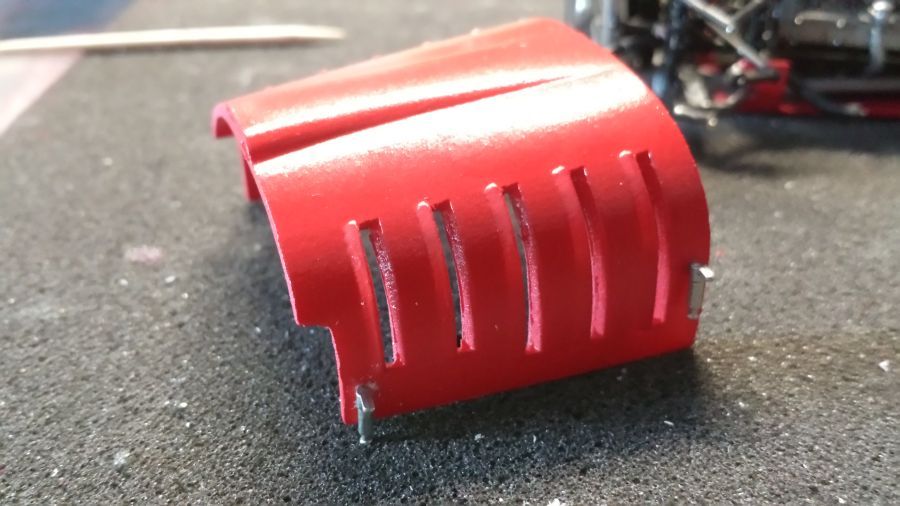
De gaatjes worden geboord in de motorkap voor de sluitingen.
The holes are drilled to the engine hood for the fasteners.
Dan eerst even een test of de tanks passen. Alle steunen worden goed gepositioneerd. Dit geldt ook voor de leidingen.
First i will do a test fit for the tanks. All supports will be bent into position. This goes for the pipes too.
Dan worden de uitlaatpijpen geplaatst.
Then the exhausts are put into place.
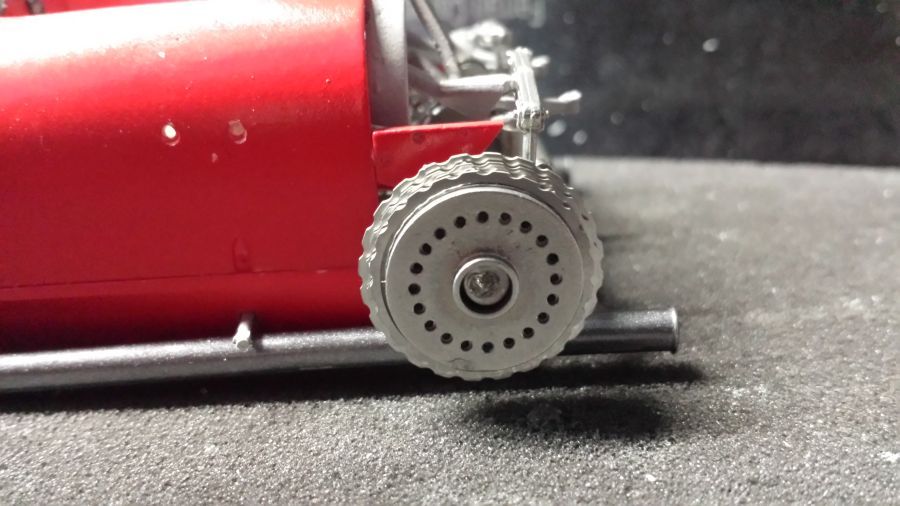
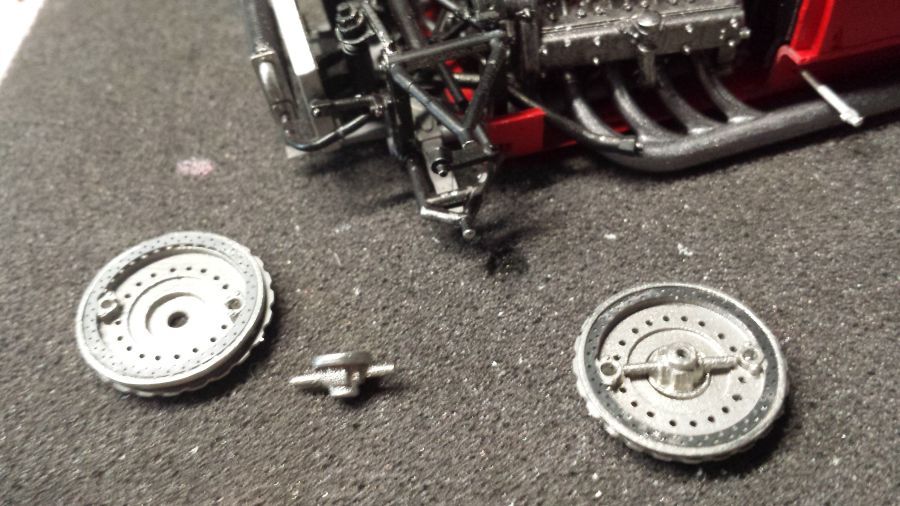
Dan worden de remtrommels gemonteerd.
Next is mounting the break discs.
Dan de tank voordat de achterkap erop kan.
Then the tank before the rear hood can be mounted.
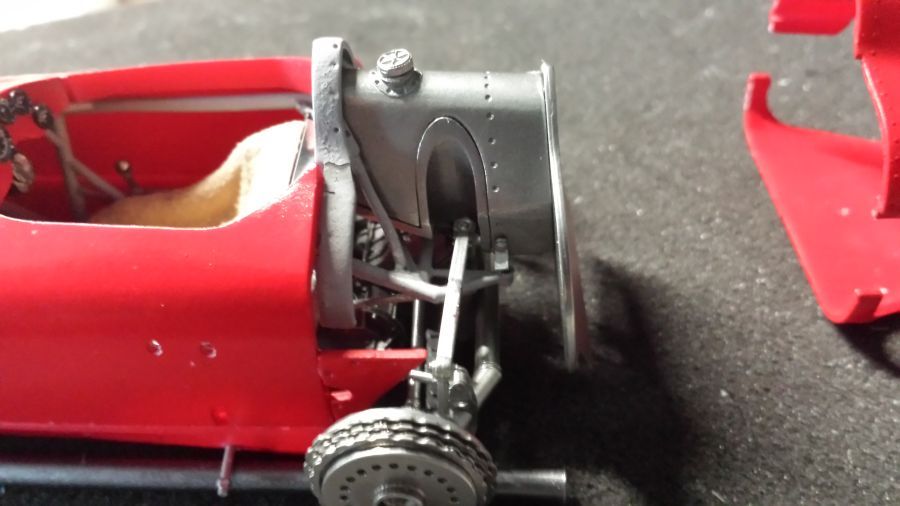
De kap en de neus gaan erop.
The hood and the nose are attached.
Dan de tanks.
Next are the tanks.

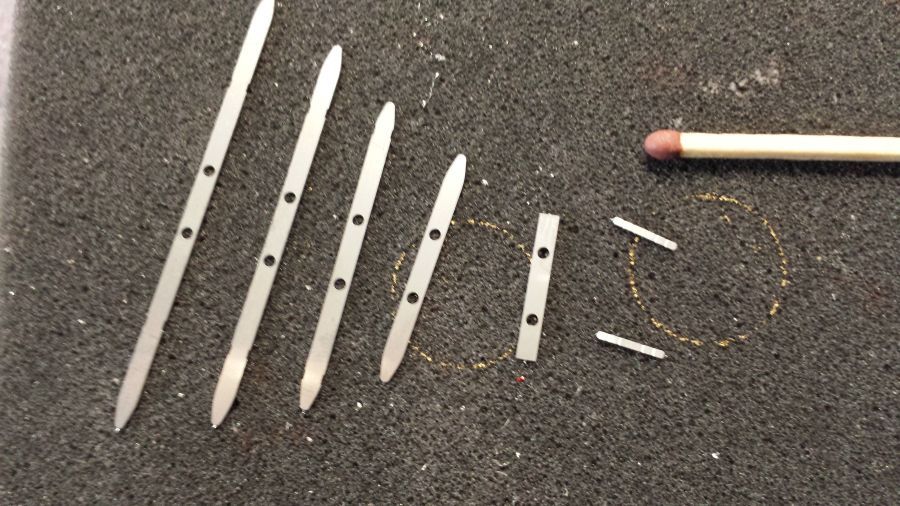
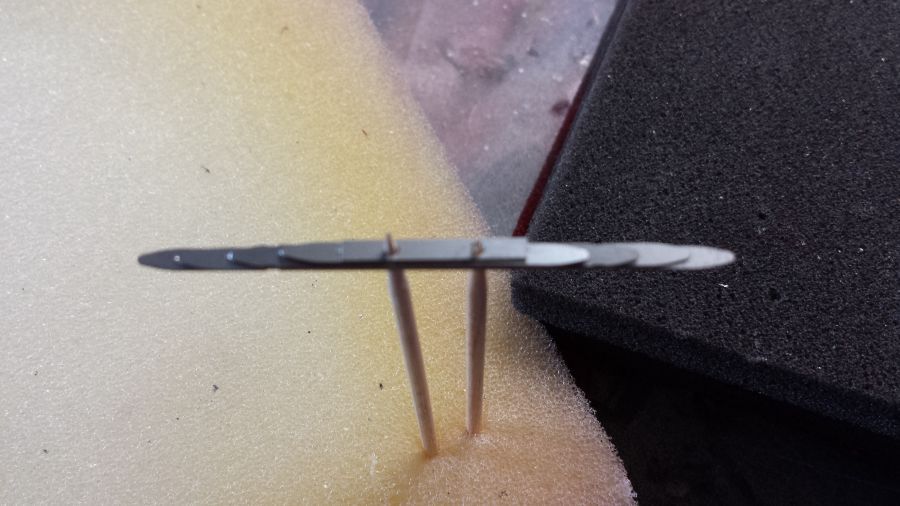
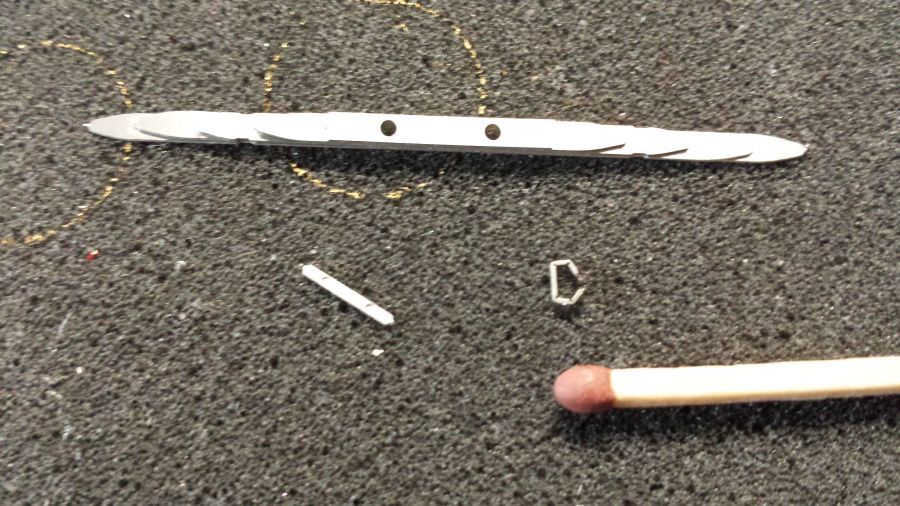
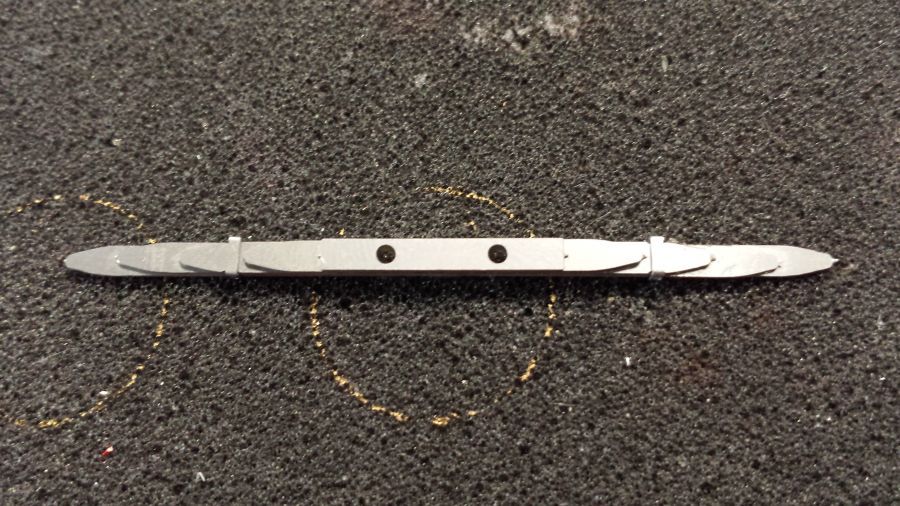
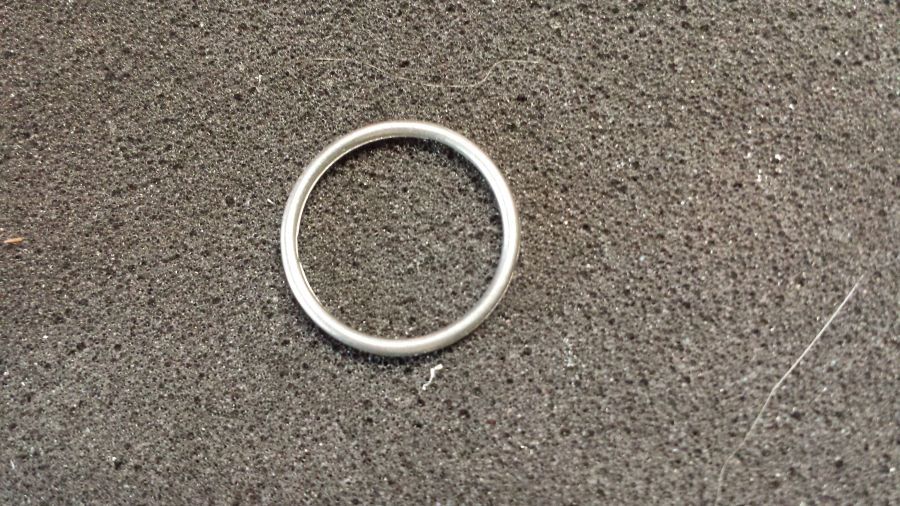
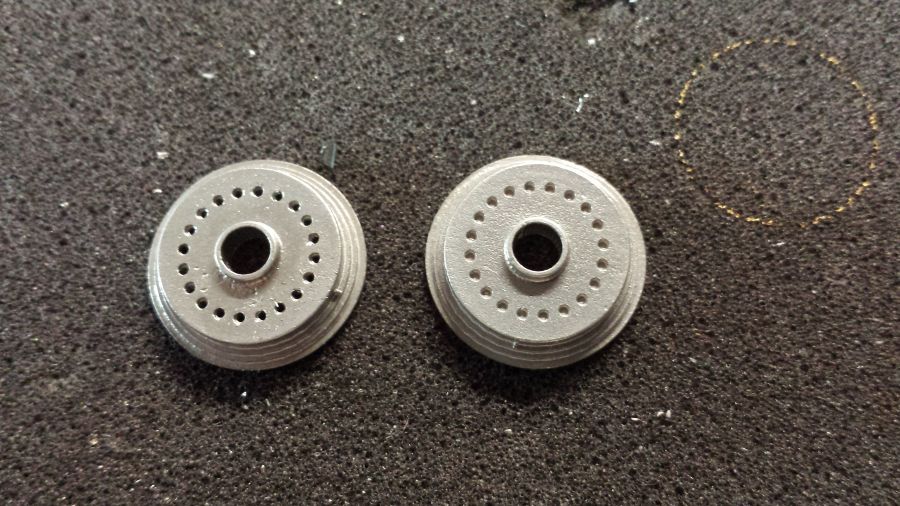
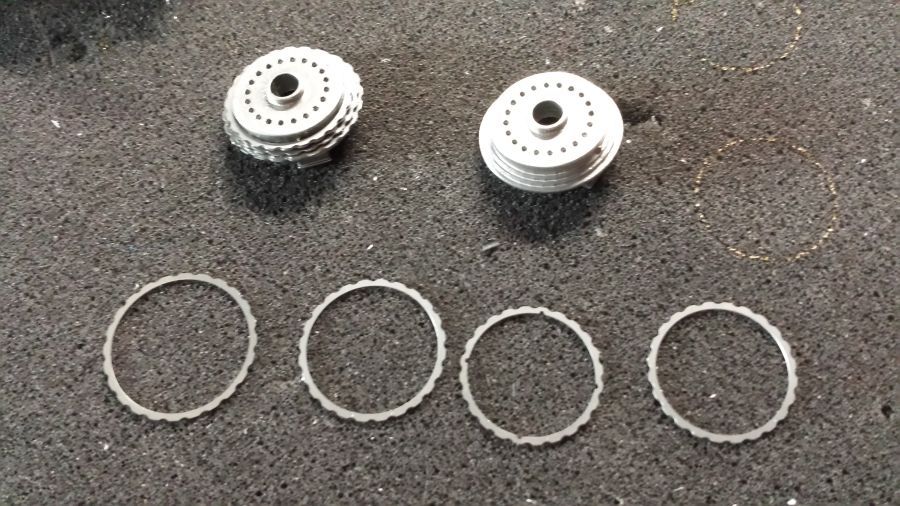
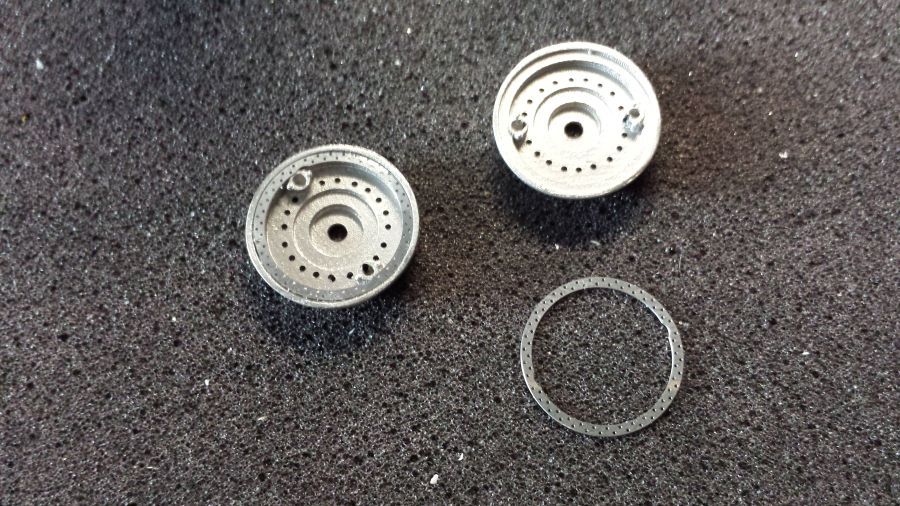
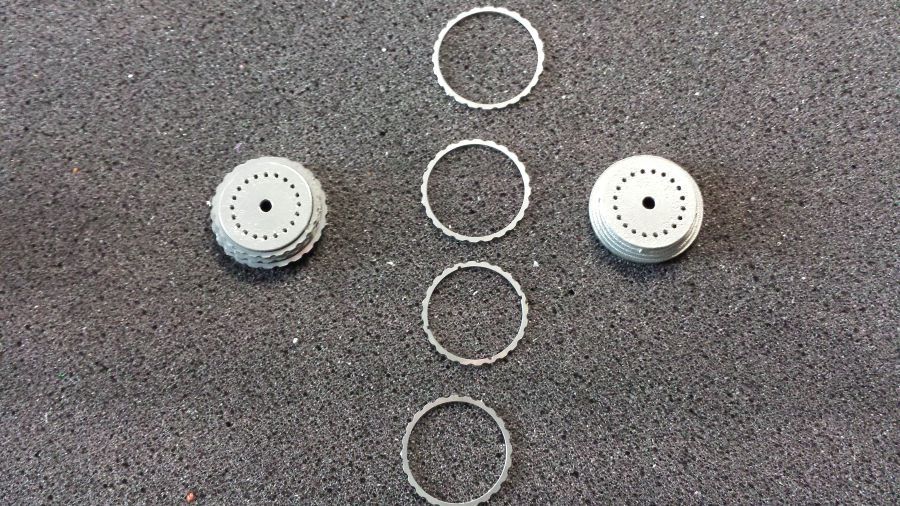
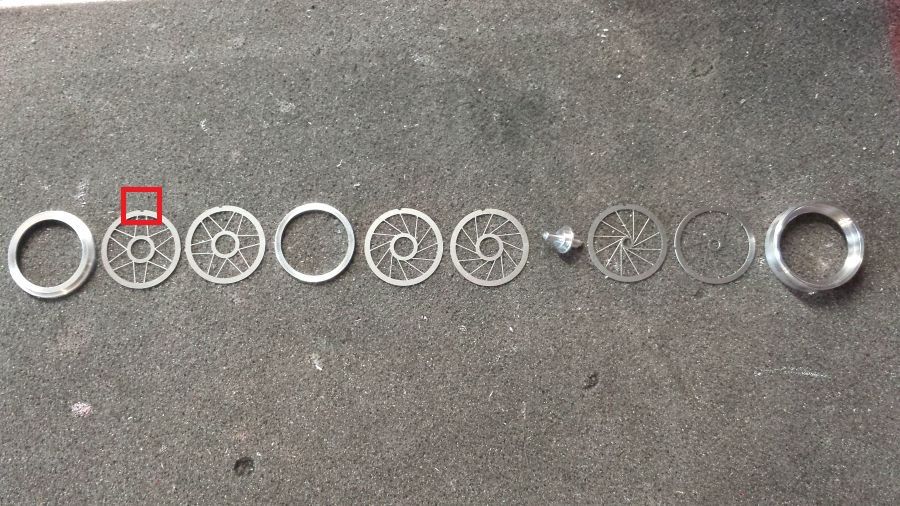
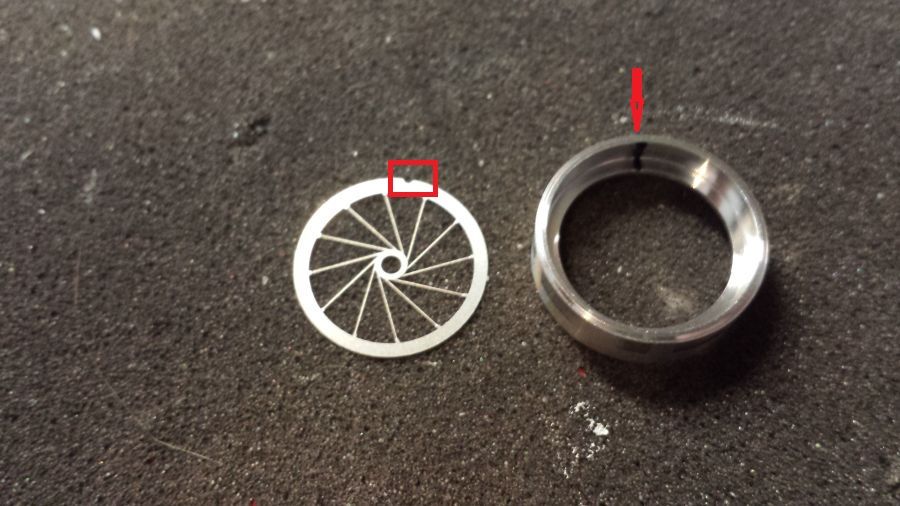
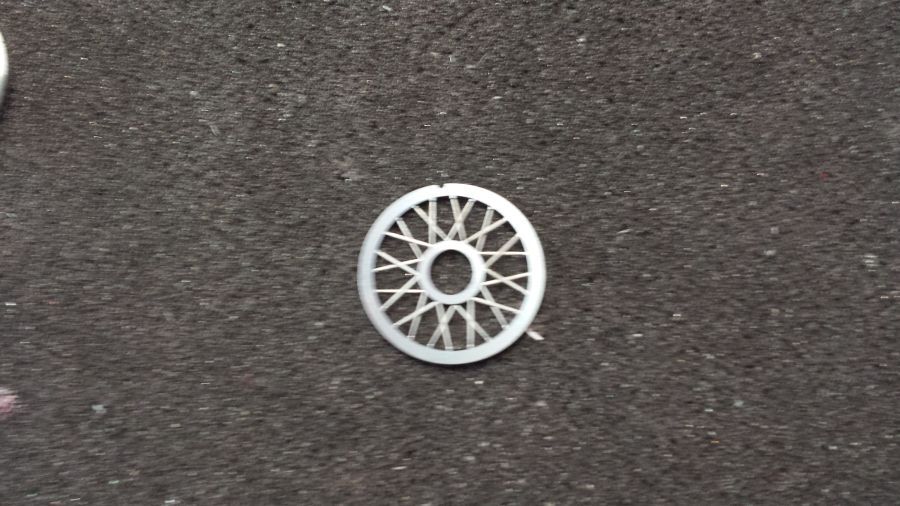
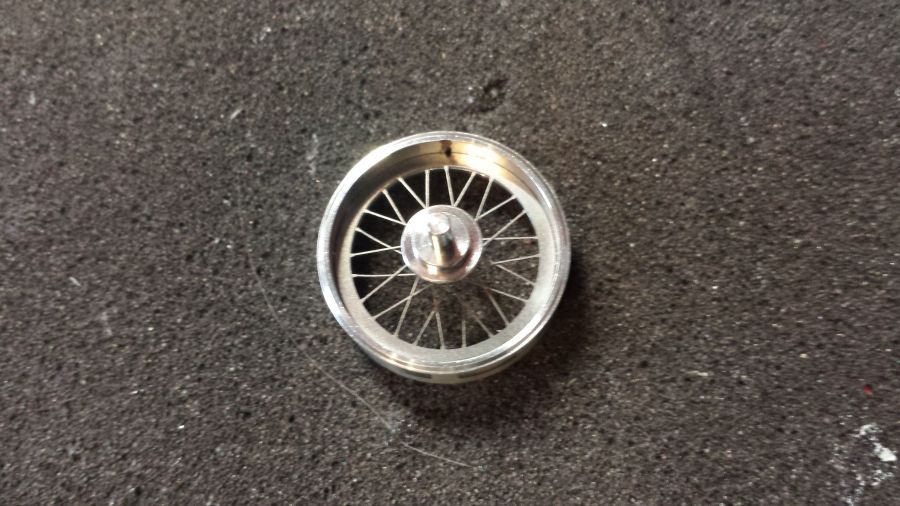
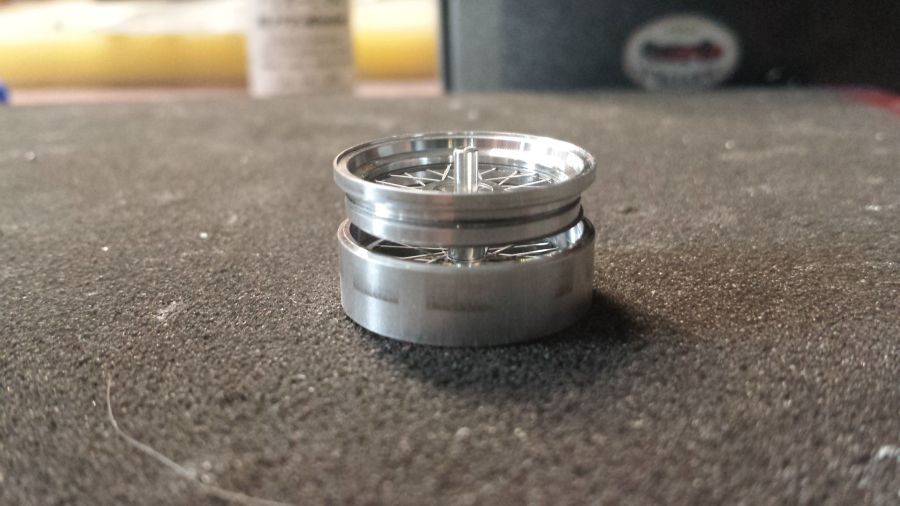
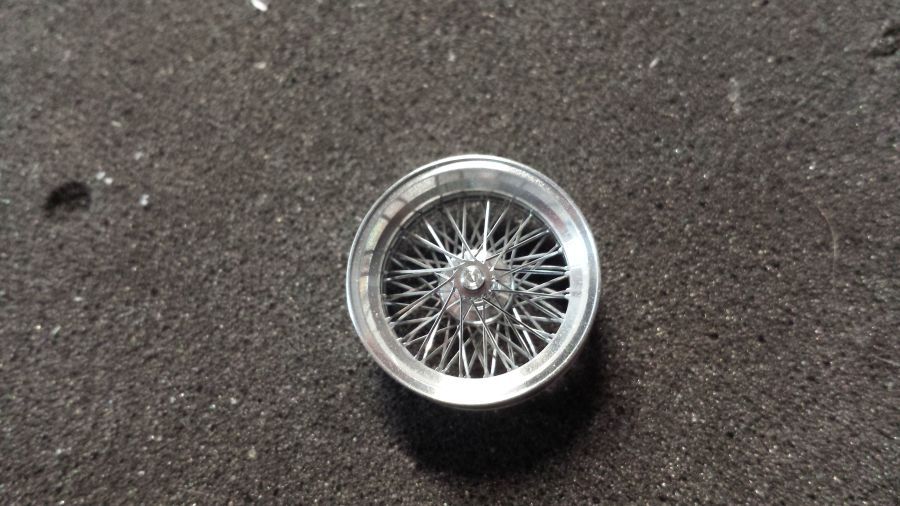
Dan het maken van de velgen. Een secuur werkje. Zorg dat alle inkepingen gelijk met elkaar vallen. Ik heb alle onderdelen uitgestald en werk van rechts naar links. Iedere keer leg ik de 2 etched onderdelen op elkaar. Op de velg heb ik met de stift een streep gezet aan de binnenkant. Dit gebruik ik om de inkepingen uit te lijnen. Als alles is opgestapeld, druk ik alles bij elkaar en laat er dunne superlijm tussen lopen.
Next are the rims. A tough job. Be sure all notches match. I have put all the parts together and work from right to left. Each time i put the 2 etched parts together. On the rim i have drawn a line on the inside with a felt pen. This i will use to line up the notches. When everything is stacked, i press it together and let flow some thin superglue.
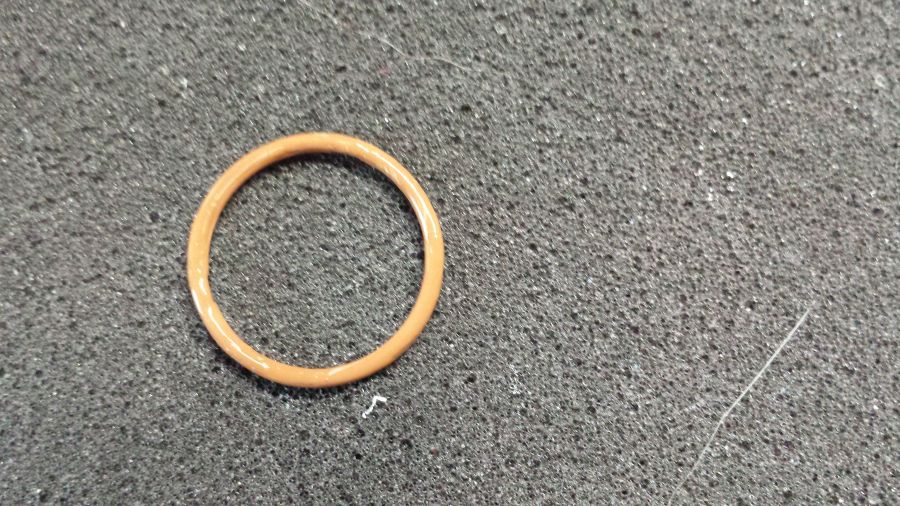
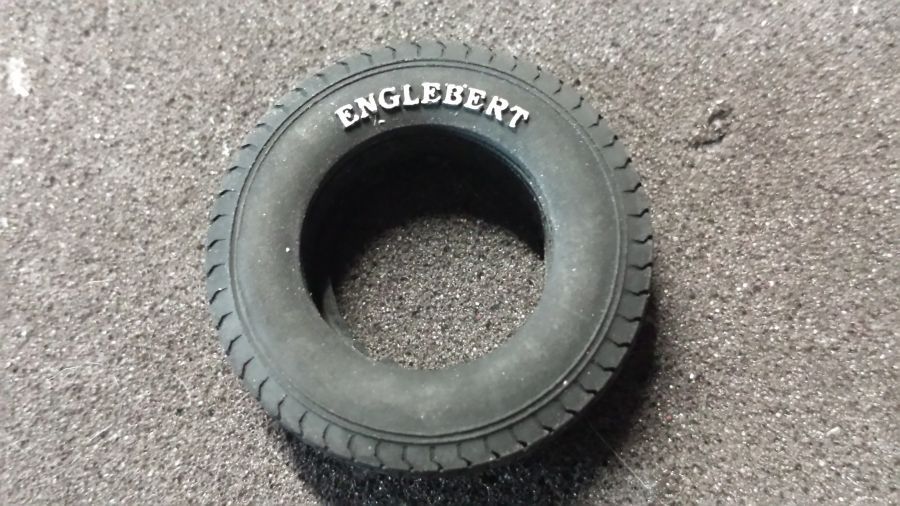
De belettering van de banden wordt geverfd met een Pilot Choose gelpen.
The writing on the tires was done with a Pilot Choose gel pen.
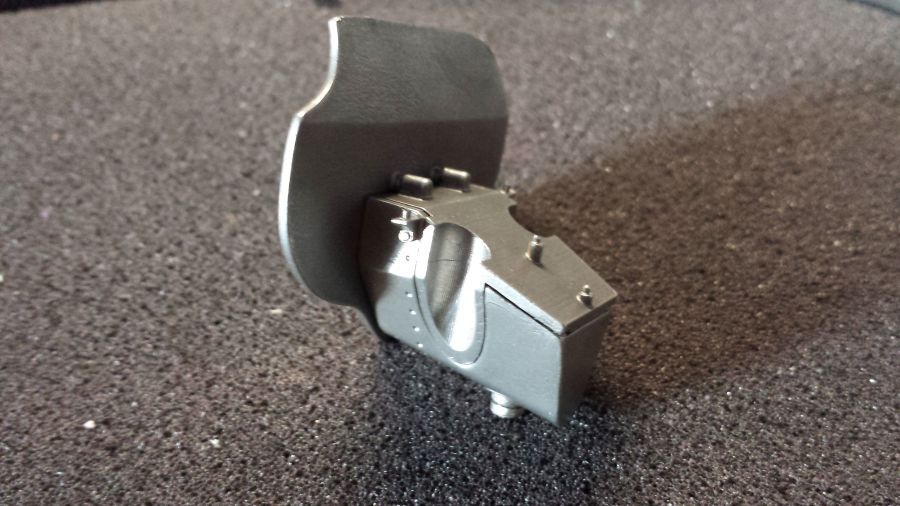
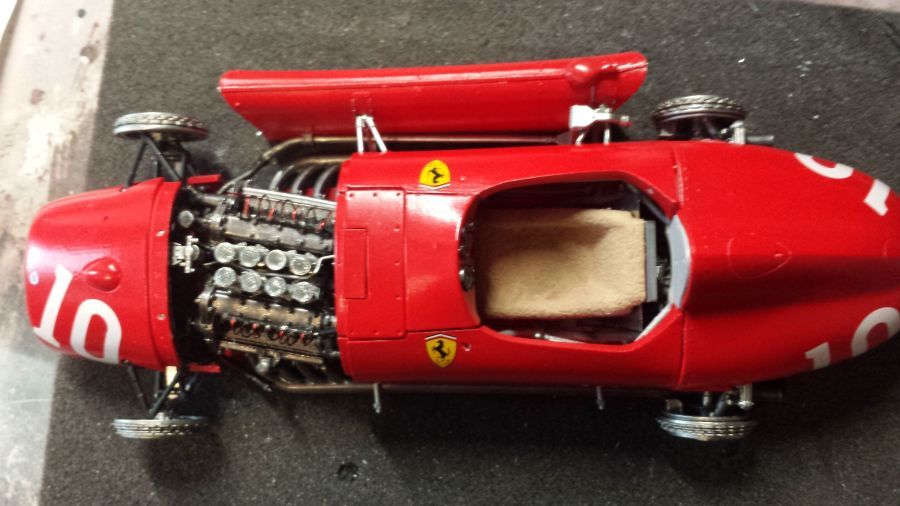
De wielen worden op de wagen gezet en de hoofdsteun.
The wheels are mounted to the car and the headrest.
De spiegels. Dit keer stickers, meestal etched plaatjes.
The mirrors. Stickers this time, most of the time etched plates.
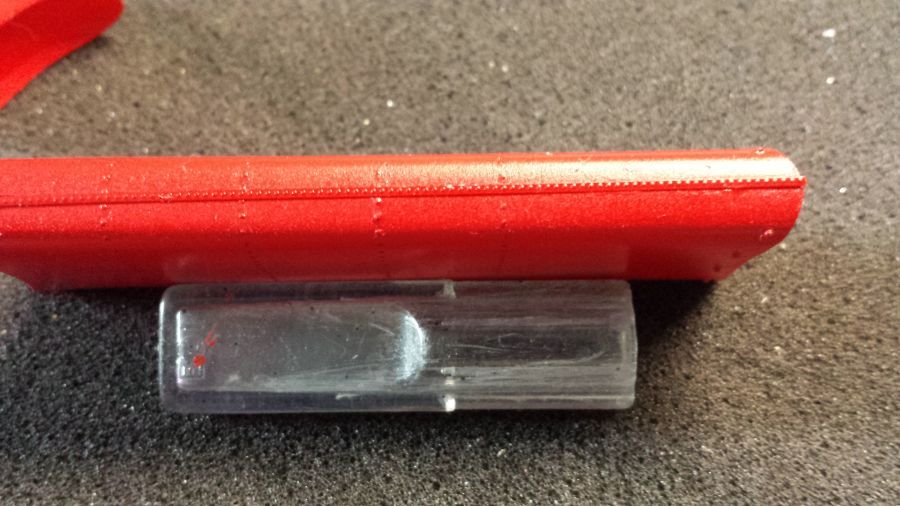
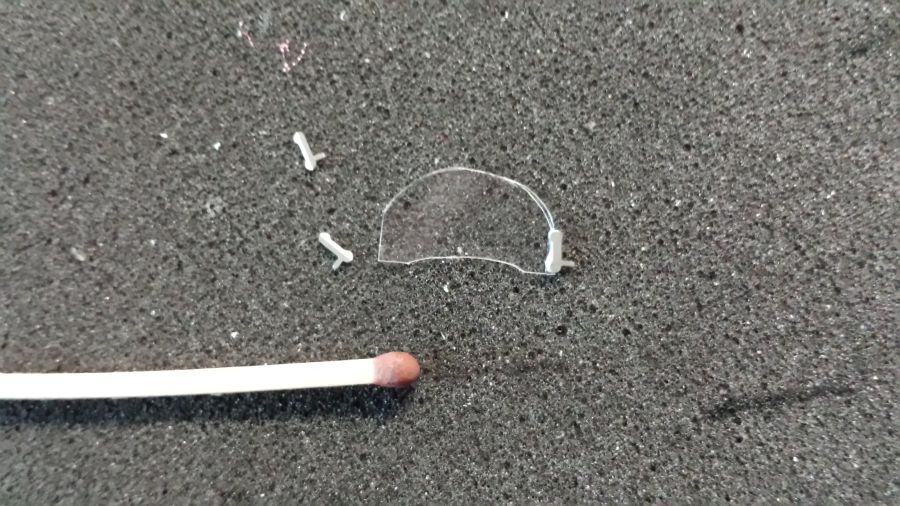
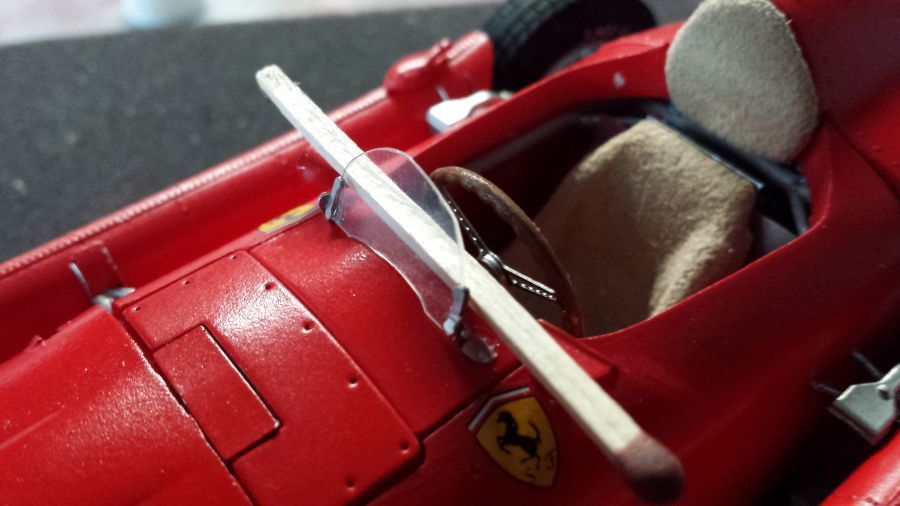
Het ruitje moet nog geplaatst worden. Eerst wordt het doorzichtige plastic met behulp van het malletje op maat geknipt. Daarna worden de steuntjes er aan gelijmd. Hiervoor gebruik ik Micro Kristal Clear. Deze lijm droogt onzichtbaar op. Volgens mij zou gewone witte houtlijm ook moeten werken.
The windows has to be attached. First the clear plastic is cut to size by using the template. Then the supports are glued to it. I use Micro Kristal Clear. This glue is invisible when dry. I think plain white wood glue would work too.

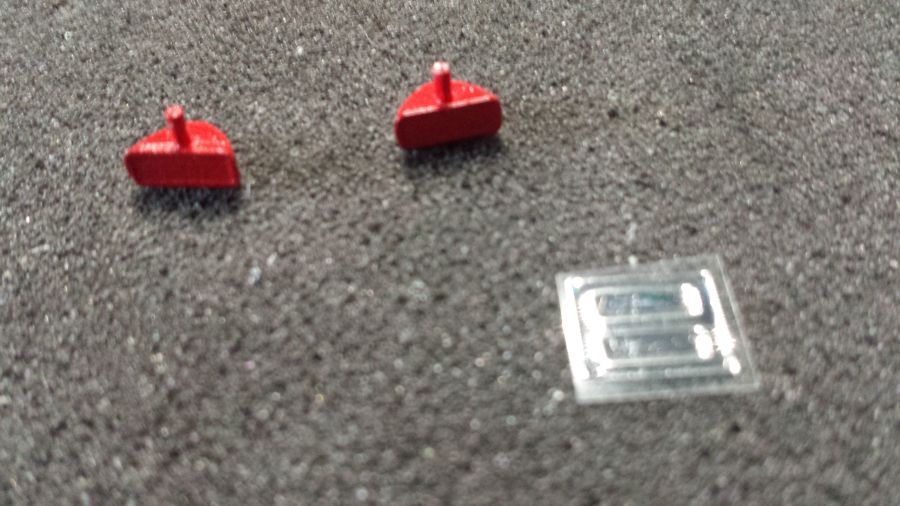
De doppen op de wielen en ....
The caps on the wheels and ....
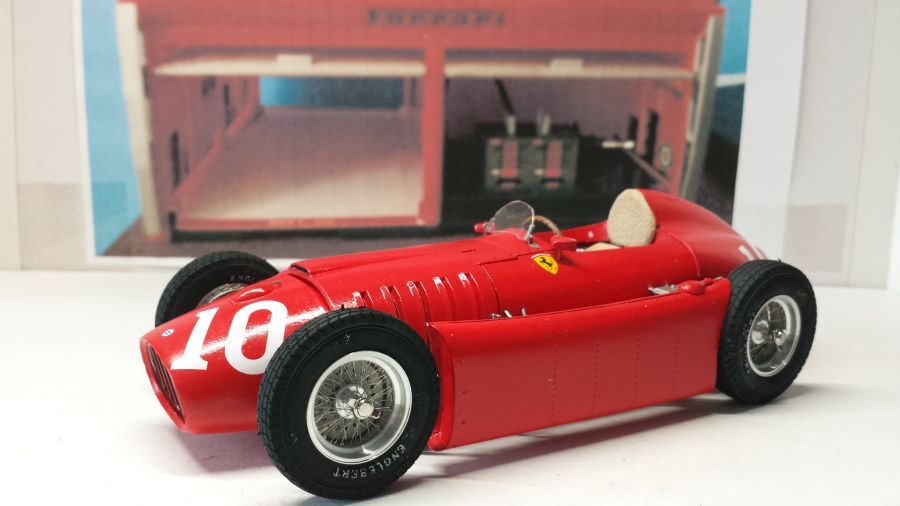
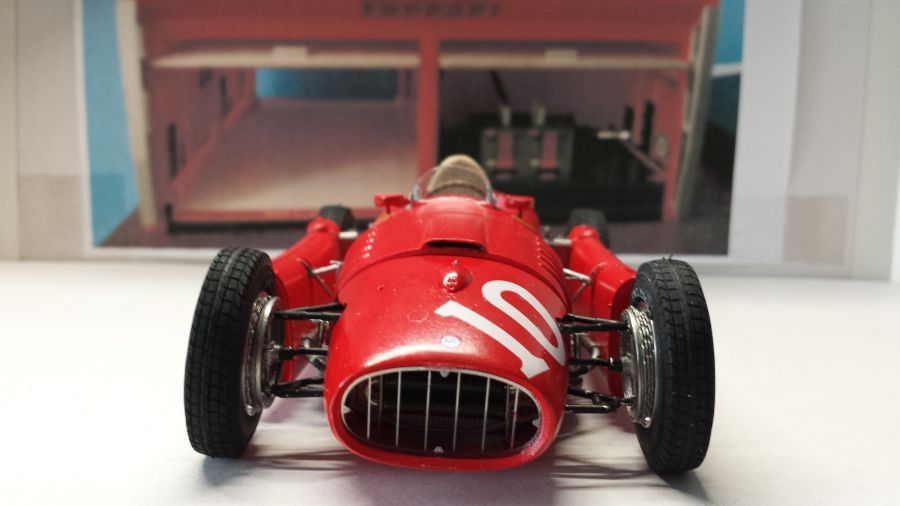
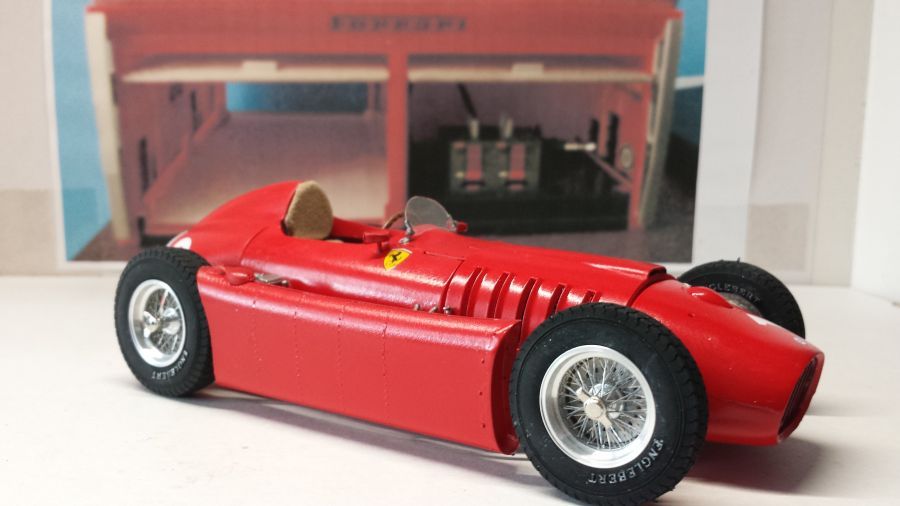
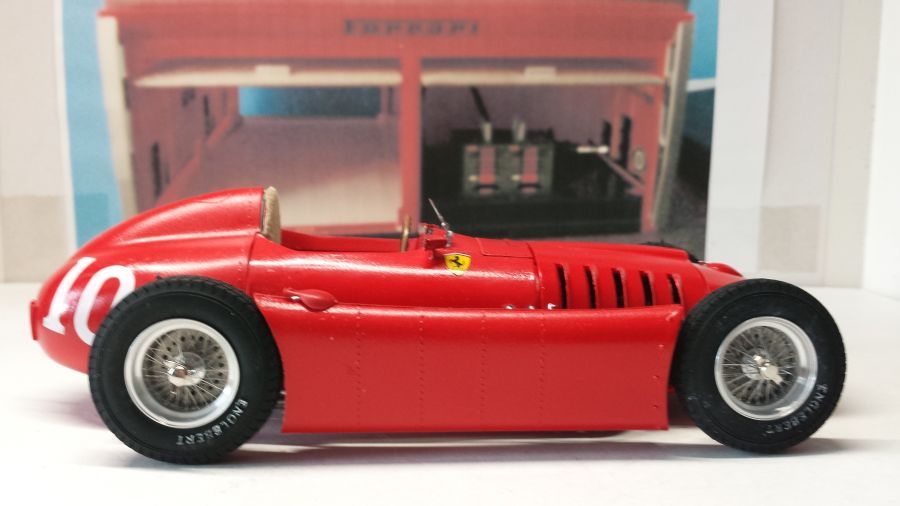
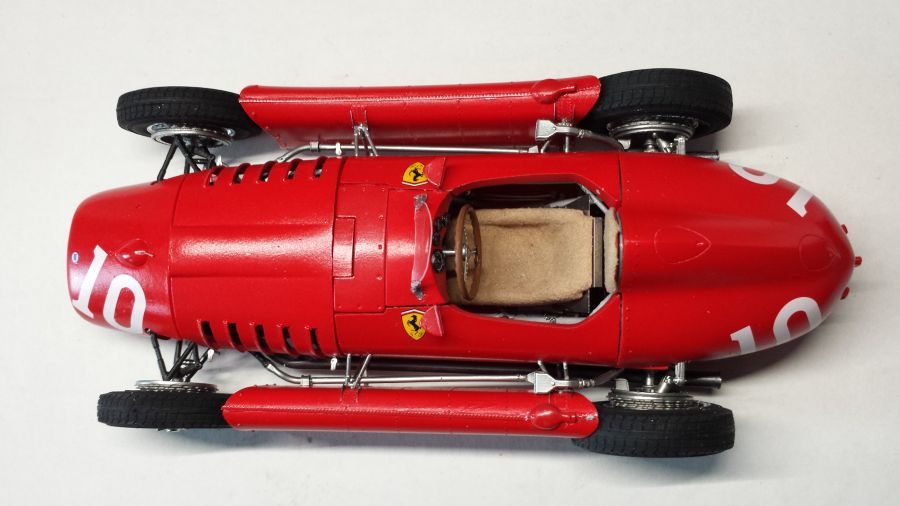
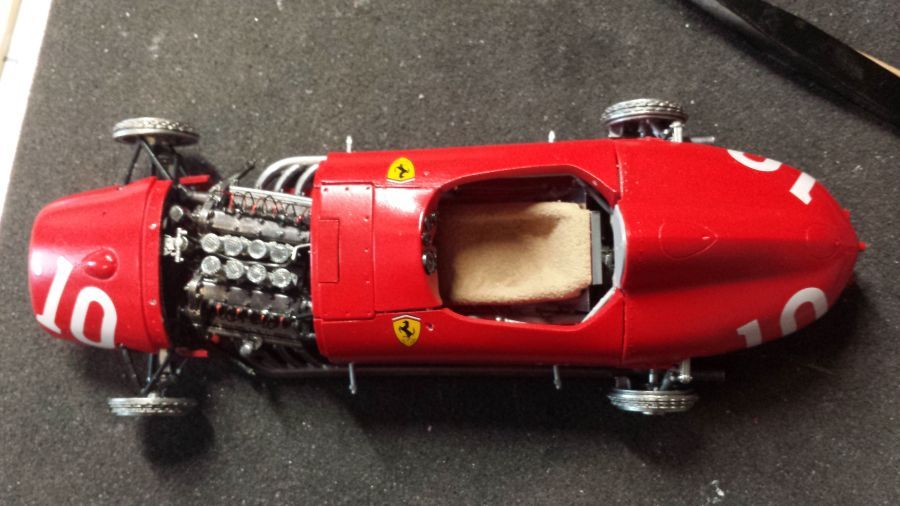
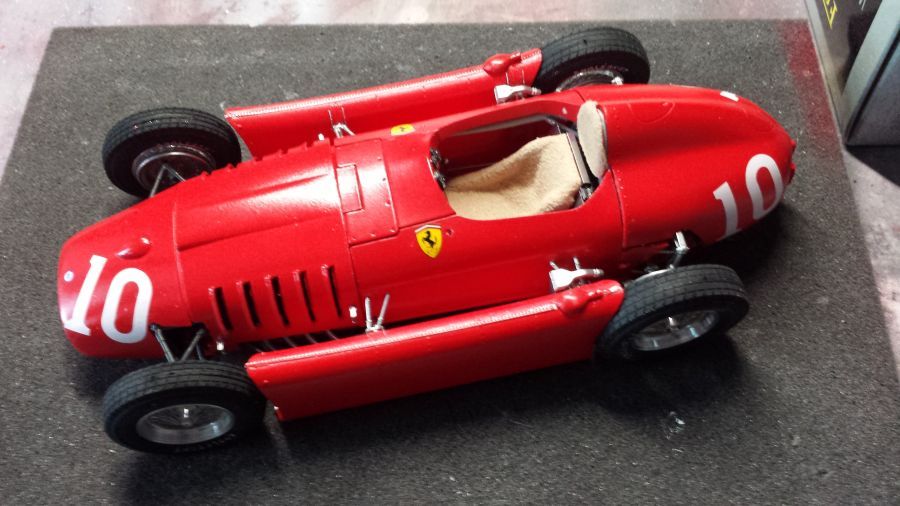
er kan weer 1 op de plank.
i have another one for the shelf.