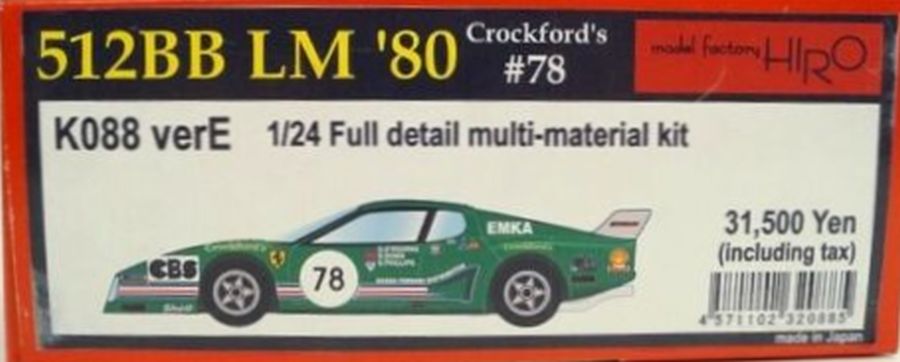
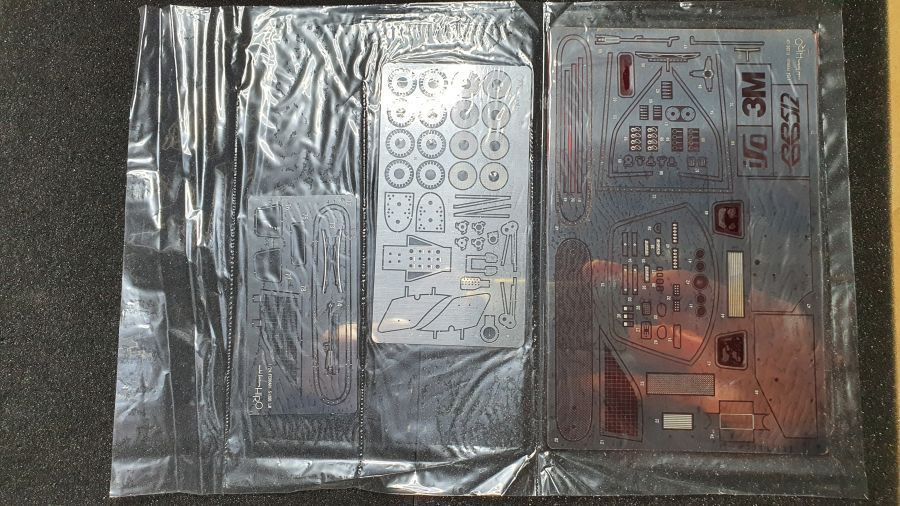
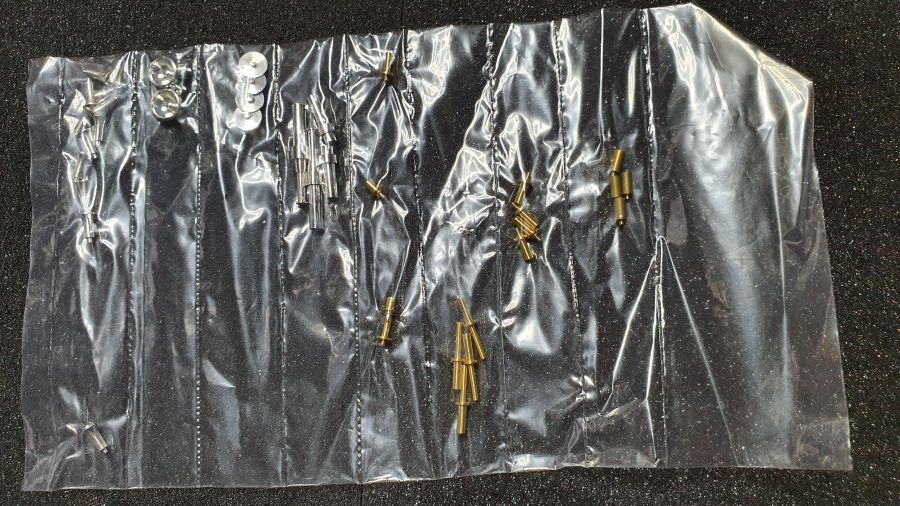
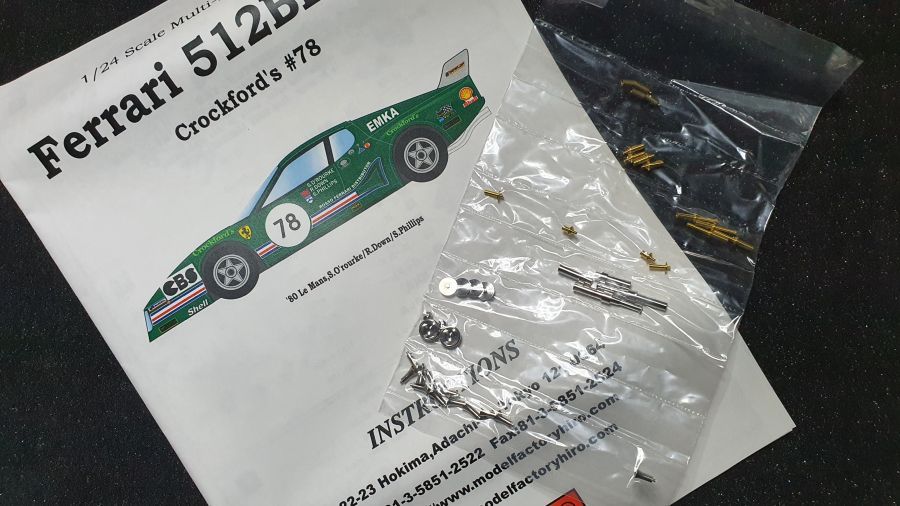
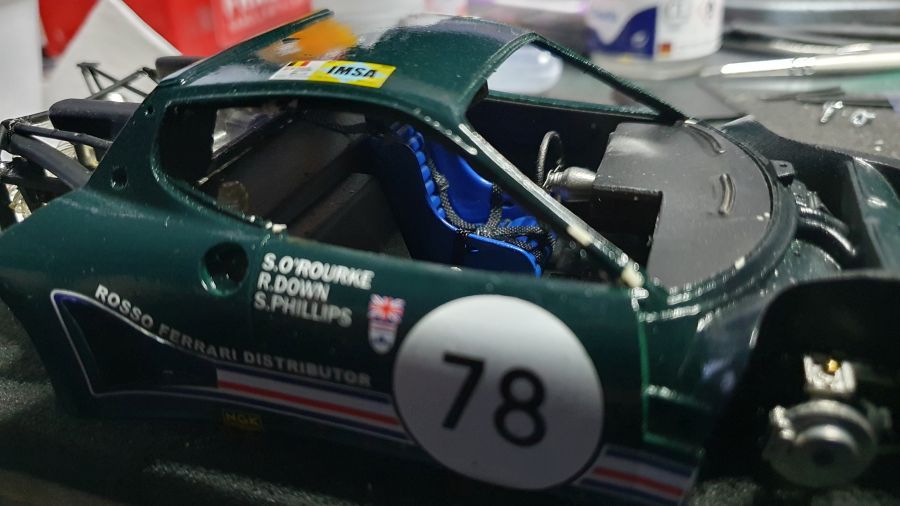
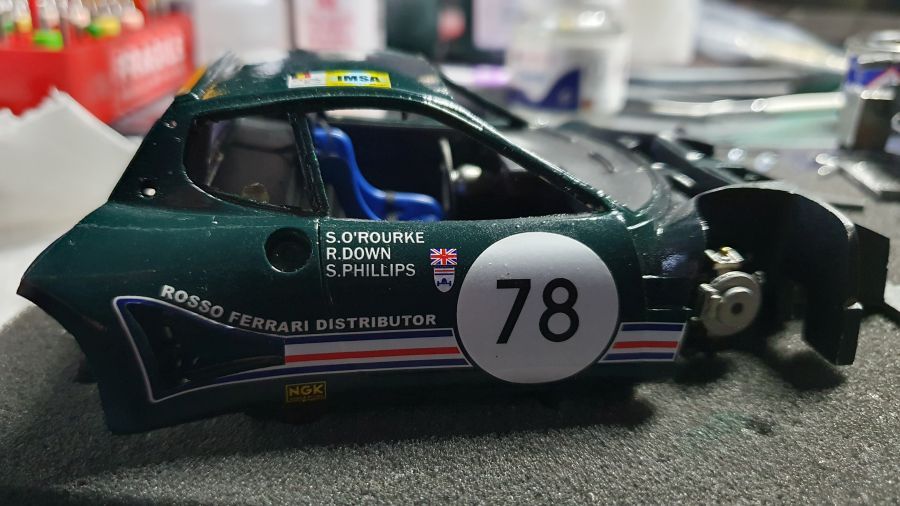
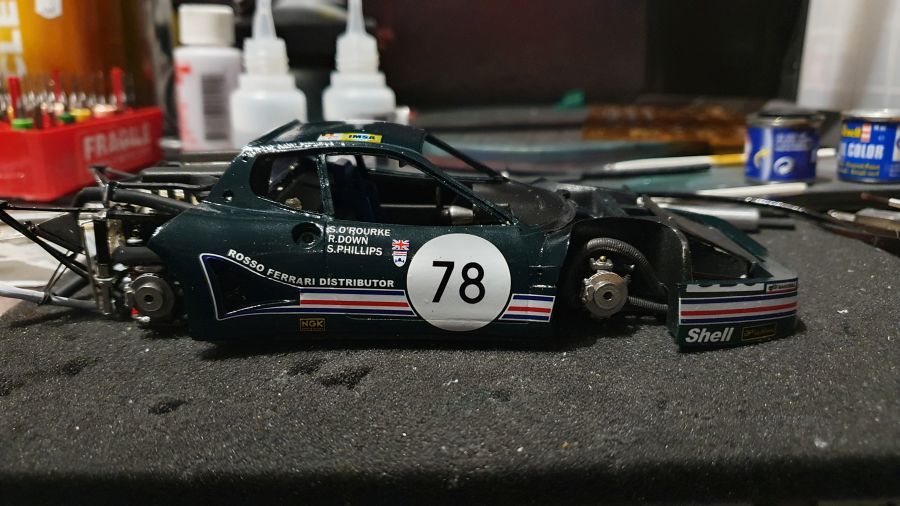
De Ferrari 512BB LM is een van mijn favoriete auto's. Ik heb een aantal verschillende versies. Andere zij-inlaten en velgen maken de grote verschillen. Ik ga nu de 1980 Ferrari 512BB LM Team Crockford's bouwen zoals deze werd gereden door Steve O'Rourke / Richard Down / Simon Phillips. Dit is zoals de auto tijdens de 24 uur van Le Mans van start ging. Tijdens de race werd de auto zwaar beschadigd en kreeg het Team Crockford's onderdelen van Team Bellancauto om verder te kunnen rijden. Die versie bouw ik later. Dit is de kit van Modelfactory Hiro (MFH) kit nr. K088.
The Ferrari 512BB LM is one of my favorite cars. I have these in several versions. Different side intakes and rims are the biggest differences. I will now build the 1980 Ferrari 512BB LM Team Crockford's as driven by Steve O'Rourke / Richard Down / Simon Phillips. This is the car as it started the 24 Hrs of Le Mans. During the race the car got heavily damaged and Team Crockford's received spare parts from Team Bellancauto to be able to go on. That version will be built later. This is a kit from Modelfactory Hiro (MFH) kit no. K088.
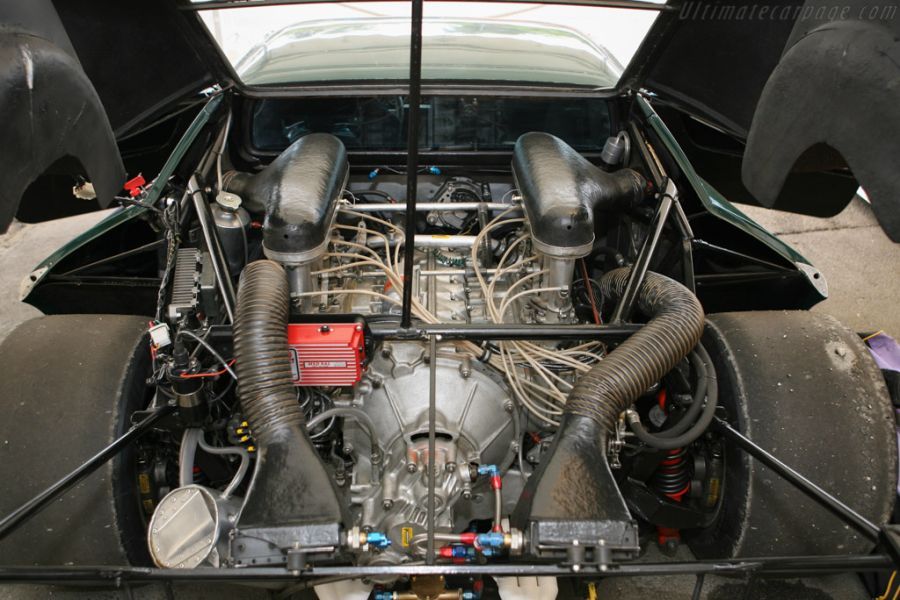
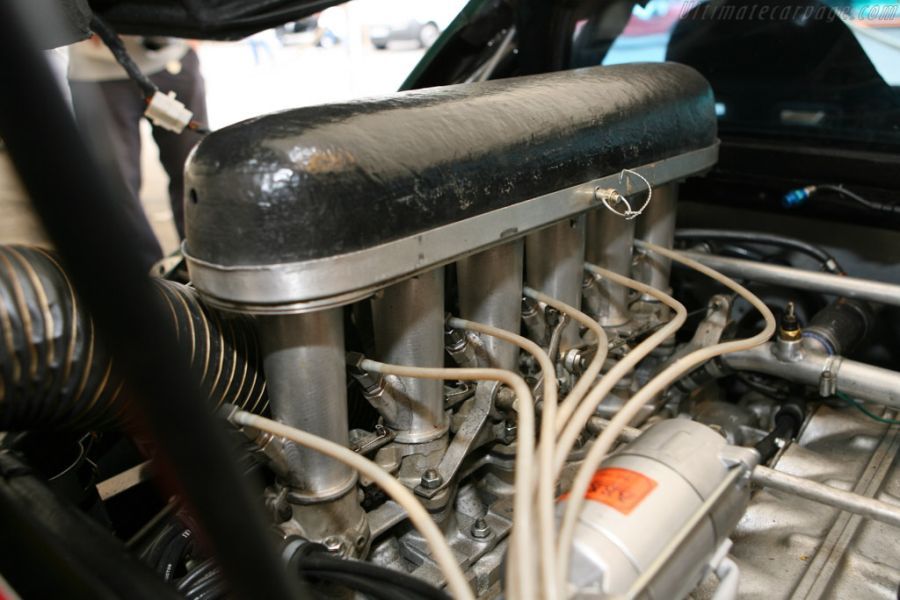
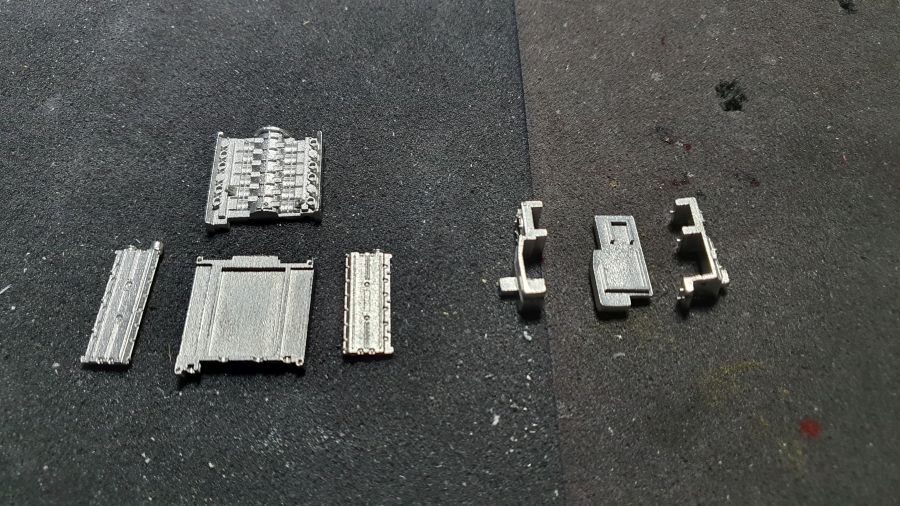
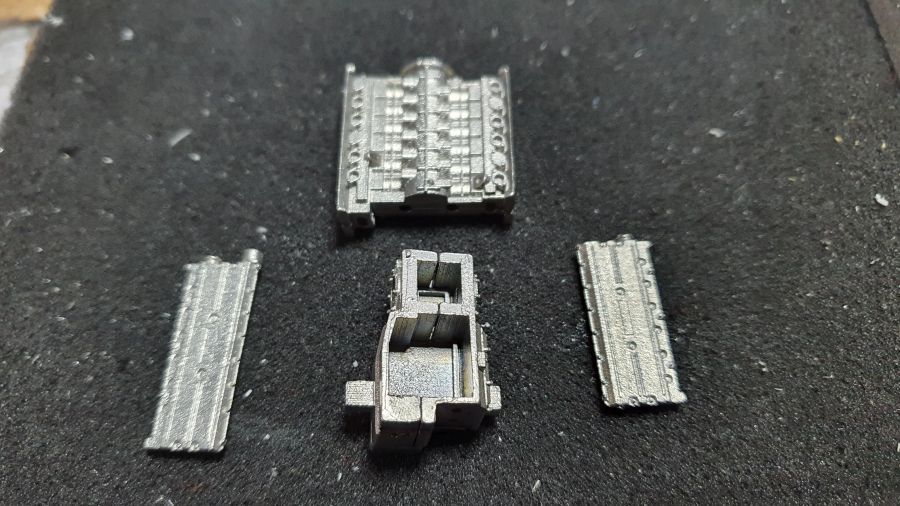
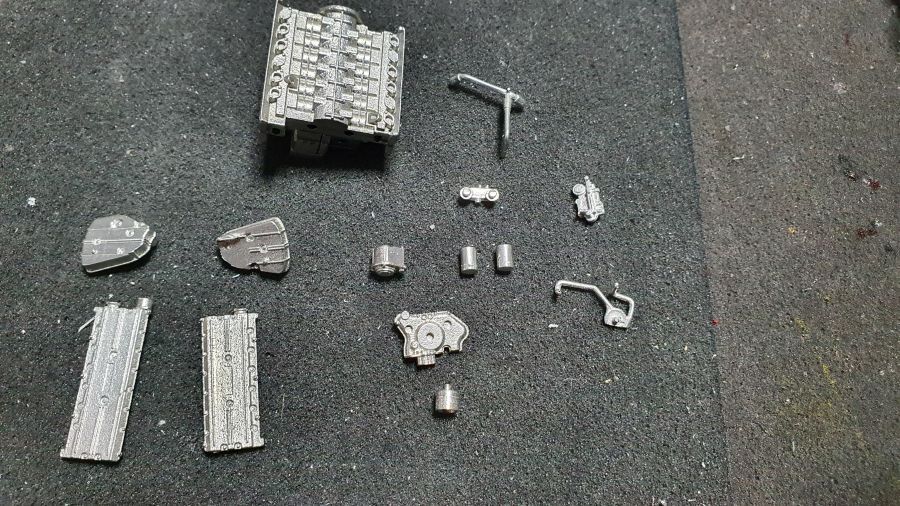
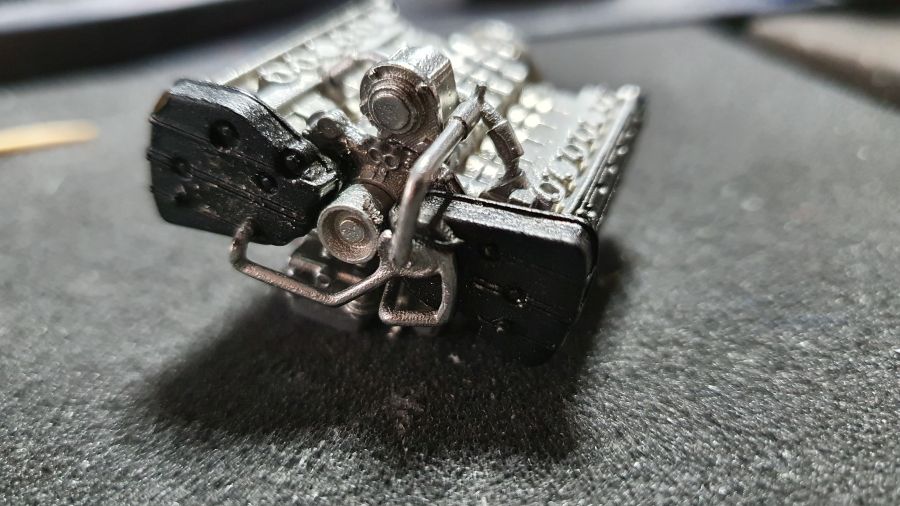
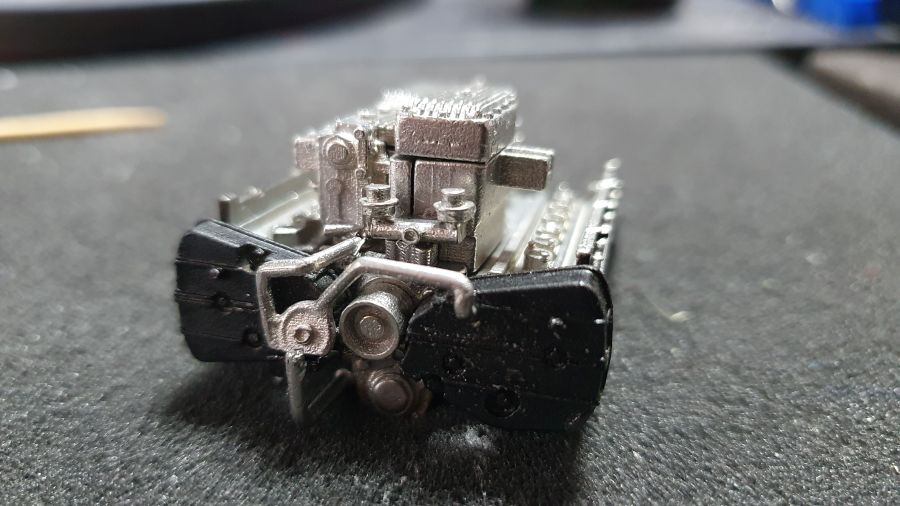
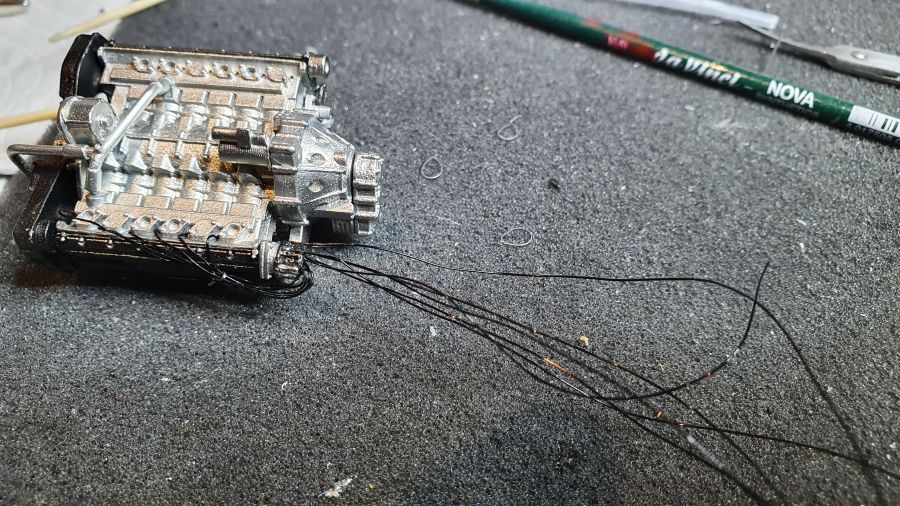
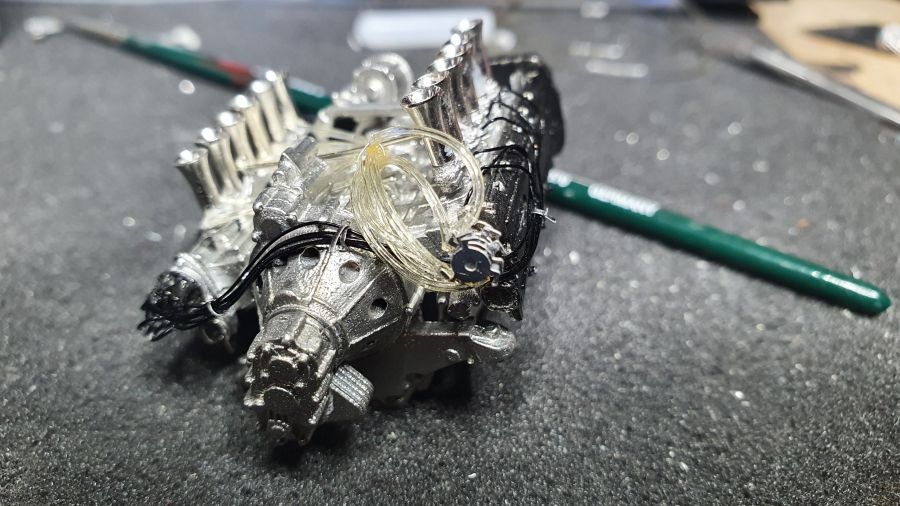
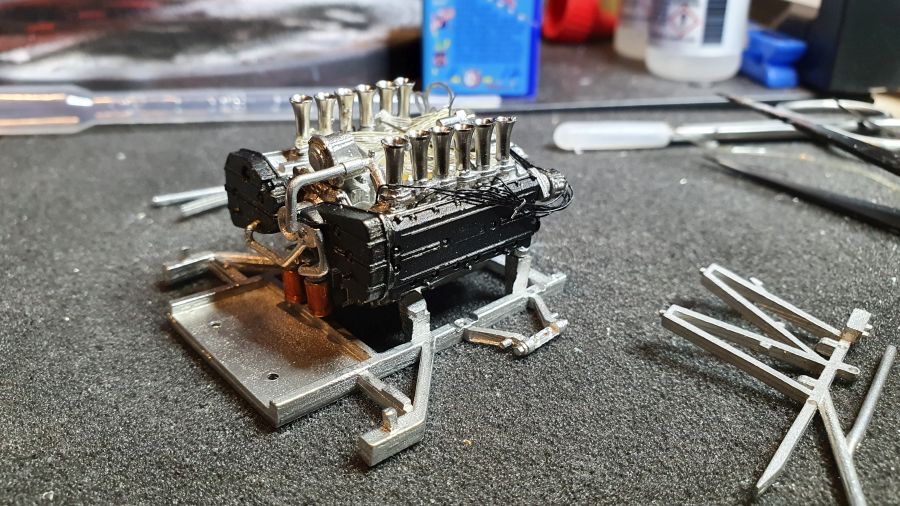
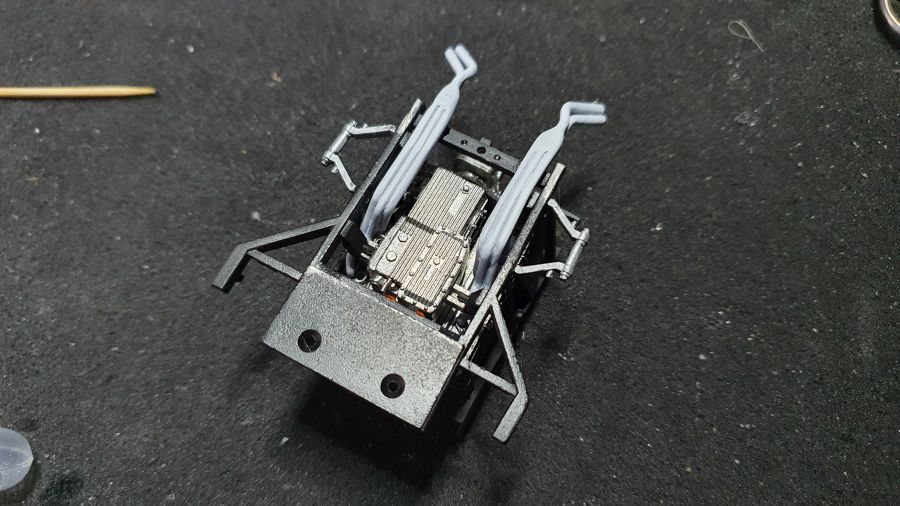
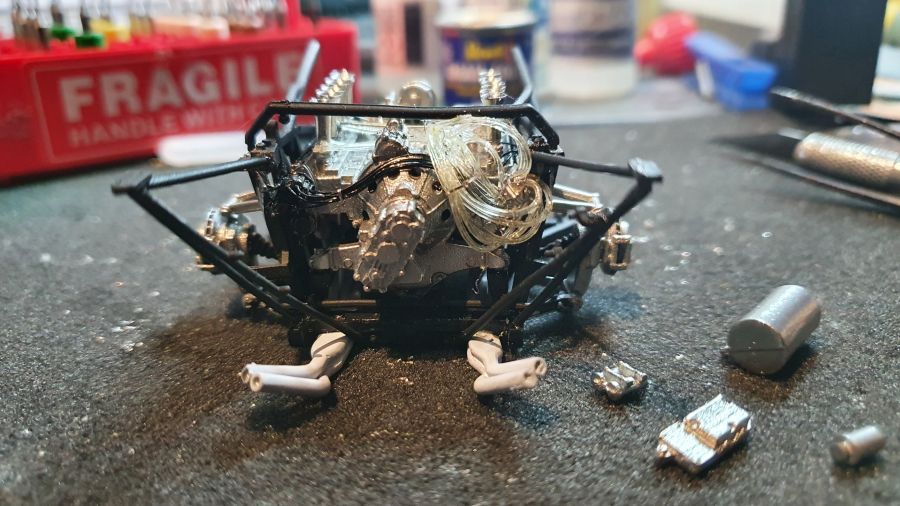
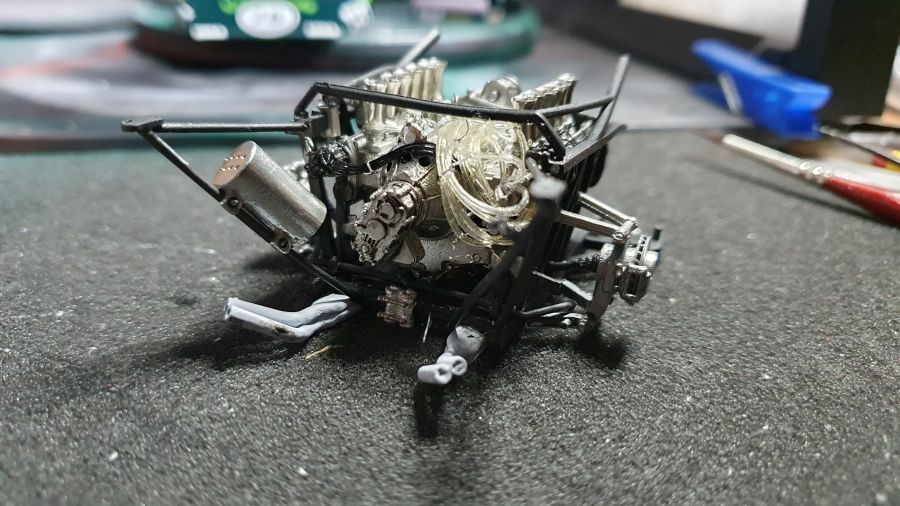
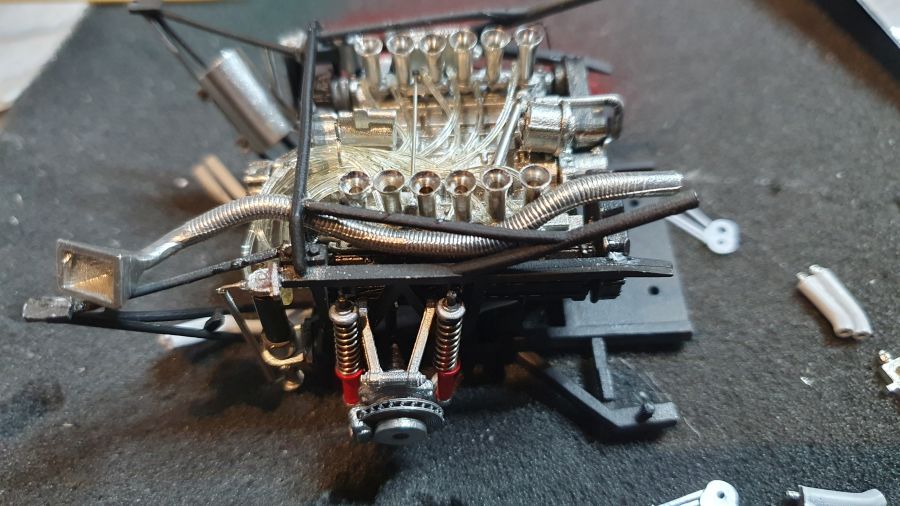
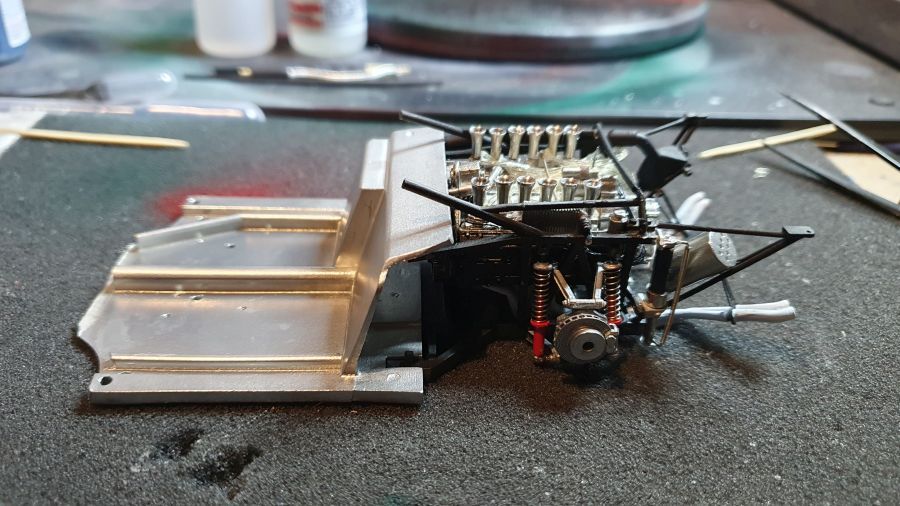
Beginnen bij de motor.
Starting with the engine.
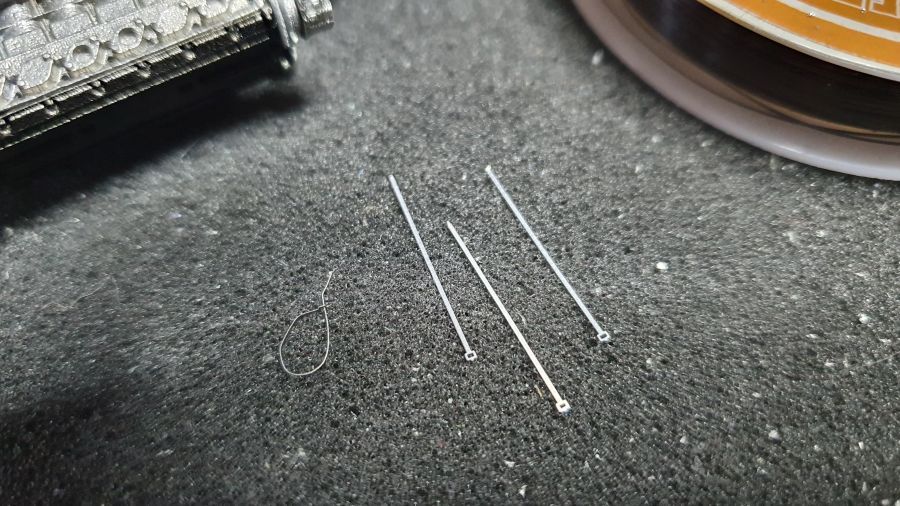
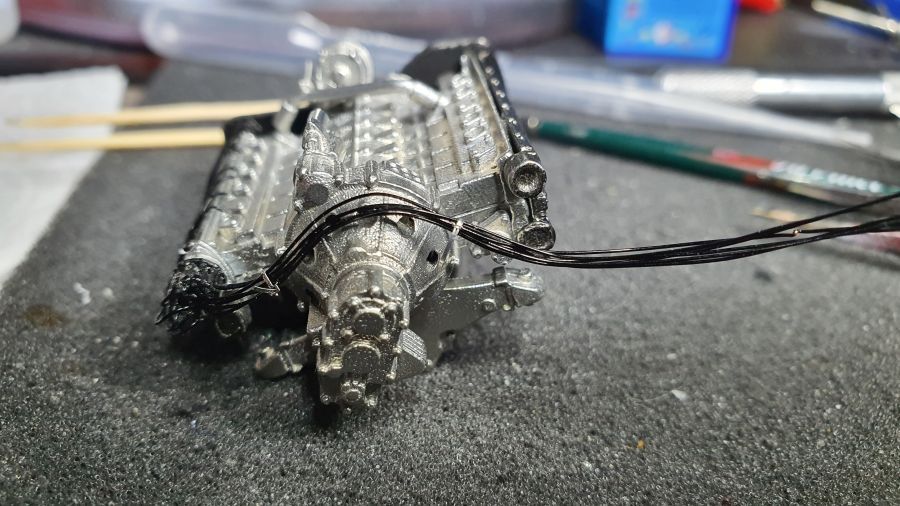
'Tie wraps' maken voor de bedrading en leidingen.
Making tie wraps for the wires and hoses.

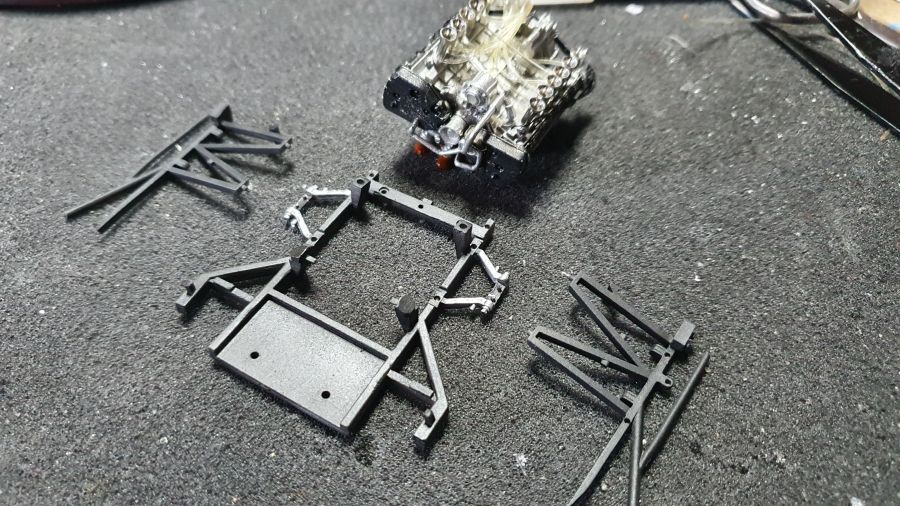
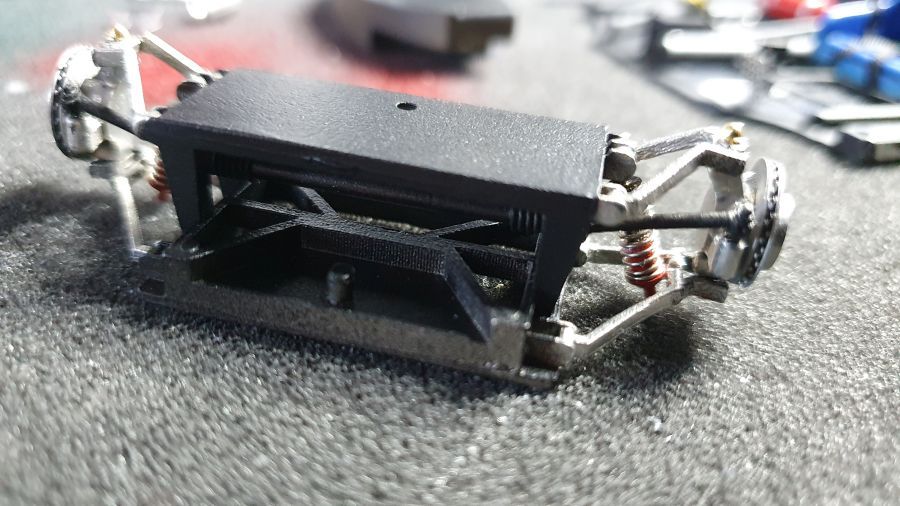
Wat testen om het frame passend te maken. Hier en daar wat buigwerk.
Some tests to make the frame fit. Some bending needed.
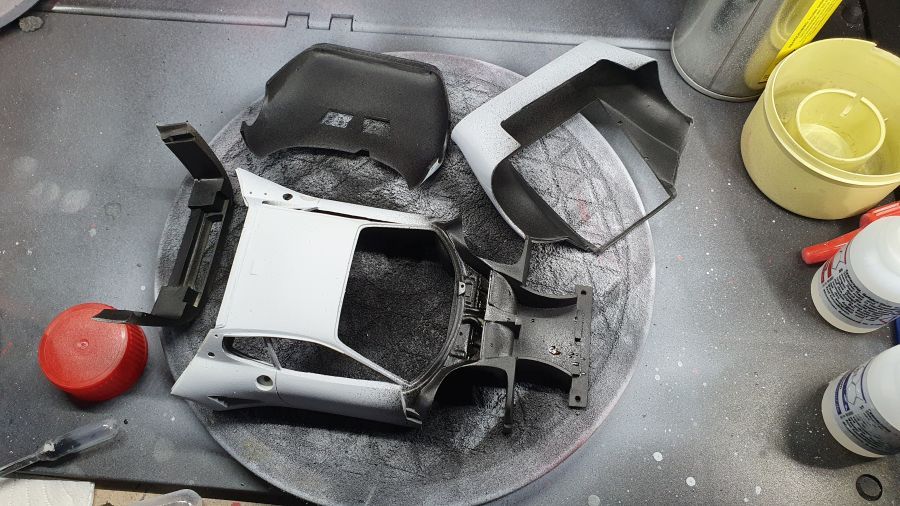
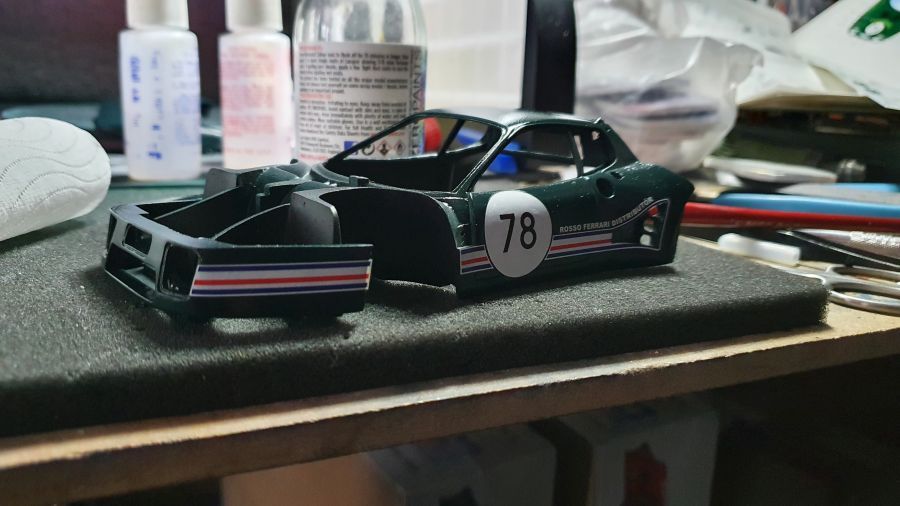
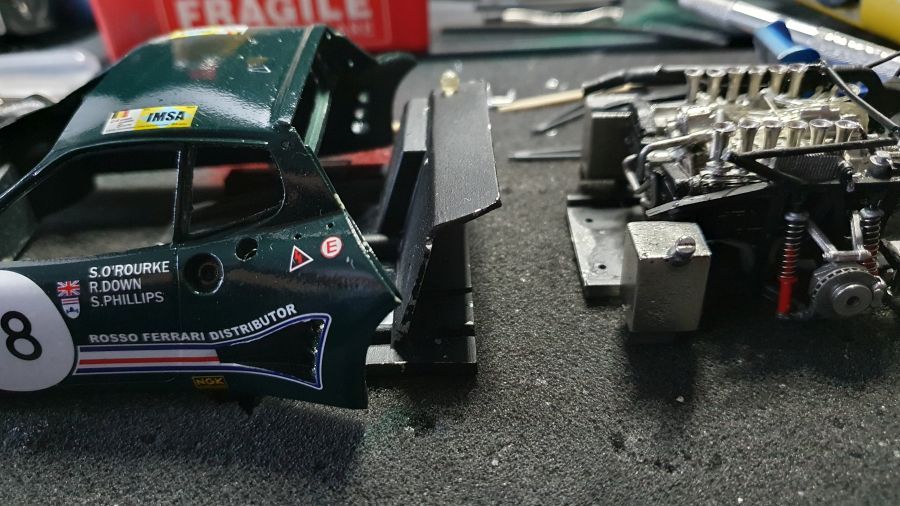
Intussen ga ik ook vast met de body aan het werk.
In the meantime i will also start working on the body.
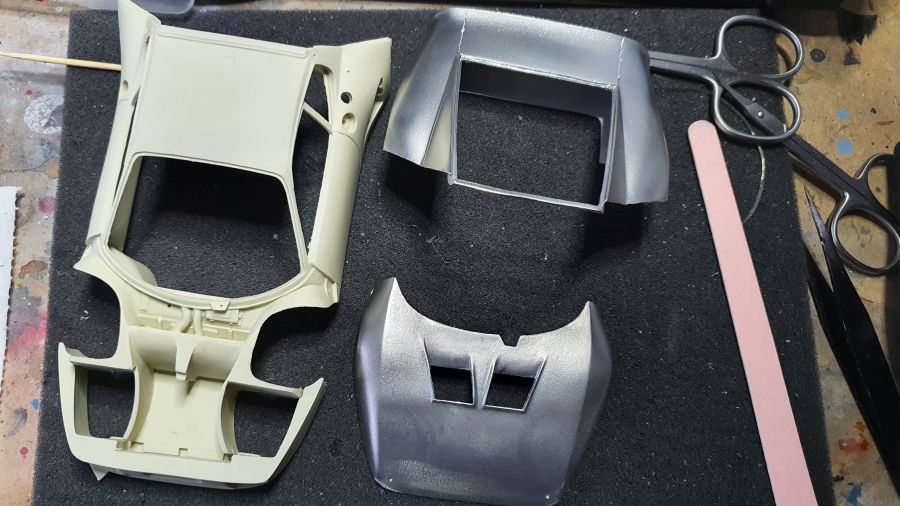
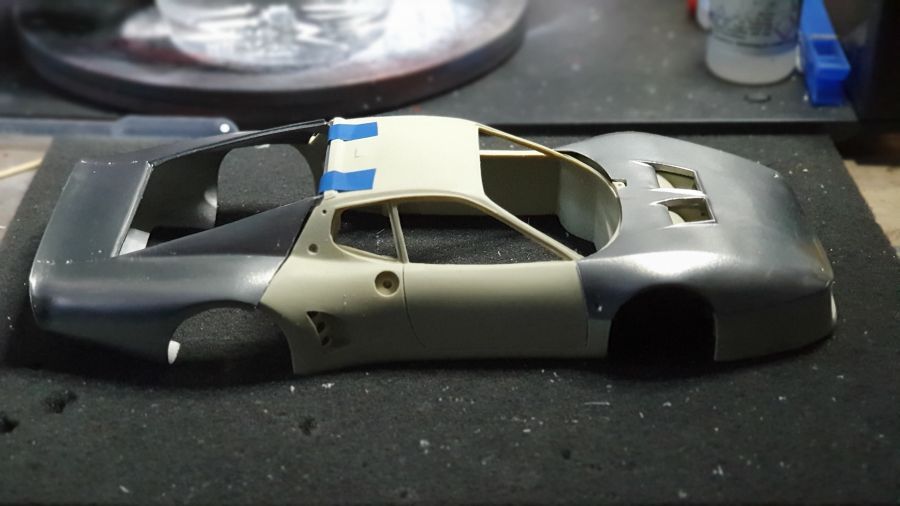
Ik spuit er alvast primer op. Op die manier komen de fouten beter naar voren.
I am spraying primer. That way the flaws are coming up better.
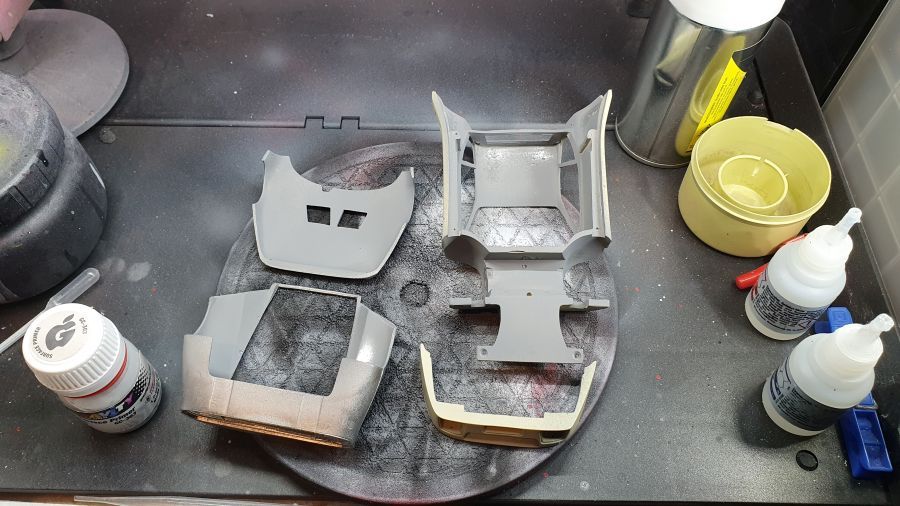
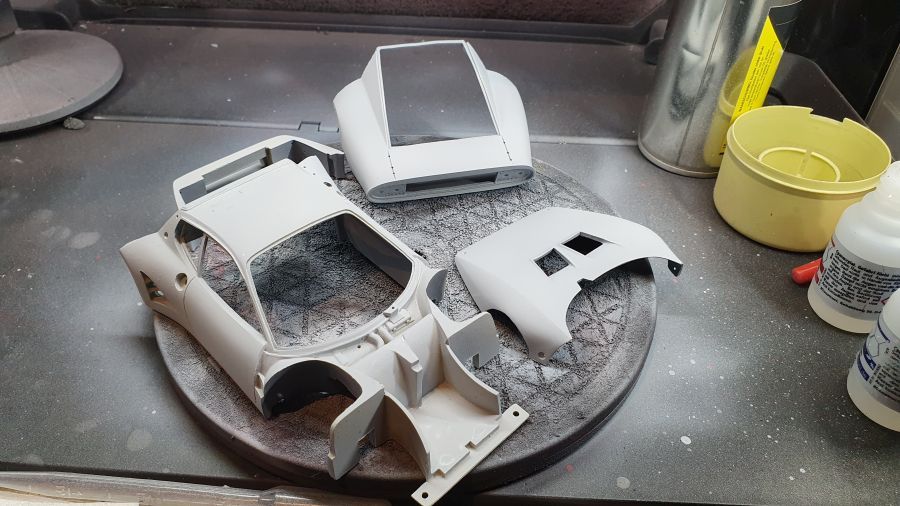
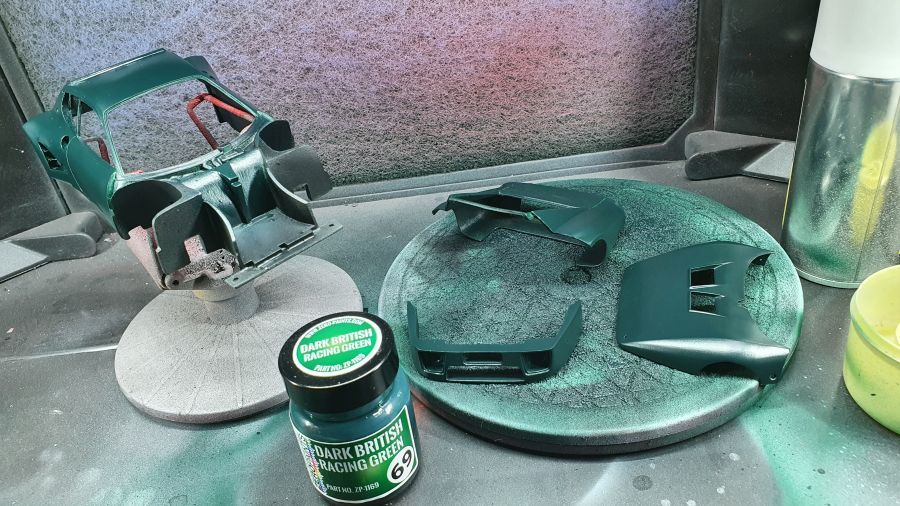
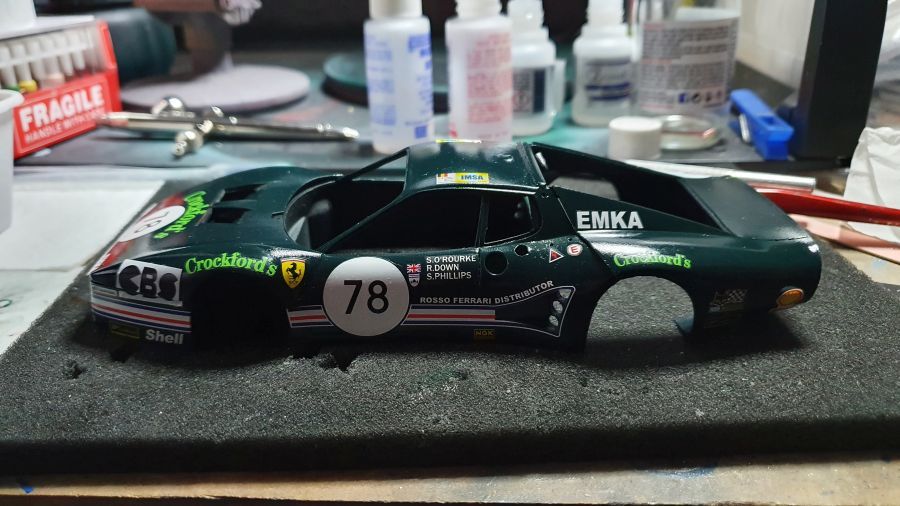
Primer spuiten en daarna het zwart voor de binnenkant en de motorruimte.
Painting primer and the the black for the inside and the engine bay.
En het groen Zero Paints ZP-1169 Dark British Racing Green.
And the green Zero Paints ZP-1169 Dark British Racing Green.

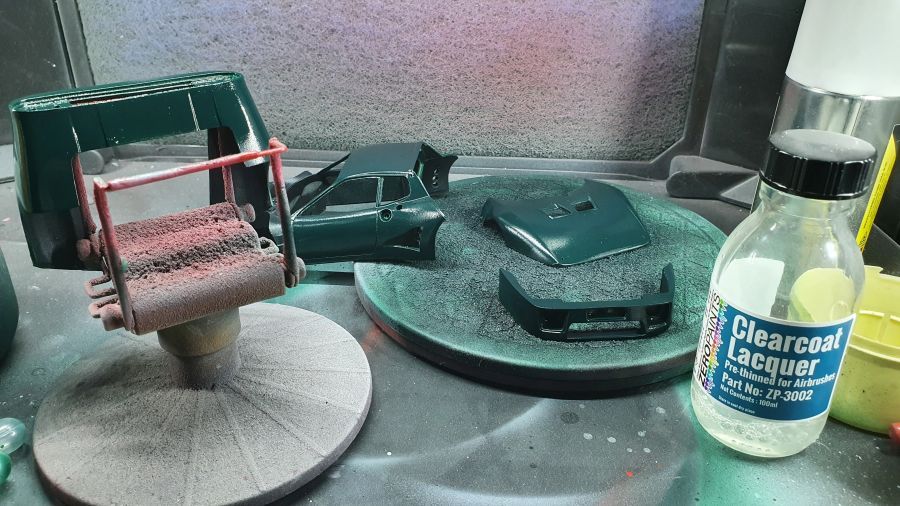
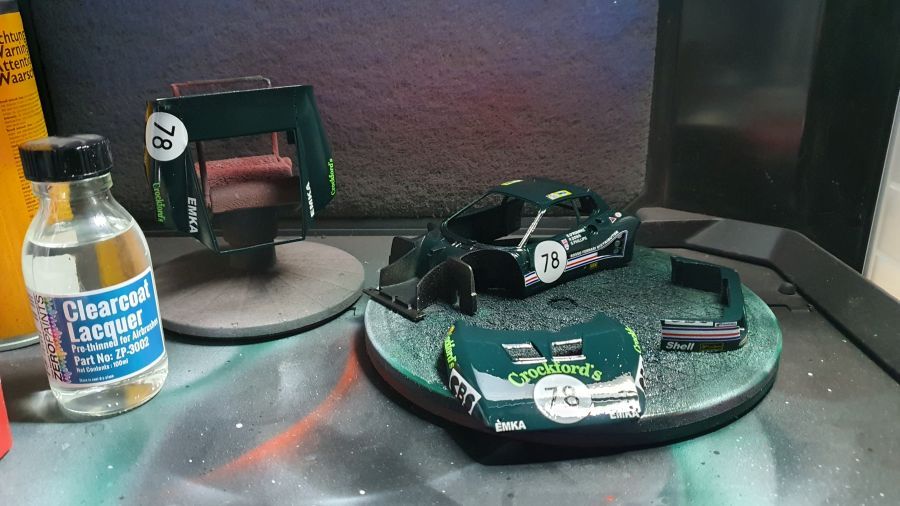
Glanslak erop. Ook nu weer geen 2K.
Clear coated. Again no 2K.
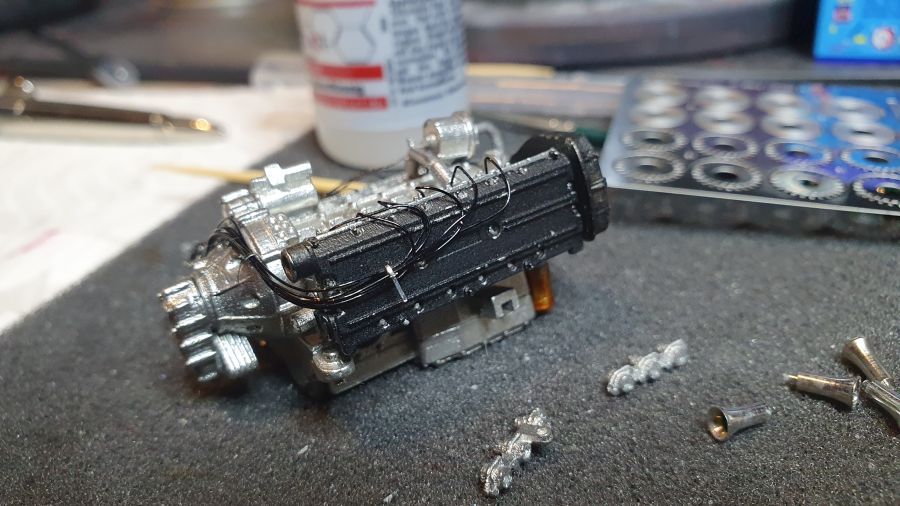
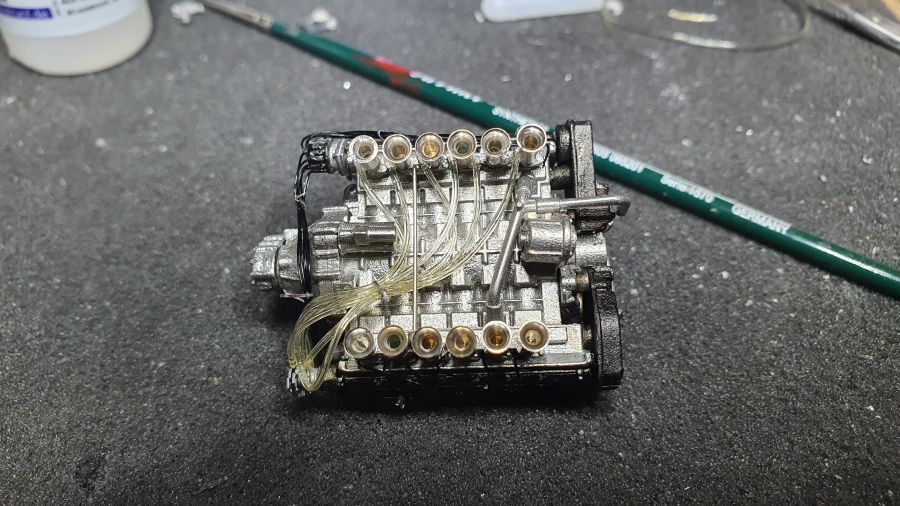
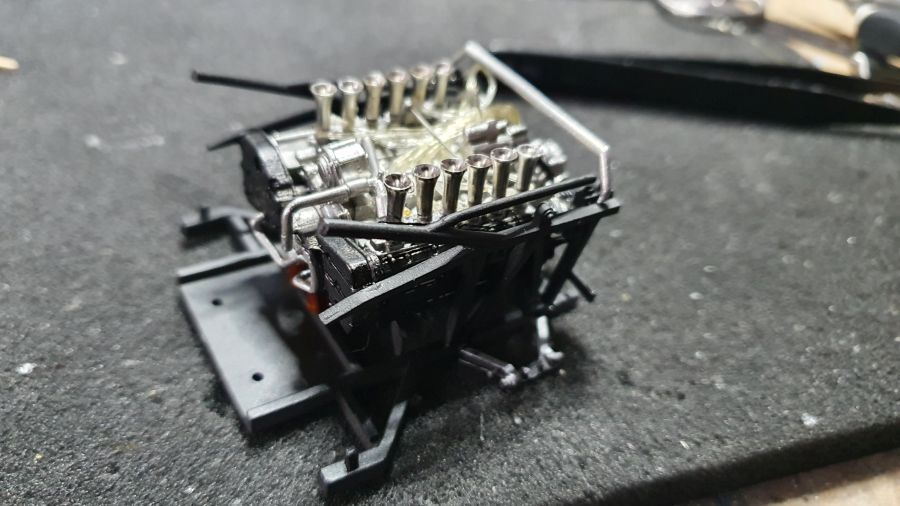
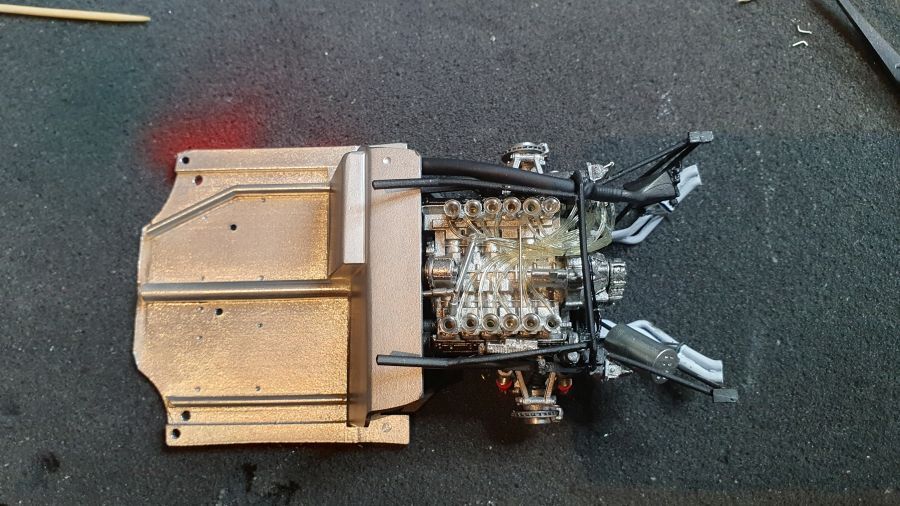
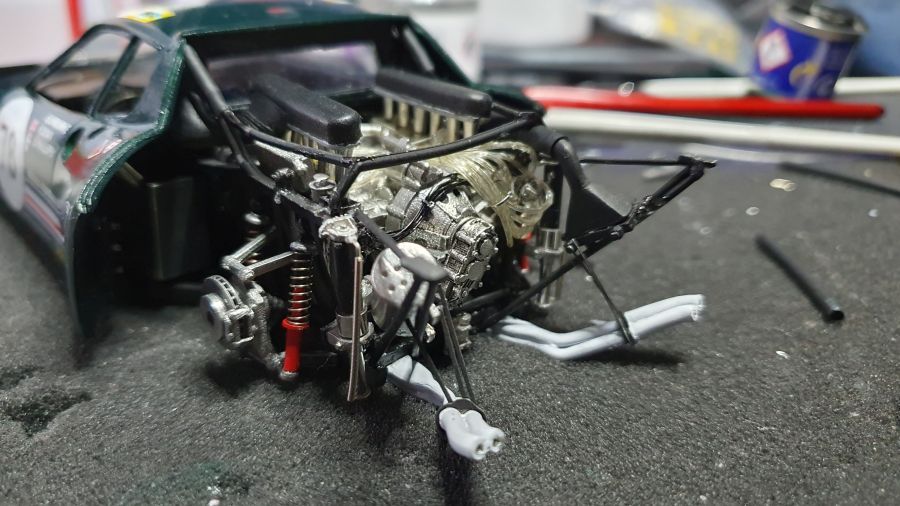
Dan weer terug naar de motor.
Back to the engine.
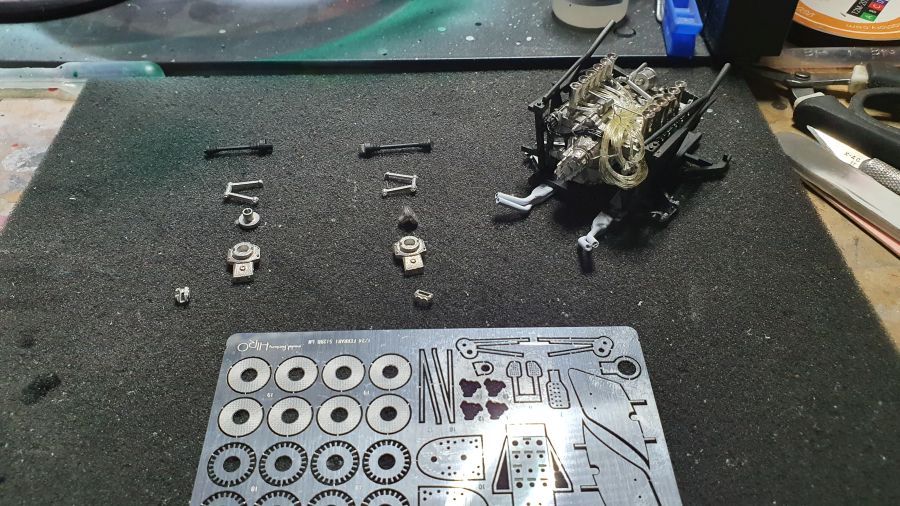
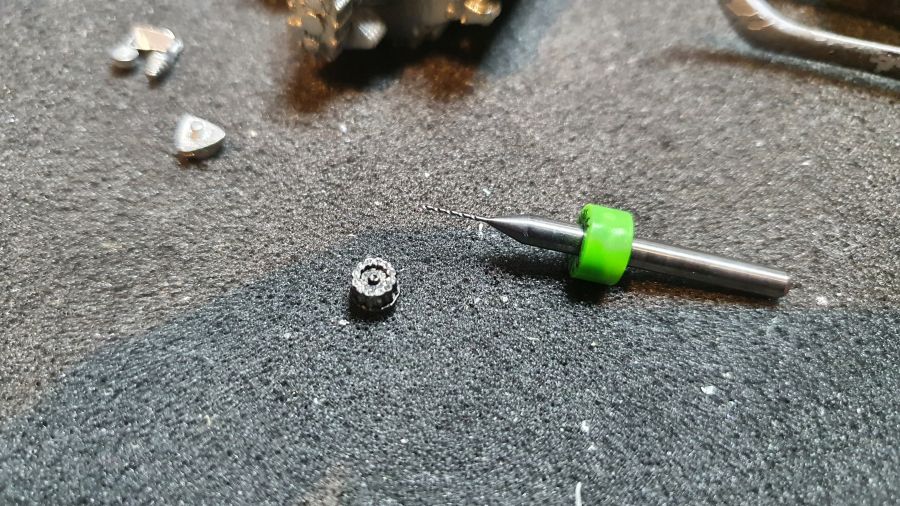
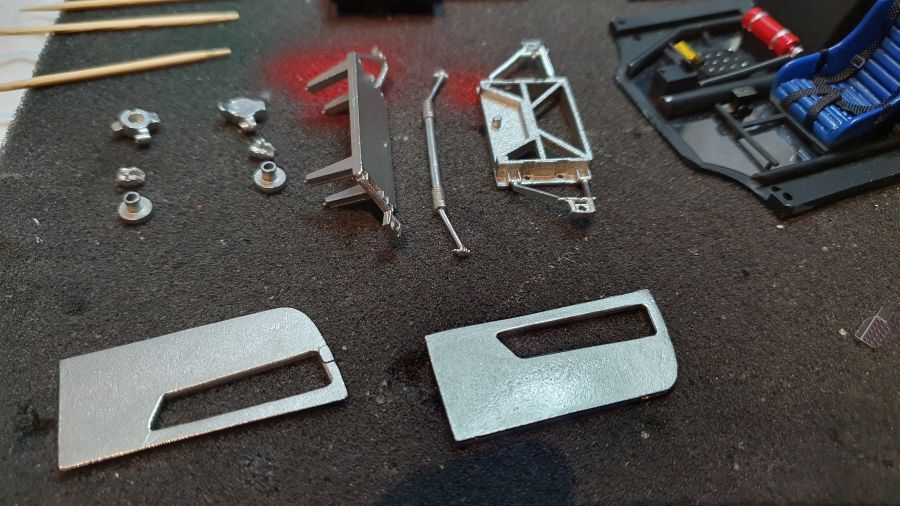
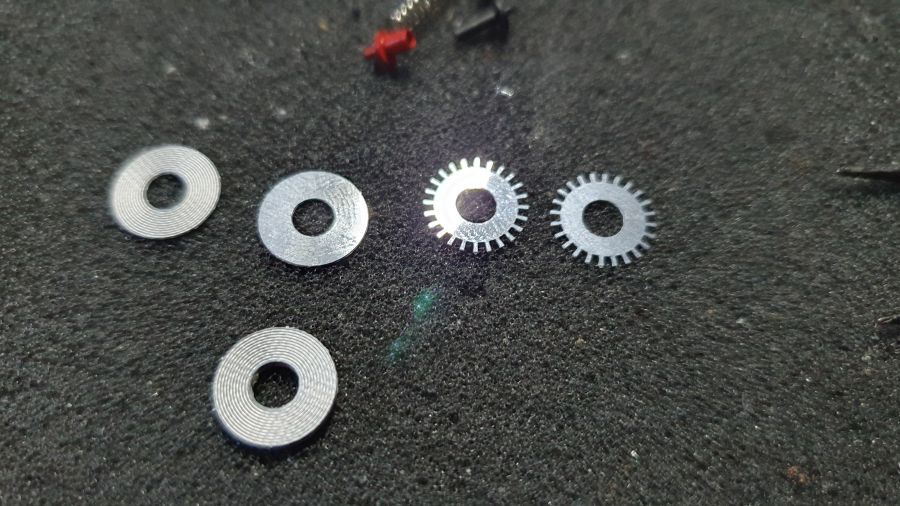
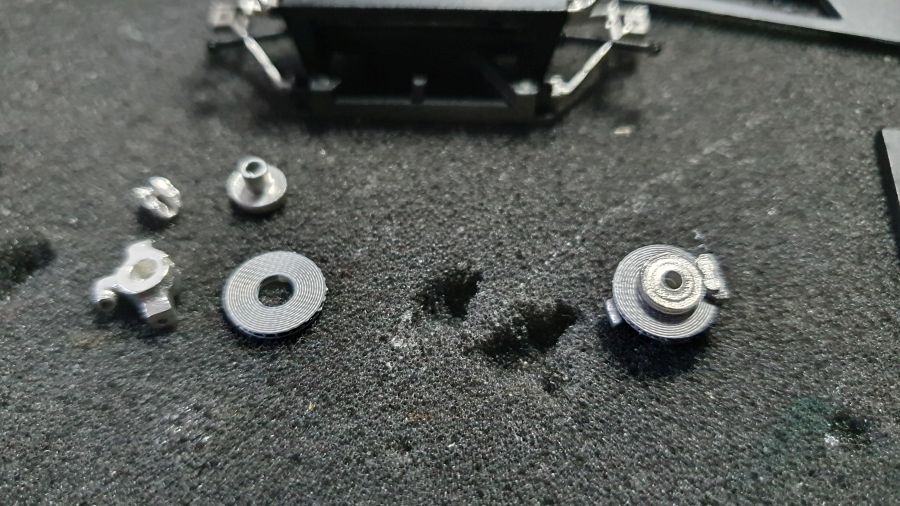
Samenstellen van de remschijven.
Fabricating the brake discs.
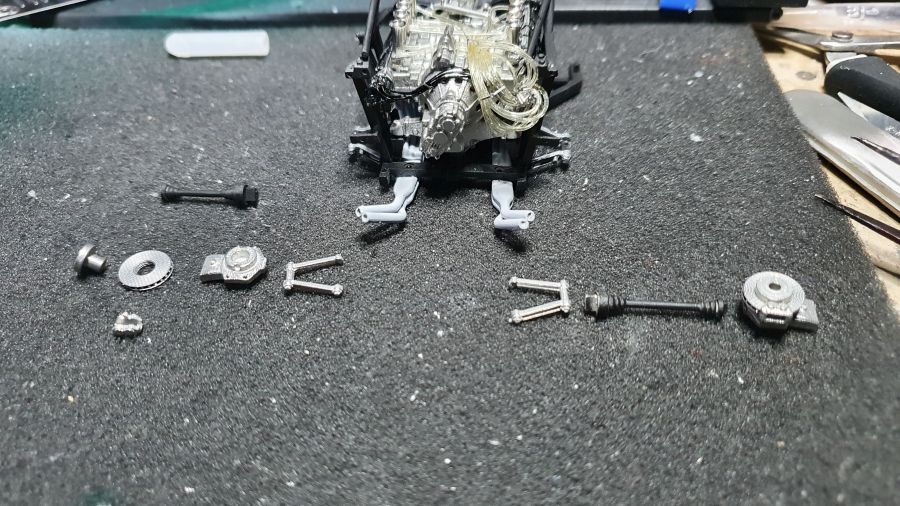
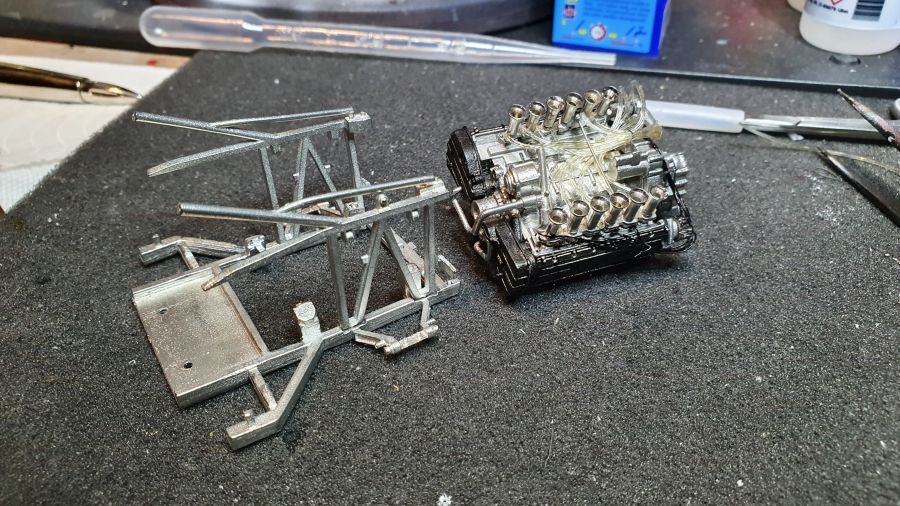
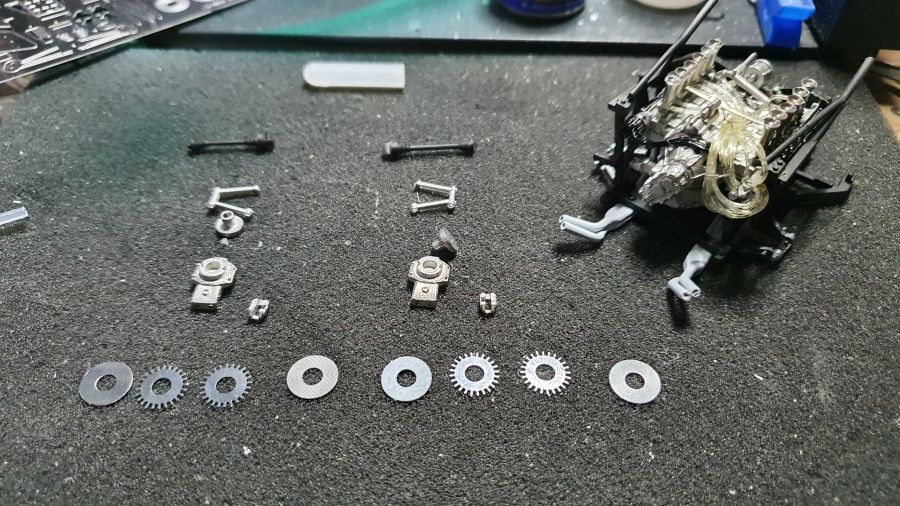
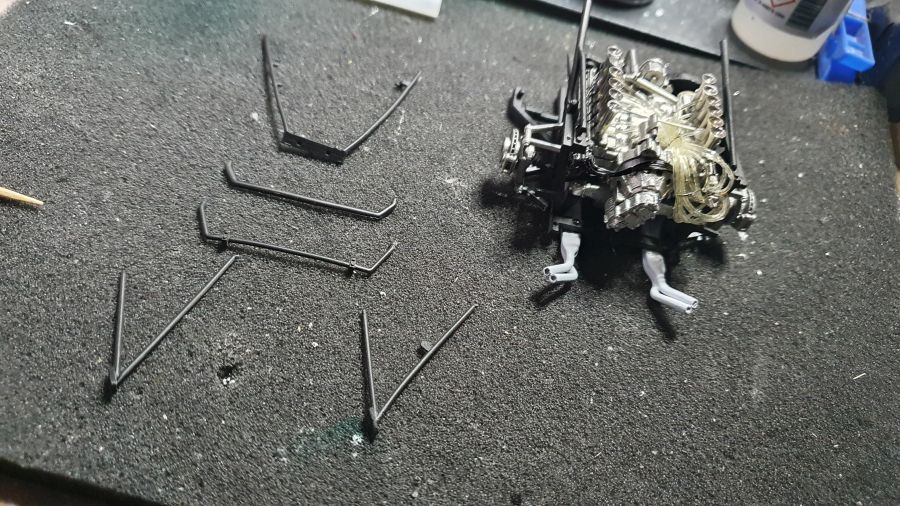
Meer onderdelen voor het fame.
More parts for the frame.
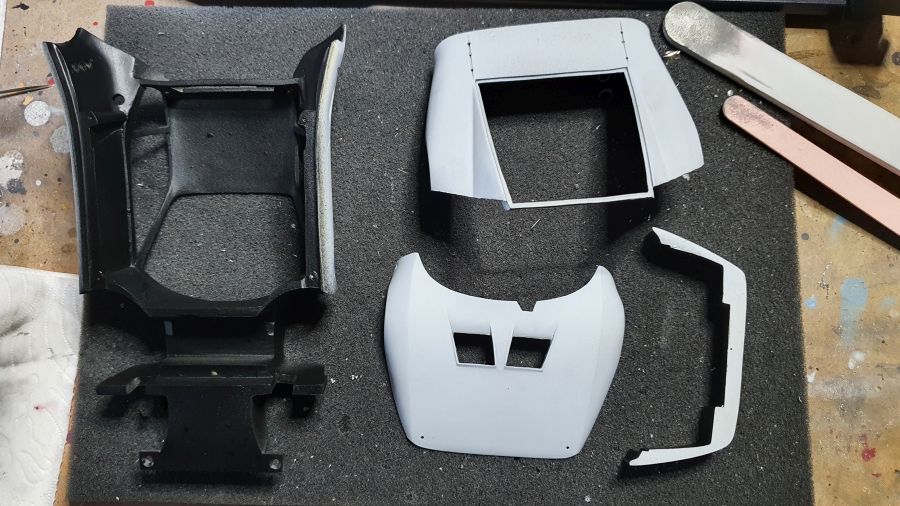
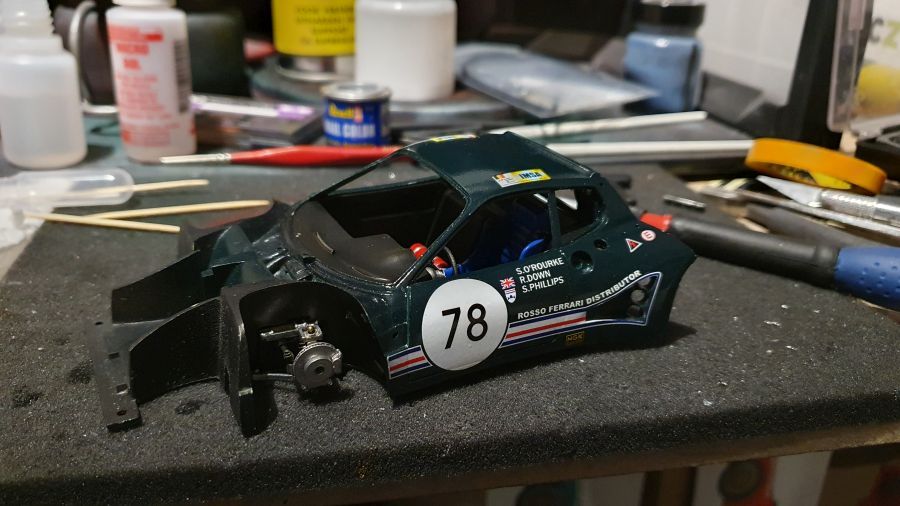
Glanslak op de body. Later nog nat schuren en poetsen.
Clear coat to the body. Later wet sanding and polishing.
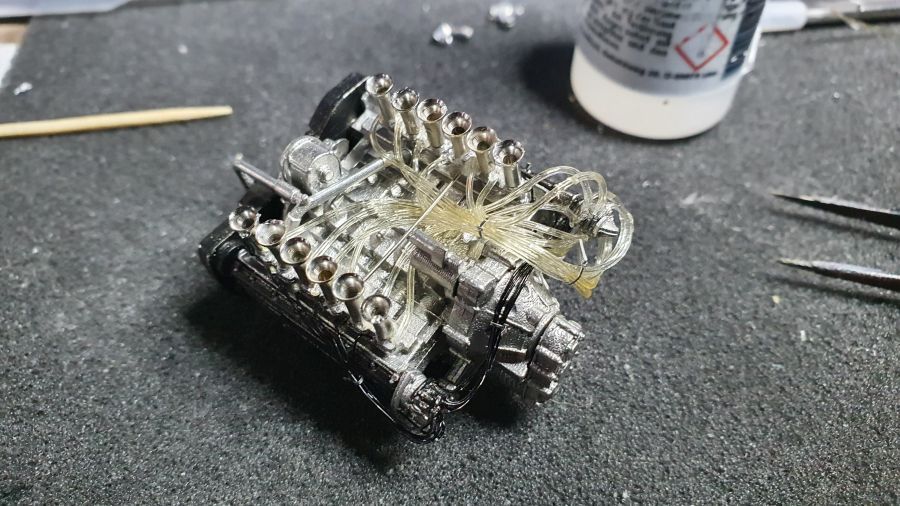
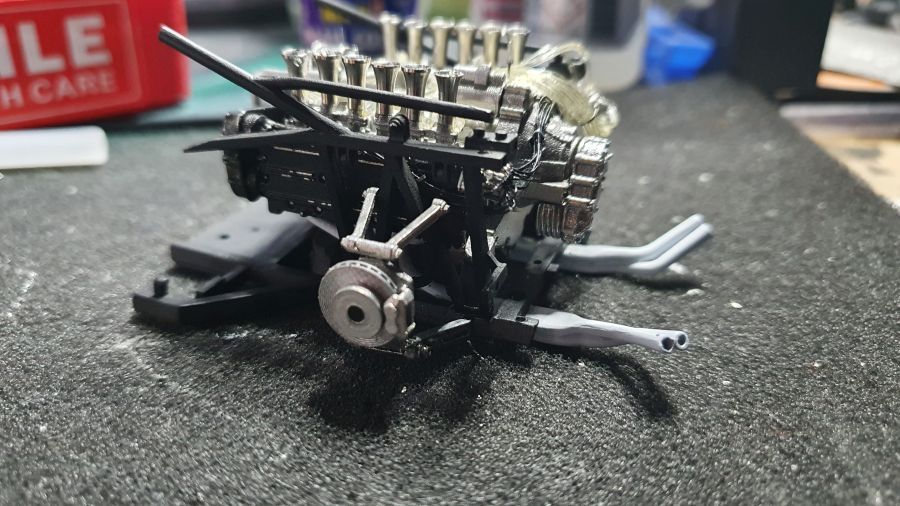
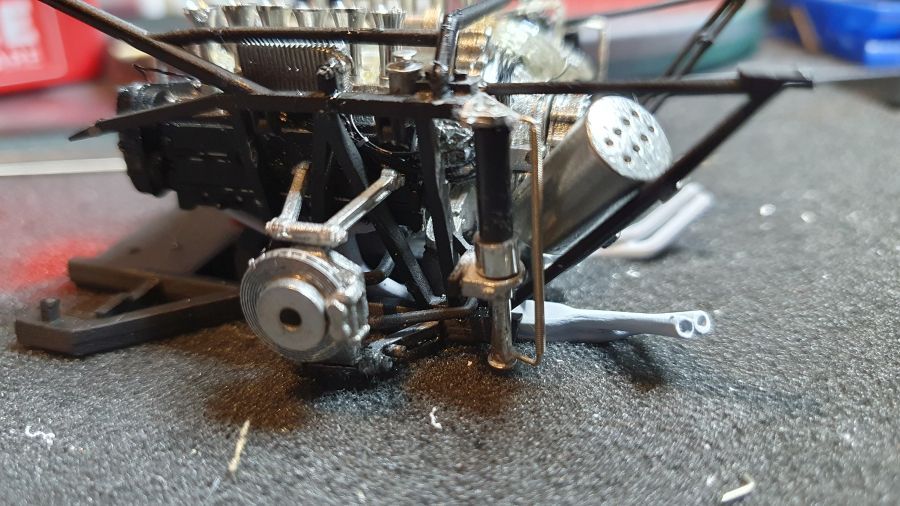
Tijdens het drogen weer verder met het motorblok.
While this dries back to the engine again.
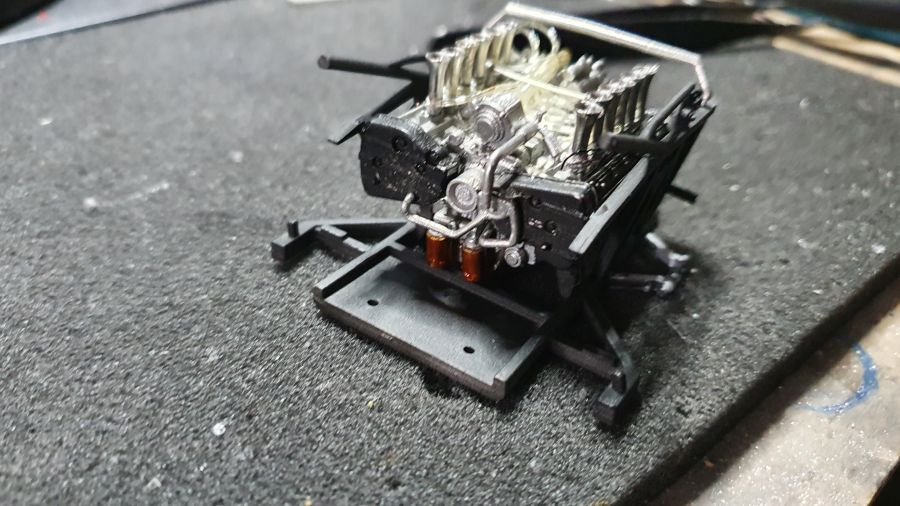
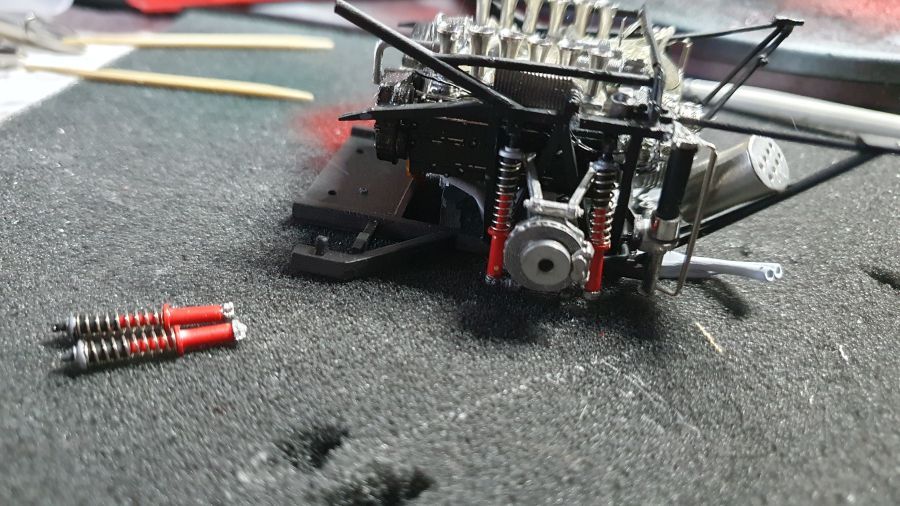
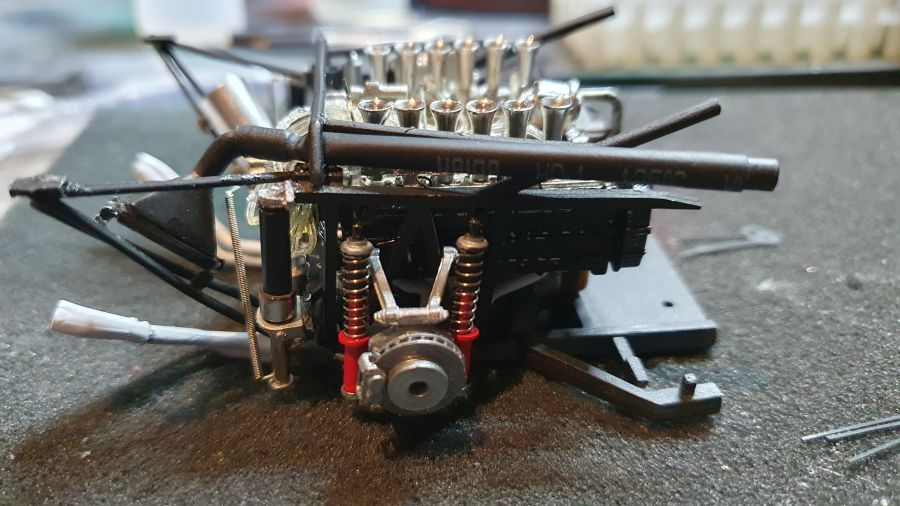
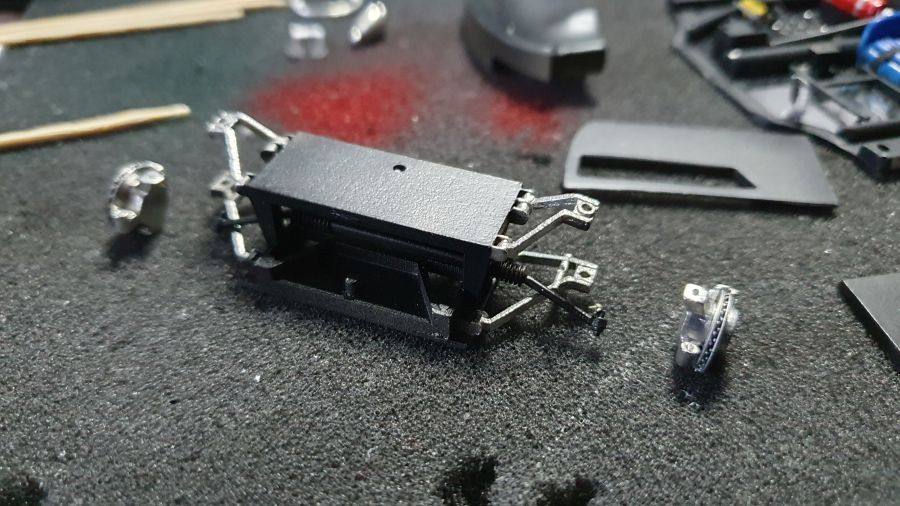
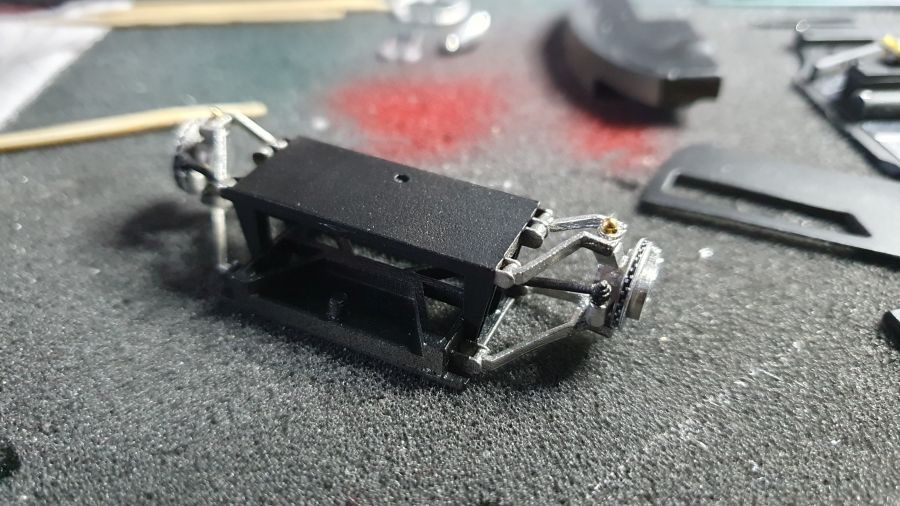
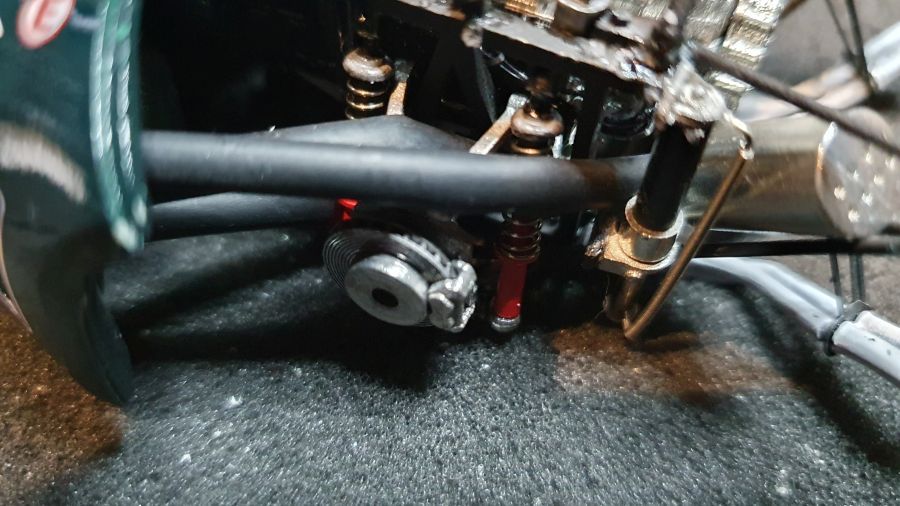
Alle schokbrekers maken en plaatsen.
Creating all shocks and add them.

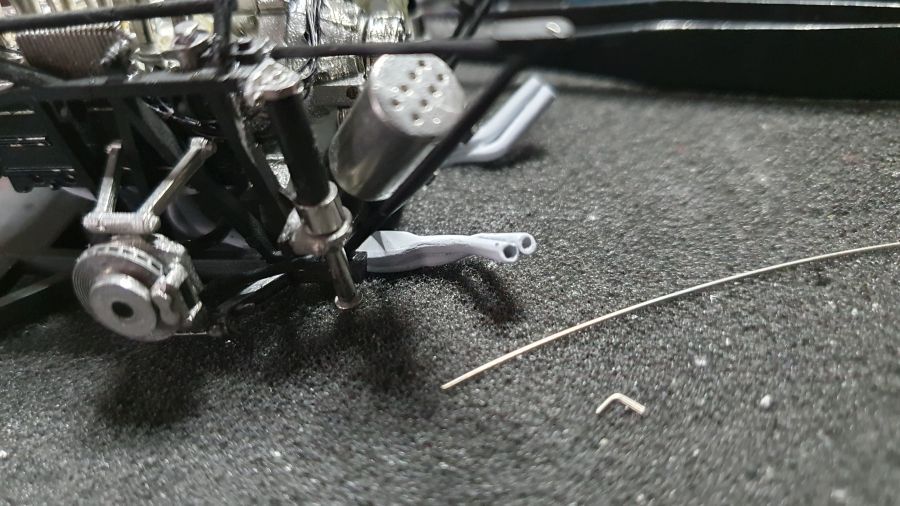
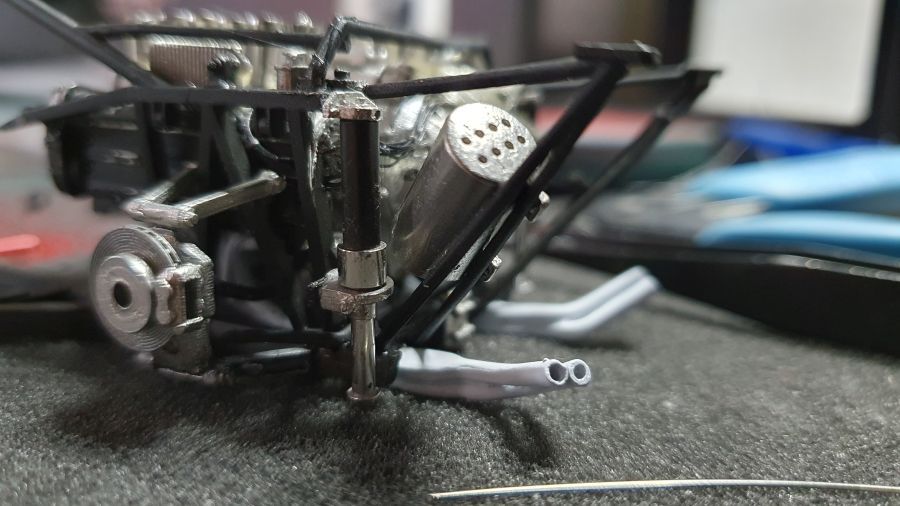
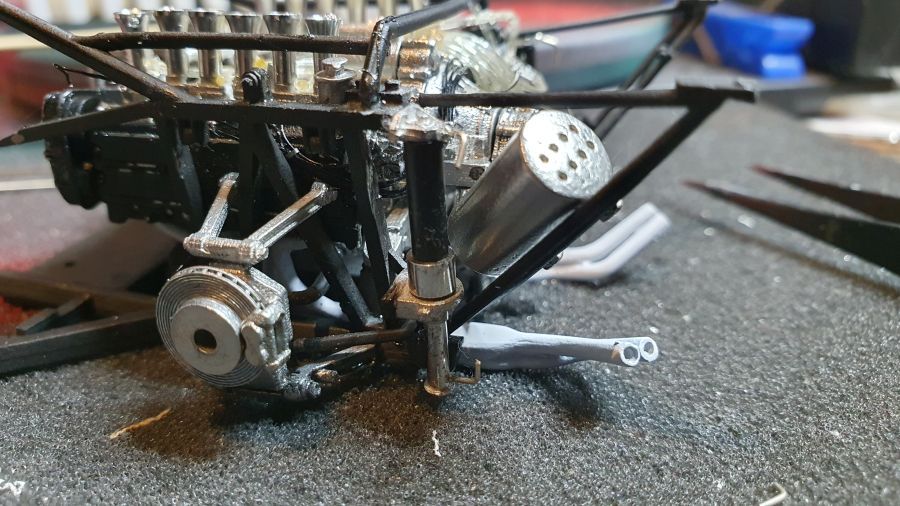
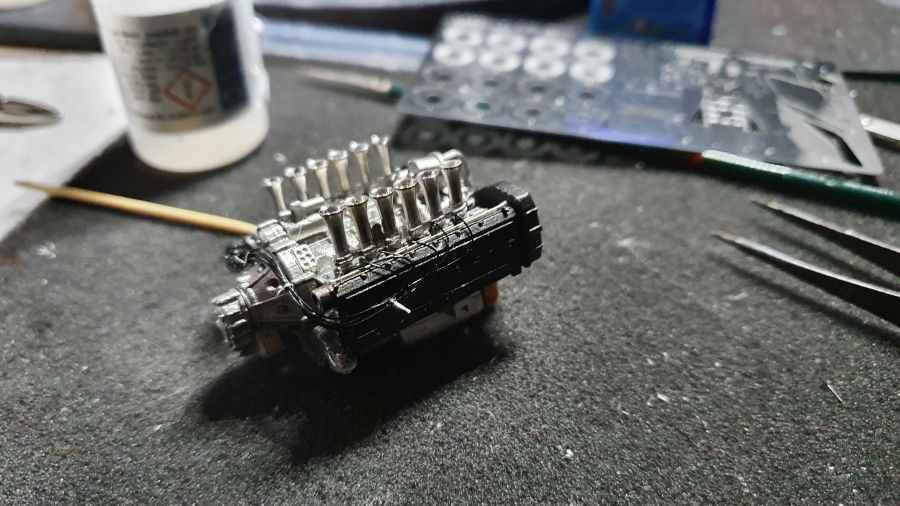
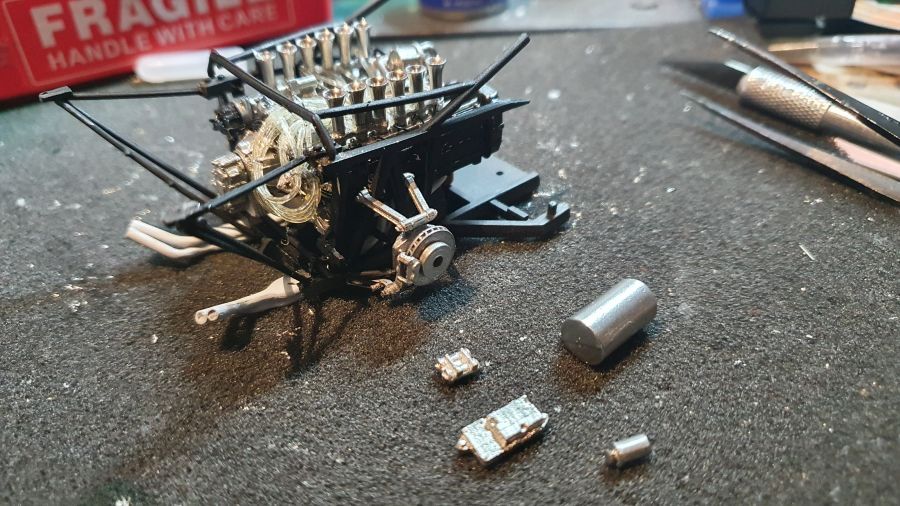
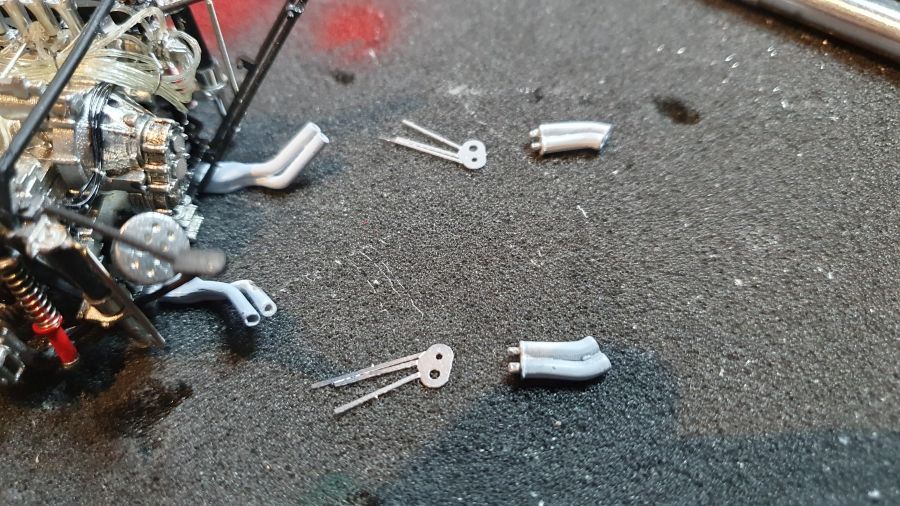
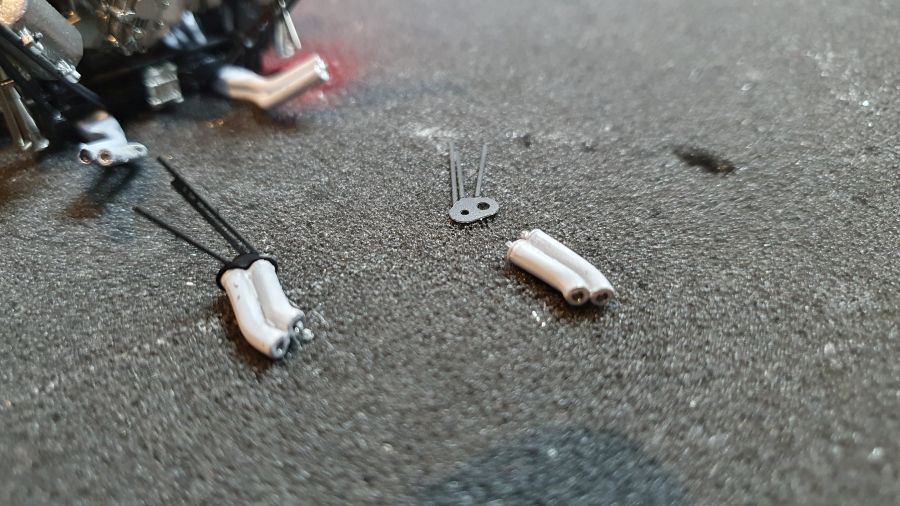
Een paar onderdelen voor de uitlaten gespoten.
Painted some parts for the exhausts.
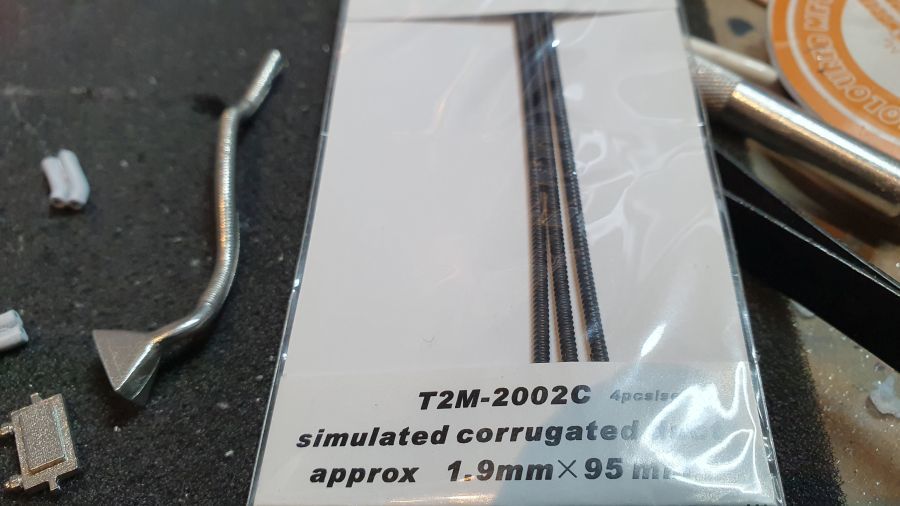
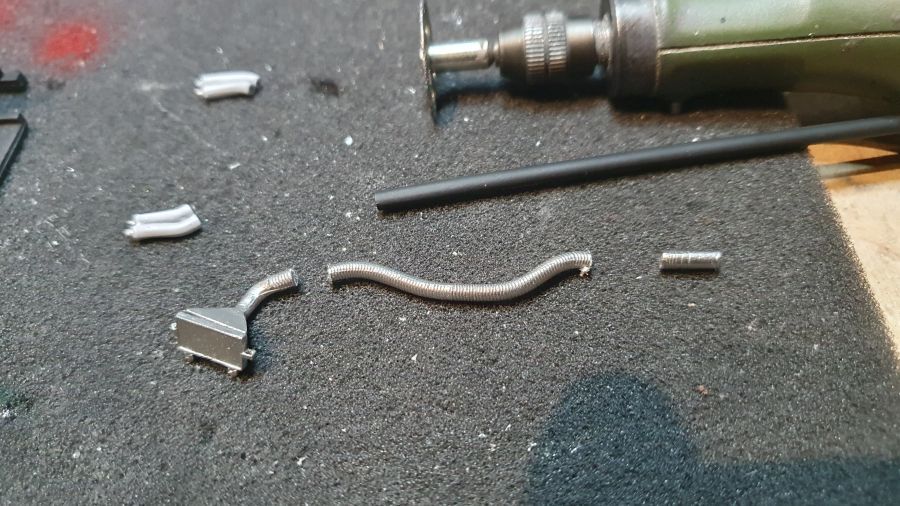
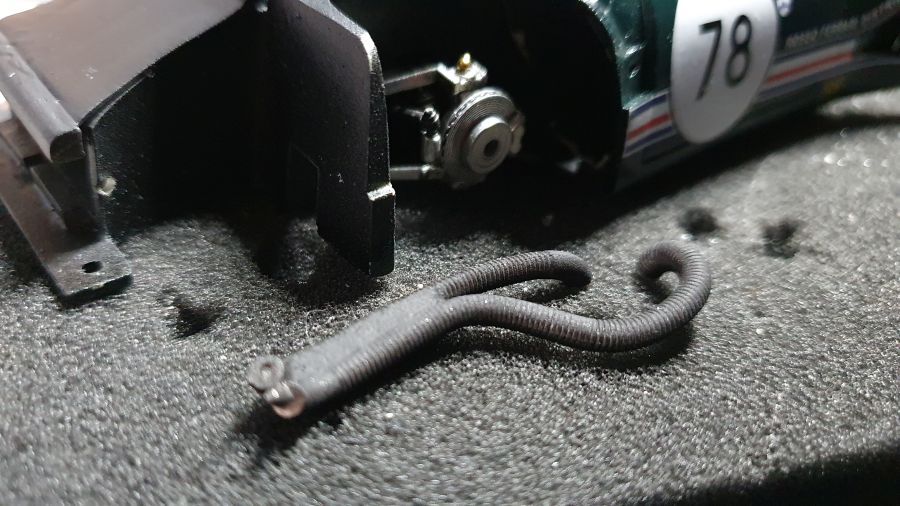
MFH levert een leiding die bijna niet te plaatsen is. Ik hem vervangen door flexibele buis.
MFH delivers a part that's hardly able to add. I'll change it by flexible tube.


Testen.
Test fit.
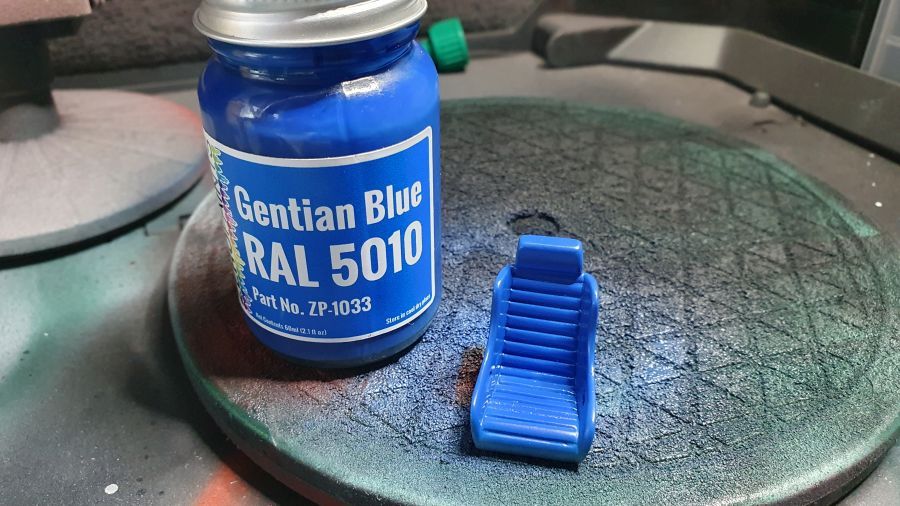
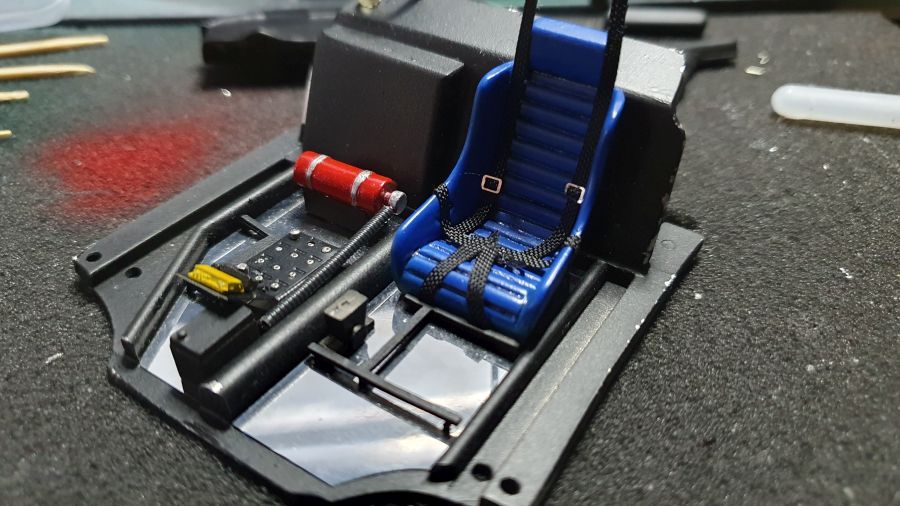
Het eerste werk aan de stoel, laten drogen.
The first work to the seat, let it dry.
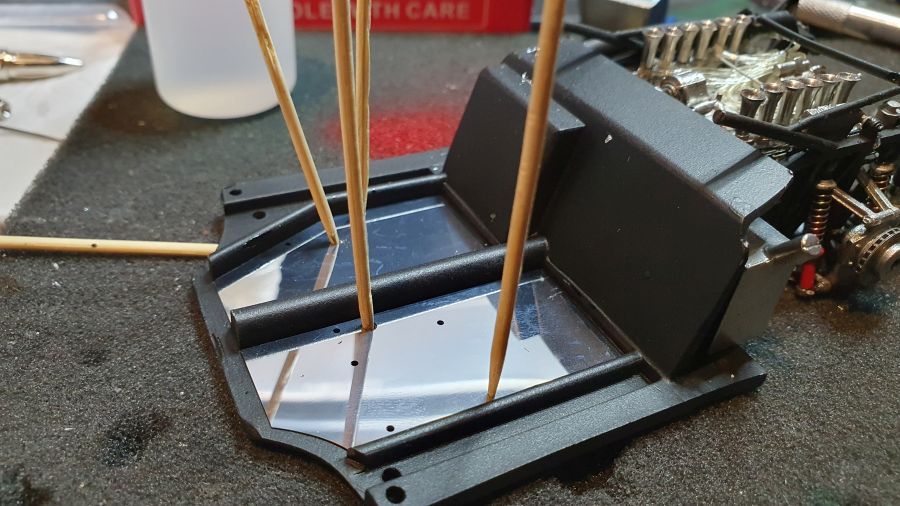
Door met de binnenkant.
To continue with the inside.
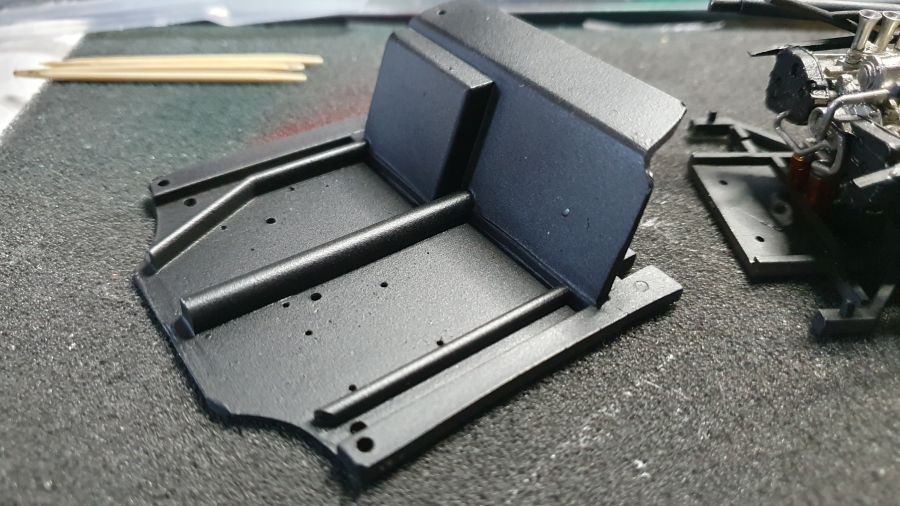
De gaatjes goed uitlijnen.
Lining up the holes.
Ik weet niet hoe MFH dit in gedachten had, maar dit gaat niet werken... improviseren.
I don't know how MFH had this in mind, but this will not work... improvising.
De steunen wat afgeknipt en door flexibele buis vervangen.
I've cut down the supports and will change them by flexible tube.
Je kunt onmogelijk de body over het reservoir plaatsen met de steunen aan het frame van de motor.
It's impossible to move the body over the reservoir with those supports to the engine frame.
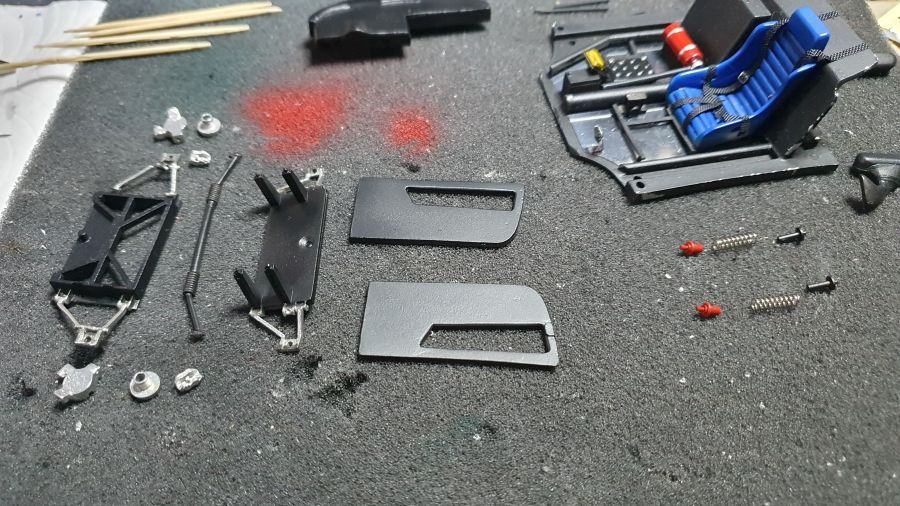
Een beetje traag i.v.m. andere verplichtingen. Verder met het interieur.
A bit slow because of other obligations. To continue on the interior.
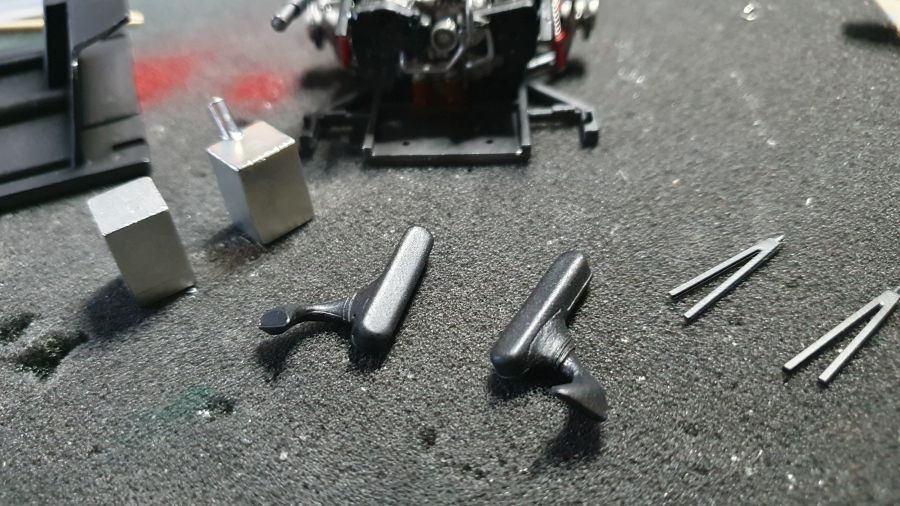
Dan de voorwielophanging.
Next is the front wheel suspension.
Dan de onderdelen aan het bodywerk bevestigen.
Then mounting the parts to the body work.

Deze leidingen zijn veel te stug, naar mijn mening. Ik ga ze vervangen door krimpkous..
These tubes are too stiff, in my opinion. I will replace them by shrink tube.

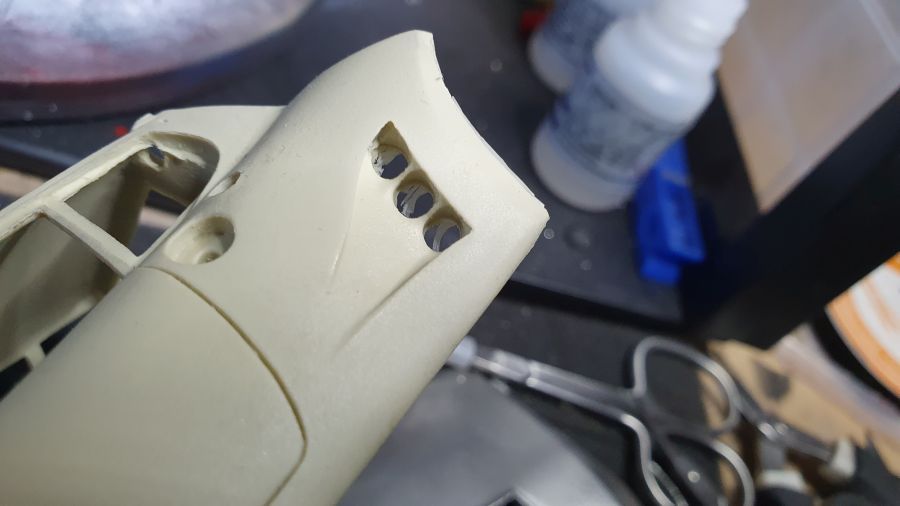
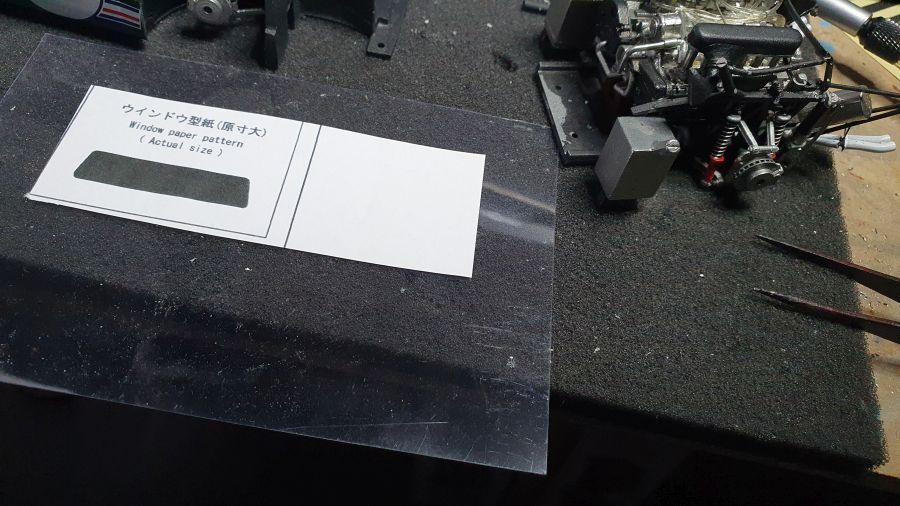
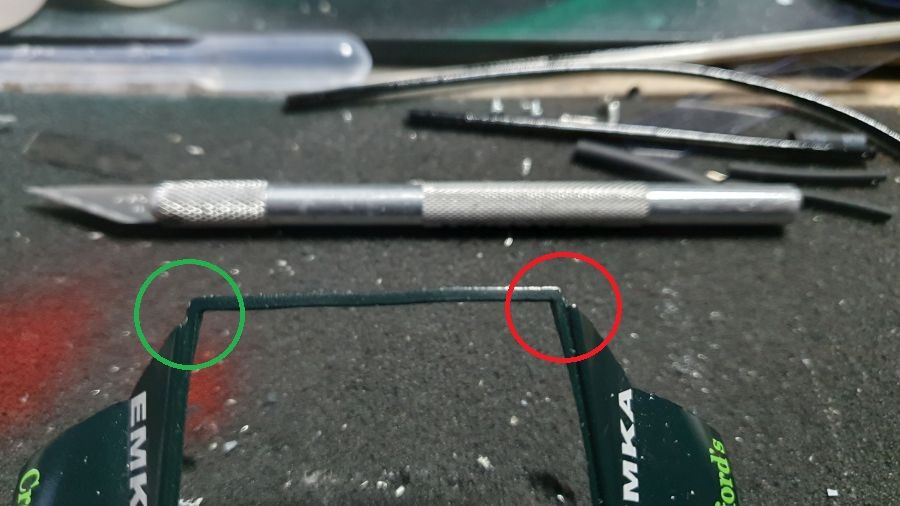
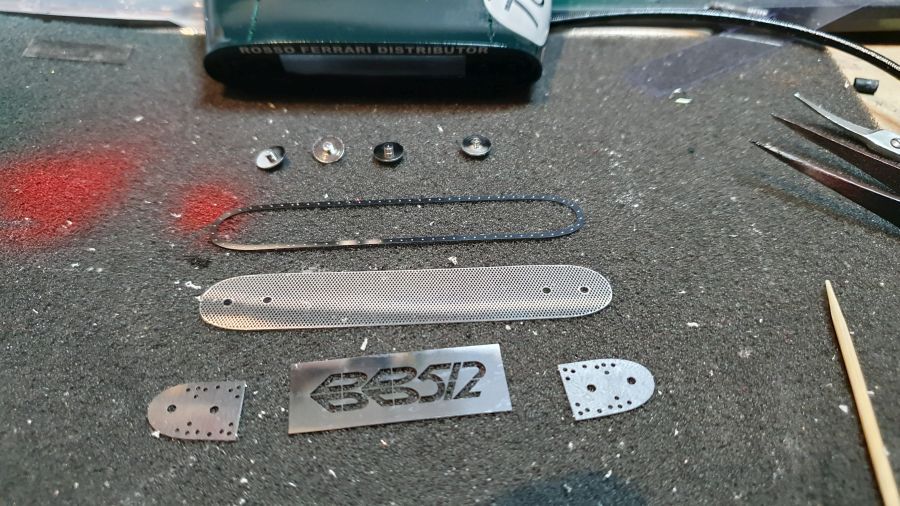
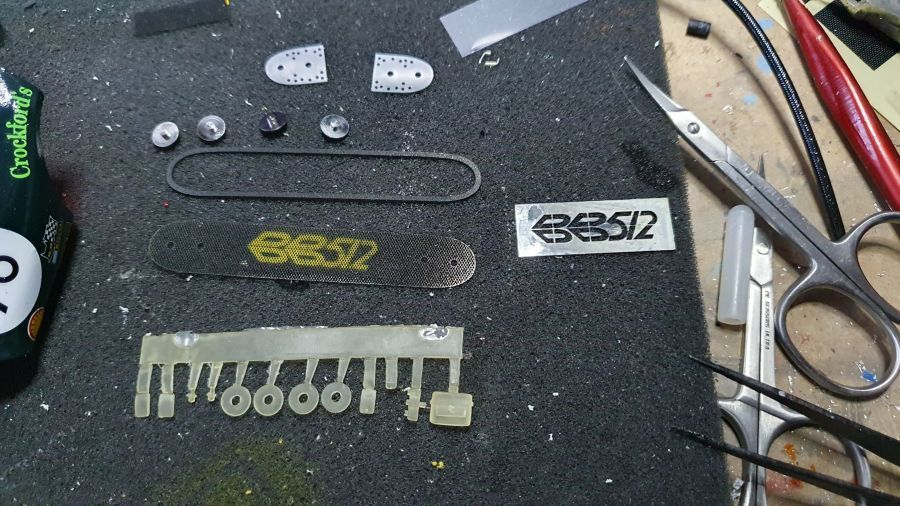
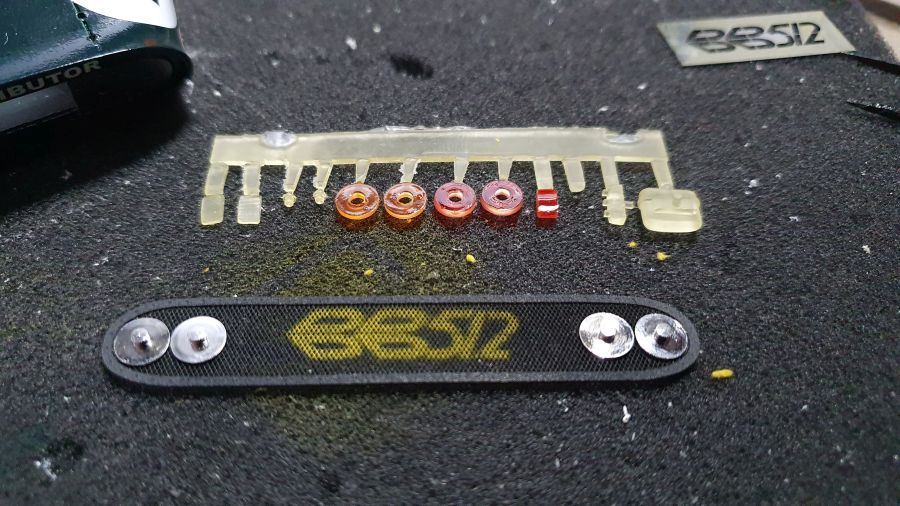
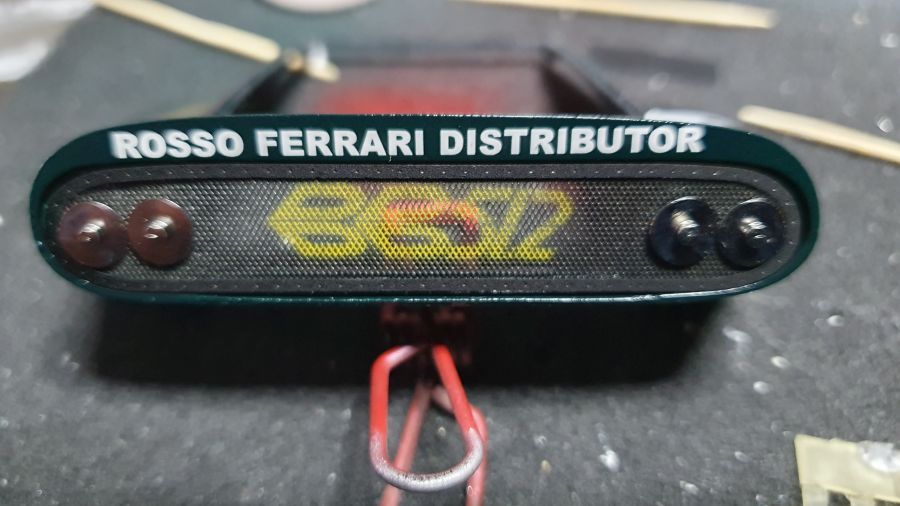
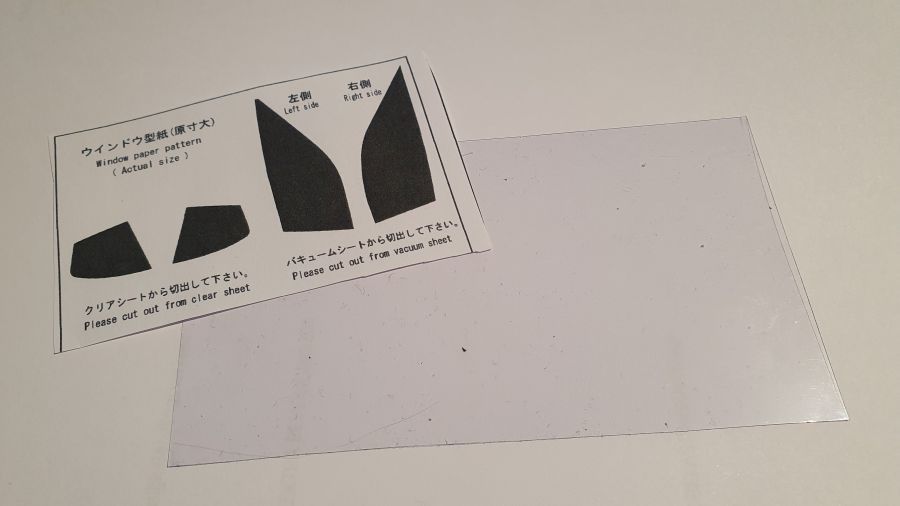
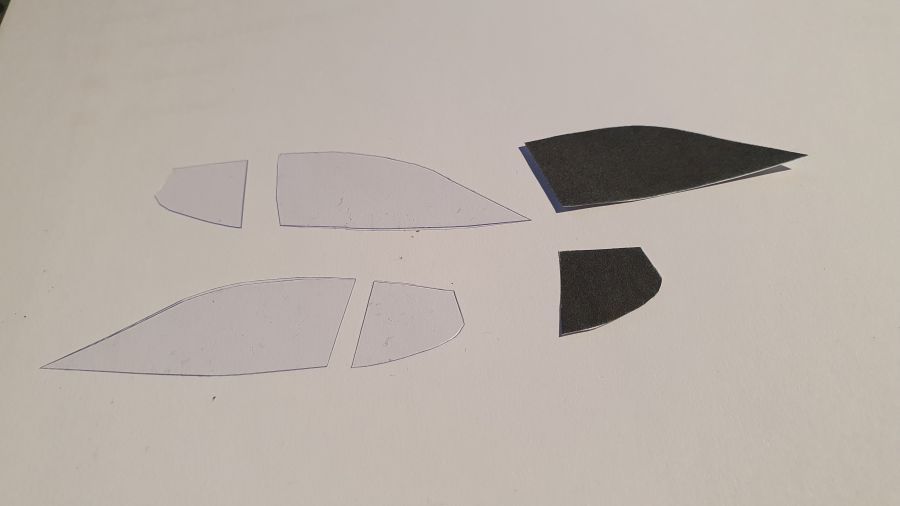
Het achterraam wordt geknipt met een sjabloon. MFH heeft niet dit raam bijgevoegd.
Cutting the rear window with a template. MFH didn't add this window.
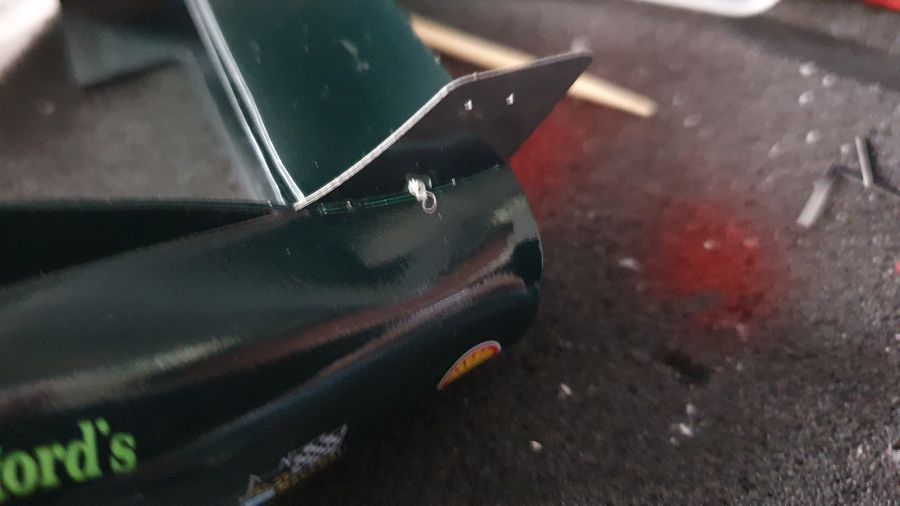
Bij het plaatsen van het motordeel heb ik iets teveel kracht uitgeoefend op de schroeven. De B-stijl is geknapt.
While adding the engine parts i gave the screws a little too much pressure. The window frame was damaged.

Gerepareerd! Aardig gelukt denk ik.
Repaired! It worked well i think.
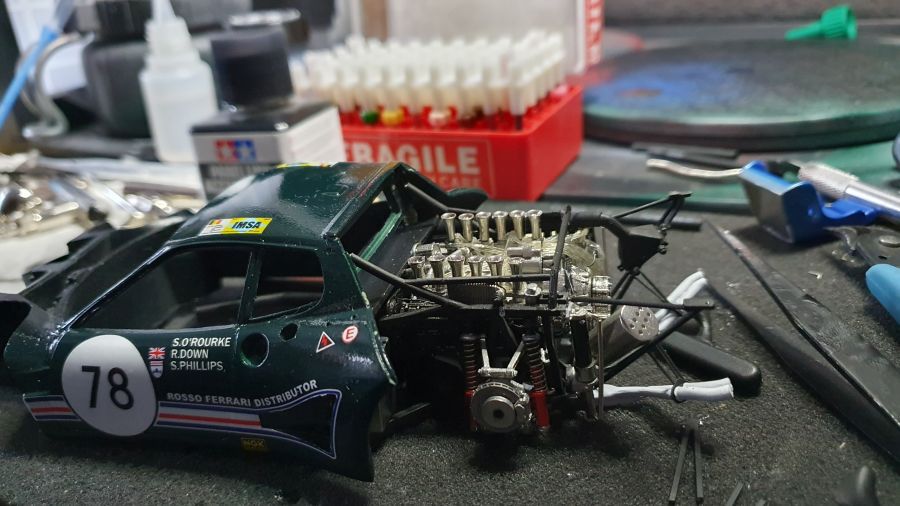
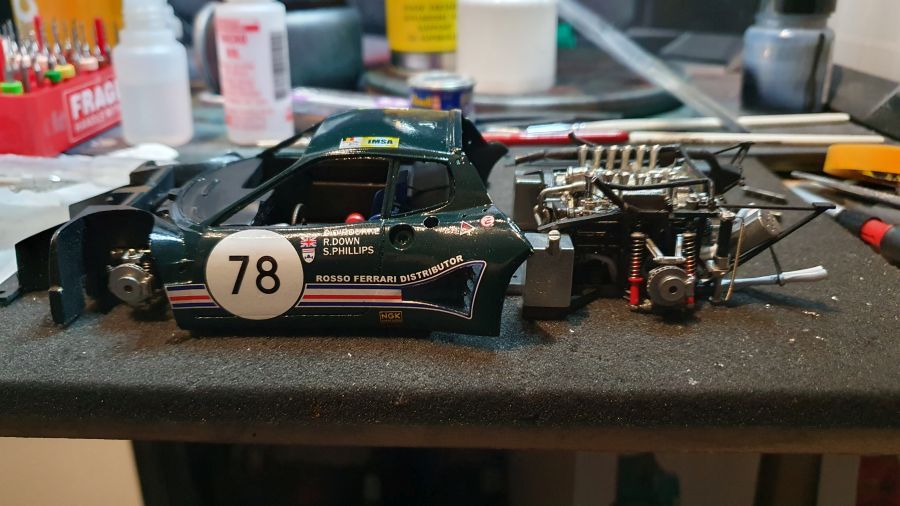
En de motor erin...
And the engine added...

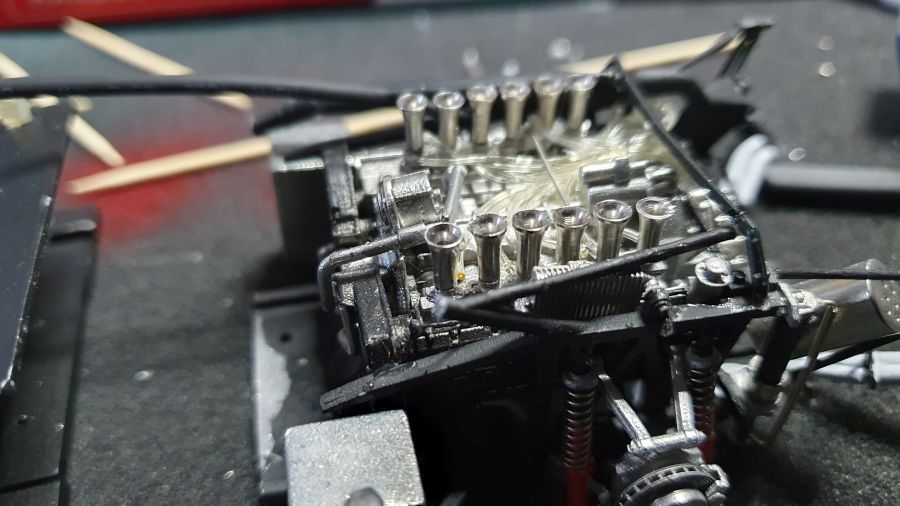
Koelslangen aan de voorkant.
Cooler tubes at the front.

En achter...
And the back...
Testen.
Test fit.
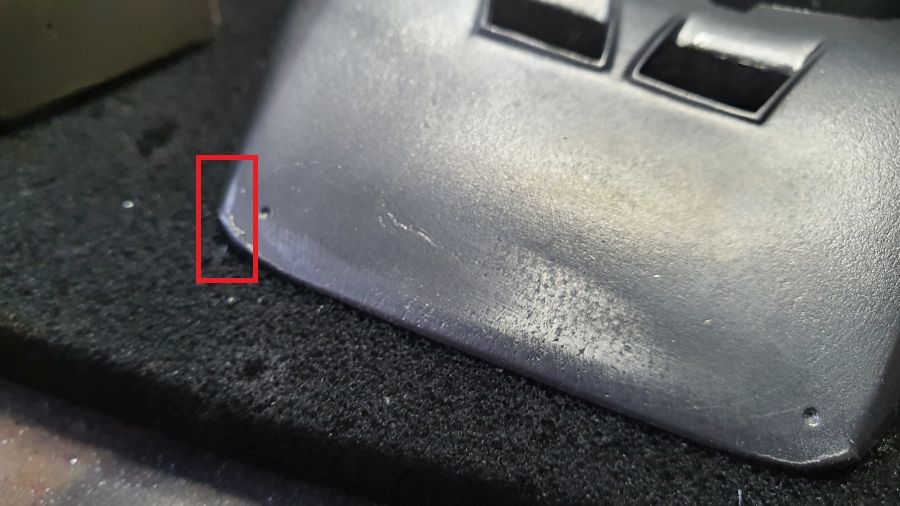
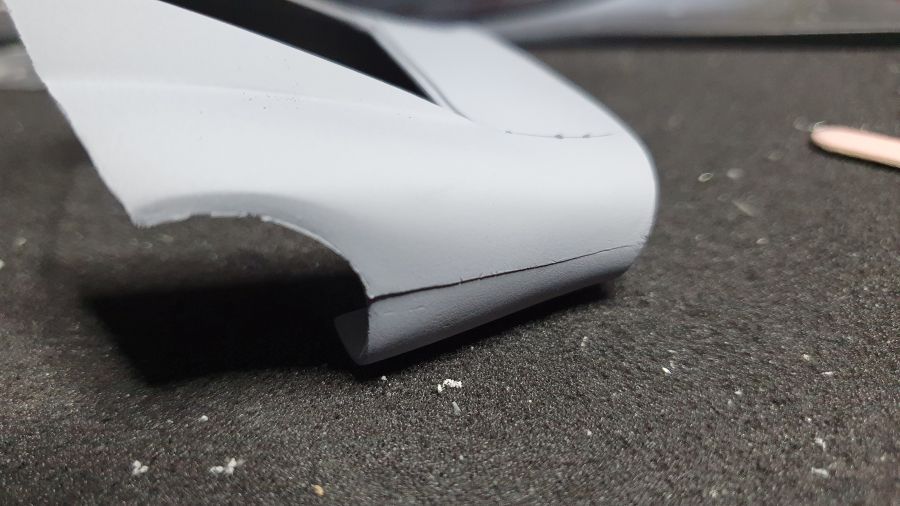
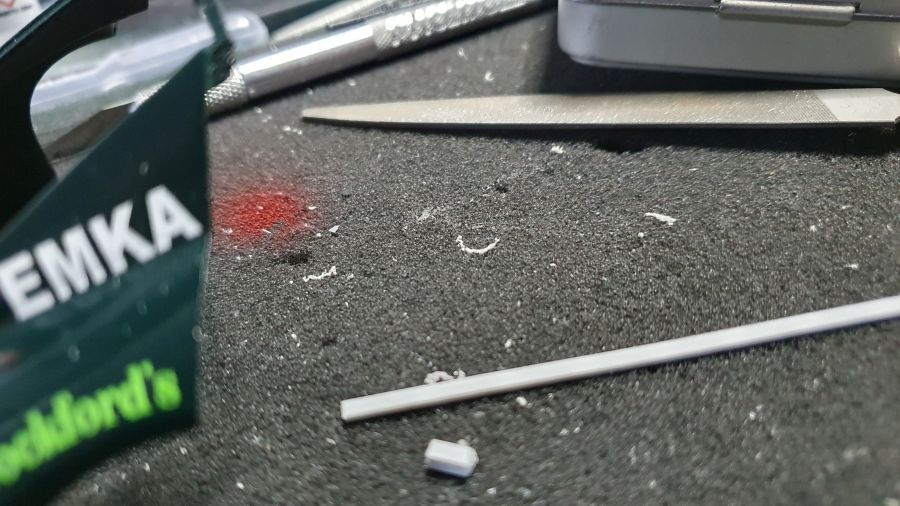
Dit kan wel eens lastig worden. De achterkant moet met een schroefje worden geplaatst, maar de rechterkant (rood) is wat korter. Het schroefje gaat niet passen. Daar ga ik iets aan doen met plastic strip.
This could give trouble. The rear should be mounted with a screw, but the right side (red) is a bit more short. The screw will not fit. I will solve this by using plastic strip.

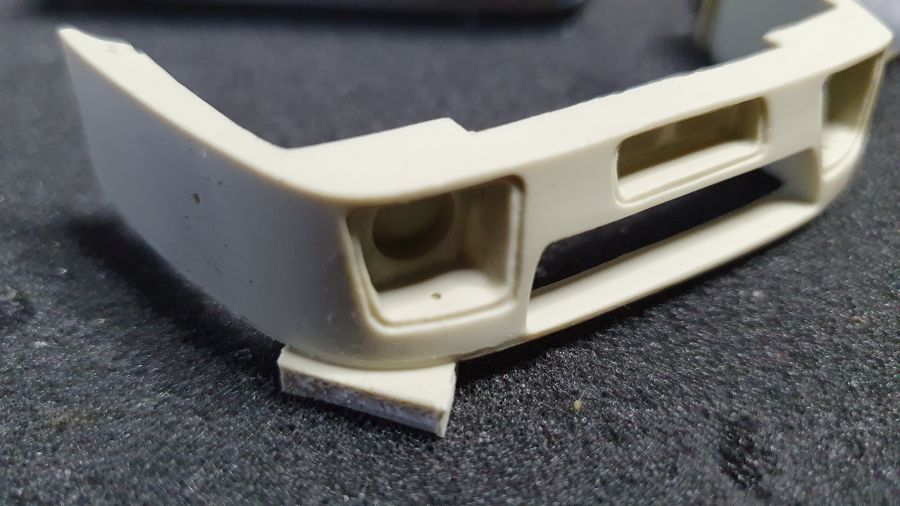
Het blijkt dat ik beide kanten moet aanpassen.
It turned out i need to do both sides.
Hier kun je zien hoeveel het gaatje voor het schroefje afwijkt.
Here you can see how much the hole for the screw differs.
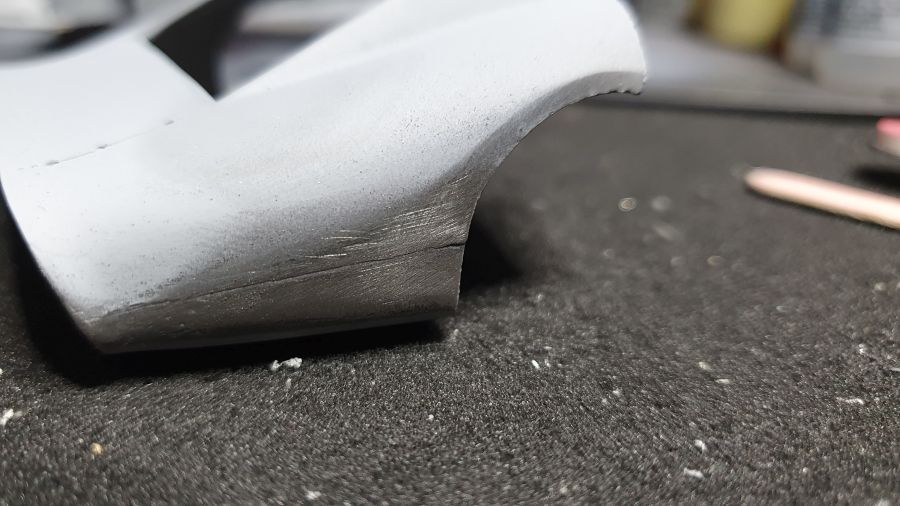
Verder met de achterkant.
To continue with the rear.
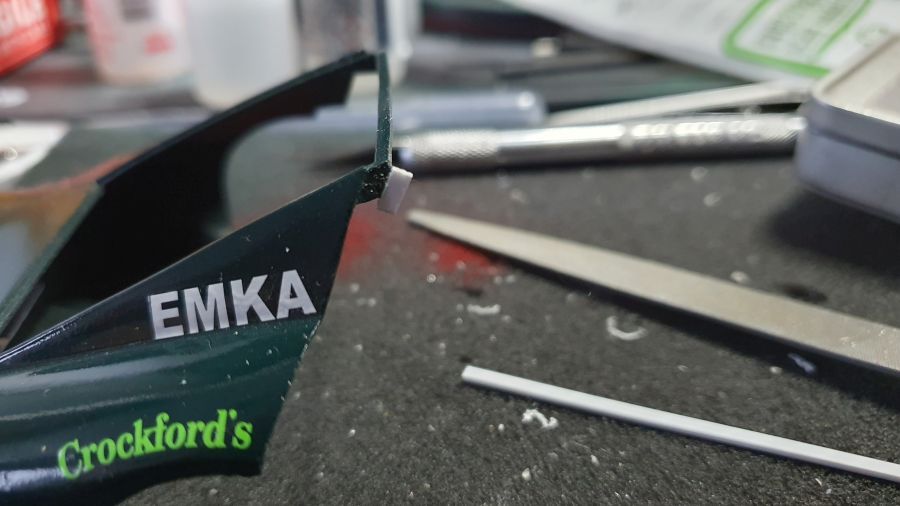
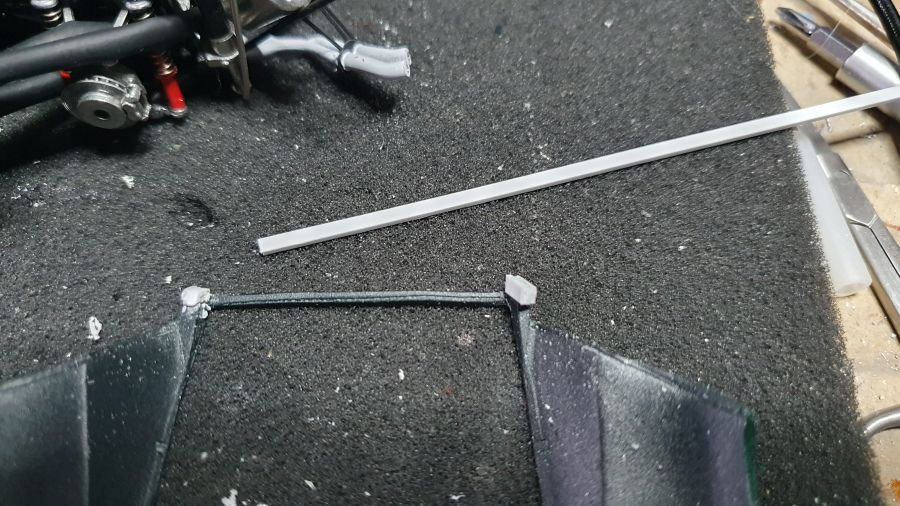
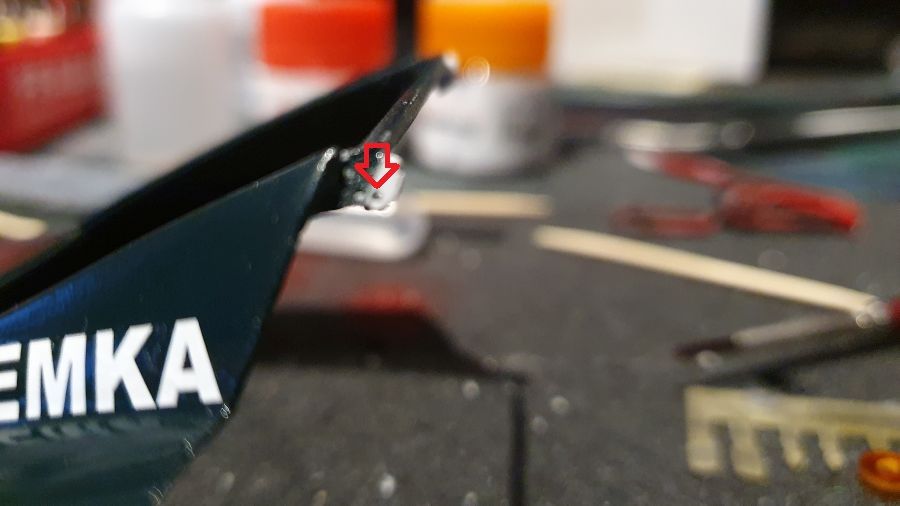
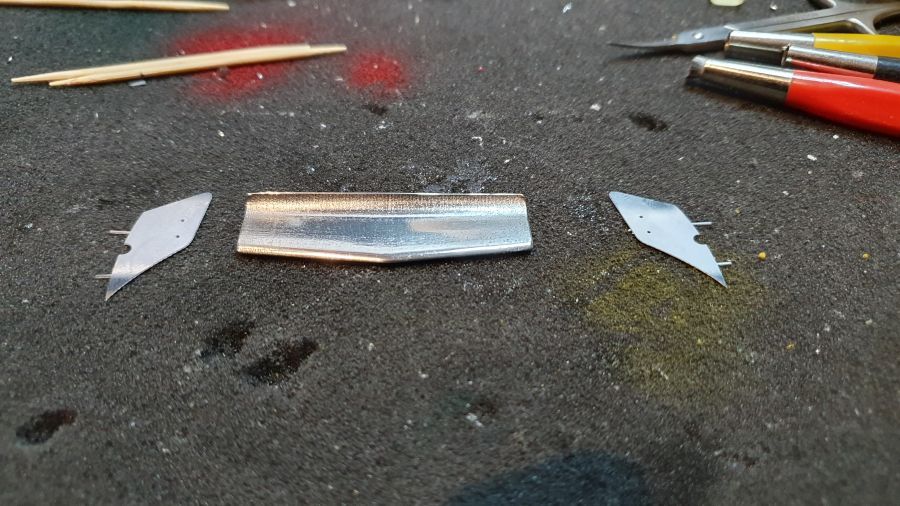
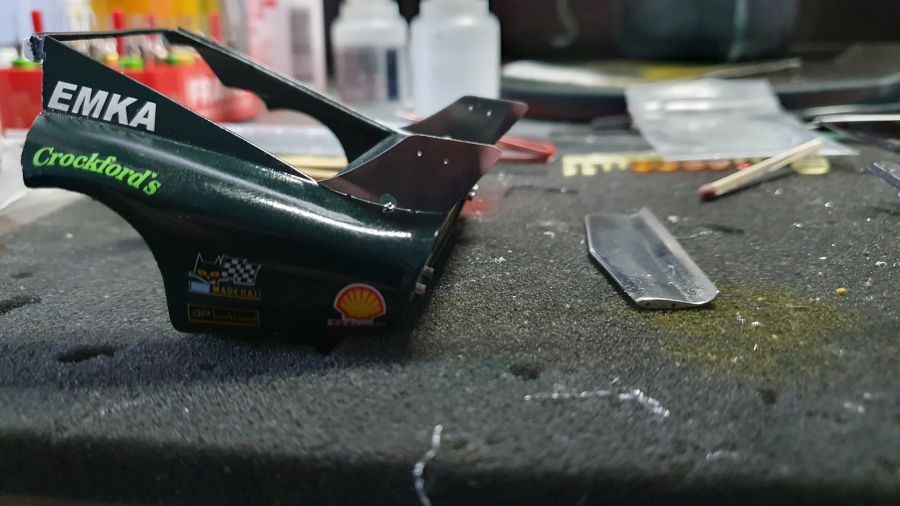
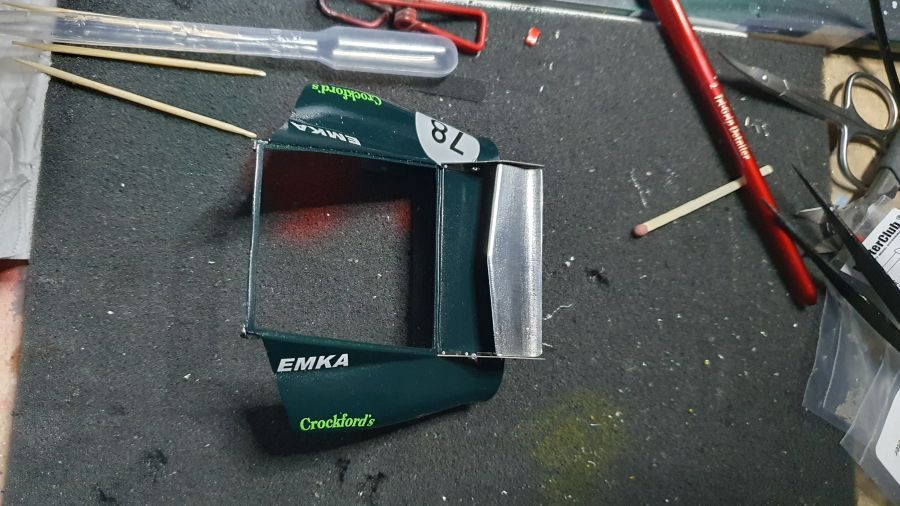
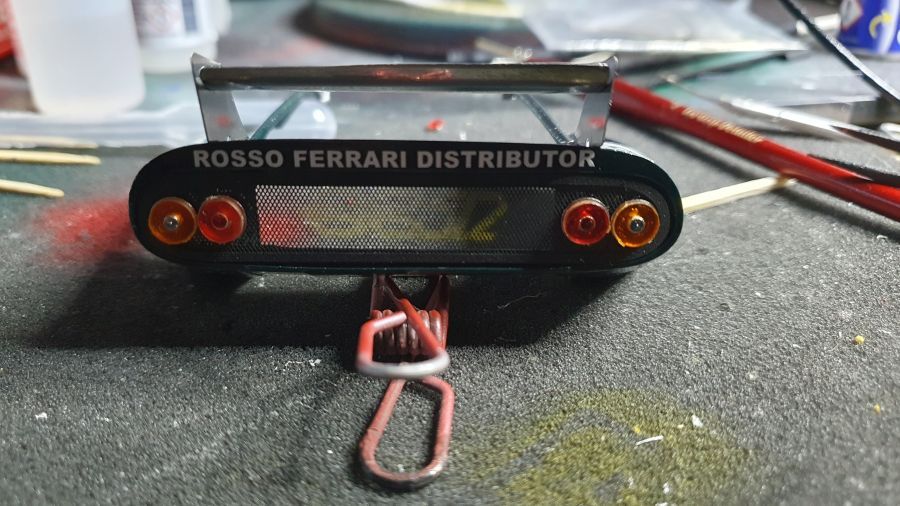
Dan de vleugel.
Next is the wing.
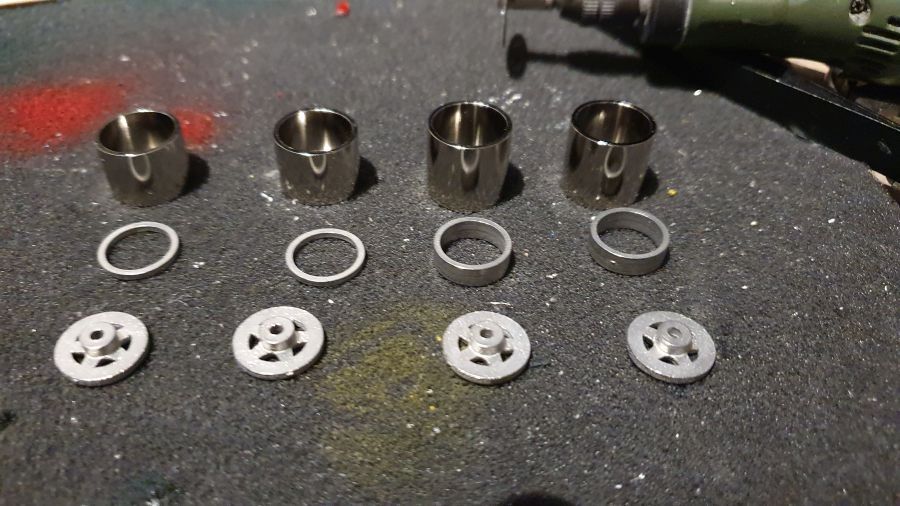
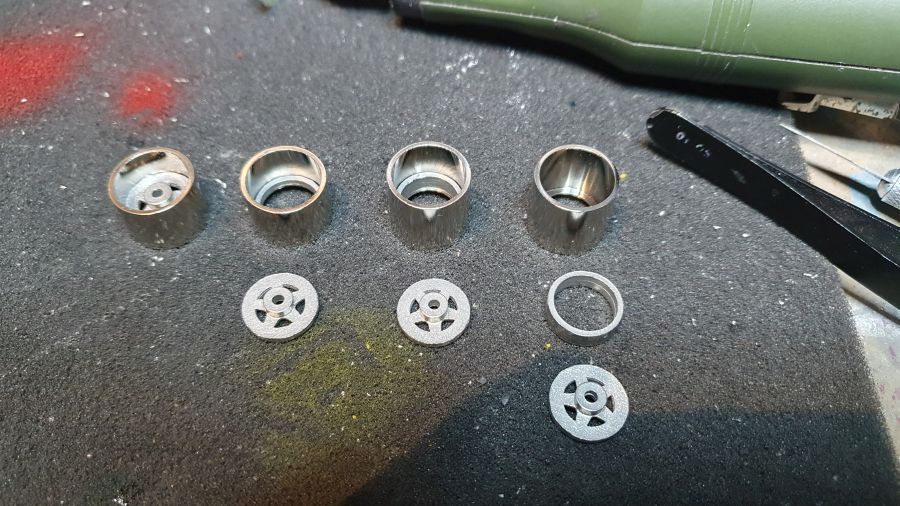
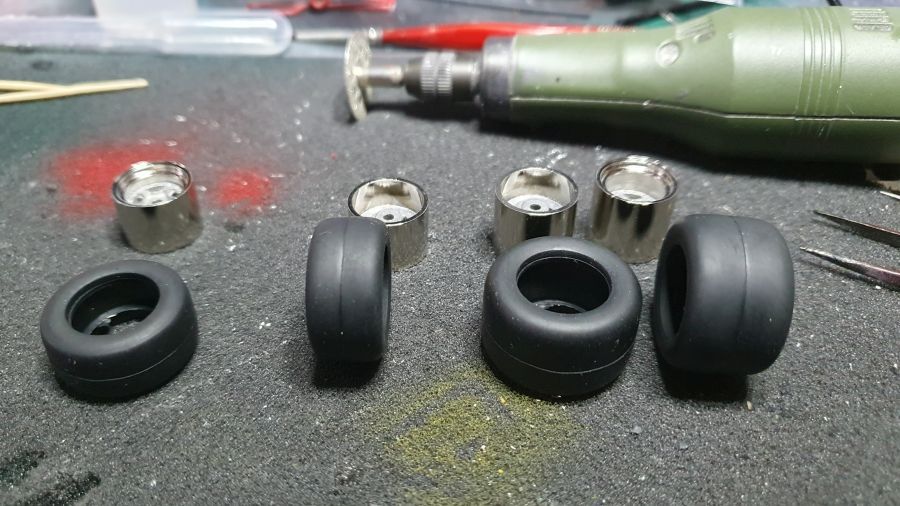
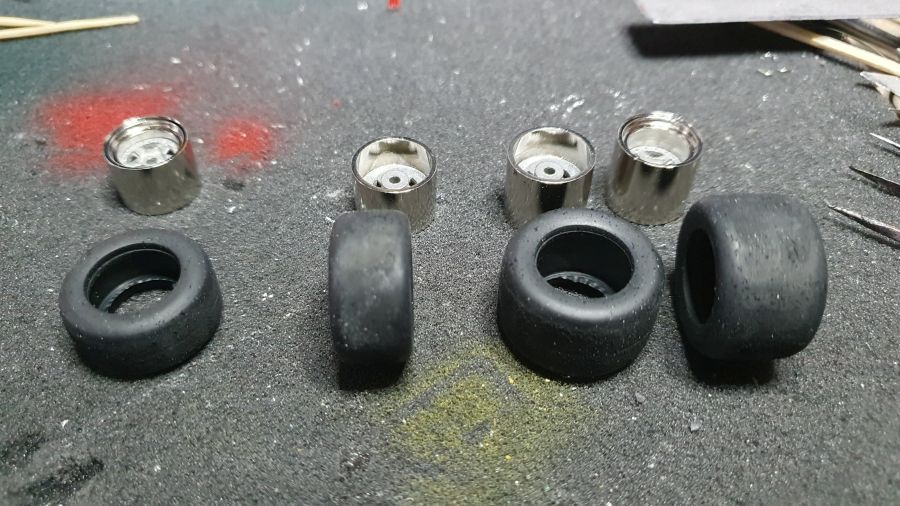
Voordat ik de beide kappen monteer, ga ik eerst de wielen erop zetten. Dat gaat nu gemakkelijker.
Before mounting the two hoods, i will first add the wheels. That's more easy to do now.
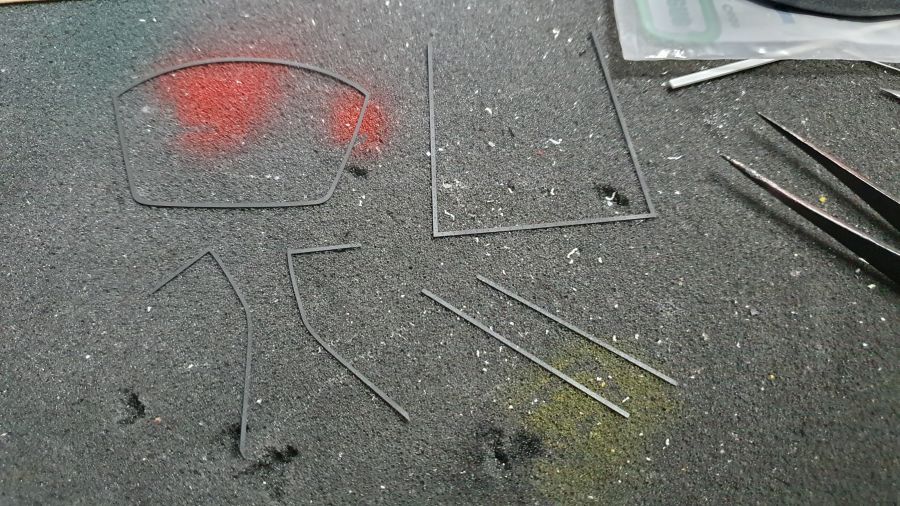
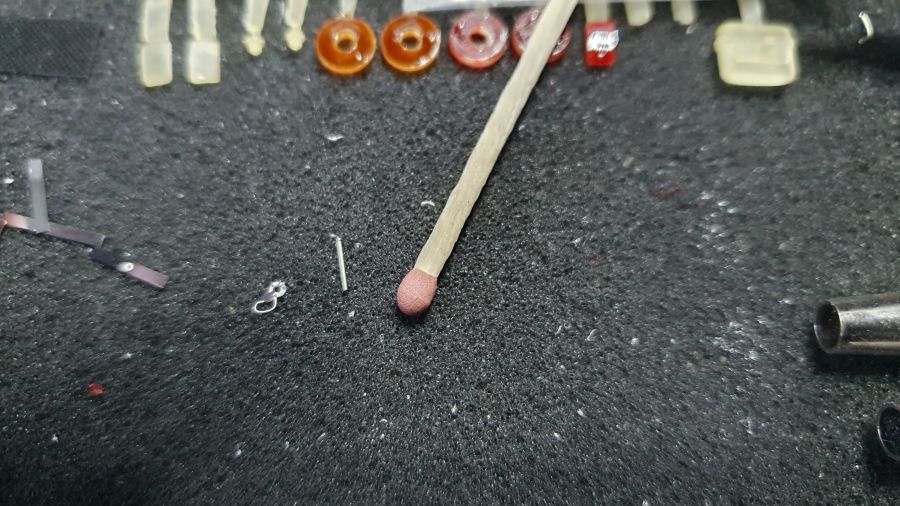
Tijd voor het glas. Ik gebruik hiervoor het acetaat voor mijn vacuum machine. Er blijven altijd stukken over die ik bewaar.
Time for the glass. I am using the foil for my vacuum machine. There are always pieces left that i tend to keep.
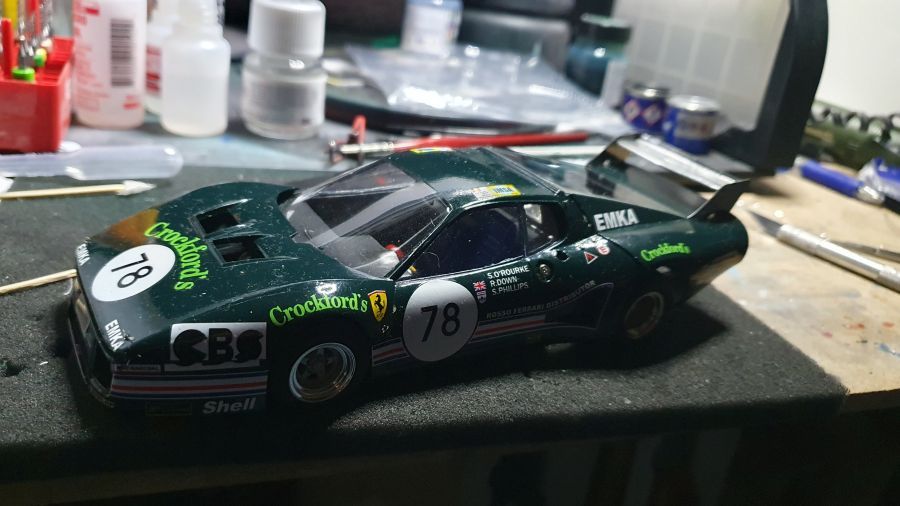
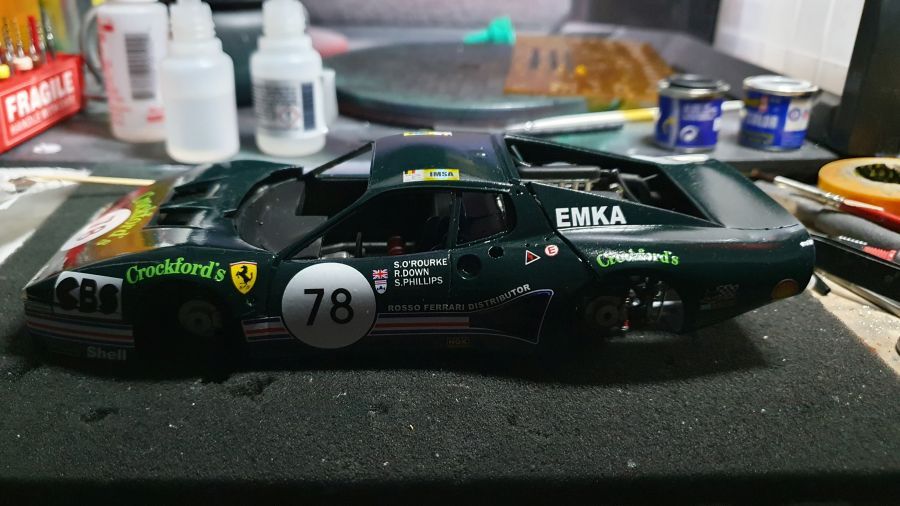
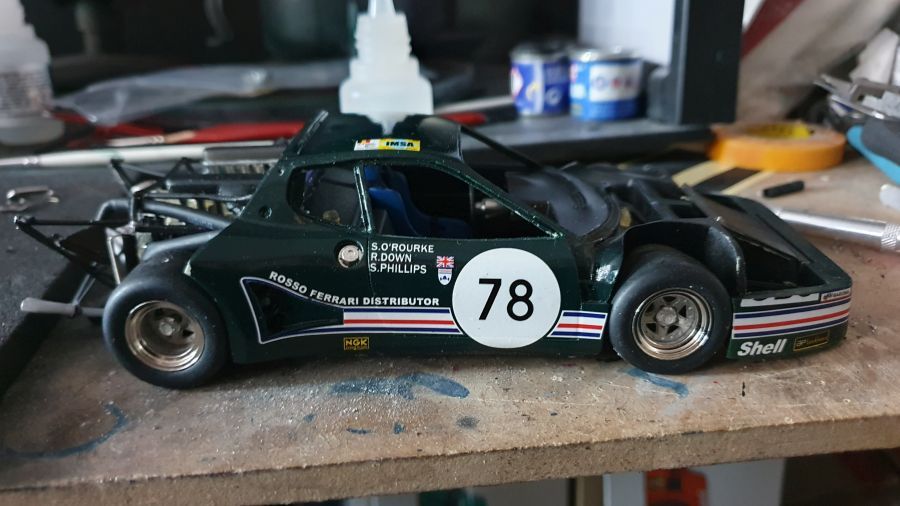
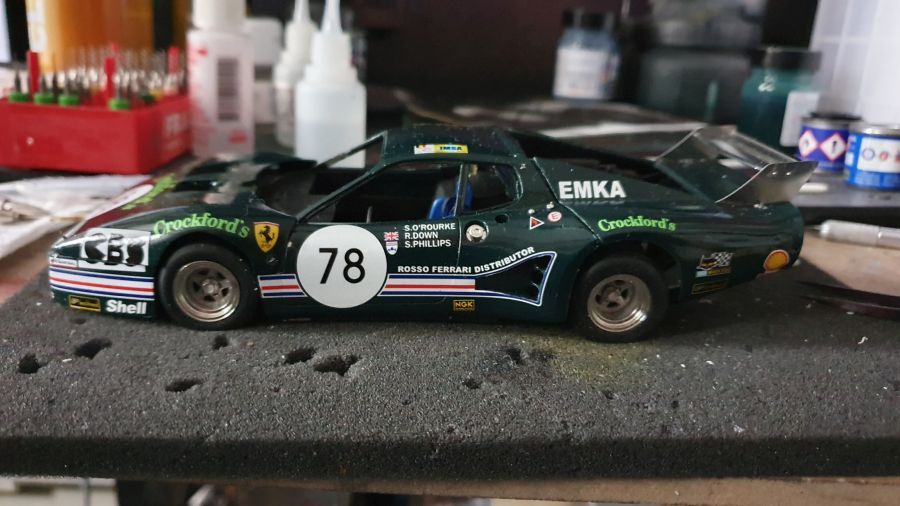
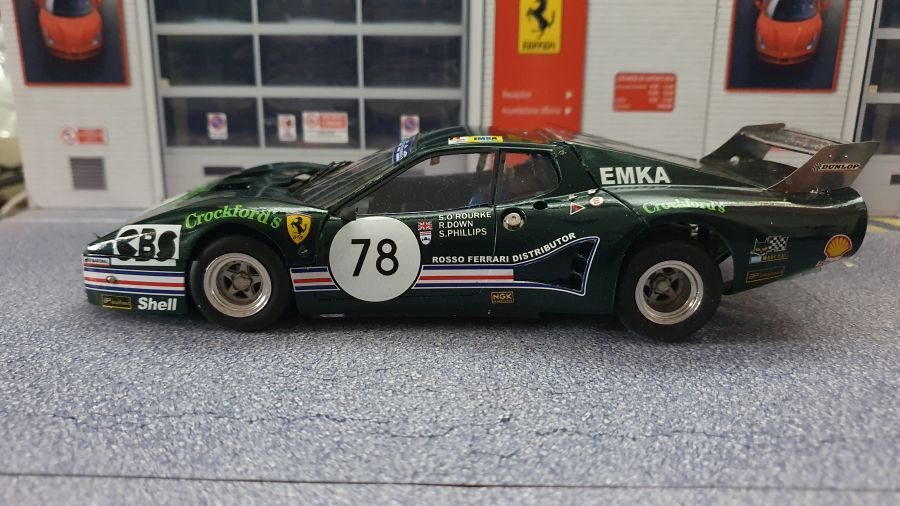
Na het plaatsen van veel onderdelen en wat poetsen, beschouw ik deze als klaar.
After adding a lot of small parts and some cleaning, i consider this one as done.
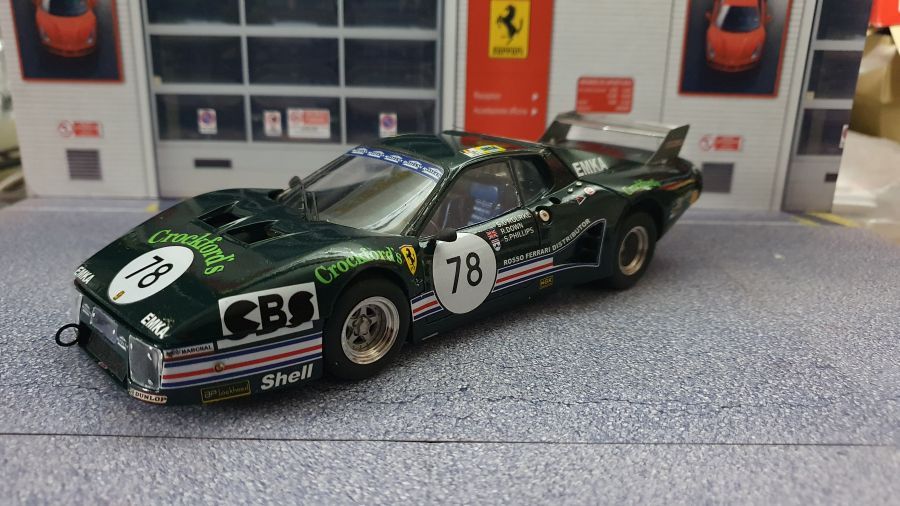
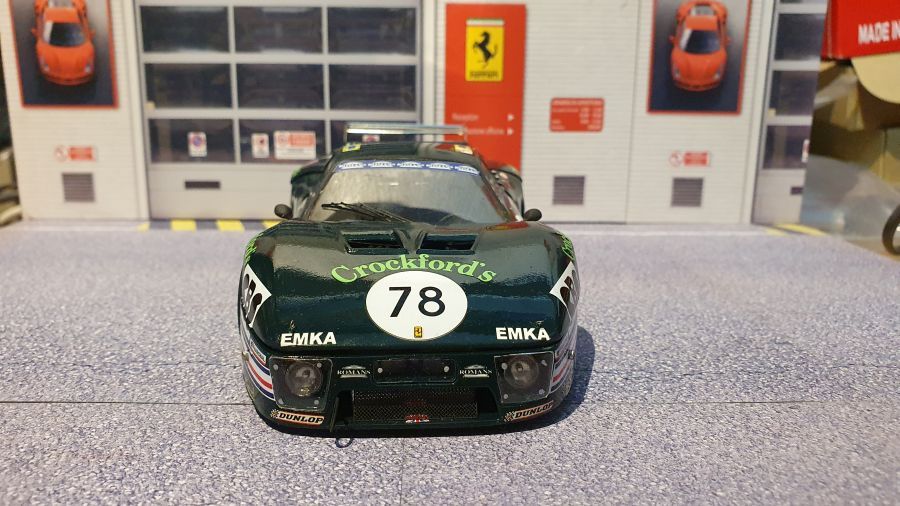
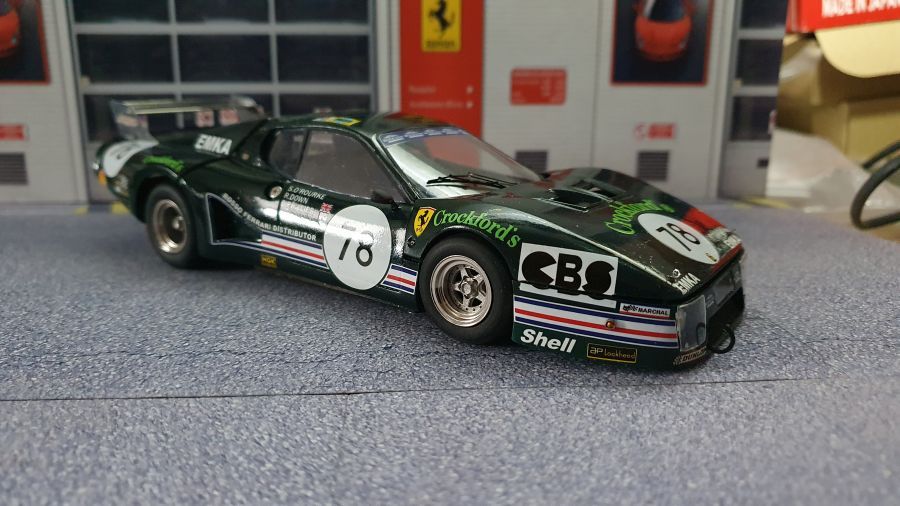
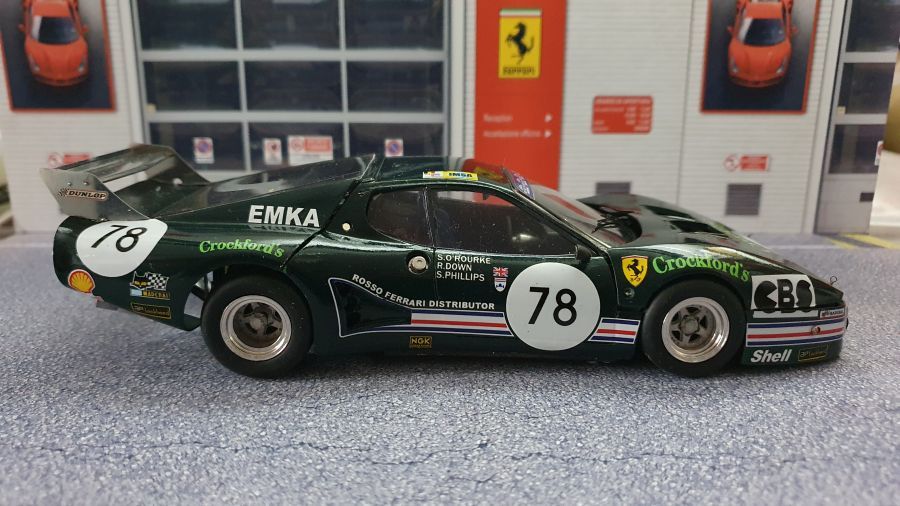
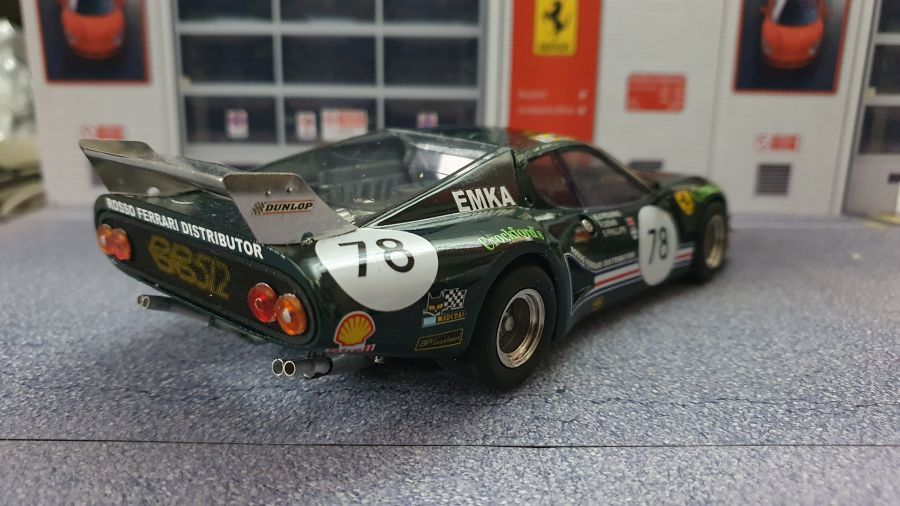
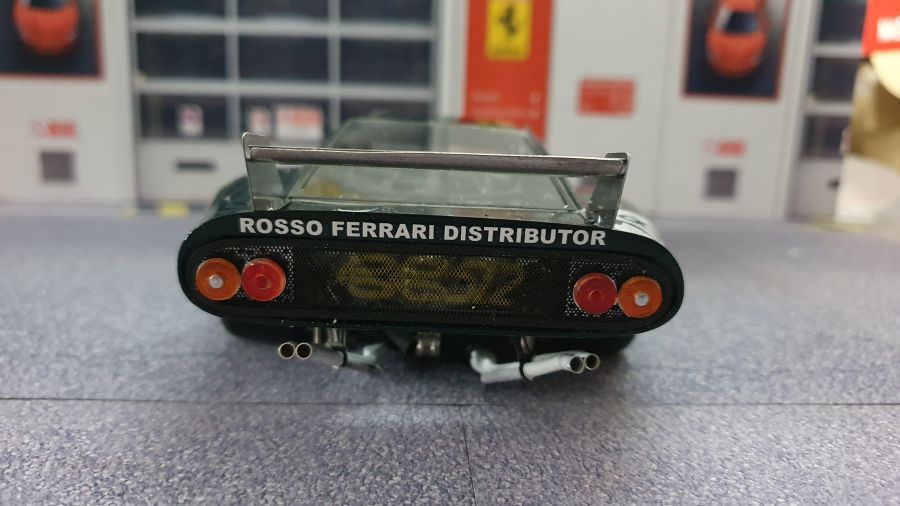
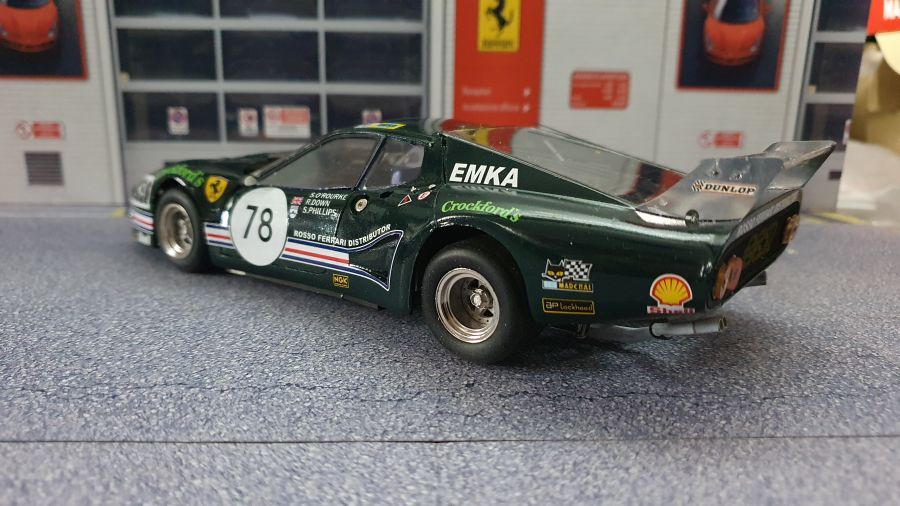
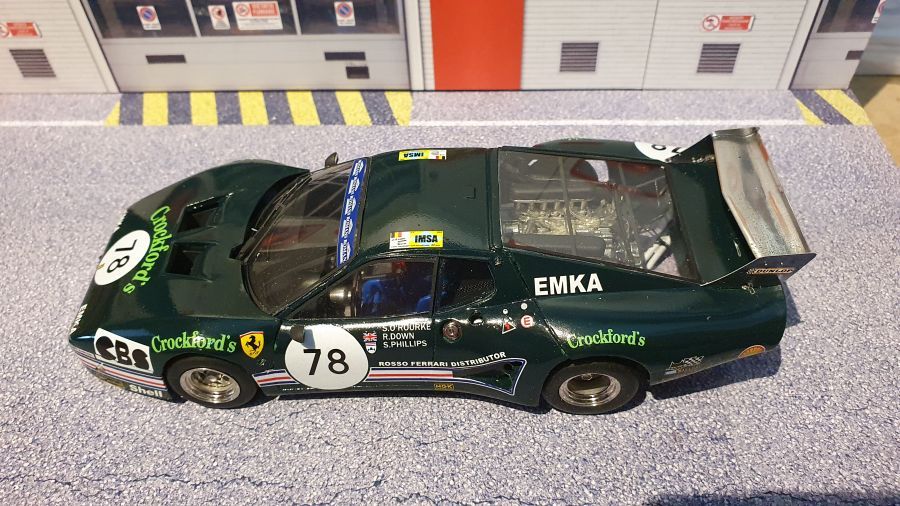
De achterkant kan open en de voorkant kan verwijderd.
The rear can be opened and the front can be removed.
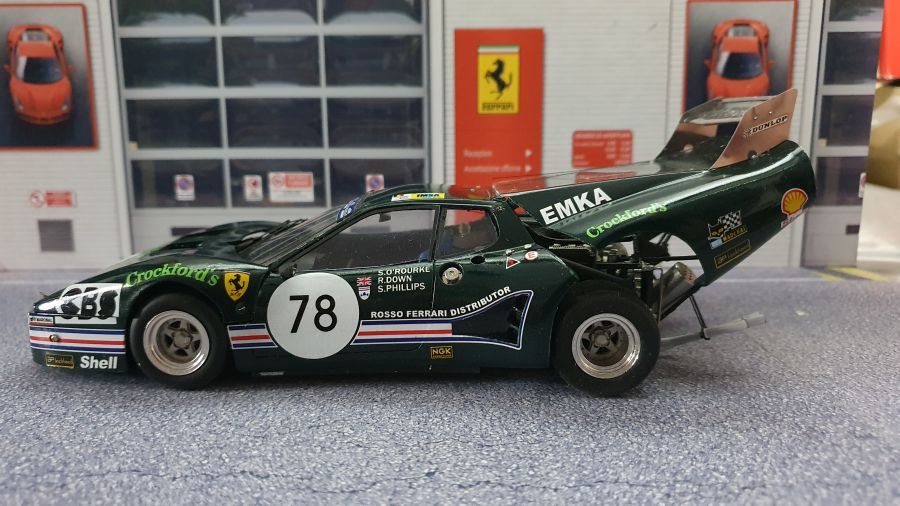
Een prachtige kit, maar het heeft zijn problemen. De body en de motor zijn zeer moeilijk aan elkaar te bevestigen, wanneer je de beschrijving van MFH volgt. De volgende keer doe ik dat zeker anders.
A beautiful kit, but it has it's flaws. The body and the engine part are very difficult to combine, if you follow the MFH manual. Next time i will do a different approach.


Ook de metalen slangen en de stijve slangen zijn lastig, daar valt bijna niet mee te werken.
Also the metal tubes and the stiff tubes are tricky, almost impossible to work with.

