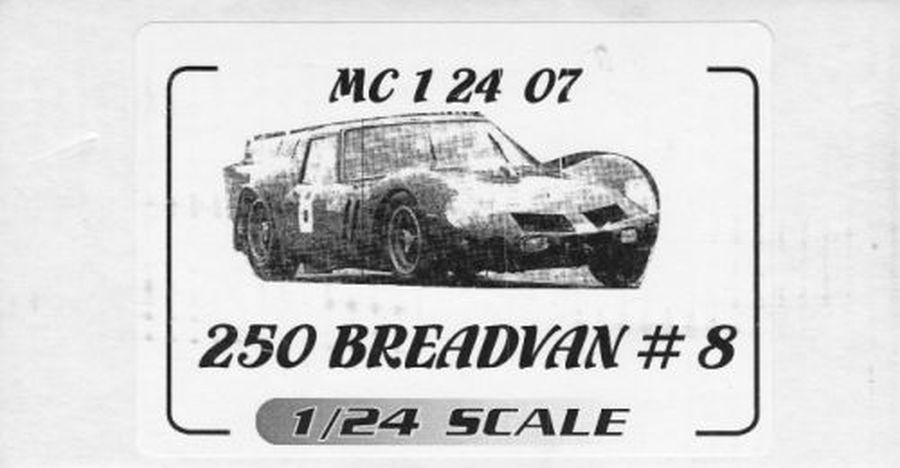
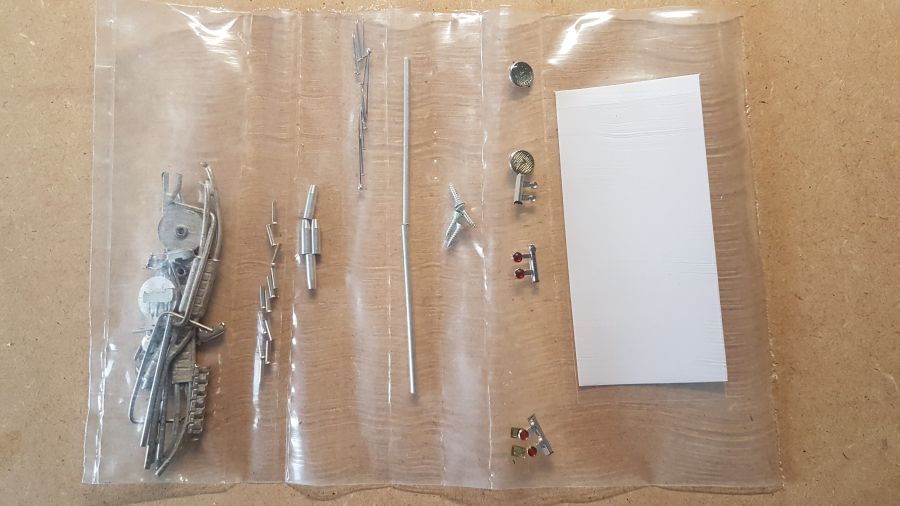
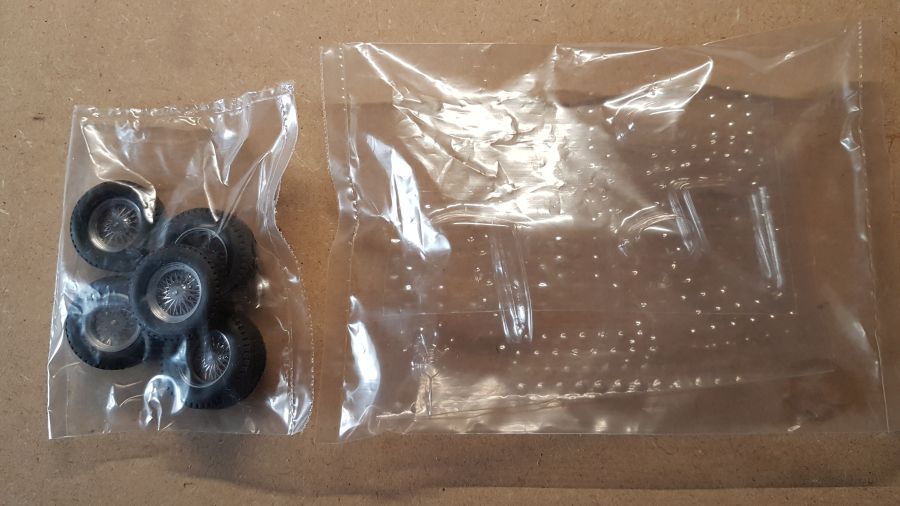
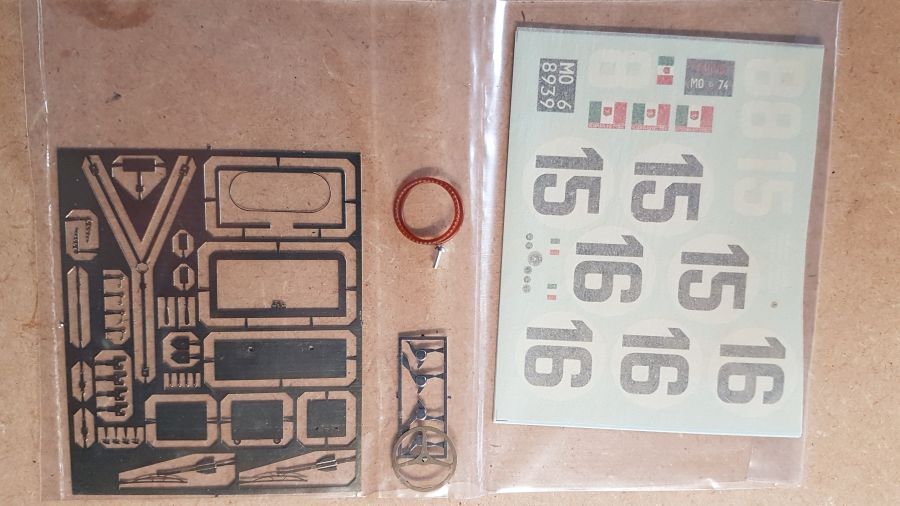
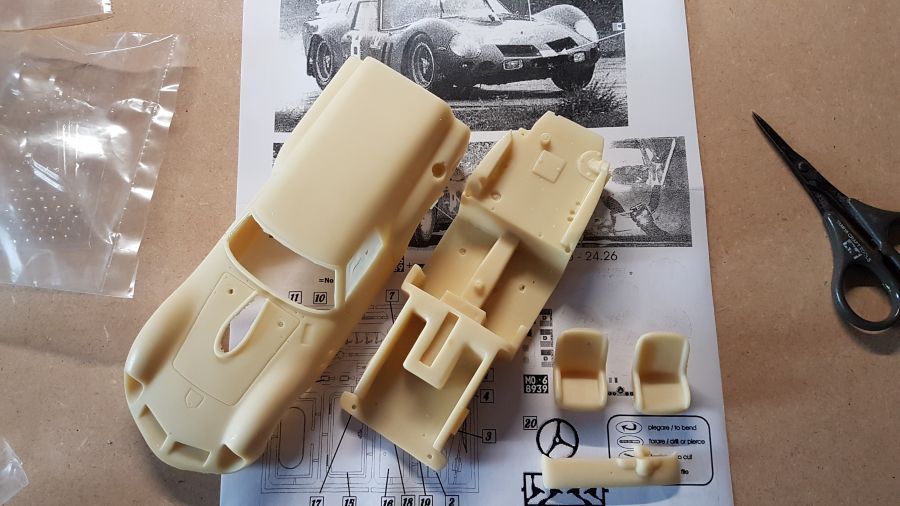
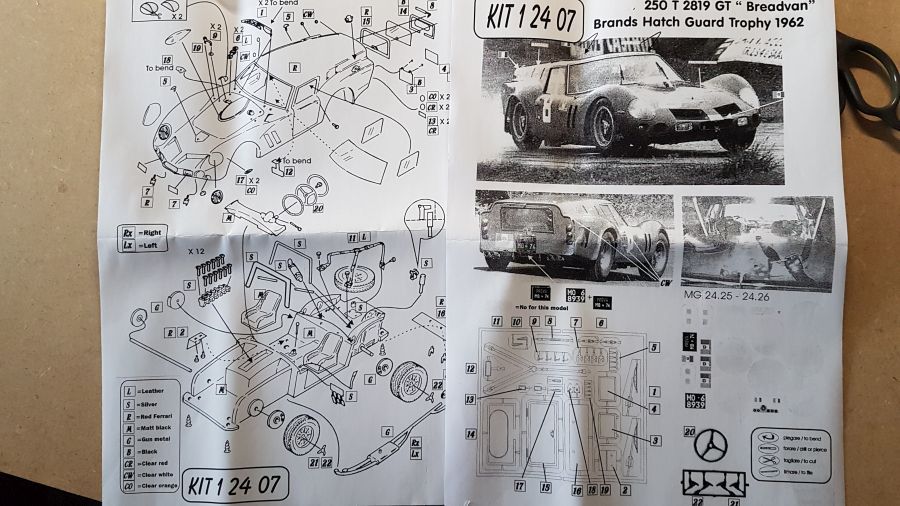
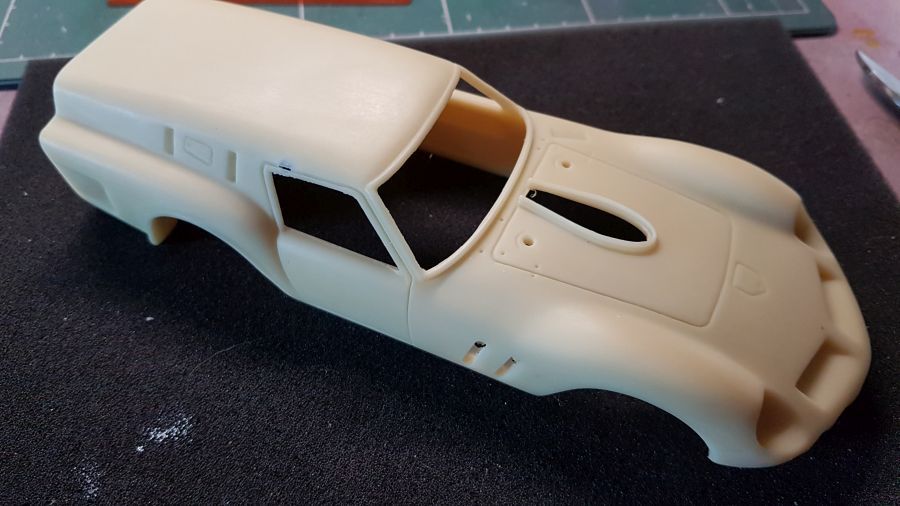
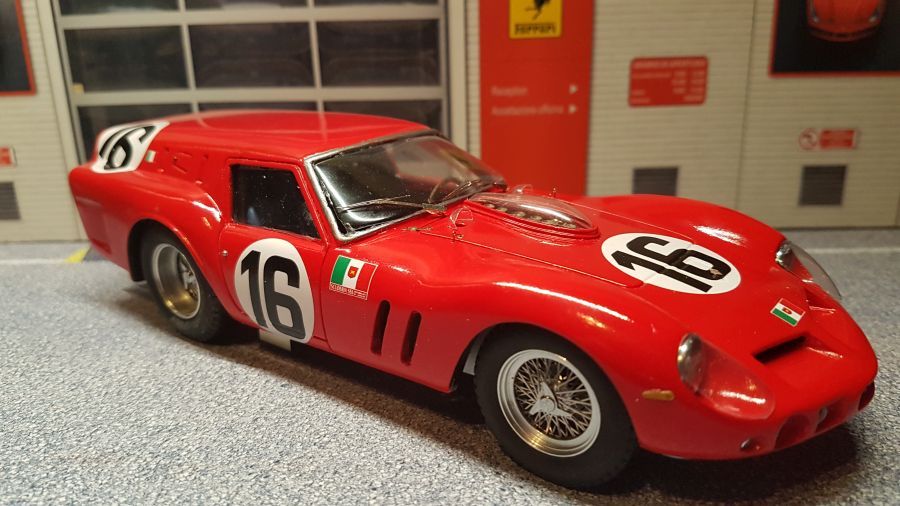
Om een of andere reden heeft deze auto een enorme aantrekkingskracht op me. Ik weet niet waarom. Dus toen ik deze voor een redelijke prijs op Ebay tegenkwam, kon ik hem niet weerstaan. De 1962 Ferrari 250 GT SWB Breadvan ga ik maken in de Le Mans versie, zoals deze werd bestuurd door het duo Carlo Maria Abate en Colin Davis. Het is een kit van MG Model Plus (kit nr. MG 24.25-24.26). Maar eens kijken of ik wat mooie foto's op intyernet kan vinden om details te zien. Eerst weer de inhoud van de kit.
For some reason this car is very appealing to me. I don't know why. So when i saw it on Ebay for a reasonable price, i couldn't resist. The 1962 Ferrari 250 GT SWB Breadvan will be done as a Le Mans version, as driven by the couple Carlo Maria Abate and Colin Davis. It's a kit from MG Model Plus (kit no. MG 24.25-24.26). I need to see on the web if i can find any detail pictures. First of all the content of the kit.
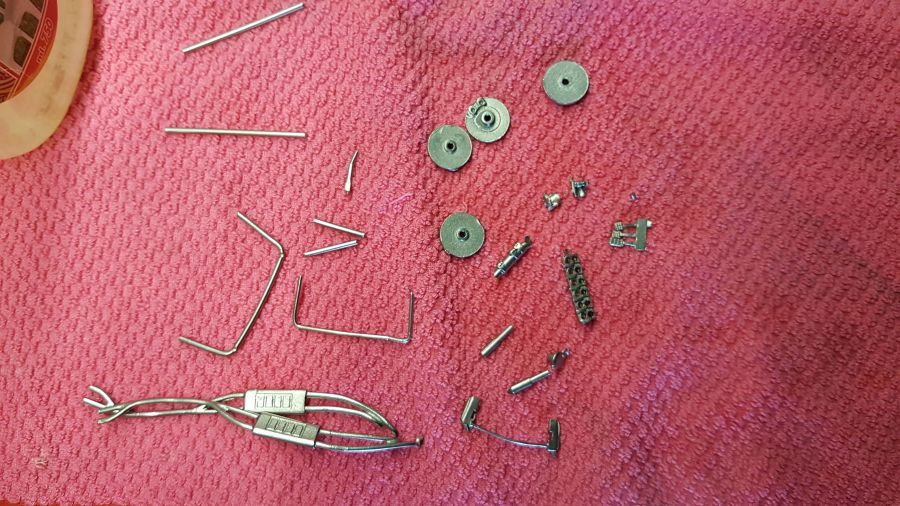
De metalen delen gaan eerst in de polijstmachine.
The metal parts are cleaned in the magnetic polisher.
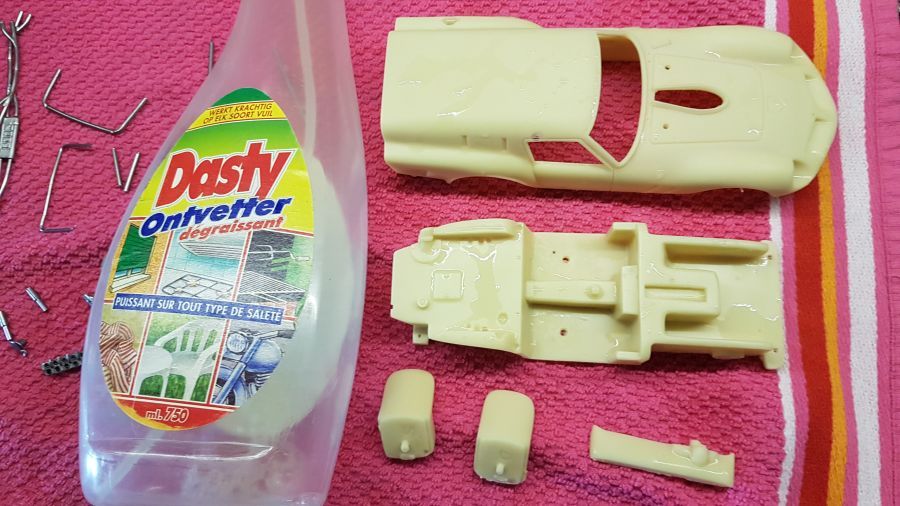
De resin onderdelen maak ik schoon met warm water en vervolgens met Dasty ontvetter.
The resin parts are cleaned with warm water and then with Dasty degreaser.
Eerst schuur ik de body op met een fijn schuurpapier (korrel 4000) en haal het overtollige resin weg.
First of all i will sand the body with sanding paper (grain 4000) and get rid of the excess resin.
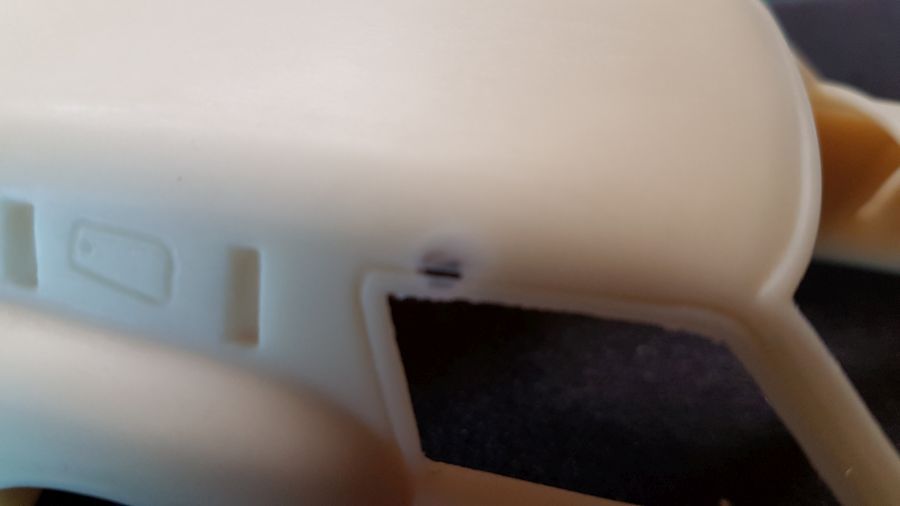
Er zit een klein gaatje in de resin, dat vul ik op met putty.
There's a small hole in the resin, i will fill it with putty.
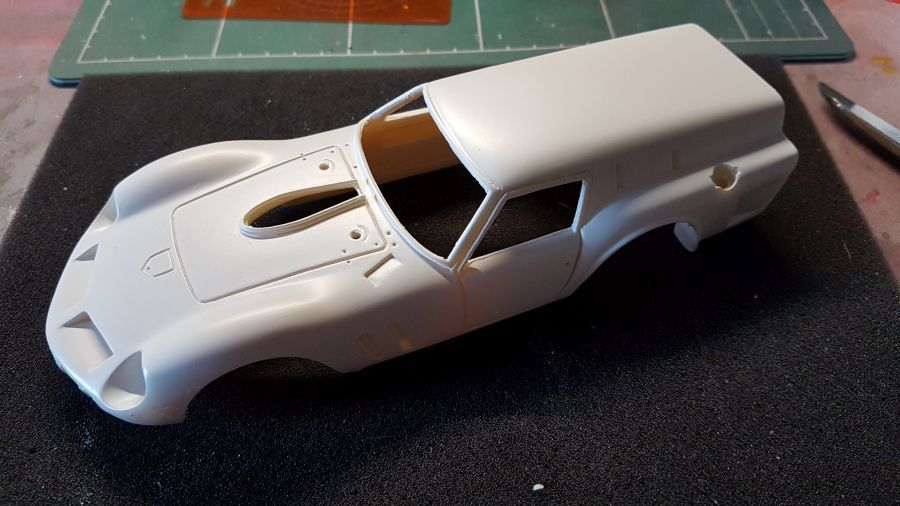
De body krijgt een laag primer opdat je alle imperfecties goed kan zien, dat maakt het gemakkelijker met schuren.
The body gets some primer so you will be able to see all imperfections, which makes it easier to sand.
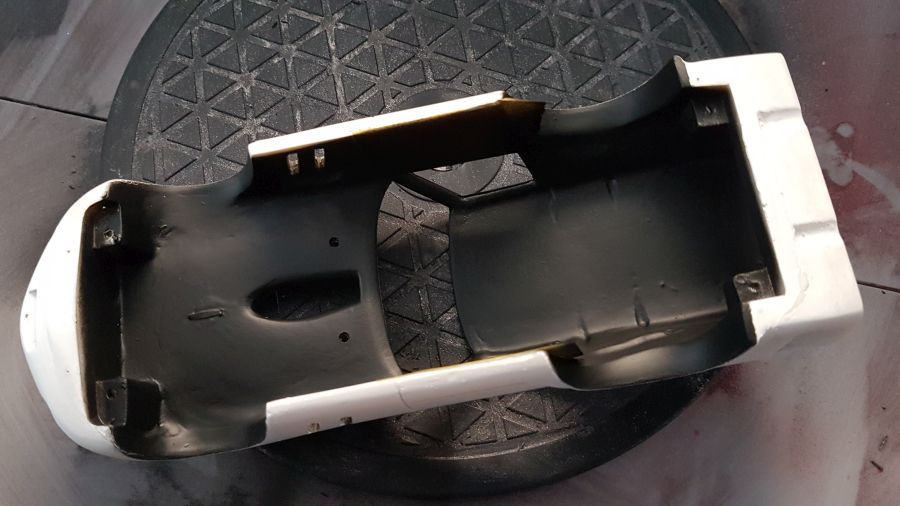
De binnenkant is zwart gespoten. De deurpanelen zijn nog afgeplakt, deze krijgen een andere kleur.
The inside was painted black. The door panels are still masked, they will get a different colour.
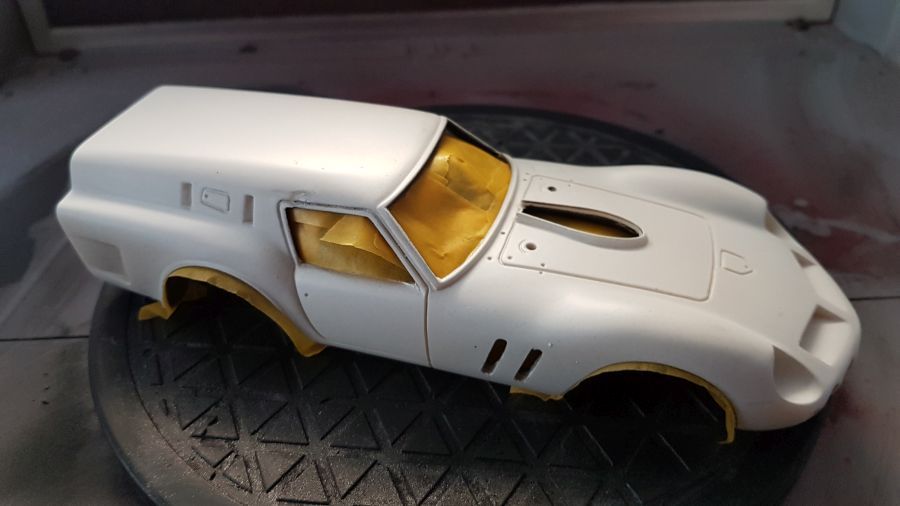
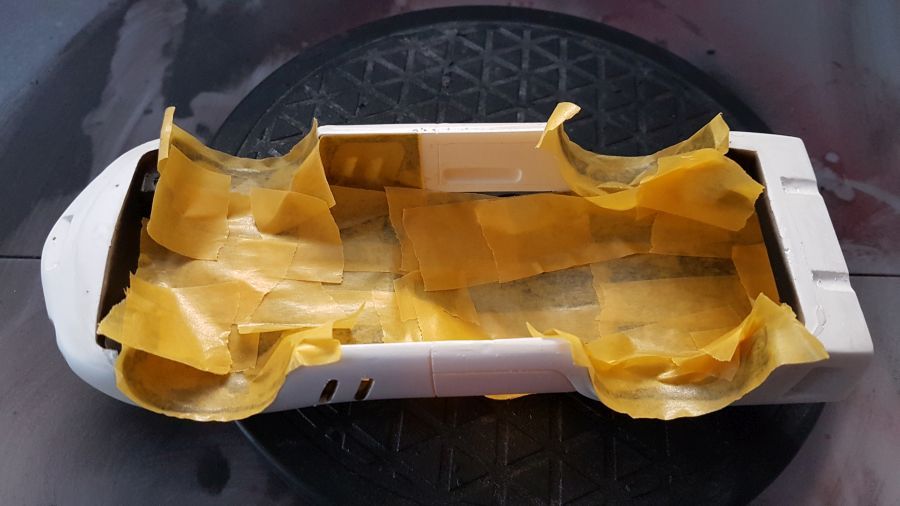
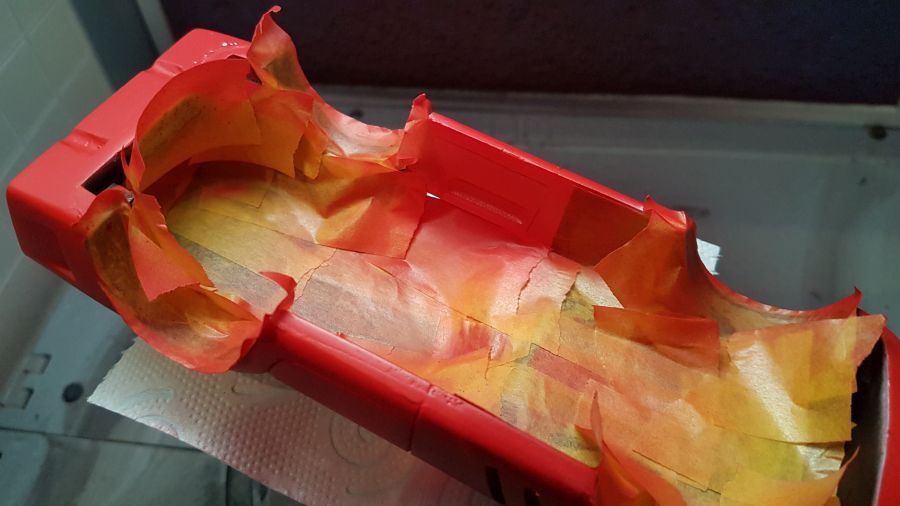
Afplakken voor het spuiten van de buitenkant.
Masking before painting the outside.
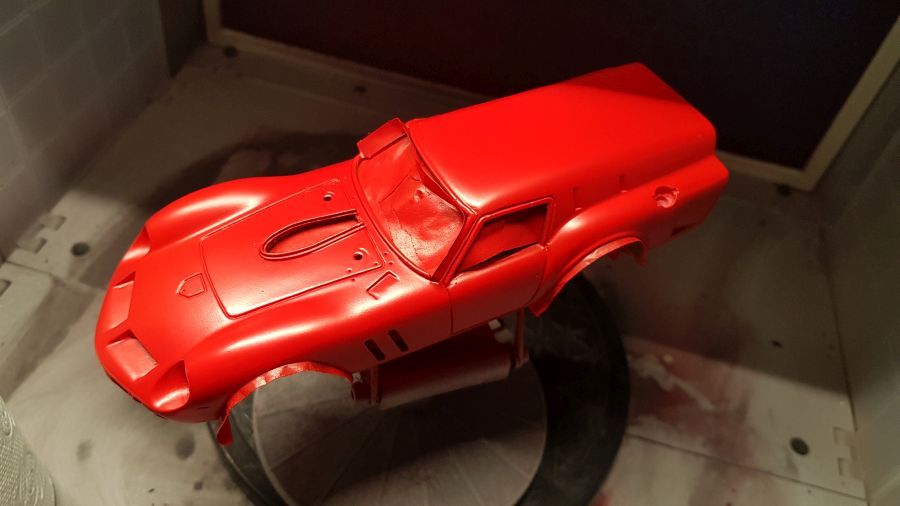
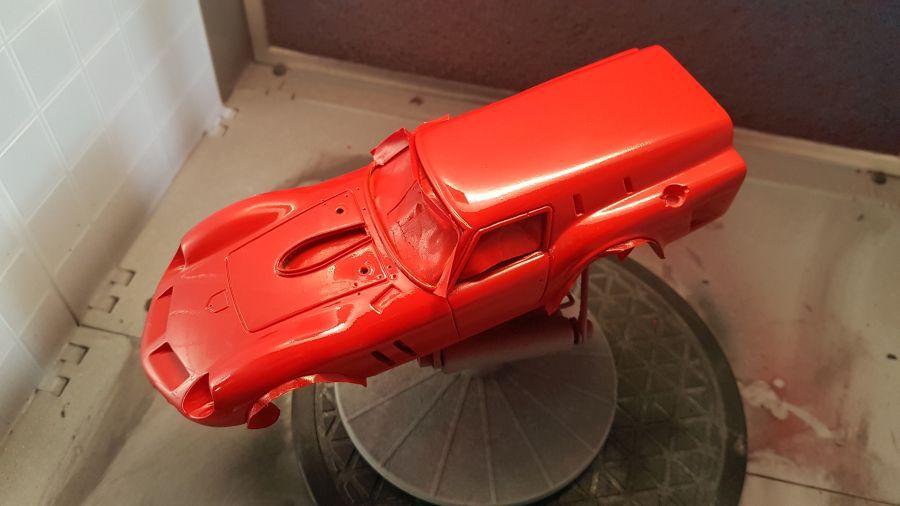
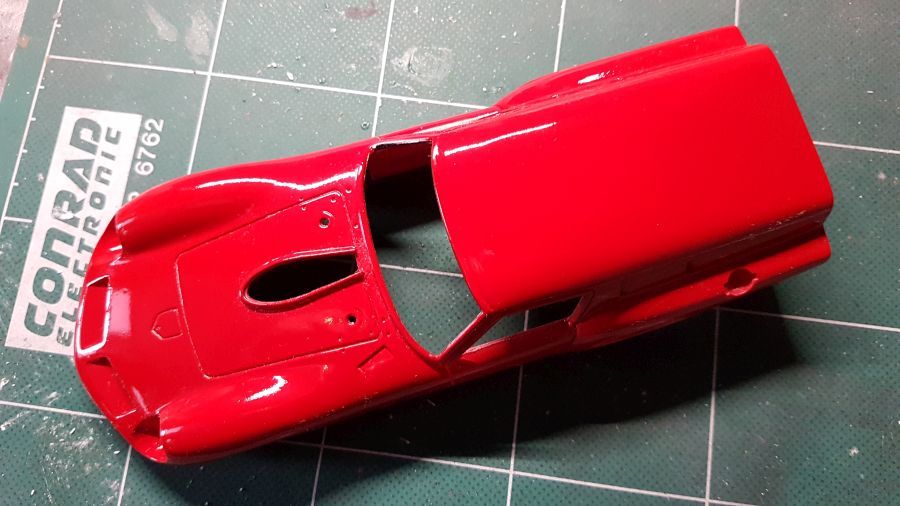
Dan het rood. Deze keer Zero Paints ZP-1007 1970-1980's Rosso Formula 1.
Next is the red. This time Zero Paints 1970-1980's Rosso Formula 1.
Dan de glanzende lak van Zero Paints.
Next is the gloss clear coat from Zero Paints.
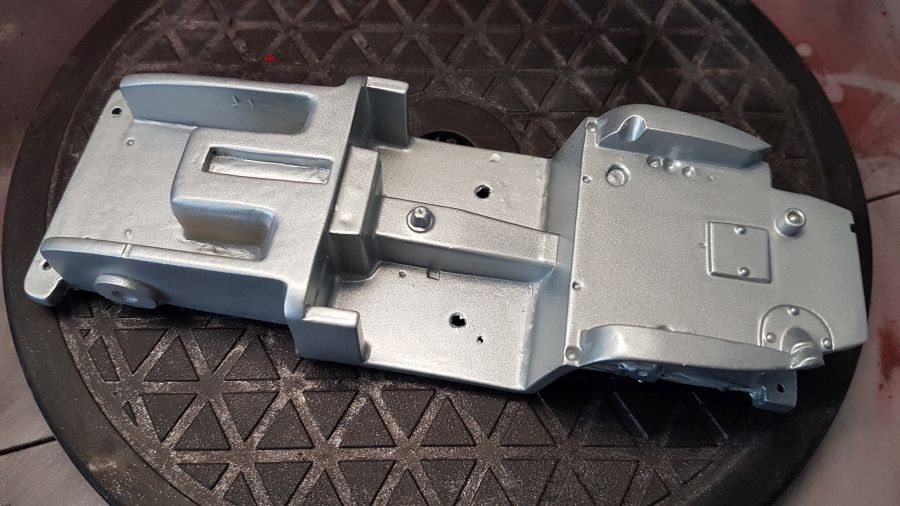
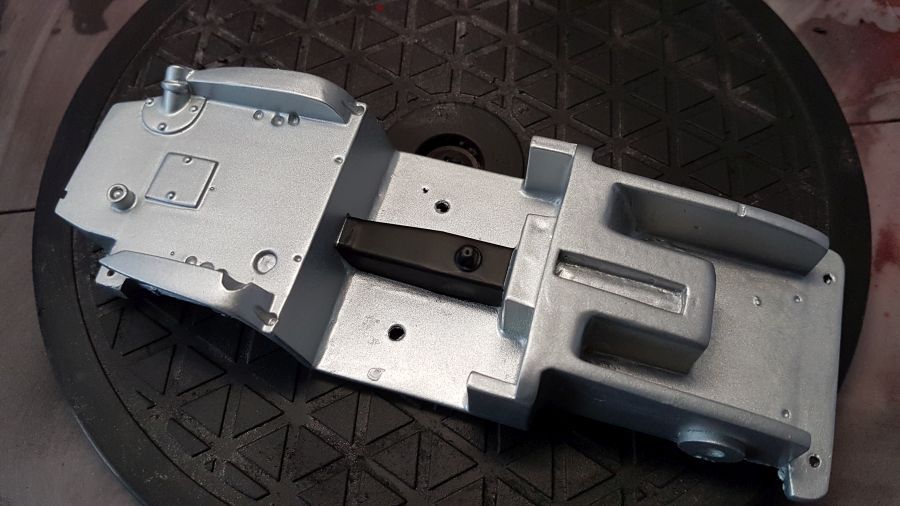
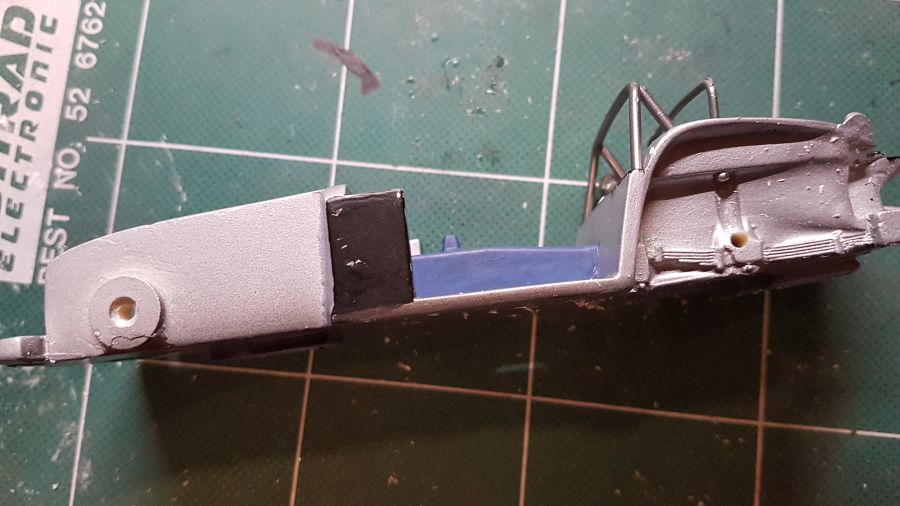
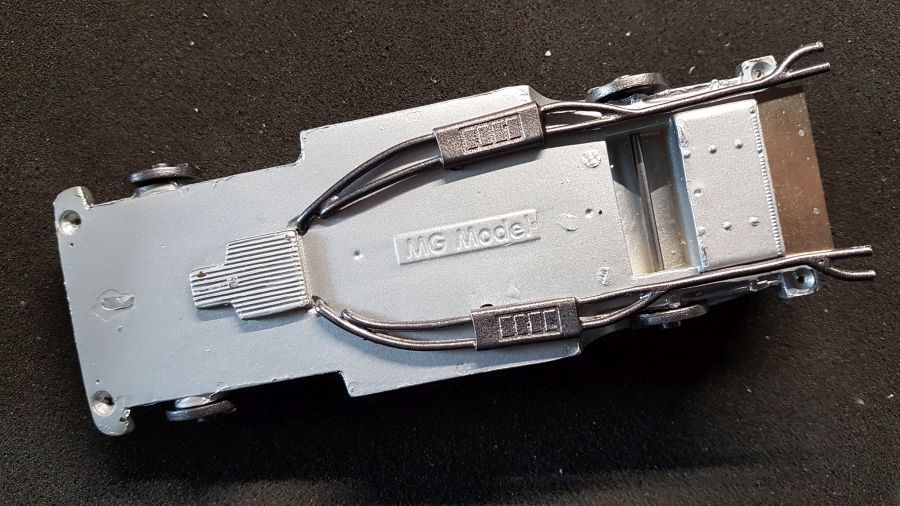
Terwijl dit allemaal moet drogen ga ik verder met de vloer. Deze wordt in de primer gezet en daarna gespoten met Tamiya TS-76 Mica Silver.
While this all dries i am going to continue with the floor. This gets some primer and then some Tamiya TS-76 Mica Silver.
Een paar onderdelen worden (deels) zwart gespoten.
Some parts are being (partly) painted black.

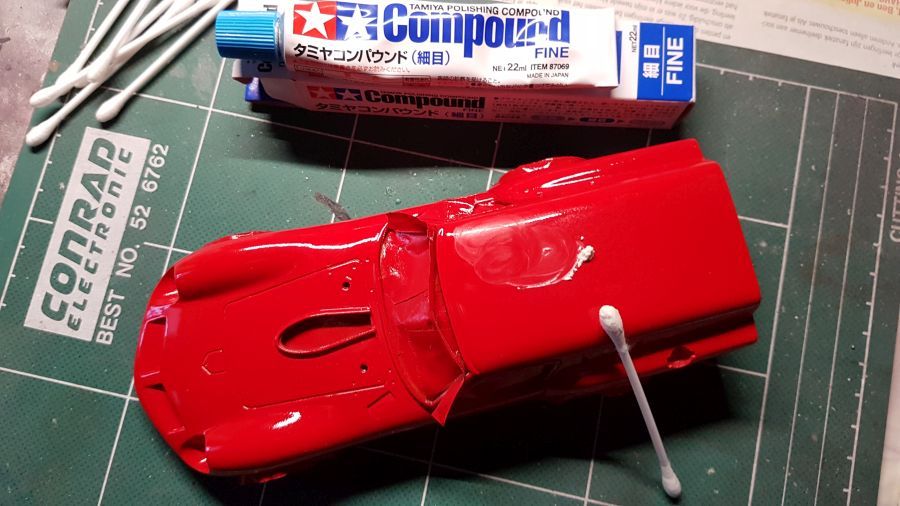
De body ga ik bewerken met Tamiya polishing compound. Met een draaiende beweging met een wattenstaaf gebruik ik eerst de Fine compound en daarna de Finish compound.
The body will be treated with Tamiya polishing compound. With a circular motion from a cotton swab i first apply the Fine compound and then the Finish compound.
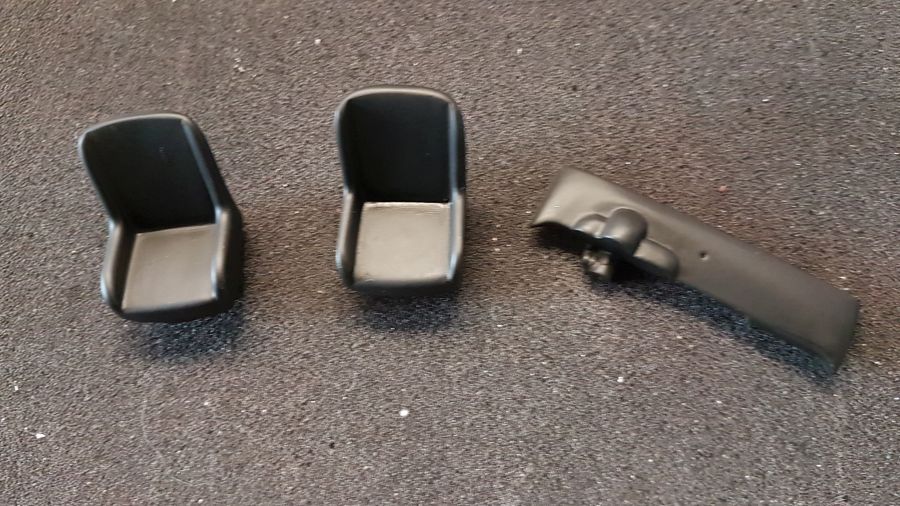
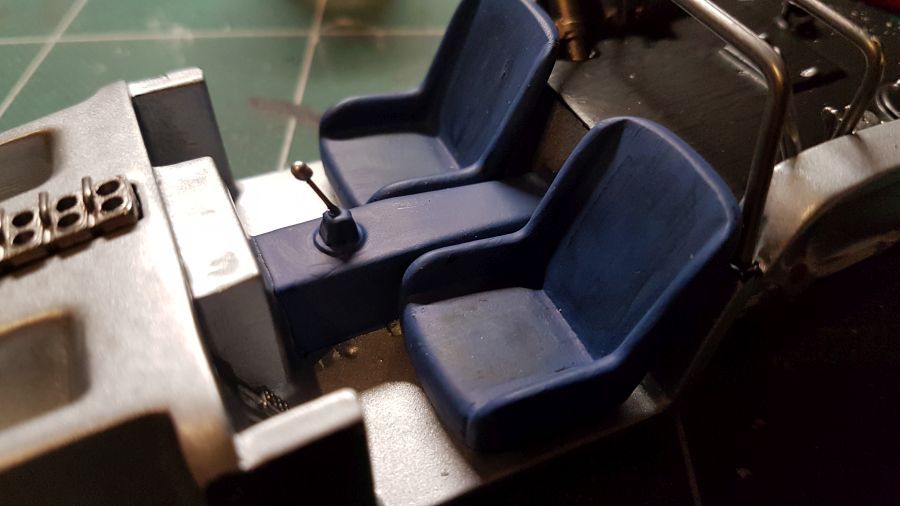
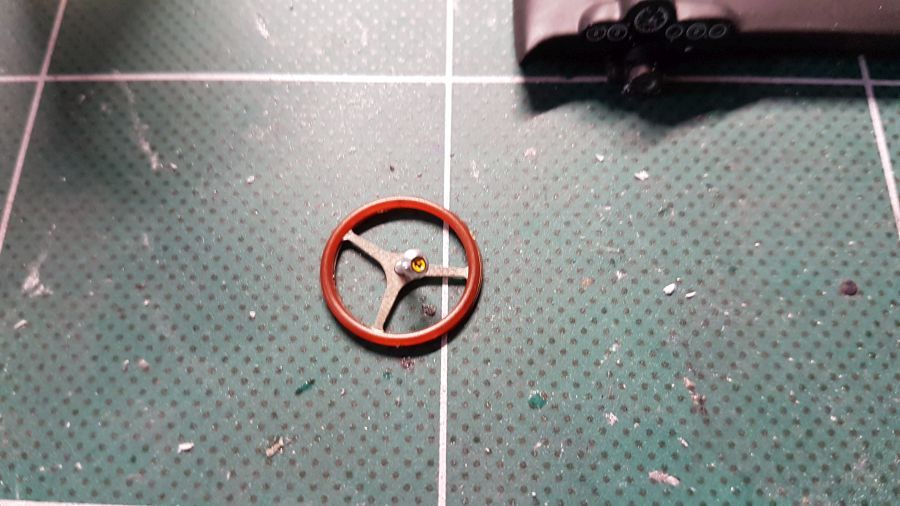
Een goede vriend vertelde me dat de kleur van de stoelen niet juist was. Dit moet niet zwart zijn, maar donkerblauw. Misschien nog te licht, maar het moet maar.
A good friend informed me the colour of the seats was not correct. This shouldn't be black, but dark blue. Maybe not dark enough, but it has to do.

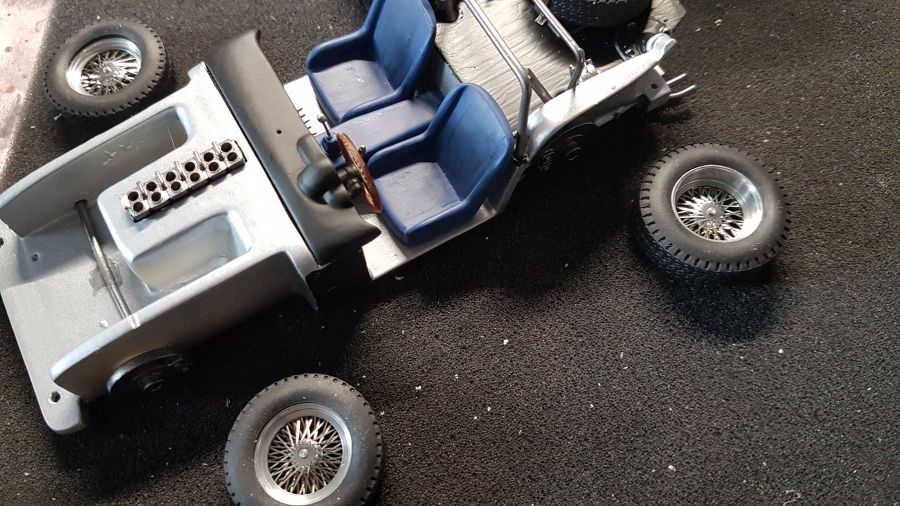
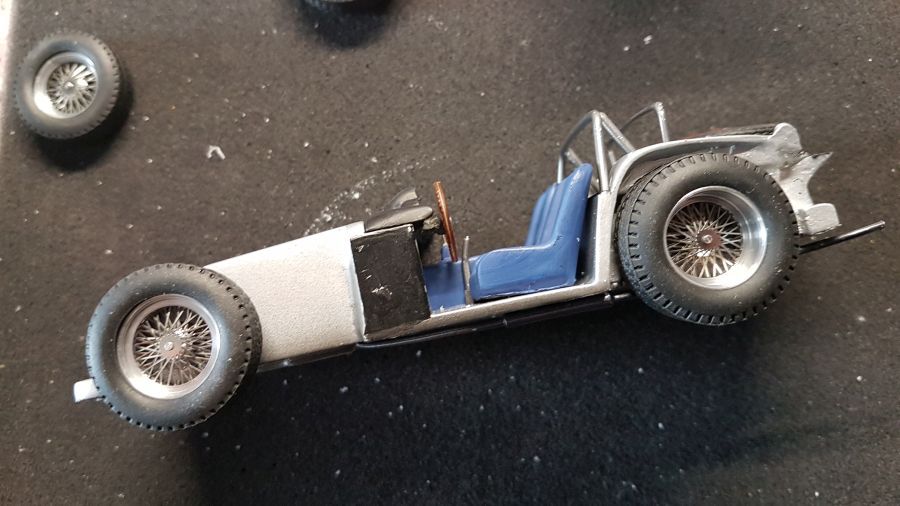
Een paar onderdelen geïnstalleerd.
A few parts got installed.
De gaten voor de assen zijn geboord.
The holes for the axles were drilled.
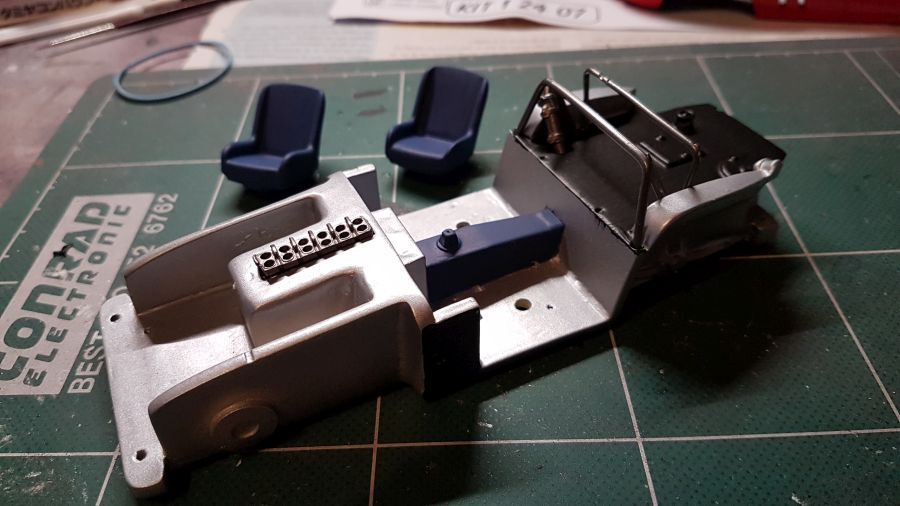
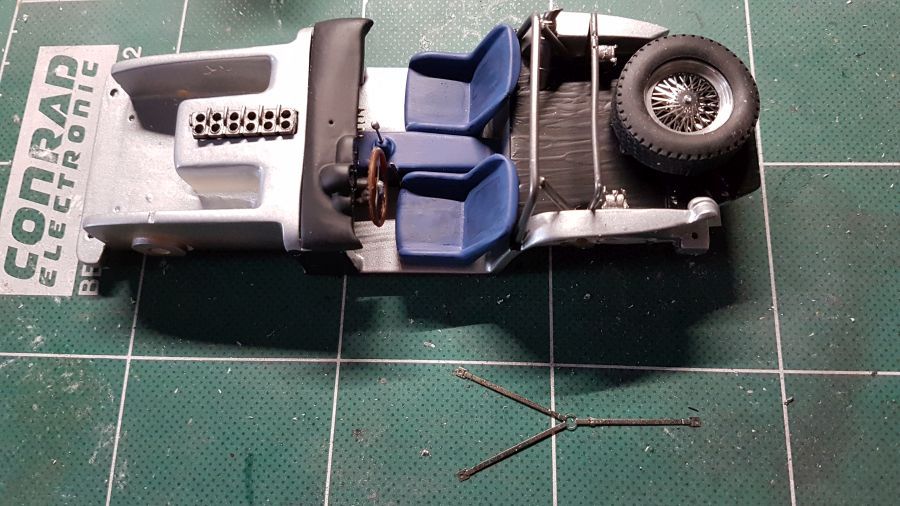
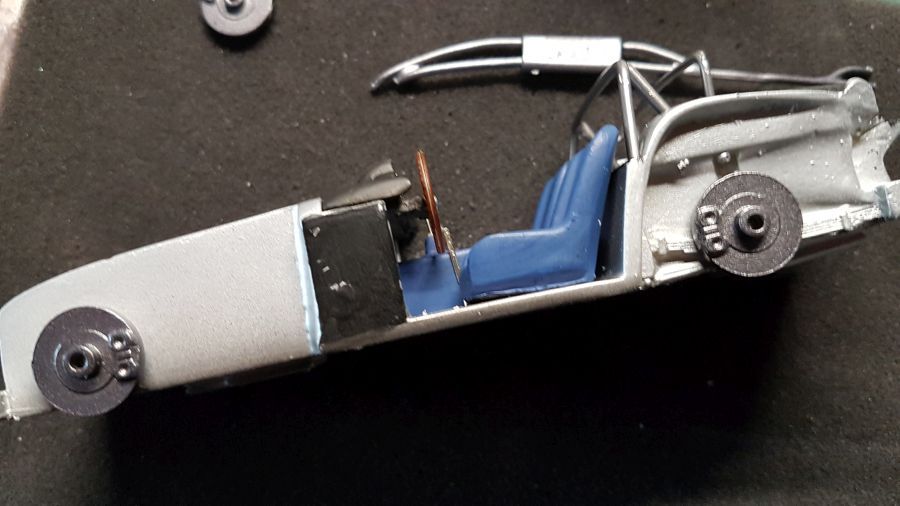
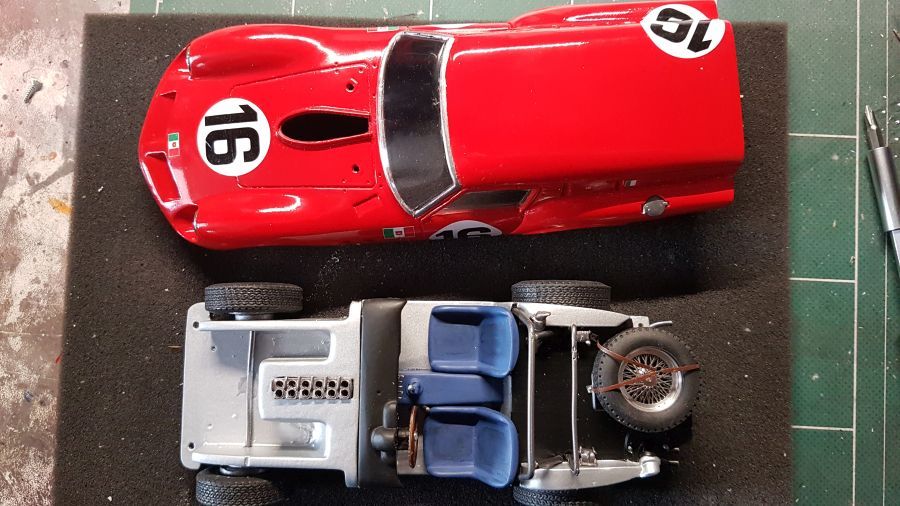
Langzaam wordt het interieur opgebouwd. De stoelen hebben een 'wash' gekregen om ze wat te verouderen.
Slowly building up the interior. The seats received a wash to age them a bit.
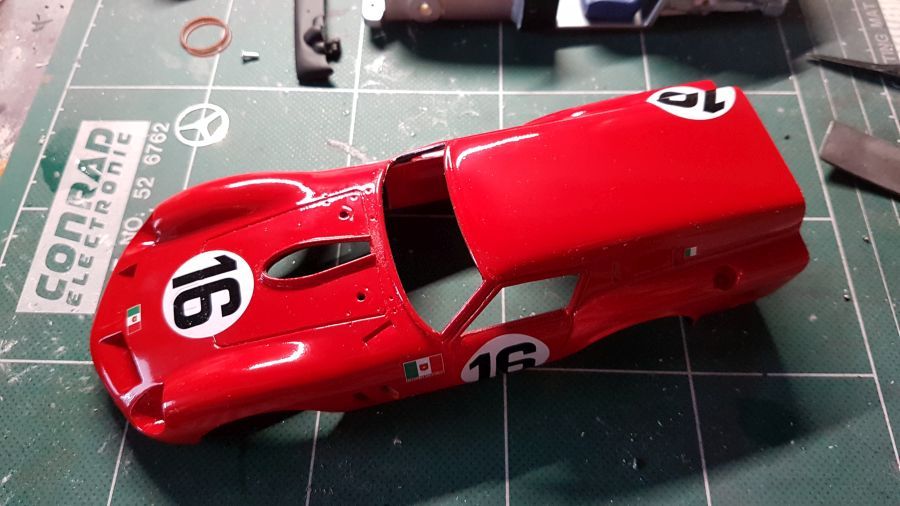
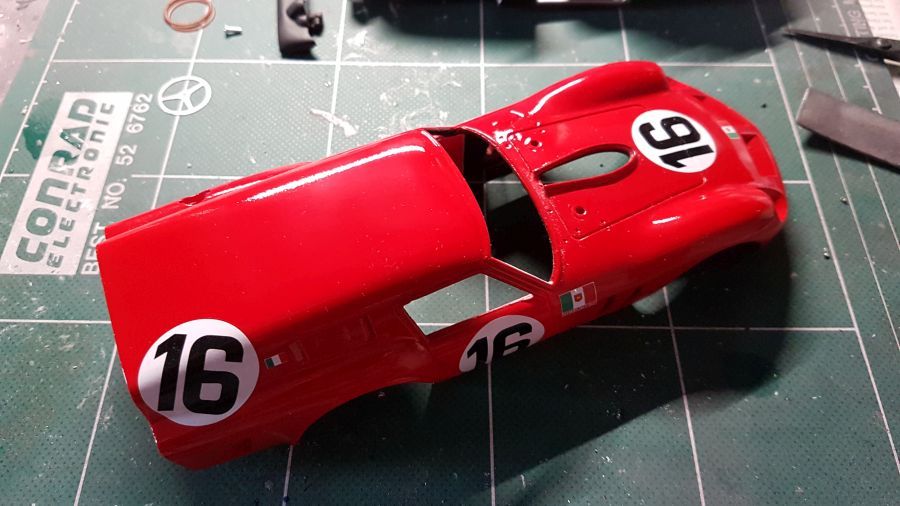
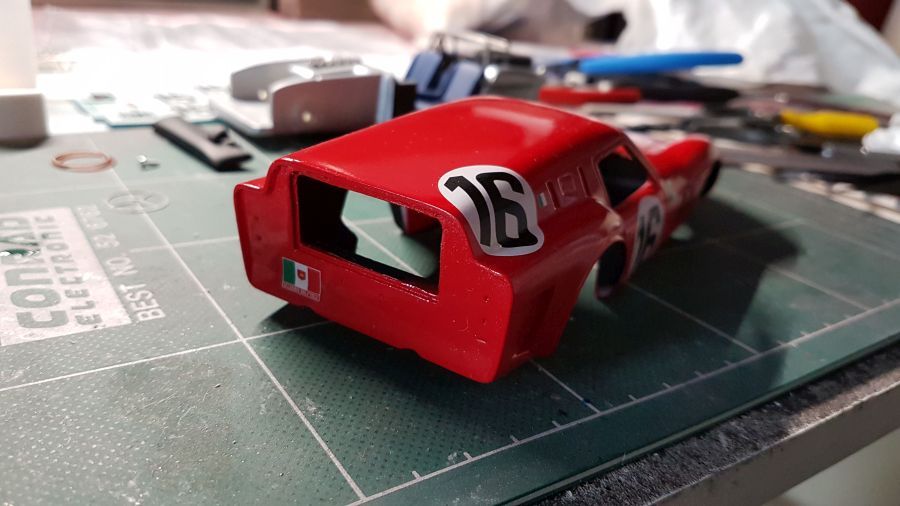
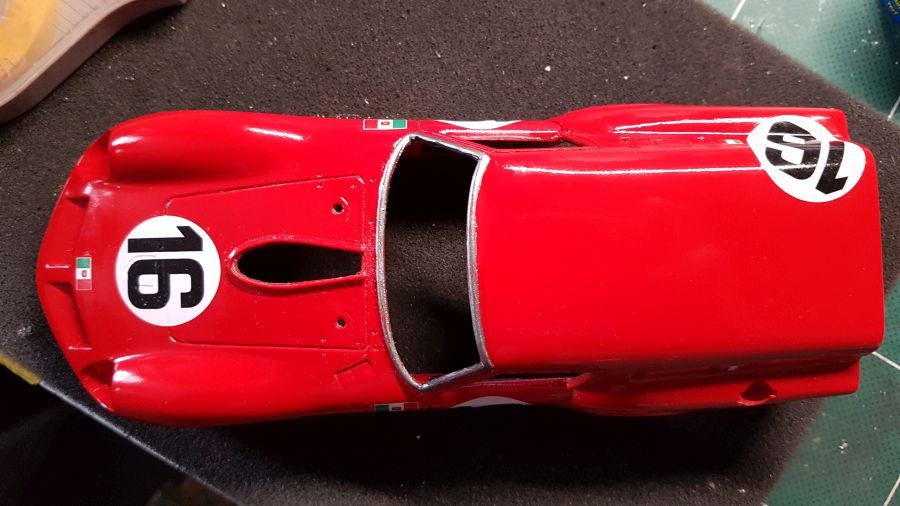
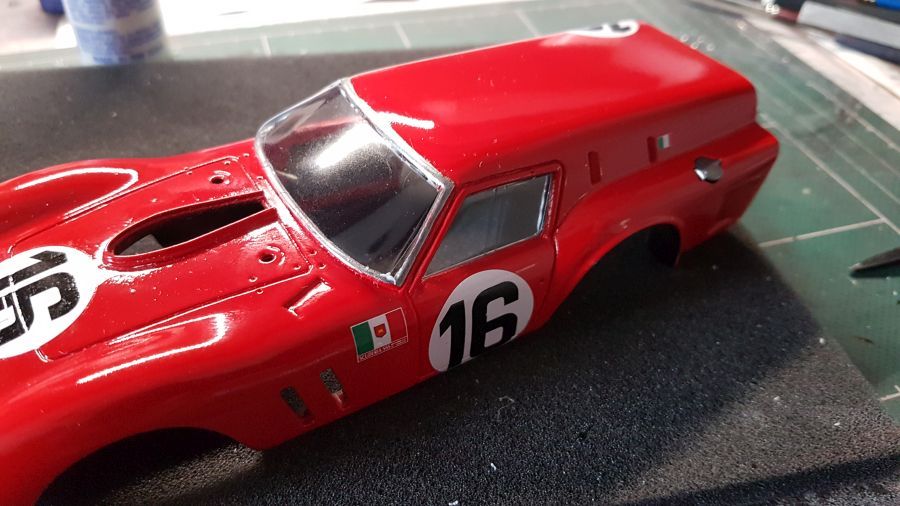
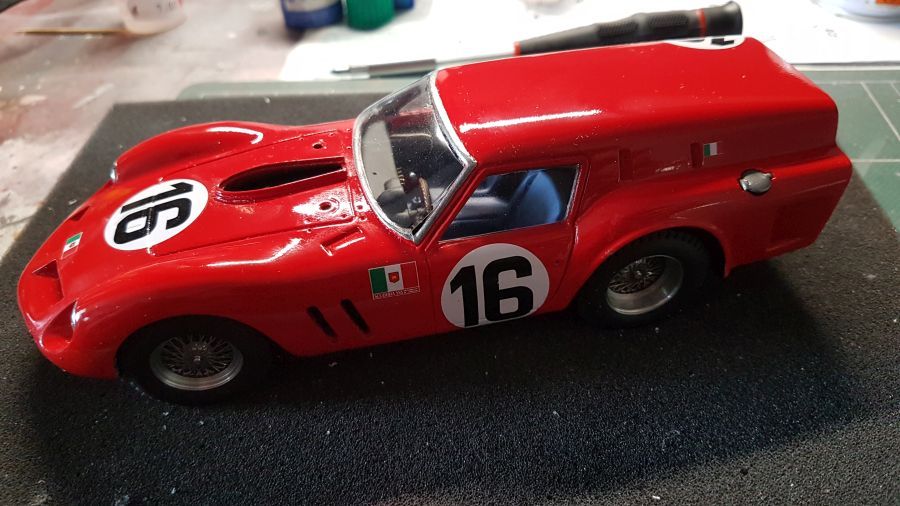
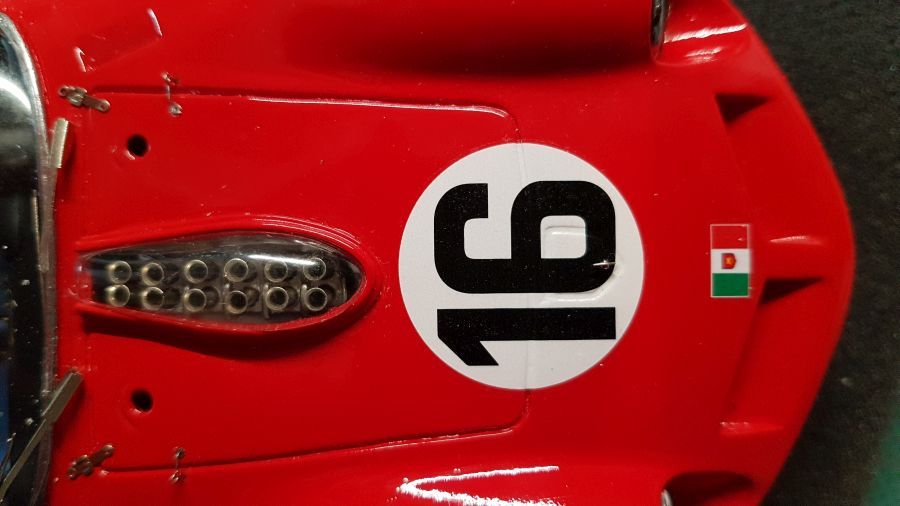
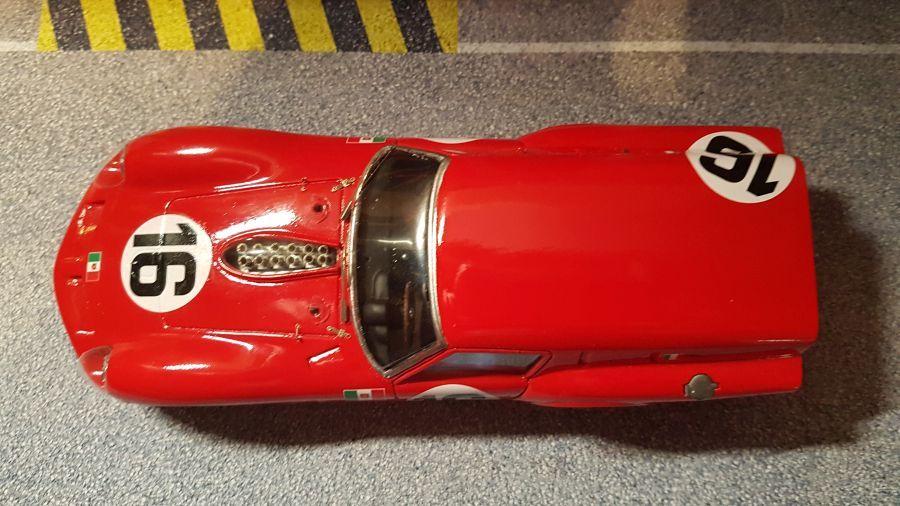
De body krijgt zijn decals.
The body gets it's decals.
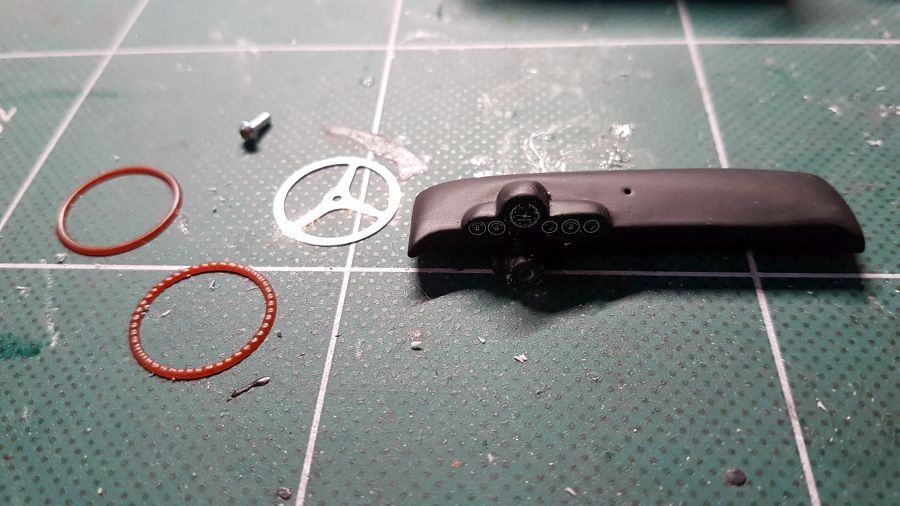
Meer werk aan het dasboard,
More work to the dash board.
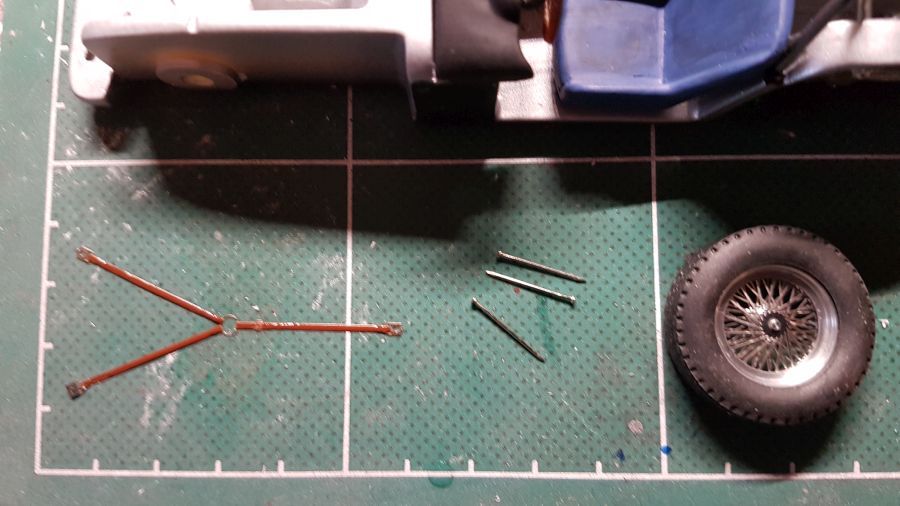
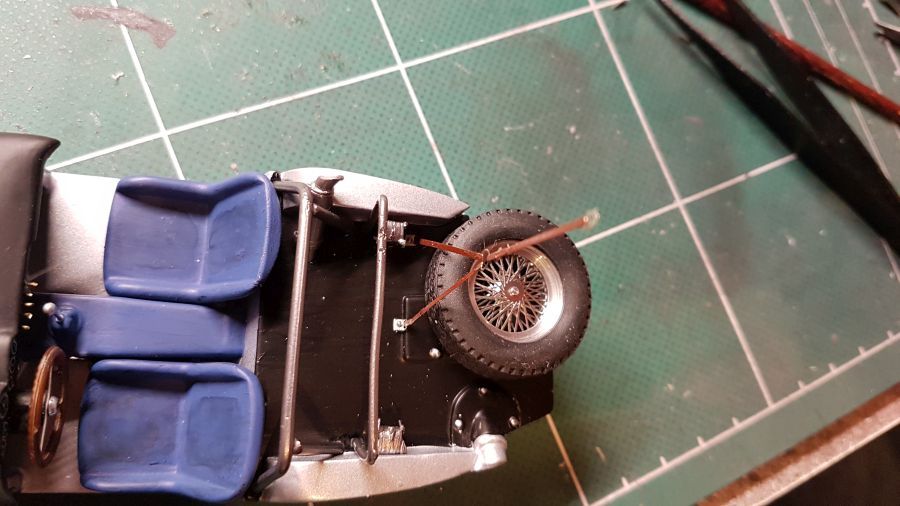
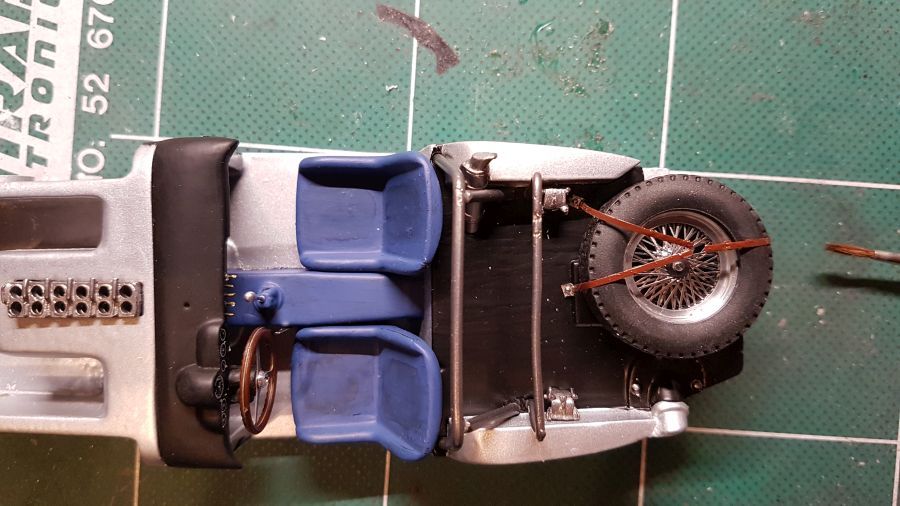
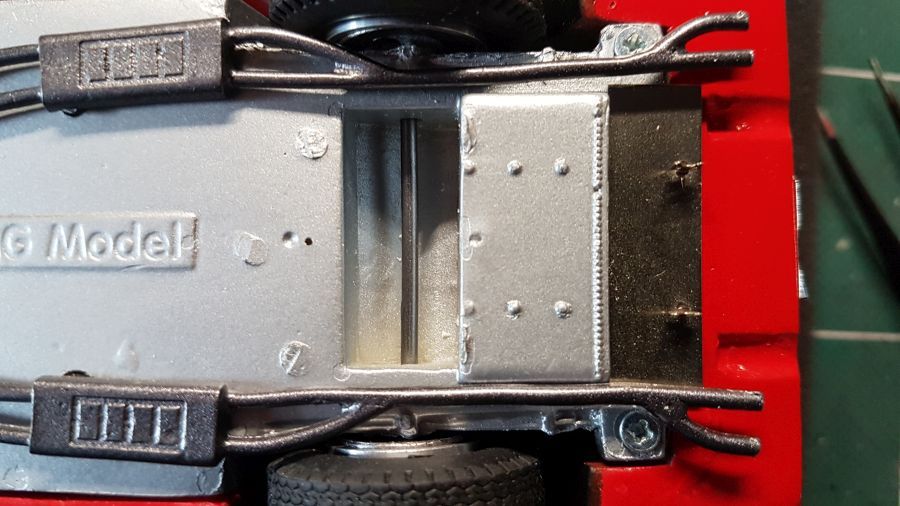
Het reservewiel moet op zijn plaats gemonteerd.
The spare wheel needs to be mounted at it's spot.
Voordat de uitlaten worden gespoten, doe ik eerst even een test fit. Een beetje buigen is nodig.
Before painting the exhausts, i will first do a test fit. Some bending was needed.
Dan de verf erop. Ik gebruik Tamiya Gun Metal.
Next is painting. Tamiya Gun Metal was used.
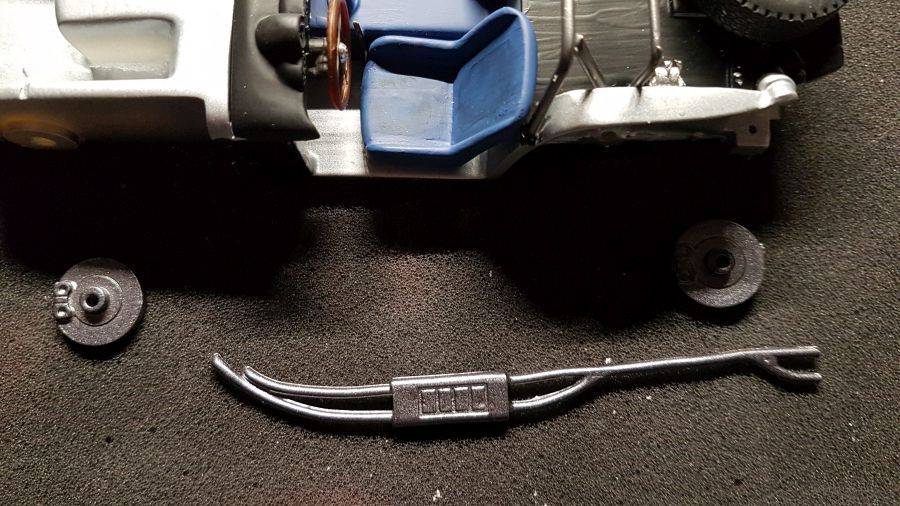
Dan worden de assen en de remschijven gemonteerd. Let op dat de goede schijf op de juiste plek komt. Die met een vlakke achterkant hoort op de achteras.
Then the brakes are mounted. Be sure to mount them correct. The one with the flat backside needs to be added to the rear axle.
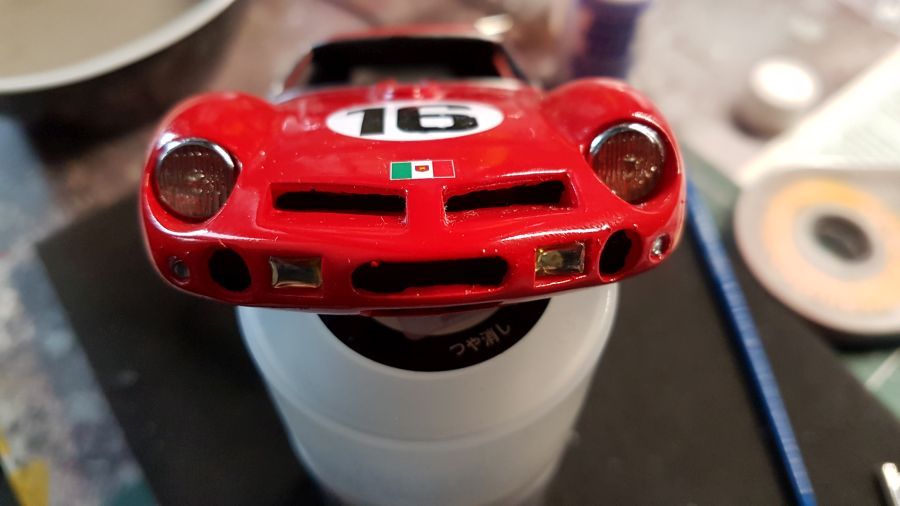
De rand van de voorraam wordt zilver geverfd.
The mounting of front window needs some silver.
De voorkant wordt voor een deel verder klaargemaakt.
The front side is being complete for a part.
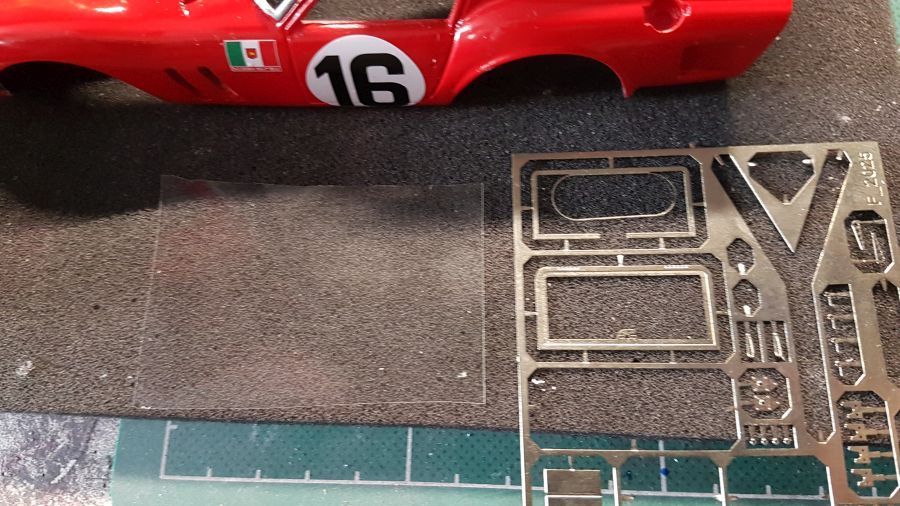
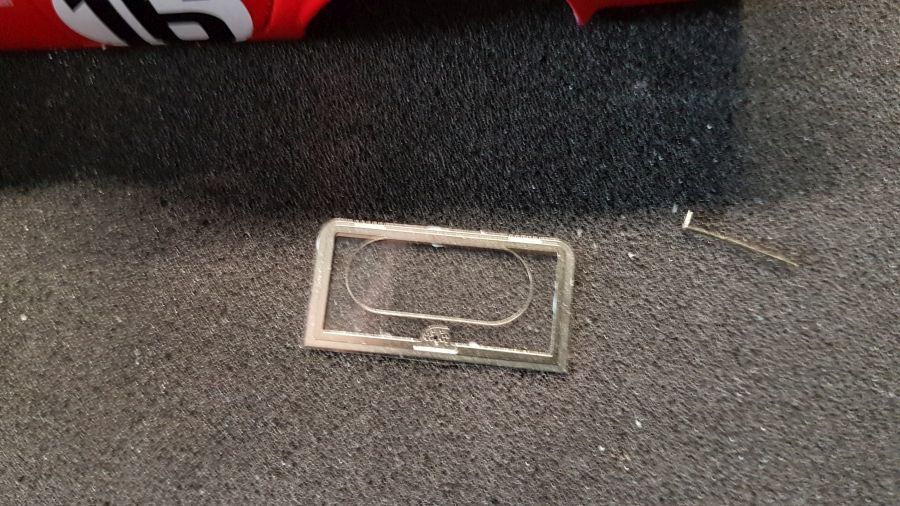
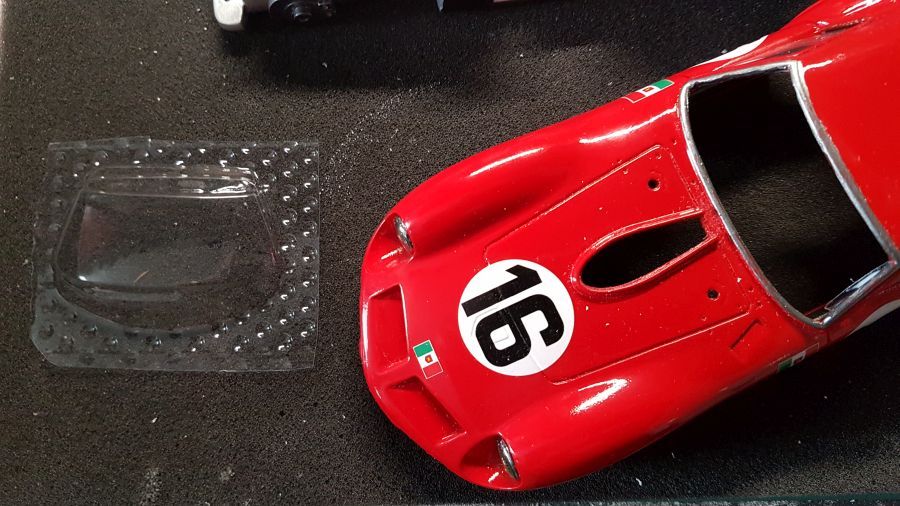
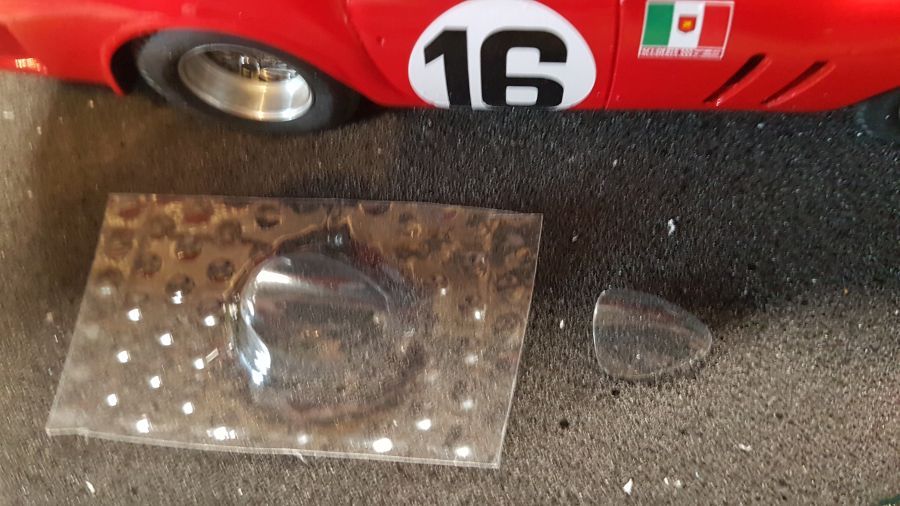
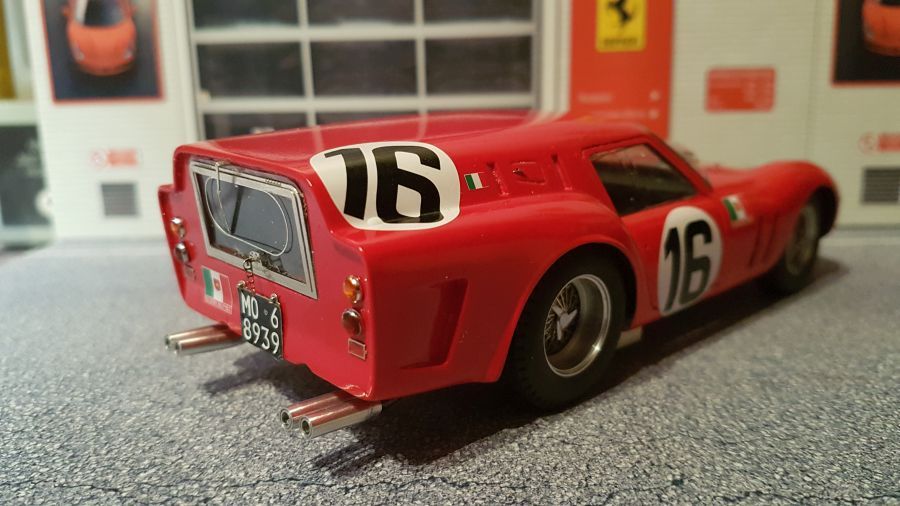
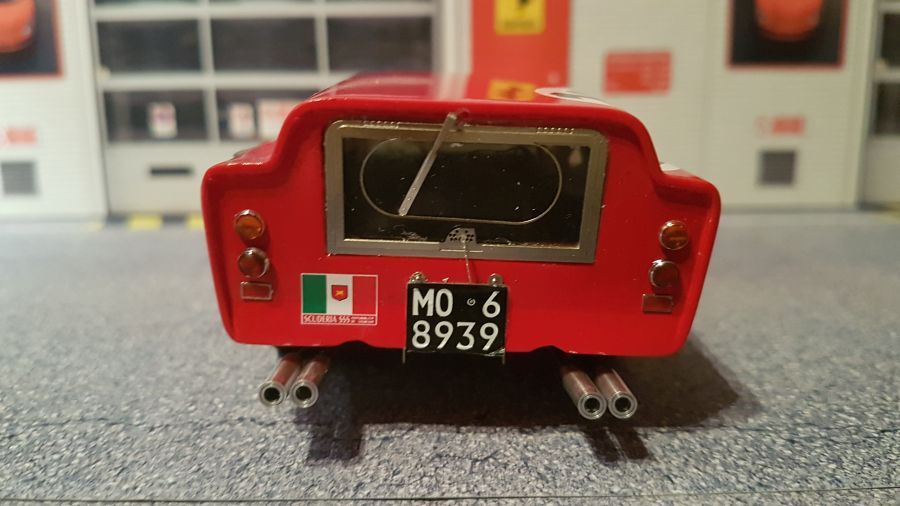
Het achterraam mist. Hier ga ik wat improviseren met een stuk folie van een verpakking.
The rear window is missing. I will improvise with some foil from a package.

Tijd voor de voorruit en de zijramen. De voorruit is wat te klein naar mijn idee, maar dat kan ik niet veranderen.
Time for the front and the side windows. The front window should be a little larger, but i can't change it.
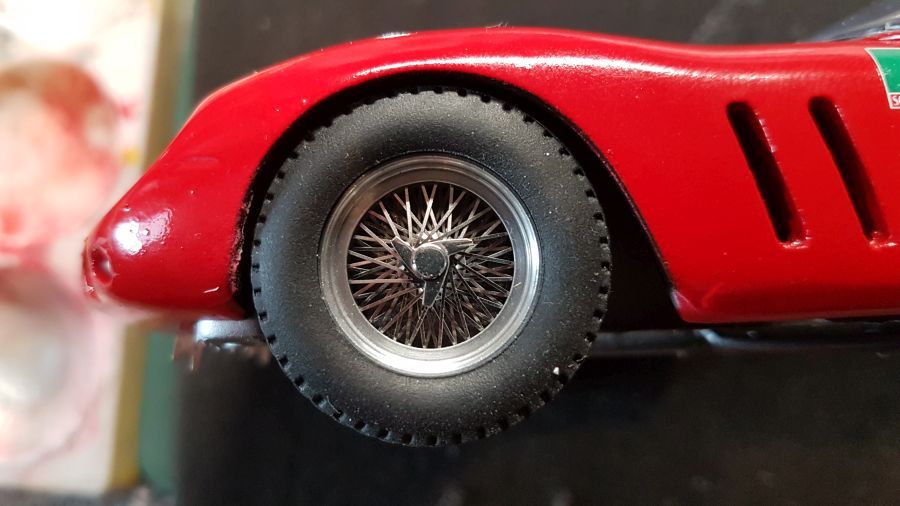
Nu verder met de wielen.
Now the wheels to continue.
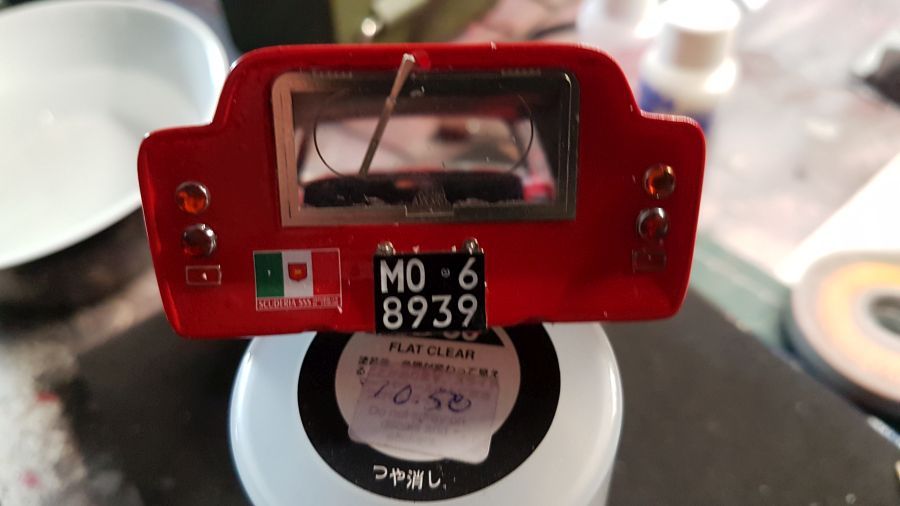
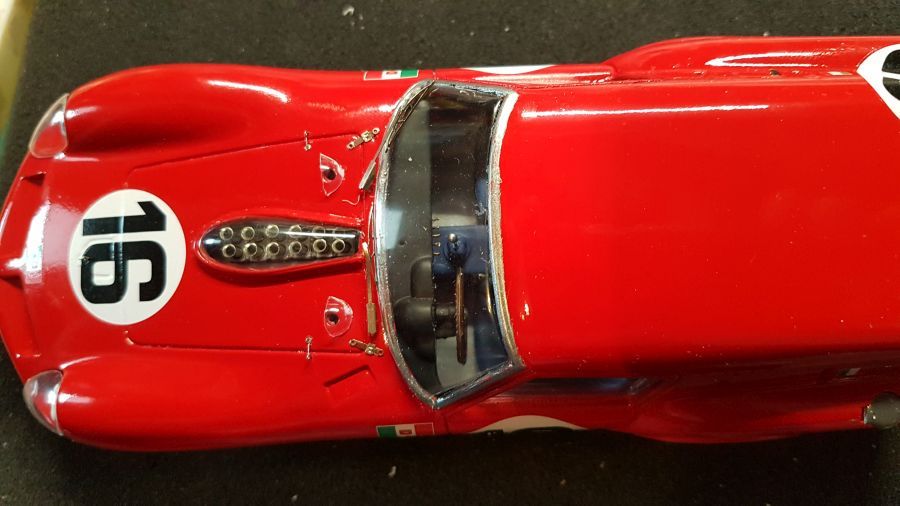
Na het plaatsen van de achteruitkijkspiegel is het tijd om de boel te sluiten.
After adding the rear view mirror it's time to close the body.
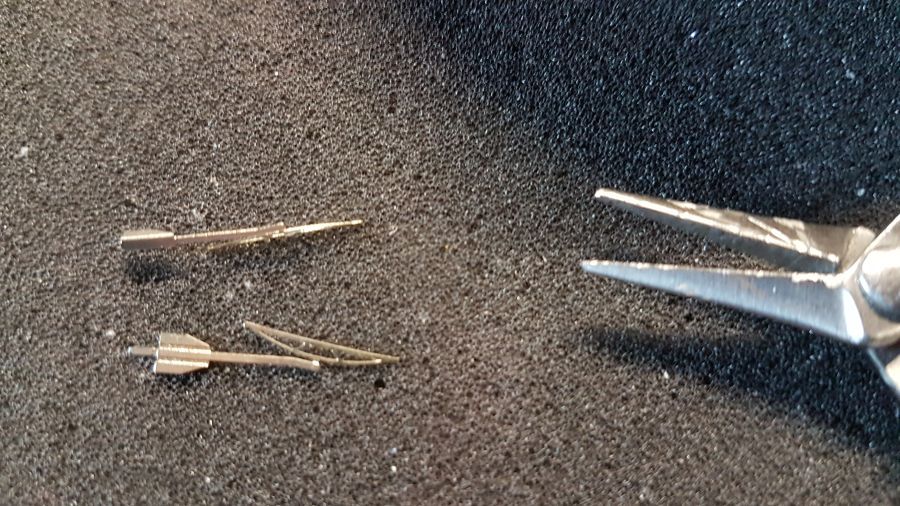
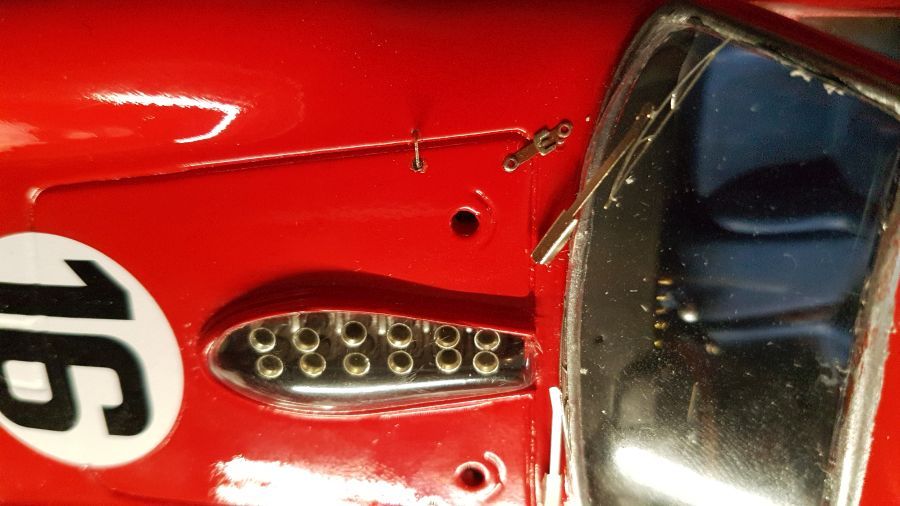
Daarna worden veel kleine etched onderdelen geplaatst.
Then many small etched parts were added.
Dan de luchtinlaten en de afdekking.
Then the funnels and the cover.
Dan nog wat plastic op maat knippen voor de koplampen en de intakes op de motorkap.
Now i have to cut more plastic for the head light covers and the intakes on the engine cover.
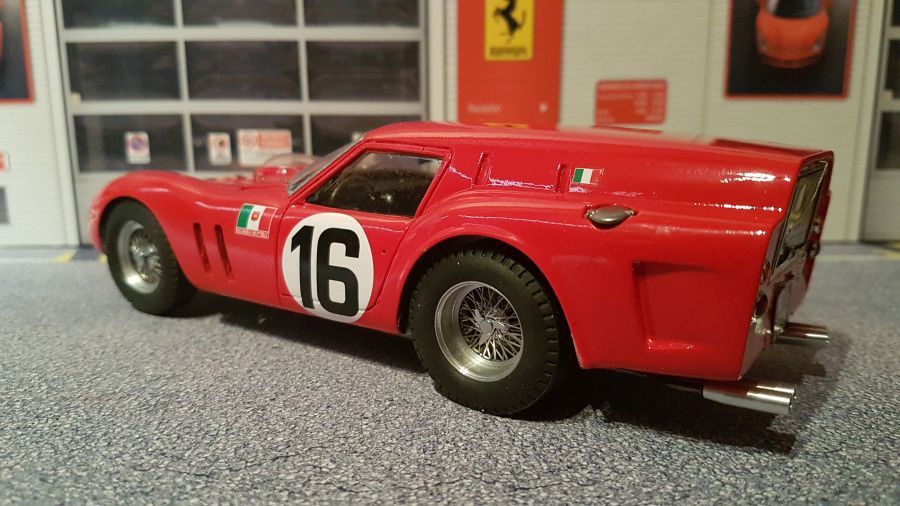
En na het plaatsen van de uitlaatsierstukken is er weer een klaar...
And after adding the end pipes to the exhausts another one has been done.
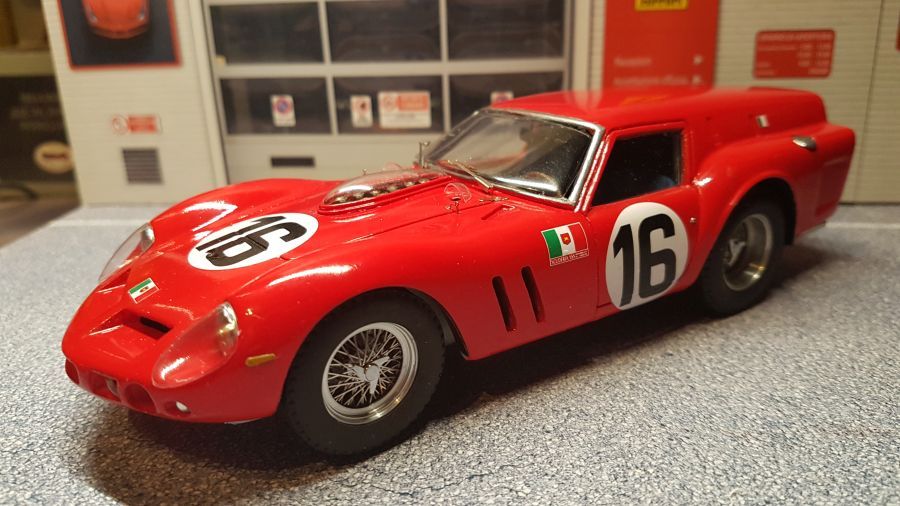
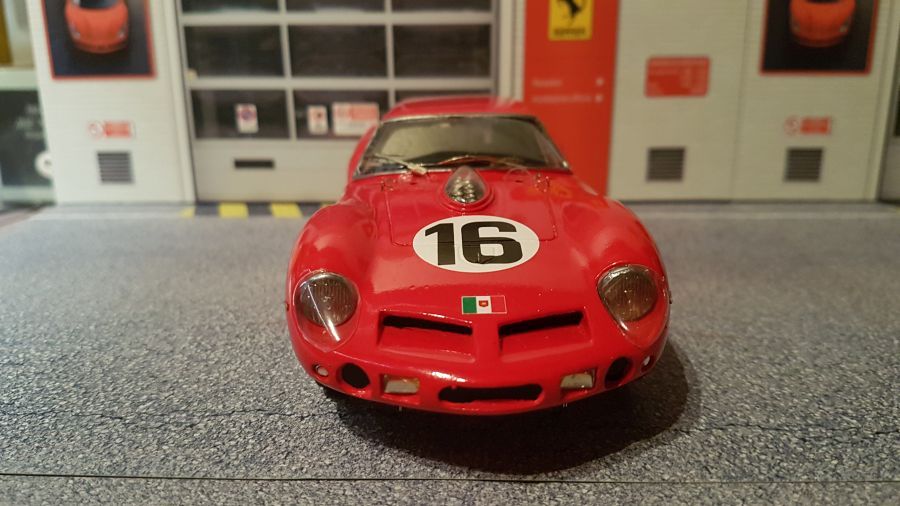
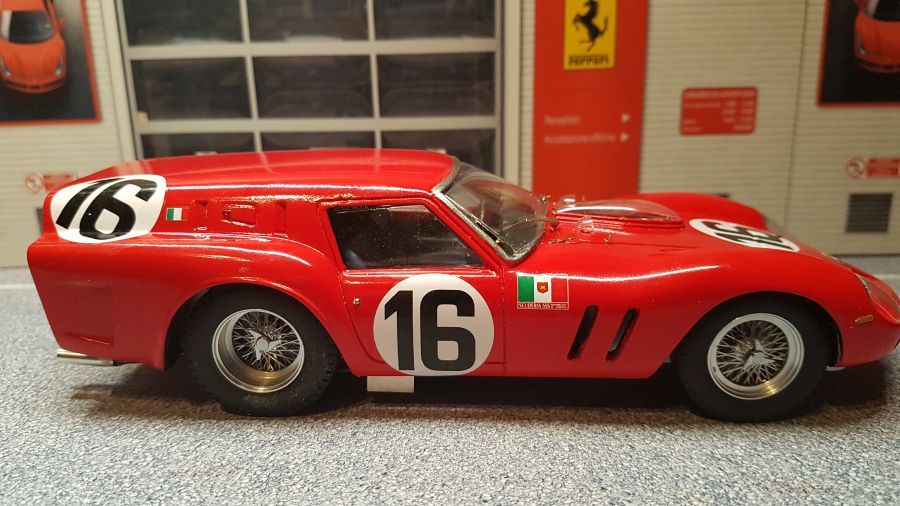
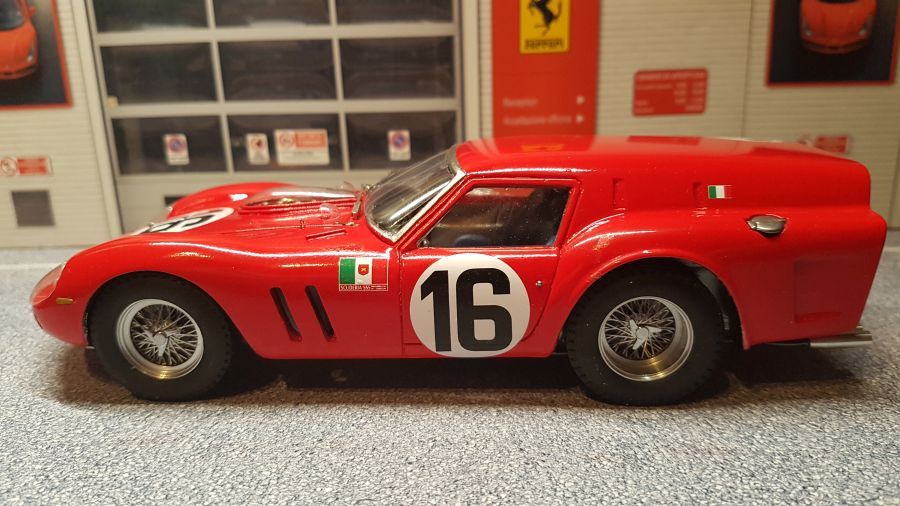
Op zich weinig problemen met deze kit. De voorruit is echter duidelijk te klein. En het ligt echt niet aan het te klein knippen.
Not many problems with this kit. The front shield however is too small. And it's not my cutting.