Edit: Iemand op het F1M forum maakte mij erop attent dat Fujimi de neuskegel in de kit van Long Beach versie verwisseld heeft met die in de kit van de Monaco versie. Helaas wist ik dit niet vooraf. Onderaan deze pagina beschijf ik het verwisselen van deze neus. Gelukkig heb ik beide kits. Het enige probleem is nu even de decals, omdat ik de vleugel al had gemaakt. Hiervoor heb ik gelukkig een paar op reserve.
Edit: Someone on the F1M forum informed me that Fujimi had enclosed the wrong nose in the Long Beach version kit. It has been changed with the nose from the Monaco kit. Unfortunately i did not know this upfront. At the bottom of this article i will describe the change of the nose. Luckily i have both kits. Only problem will be the decals, because i already made the wing. I have a few in my scrap box though.
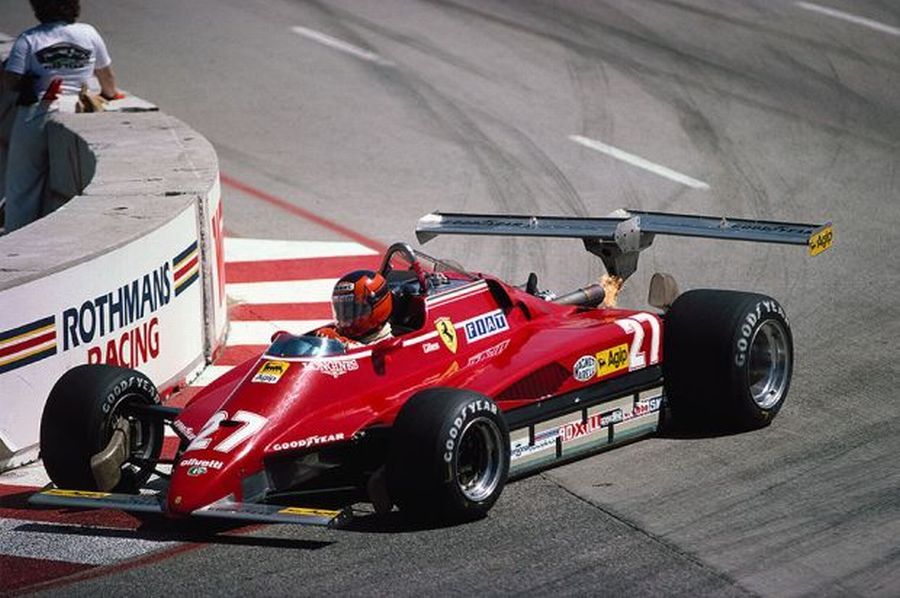
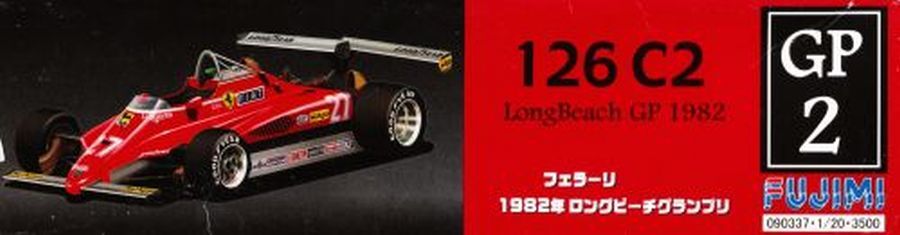
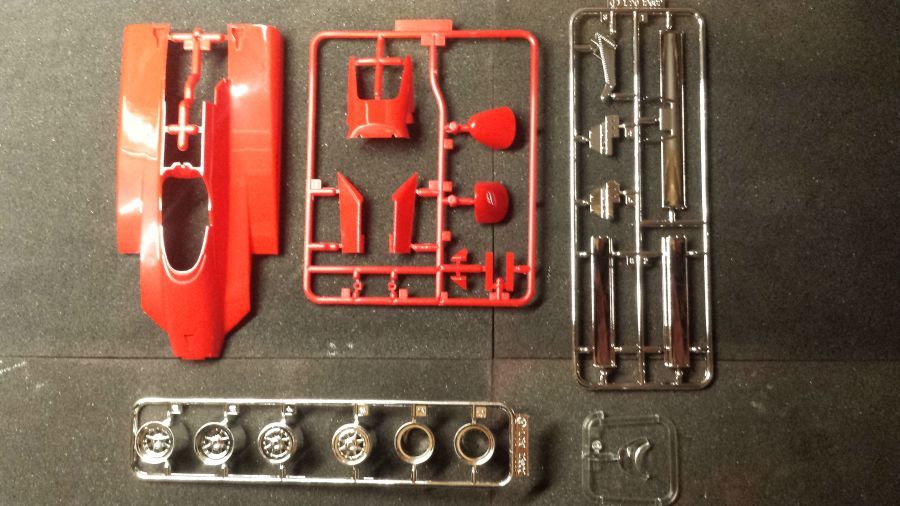
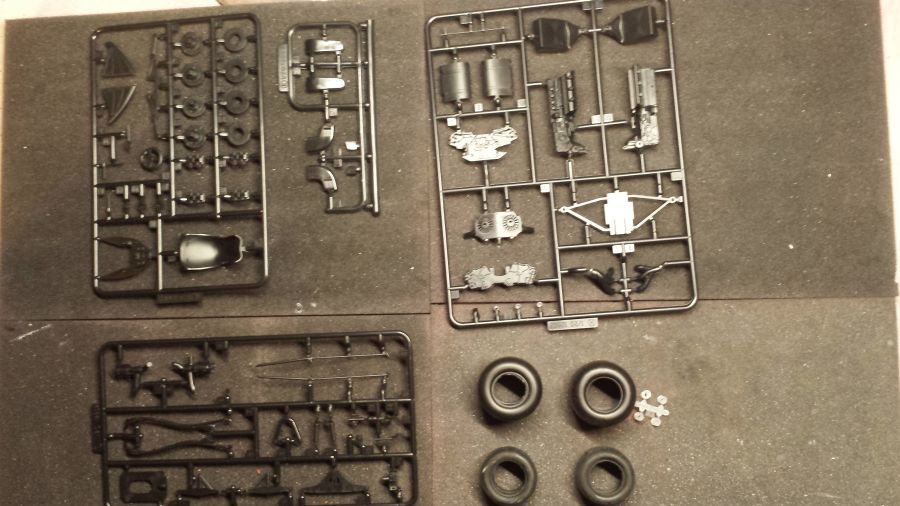
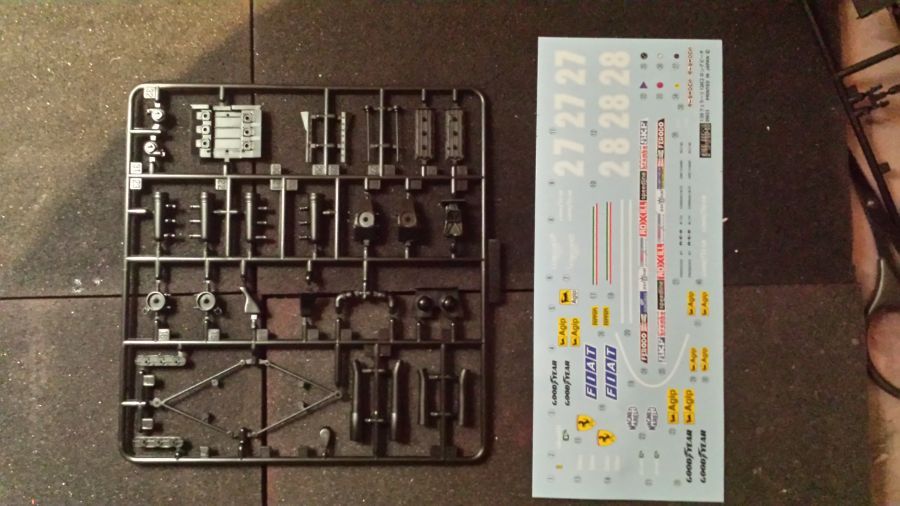
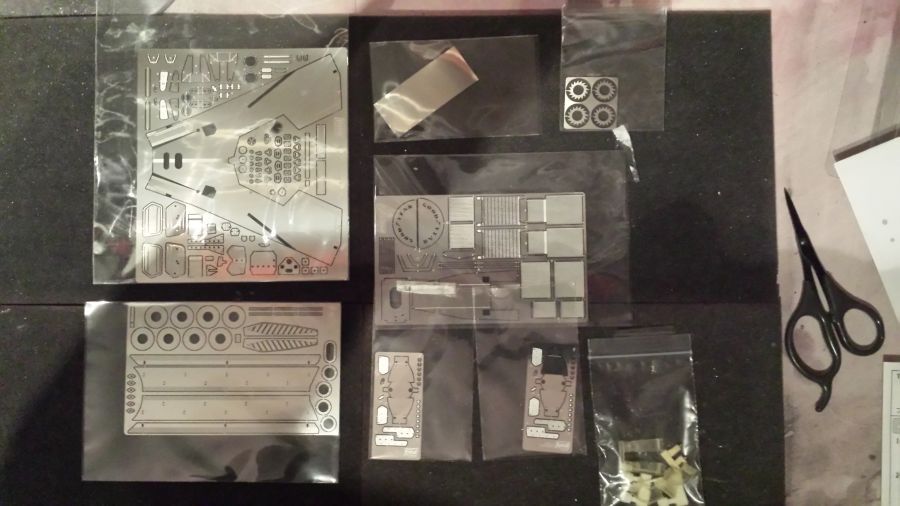
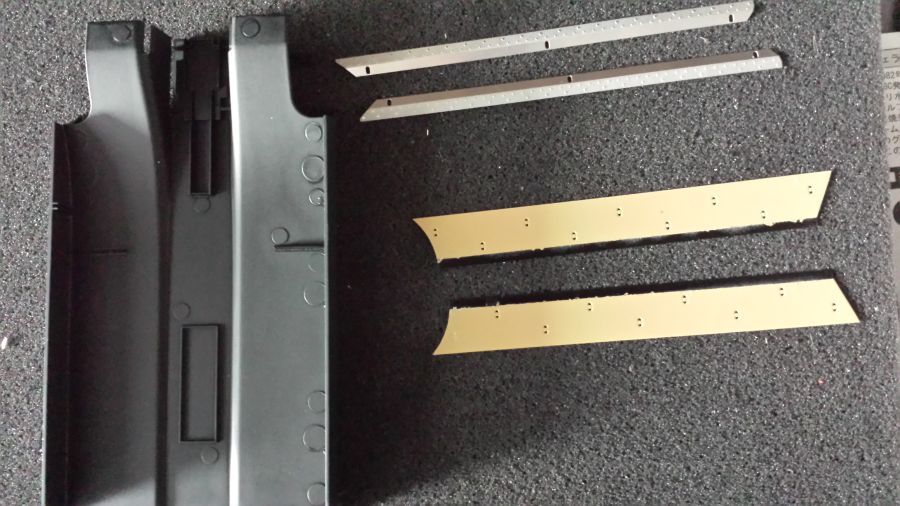
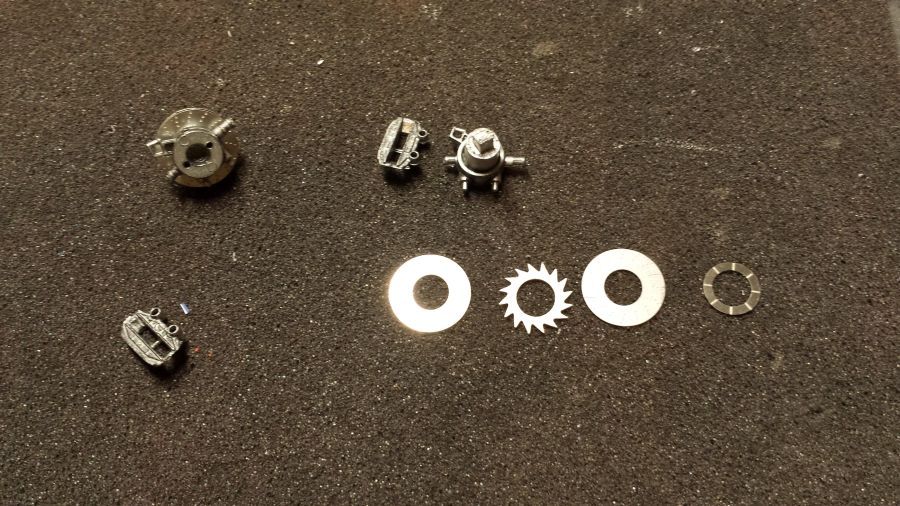
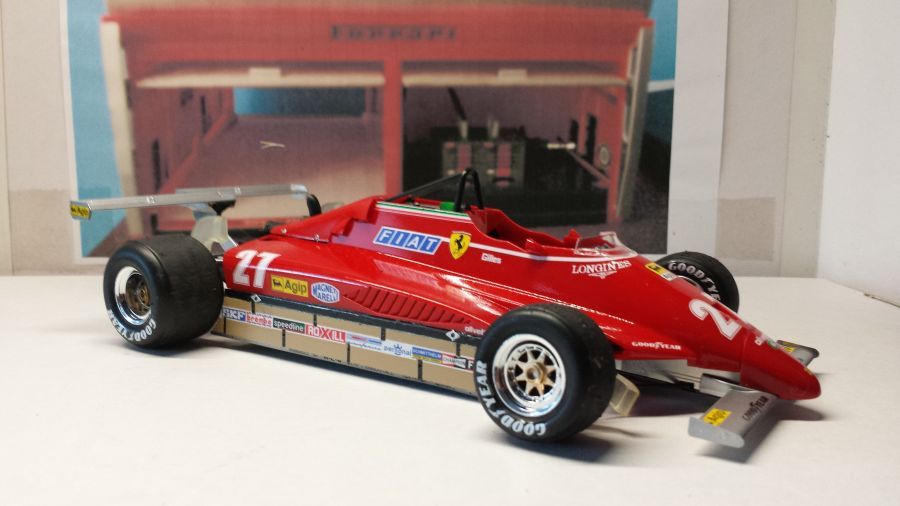
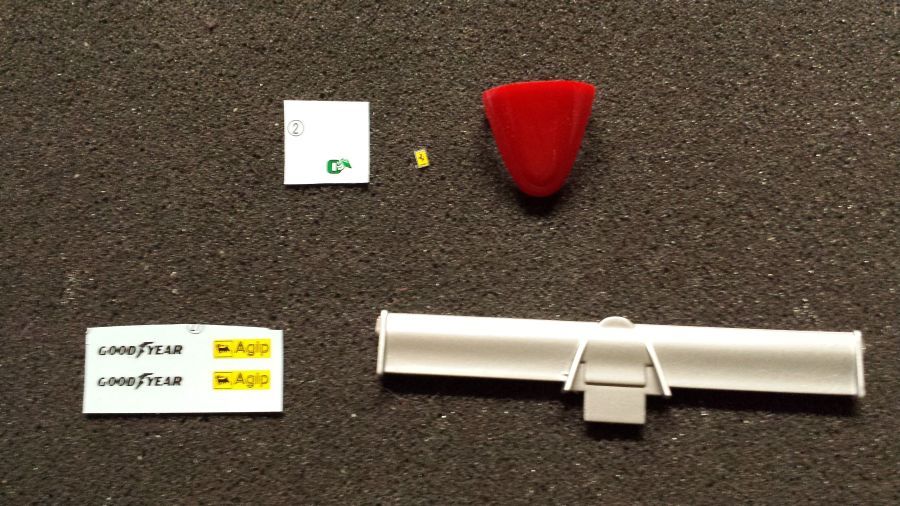
Dit keer is de Ferrari 126 C2 Long Beach (USA) versie uit 1982 aan de beurt. Deze wagen werd gereden door Gilles Villeneuve. Het betreft hier de schaal 1/20 Fujimi Kit (nr. GP2 - 090337). Daarnaast heb ik een etched set gekocht van FMD (nr. FE-20002). Een zeer uitgebreide set. Onder eerst weer de foto's van de inhoud. Ik weet dat er eigenlijk geen eer aan te behalen is om deze auto te bouwen. Deze is inmiddels al vaak gedaan. Maar ik heb meerder versies van de Ferrari 126 C2 te doen en wil niet alles achter elkaar bouwen. Te saai.
This time it's the Ferrari 126 C2 Long Beach (USA) version from 1982. This car was driven by Gilles Villeneuve. This is a scale 1/20 kit from Fujimi (No. GP2 - 090337). Next to it i bought an etched set from FMD (No. FE-20002). A very large set. Below the pictures of the content. I know this kit has been done a lot of times. But i have multiple versions of the Ferrari 126 C2 to build. I don't want to do them all next to each other. Too dull.
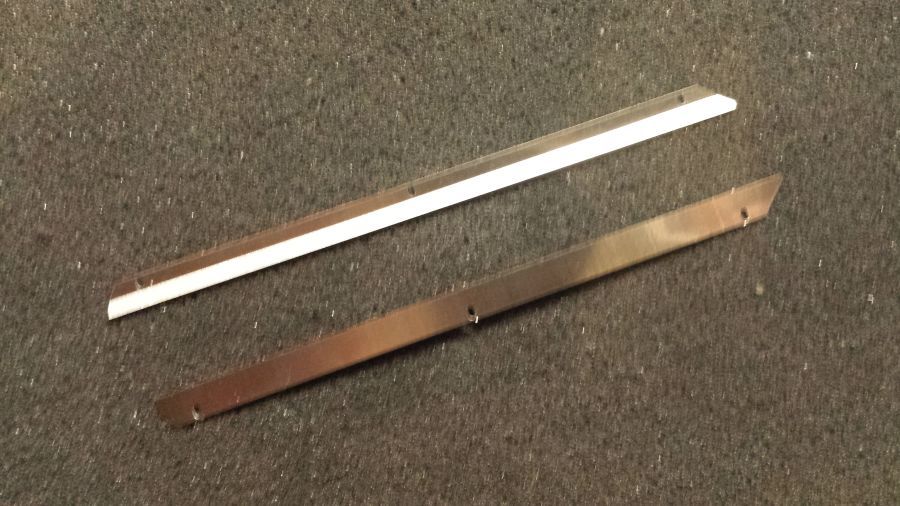
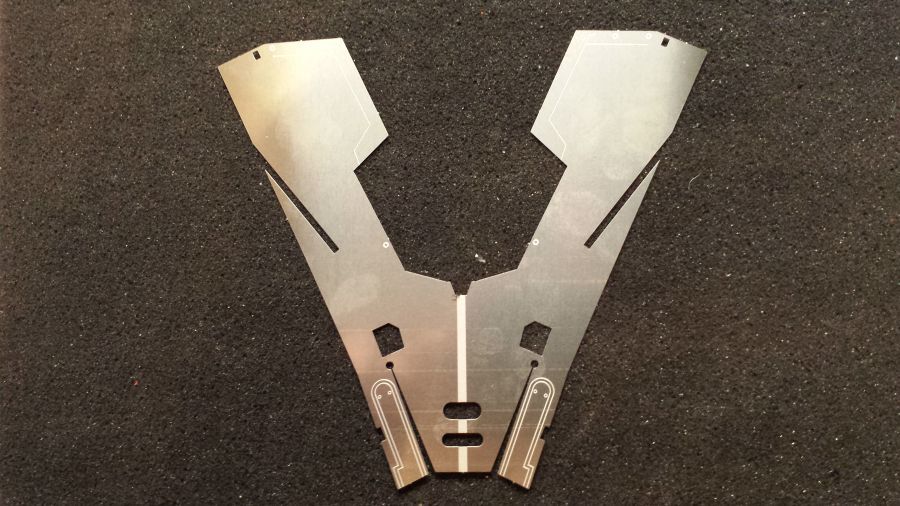
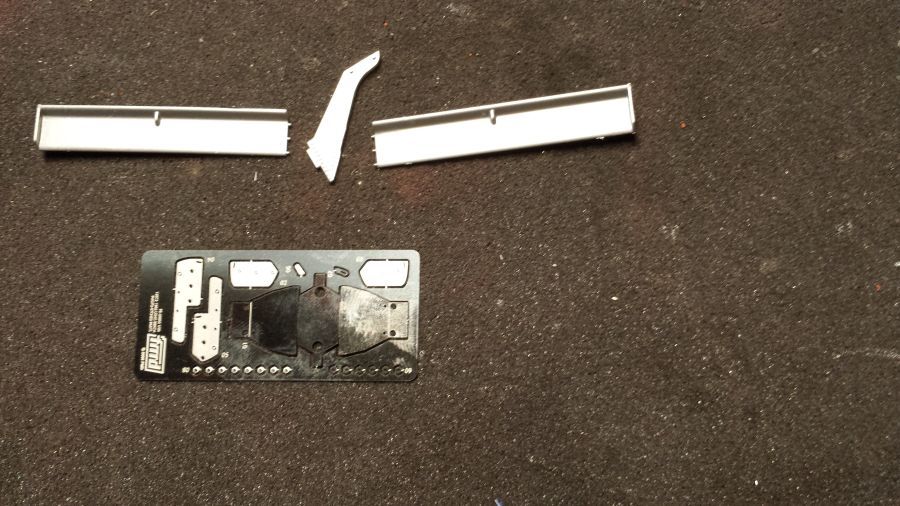
Eerst het werk aan de bodem. De standaard skirts ga ik vervangen door die van de etched set. De skirts bestaan uit 2 delen. Eerst moet 1 deel licht gebogen worden. Hiervoor gebruik ik de folding tool. Op de 2e foto is het verschil te zien. Het bovenste deel is licht gebogen.
First some work to the floor. I will replace the kit skirts by those of the etched set. The skirts exist of 2 parts. At first part 1 has to be bent a little. I will use the folding tool for this. On the 2nd picture you can see the difference. The upper part has been slightly bent.

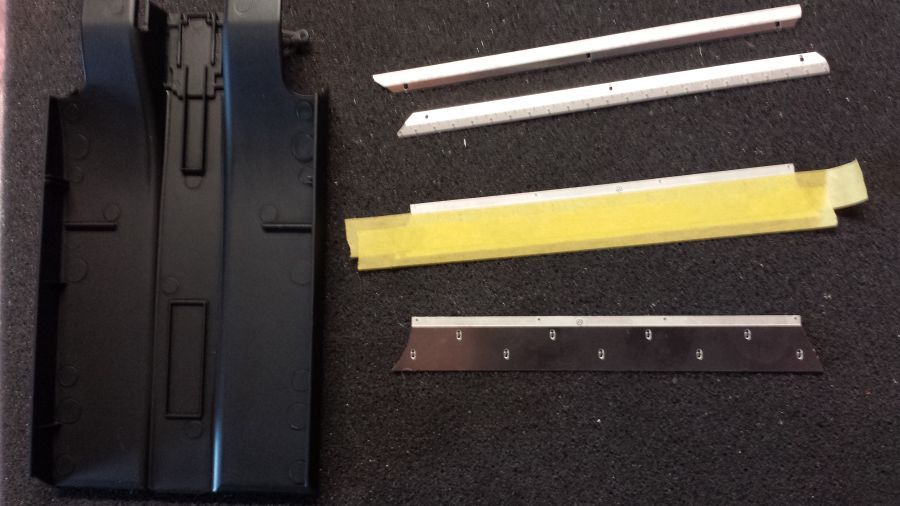
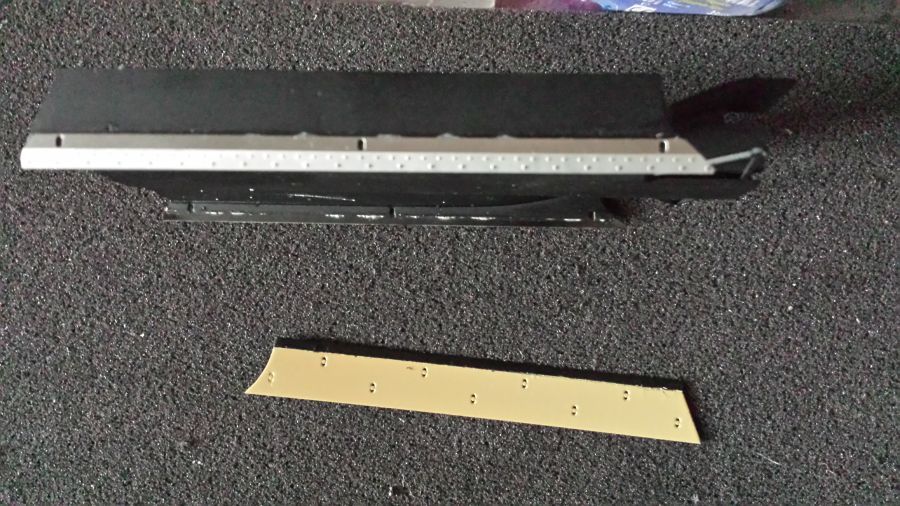
Hierna wordt het andere deel van de skirt gemaskeerd om daarna te spuiten met grondverf en vervolgens met Tamiya TS-46. De bodem is mat zwart gespoten met Tamiya TS-6. Daarna wordt het kleine deel van de skirt aan de bodem gelijmd. De originele skirts zijn beweegbaar, maar dat maakt voor mij niet veel uit.
After this the other part of the skirt was masked to be sprayed with primer an after this with Tamiya TS-46. The floor has been sprayed matt black with Tamiya TS-6. Then the small part of the skirt will be glued to the floor. The original skirts are movable, but i don't mind.
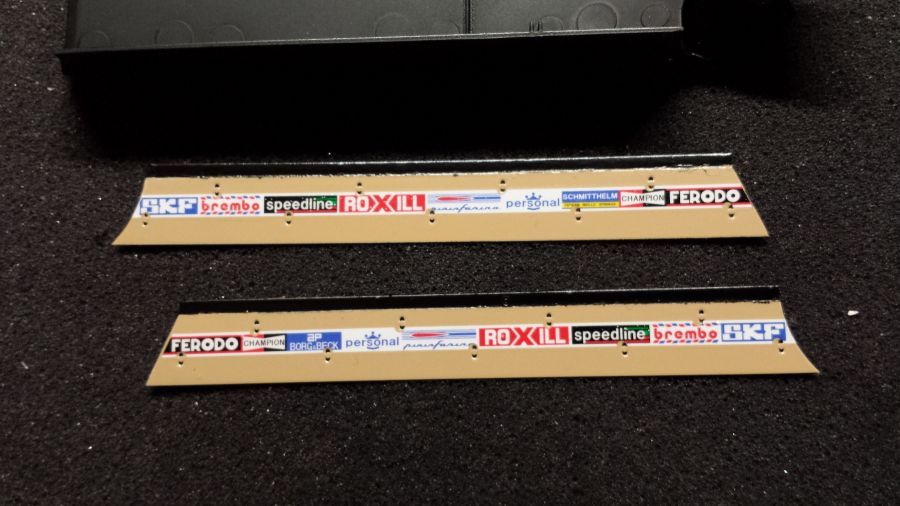
Vervolgens worden de grote delen gespoten met primer, daarna met Tamiya TS-46 (Light Sand). Dan Tamiya TS-6 (Flat Black) op het bovenste randje en vervolgens Tamiya TS-79 (Semi Gloss Clear) in een paar dunne laagjes. Dan de decals erop en weer spuiten met Tamiya TS-80 (Flat Clear).
Next the larger parts are sprayed with primer, then Tamiya TS-46 (Light Sand). Then Tamiya TS-6 (Flat Black) on the upper ridge, followed by a couple of small layers of Tamiya TS-79 (Semi Gloss Clear). Next the decals are applied and then sprayed again with Tamiya TS-80 (Flat Clear).
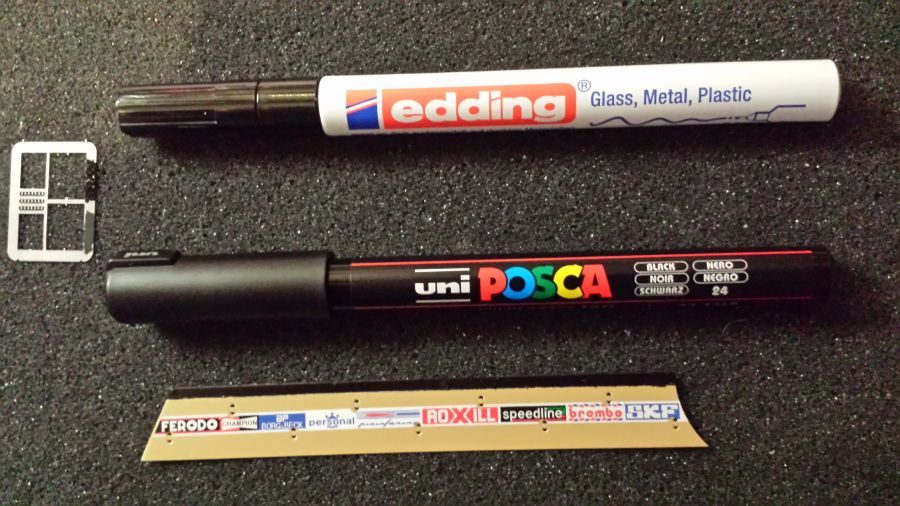
Om de verticale zwarte strepen te maken op de skirts, ga ik gebruik maken van een verfstift. Ik heb er 2 gekocht om te testen. De 1e is van Edding (Type 680 Creative) de 2e van Uni Posca (Type PC-1MR). Beide zijn geschikt om te schrijven op metaal en/of plastic. De Edding inkt blijft glanzen na het drogen. De Uni Posca droogt mat op. Mijn voorkeur gaat uit naar de laatste.
To make the vertical stripes on the skirts, i will use a paint pen. I bought 2 different ones to test. The 1st is from Edding (Type 680 Creative) the 2nd from Uni Posca (Type PC-1MR) Both are suitable to write on metal and/or plastics. The Edding leaves a shiny stripe after drying. The Uni Posca leaves a matt finish. I prefer the last.
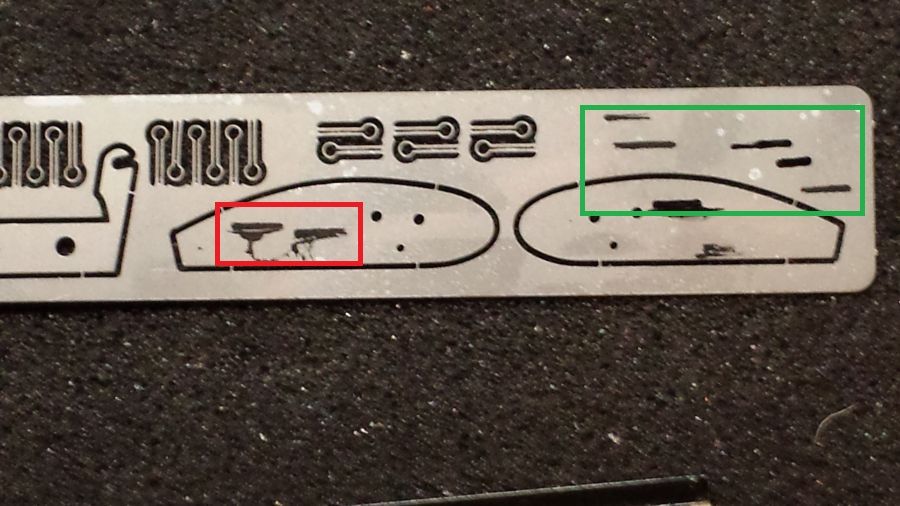
Ik durf geen gebruik te maken van Tamiya masking tape. Het zou niet de 1e keer zijn dat de tape bij het verwijderen decals of verf meeneemt. Dit wil ik beslist niet. Ik ga daarom gebruik maken van een lineaal. Het is natuurlijk oppassen geblazen dat het moor strak wordt en de inkt niet uitveegt. Eerst even oefenen. In het rode vak staan strepen waarbij ik een stuk etched gebruikt heb als lineaal. Het etched is zo dun, dat bij het weghalen een grote smeer ontstaat. In het groene vak staan strepen die gemaakt zijn met een lineaal die wat dikker is. Veel strakker.
I dare not to use Tamiya masking tape. It wouldn't be the 1st time the tape peals off decals and paint when it is removed. I surely do not want this. I will use a ruler. Of course i want straight lines and no paint wipes. So first i will practice. The red square contains stripes where i use a piece of etched as a ruler. The etched is this thin, so when you remove it, it leaves a paint wipe. The green square contains stripes made with a ruler that was a bit thicker. Much better.
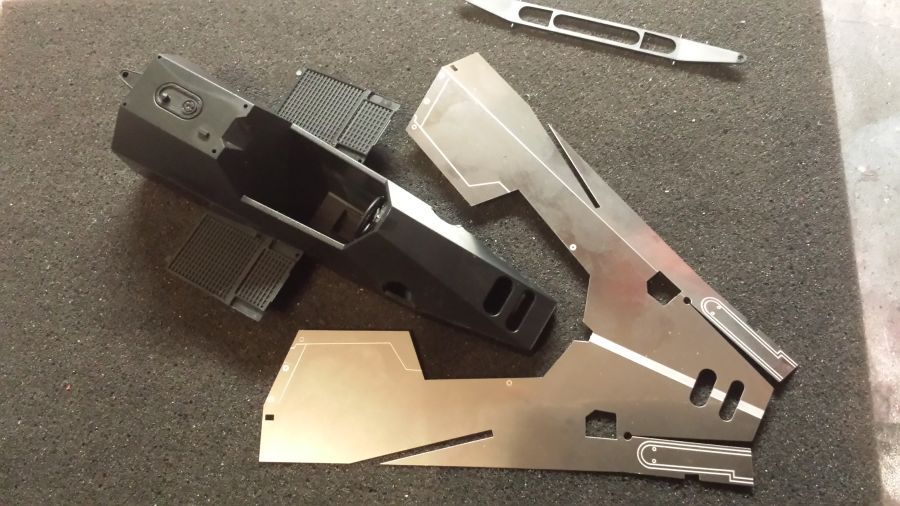
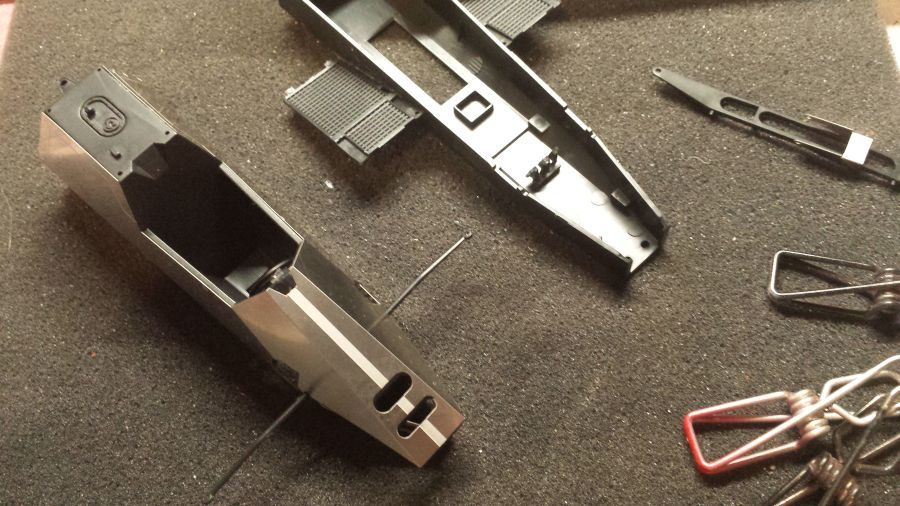
Het werk aan de kuip. Eerst de voorwielophanging verwijderen. Deze wordt vervangen door etched onderdelen.
Working on the tub. First remove the front wheel suspension. This will be exchanged by an etched one.
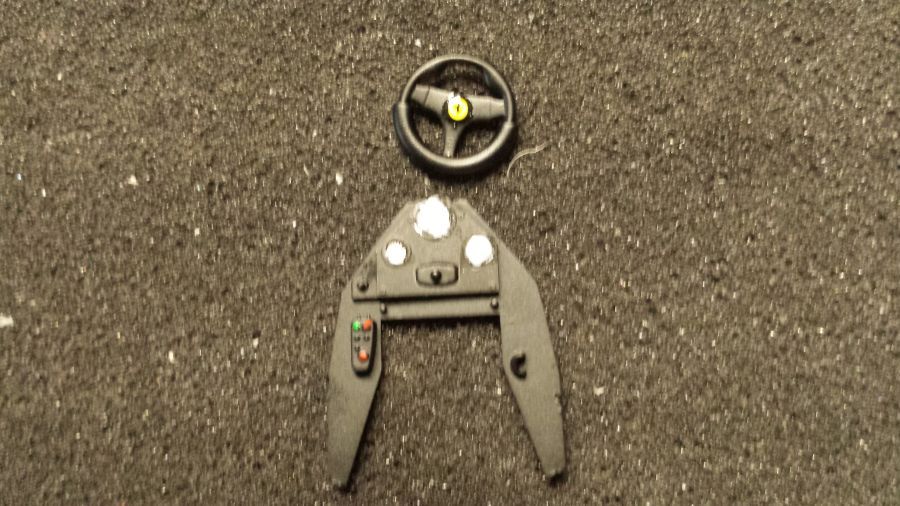
Het dashboard. Een paar drupples Micro Crystal Clear op de meters om het 'glaseffect' te krijgen. Wanneer dit droog is, is het volledig helder.
The dashboard. A few drops of Micro Crystal Clear on the gauges to create a 'glass effect'. When dry this is completely clear.
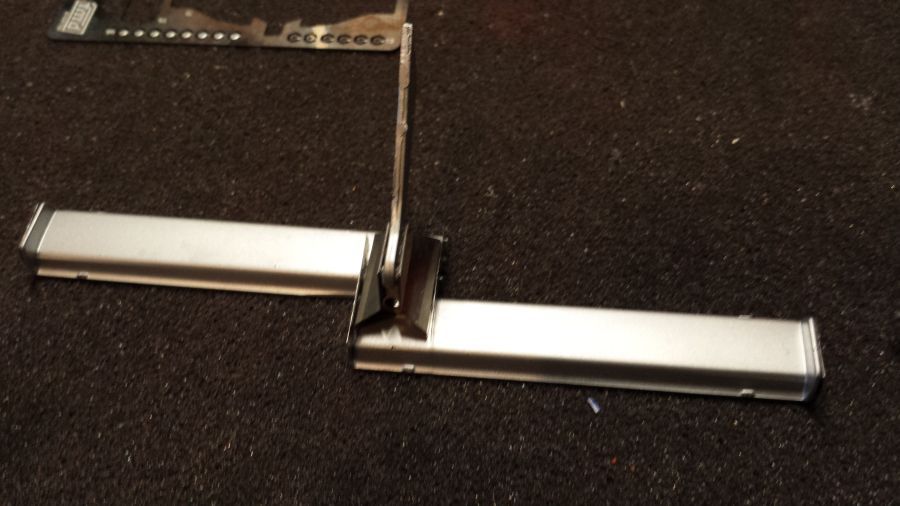
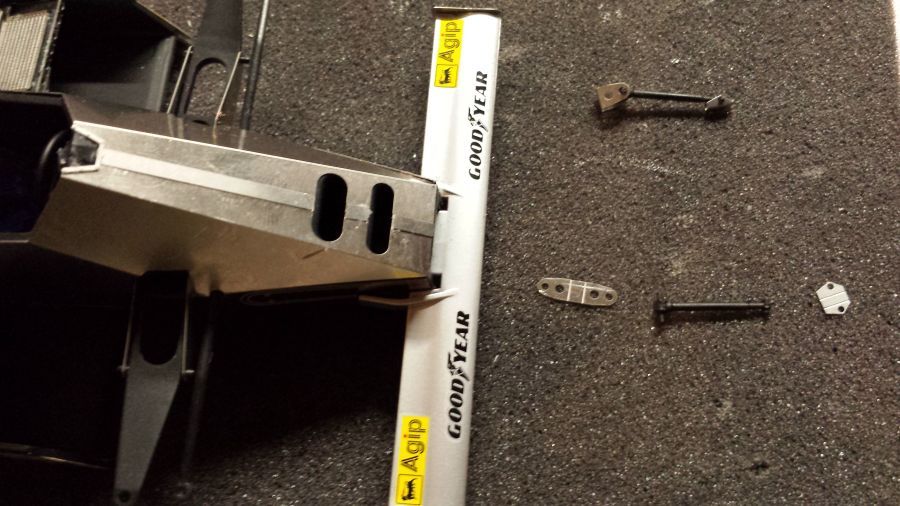
Een groot element om te vouwen. Dit zal niet volledig met de folding tool gaan. Ook de Tamiya vouwtang moet worden gebruikt. Dit vraagt wat studie over hoe het beste aan te pakken. Uiteindelijk besluit ik de 2 langste vouwen met de tool te doen, de rest met de tang.
A large element to fold. This cannot be completely done by using the folding tool. The Tamiya folding pliers will be of use too. This needs some study on the best approach. Eventually i have decided to do the 2 long folds with the tool and the rest with the pliers.
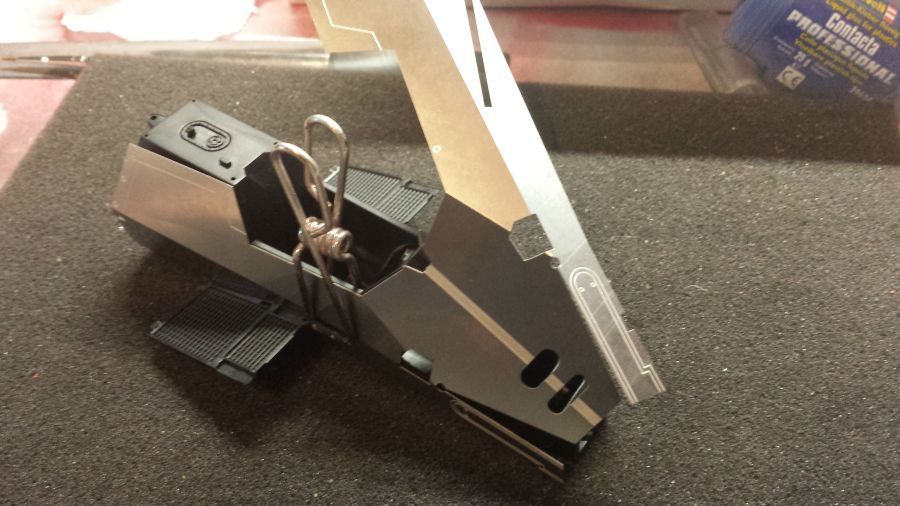
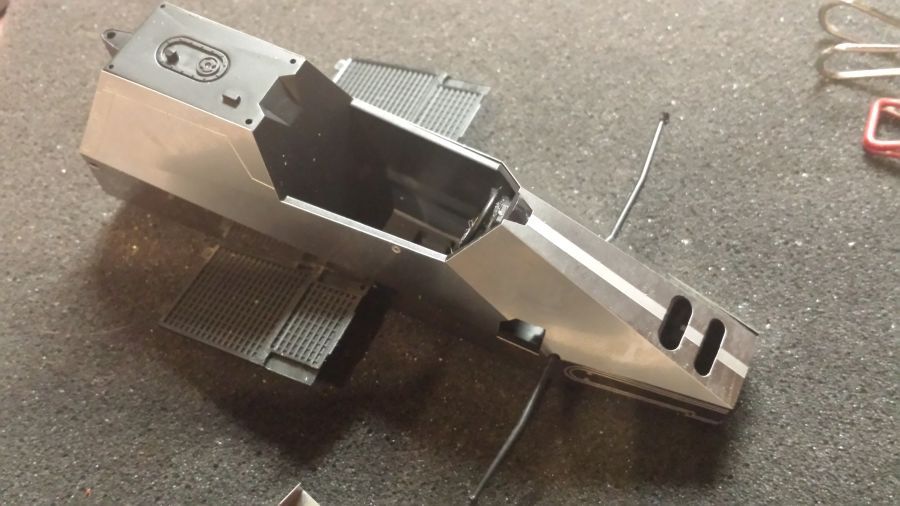
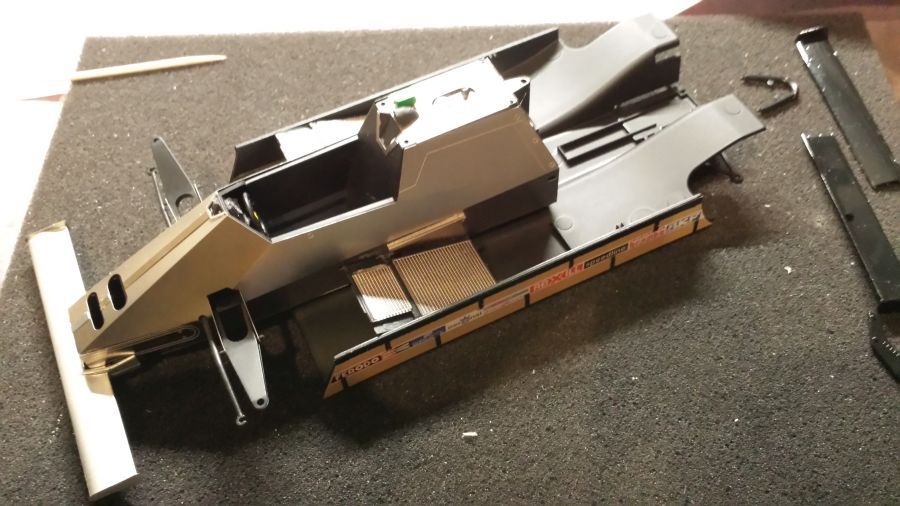
De metalen romp wordt aan de bovenste helft van de kuip gelijmd. Daarna wordt de stuurstang geplaatst. Pas dan wordt het onderste deel van de kuip gelijmd. Dit lijkt mij de beste manier. De stuurstang past niet door de gaatjes en kan dus niet achteraf ingeschoven worden. Dat geldt ook voor een deel van de voorwielophanging. Daar moet ik iets op verzinnen.
The metal body is glued to the upper half of the tub. Then the steering rod is attached. Only then lower half of the tub will be glued. This looked the best way to me. The rod can not be added afterwards, as it doesn't fit the holes. The same goes for a part of the front wheel suspension. I have to think of a solution.
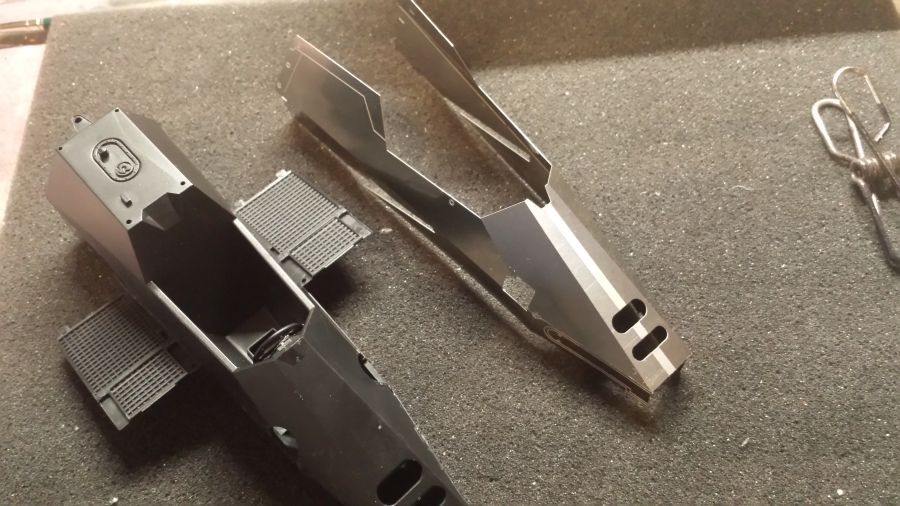
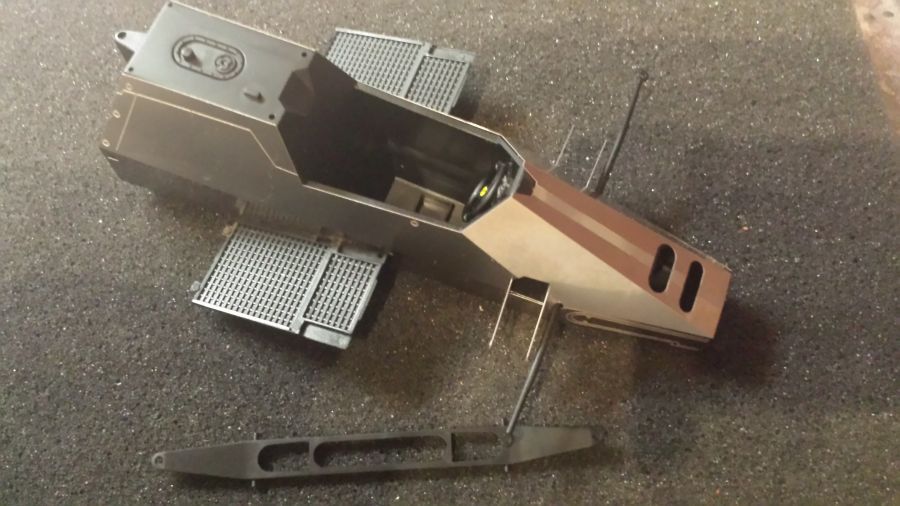
De steunen voor de armen zijn geplaatst, maar de arm past op geen enkele manier door het gat. Ik zal de arm door midden snijden en dan vanaf iedere kant naar binnen steken. Het resultaat lijkt goed. Ik heb alles nog niet vastgezet, zodat ik later nog iets kan stellen.
The supports for the arms have been placed, but there is no way the arm fits through the holes. I will cut the arm in two and stick them through the hole on each side. The result looks o.k.. I did not fixate everything, so i will be able to make some adjustments.
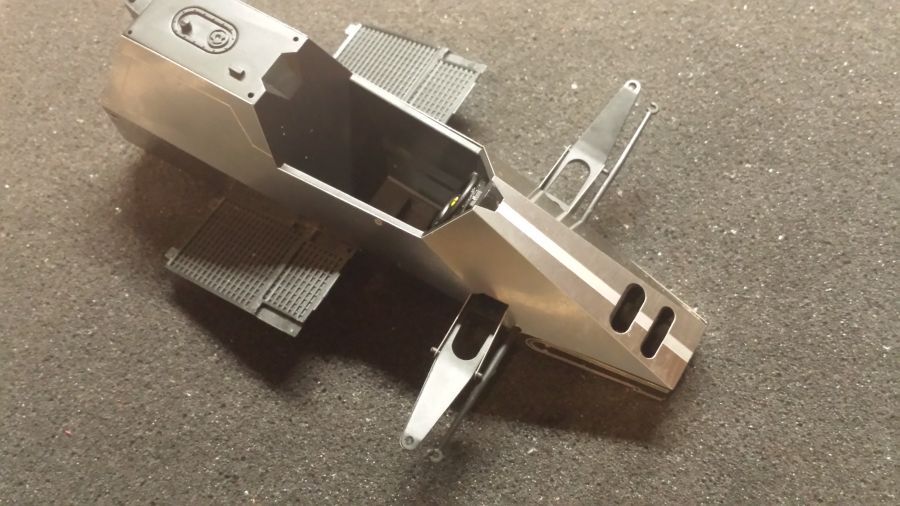
Nu verder met de onderkant.
Now continuing with the down side.
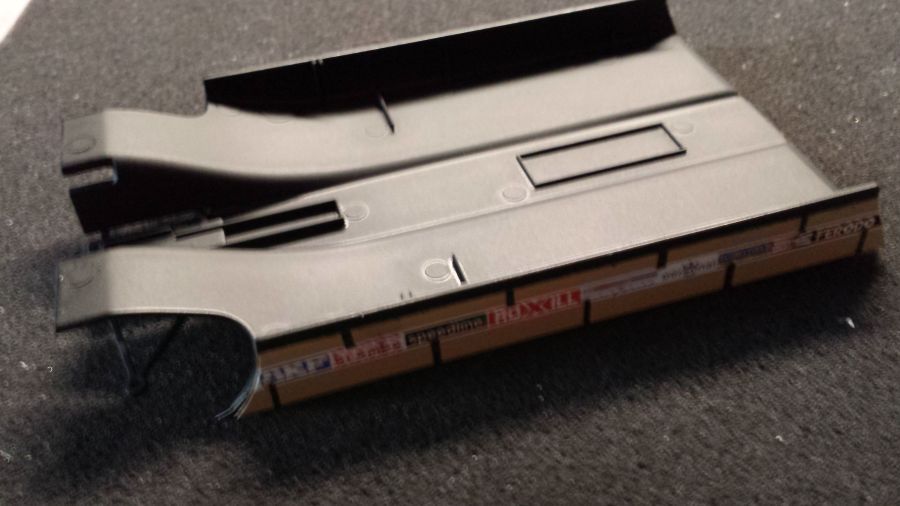
De zijplaten zijn aan de vloer bevestigd.
The side plates have been attached to the floor.
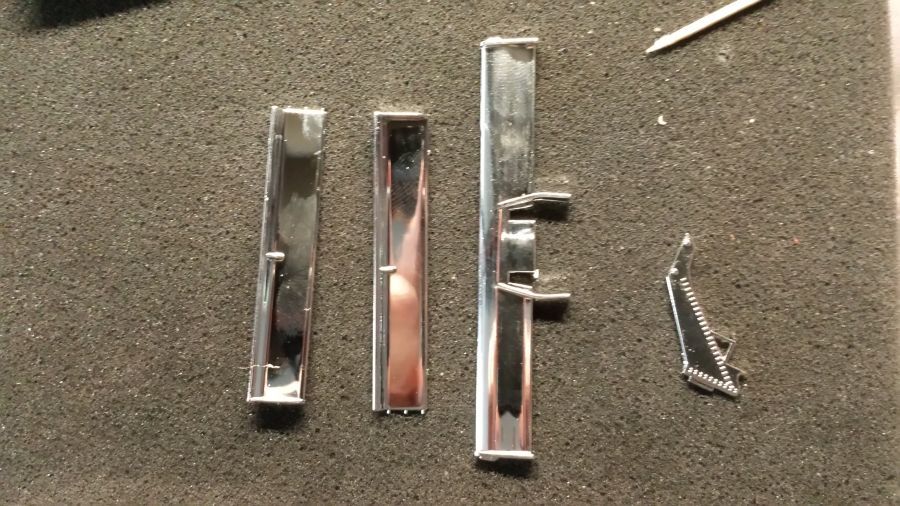
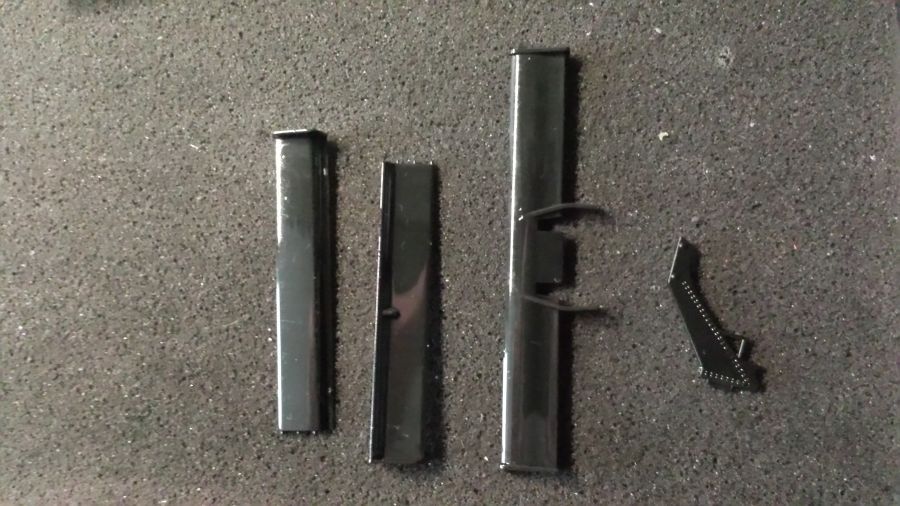
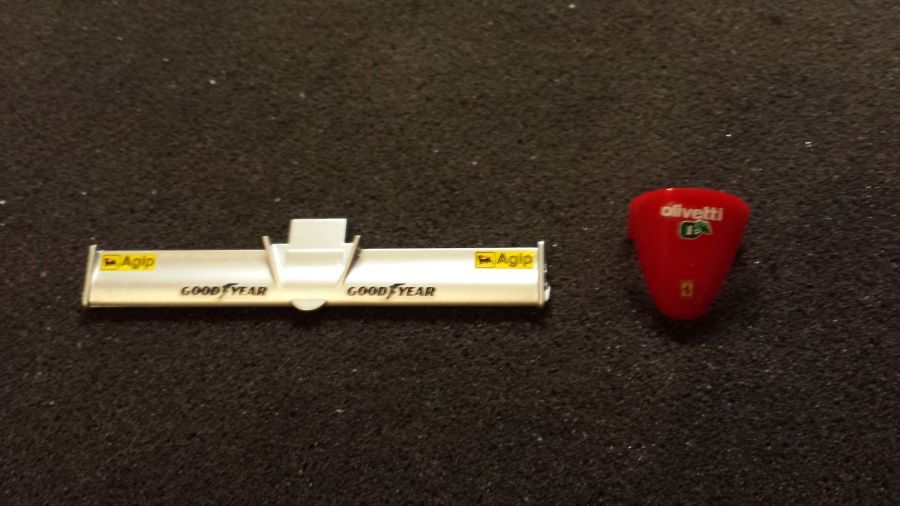
Het chroom wordt verwijderd van de achtervleugelonderdelen. Mr. Muscle ovencleaner doet het werk prima.
The chrome will be taken off of the end wing parts. Mr. Muscle oven cleaner works well.
De voorvleugel is gespoten en gemonteerd en de cockpit is aan de bodem bevestigd.
The front wing has been painted and mounted and the cockpit has been attached to the floor.
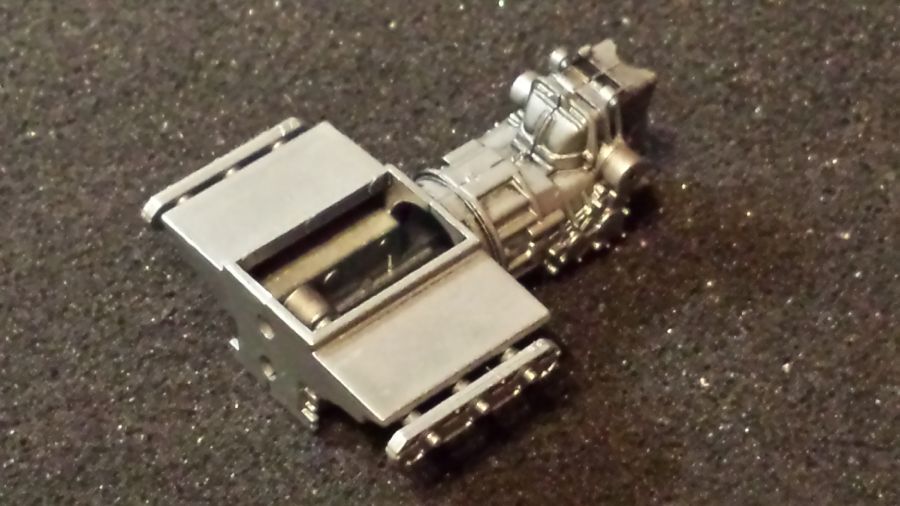
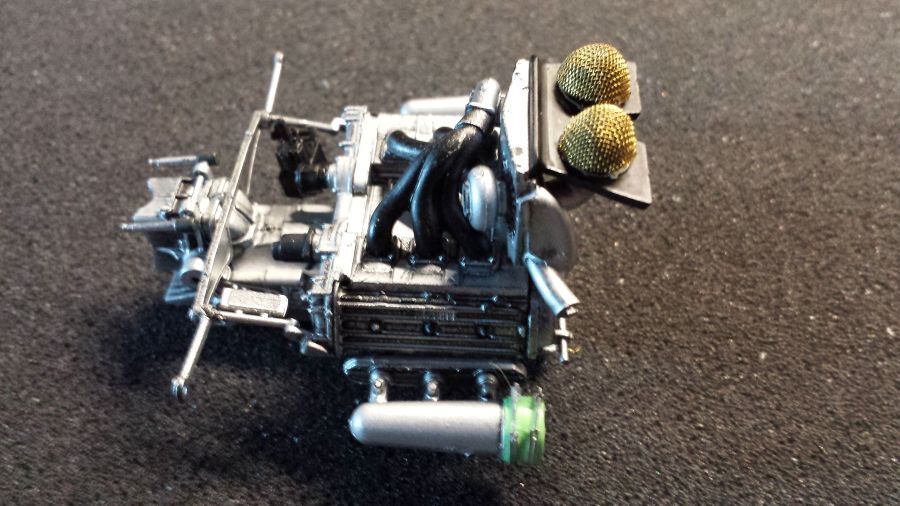
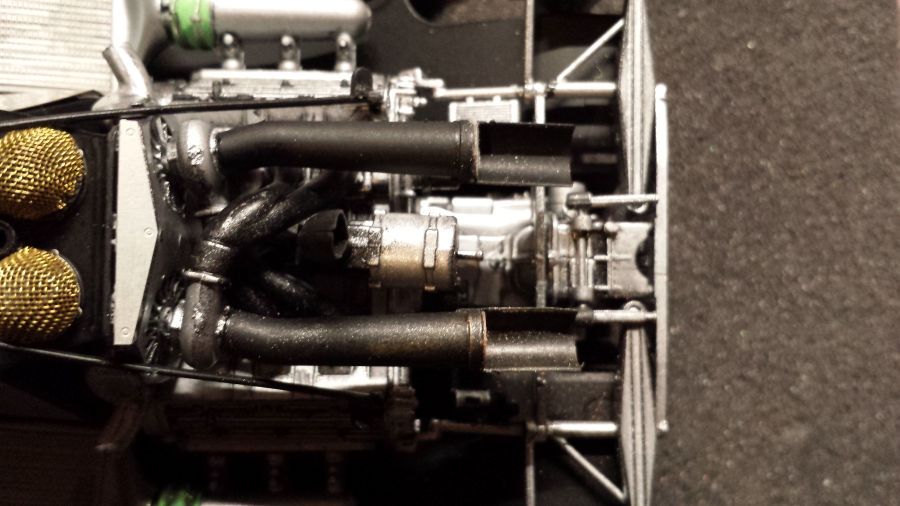
Door naar de motor.
On to the engine.
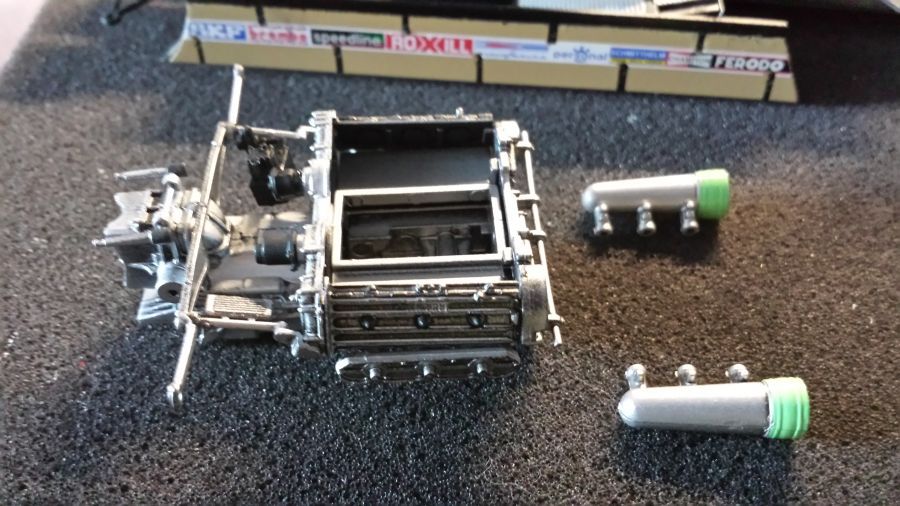
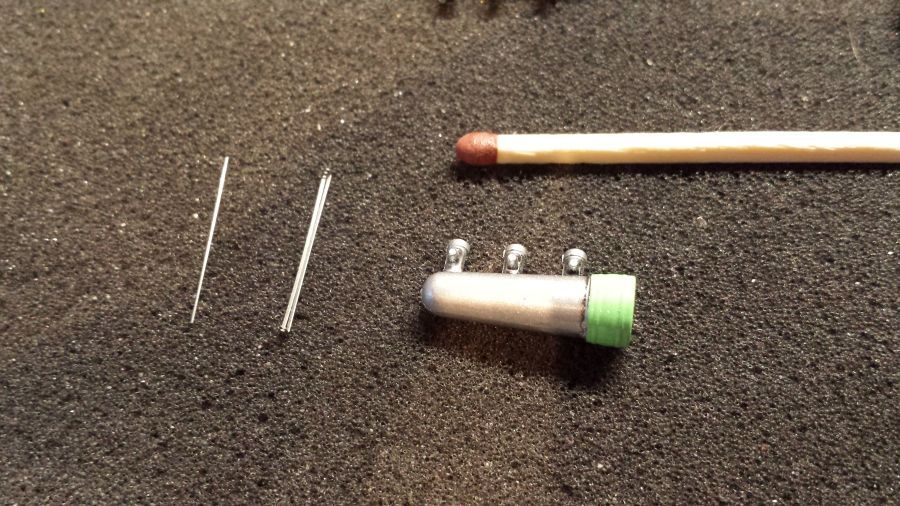
Door met wat zeer klein etched werk. De rolling tool is weer erg handig bij dit werk.
Continuing with some micro etched work. The rolling tool comes handy doing this job.
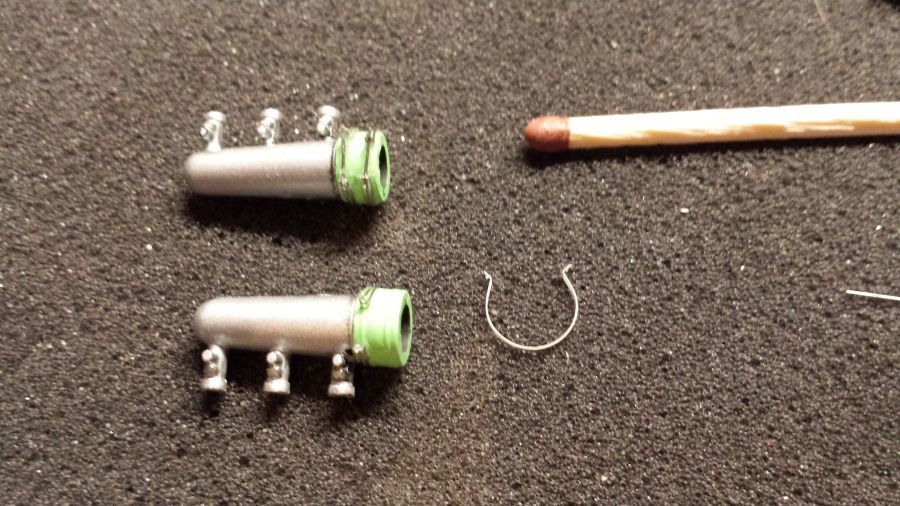
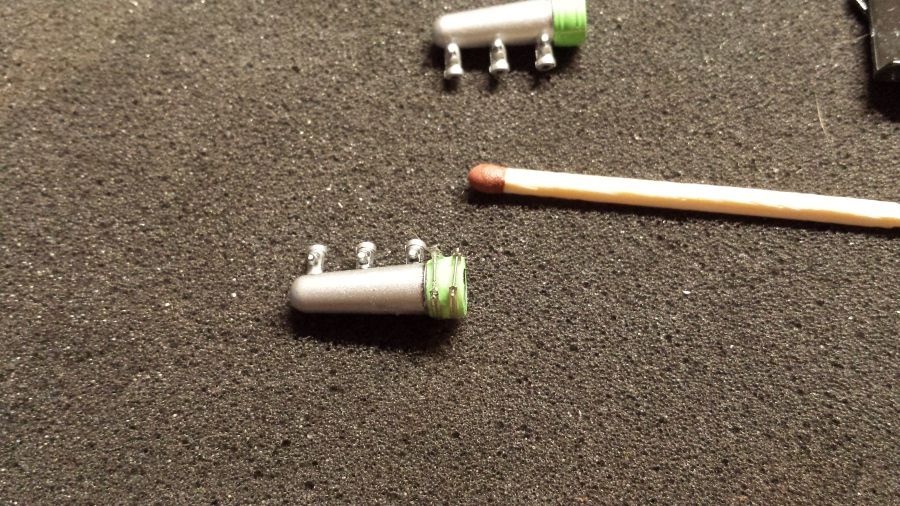
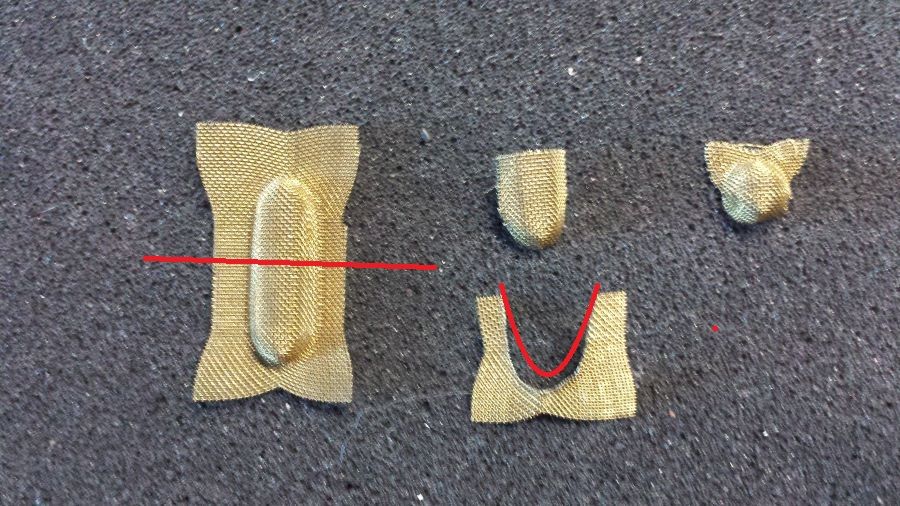
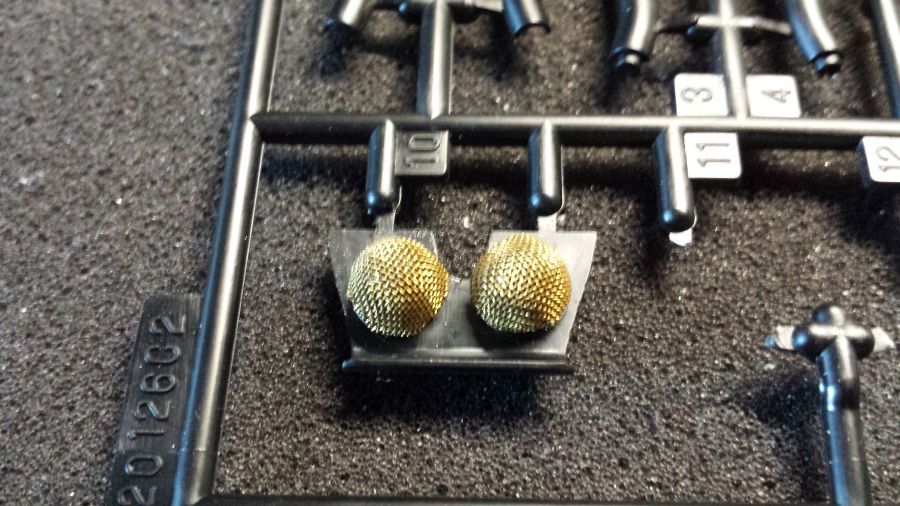
Ik wil messing covers over de inlaten maken. In de rommeldoos vond ik nog iets voor een Cosworth motor dat ik kan gebruiken. Eerst de cover door midden knippen, dan de ronding aan 1 kant maken, dit geheel over de bol vormen, weer de ronding maken en dan maar hopen dat het een beetje lijt.
I want to make mesh covers over the intakes. In the scrap box i found something for a Cosworth engine that might be useful. First i will cut the cover in half, then cut it round on 1 side, then form it over the dome, again cut it round and then hope it looks nice i hope.
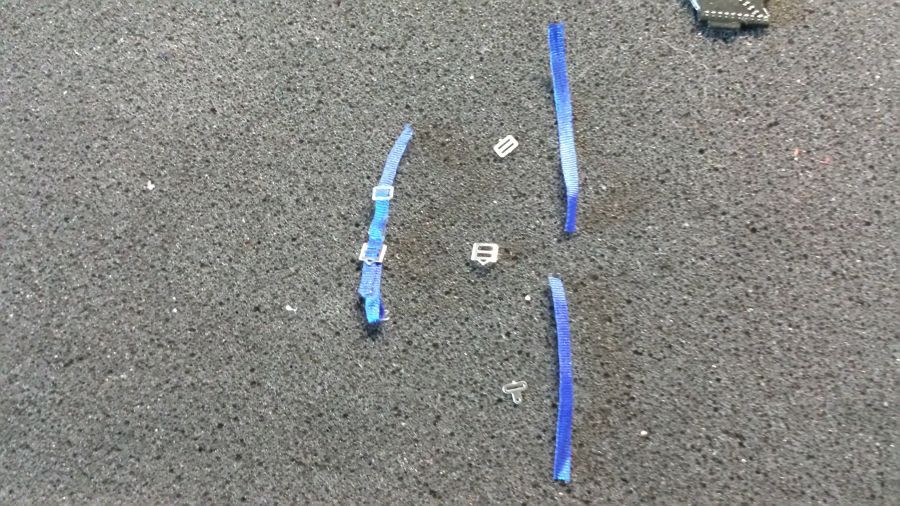
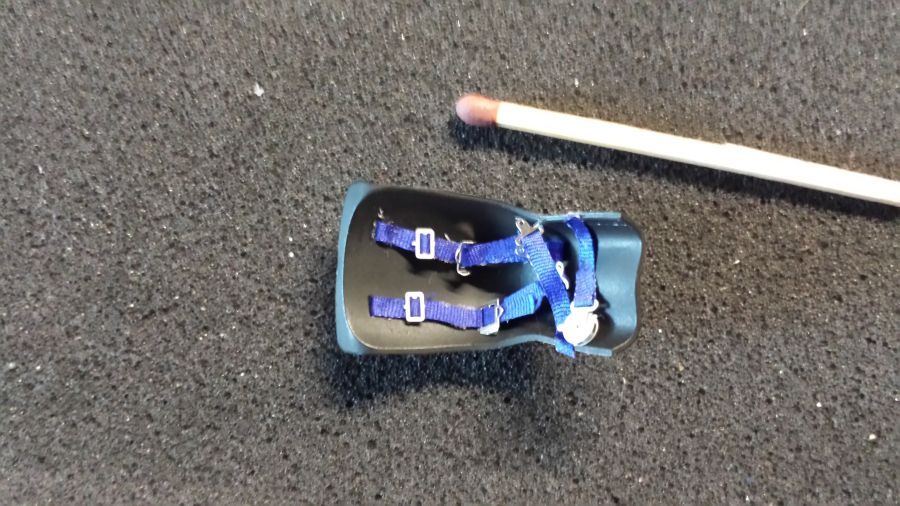
Het werk aan de gordels.
Working on the belts.
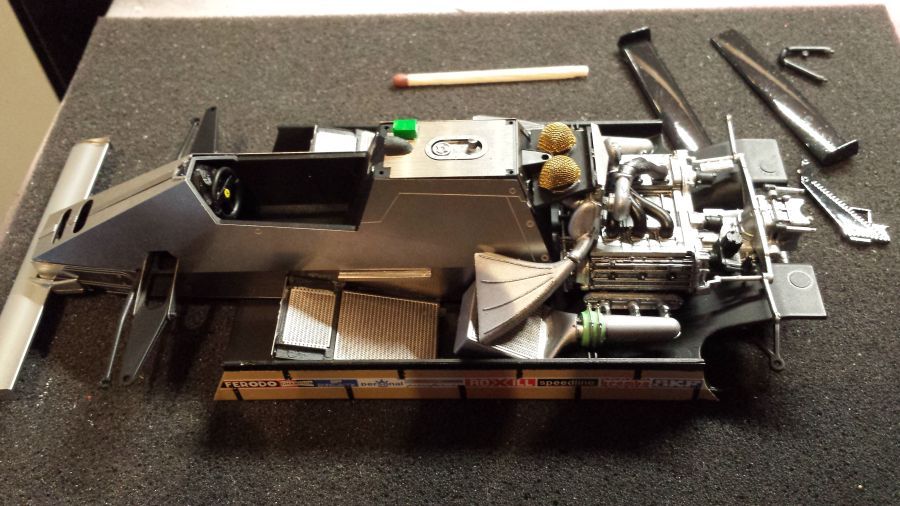
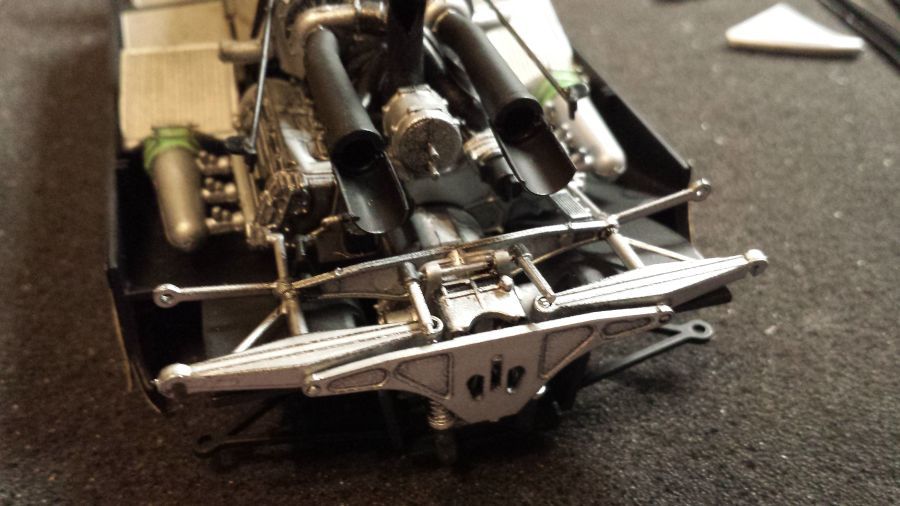
De achterwielophanging is geplaatst, daarna de remmen.
The rear wheel suspension has been mounted, the brakes are next.
De cover is gespoten met Tamiya TS-8 Italian Red. Daarna de decals aanbrengen en vervolgens de glanslak.
The cover has been sprayed with Tamiya TS-8 Italian Red. After this it is time for the decals, followed by the clear coat.
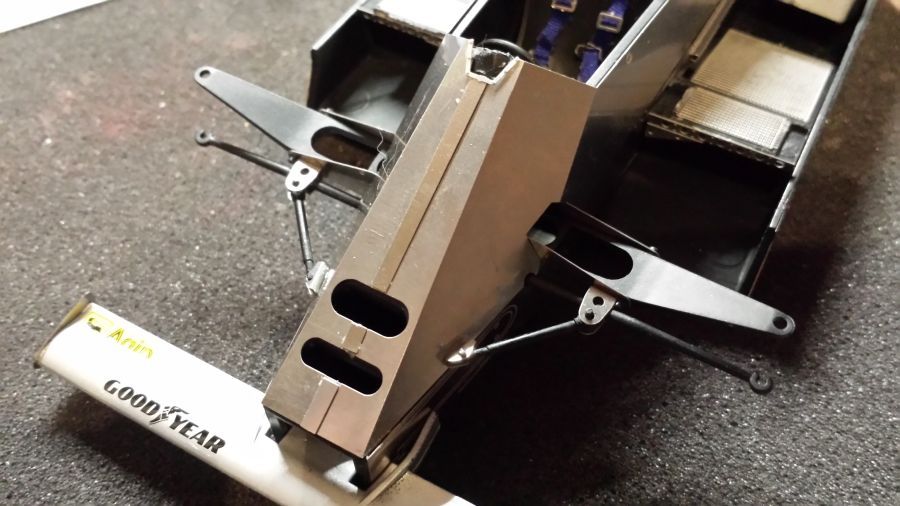
Door met de achtervleugel.
Continuing with the rear wing.
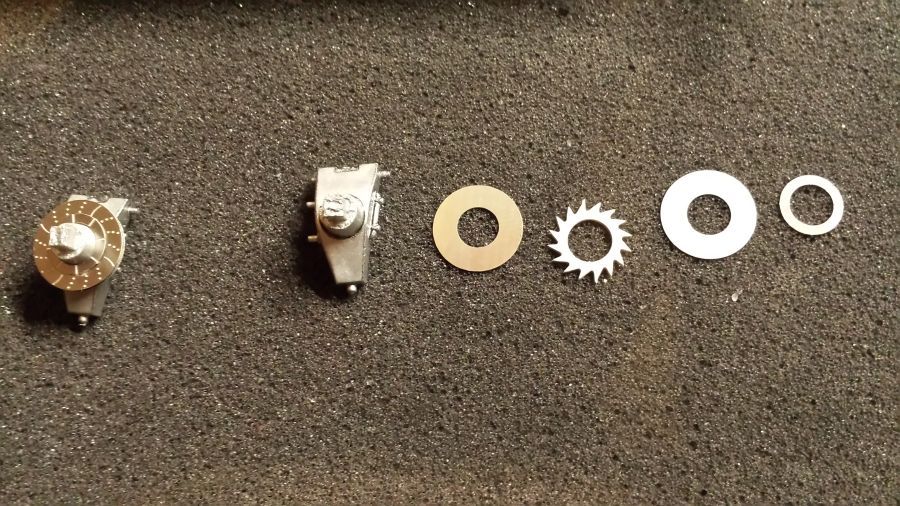
Dan de voorremmen.
Then the front brakes.

Eerst nog wat klein werk aan de voorwielophanging.
First some additional small work to the front wheel suspension.
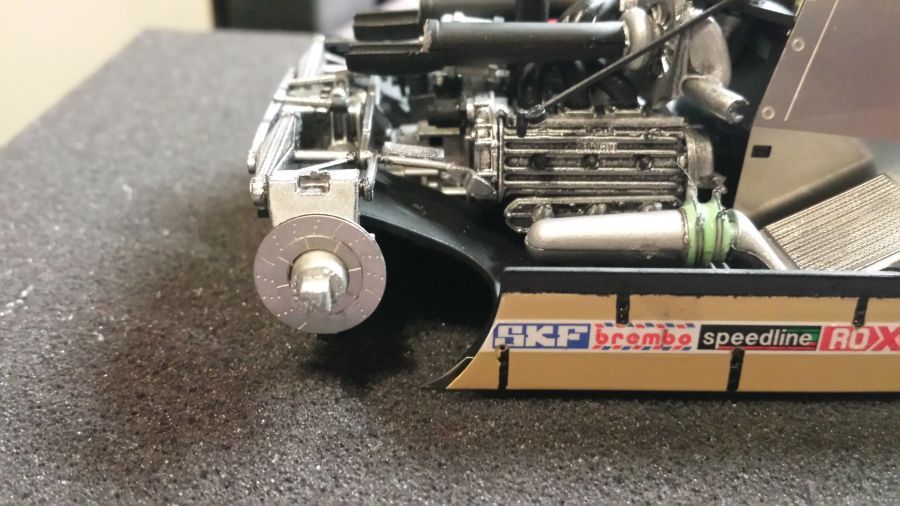
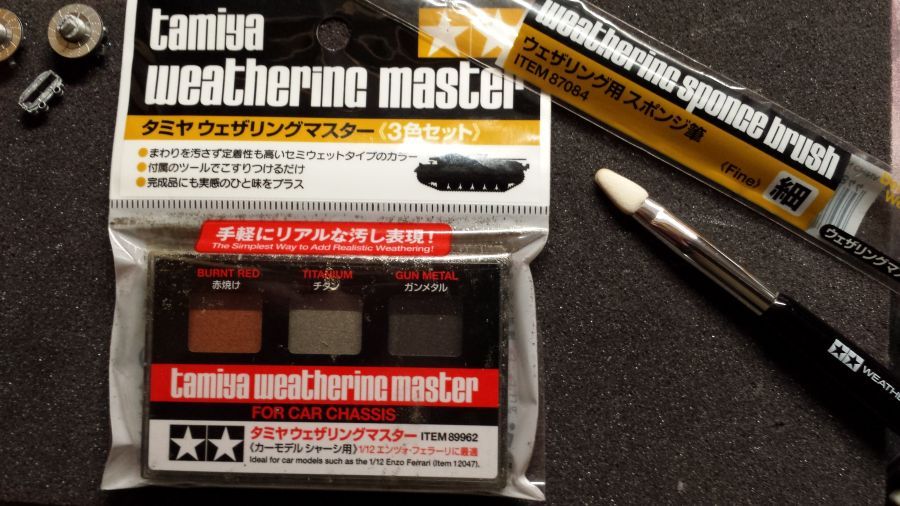
Ik ga de uitlaten wat verouderen. Daarvoor gebruik ik een weatheringset van Tamiya (#89962) speciaal voor auto's. Het is een beetje een vettig poeder dat met een bijgeleverd kwastje of sponsje wordt aangebracht. De onderste uitlaat is behandeld, de bovenste niet.
I am going to weather the exhausts. For this i will use a weathering set from Tamiya (#89962) specially for cars. It is a kind of fat powder that can be applied with the enclosed brush or sponge. The lower exhaust has been weathered, the top one not.
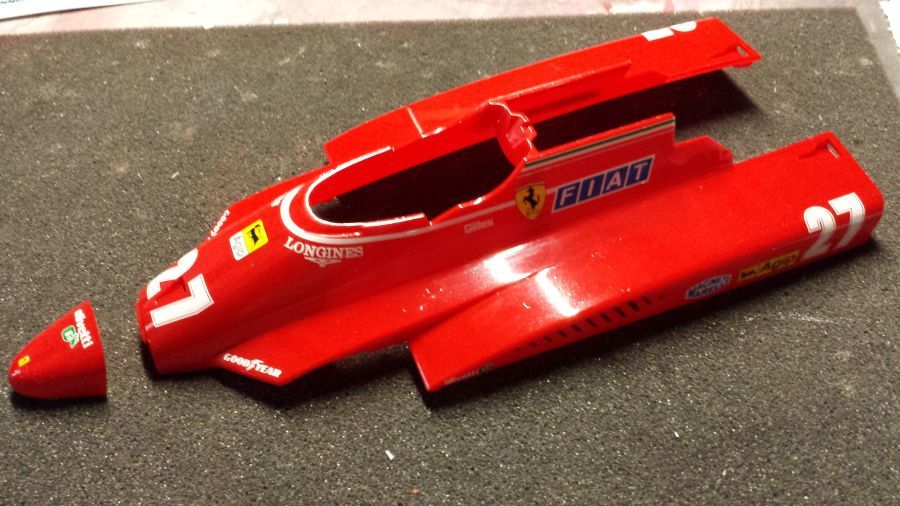
De kap zit erop. Ook bij deze kit past het allemaal maar net of net niet.
The cover is on. Also with this kit a very tight fit.
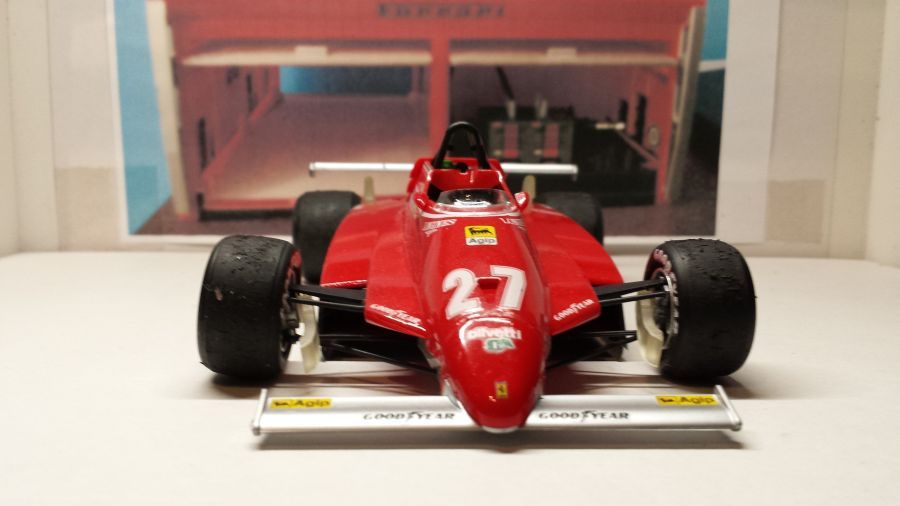
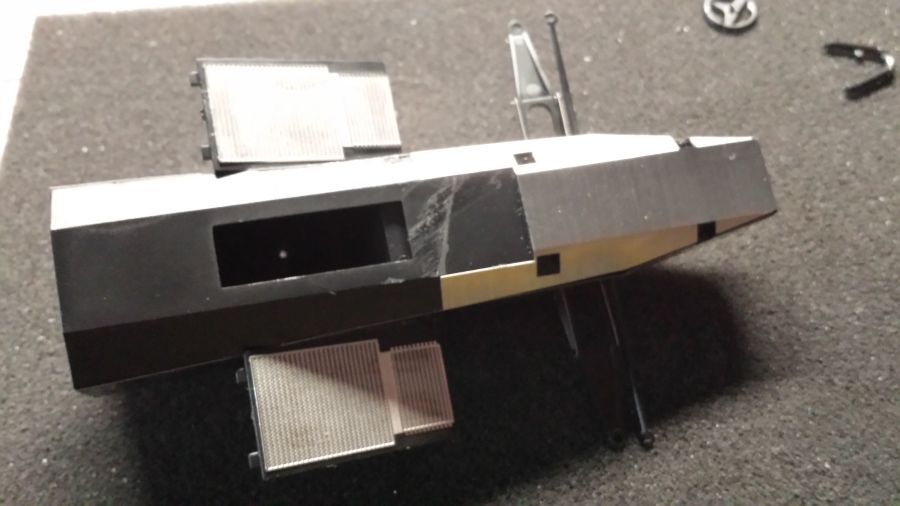
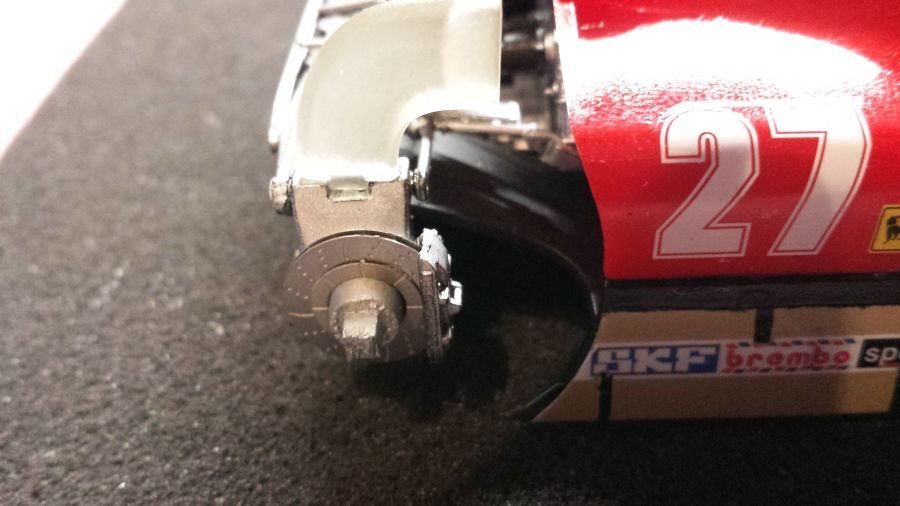
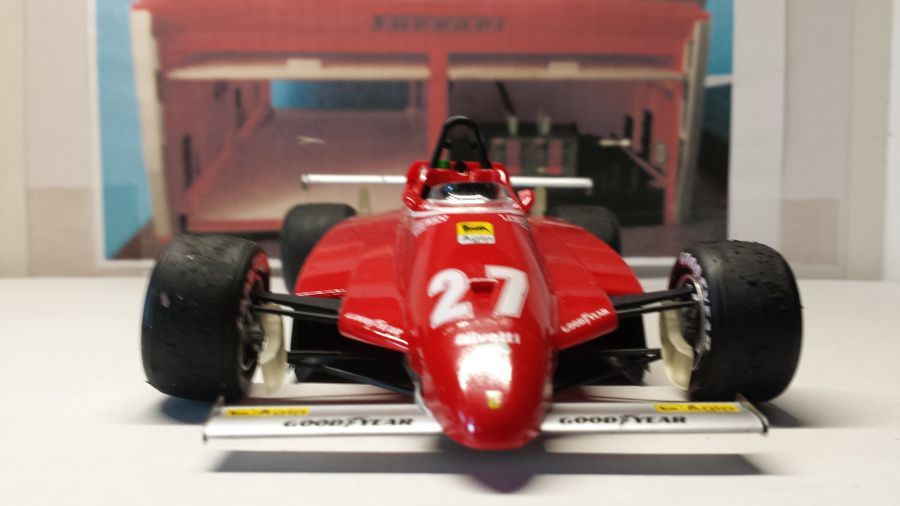
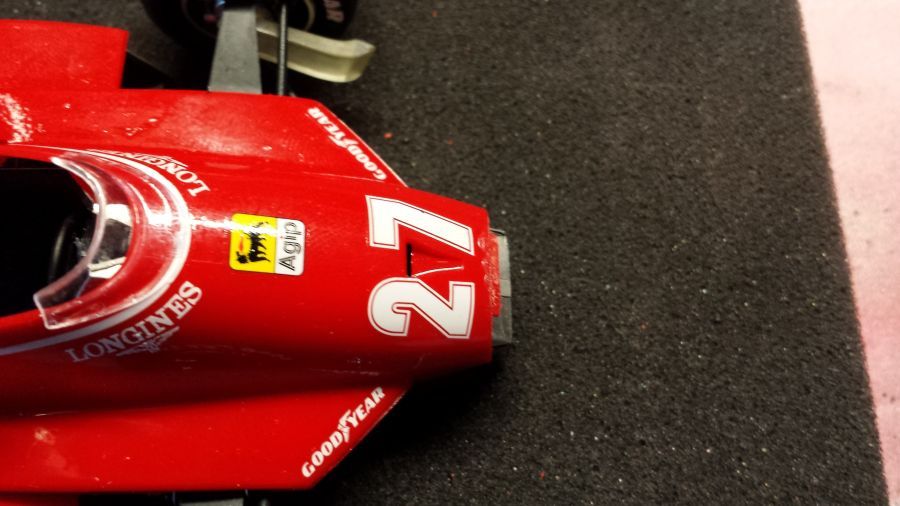
De remmen en de ventilatie zitten erop. De foto laat nog de onjuiste neus zien.
The brakes and the vents are on. The picture still shows the incorrect nose cone.
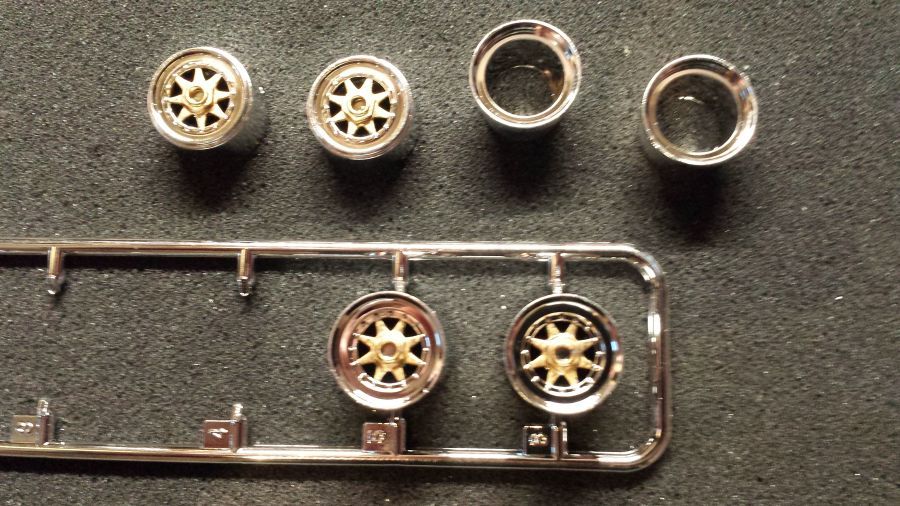
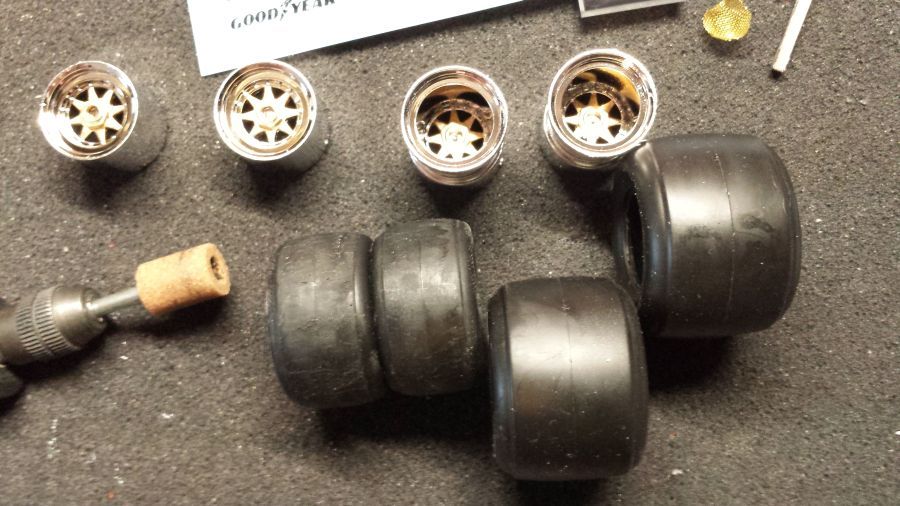
Door met de velgen en banden.
Continuing with the rims and tires.
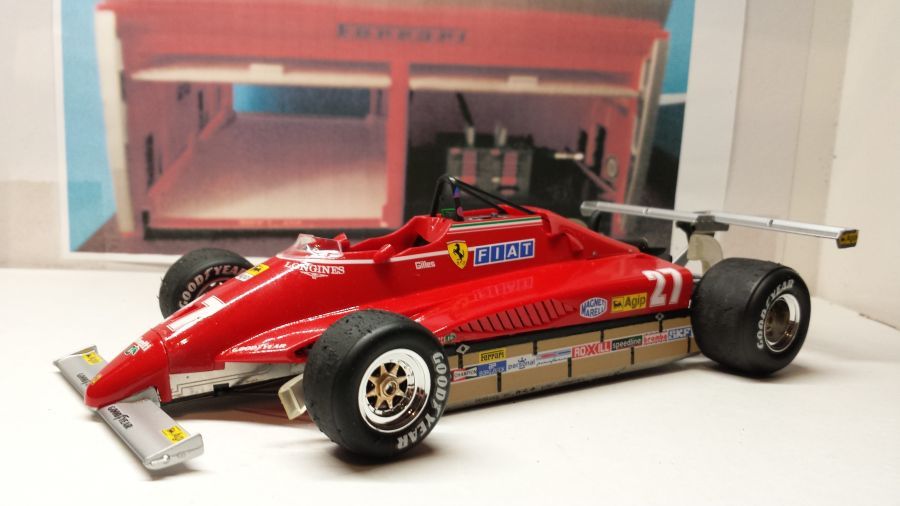
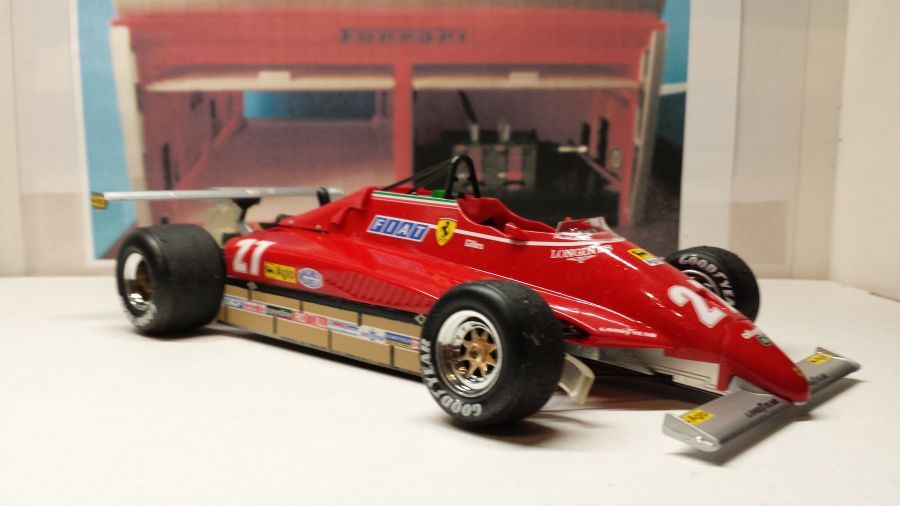
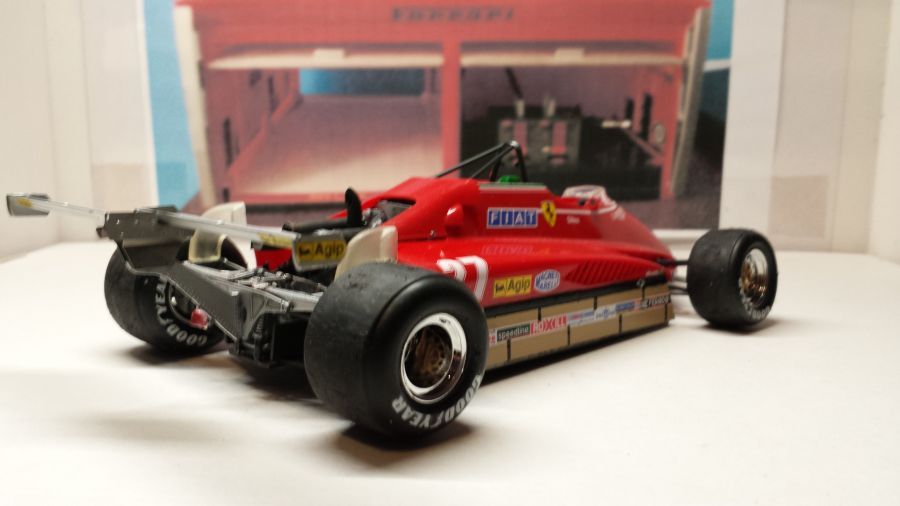
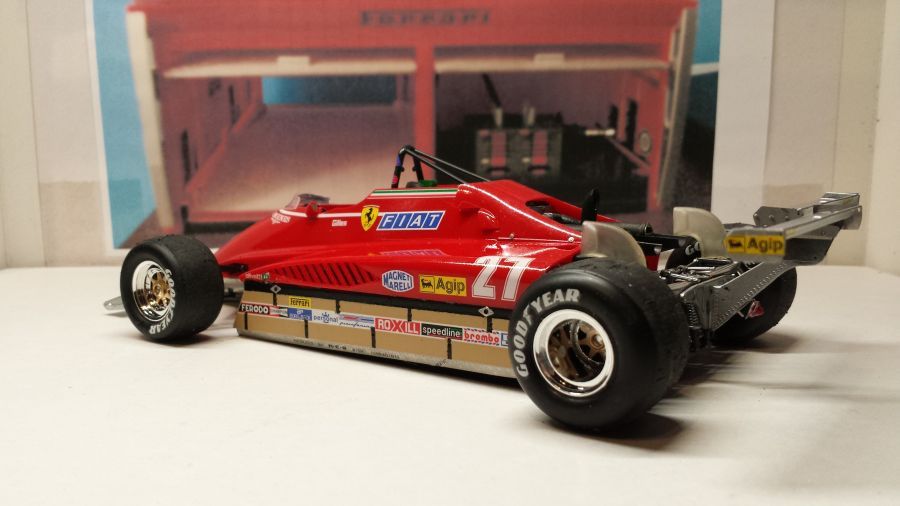
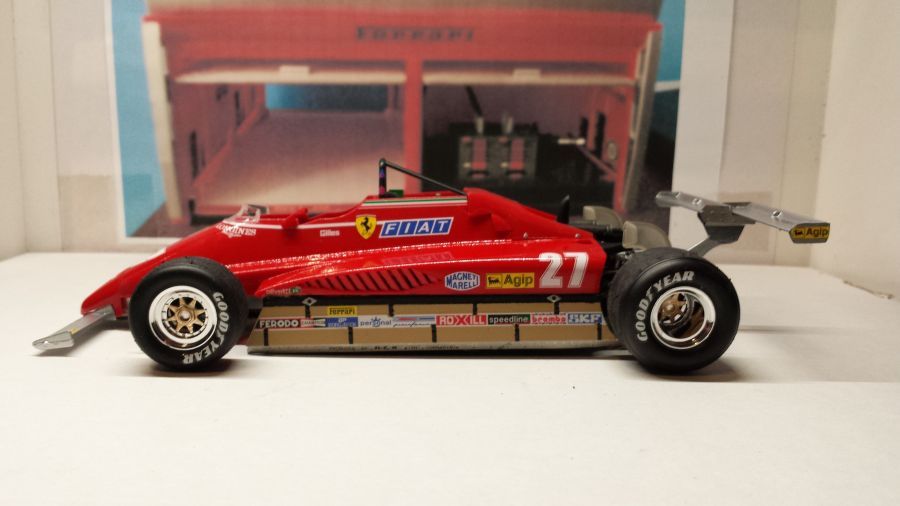
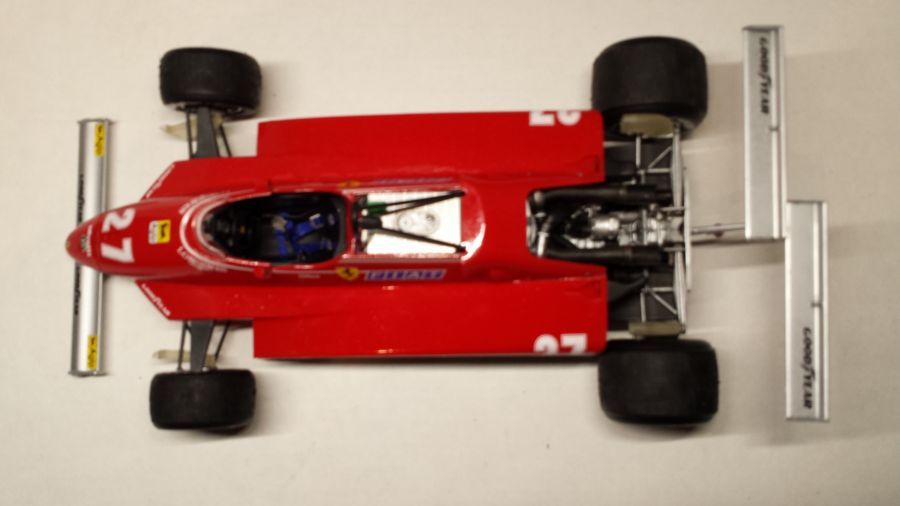
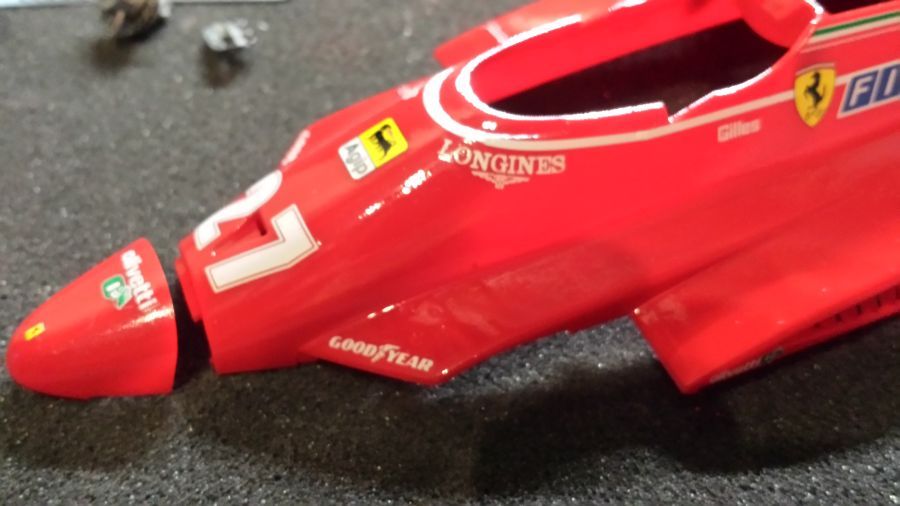
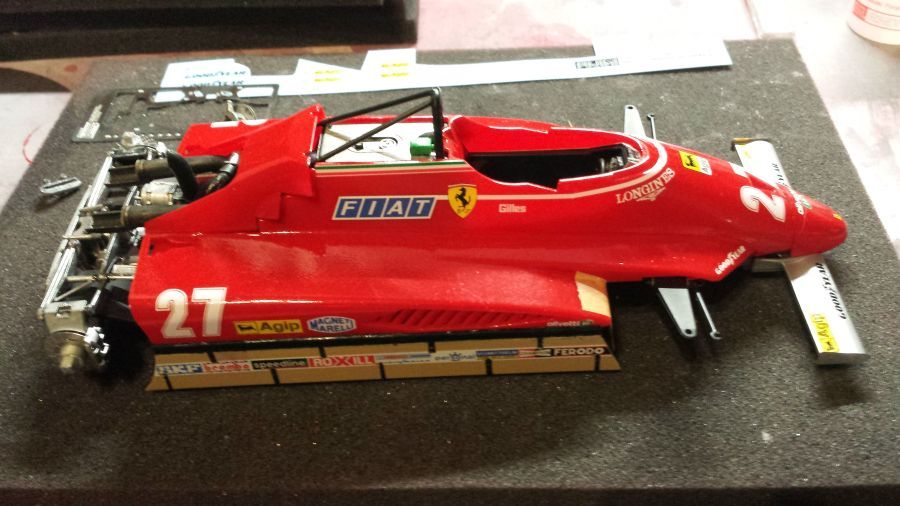
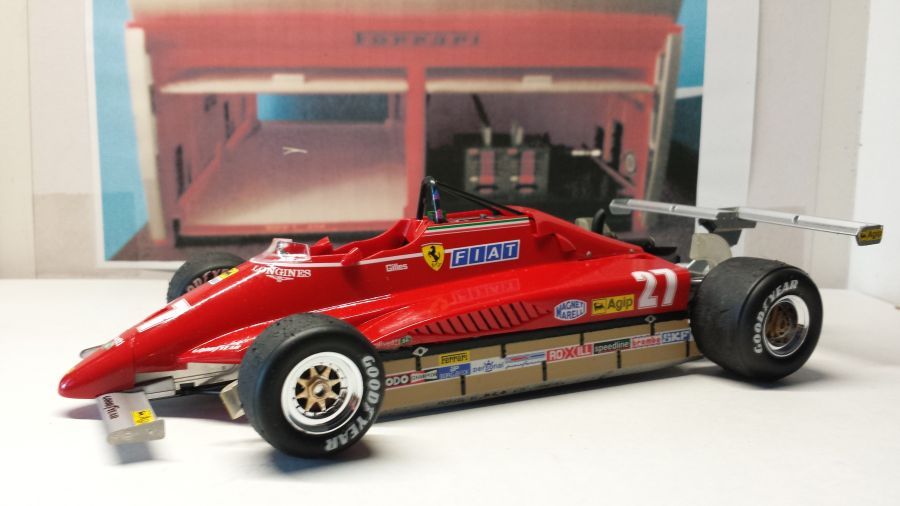
Daarna de laatste details en weer 1 klaar. Dit is dus een foto van de onjuiste Long Beach versie.
Then the last details and another one is ready. So this is a pic of the incorrect long Beach version.
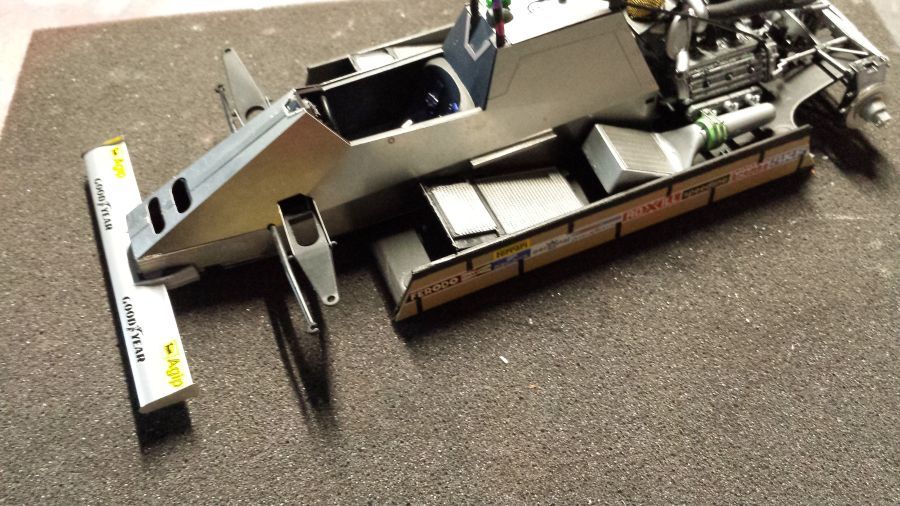
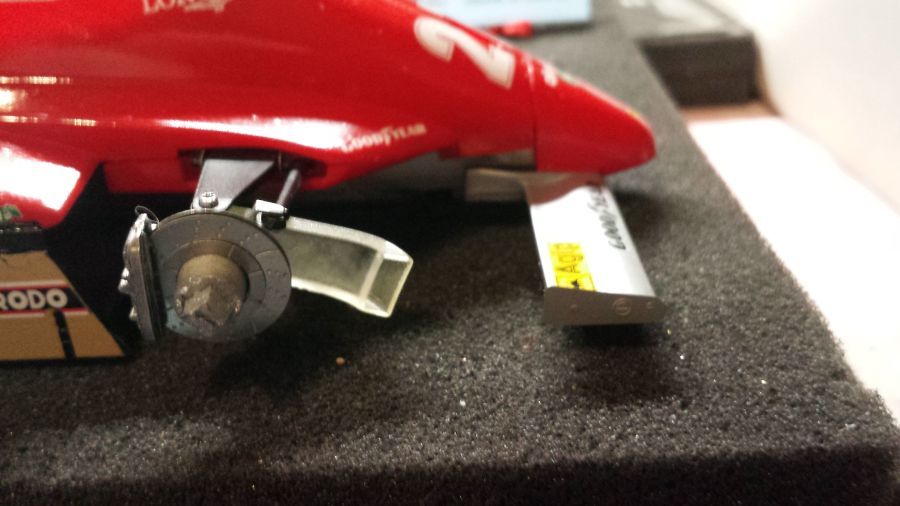
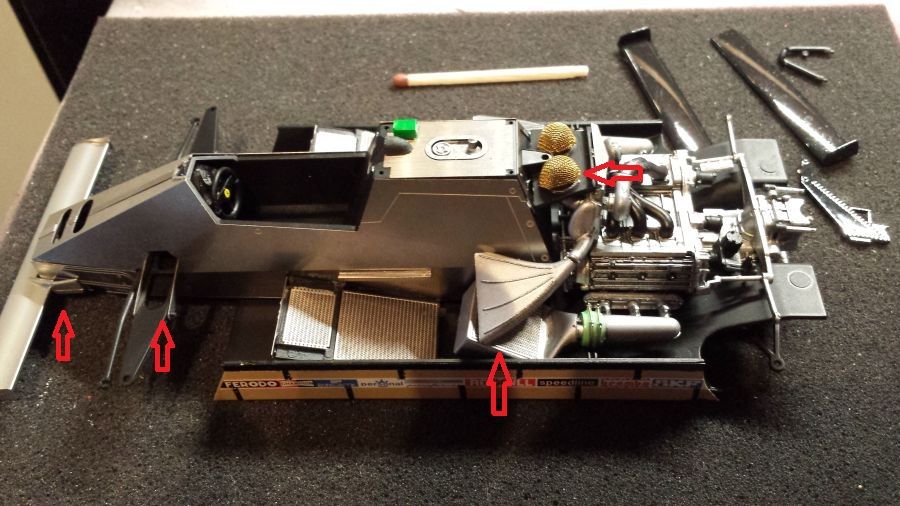
Beneden alle problemen aan chassis/motor. En dus het passen van de neuskegel.
Below all problem area's to the chassis/engine. And the fit of the nose cone.
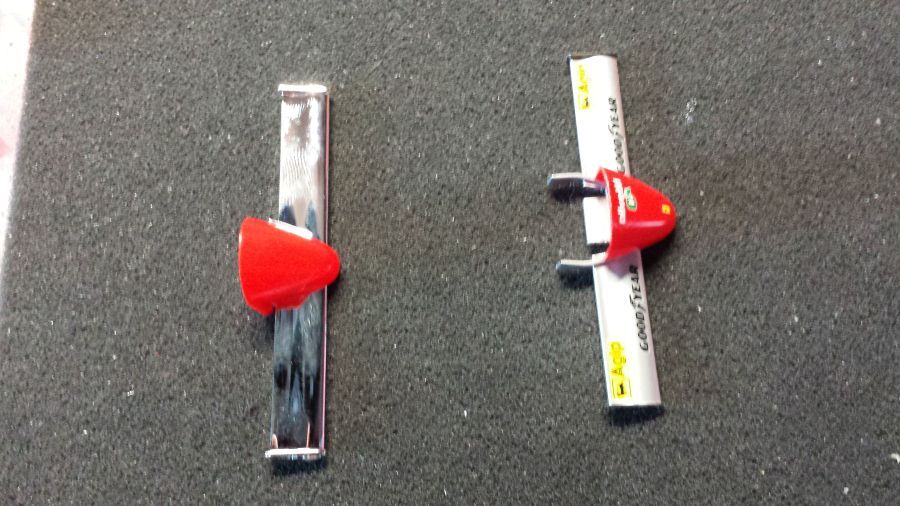
De neus en de voorvleugel zijn verwijderd. Deze verhuizen dus naar de Monaco kit en die van de Monaco kit verhuizen naar de Long Beach kit. Links de vleugel/neus zoals deze dus bij de Long Beach kit horen. Rechts de vleugel/neus zoals deze bij de Monaco kit horen. De verschillen zijn duidelijk te zien.
The nose and front wing have been removed. These will move to the Monaco kit and those of the Monaco kit will move to the Long Beach kit. On the left the wing/nose that should belong to the Long Beach kit. On the right the wing/nose that should be in the Monaco kit. The differences are obvious.
Eerst haal ik weer het chroom van de vleugel met ovencleaner. Daarna overspuiten met Tamiya TS-30 Silver Leaf.
First i will remove the chrome with oven cleaner. Next respray it with Tamiya TS-30 Silver Leaf.
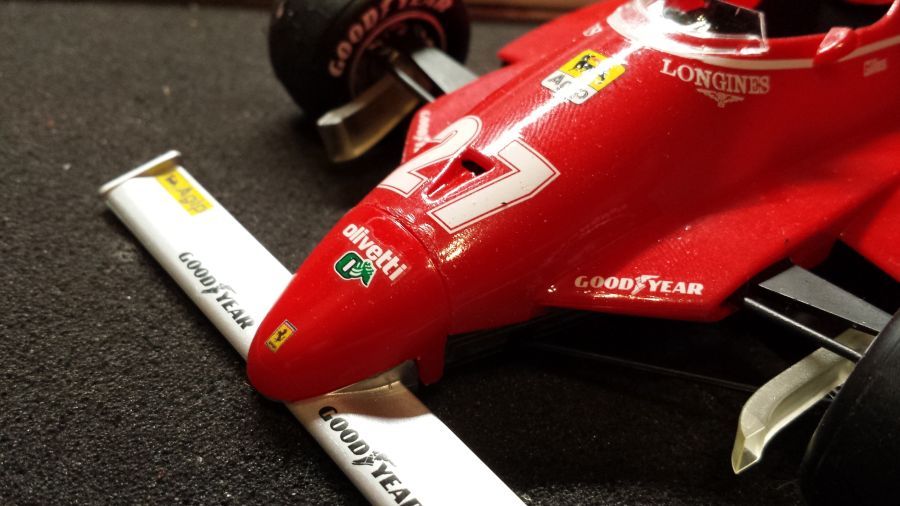
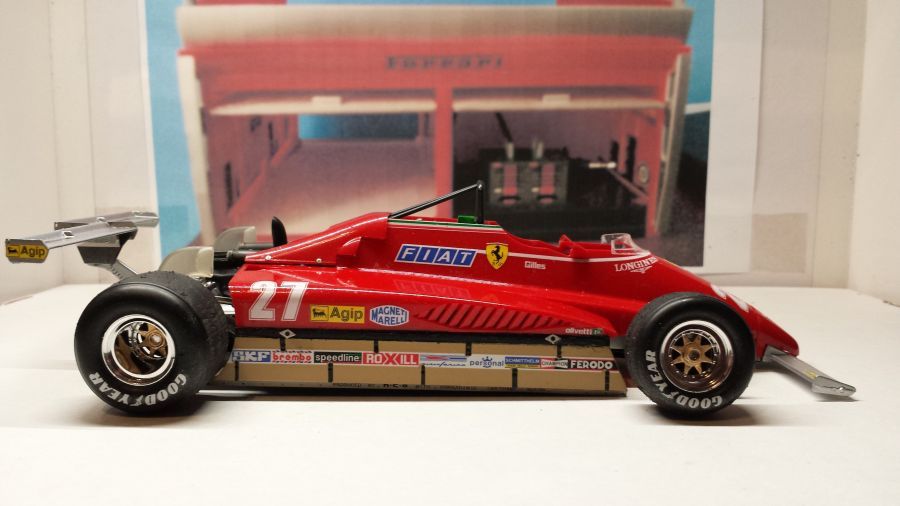
Dit is de correcte Long Beach versie (dus met de neus/voorvleugel van een Monaco versie).
This is the correct Long Beach version (so with nose and front wing from the Monaco version).