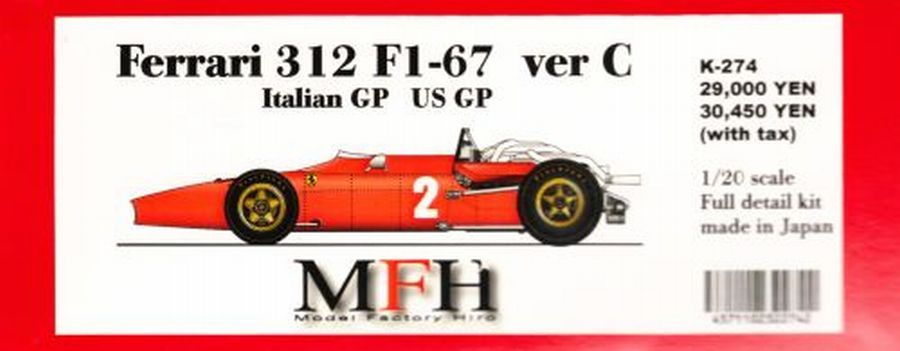
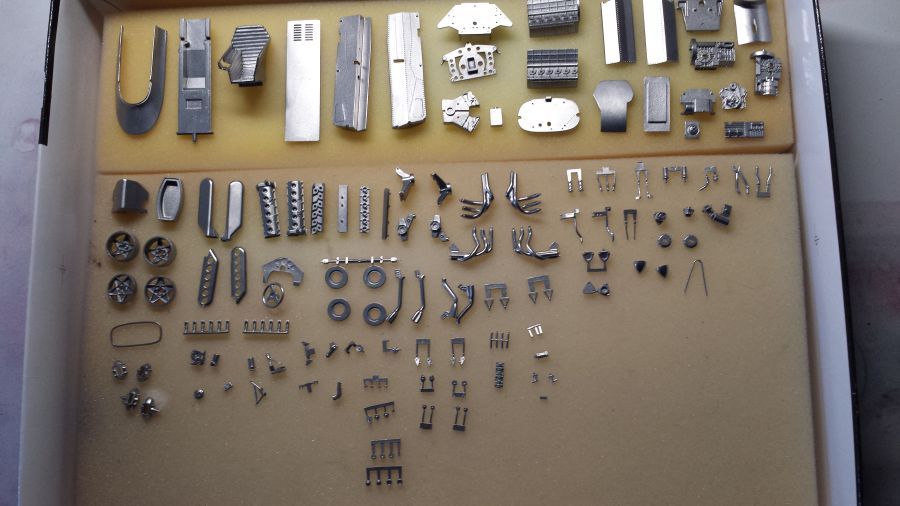
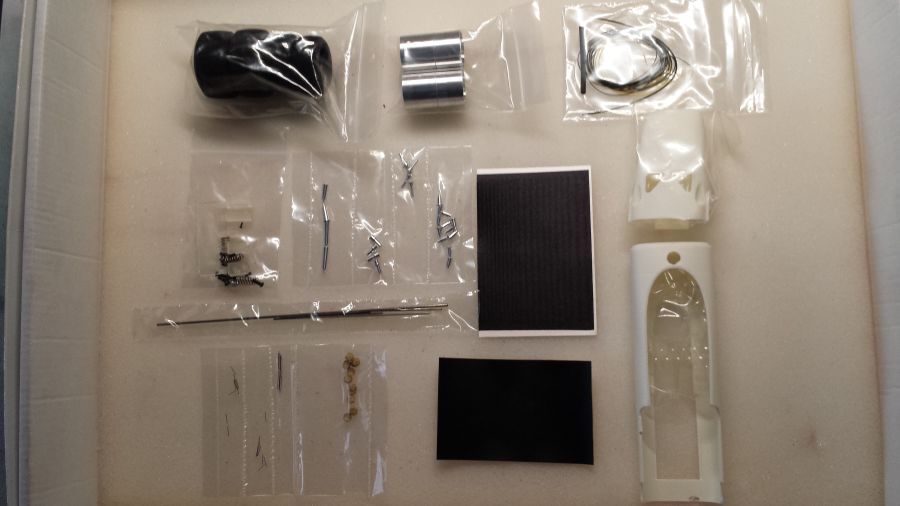
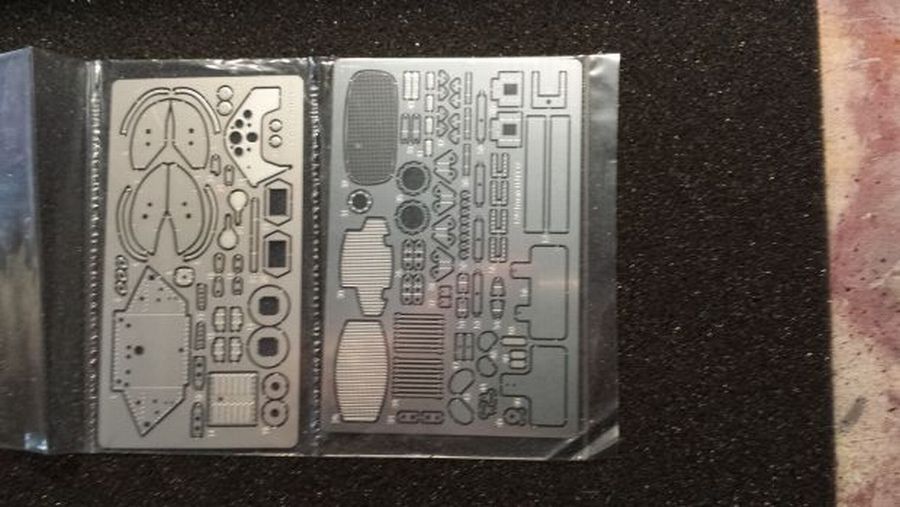
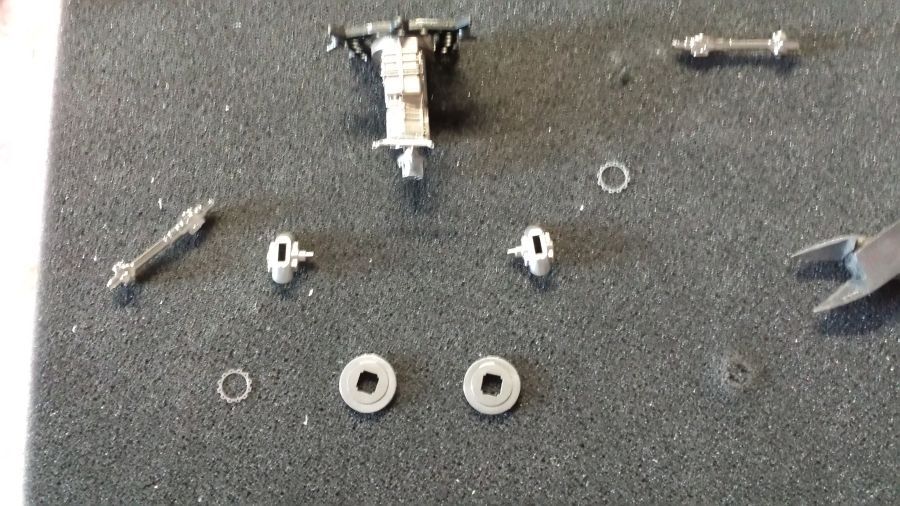
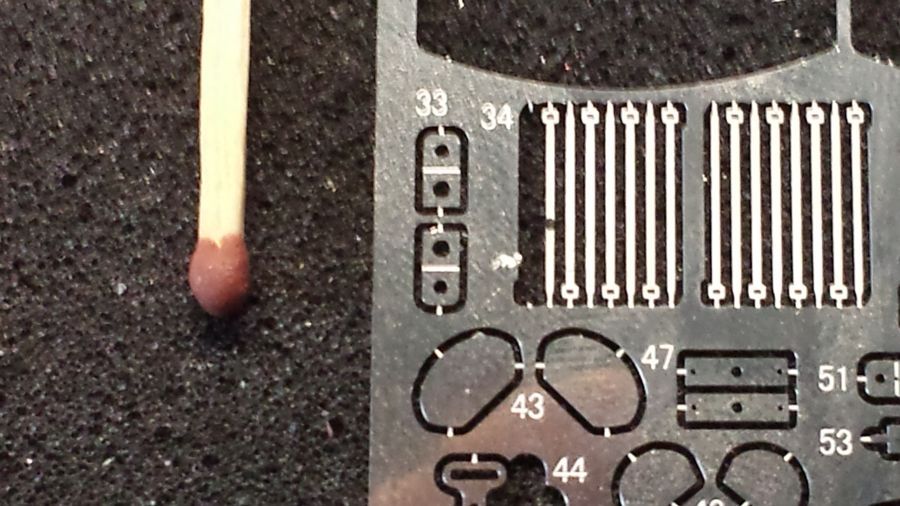
Dit is de beschrijving van de bouw van een MFH kit (K-274), de 1967 Ferrari 312 F1 Italy versie (Ferrari 312 F1-67). Hieronder eerst weer de foto's van alle onderdelen van de kit. Een paar onderdelen zijn dit keer niet van wit metaal, maar van nikkel en volledig verchroomd.
This is the description of the build of a MFH kit (K-274), the Ferrari 1967 312 F1 Italy version (Ferrari 312 F1-67). Below first of all the pictures of all parts of the kit. A few parts are not made of white metal this time, but nickel and fully chromed.
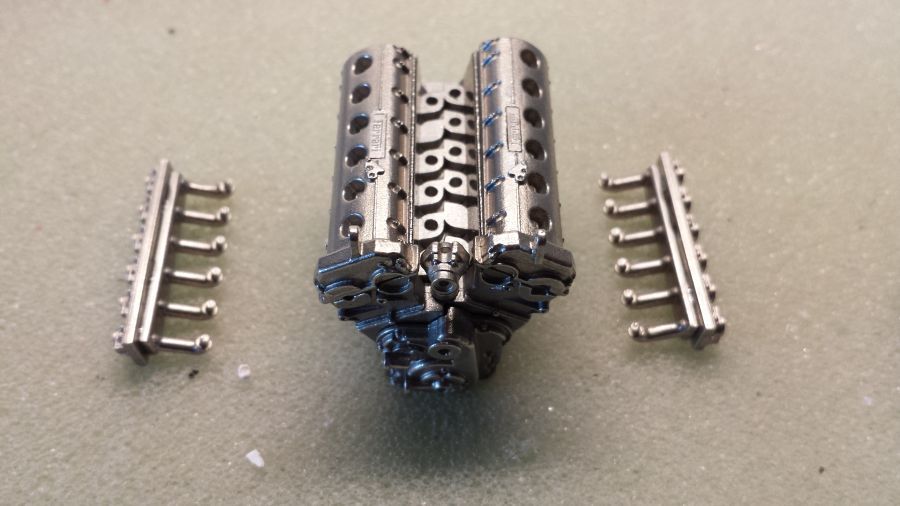
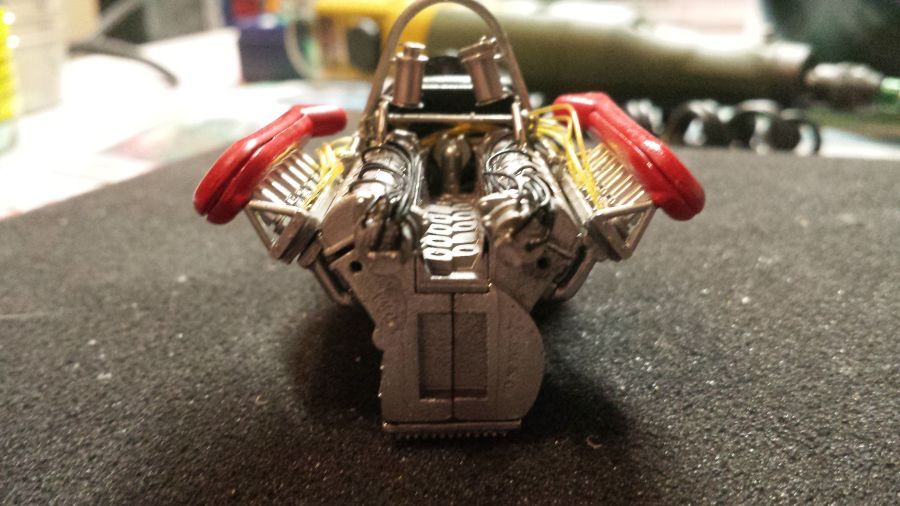
De motor zet ik standaard in elkaar. Wanneer ik naar de bouwtekeningen kijk, vind ik alles genoeg gedetailleerd. De gaatjes voor de bekabeling moeten wel alvast worden geboord.
The build of the engine will be out of the box. When i have a look at the instructions, i think there will be enough details. The holes for the wiring have to be drilled up front.
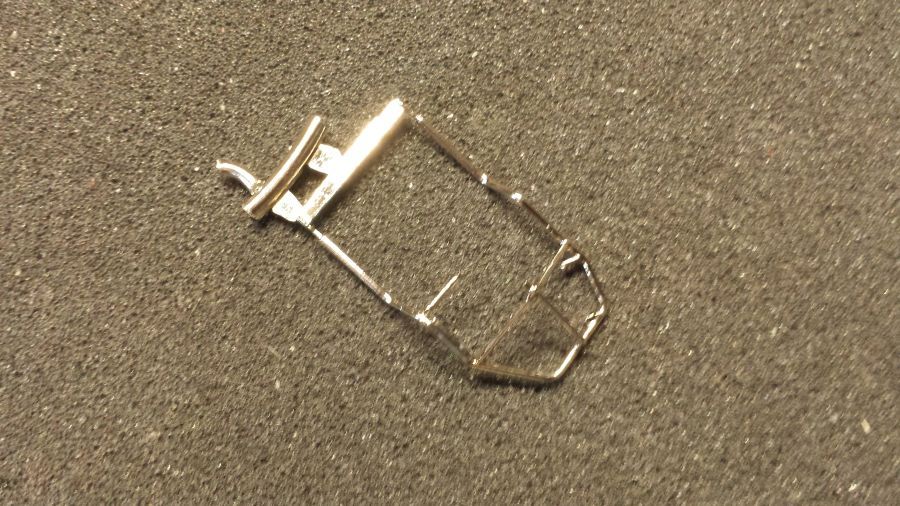
Het deel waar de stoel enz. in komt alvast in voorbereiding.
The preparation of the part where the seat etc. will be mounted.
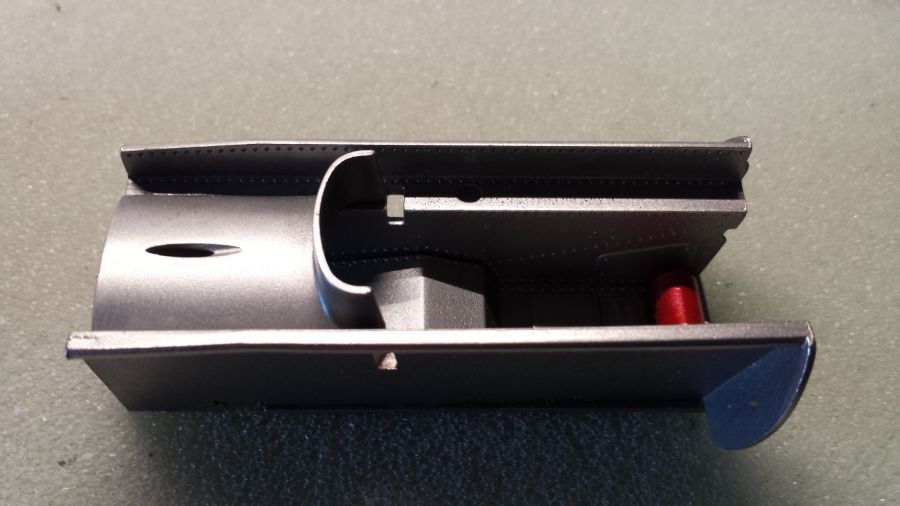
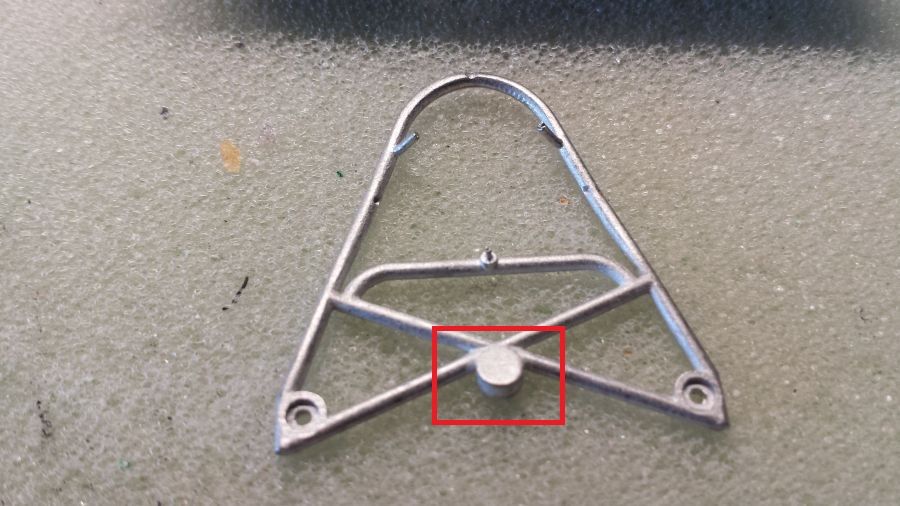
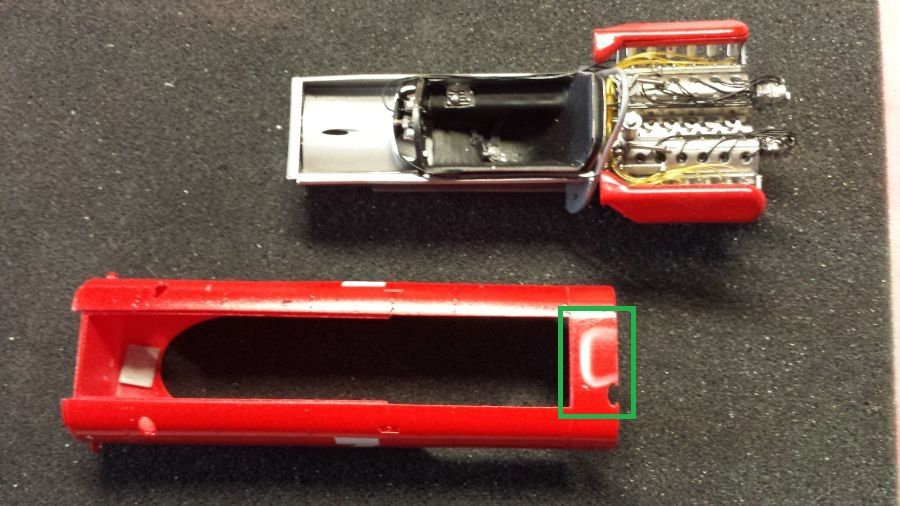
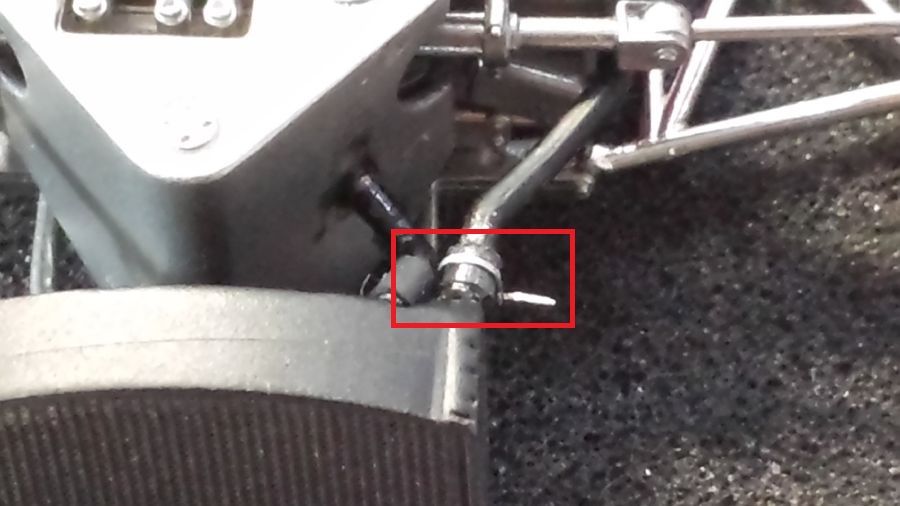
Hoewel het op de tekening niet staat aangegeven is het verstandig nu alvast ook het gat op de met rood gemarkeerde plek te boren. Later zul je er niet of nauwelijks bij kunnen.
Though it's not on the instructions, it is better to drill the hole on the red marked spot right away. It will be very hard to do it at a later time.
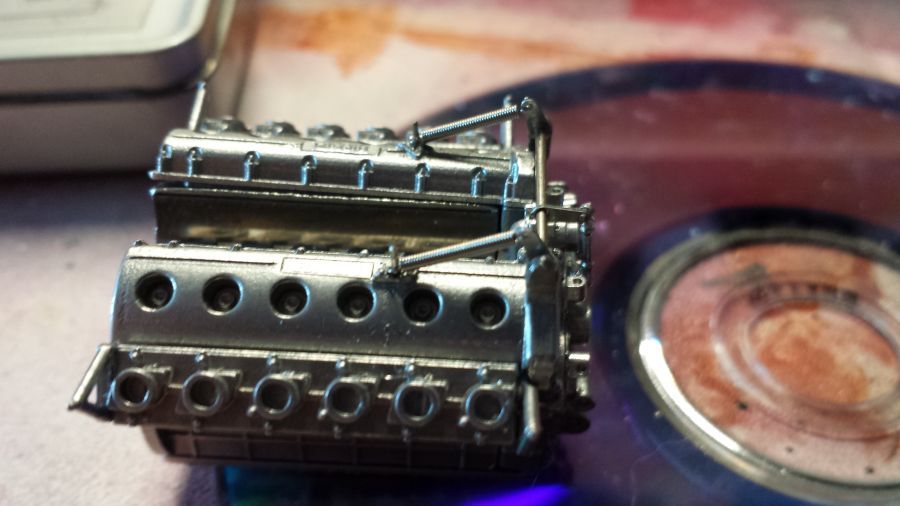
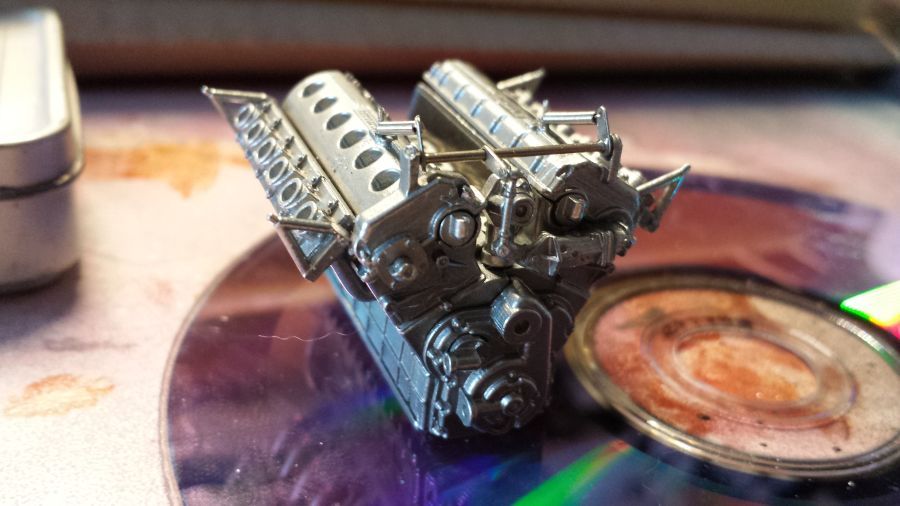
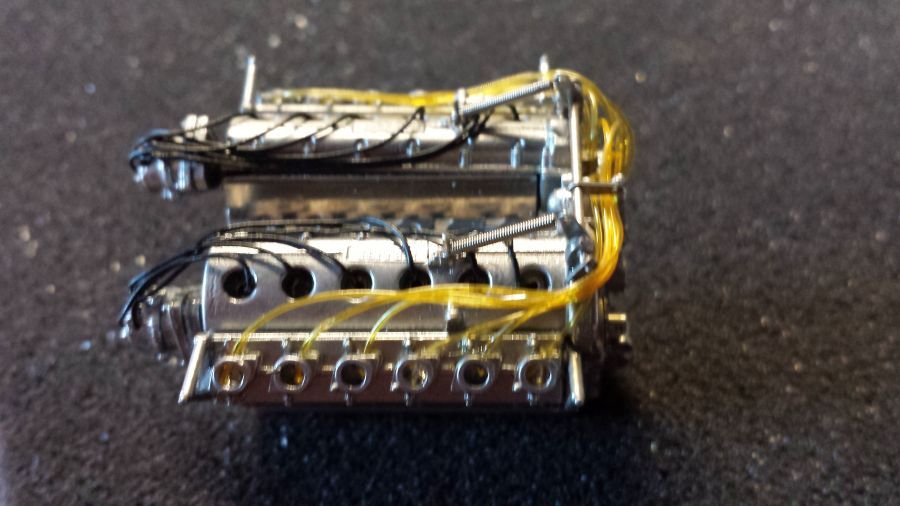
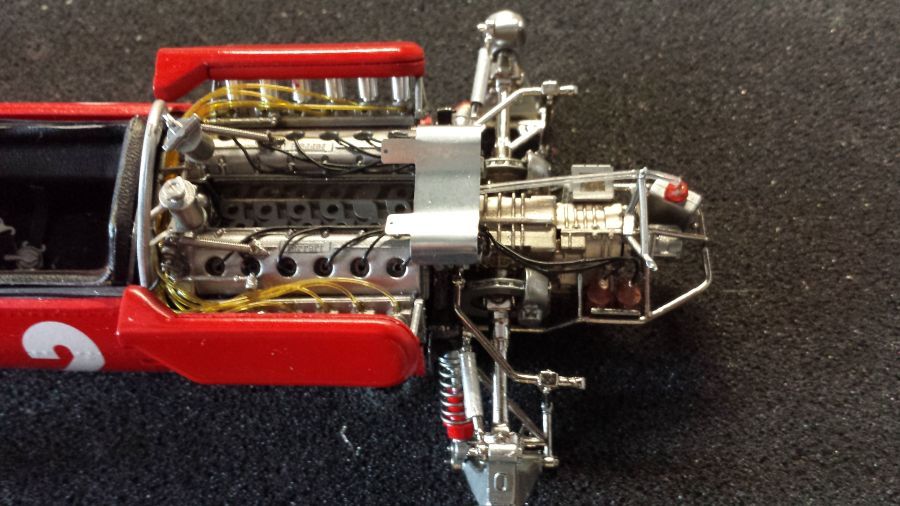
Kijk eens naar de geweldige detaillering van de motor. MFH heeft weer een top kit afgeleverd.
Have a look a the beautiful details of the engine. MFH delivered a top kit again.
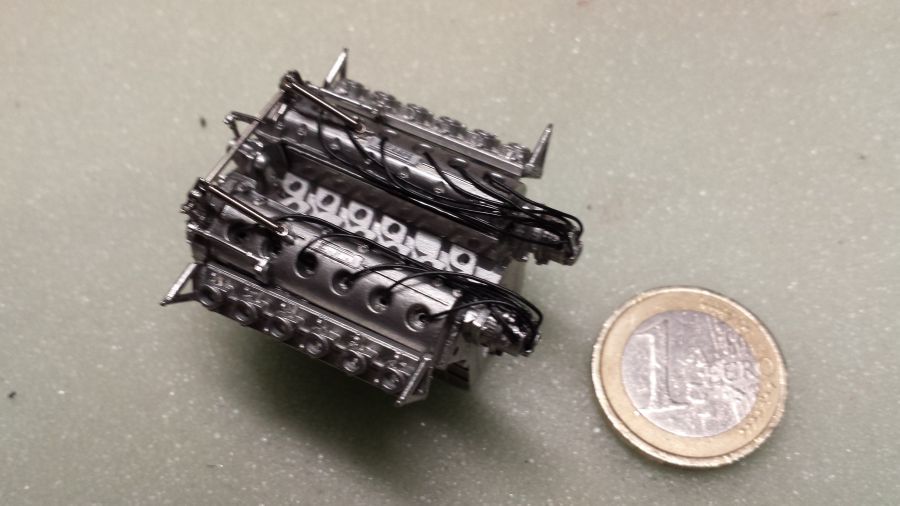
Het aanbrengen van de slangen en kabels nam ongeveer 3 uren in beslag.
The wiring and tubing took about 3 hours.
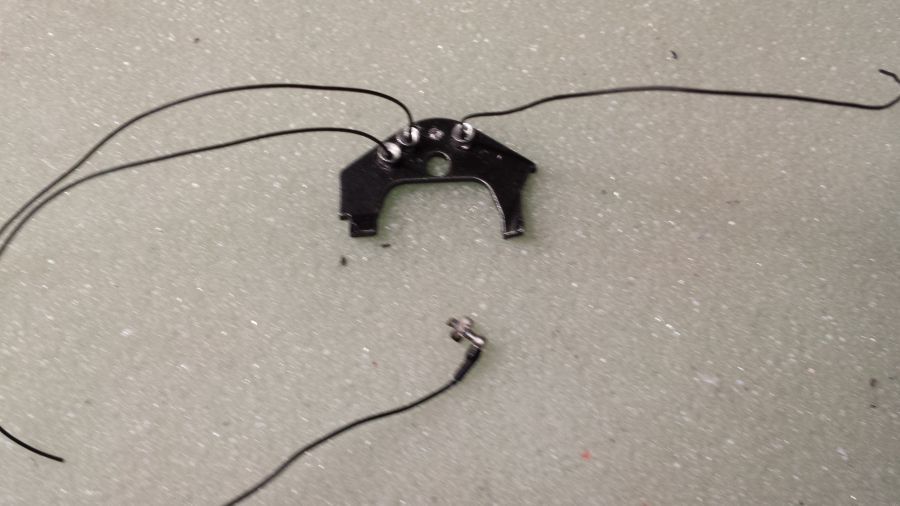
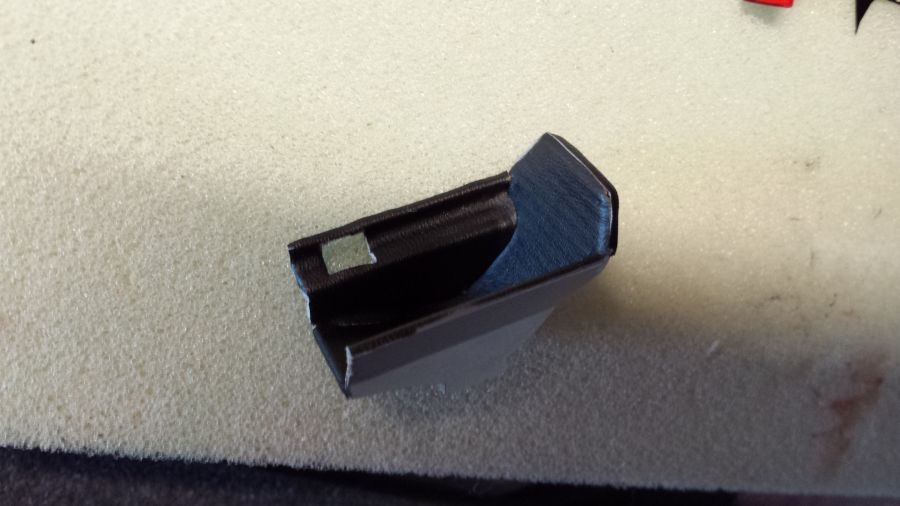
De bedrading voor het instrumentenpaneel. Voor het onderste onderdeel moet volgens de instructies een gaatje worden geboord. Volgens mij niet te doen, in ieder geval zonder verwonding. Daarom heb ik maar krimpkous gebruikt.
The wiring of the instrument panel. The bottom part should be drilled according the instructions. I think it is almost impossible, at least without getting hurt. Therefor i used shrink tube.
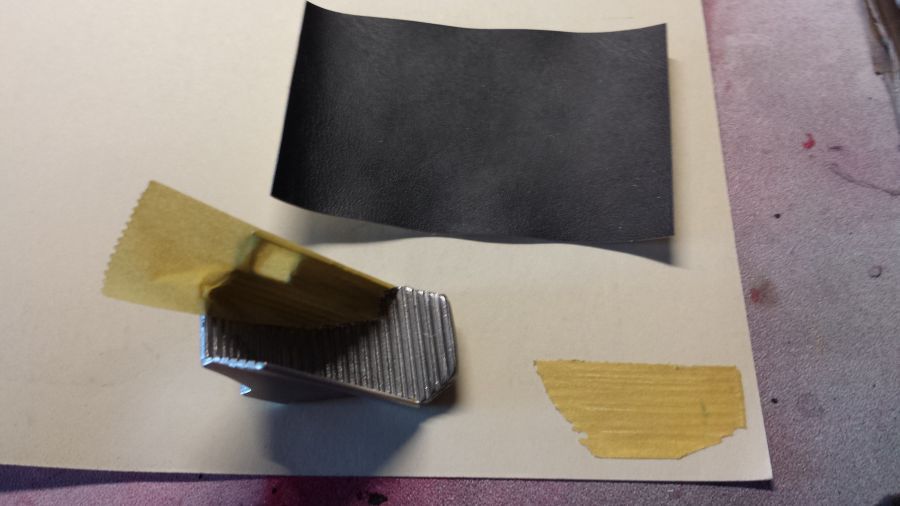
Om de stoel te kunnen bekleden met leer, maak ik een mal. Hiermee kan ik het in 3 delen op maat knippen. Hiervoor gebruik ik gewoon Tamiya Masking Tape.
For the upholstery i am making a template. I will be able to cut it into three parts. I use the plain Tamiya Masking Tape for this.

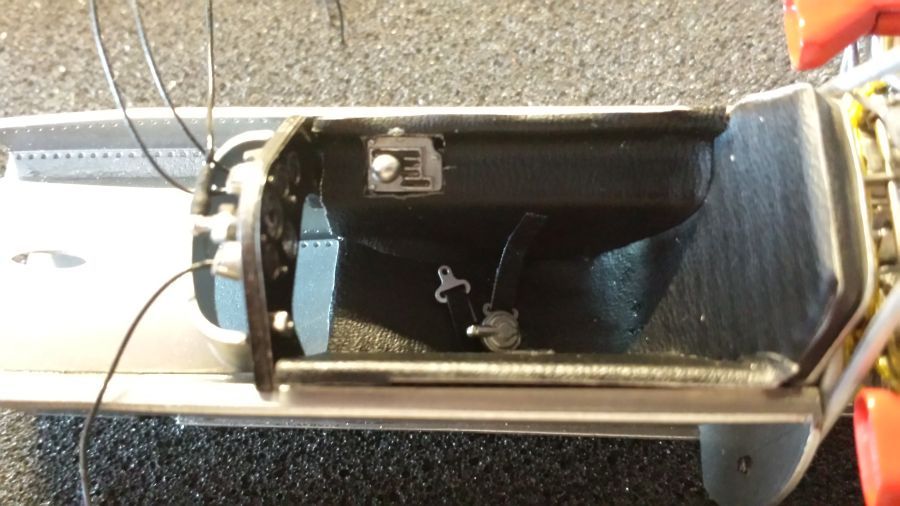
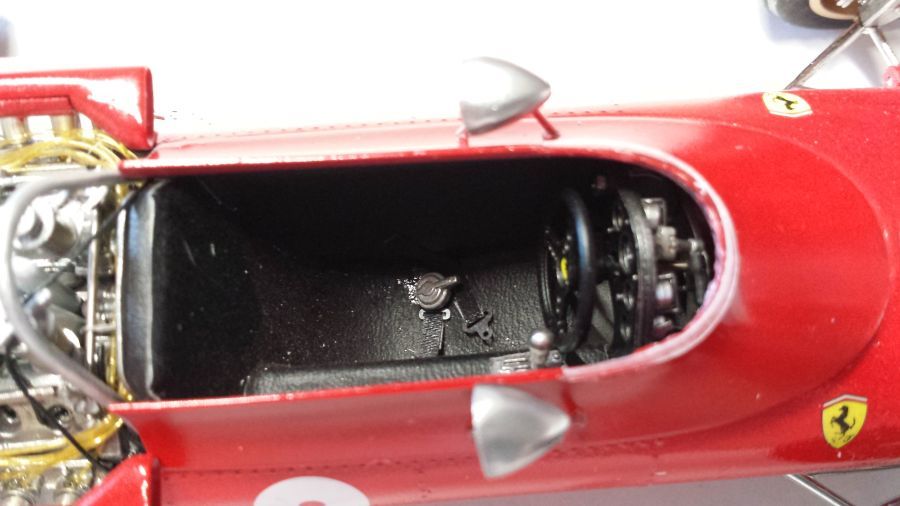
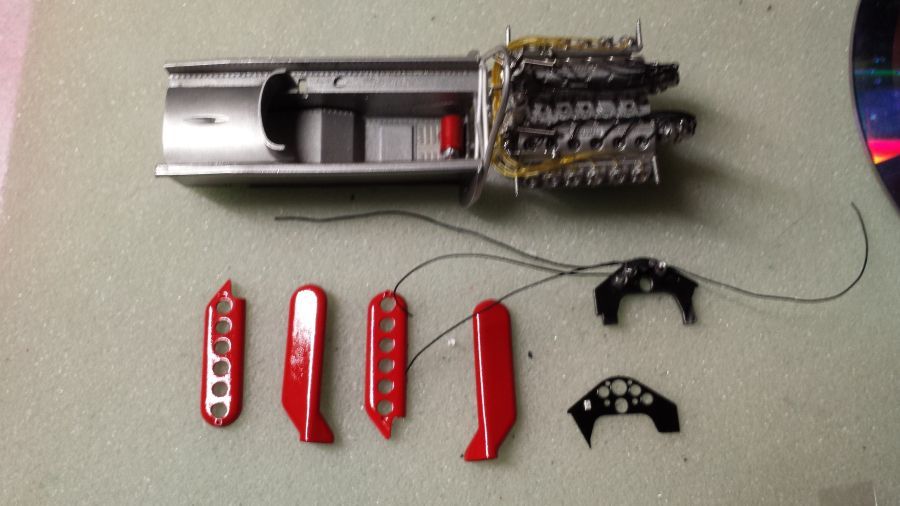
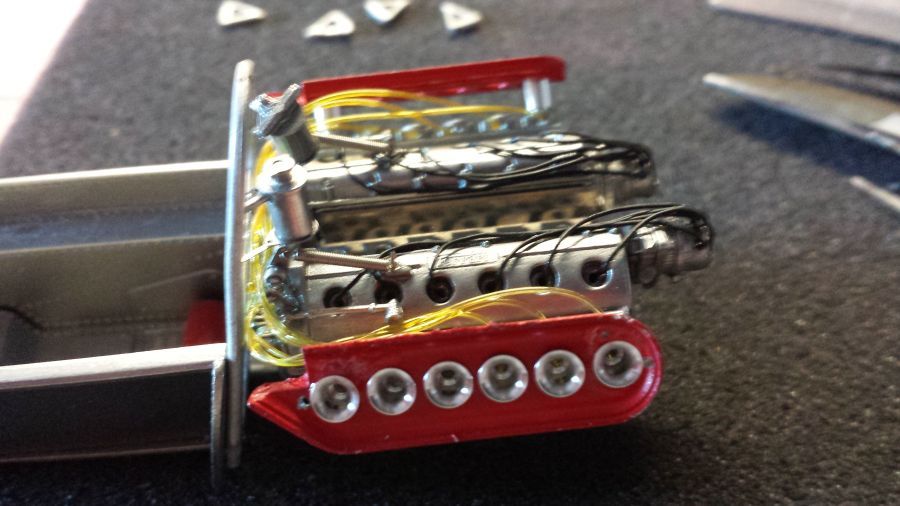
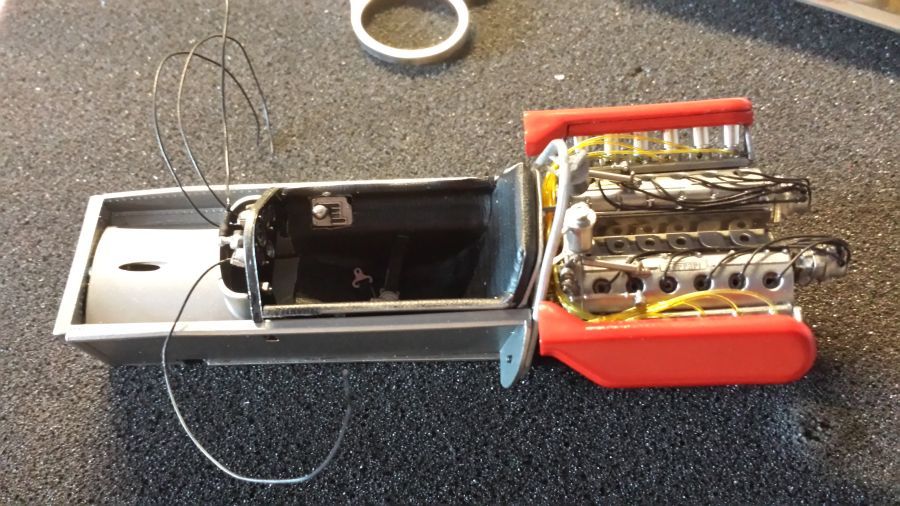
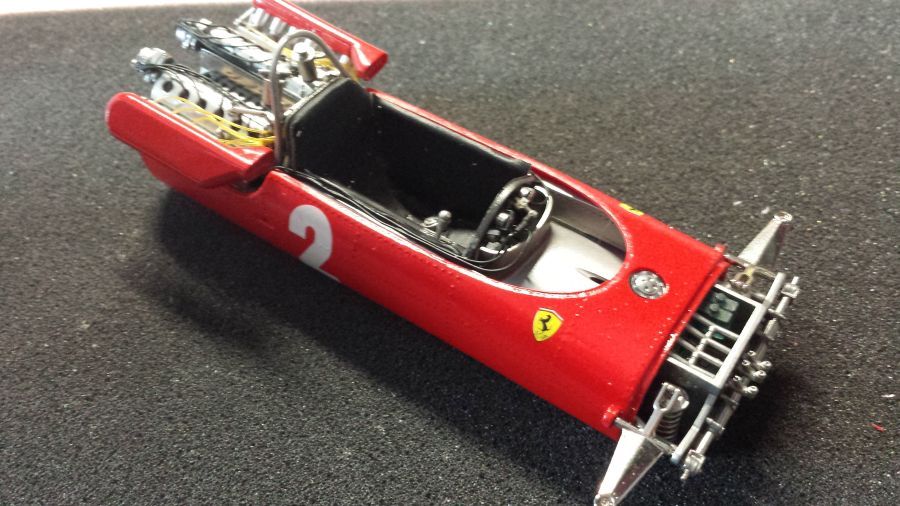
De kabels van de meters worden langs de kant naar achteren gevoerd, voordat het complete element in de carrosserie wordt geschoven. De vooruitgang to zover. Nu door met de carrosserie.
The wires of the gauges will be lead to the back, before this complete element will be combined with the body work. Progress so far. Now going on with the body work.
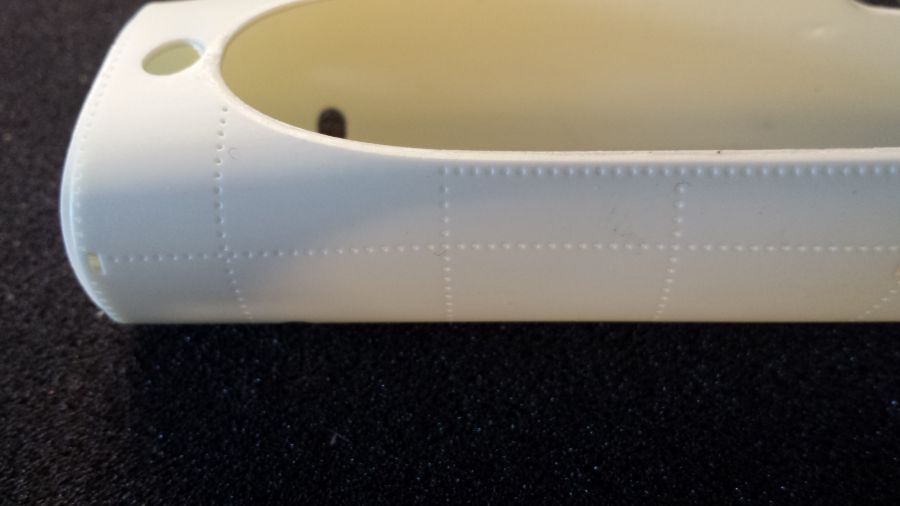
Op de plek van de popnagels heeft de carrosserie kuilen in plaats van bulten. De kuilen ga ik vullen met putty en daarna ga ik de popnagels van Archer aanbrengen.
Where the rivets are, the body work has dents instead of bumps. I will fill the dents with putty and then make new rivets by using Archer transfers.
De gaten zijn gevuld. De carrosserie is licht geschuurd.
The holes have been filled. The body work has been slightly sanded.

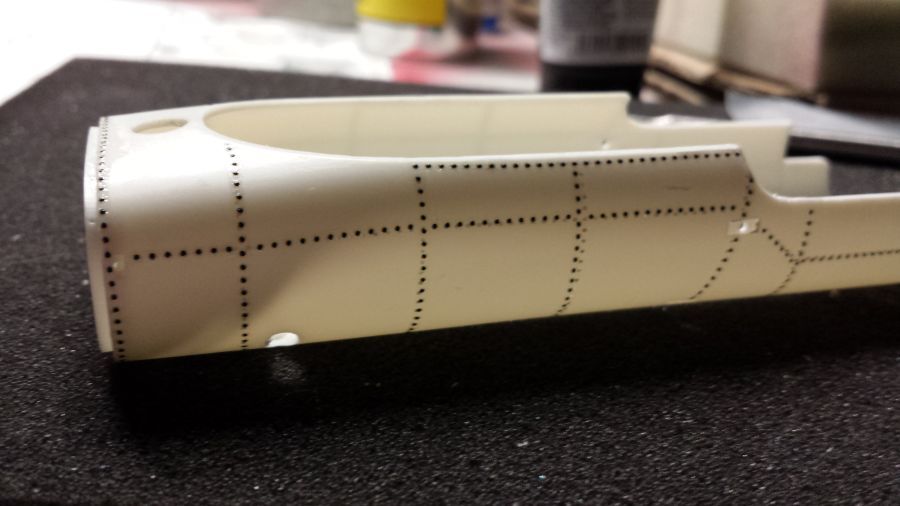
Ongeveer 380 popnagels zijn aangebracht.
About 380 rivets have been applied.
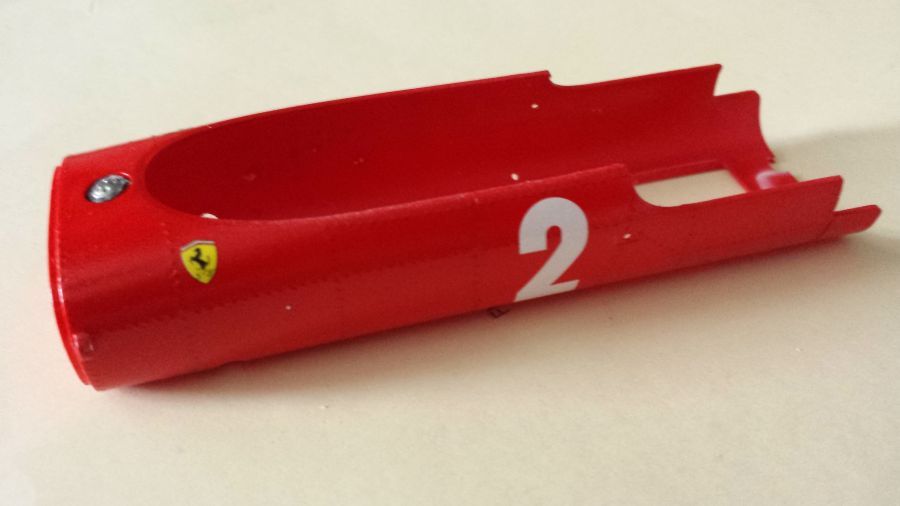
Gespoten met Zero-Paints ZP-1007 1970's-1980's Rosso Formula 1 en 2 lagen lak. Nu drogen voordat de decals aangebracht worden en weer 2 of 3 lagen lak.
Sprayed with Zero-Paints ZP-1007 1970's-1980's Rosso Formula 1 and 2 coats of lacquer. Now it has to dry before applying the decals and another 2 or 3 coats of lacquer.
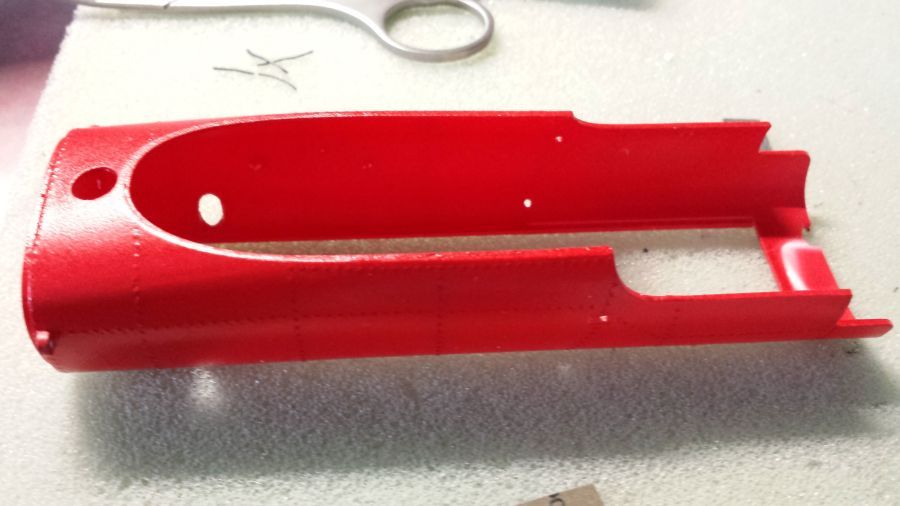
Voordat de carrosserie met het stoel/motor-deel wordt verbonden moet het groene deel worden afgezaagd.
Before joining the body work with the chair/engine-part, the green part needs to be cut off.
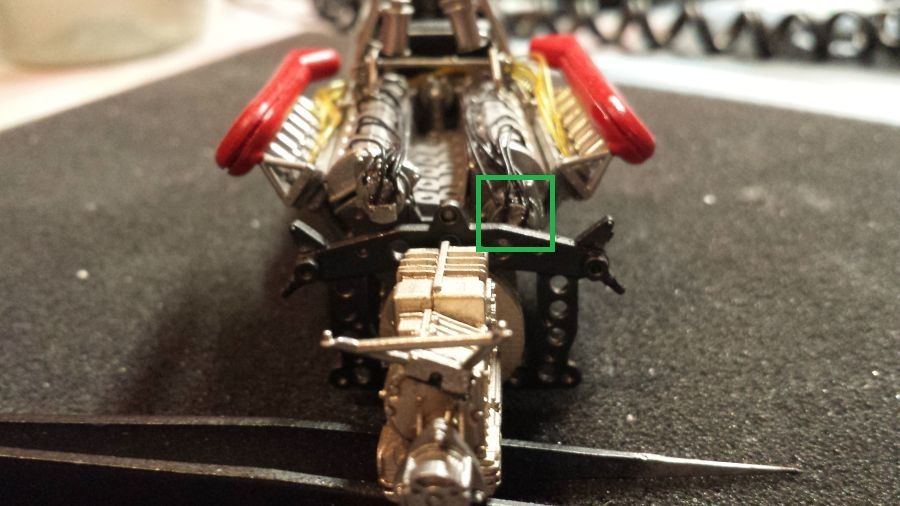
Tijdens het drogen van verf, decals en lak ben ik vast met de versnellingsbak begonnen. Klein probleem bij het testen van de versnellingsbak aan de motor. De ontsteking rechtsachter zit in de weg. Deze haal ik eraf, boor een nieuw gat en bevestig de ontsteking hoger aan het blok.
During the drying process of the paint, decals and lacquer i started working on the gear box. Small problem when test fitting the gearbox to the engine. The ignition at the back on the right is in the way. I will take it off, drill a new hole and glue the ignition at a higher position.
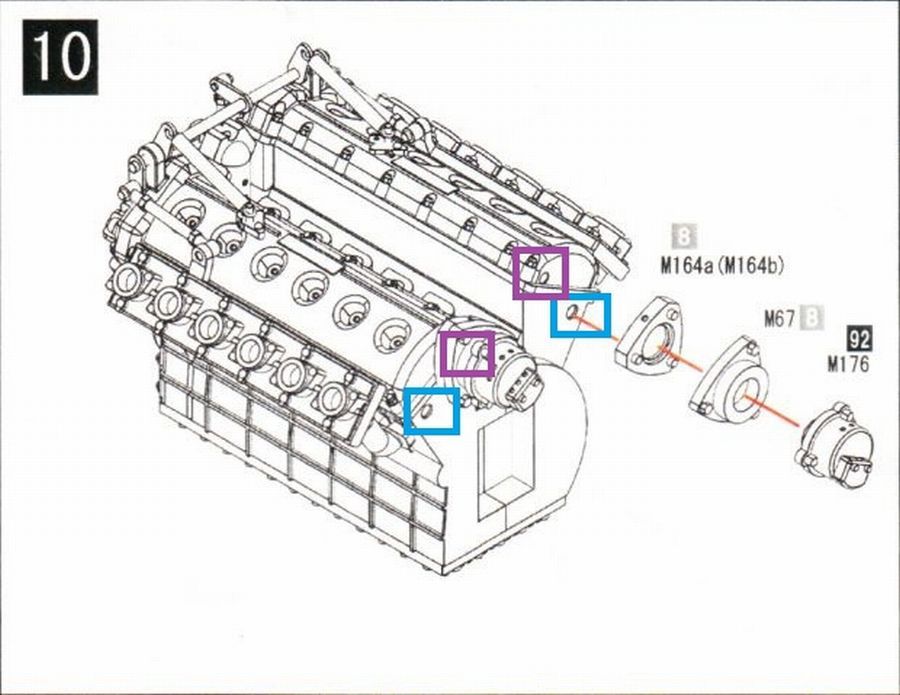
Is het mijn fout? Het staat in ieder geval niet goed op de tekening van MFH! De rechter ontsteking wordt volgens de tekening op de blauwe positie gelijmd, de linker op de paarse positie. Beide horen op paarse plek..
Is it my mistake? It is definately a flaw in the MFH instructions! The right ignition is glued at the blue position, the left at the purple position. Both should be glued at the purple spot.
De ontsteking verplaatst naar de juiste positie.
The ingnition was moved to the correct position.
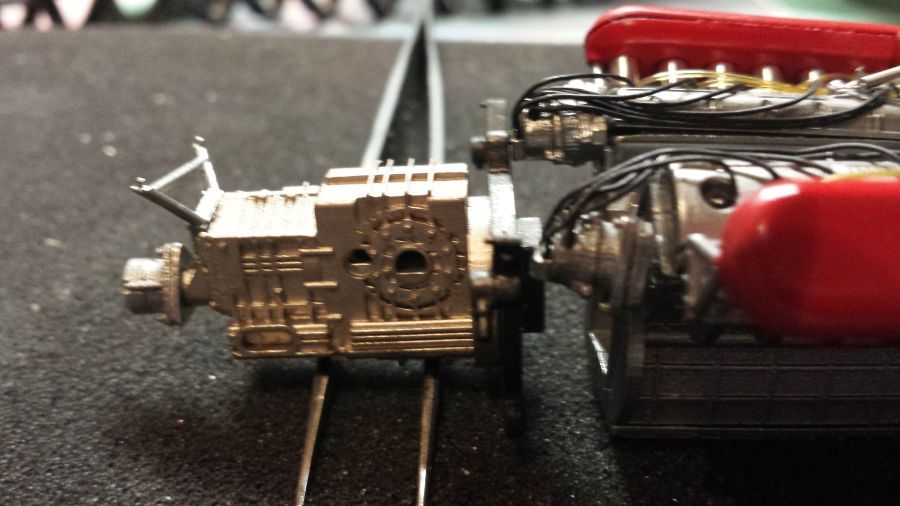
Met de versnellingsbak en de achteras aan het werk.
Working on the gear box and the rear axle.
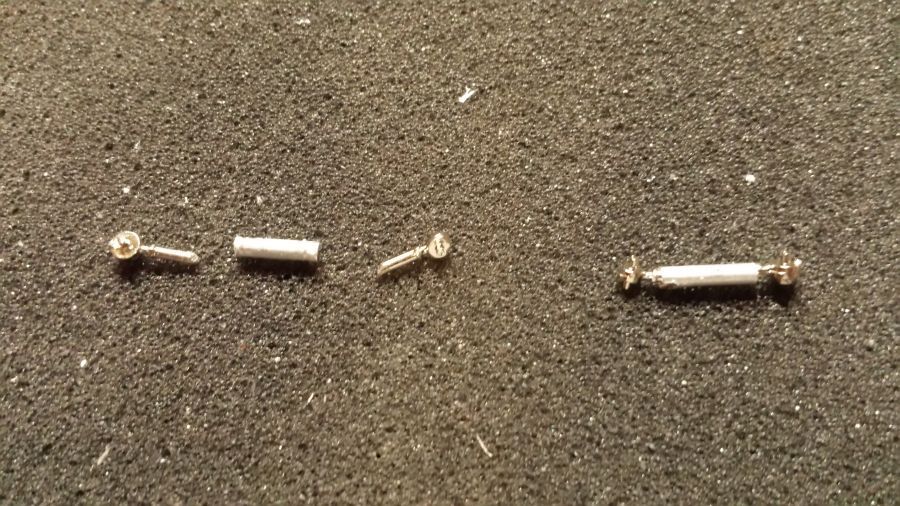
Twee armen van de achterwielophanging zijn een beetje te kort. Ik heb ze in tweeën geknipt en met een
stukje buis weer met elkaar verbonden. Zo zijn ze iets verlengd.
Two arms of the rear suspension are a little bit too short. I have cut them in halves en connected
them by a piece of tube. Now they are a little bit longer.
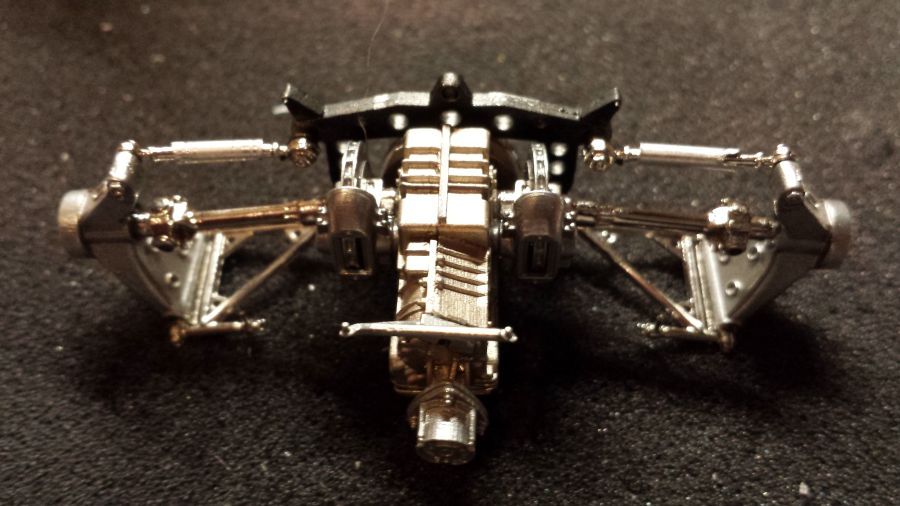
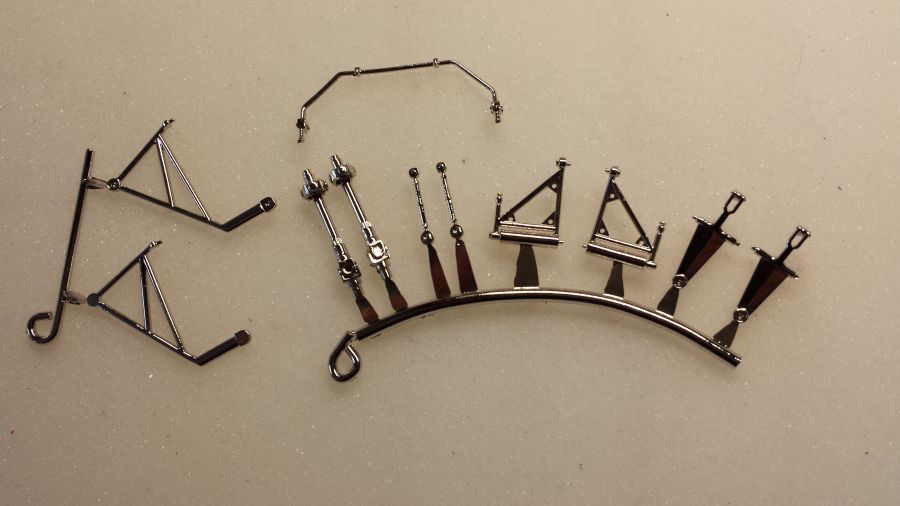
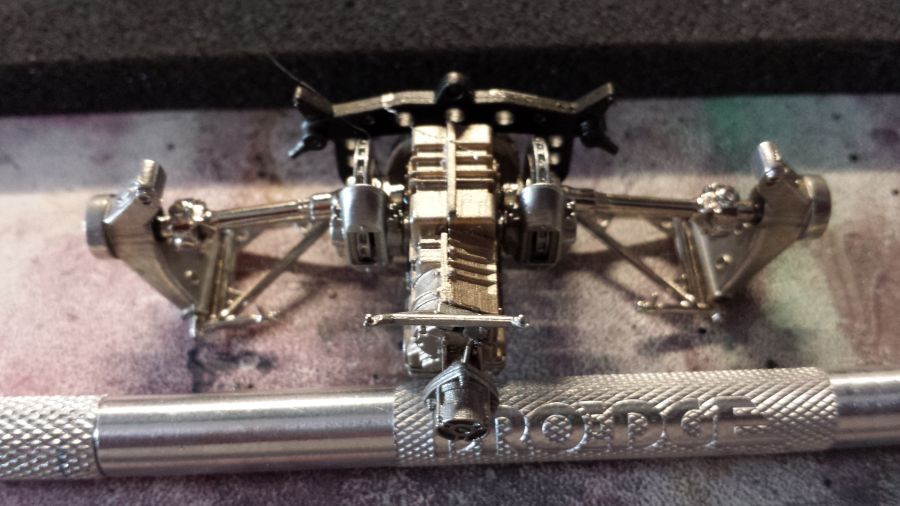
Het overgrote deel van de voorwielophanging is klaar.
The main part of the front wheel suspension is ready.
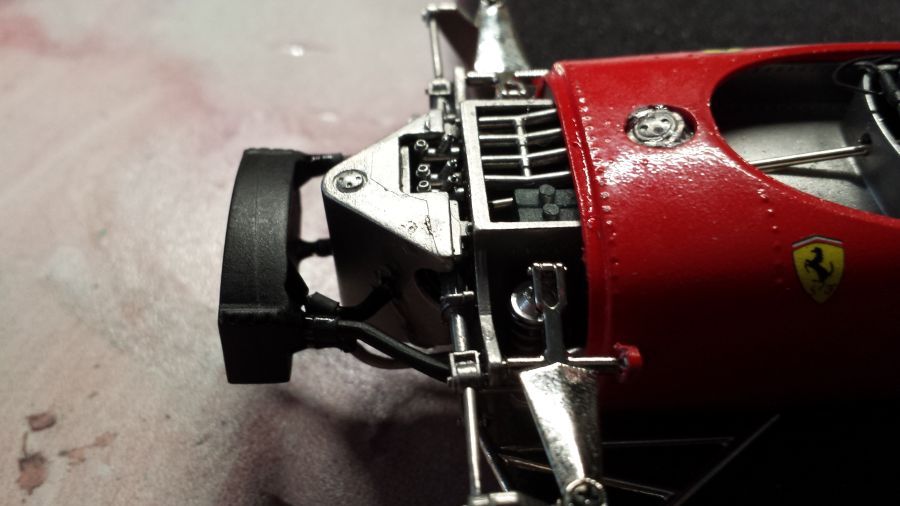
Het monteren van de radiateur. Geen gemakkelijk karwei. Zeker met die enorme tie-wraps.
The mounting of the radiator. Not an easy job. Especially with those huge tie-wraps.

Het missende deel is binnen. Aan het werk.
The missing piece finally arrived. On to work.
En op zijn plek geplaatst.
And mounted at it's place.
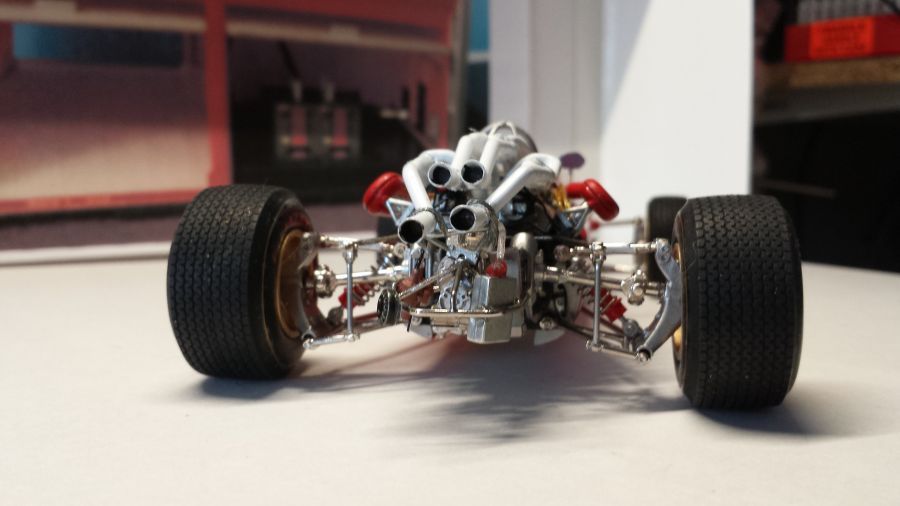
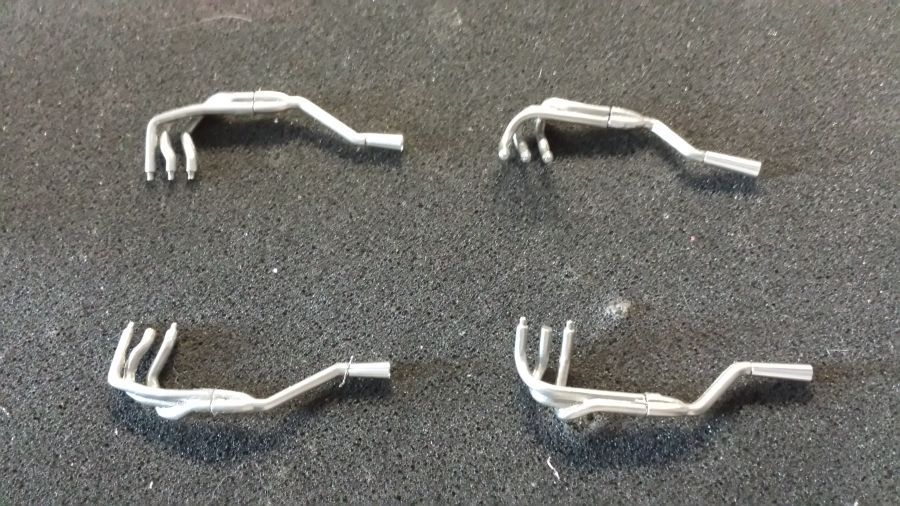
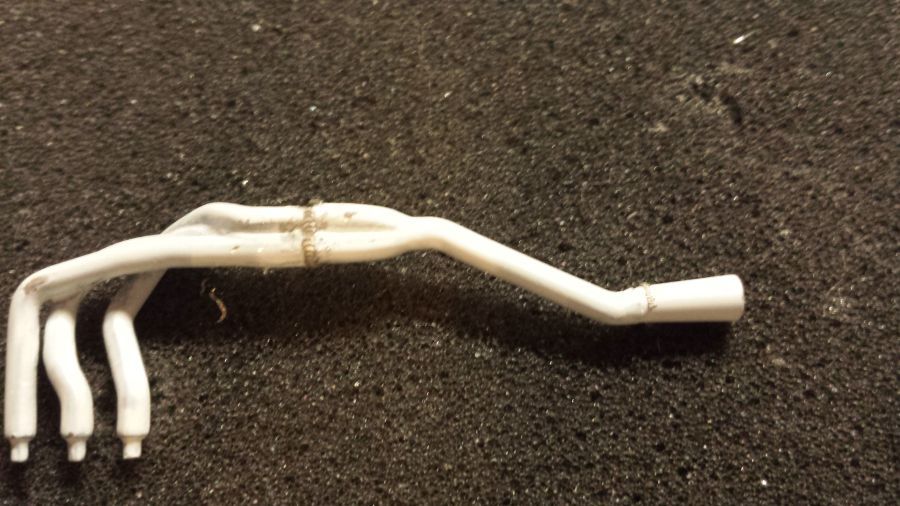
Verder met de uitlaten. Na het aanbrengen van de lasnaden kunnen ze mat wit worden gespoten.
On to the exhausts. After applying the welding seems they can be sprayed mat white.
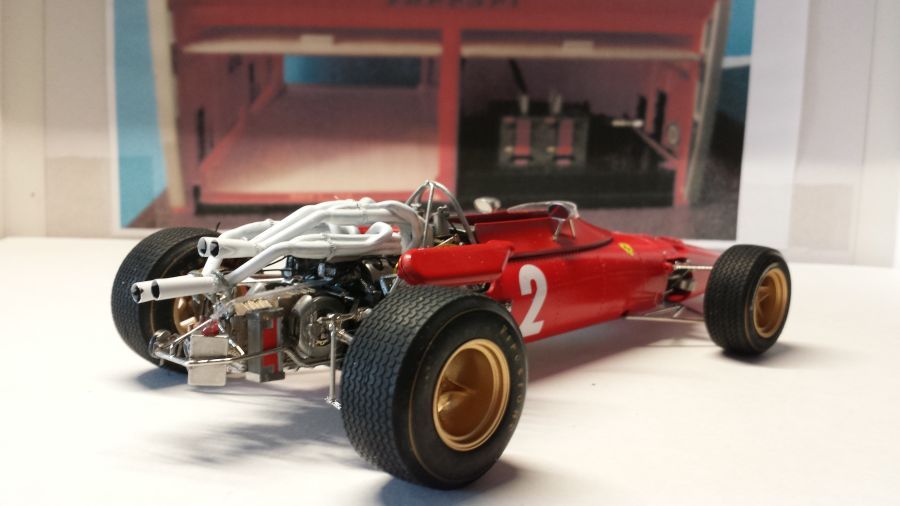
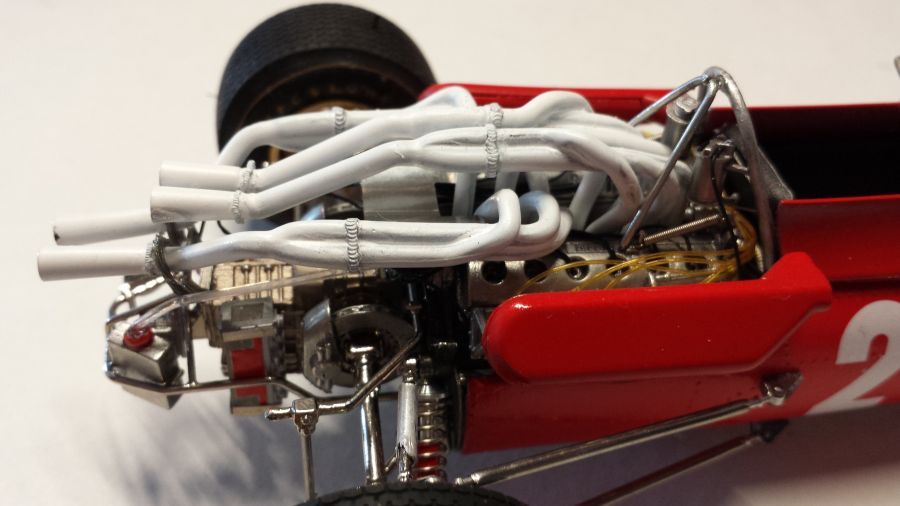
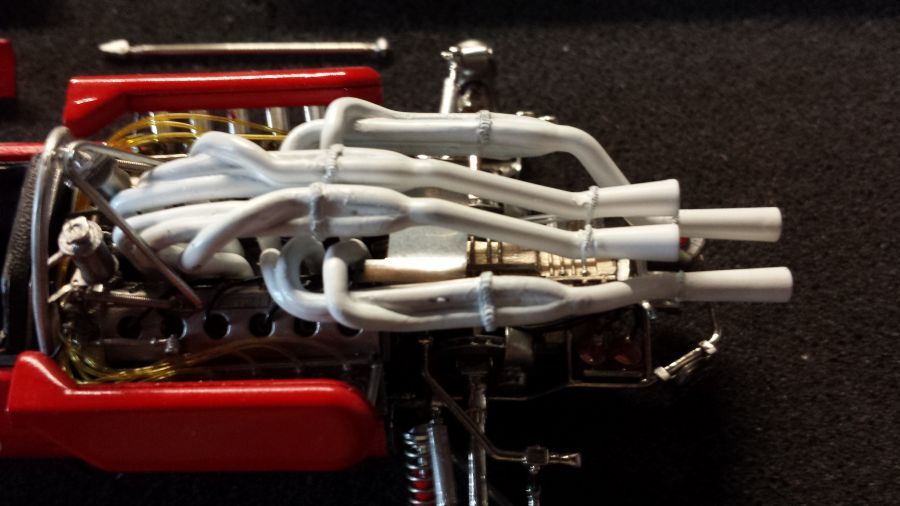
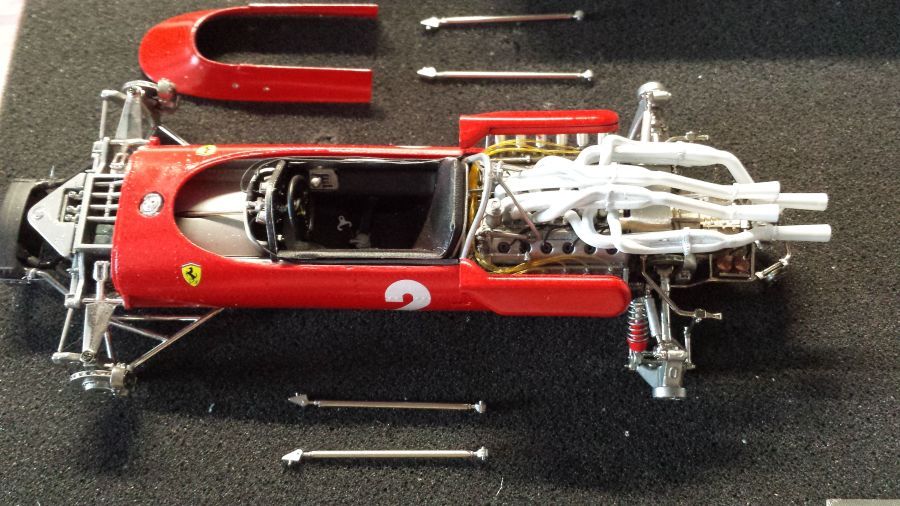
De uitlaatpijpen zijn geplaatst. Ik zal ze wat later nog wat verouderen.
The exhausts are in place. I will do some weathering later.
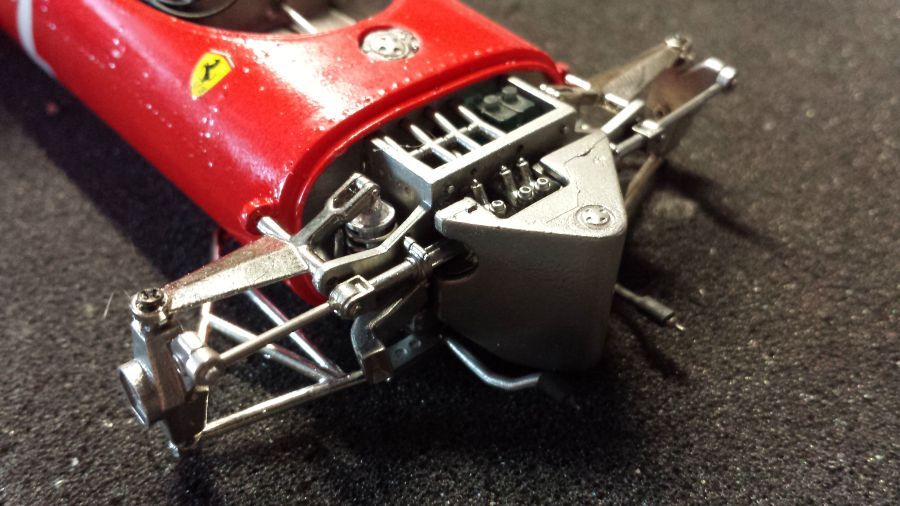
De steunen voor de achterwielophanging zijn klaar. De gaatjes voor de spiegels geboord.
The supports for the rear wheel suspension are ready. The holes for the mirrors have been drilled.
Tot zover klaar. Nu door met de wielen.
Progress so far. Now on to the wheels.

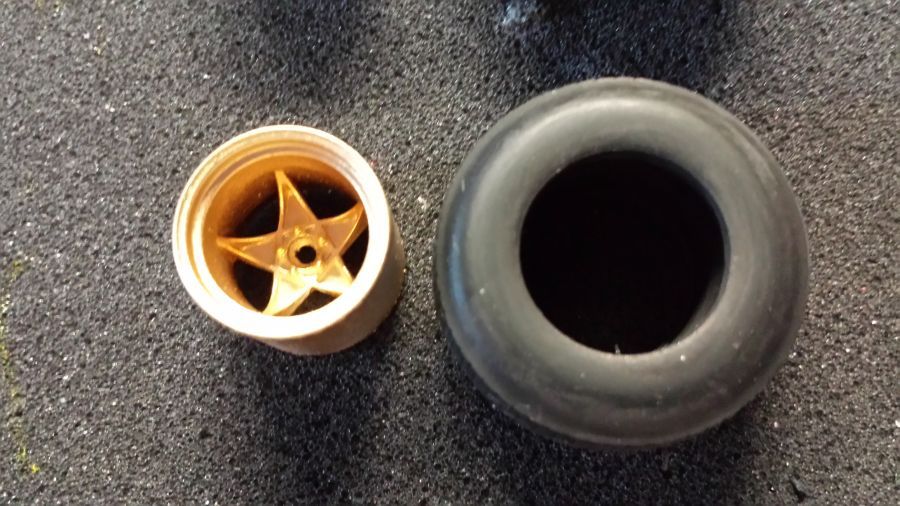
De velgen zijn gelijmd en goudkleur gespoten met Revell Email 94. Nu nog decals op de banden.
The rims have been glued and sprayed gold with Revell Email 94. Now the decals on the tires.
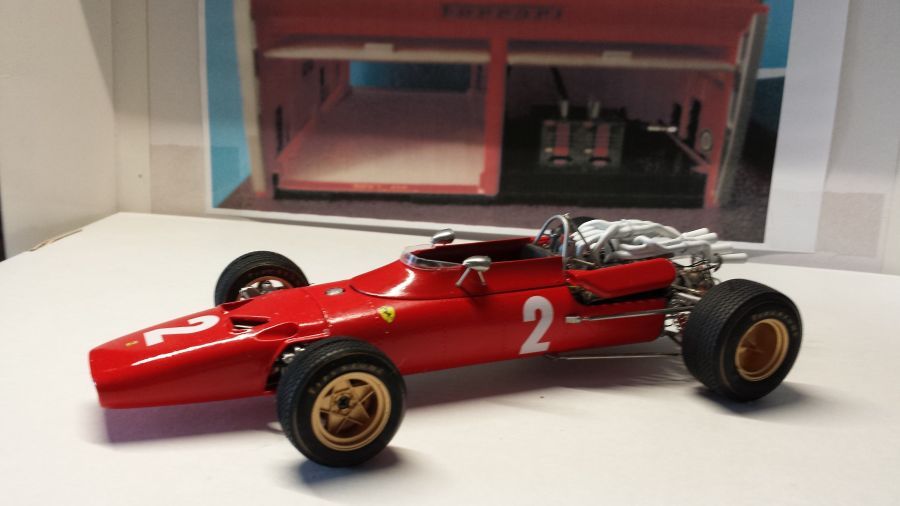
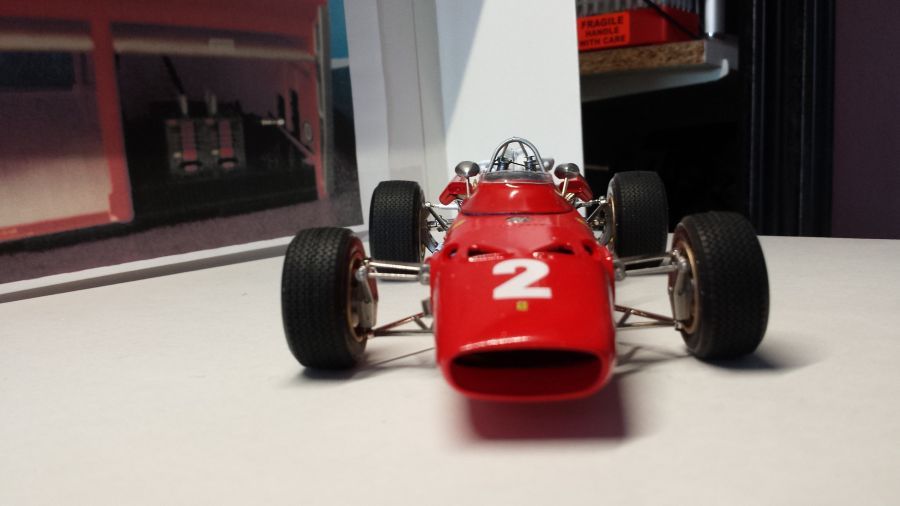
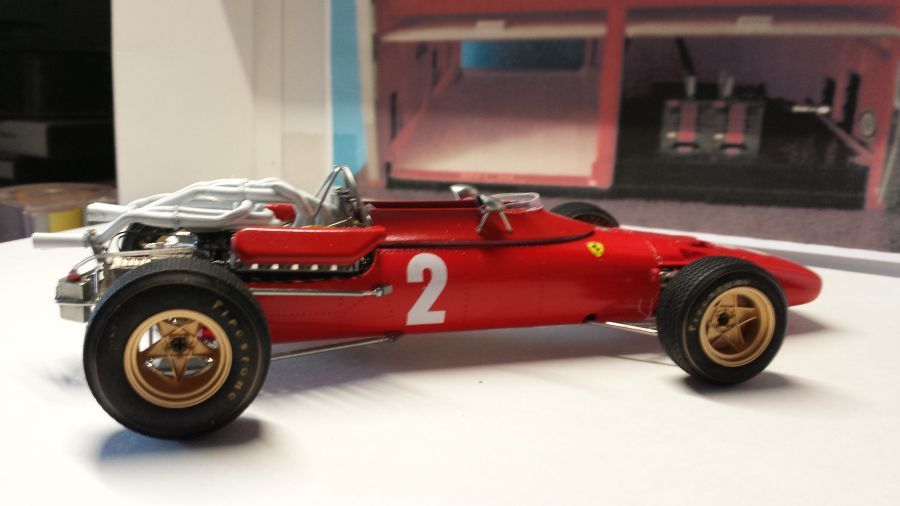
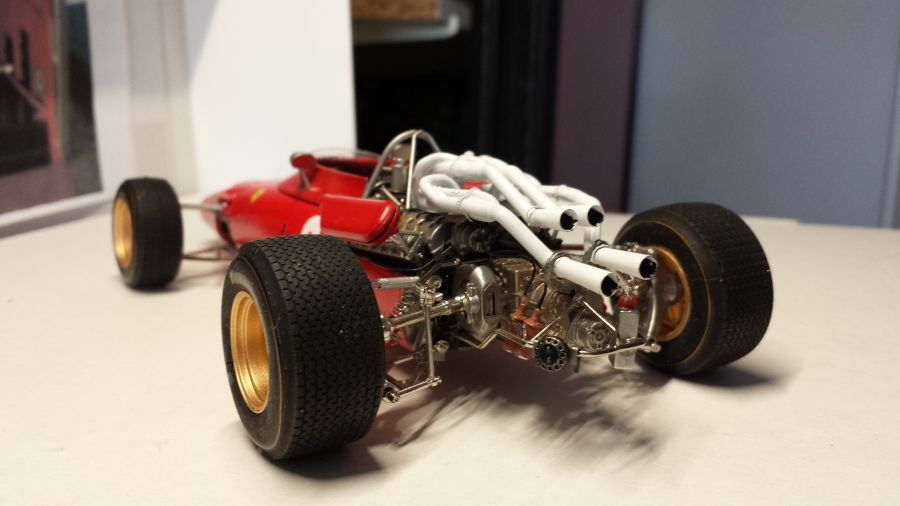
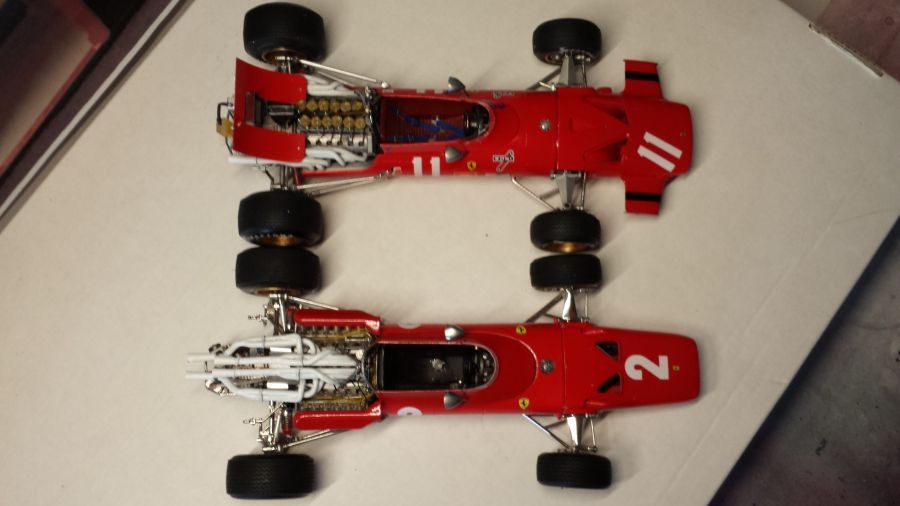
En na montage van de velgen en de spiegels is er weer een klaar. De schroeven voor montage van de achterwielen waren iets te lang. Deze heb ik ingekort. Deze Ferrari 312 F1 uit 1967 is een van mijn favoriete modellen.
And after mounting the rims and the mirrors, another one is ready. The screws to mount the rear rims where a bit too long. I had to shorten them. This Ferrari 312 F1 from 1967 is one of my favourite models.